My original intention was to scratch-build the instrument panel from sheet styrene and the Waldron instrument faces. And though I got a decent start with it, what I ended up with would not work. I estimate that I was about six scale inches short of the space I needed to be able to use a scratch-built instrument panel. I could have thinned out the sides of the cockpit where the panel mounts, but that would have left me with extremely thin plastic and I didn’t want to go there. The PE set has a very nice photo-etched panel with a sheet of gauge faces printed on what I suspect is acetate and that’s the route I decided to take.
The P-51 panel has an inner panel that isn’t really attached to the surround (there are brackets behind the actual panel that it mounts to). The PE set had a two-piece panel that nicely replicated the original’s panel, it would just some tweaking (and as it turned out, fitting) to work.
One of the (many) interesting features of the P-51 was that it had no hard-points under the wings from which to hang bombs or drop tanks. I’ve already removed the salvo controls (those things that transform something being carried to something being dropped) but there are three toggle switches that have to come off the panel itself. Those three toggles are the “master arm” switch and one toggle each to arm the nose and tail fuses of bombs. Easy to not put something there, but I also had to plug the holes where the toggles go as well as trim down the switch panel itself, then to add the wire to replicate the bats of the toggle switches. With that done, I mixed flat black (75%) with gloss white (25%) to achieve scale color representation. Once the panel was painted, I used a white colored pencil to VERY lightly add highlights to the upper edges of the instrument bezels. The areas of the gauges faces that aren’t black are clear. If I want the gauge details to show (AND I DO), they need to be painted white, so I covered the areas of the faces from behind with white paint. I used the watch crystal cement to attach the acetate gauges and superglue to bond the instrument panel’s surround to the panel proper, and then painted the toggle switch bats:


I decided that while I was doing gauges, I would also do the main wing tanks gauges, which are set into the floor. The acetate sheet that came with the PE set also had the fuel tank gauges. An insurmountable problem developed when I used the punch/die set to punch out the gauge faces. There is just enough slop in the punch/die set for the gauge face to not punch cleanly through. Instead, about 75% of the face was separated, but the remaining 25% caused the face to curve inside the die and the punch scraped the instrument detail off.
Once I was done with my (useless but satisfying) invective, I remembered I had a lot of dry-transfer gauge faces in my armor parts stash. All I needed were two basic “quantity” gauge faces (a needle pointing to the left and a series of marks arcing across the top of the face). Once I found what I needed, I also needed to make sure that they were of the proper diameter. I used the PE bezels for that determination.
Did I mention these things are small?:

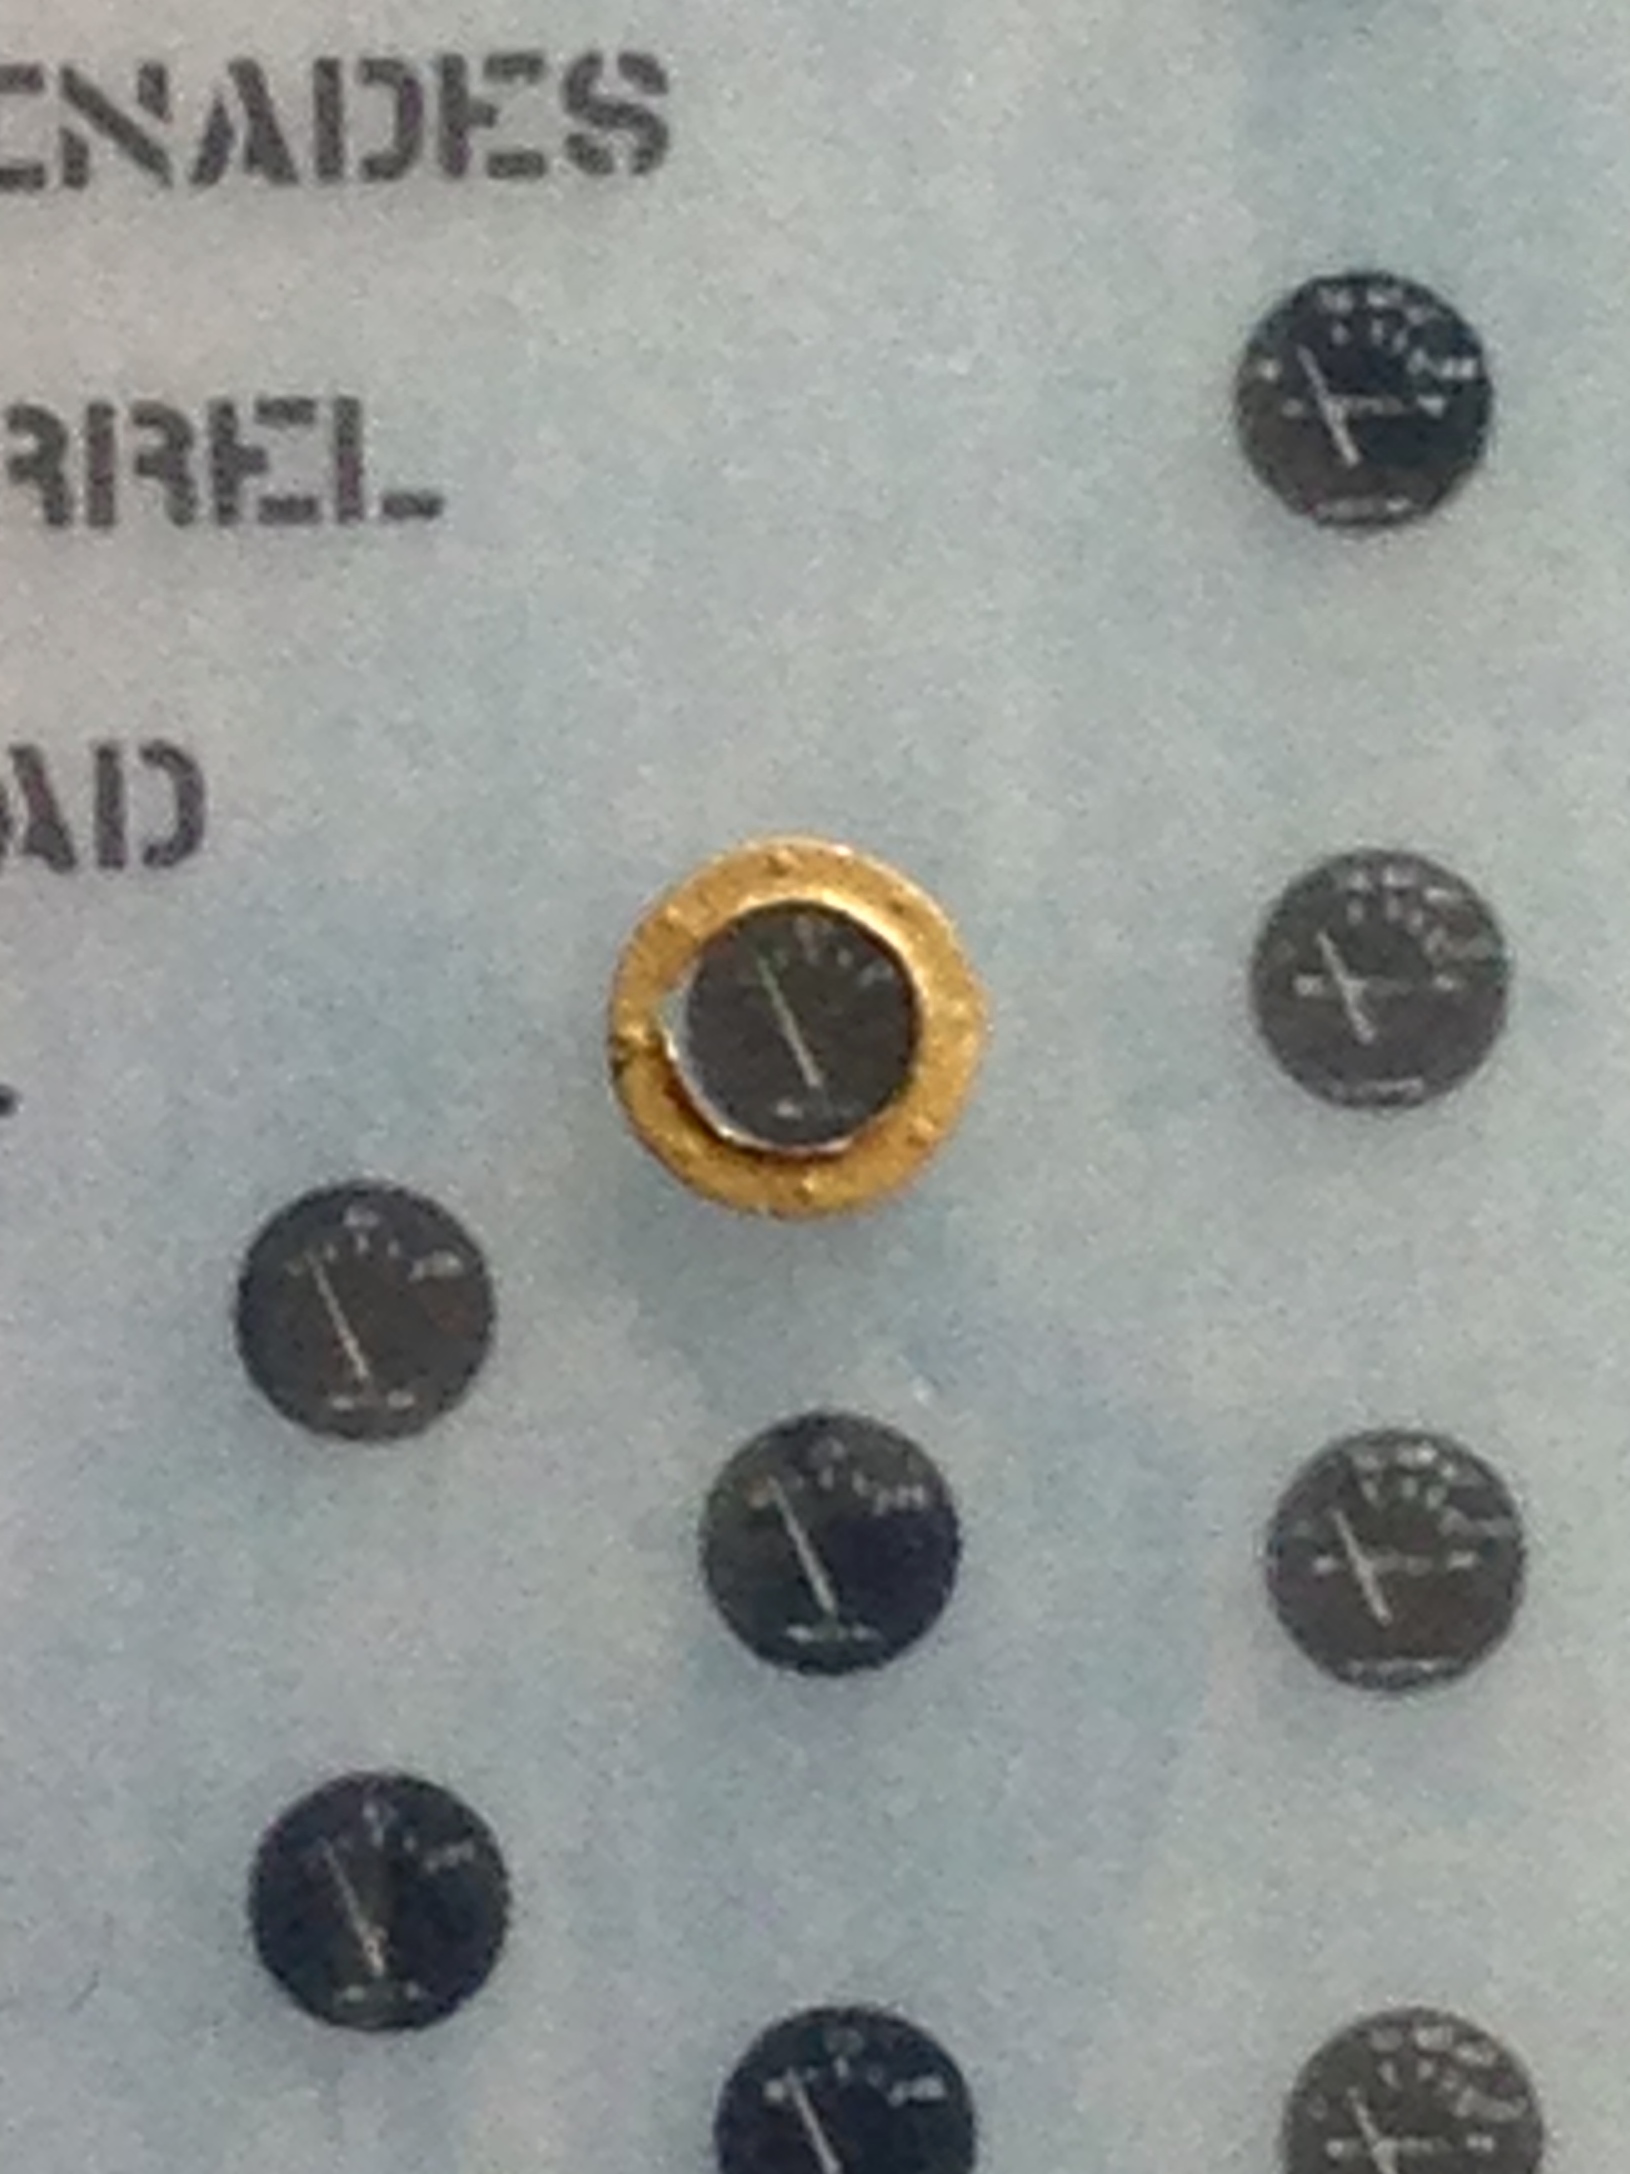
To use the acetate gauge faces I had to drill a depression for the faces to fit into. And then I discovered I couldn’t use the acetate faces so those depressions had to be filled in with styrene:

The dry-transfer faces were applied and the bezels set in place and glued (I used a very small dab of watch crystal cement to hold the bezels in place because experience has shown me that with parts this small, as soon as I touched the needle with the superglue on it, the small part would stick to it; the watch crystal cement worked perfectly to hold the bezel in place while capillary action moved the superglue from the needle to between the bezel and the floor) (yes…I actually glued something in place so I could glue something in place):

I used the punch/die set to punch out a couple of discs of masking tape which I laid over the bezels to keep them from being painted over. With gauges taken care of, I started work on detailing the sides of the cockpit by adding the control cables of the throttle and propeller pitch controls and the landing gear controls at the bottom of the left panel:

Satisfied with that, it was all ready to paint. I prefer to work with acrylics because clean up is SO much easier; water is the only solvent required. The problem with that is that I couldn’t find the exact interior green color I wanted in acrylic. What I ended up doing was using 75% Tamiya’s “IJN Cockpit green” (“IJN” stands for Imperial Japanese Navy), which is lighter than what the US used, and 25% of Tamiya’s basic green, which is darker than what the US used:

Once I had the mix correct (and added 25% white), it was painting time.
If you consider that a cockpit is a hole in the top of the fuselage that’s then filled with the controls of the aircraft and the pilot’s seat, it’s no great stretch to the realization that light isn’t going to reflect from the floor and the bottoms of the sides of this hole as much as it will from the those items that are in direct light at the top of this hole. My first step to painting the cockpit my green mix was to paint it flat black. The flat black would end up being the base shadow value, and since I’m basically lazy, I decided that all the parts that get painted green would be pre-shaded:

Next was to overshoot the “shadow” with the cockpit green. The landing gear wells are underneath the aircraft and would get the least amount of direct light and would therefore be mostly shadowed with just highlights of green:

The rest of the application of green followed the idea of what areas would reflect the most light and the green was misted on top of the black and then I used aluminum paint to replicate paint wear:


With the cockpit parts shaded, painted, and chipped, it was time to turn my efforts to the seat.

I’m a visual learner without experience in model building. Your posts, the combination of sequential photographers and words, allows me to follow along in the many processes to these builds. I respect and appreciate the work that you put into this blog.
LikeLiked by 1 person
Thank you! I’m visually oriented as well and *seeing* something goes a LONG way towards any understanding of it I may acquire.
And thanks for your kind words regarding this blog. (It often gives me something to do while glue sets up.)
LikeLiked by 1 person