With most (I think) of the major sub-assemblies done, it’s time to start getting the hull ready for paint. Because of all the different materials used, I want to prime the upper hull before I lay down color; experience has shown me that acrylic paint doesn’t adhere well to brass.
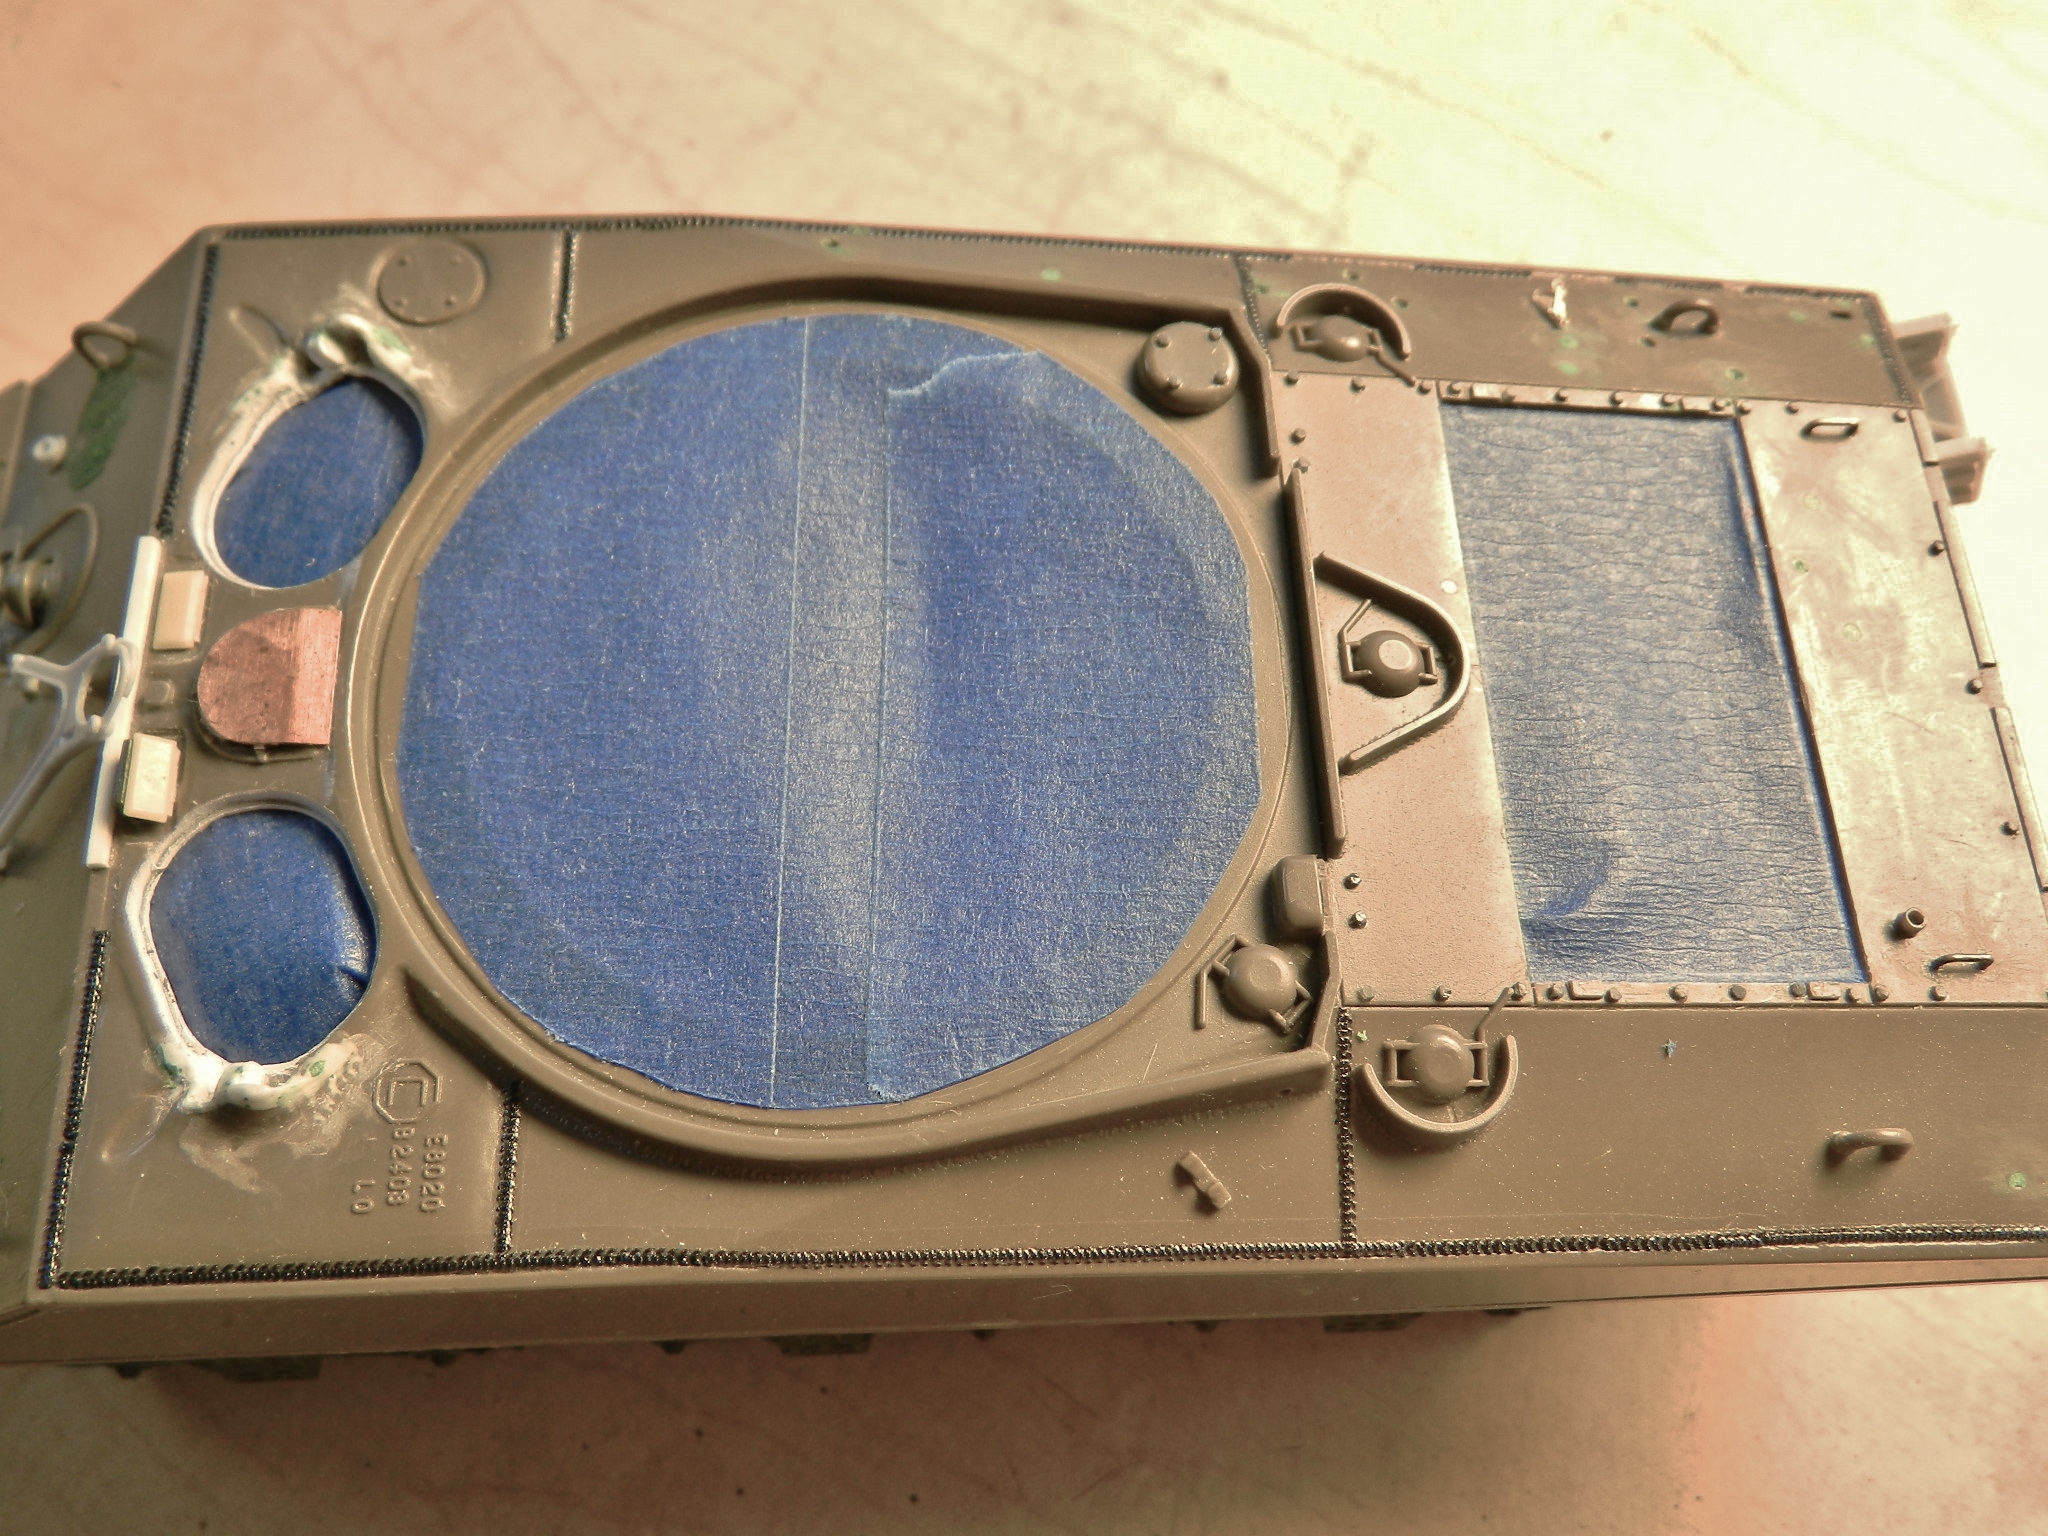
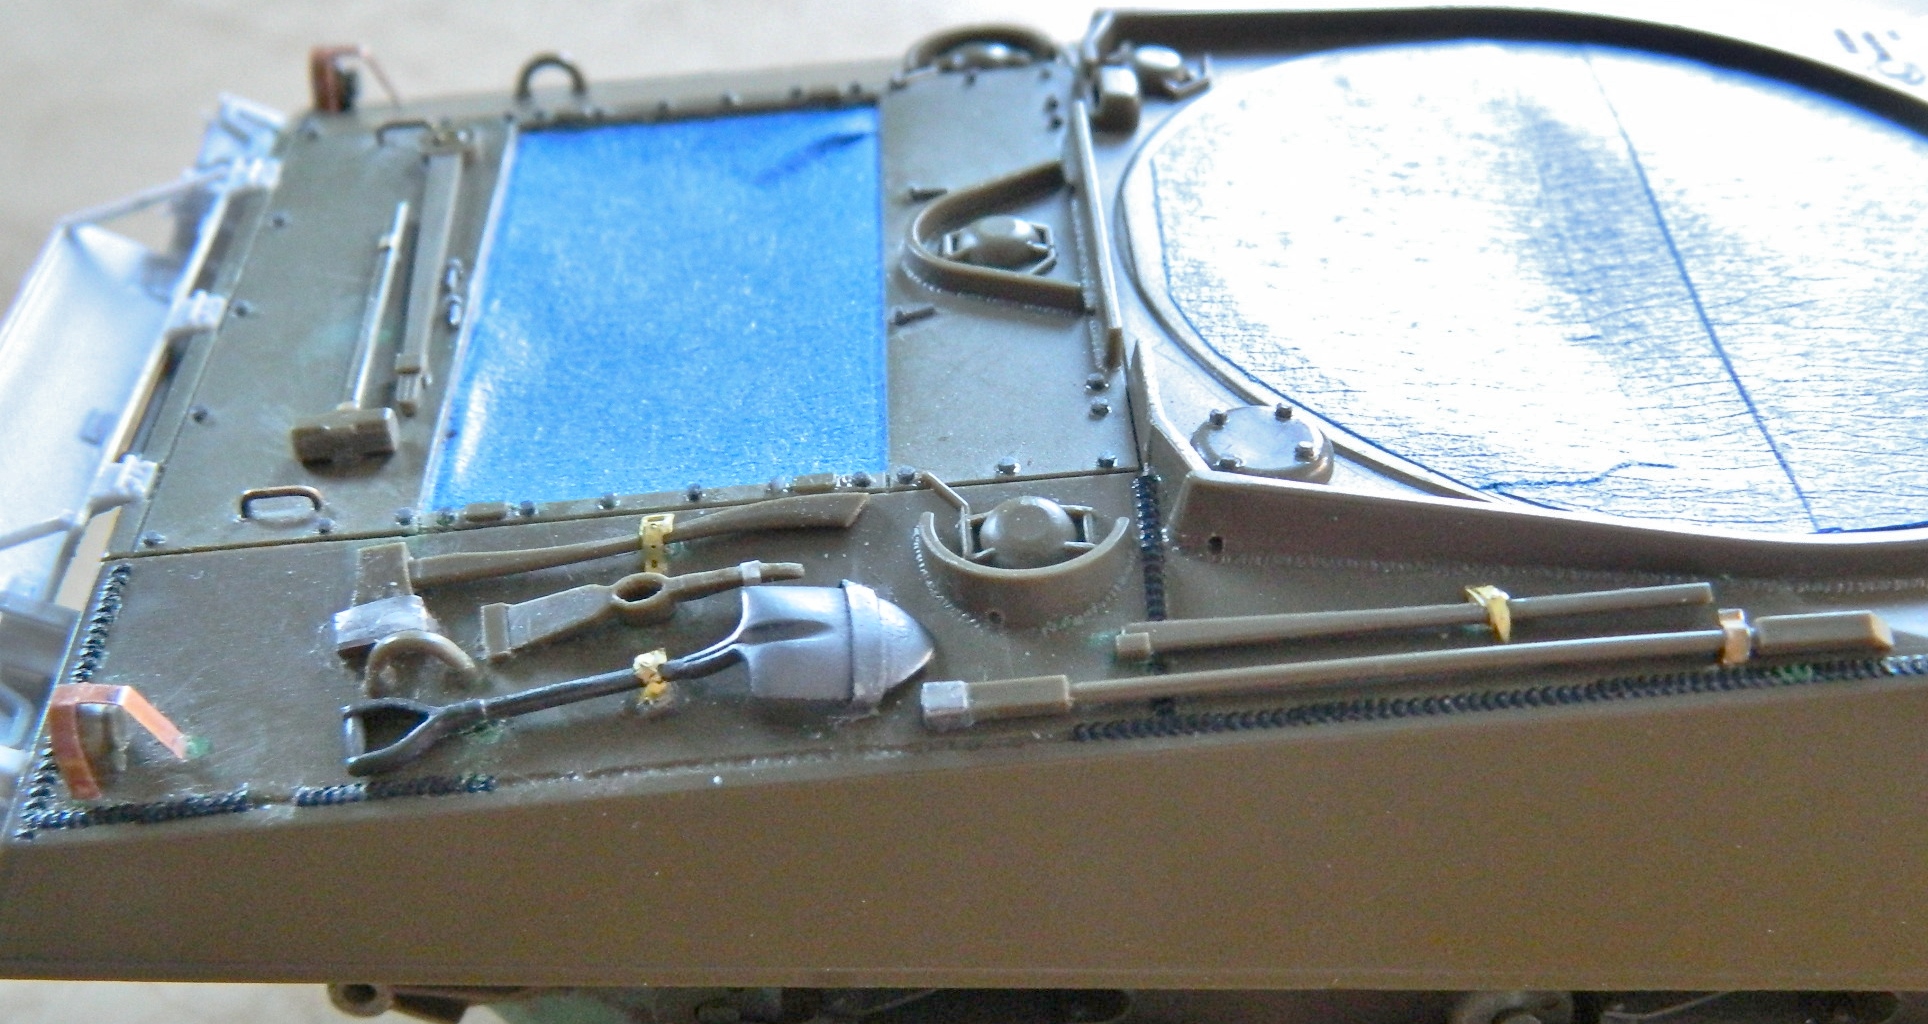
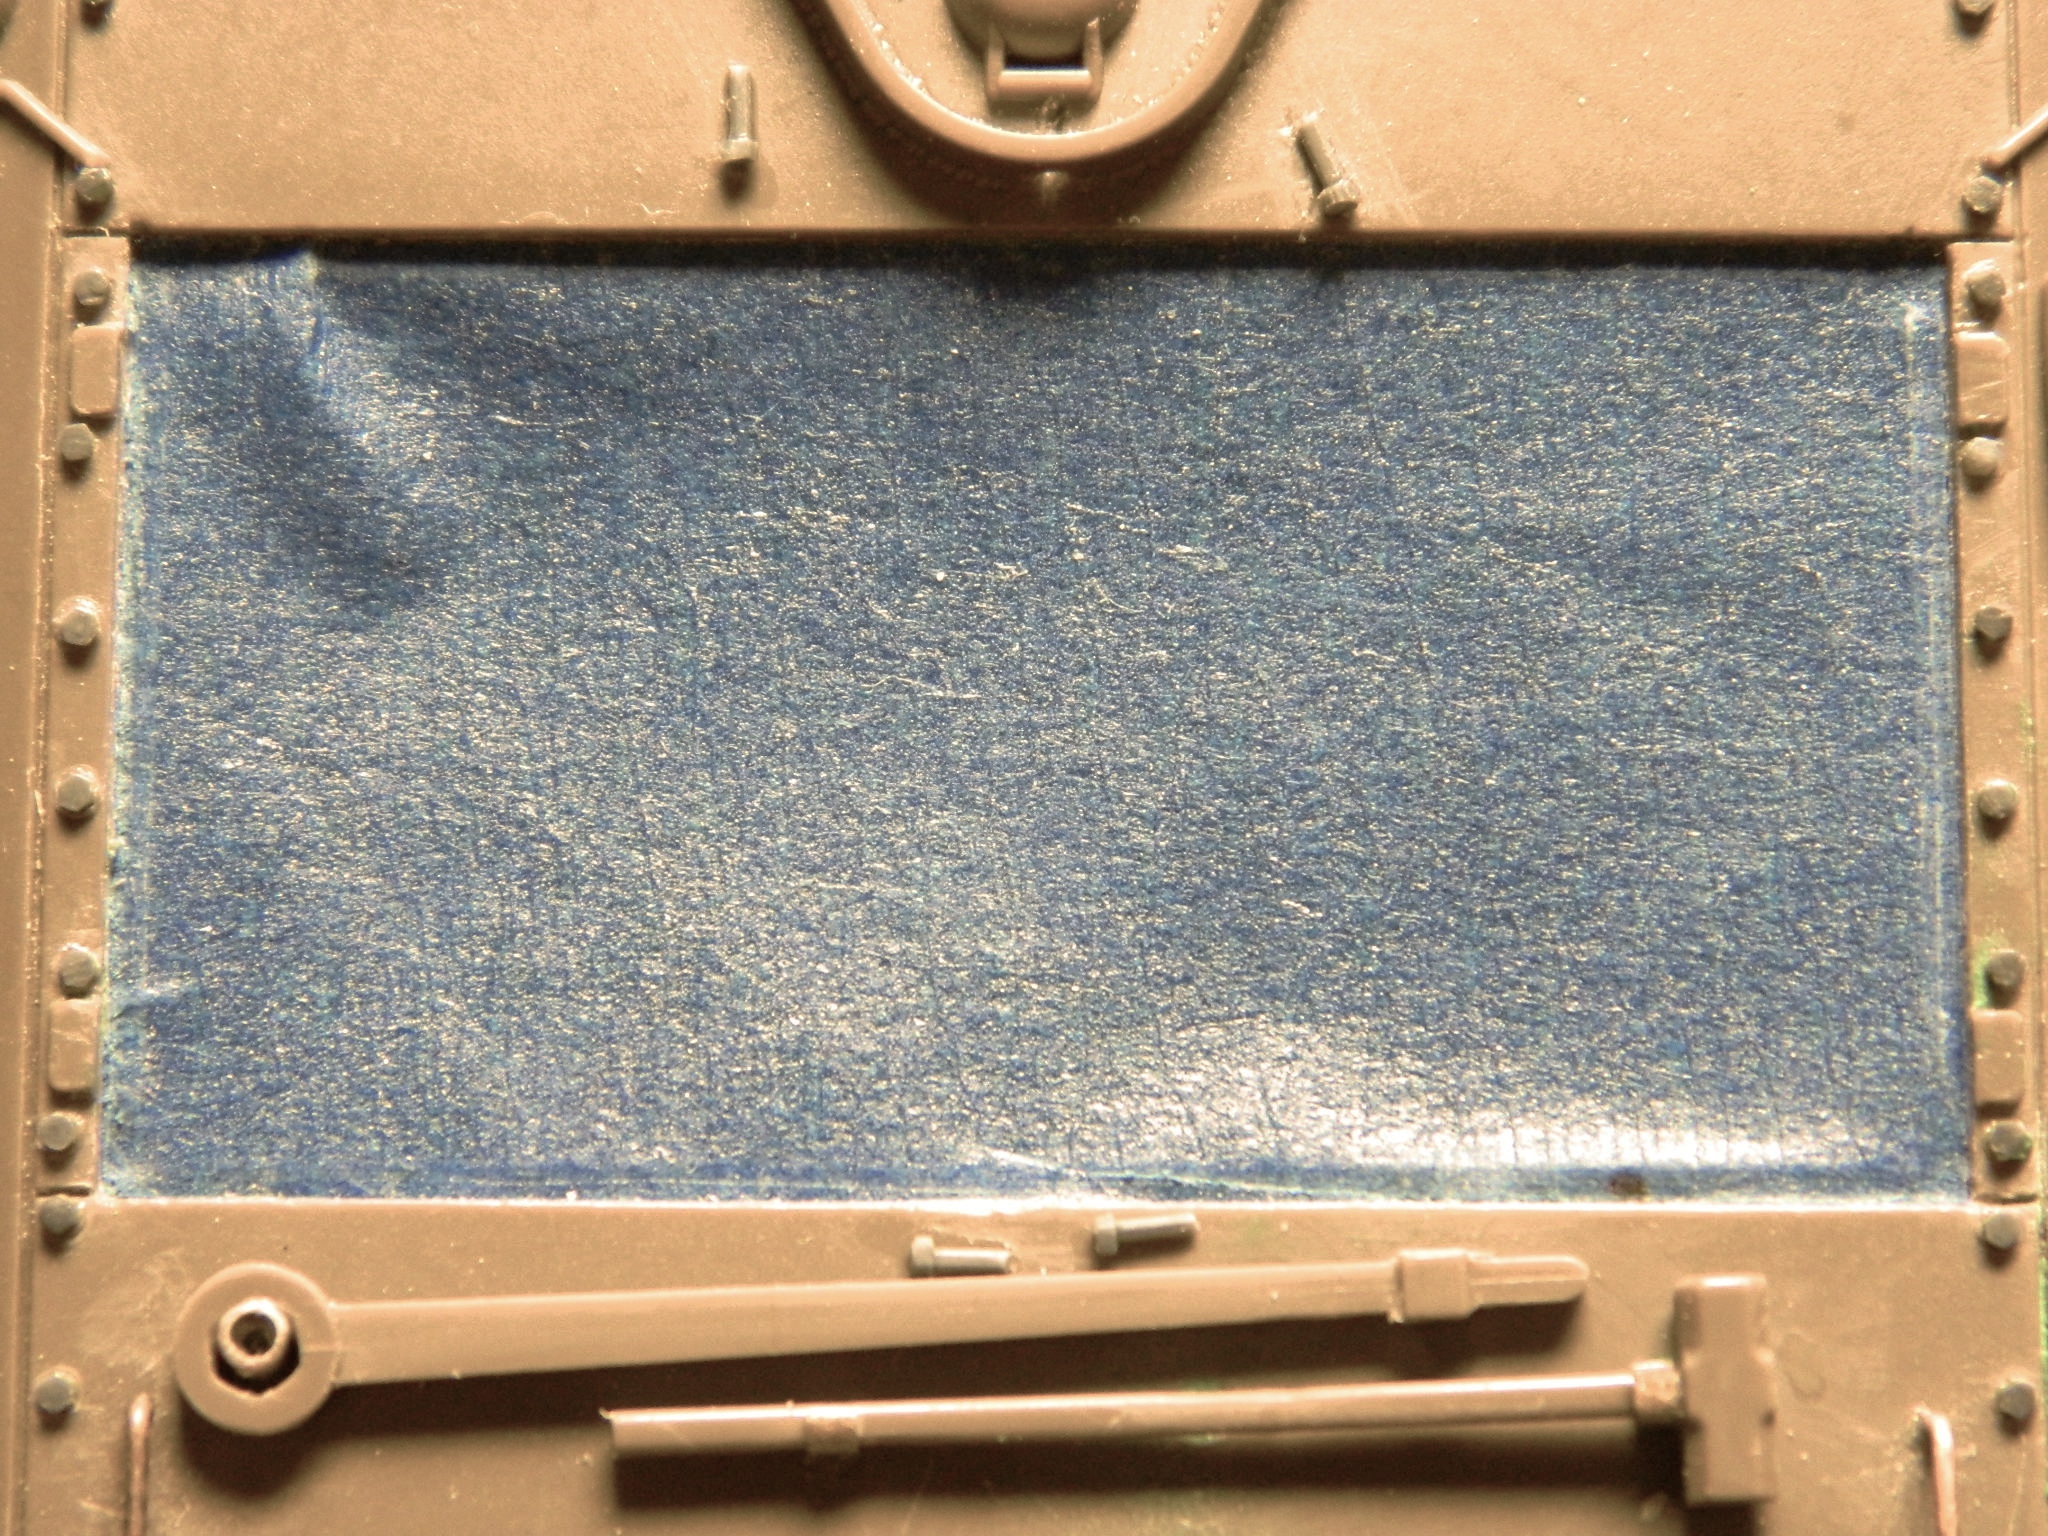
I masked off the off the crew compartment and engine bay:
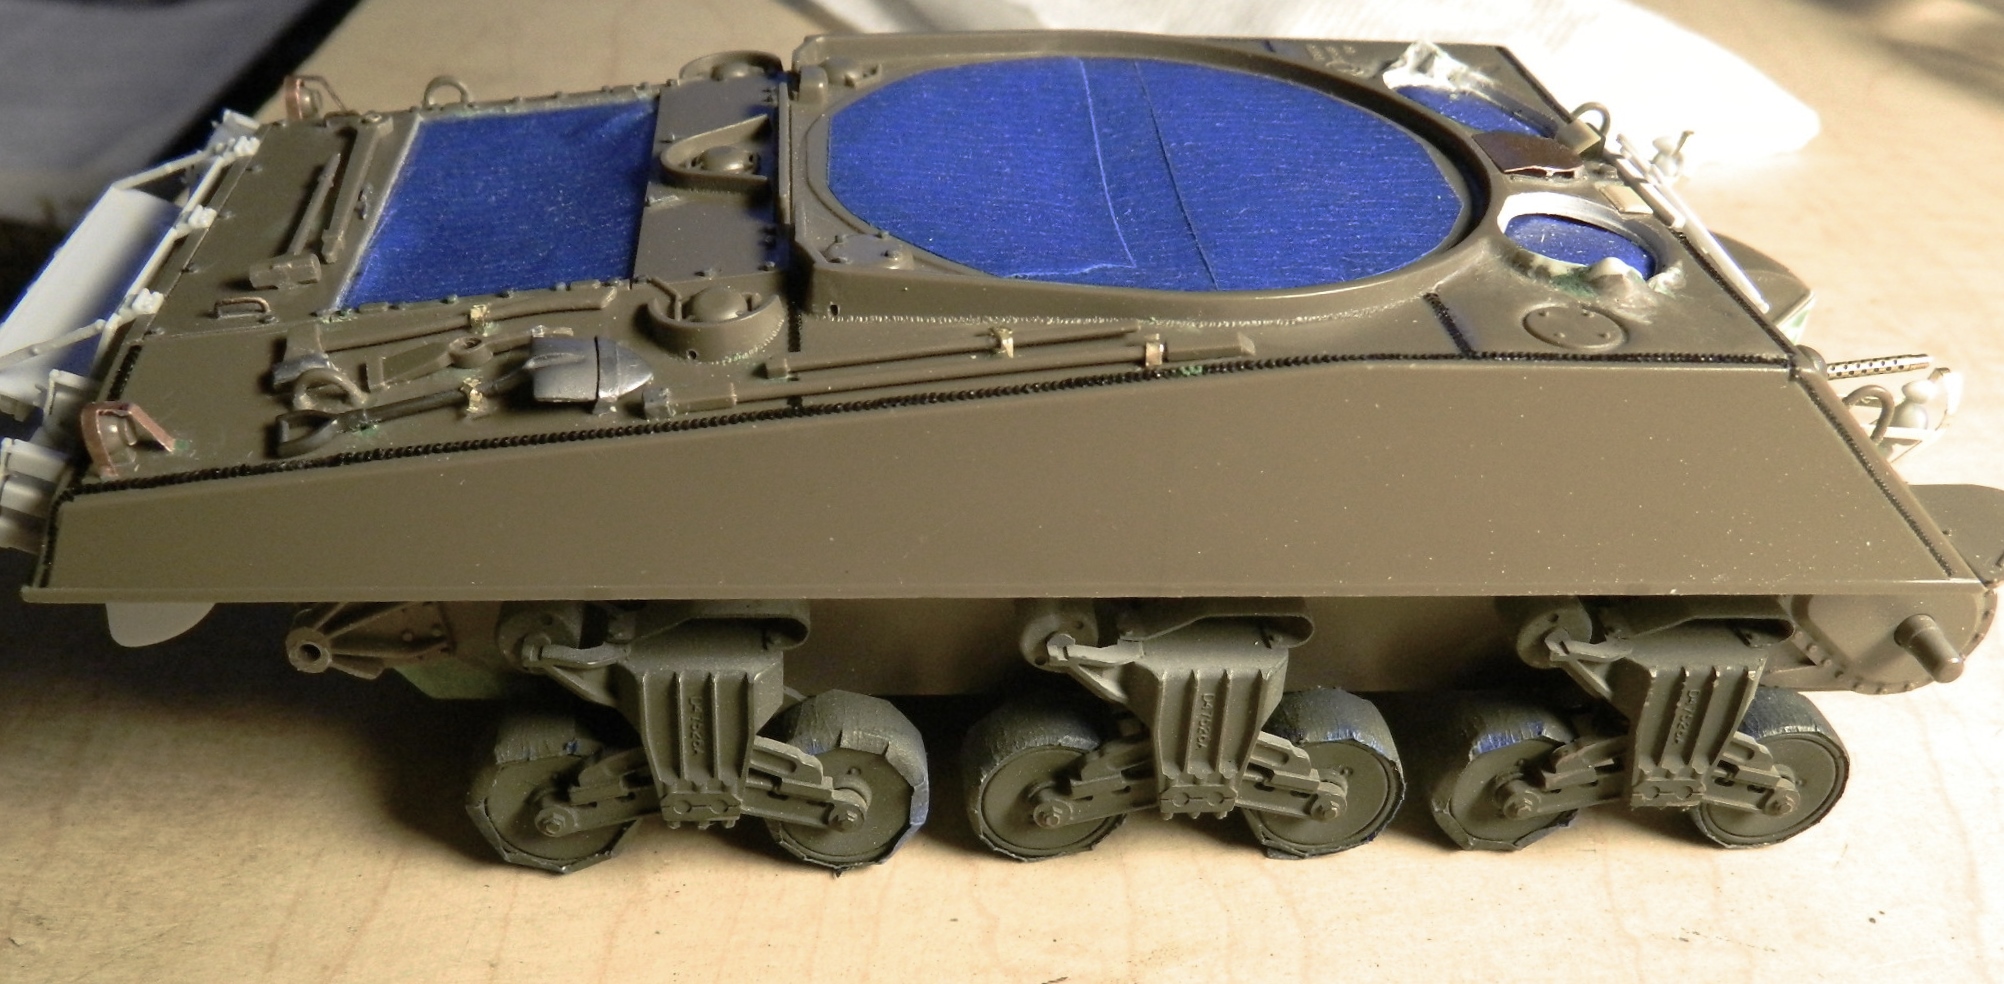
I had considered waiting until very late in the build to put the detail parts in place on the hull. But because of the fairly involved paint scheme I have in mind, getting the details to fit with the color scheme would be substantially easier if they were painted along with everything else on the hull. That means details get added now. The first thing I did was to shorten the front lifting loops and while the glue was setting up, I trimmed and blended where I had shortened the rear lifting loops. That took so long that the glue on the front loops had set up by the time I was finished with the rear and then did those also.
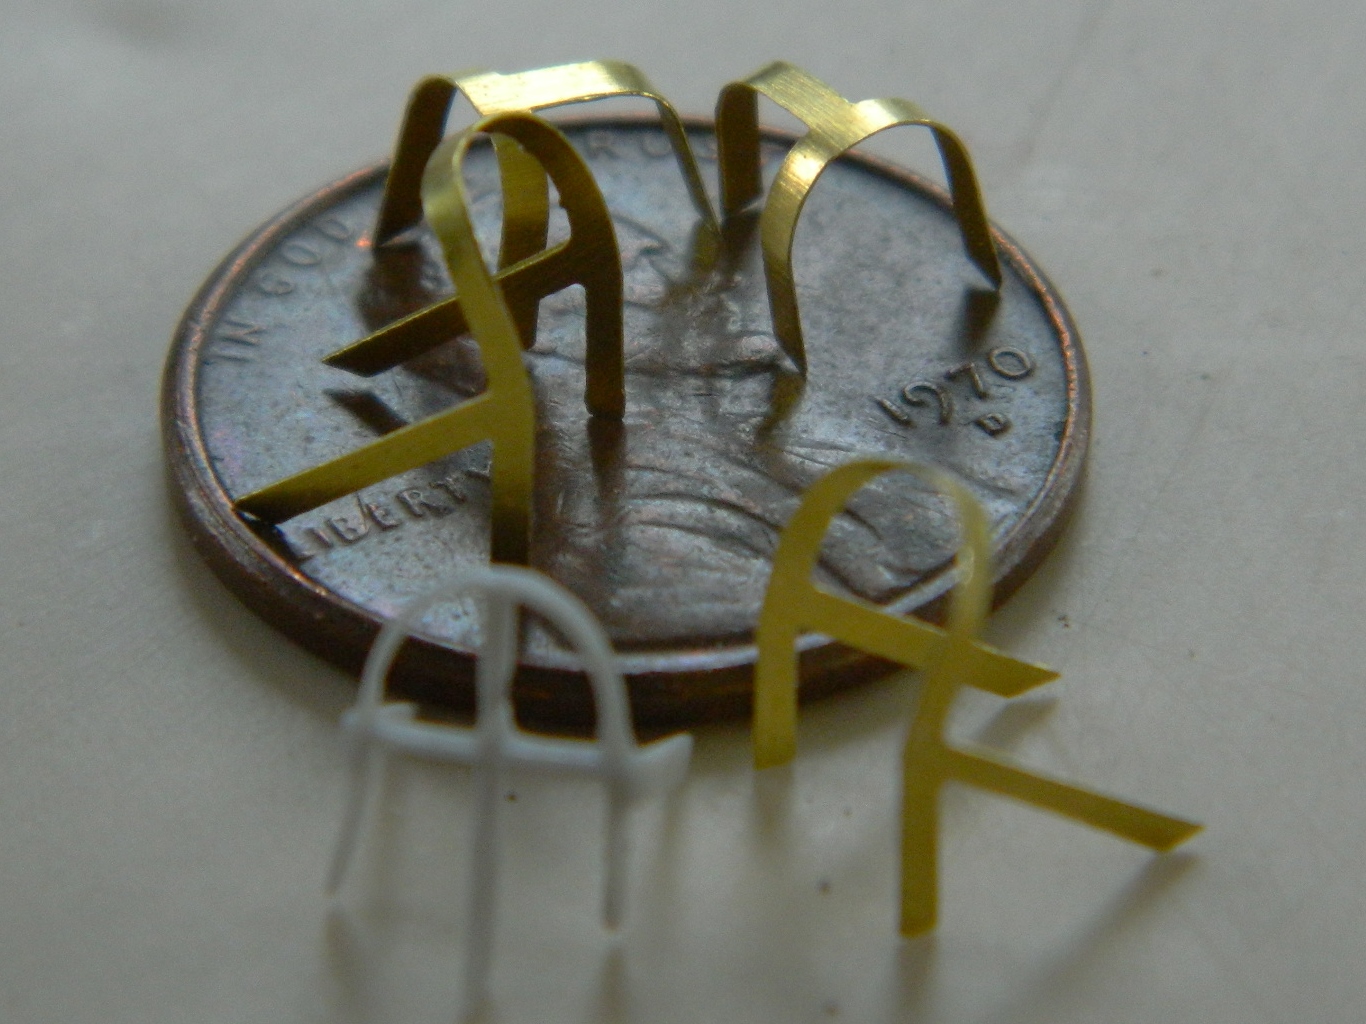
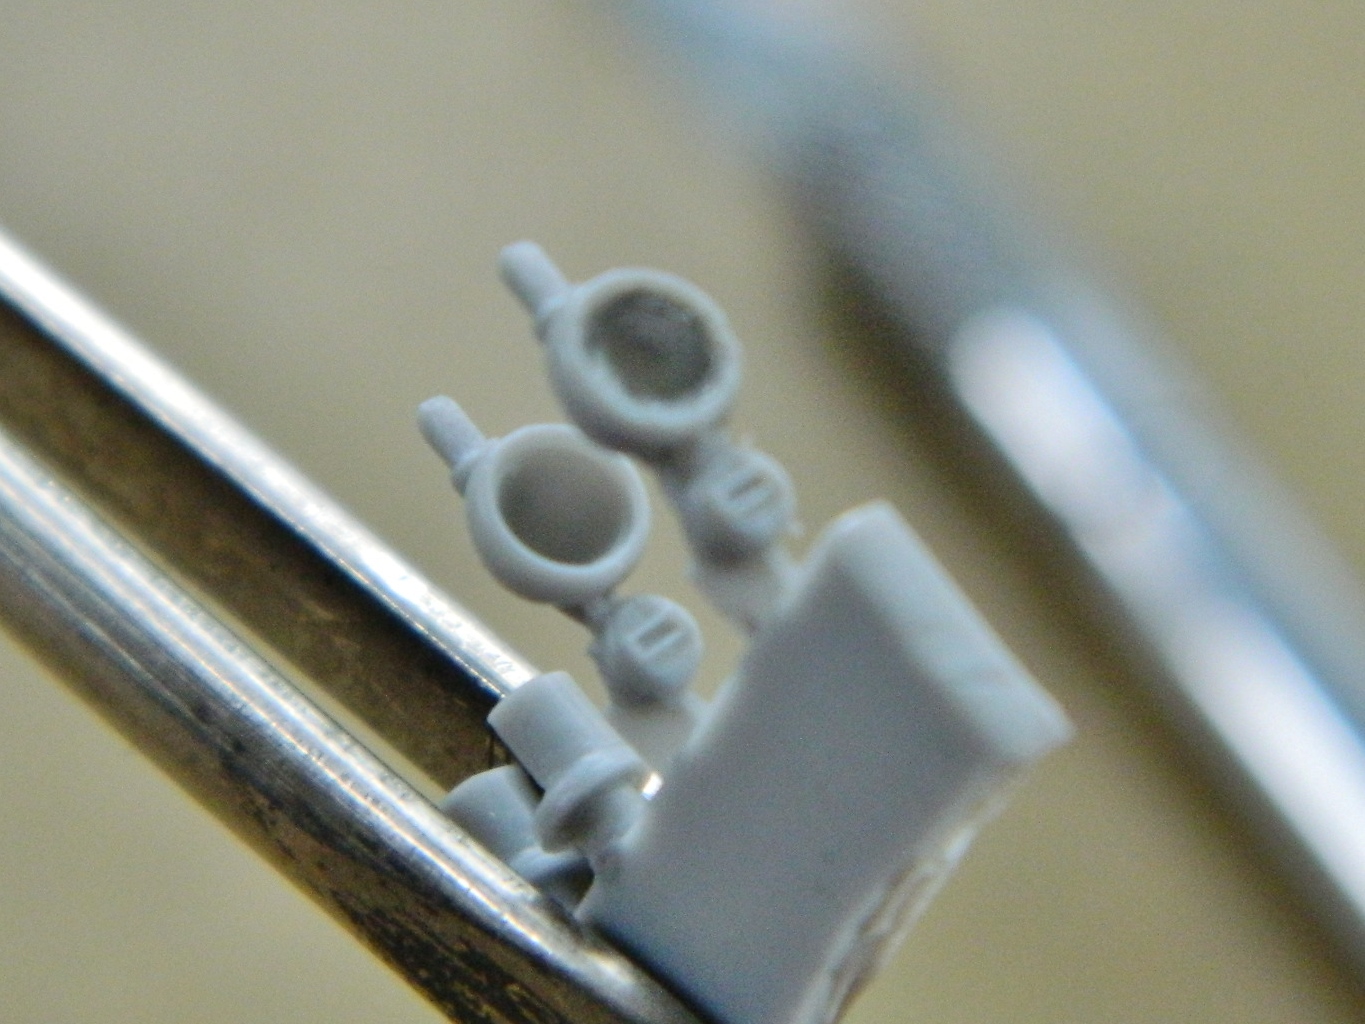
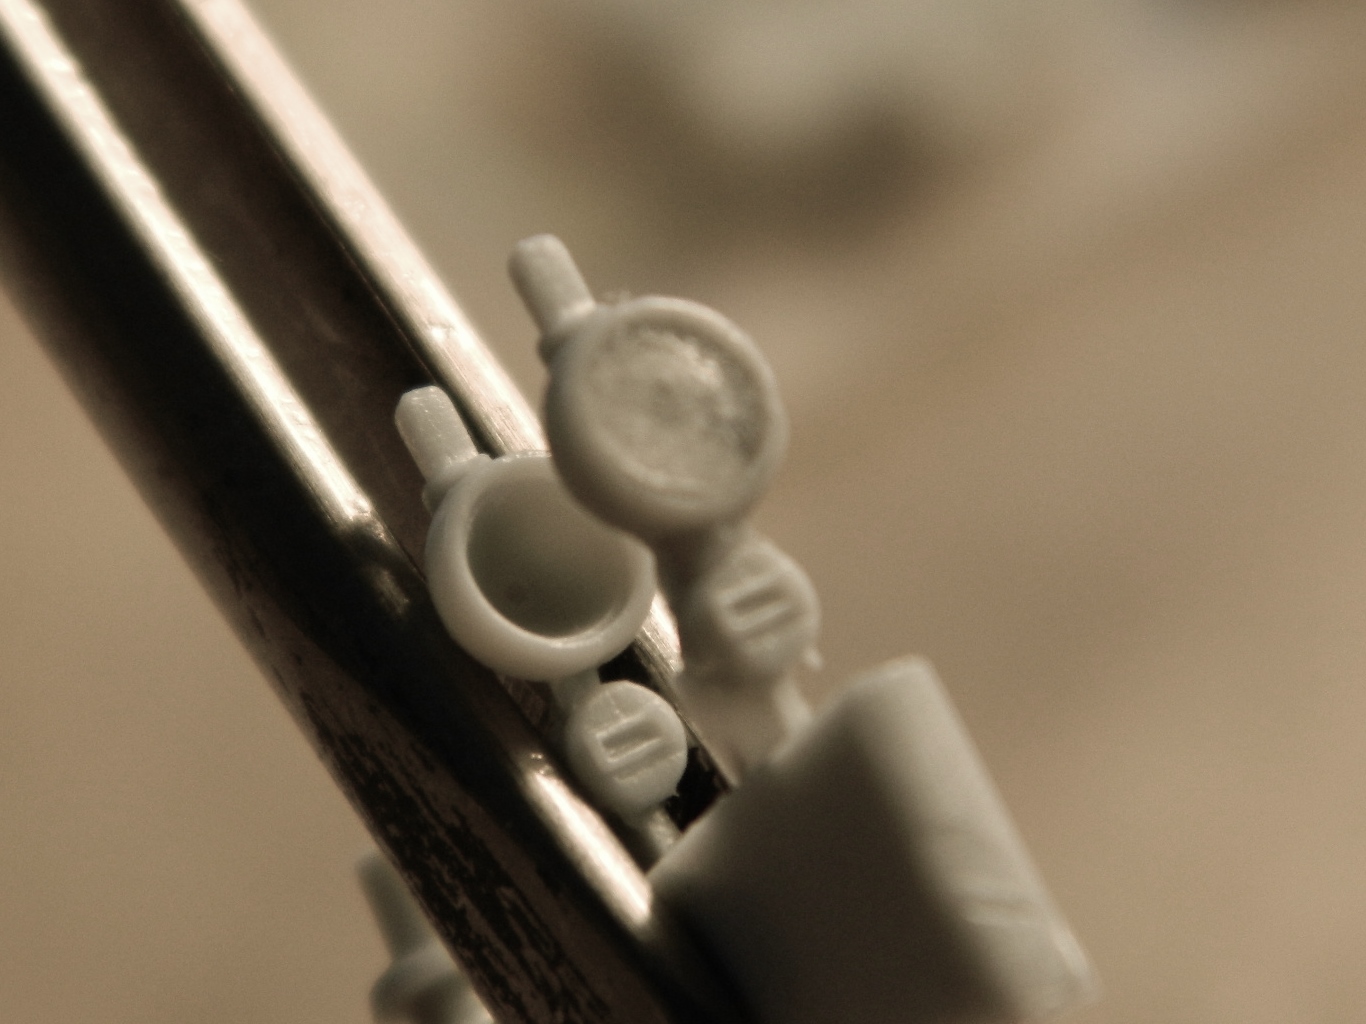
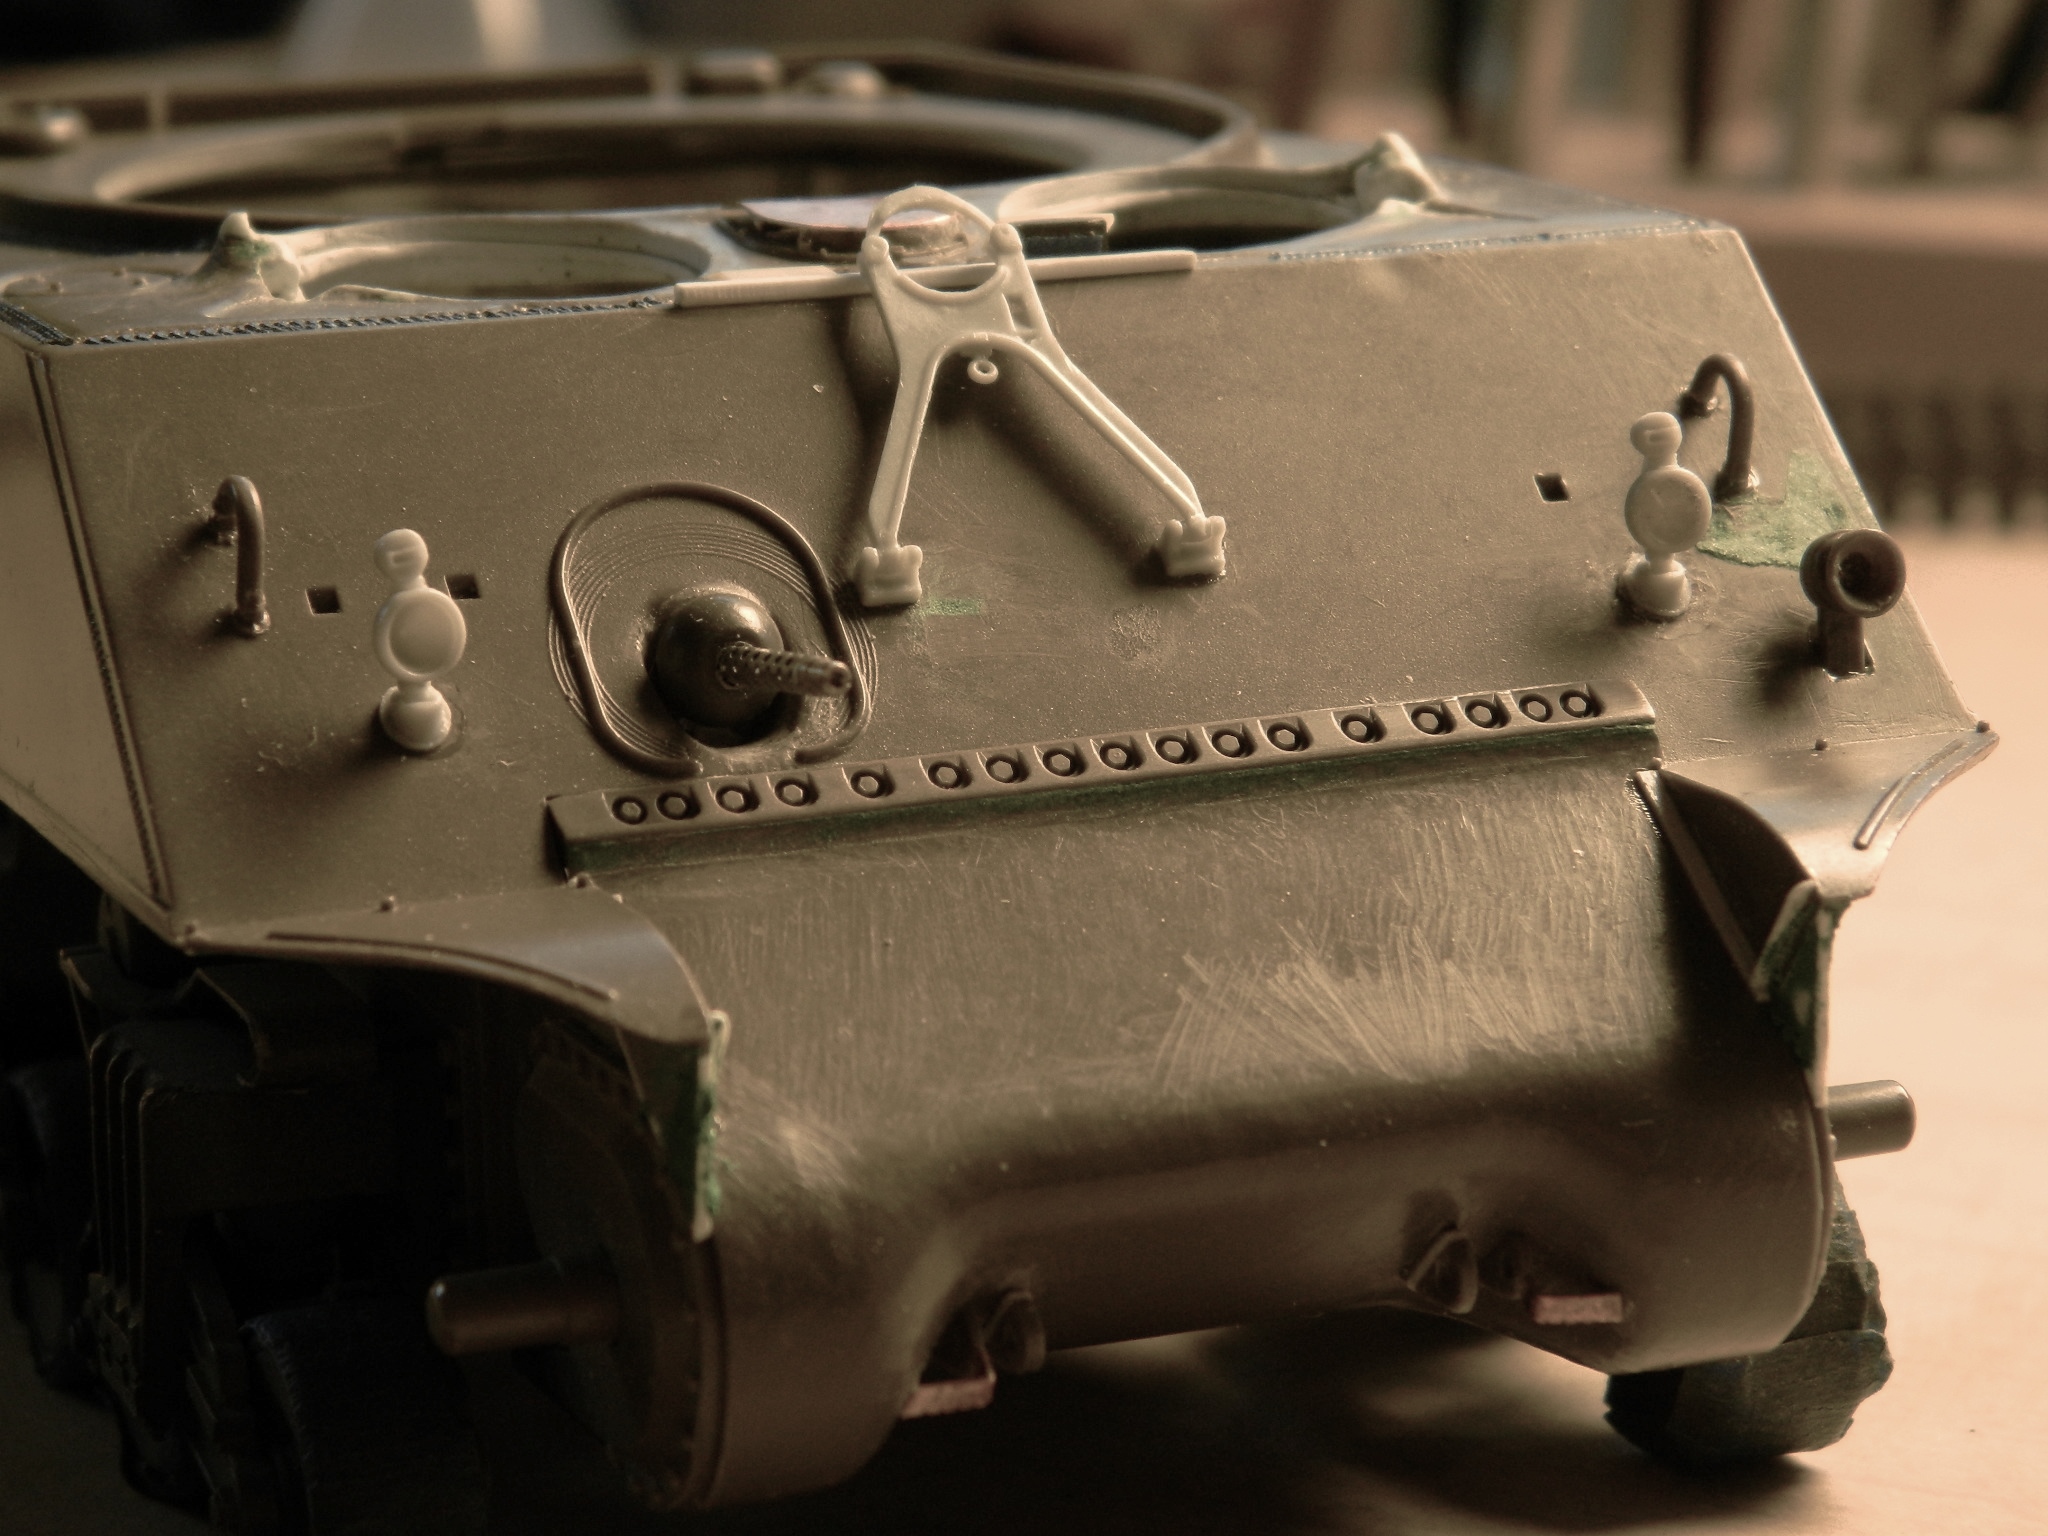
Then I started bending PE parts for head and taillight guards from Verlinden’s Sherman detail set and I used TMD’s resin guard for the siren:
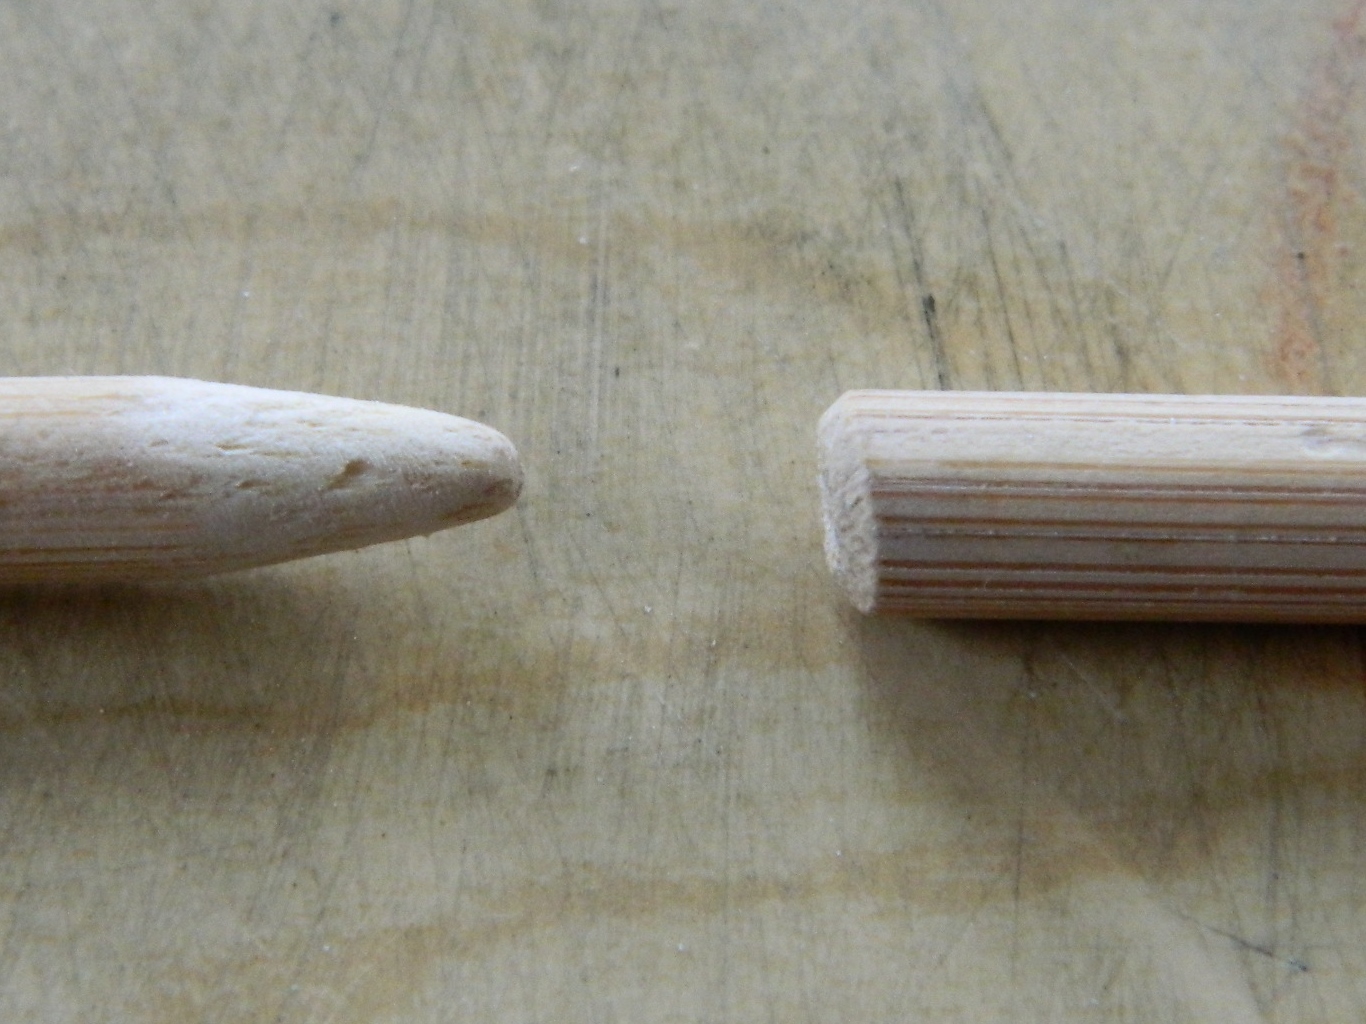
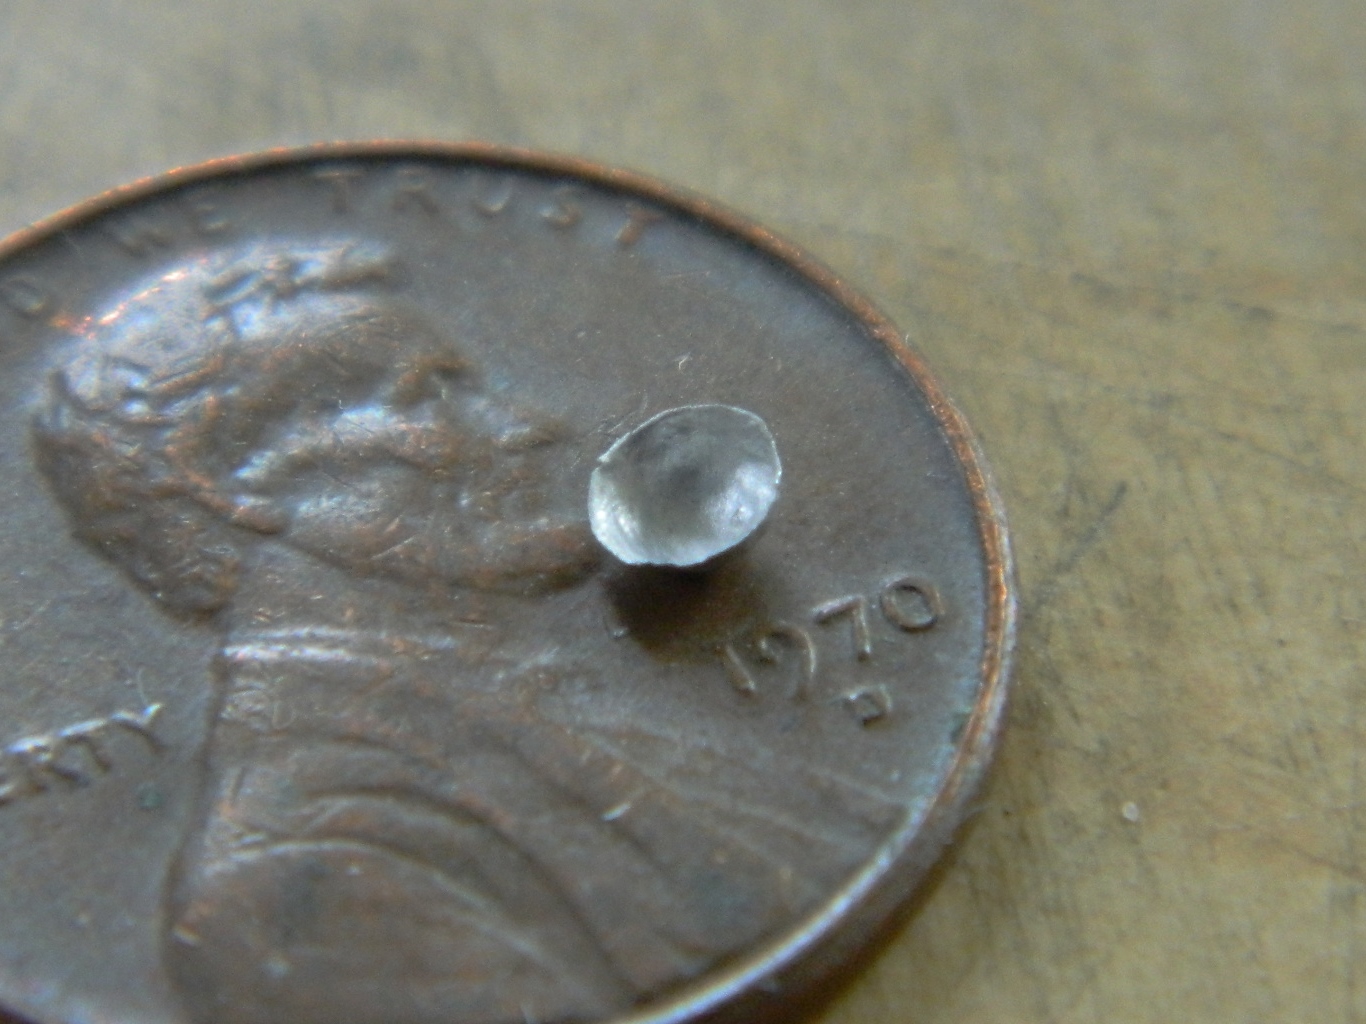
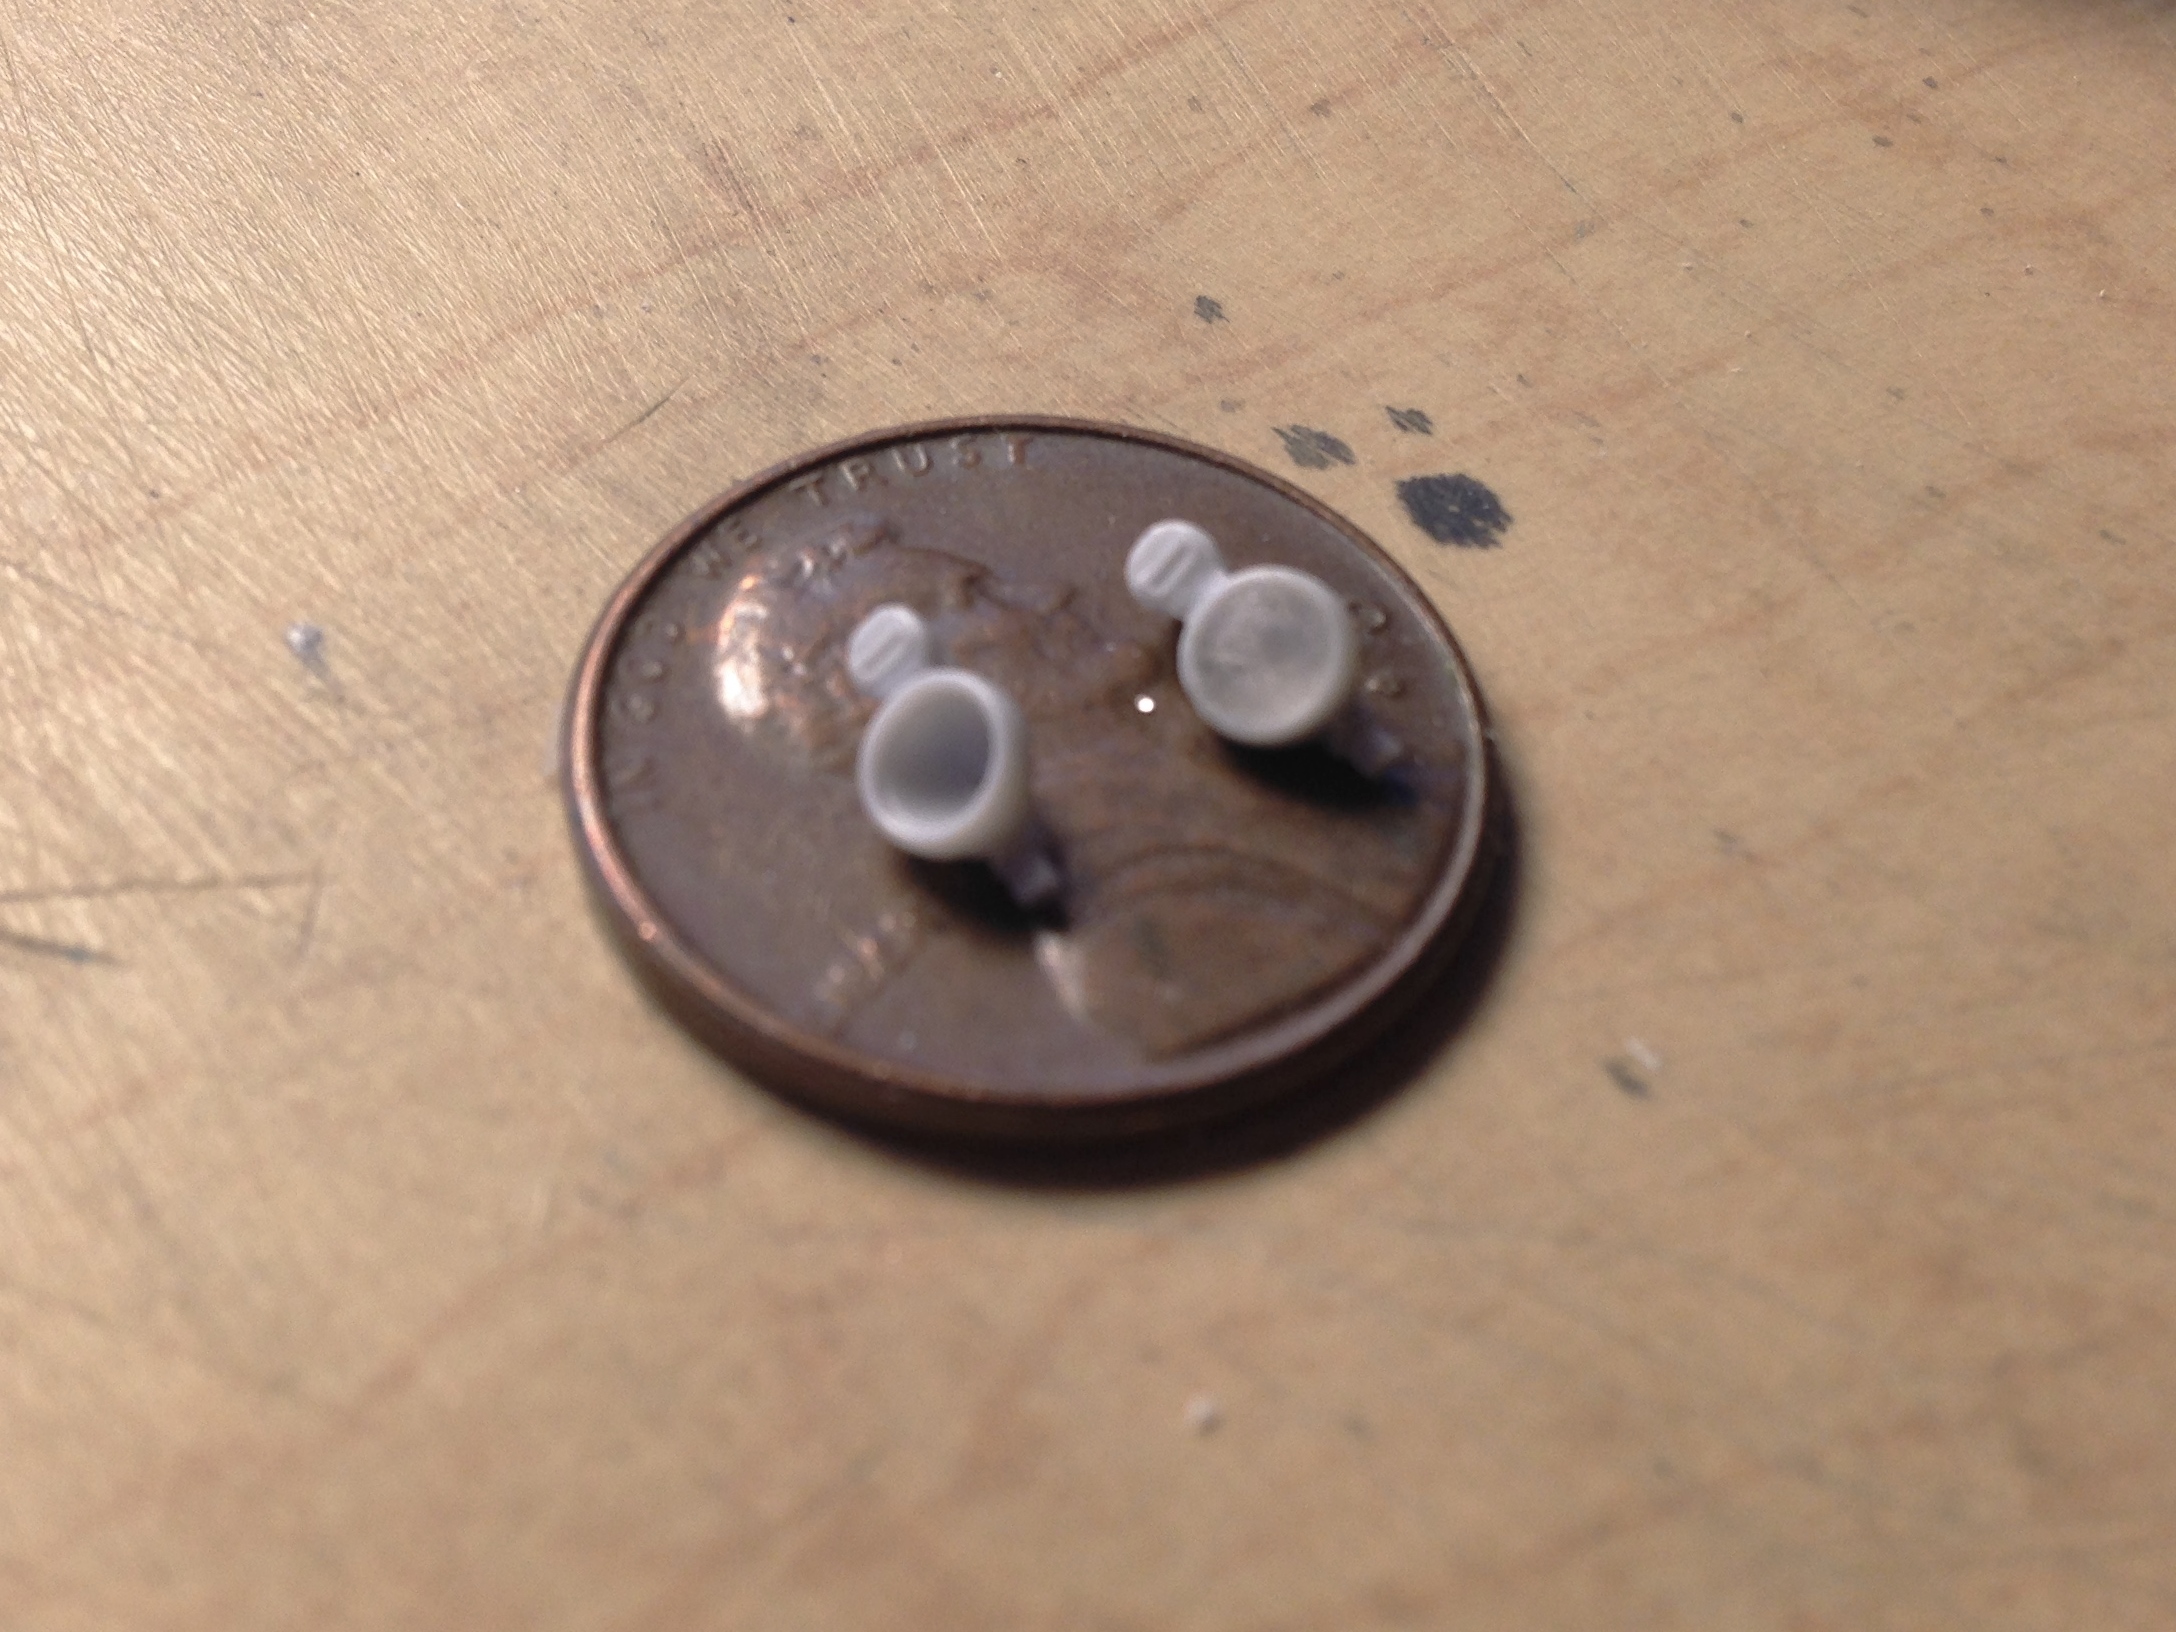
Doing lenses of any hue with paint doesn’t work for me – it just screams I’M A MODEL. I wanted to try something different for the headlights. The New Tiger Models Direct (TMD) makes a set of headlights and guards. I had originally intended to use the clear resin headlights that came with the set but decided to get daring. I used the opaque resin parts instead because clear lens covers also come with the set. For a little more visual impact, I decided to leave the lens off one headlight completely (I mean it’s a tank and the lights are glass, so no great stretch for one of the headlights to be broken). For the other headlight I decided to try and make the reflector out of thick aluminum. I used the headlight itself as my buck and sharpened and shaped a bamboo chopstick to use as my form and very gently pressed the stick into the aluminum while it was in place over the headlight:
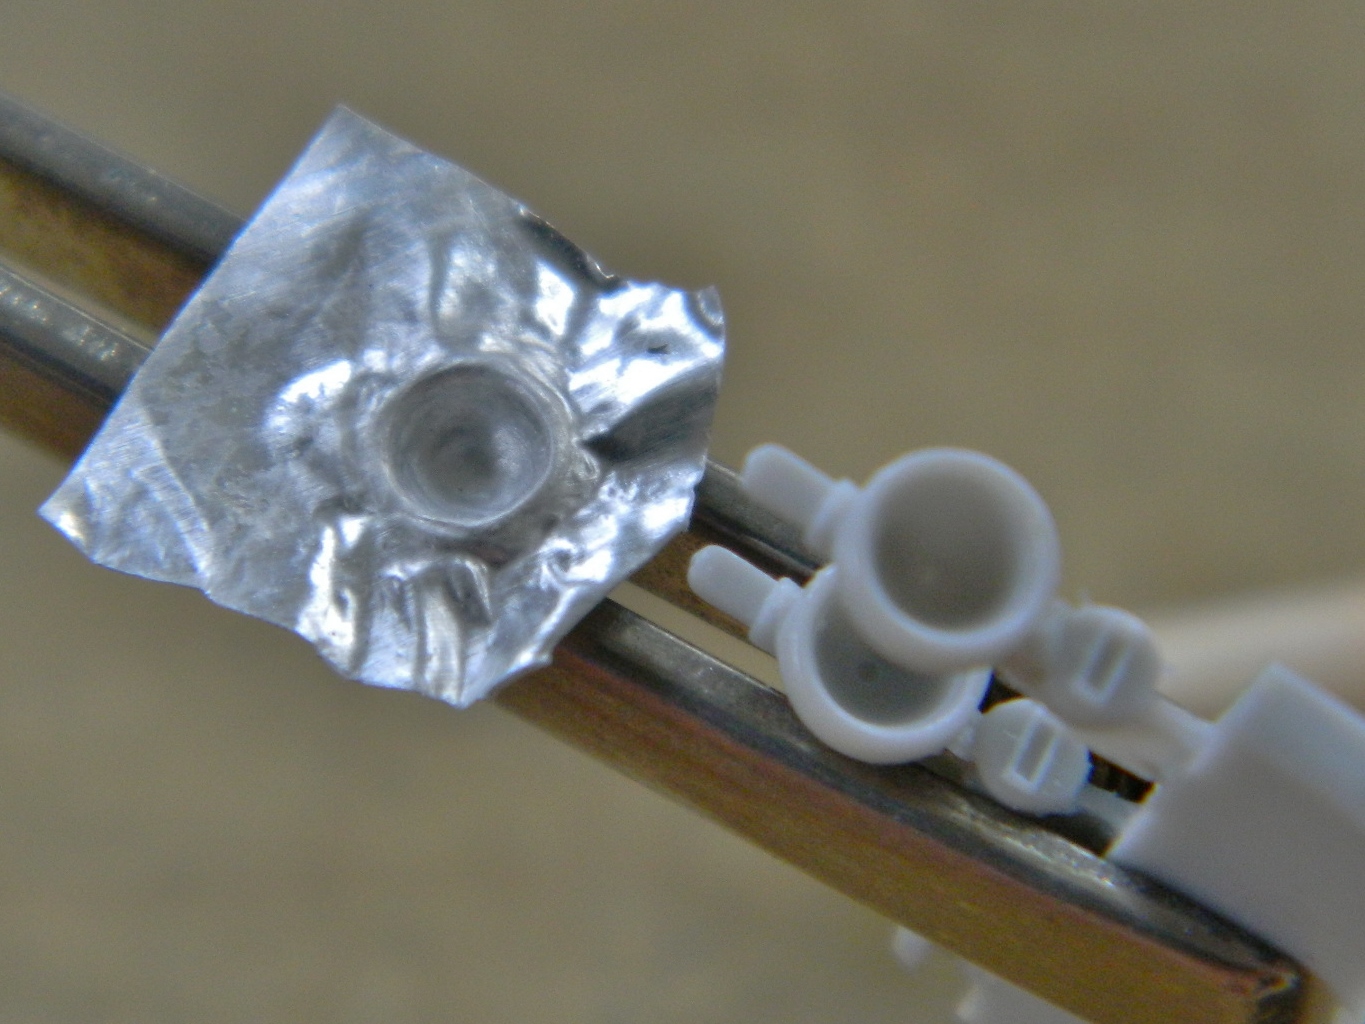
Using small scissors I cut away most of the excess:
After pressing and gluing the aluminum reflector into the headlight bucket, I did the fine trimming with a round-tip hobby knife then placed the lens over the reflector. I liked it, so I glued the lens in place and then used white glue to hold both headlights to see how they work. I liked that, too:
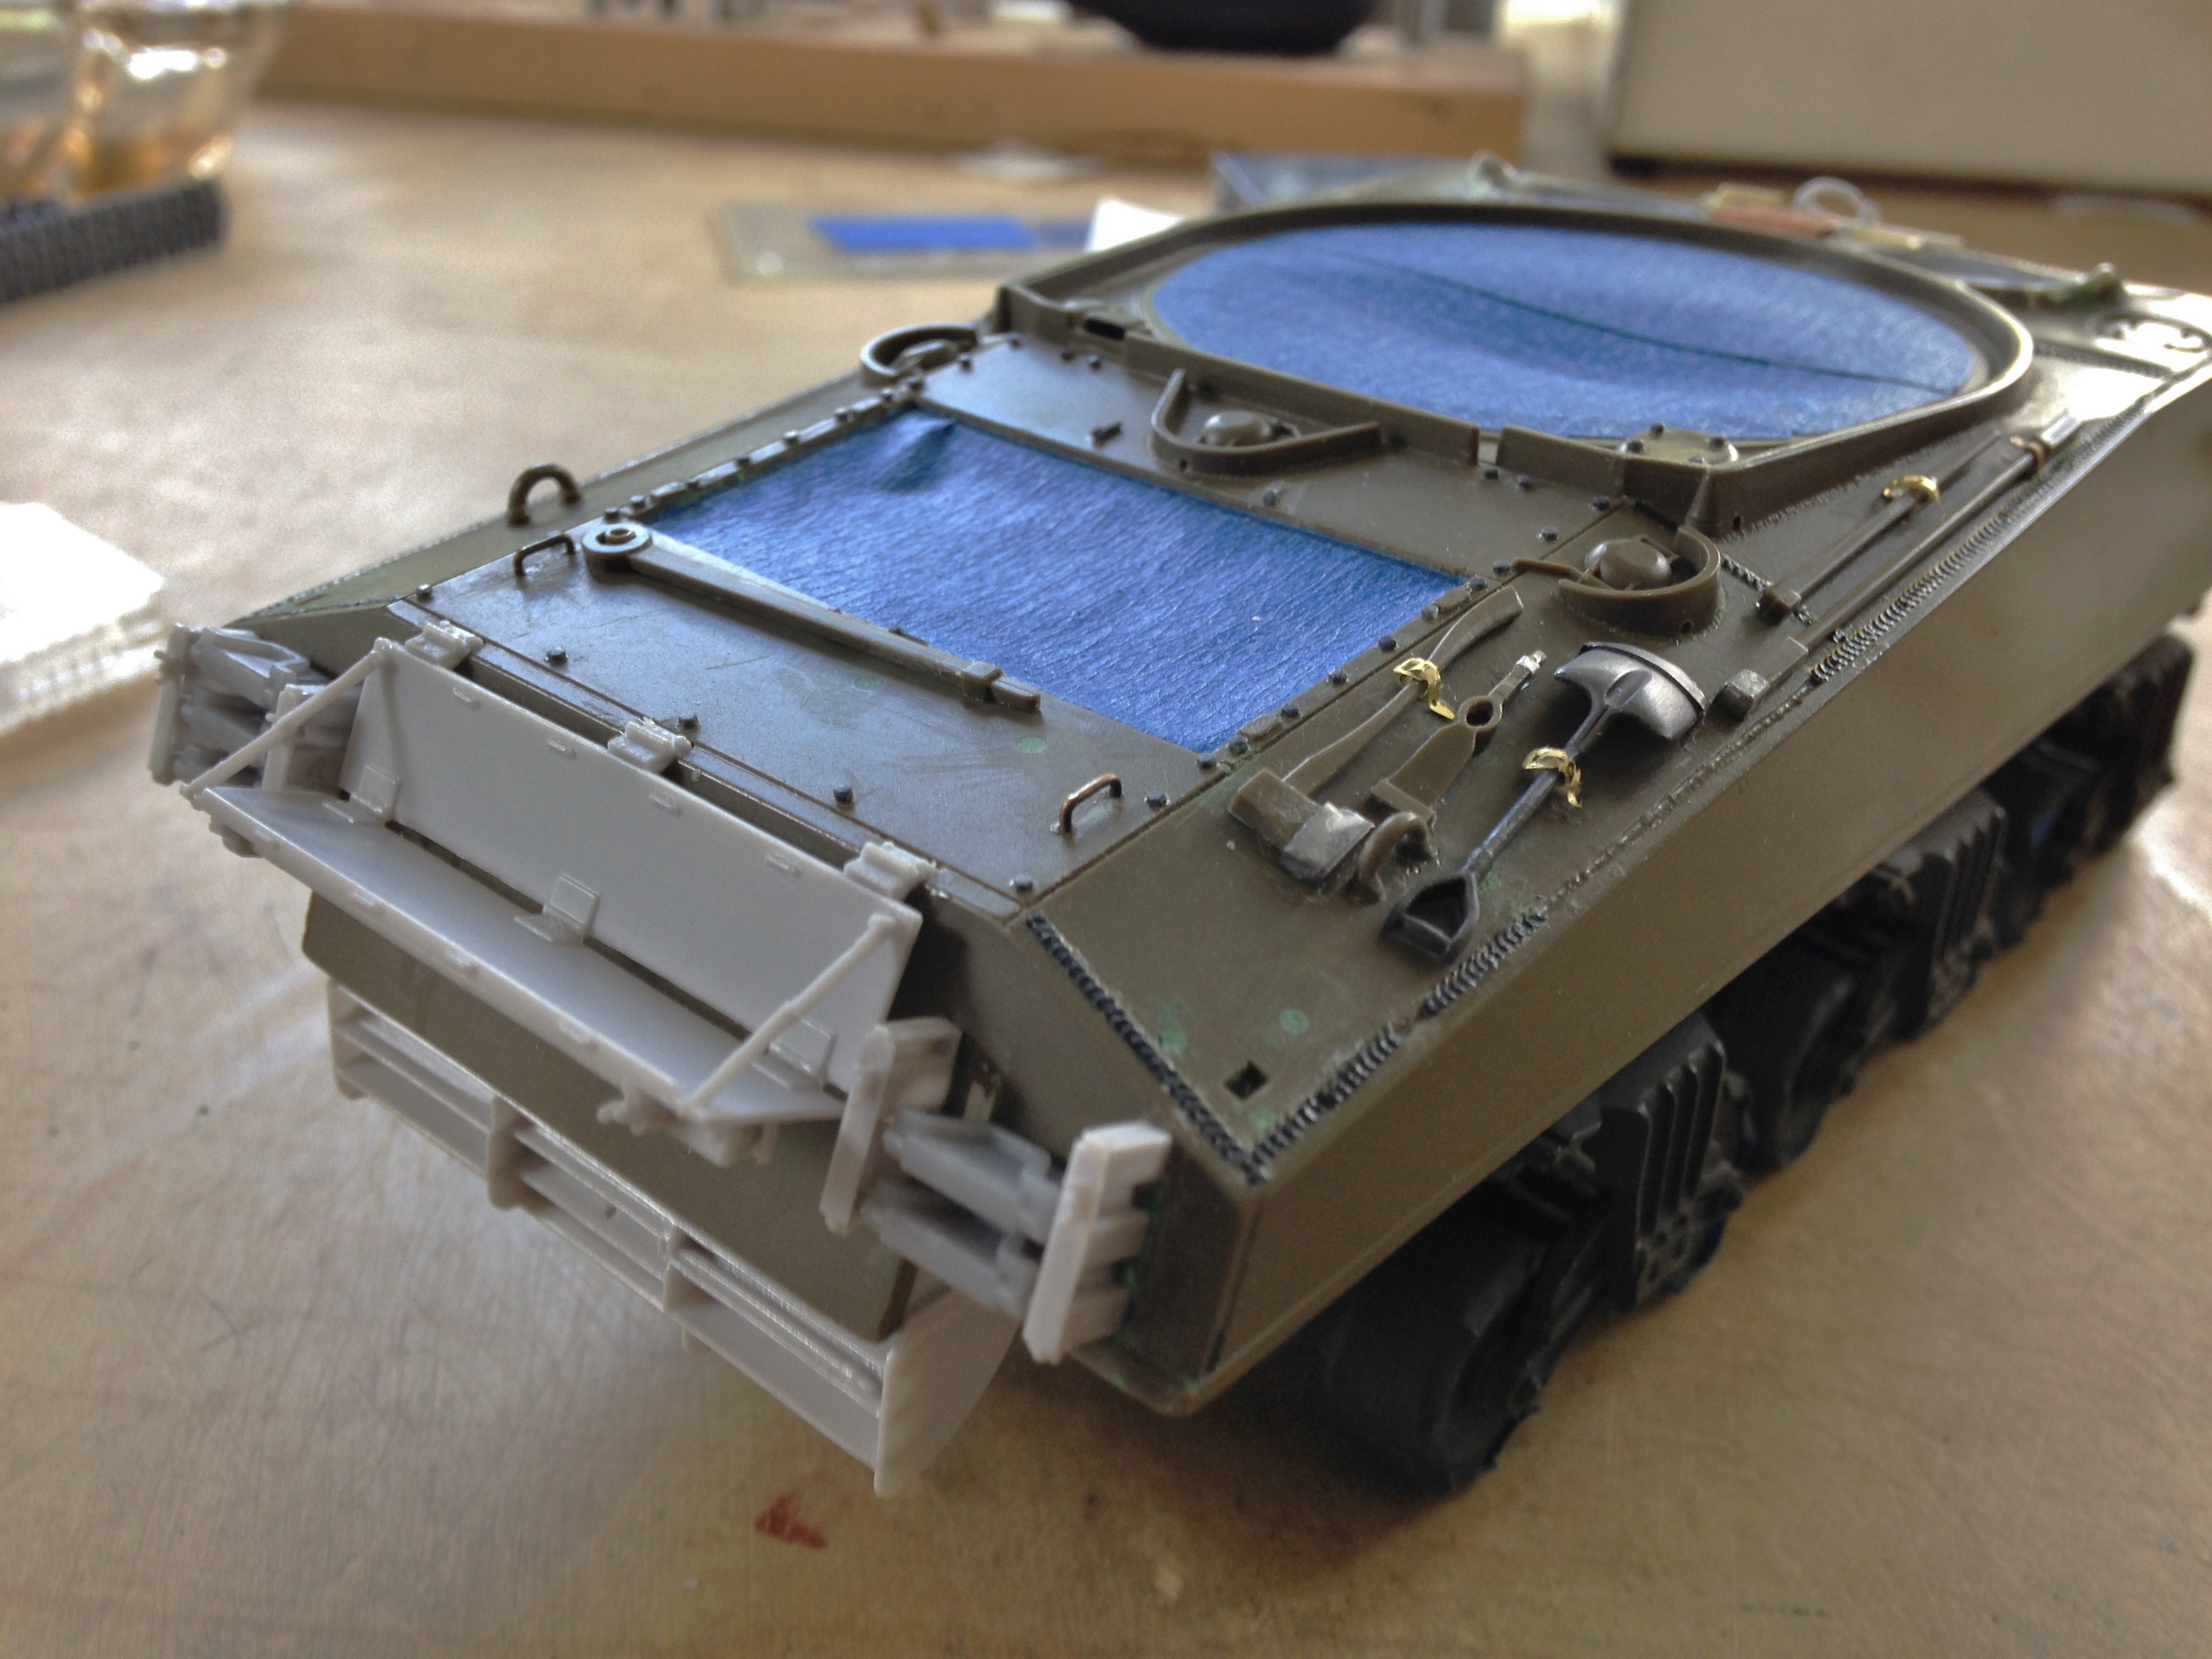
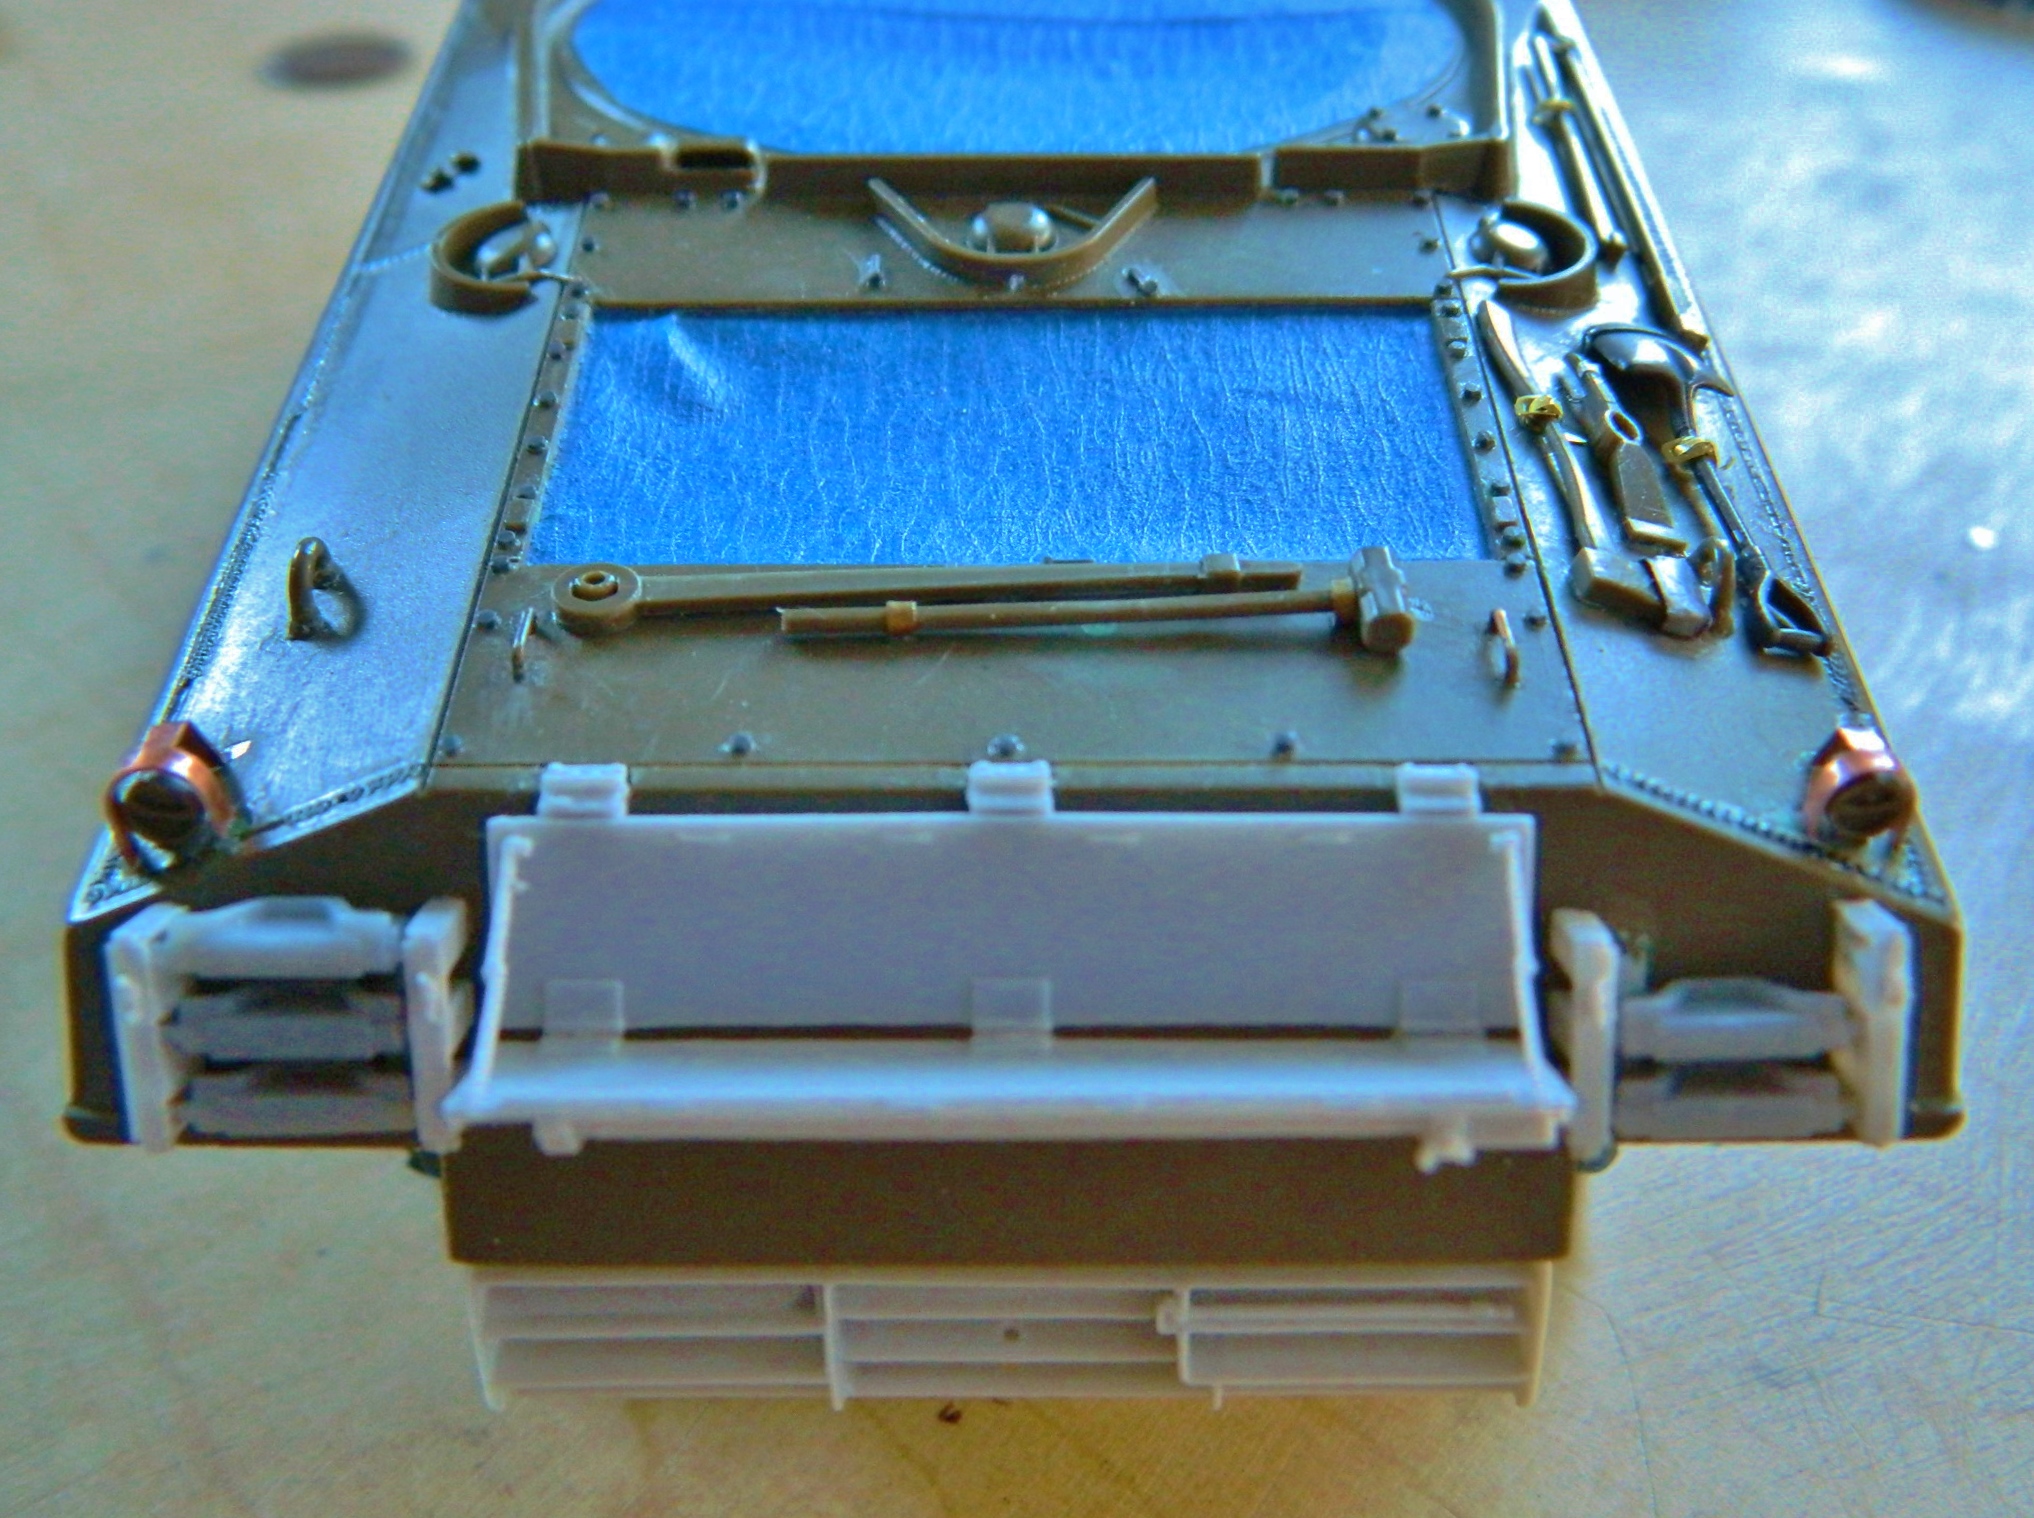
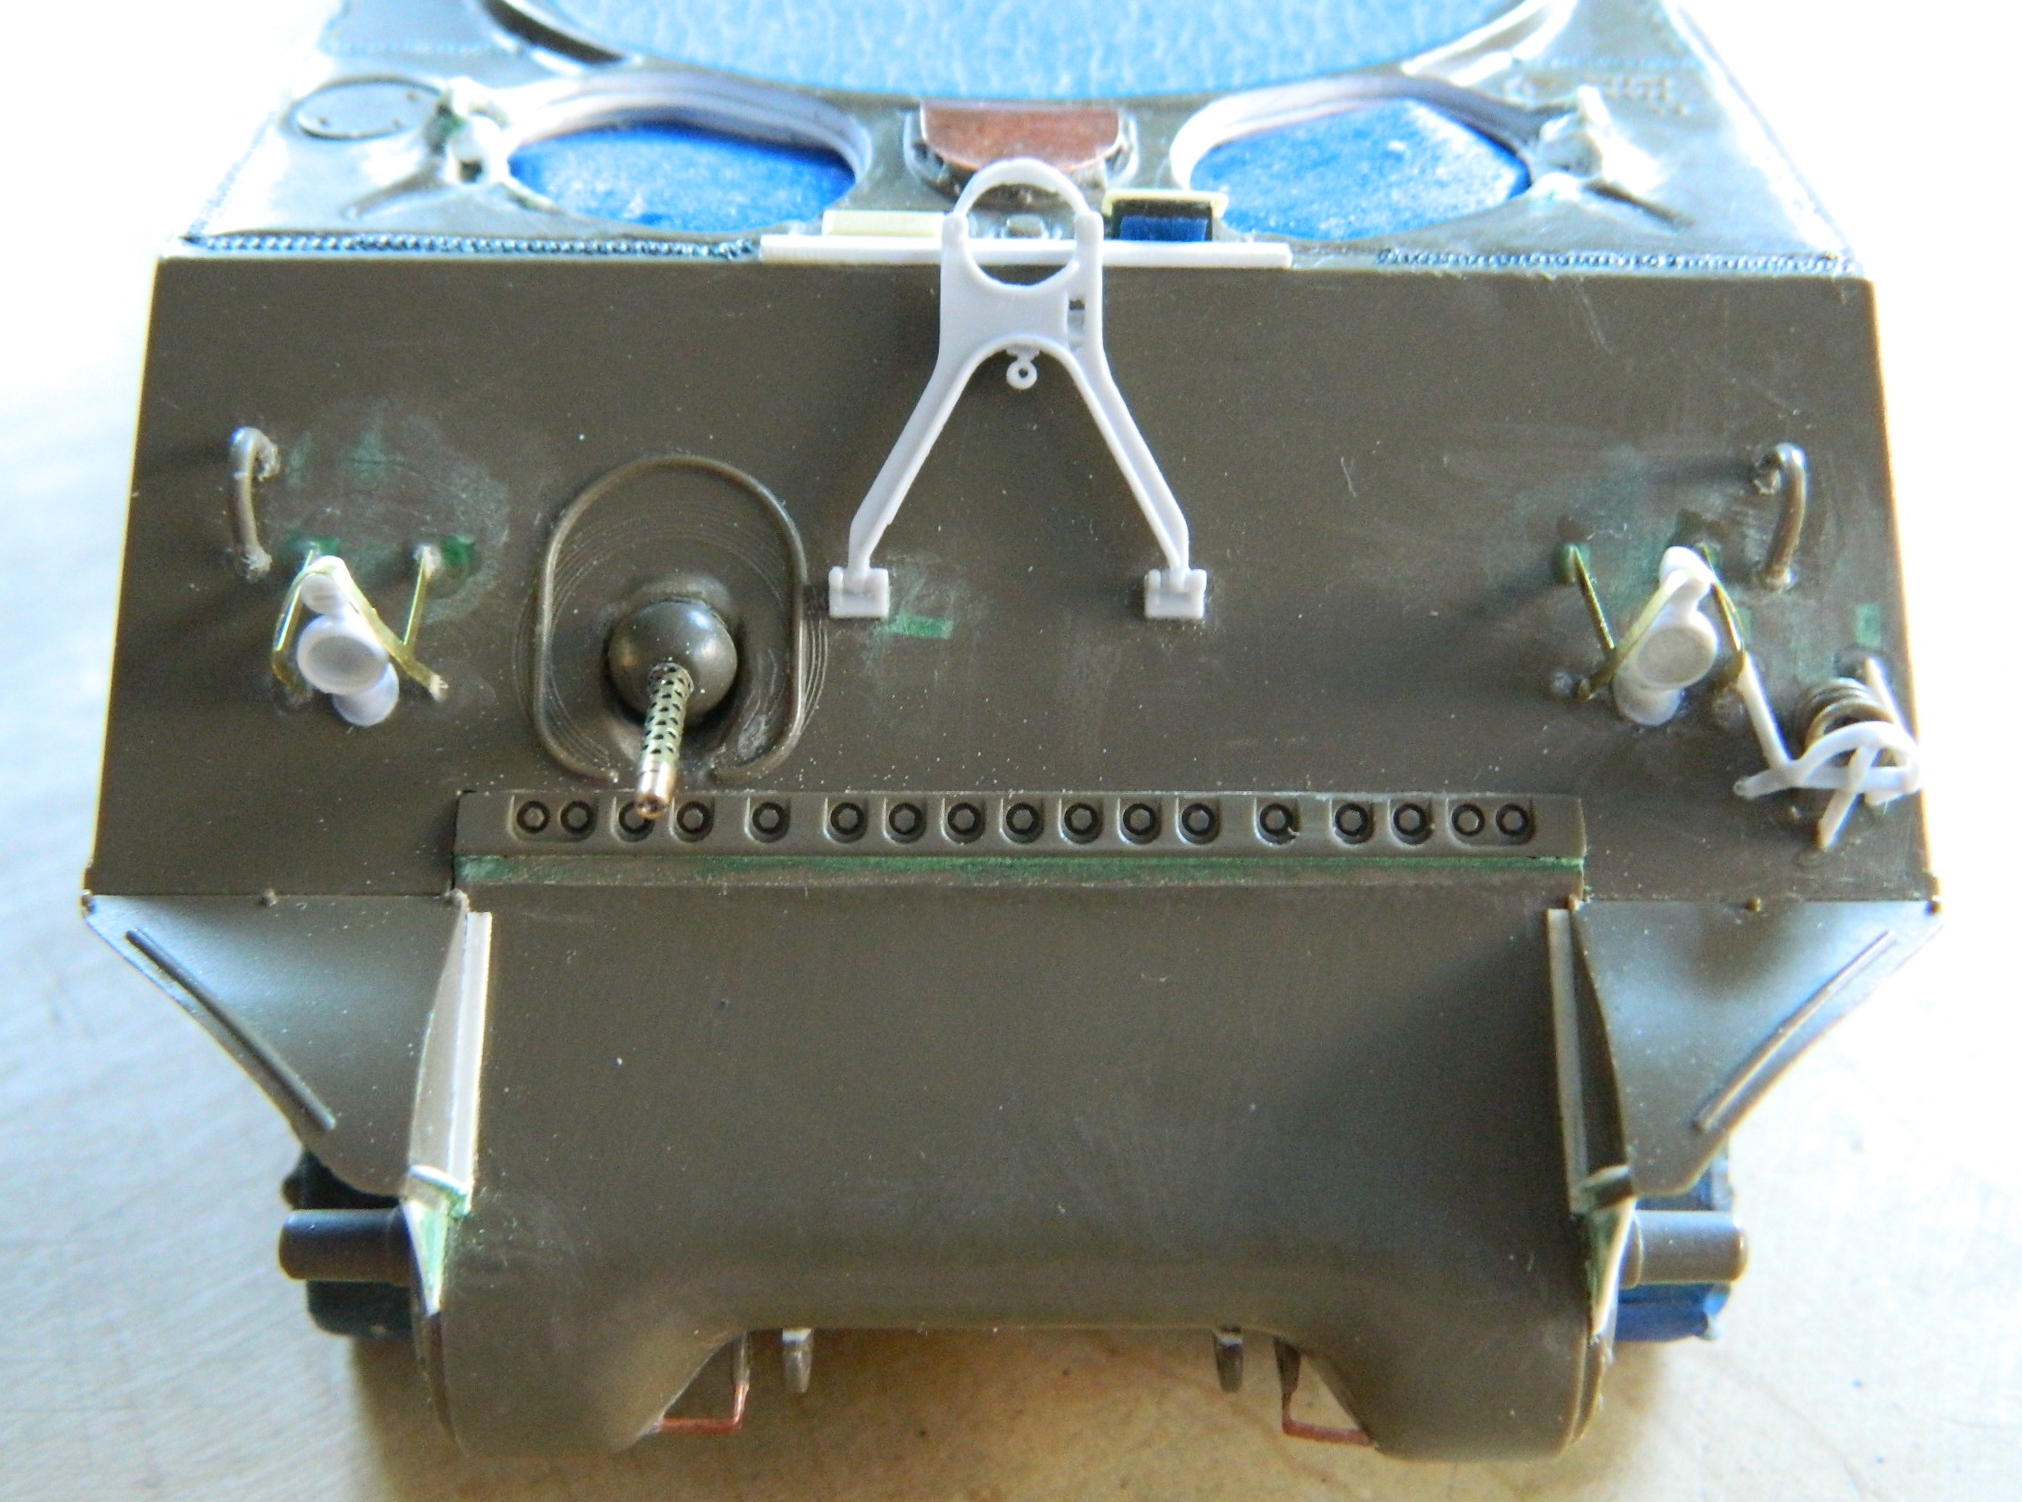
Moving to the back of the tank, I added the spare track links to the racks. Reference photos showed that the spare links were over-painted OD green (as was everything else on the tank when it got a coat of paint, including dirt, spare tracks, and whatever else was strapped to it), so I added them to the racks and then added the fold-down shelf:
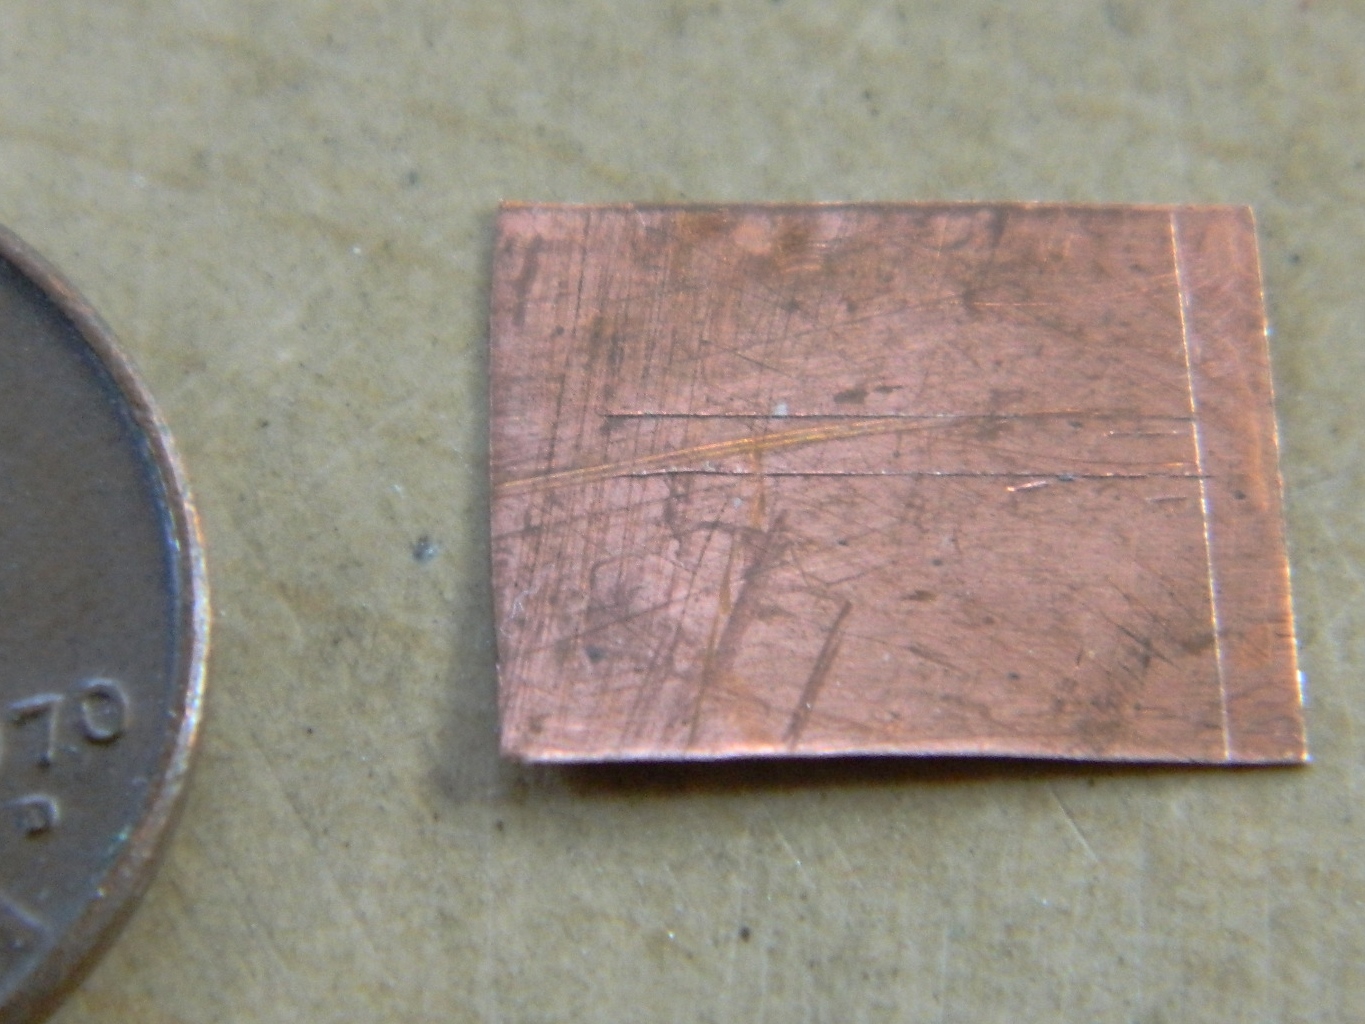
I successfully glued one of the taillight protectors in place, but when I was doing the second one, evidently I had another brain fade. I thought I had the knife positioned properly but something shifted, I didn’t notice it had, and I ended up cutting a quarter of an inch off the protector instead of a profoundly thin piece as I’d intended to do.
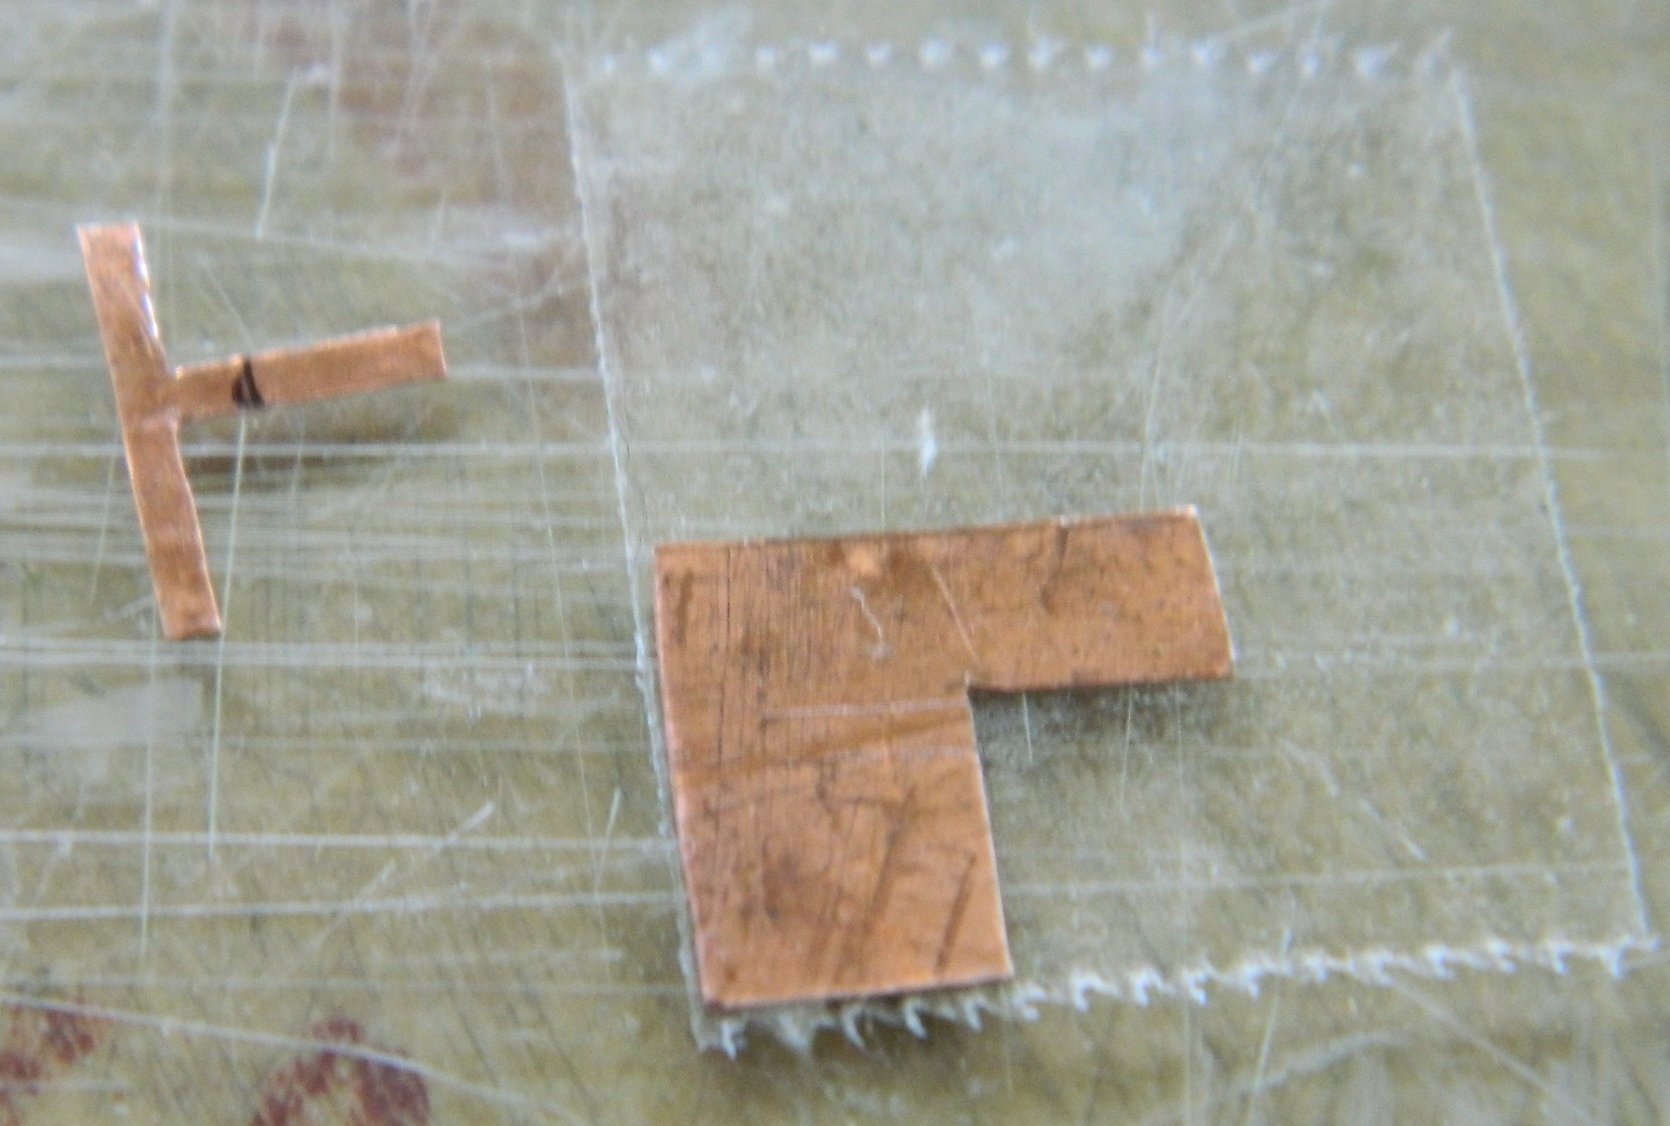
[Insert colorful invective here]
Turn off the lights, walk away, get a good night’s sleep (for a change, surprisingly), and the next morning while having life’s blood coffee and just ruminating on my options, I remembered (for a change, surprisingly) that I have .005″ (.127mm) copper shim stock on hand. Okay, using the ruined guard as a basic template, I traced the shape onto the shim stock and using the small scissors again, cut out a new piece:
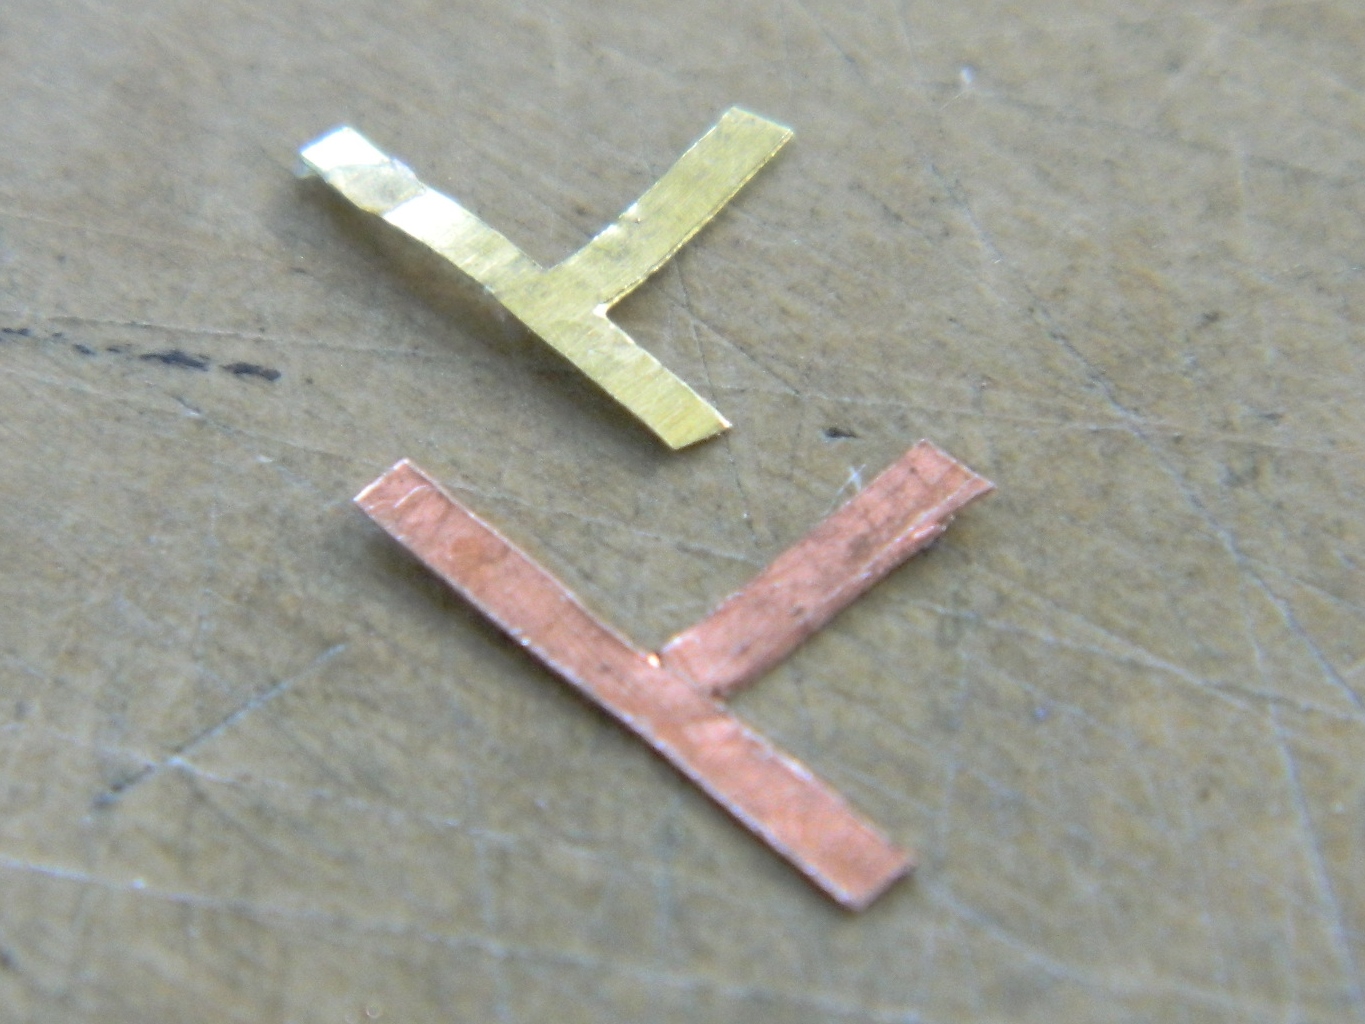
I liked the replacement so much better than the PE part that I snapped the “good” guard off and made another one:
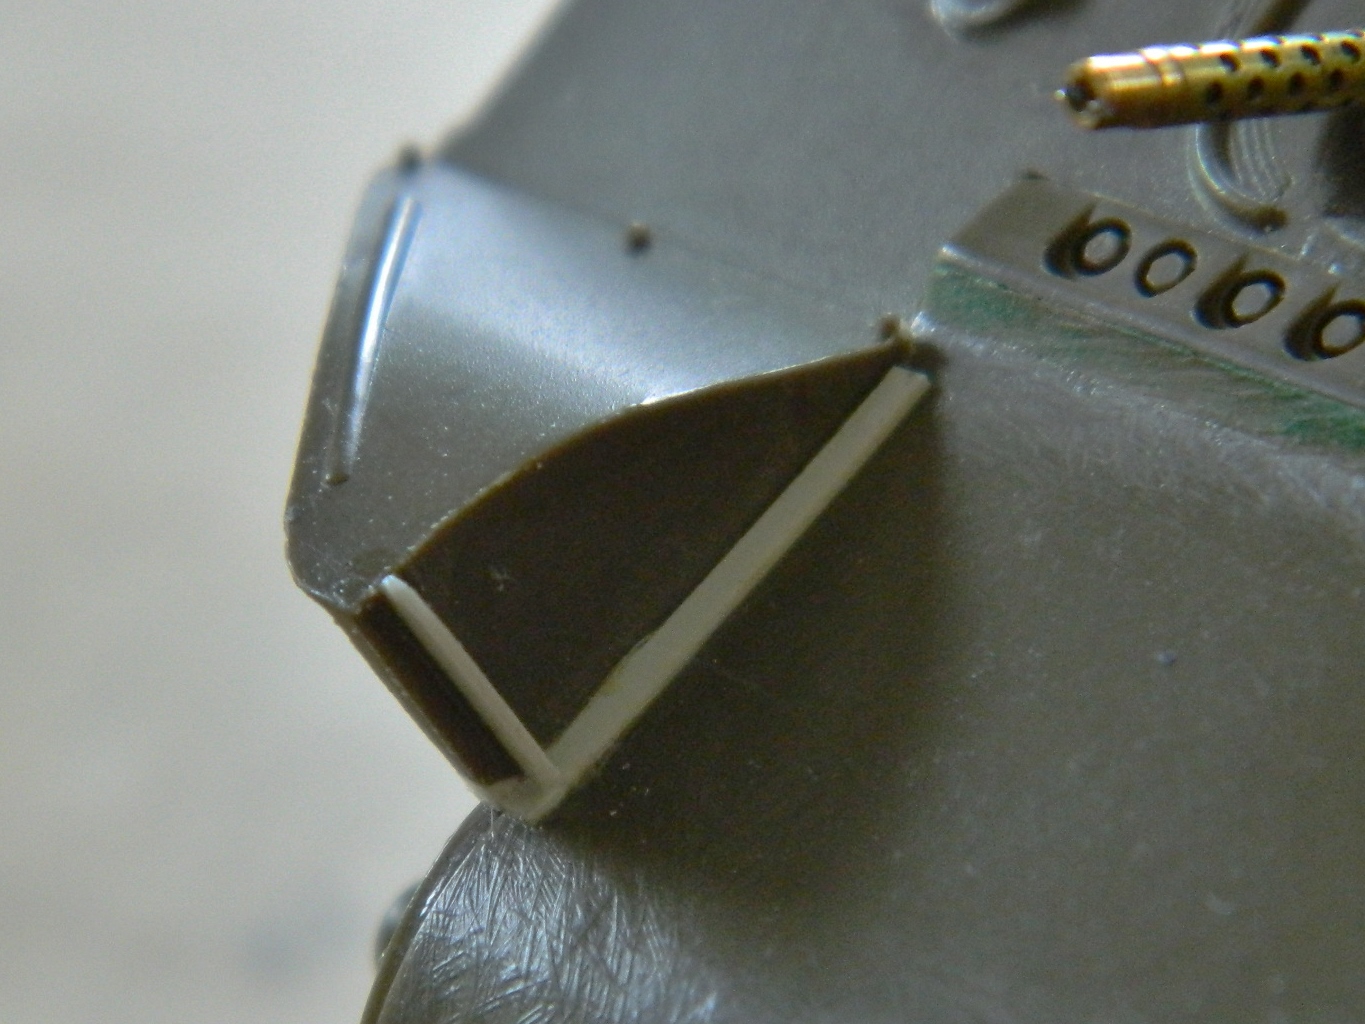
Back at the front, I needed to add the front fender mounts where they attach to the differential cover. But something didn’t look right. I went to my reference photos and realized that Tamiya hadn’t molded the front fenders correctly. On most of the late-model M4A3s in the photos, the sheet metal doesn’t form a 90-degree angle with the line where the fender meets the differential casting (that seems to be more common on earlier variants), it runs vertically down from the corner of the fender. I added .020″ (.508mm) sheet:
I applied putty to hide the seam and let that sit to cure.
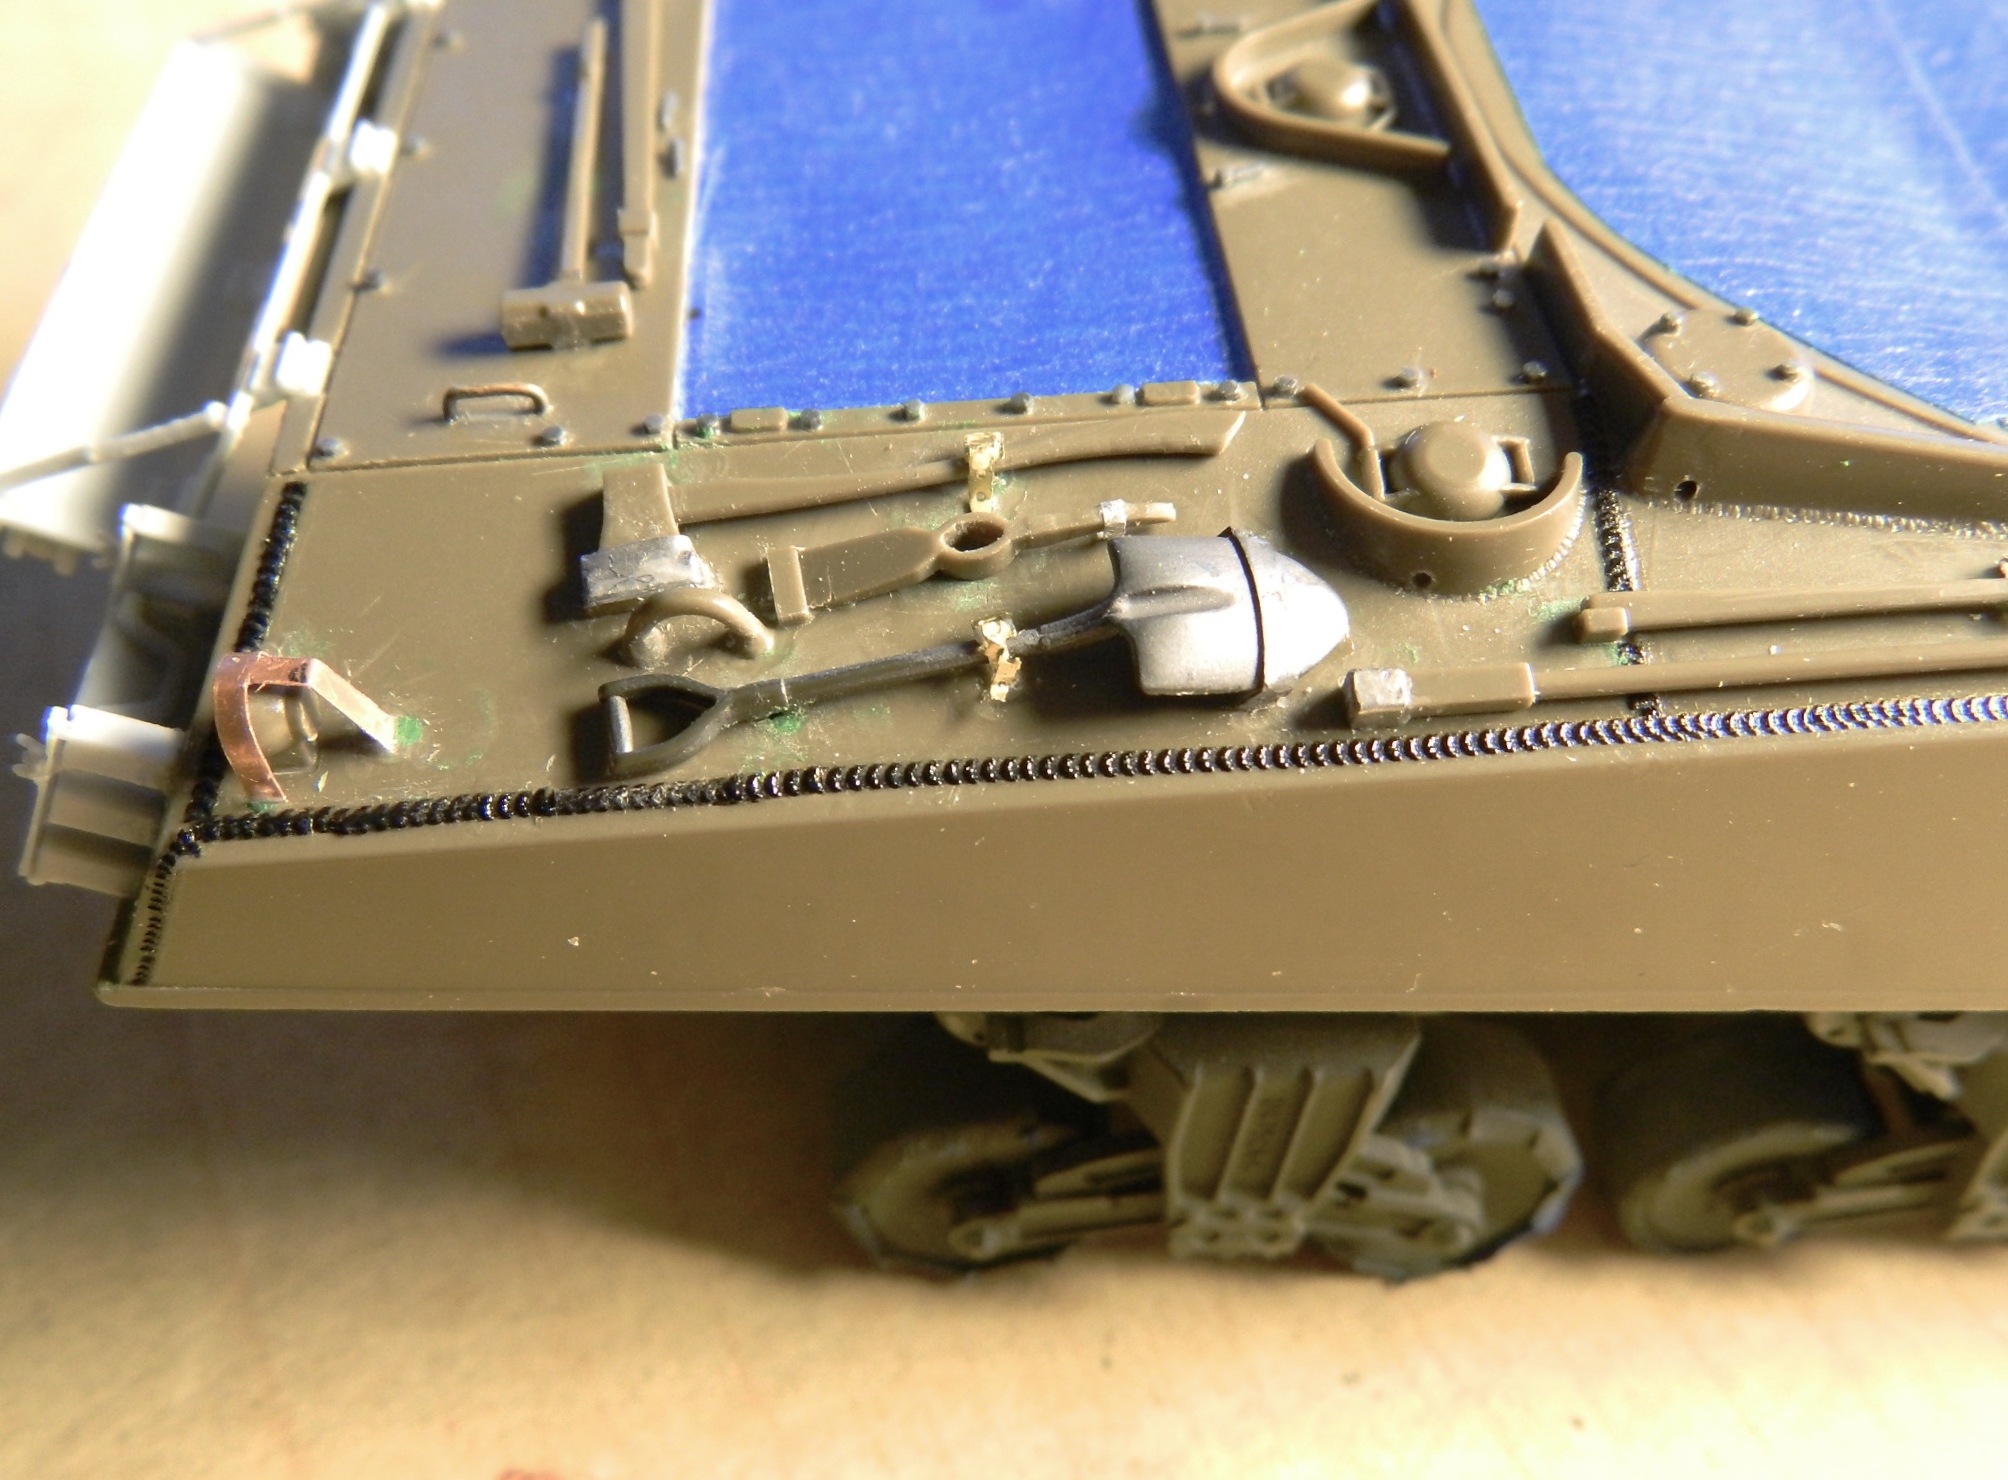
Tools don’t just sit there. Sherman tanks bounced a fair bit (saw a photo of one named, “Bouncing Bitch”), so anything not secured to the tank wouldn’t stay in place. What the kit has molded to the tools as “attachments” were unacceptable. The brass straps and buckles came from the Verlinden PE set, brackets and sockets were made from lead foil:
The engine covers are bolted closed and to open them they have to be unbolted. So where do the bolts go? I would imagine they’d just be set on top of the rear plates until it was time to close the covers. I modified four Grandt Line bolts, trimmed them to length, and glued them in place:
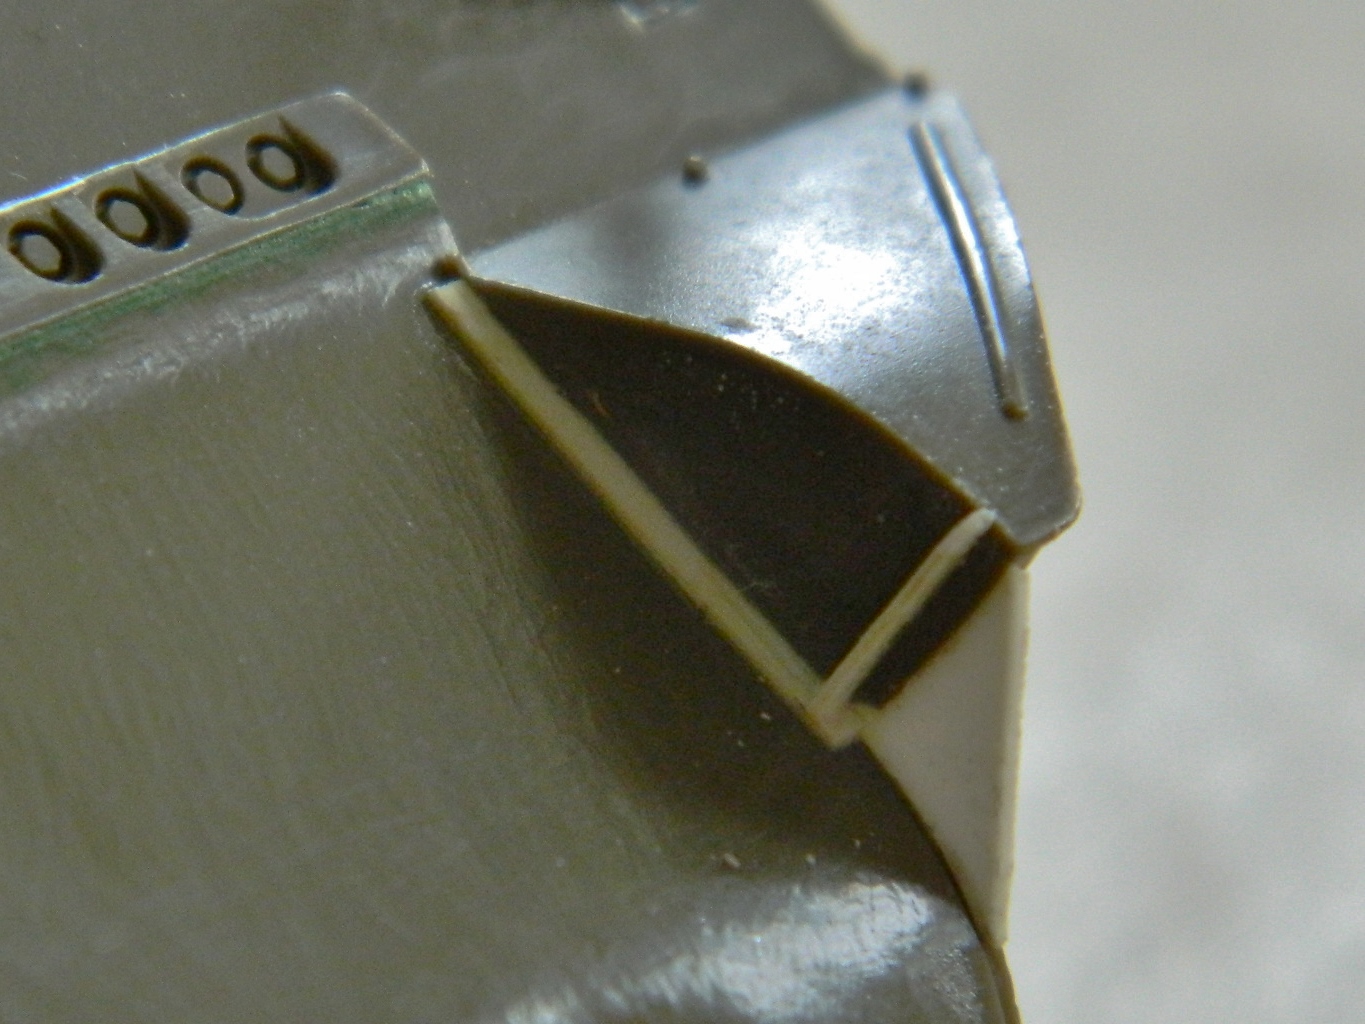
With the putty cured, I went back to the front and smoothed away the excess putty. Since I used .020″ (.508mm) sheet to add the missing fender sections, the edges needed to be thinned to replicate sheet metal (yeah, it’s still too thick for scale accuracy, but making them as thin as they should be would result in them being too thin for reality):
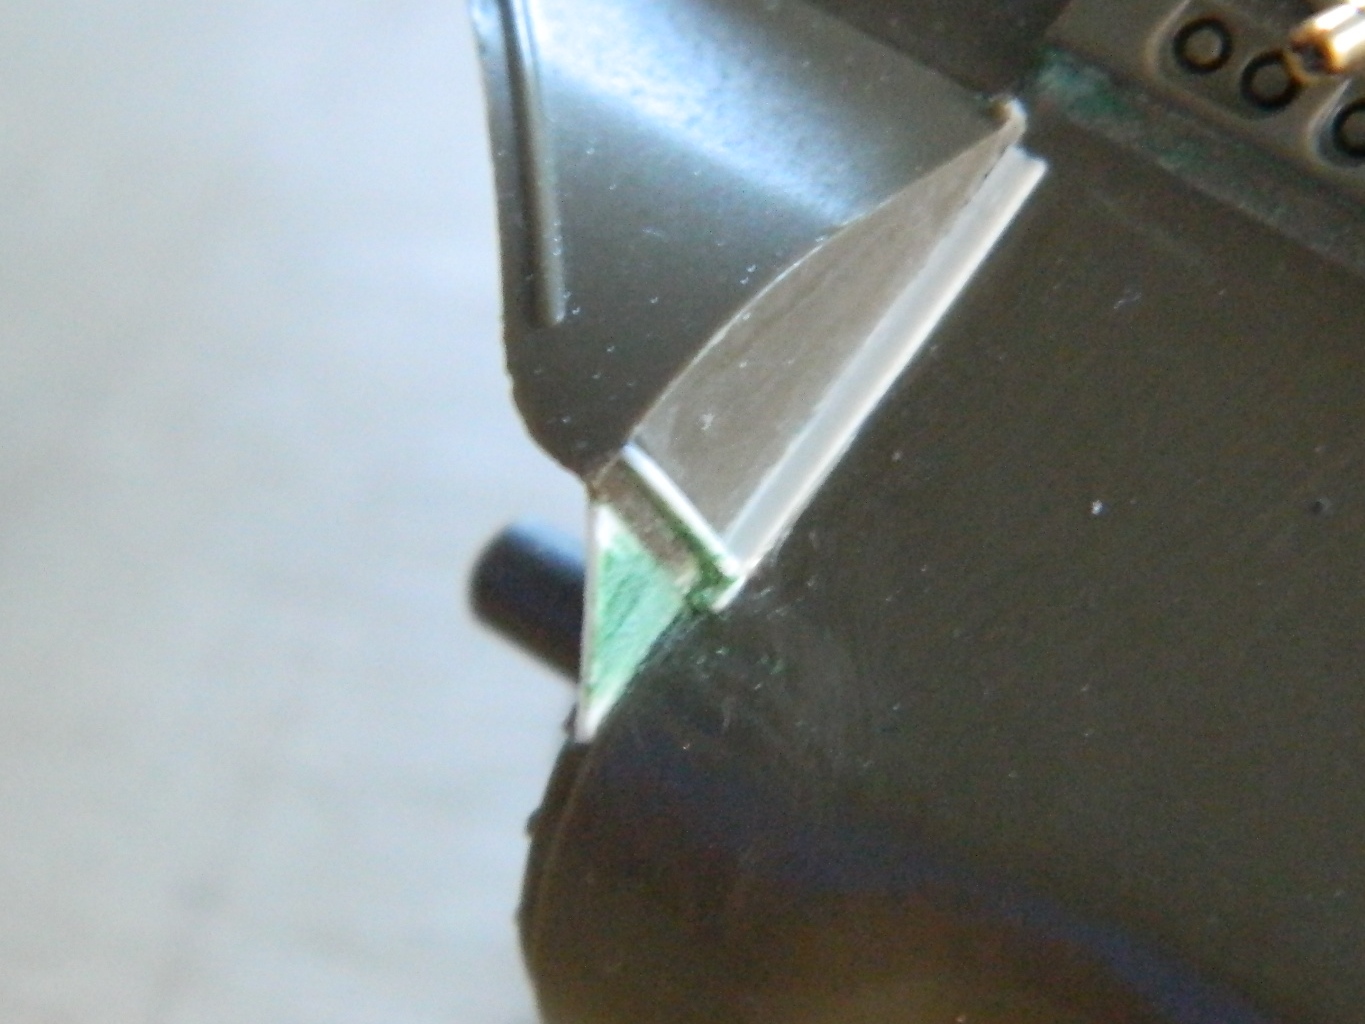
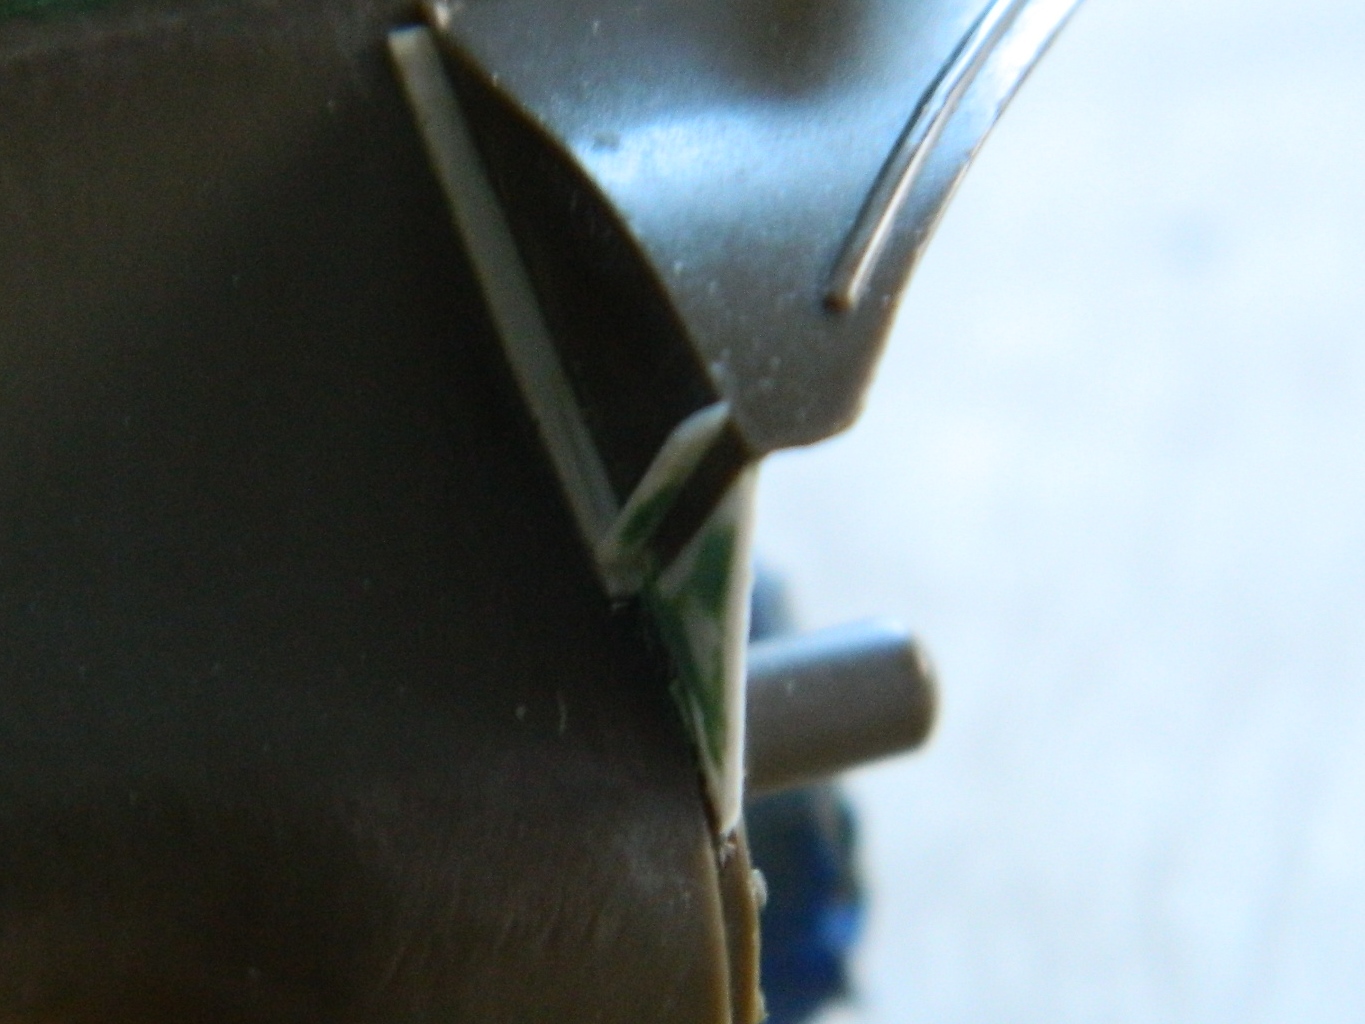
Okay, that looks much better:
Since the goal is to get this under a coat of primer, and all of the fiddling with the top surface is done (I HOPE), I replaced the resin weld beads that had gotten knocked off during handling (lots and lots of handling):
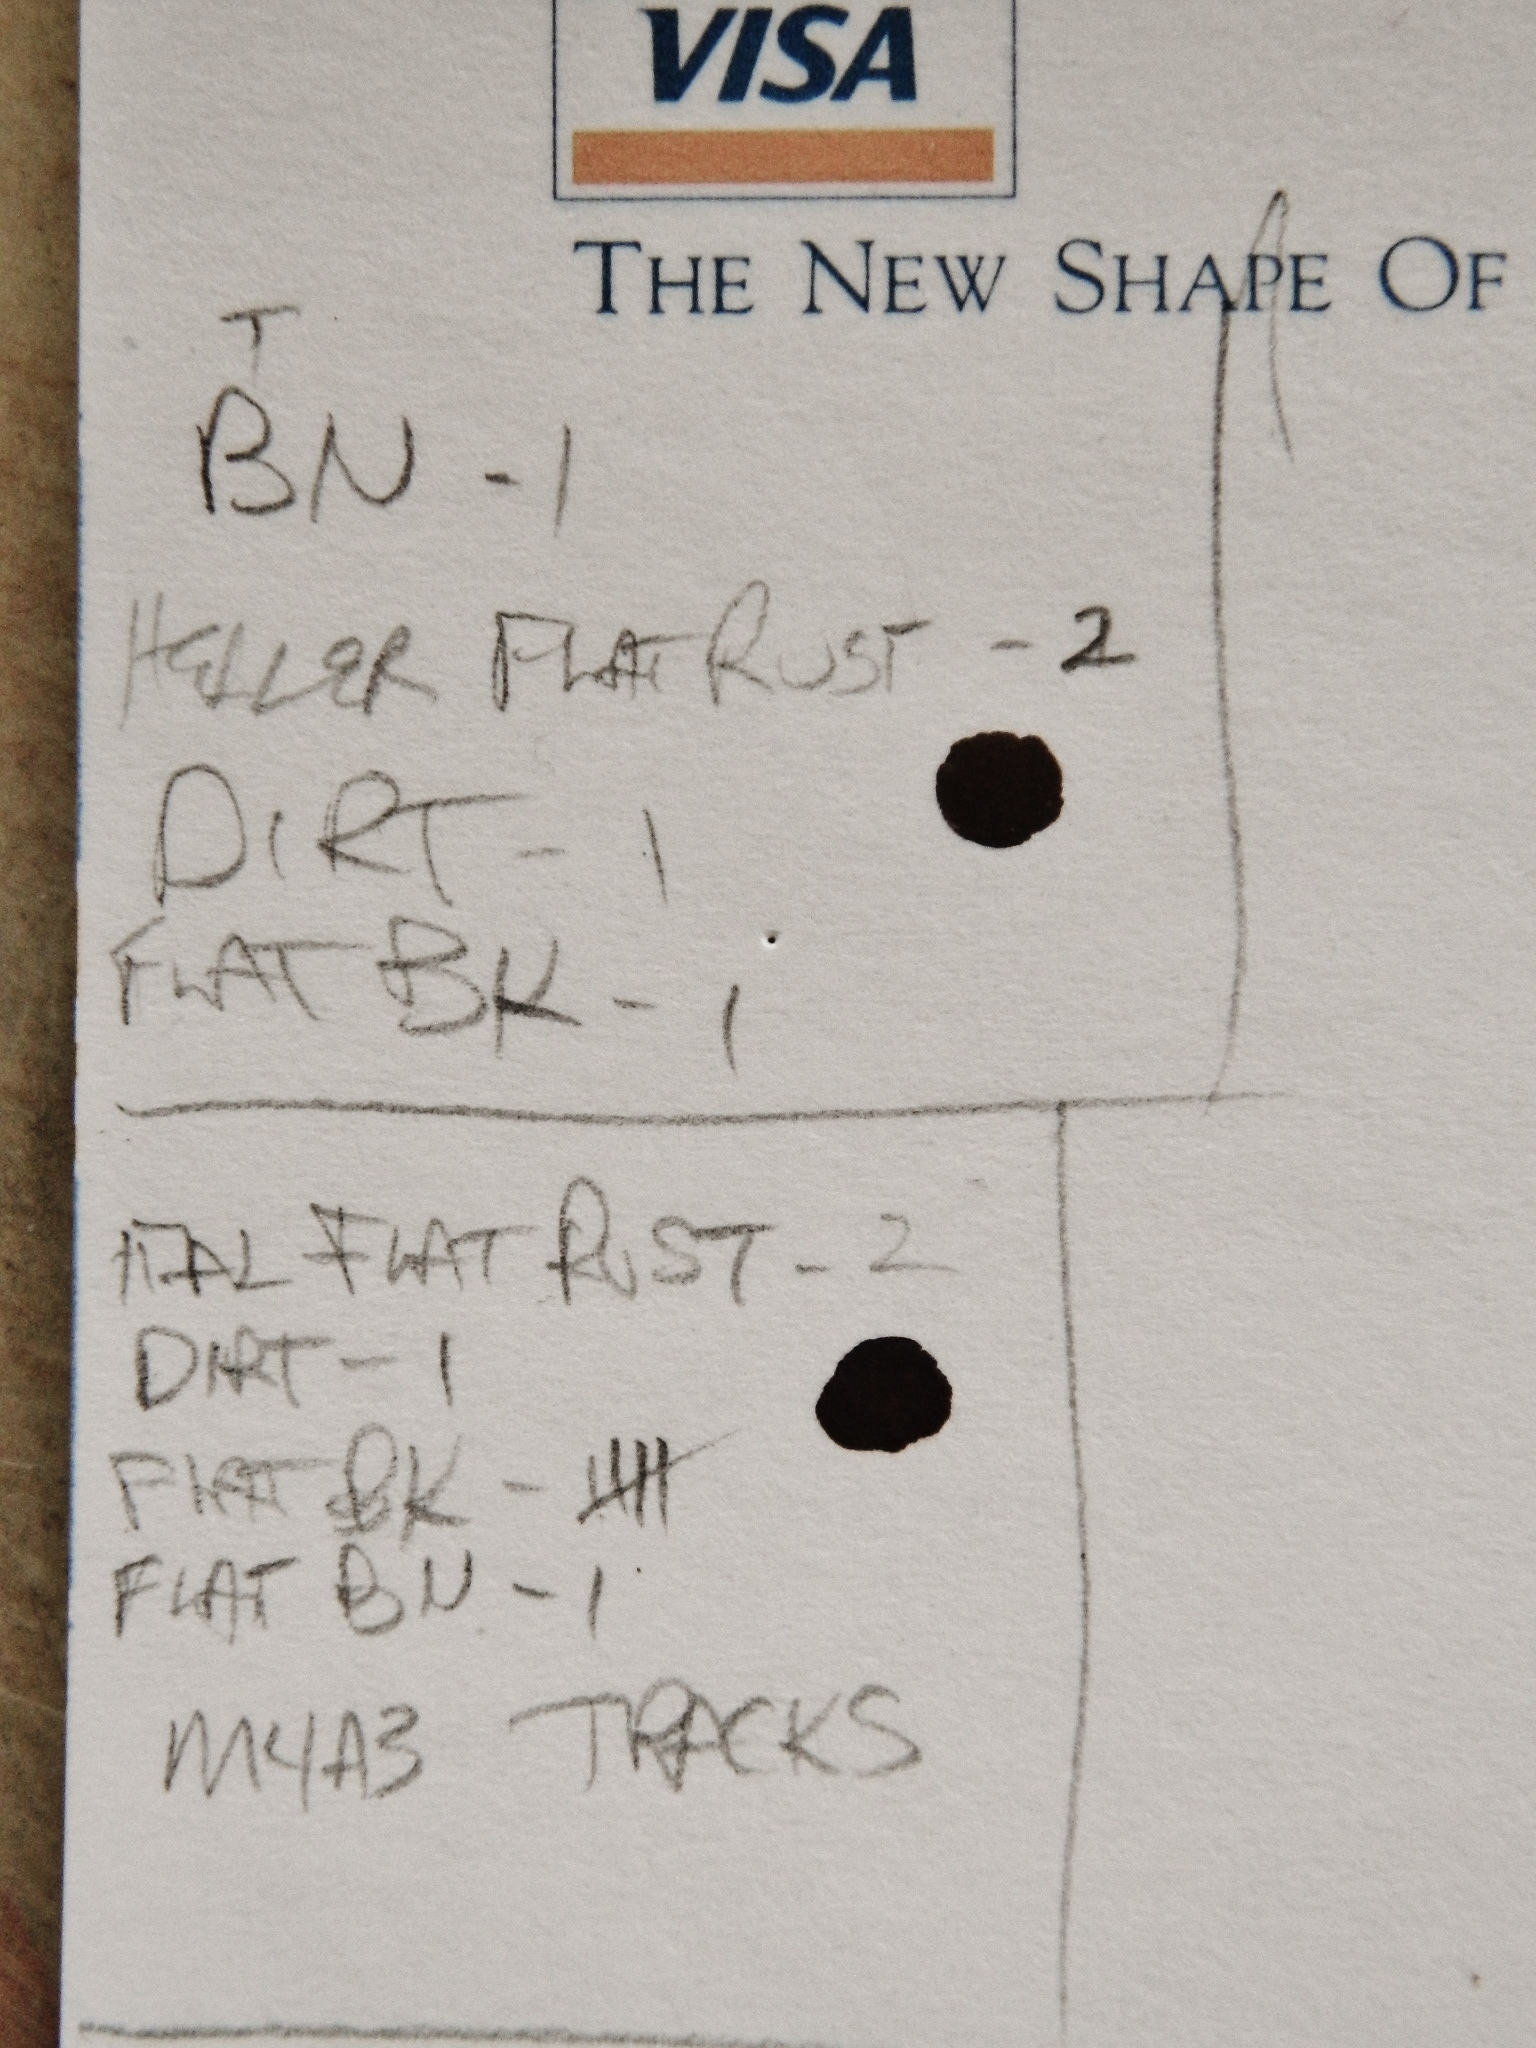
Another part I want to paint while I’m in painting-mode is the tracks. I have the buffed-out steel already on them as my undercoat. For it to be an “undercoat,” there needs to be a topcoat. For all the wear a tank in the field is subjected to, the tracks get the worst of it. I wanted something that combined generic crud with old rust, so that means I have to break one of my rules and mix paints from different manufacturers to get the color I’m after.
Heller’s Flat Rust is good if you’re after a reddish rust. But, like stupidity, rust comes in an almost infinite palette of colors. The first combined Tamiya’s XF-10 Flat Brown and XF-1 Flat Black, Polly-S Dirt (after twenty-four years it’s still good!), and Heller’s Flat Rust.
The second formula again used Tamiya’s XF-1 Flat Black and XF-10 Flat Brown and Polly-S Dirt, but this time I used Italeri’s Flat Rust which is browner than Heller’s version.
I don’t think the photo shows the colors well at all; I liked the second formula better than the first, so that’s what I’ll be using on the tracks for the topcoat.
The numbers or hash marks after the color indicates how many parts of which particular color are in the mix, so the first formula is one part each of brown, dirt, and black, and two parts flat rust. The second formula is one part each of dirt and brown, two parts flat rust, and five parts black:
Never one to miss a pun, it’s prime time!
