(Vacuum Molder
When getting into modeling a bit deeper than Out Of Box (OOB), having the ability to make your own parts is quite handy.
An example is the canopy on a 1/48 scale (or any scale, really) aircraft. Sure, the kit part is clear, but if you measure its thickness and convert that to scale dimensions, you’ll realize that the real canopy isn’t six inches thick. Light does “interesting” things when it has to work through thick sections of plastic, and unless you replace that kit part with something closer to scale thickness, it’s going to look like what it is. A small plastic part. That’s when being able to vacu-form scale parts comes in handy.
I got the basic plans from FineScale Modeler back in the ’90s. It’s an easy set up to build and isn’t expensive. (I tweaked it a bit because that’s just what I do.)
To make one of these handy gizmos, you’ll need:
A bread pan, 1/4″ graph paper, sharp 3/32″ drill bit, epoxy putty, silicone sealant, plywood, a piece of pvc or plastic tubing about 4-5″ long, 1/2″ to 3/4″ wood screws, and something to make a split frame with (I used 3/16″ aluminum sheet), a hot place or access to an electric stove (and an understanding mate if you screw things up and drop molten plastic onto the burner) (or someplace else to sleep for a week or two should understanding not be in plentiful supply)
The main part is the plenum. This is the volume that traps the air you’re going to want to suck out. A standard-size, sheet metal bread pan, works great. I strongly suggest you get one that is stamped; it will have rounded edges at the bottom of the pan.
Get some graph 1/4″ paper, where the squares on the paper are a quarter inch square. Turn the pan over so the bottom is up, trim the paper to fit over it, and then tape it down. Take a sharp punch and tap firmly enough to leave a dimple in the metal without deforming it every place the lines intersect.
Use a sharp 3/32″ bit and drill a hole everywhere you made a dimple. Once you’re done, if you end up with what I did, you’re going to need to deburr the surface. For that I used a combination of a fine finishing file and sandpaper. (You don’t want sharp projections to puncture the plastic you’re going to be forming.)
Next you need to cut a hole in one end of the bread pan to attach the pvc or plastic tube to. This is where you’re going to hook up your vacuum cleaner (which is what will draw the plastic down around your form). Once you have the hole cut just large enough for the tube to fit, use the epoxy putty to build a flange on both sides where the tube goes through the hole in the bread pan. Put it aside until the putty has completely cured.
Size your plywood (I used a scrap of 3/4″) large enough to offer a stable base and place your bread pan, upside down, onto the plywood and outline it with a pencil. Run a bead of silicone sealant around the inside perimeter of your outline, settle the bread pan upside down (or with the bottom and all those holes up) and screw it down to the plywood. Let the silicone sealant cure.
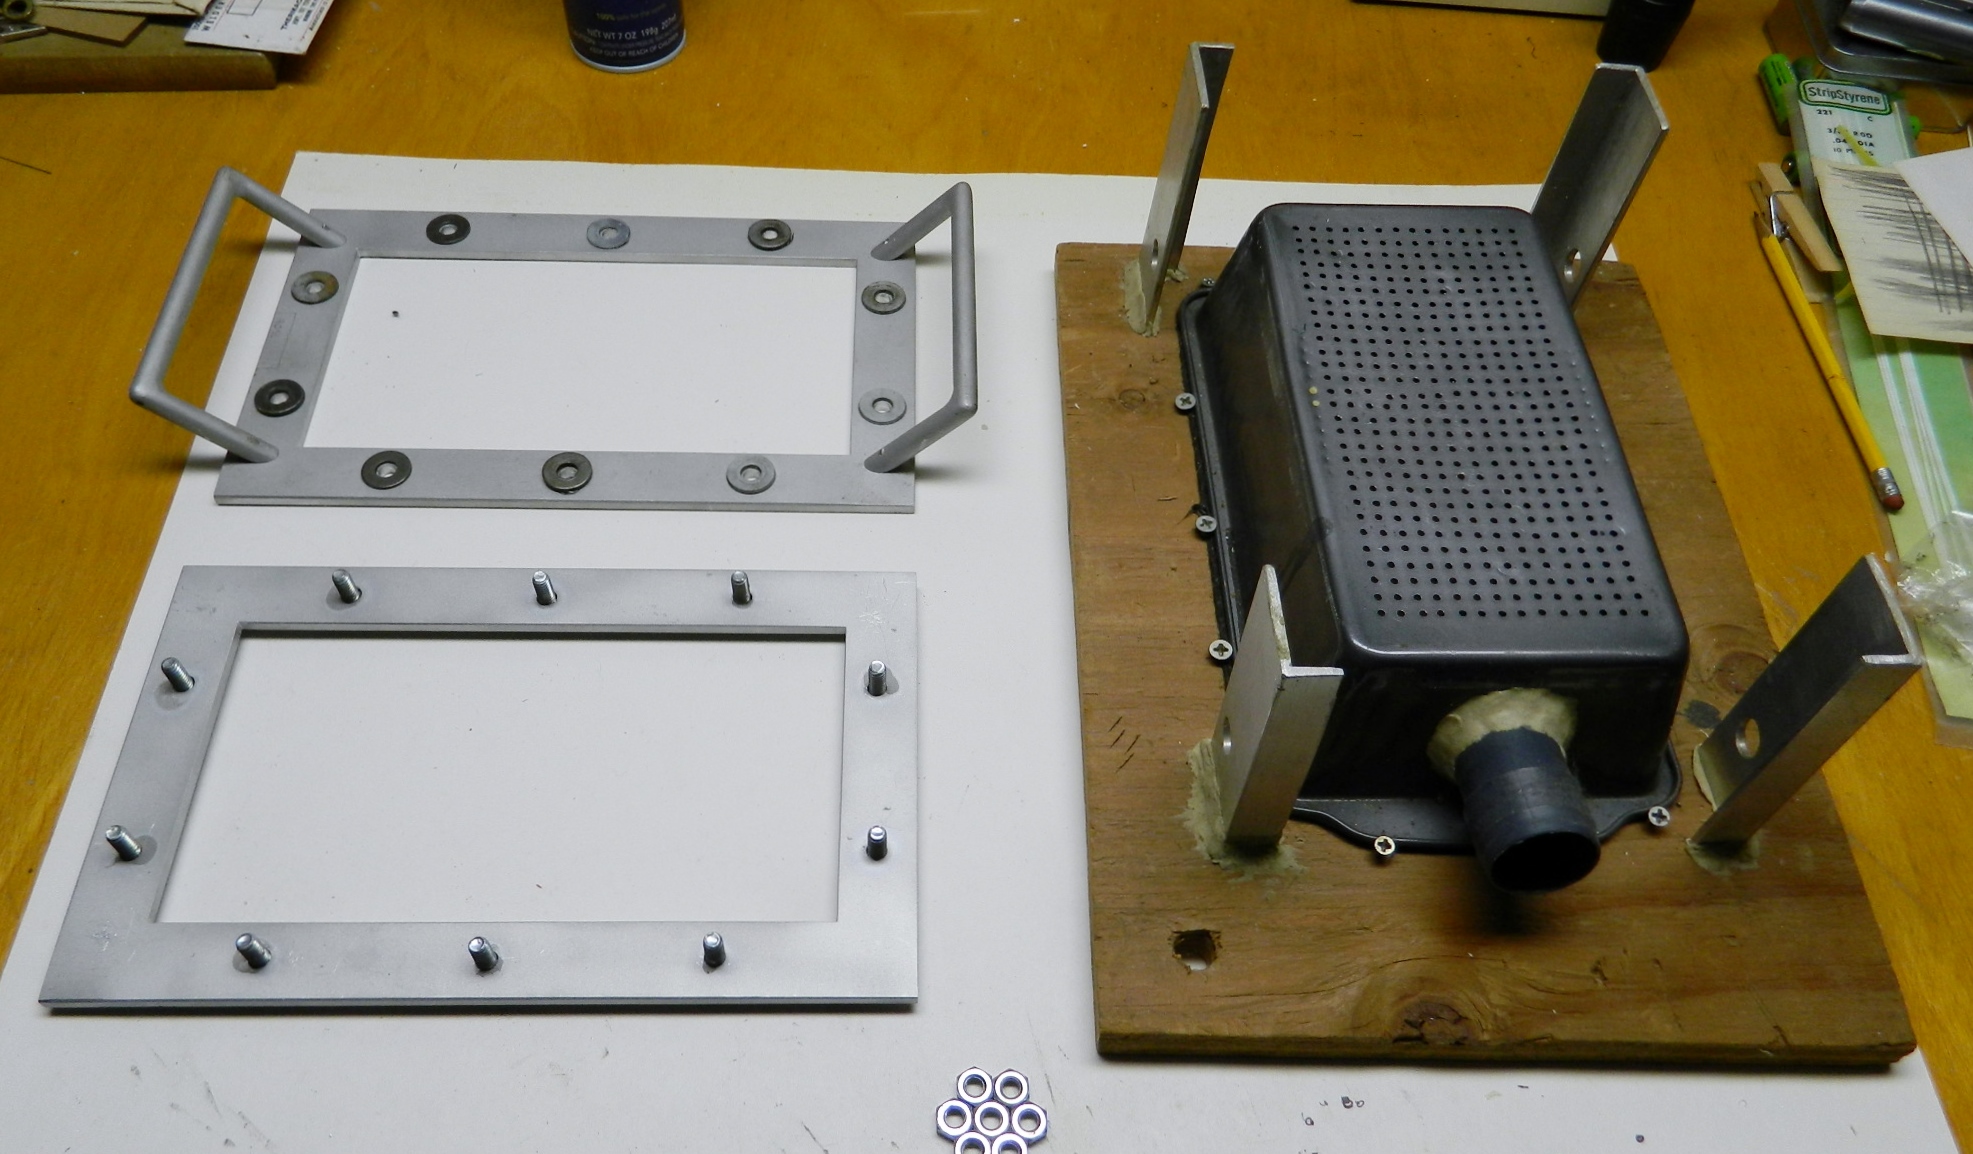
The purpose of the frame is to hold sheet styrene (or butyrate) firmly over a heat source (I use an electric hotplate but an electric stove works also). Here’s where I got a little fancy. I had a friend who worked in a machine shop make a frame (two frames, actually) for me from 3/16″ aluminum plate (anything sturdy will do). I sized the inner opening to be just slightly larger than the bottom of the bread pan and the width of the frame to be an inch. I used bolts and wingnuts to hold the two frames together (once all the holes were drilled, obviously, I used superglue to hold the bolts in place), and I guess he was having a boring day at work because he also made me two nice handles for the frame (comes in handy when protecting the delicate fingers from holding this over heat).
Because I’m clumsy, I later added the aluminum L-stock to guide the frame to a centered landing on the platen (bottom of the bread pan with all those holes).
Place your form of what you want to replicate onto the platen. It can be anything of the desired shape that you can pull the plastic down over, things like canopies, body panels, etc. Anything you need a thinner piece of. I’ve found that gluing the form onto a pedestal and getting the bottom of your form off the platen makes life SO much easier! I use a drop of superglue to hold the pedestal to the platen (if you don’t leave it there overnight, it will snap right off).
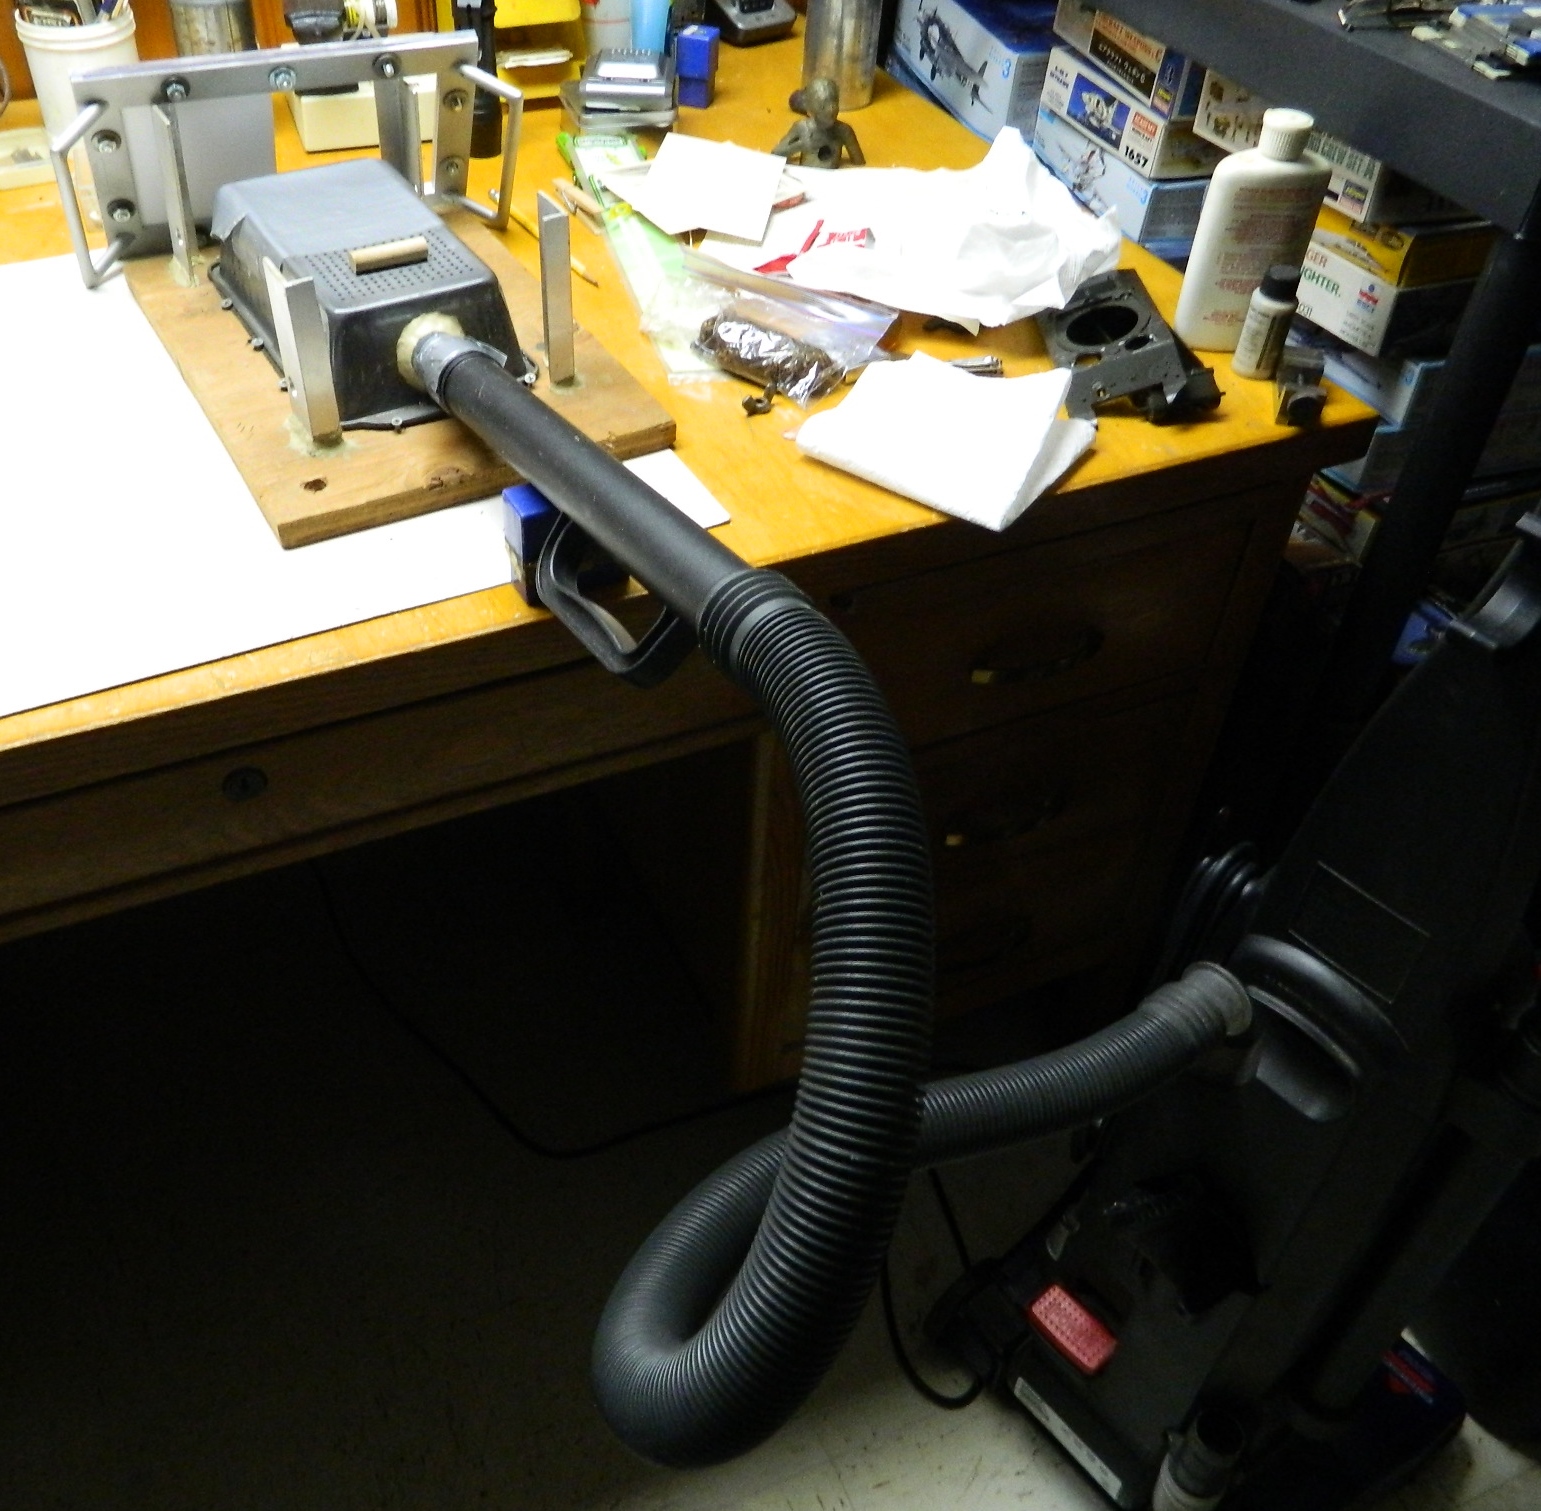
When you’re ready to have at it, attach the hose to a vacuum cleaner to the tube you epoxied to the bread pan. Put your form in place. Take a sheet of whatever you’re forming and fit it to your frame; once it fits, tighten the wingnuts securely, and then hold the plastic (or whatever) over your heat source and pay attention. You want to heat it until it’s flexible, but you do NOT want to heat it to the point where it falls out of the frame and onto your heat source, for reasons I sincerely hope are obvious. (Sure became obvious to me!)
Be prepared to waste plastic (or whatever). It takes a little, not much, experience for you to be able to tell when the plastic is soft enough to form, which will generally be once it starts to sag. Once you think it’s ready, turn the vacuum on and drop the frame over the platen, trapping your form underneath (don’t forget to turn off the vacuum…it doesn’t take long, just a few seconds) . Remember, this thing works on vacuum to suck the plastic around your form, so you’ll need to press down with the frame until the plastic seals against the platen, allowing the suction to pull the plastic down over the form (that’s why I made the inner opening of my frame just slightly larger than the bread pan). If you don’t heat it enough you can reheat it.