This is what the kit provided for the main landing gear bays:
Yeah…it’s pretty sparse and not very accurate. I keep reminding myself that when the dies for this model were cut, the Blackbird was TOP SECRET. So rather than beat up the designers over what isn’t accurate, they deserve credit first for making it at all, and then for making it accurate enough that some maniac (me, obviously) 40+ years later has enough to work with.
As with many kits in this scale, there is a major difference between the provided landing gear bays and how they should be. Primary inaccuracy for the openings is that the bay is not defined by the openings; the bay is recessed back from the openings. The first step is to remove the inaccurate bay bulkheads. Multiple passes with the hooked scriber enables me to get a slot started that I can insinuate the edge of a razor saw into:
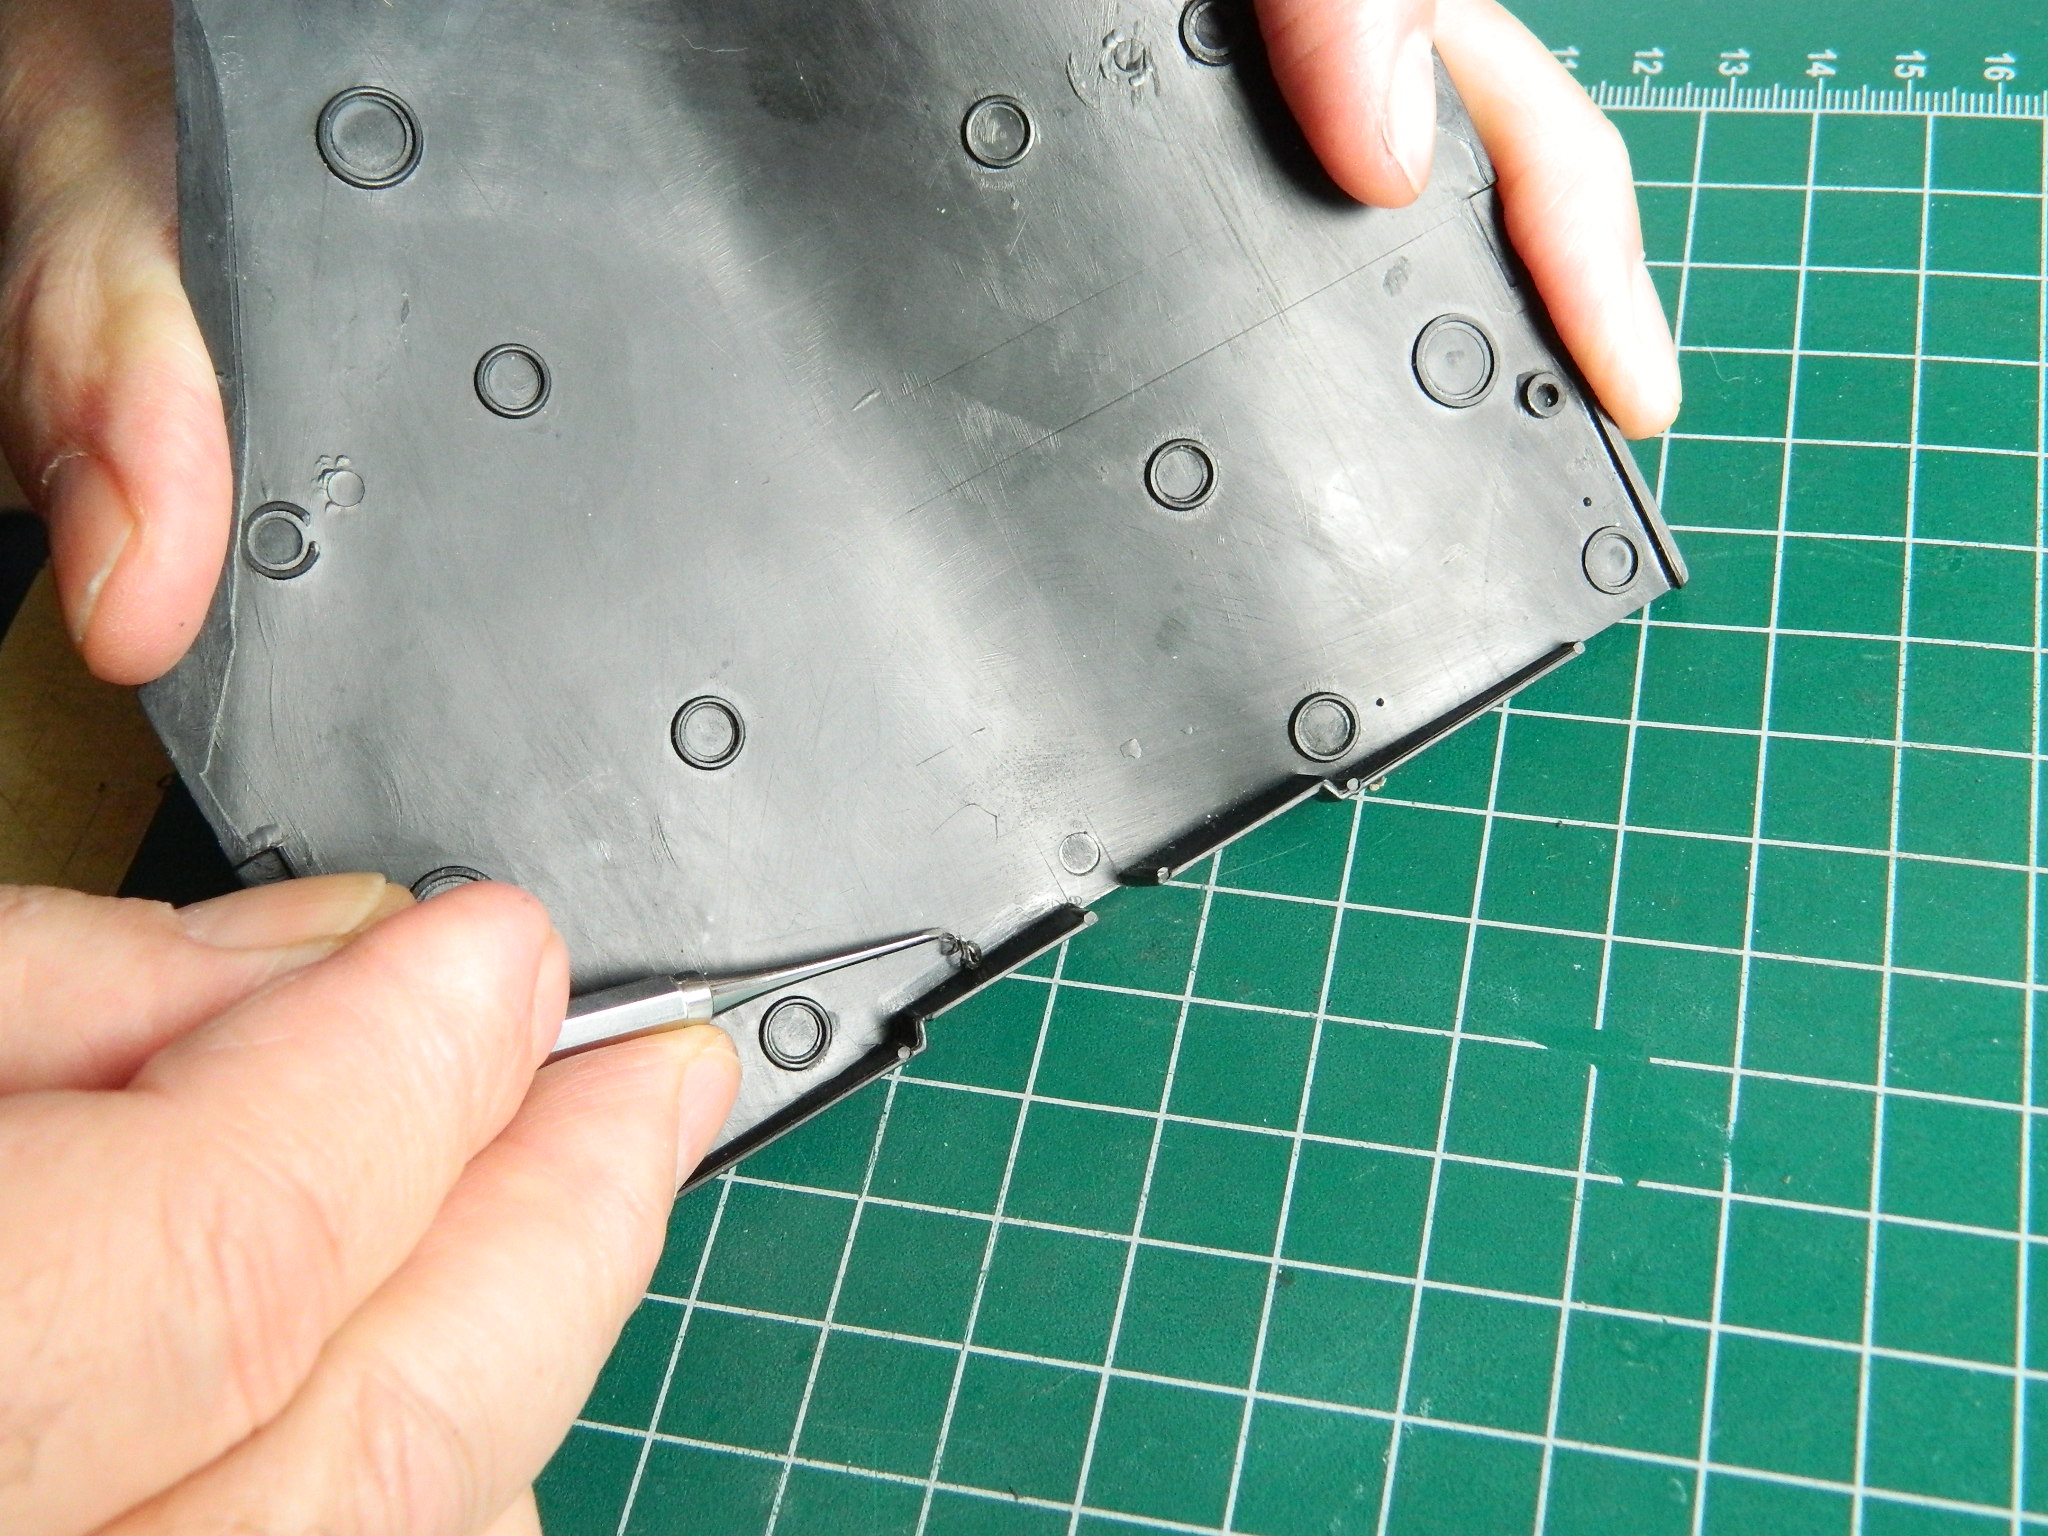
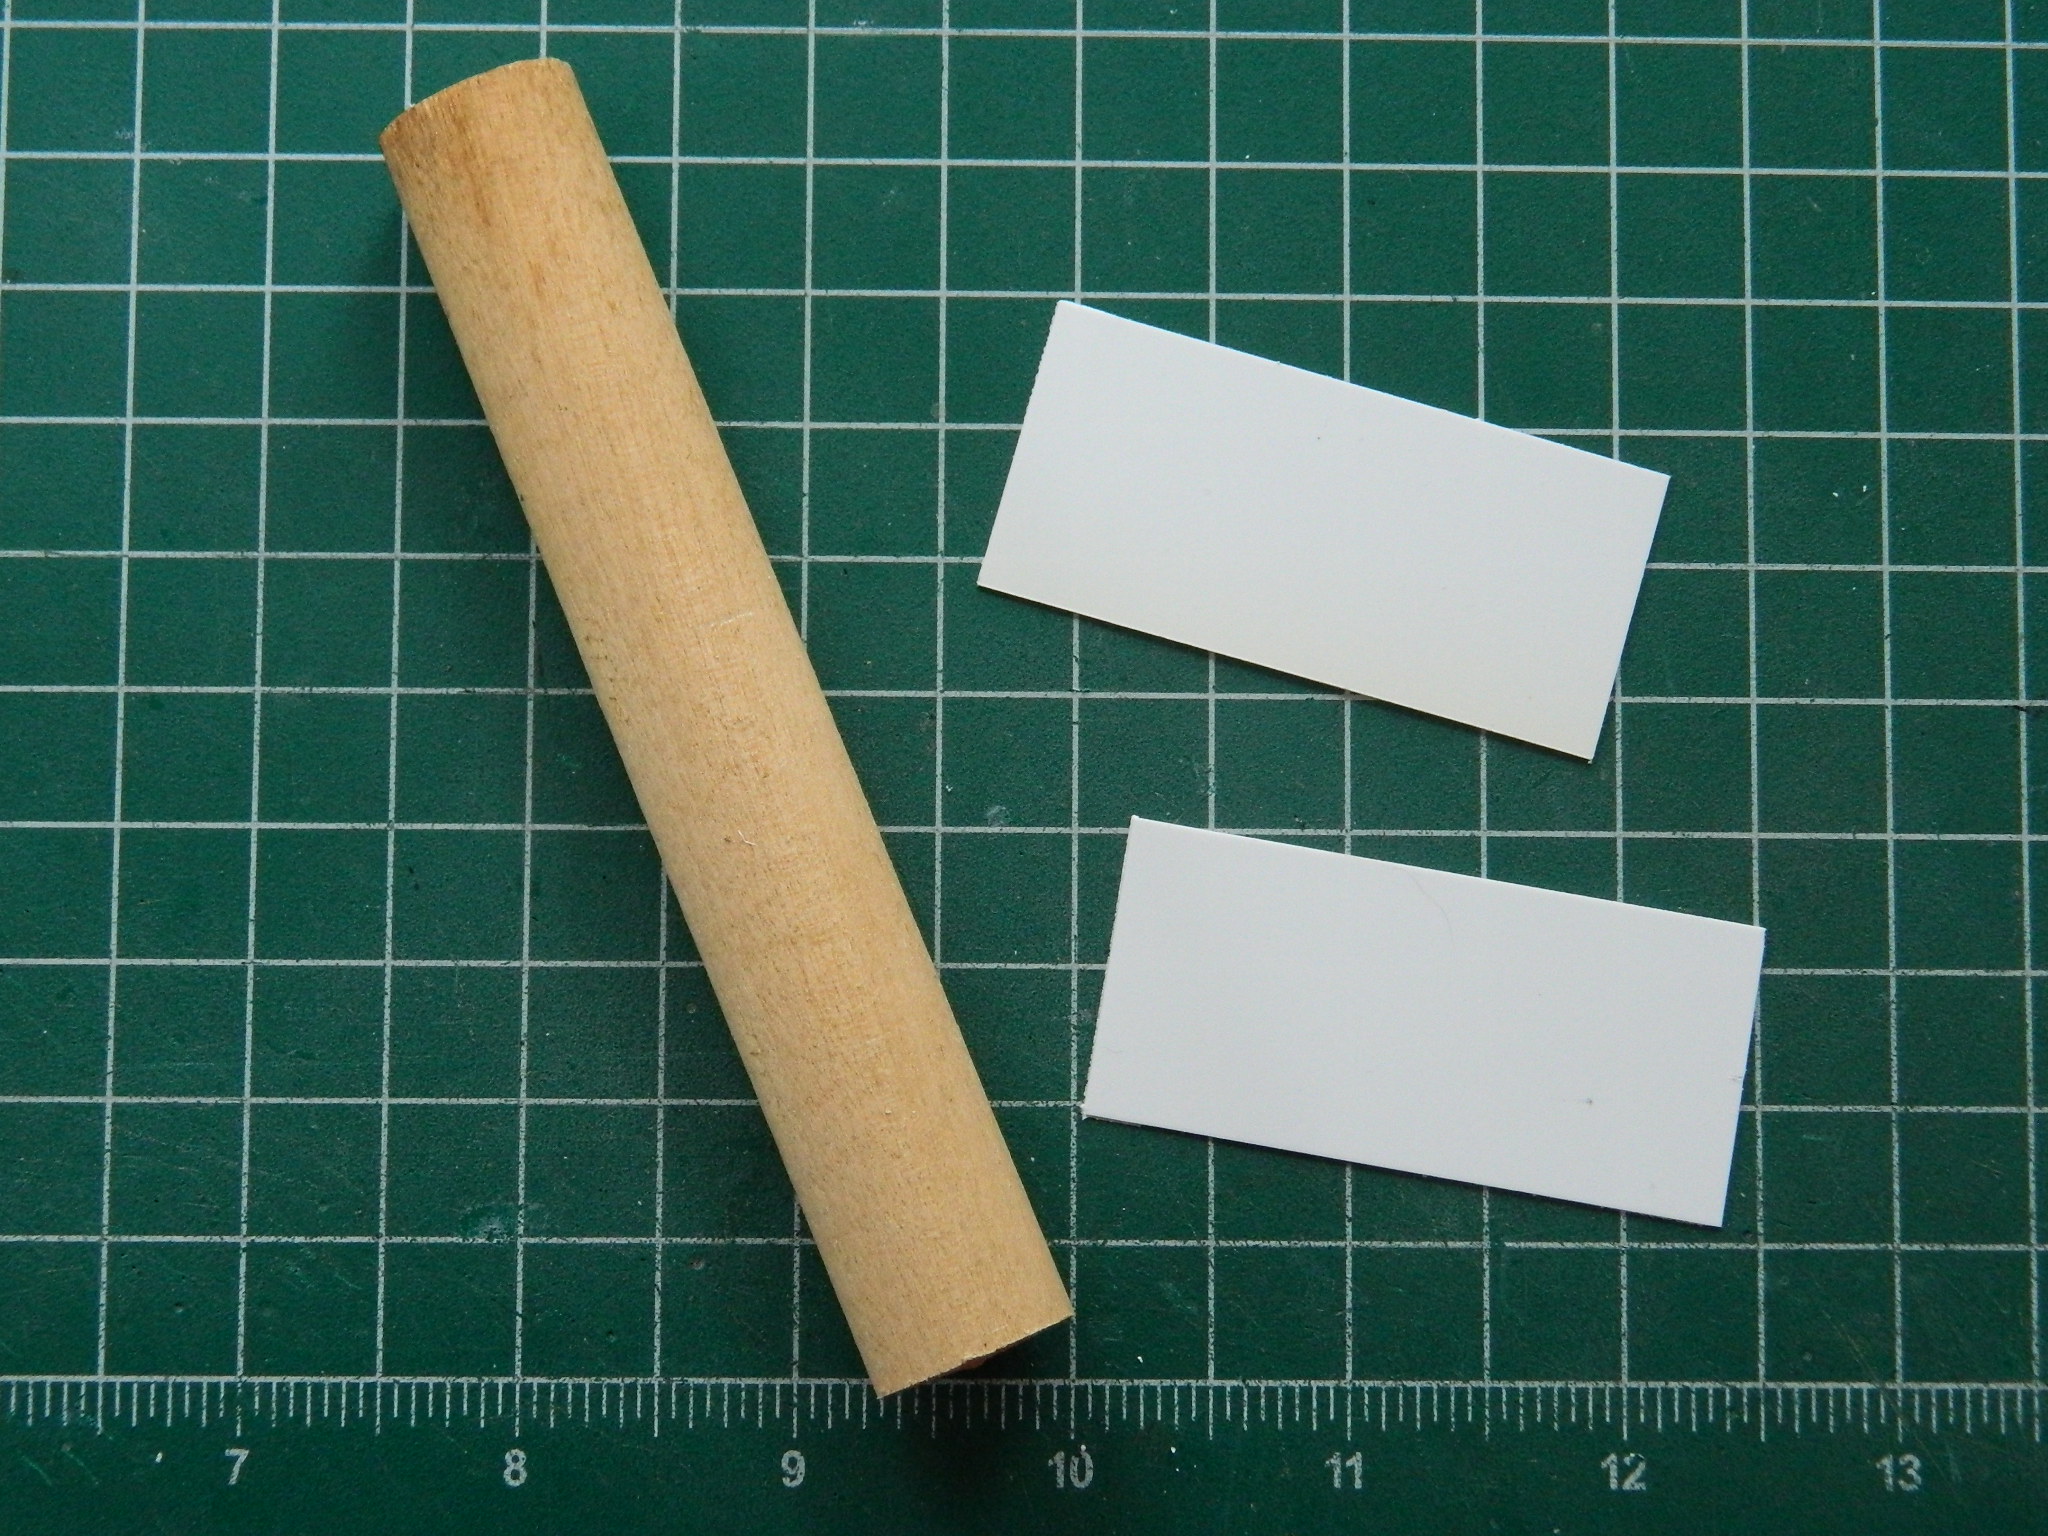
Once those are cut away, my favorite chore of making a perpendicular surface fit the inside curve of a surface is next. I roughed them in using 3″ (76.2mm) x 5″ (127mm) index cards for templates. There was MUCH fiddling and diddling to get them close (or at least I thought they were close at the time):


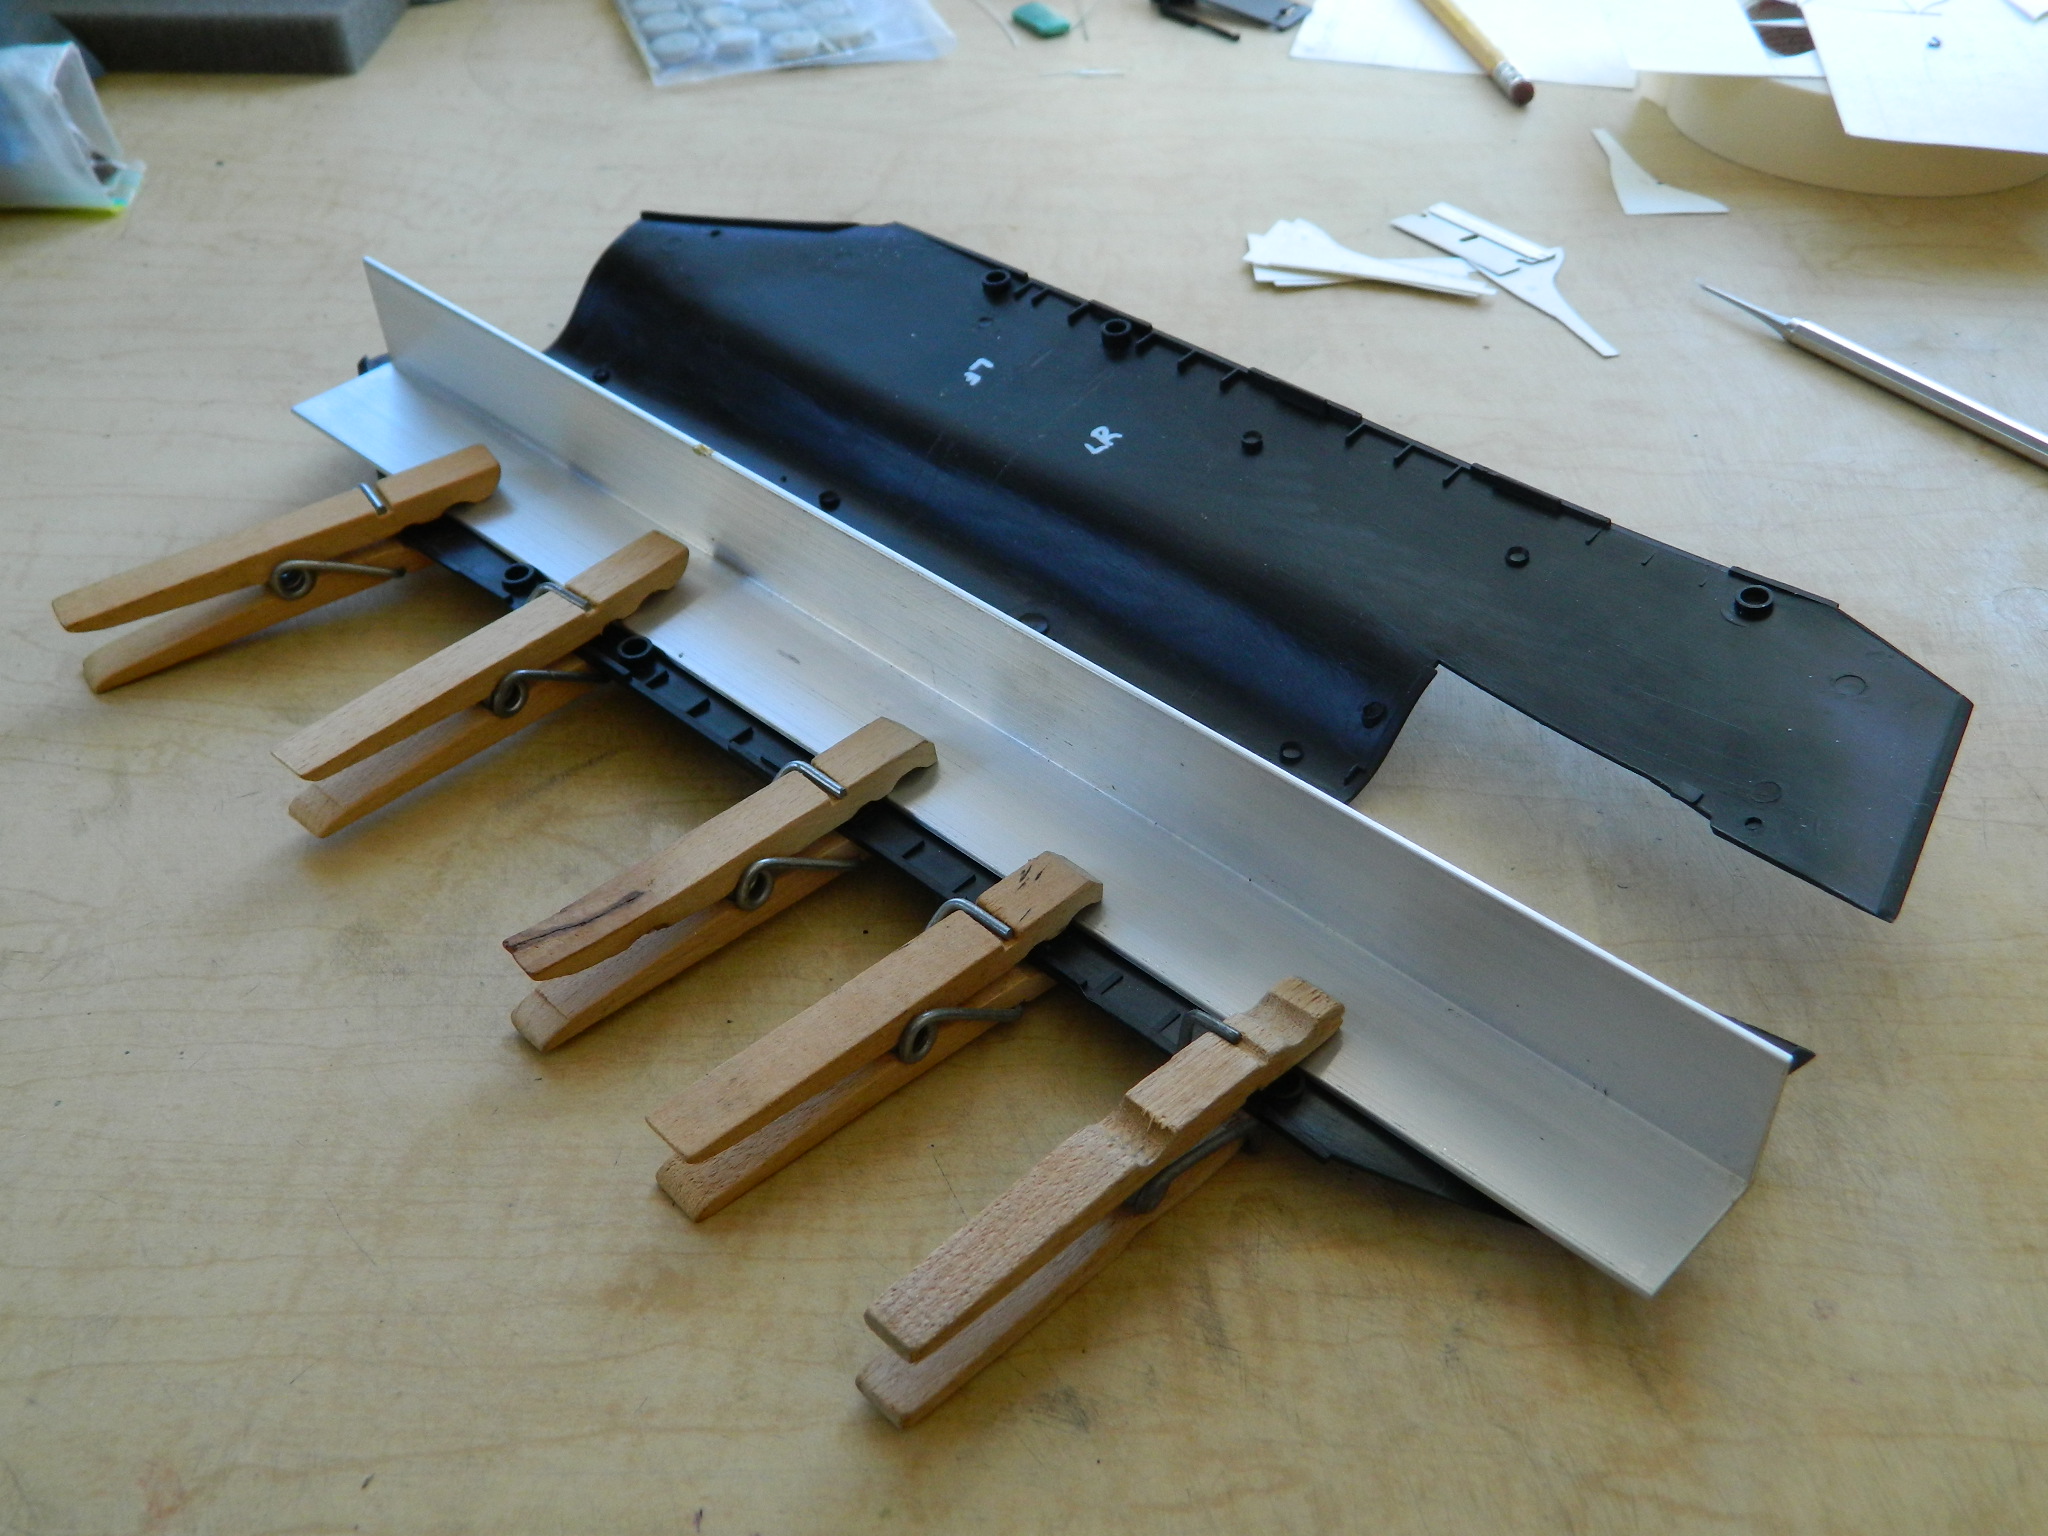
Large pieces of plastic stored snugly into a box and then left to sit for several decades doesn’t do good things for the dimensional integrity of the parts. Things are bent and because they stay bent, they stay bent. The curved surfaces aren’t supposed to be curved and since I wasn’t sure how the warped plastic would affect the build, I wanted to get the parts a bit straighter.:
I have some aluminum channel that I used as the straight edge and used clothespins to attach it. I’m hoping not to scald myself during the straightening process, getting my hands out of that process can only help with that:
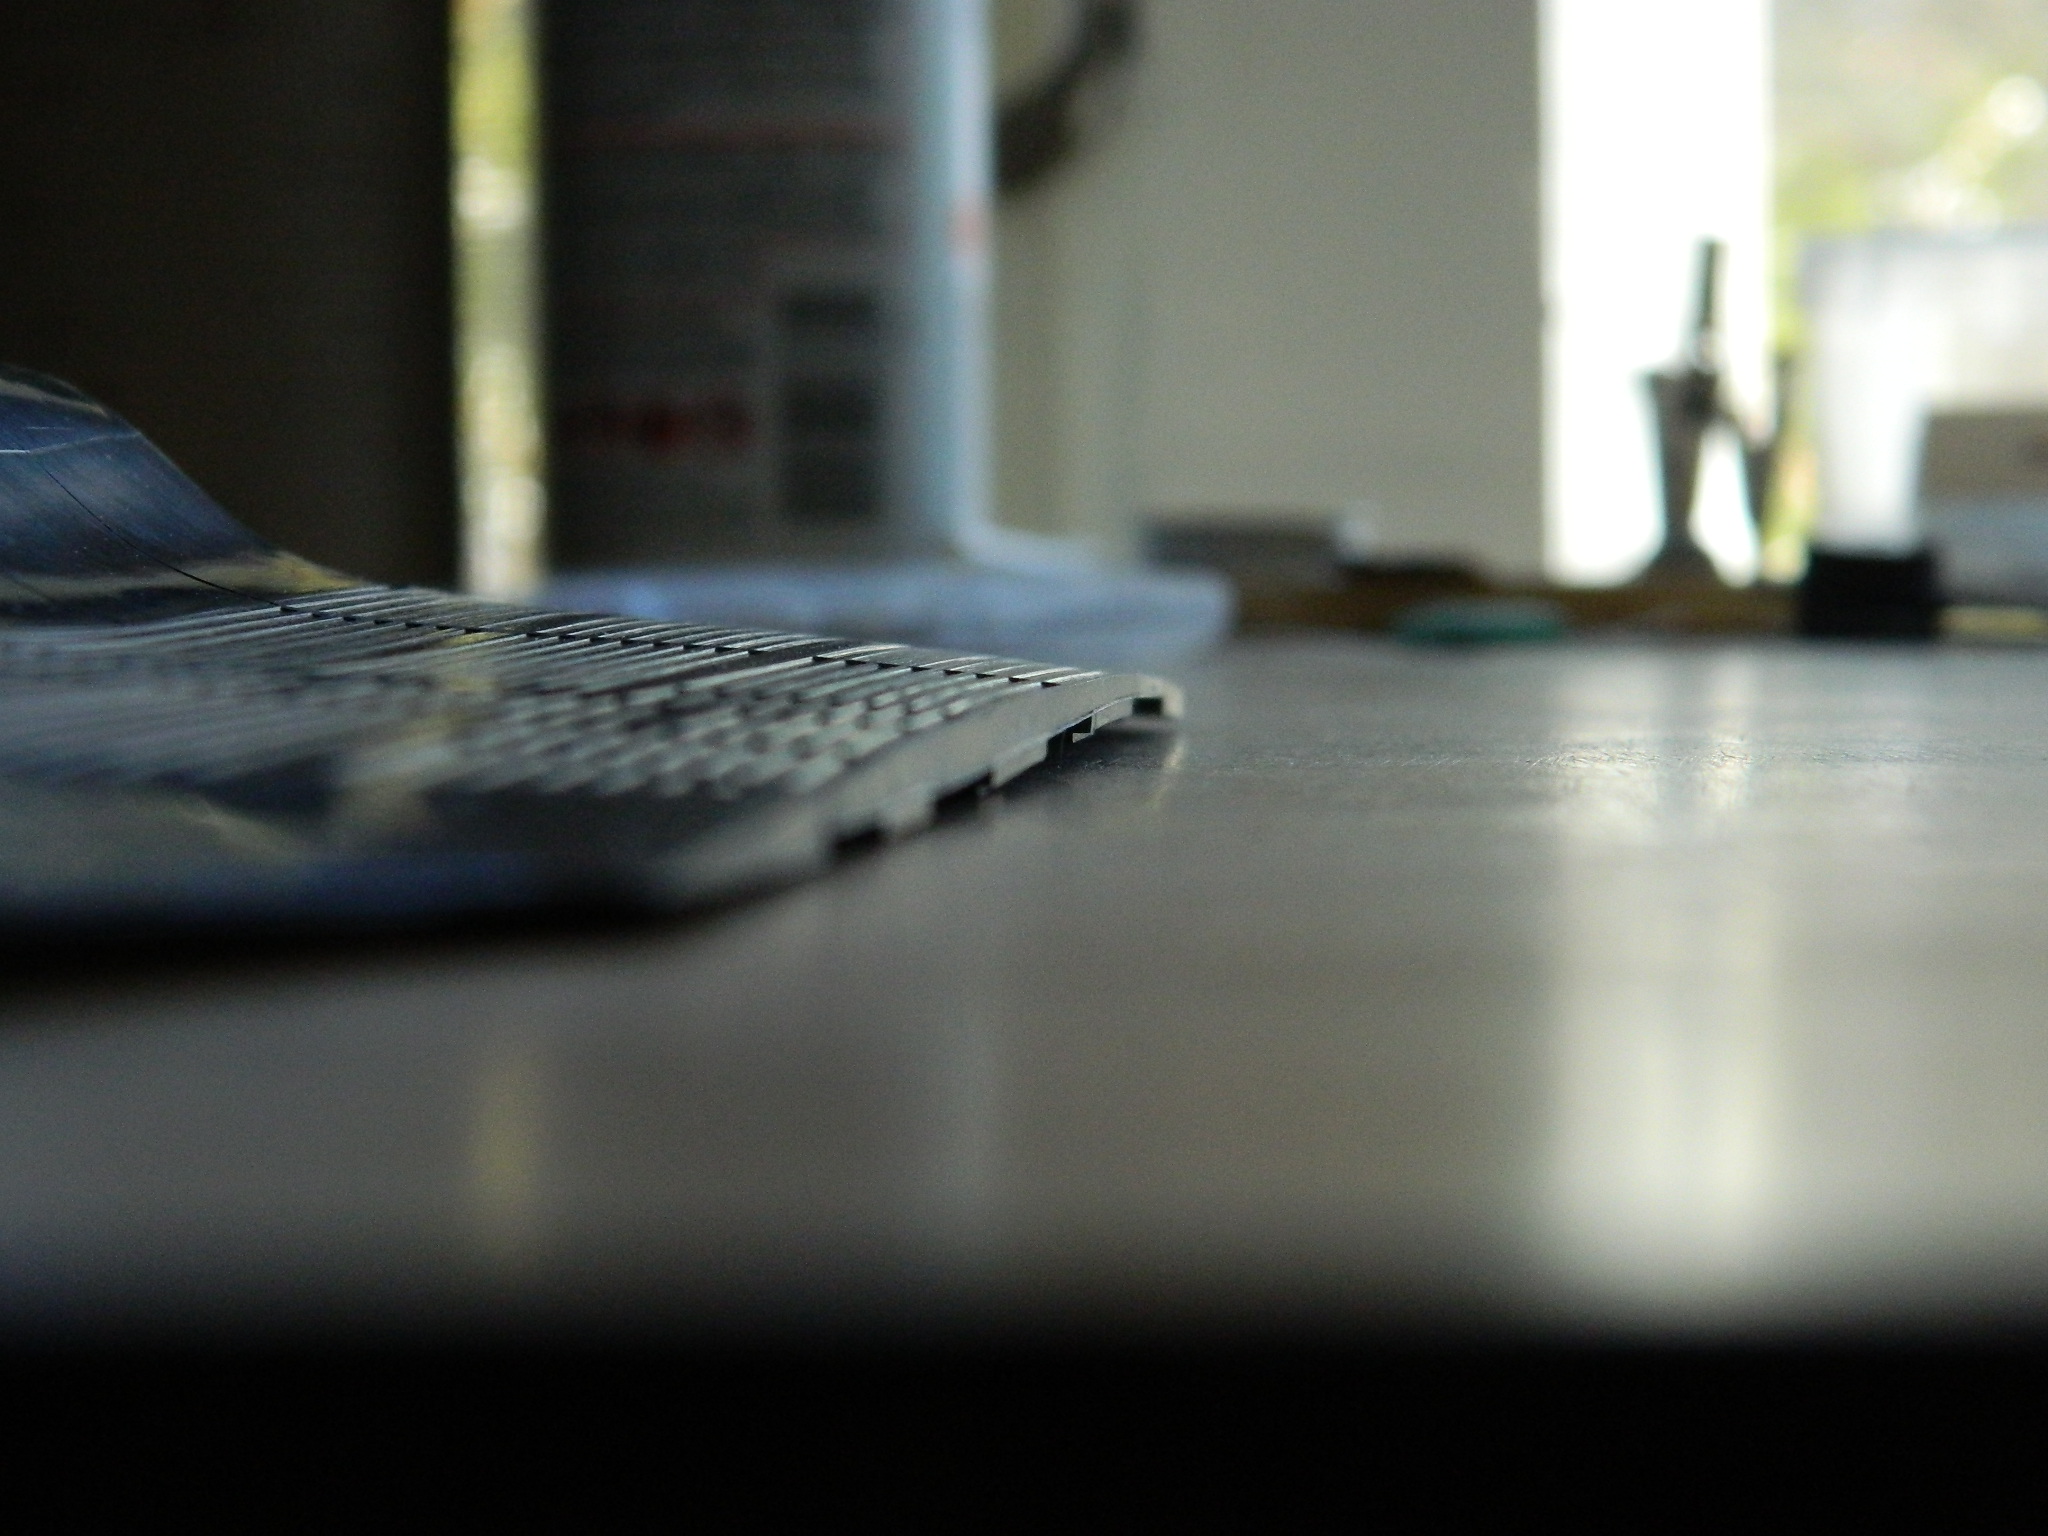
The hot water here is HOT. It’s certainly hot enough to make me whine like a five-year-old. But it’s not hot enough to enable me to get the parts straighter (a situation not improved by the sink itself acting as a cooling fin):

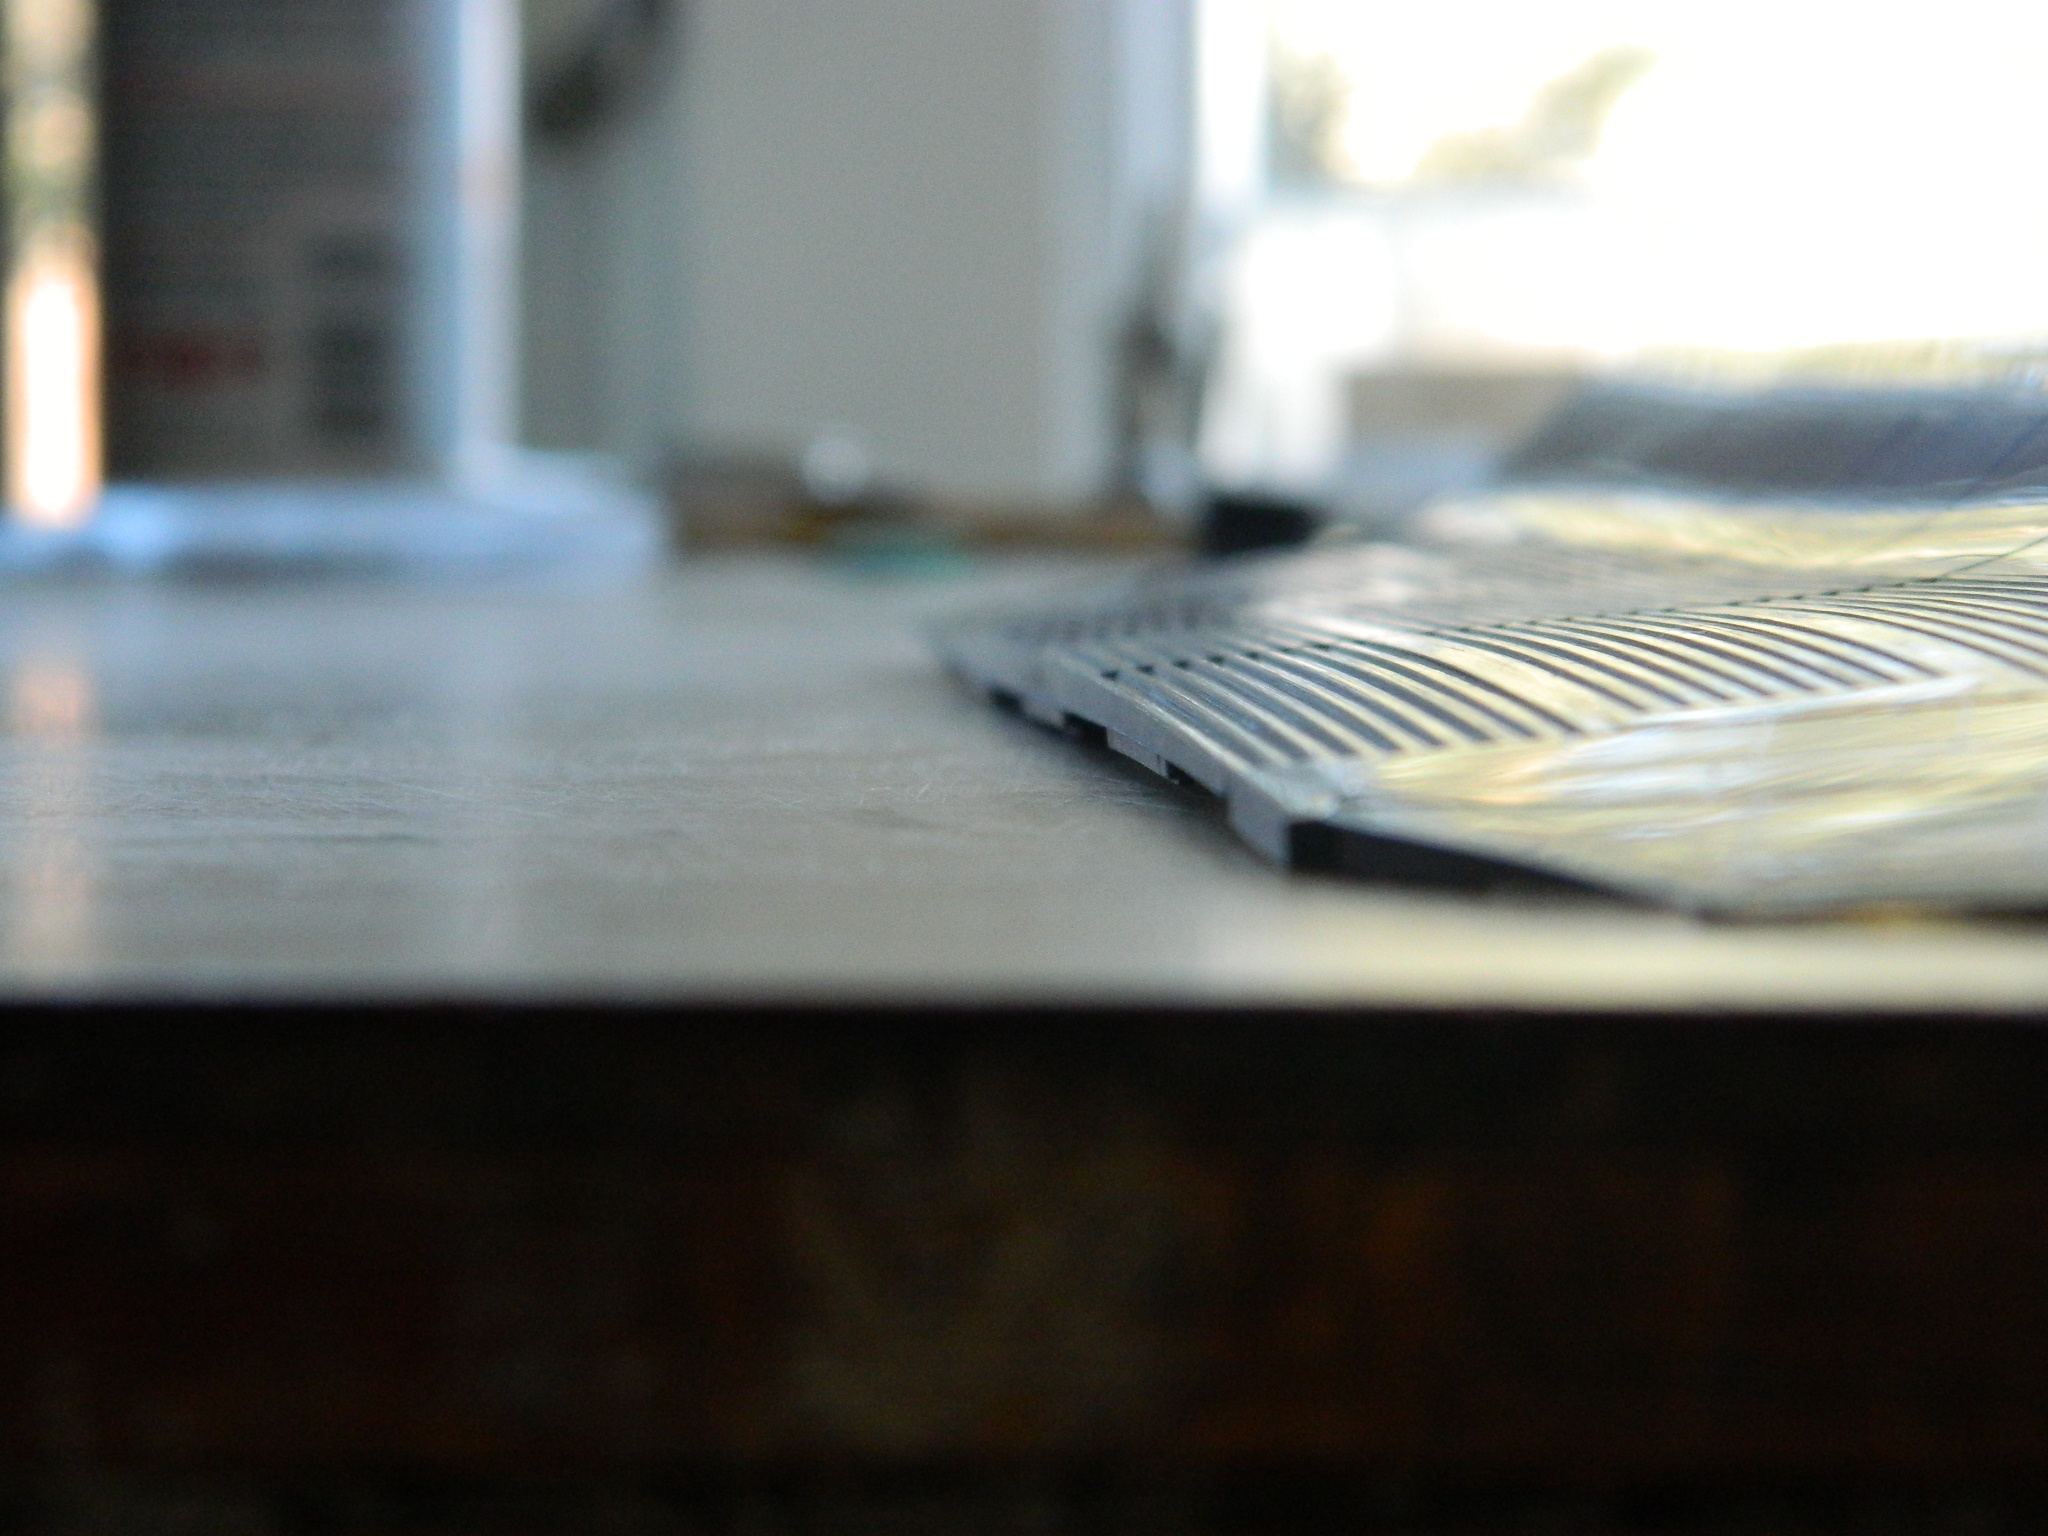
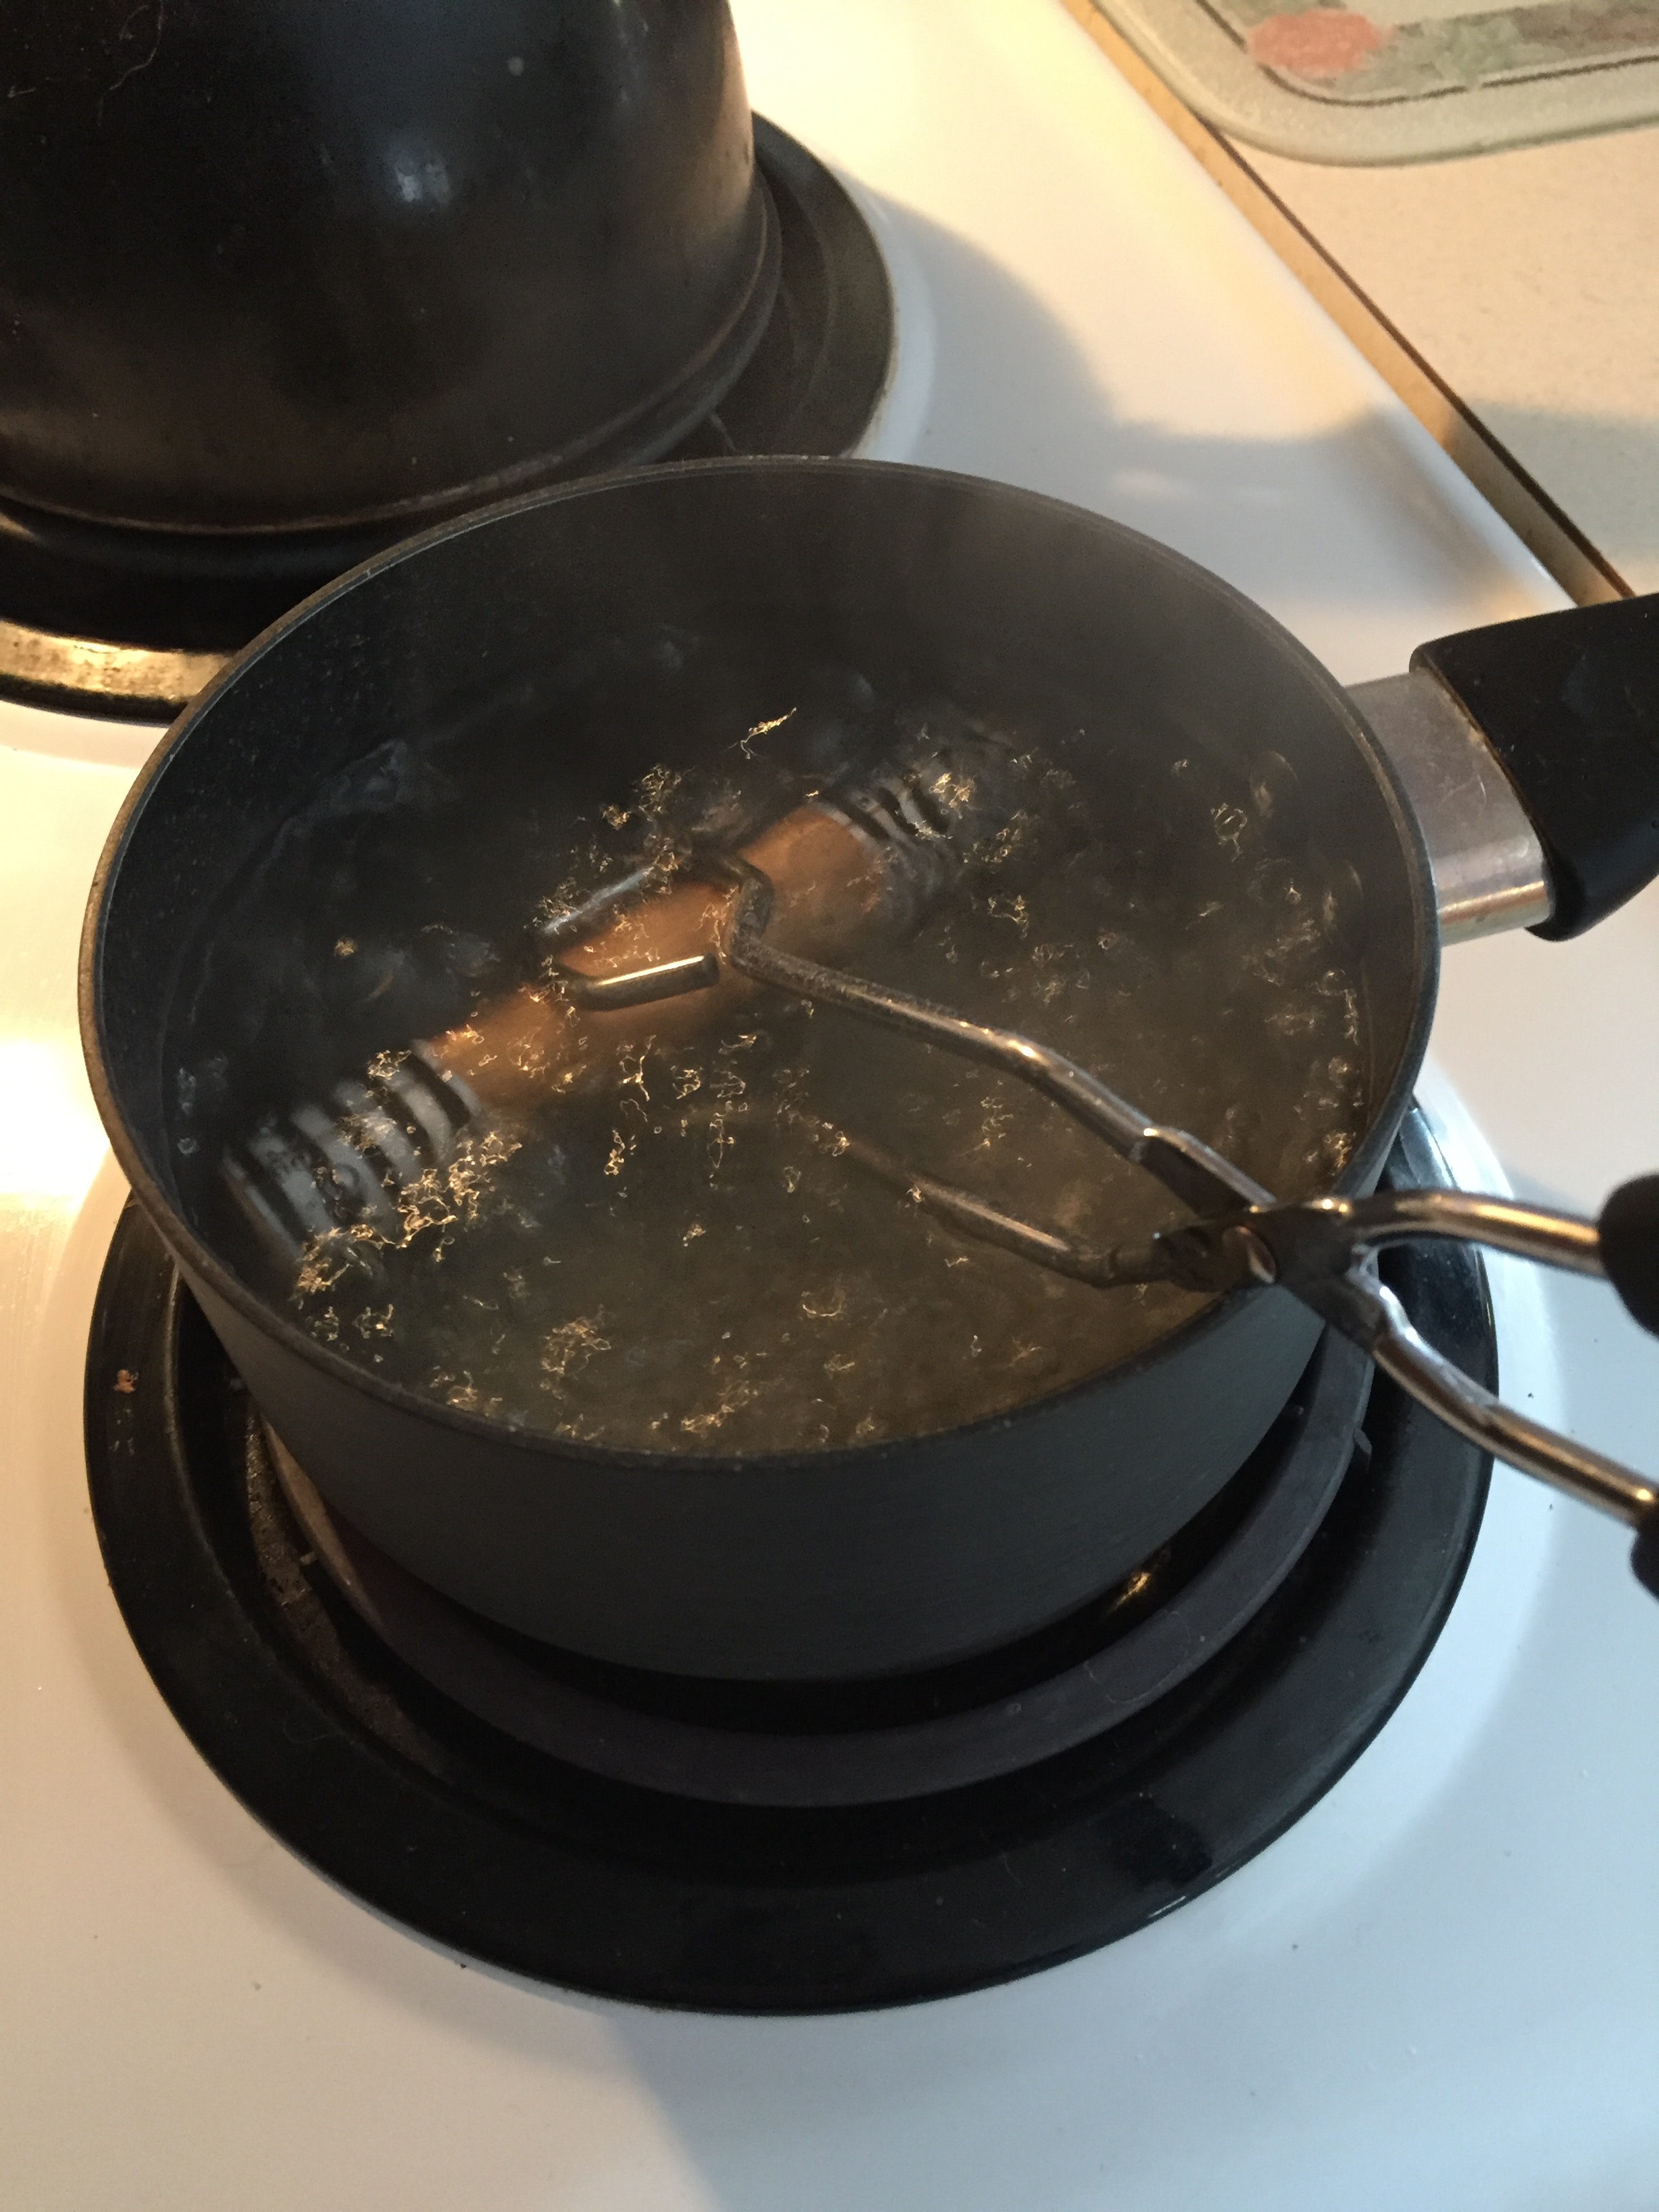
I filled a glass pan with water and ran it through the microwave. A lot. (I wasn’t sure the glass would hold up to being placed directly on an electric stove.):

Though I wasn’t able to get the water to boil, I was able to get it to about 190 degrees (87.77C). The parts were placed in the pan until the water temperature fell below 180 (82.22C), and then the process was repeated several times. And though not perfectly straight, they’re a lot better than they were when I started:

Having delayed and put off the tedium of fitting these bay bulkheads as long as I could, there was nothing to do but to fit the damned things. I had thought my cardstock templates were accurate, which wasn’t the case. So there was a lot of filing, sanding, cursing (never miss an opportunity for that) until things fit, then the first two bulkheads were glued on:

While the glue was curing, I decided to get another potentially fiddly task out of the way. Create the blast shields for the landing gear.
The tires on this aircraft GOT HOT. It was determined that taking off or landing with more than about half a load of fuel was too heavy for even aluminum impregnated tires to withstand and evidently they would blow up. These aren’t low-pressure tires and if they exploded in the bays, those large chunks of rubber moving at high speed did nothing to the hydraulic lines or wiring that anyone wanted to have done. The solution was to create circular blast containments that would surround the tires when the gear was retracted.
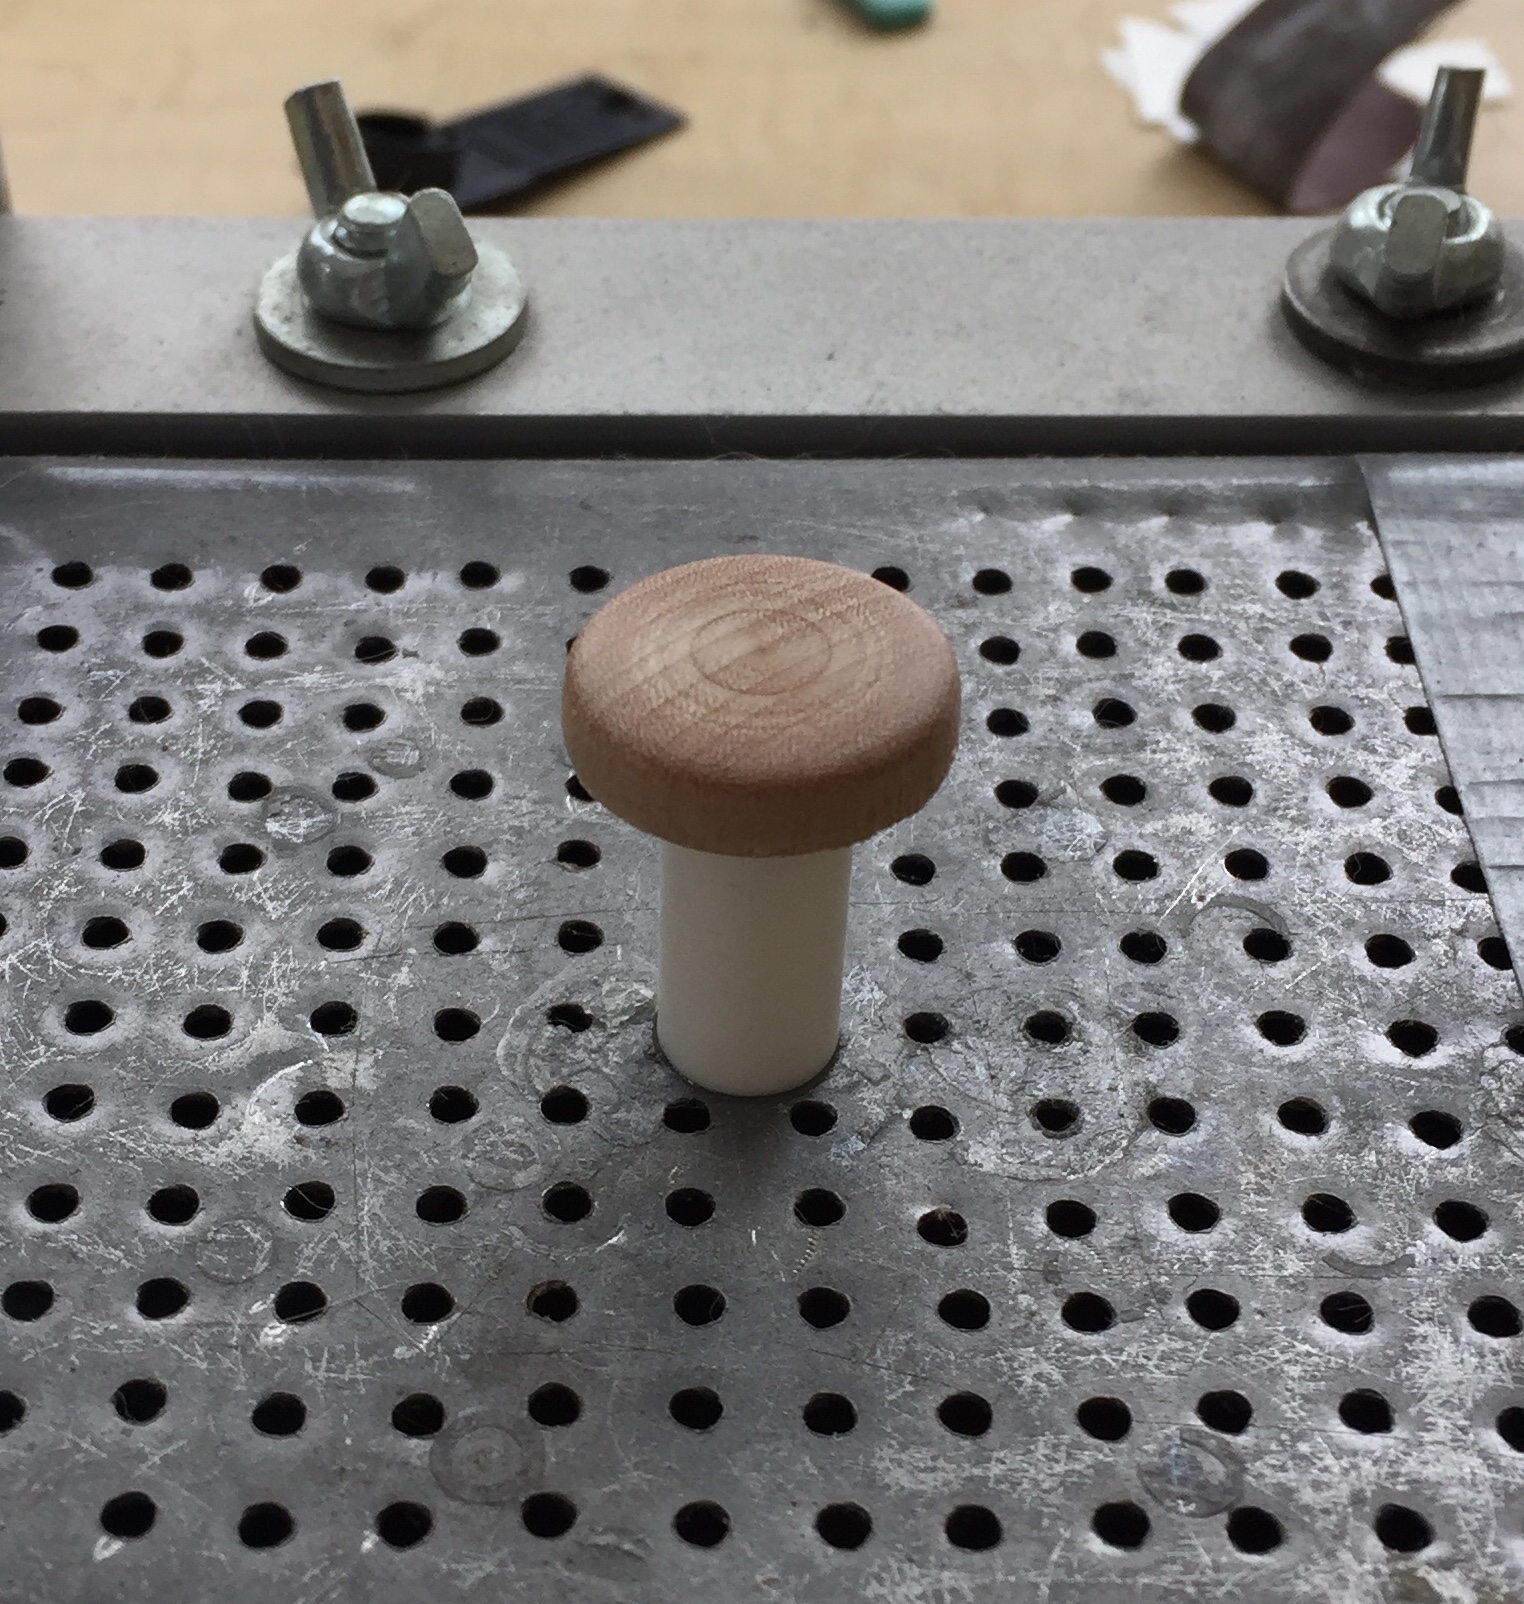
To make those, I staggered around the house, garage, and basement, looking for something the proper diameter that I could heat form cylinders around and use to make a buck to vacuform the caps over. Turns out that a 3/4″ (19.05mm) wooden dowel was just what I needed. To form the plastic, I needed to curve flat plastic (.010″ [.254mm]) around the surface and hold it as snugly as possible. Rubber bands didn’t hold it tightly enough, so I went with cable ties:

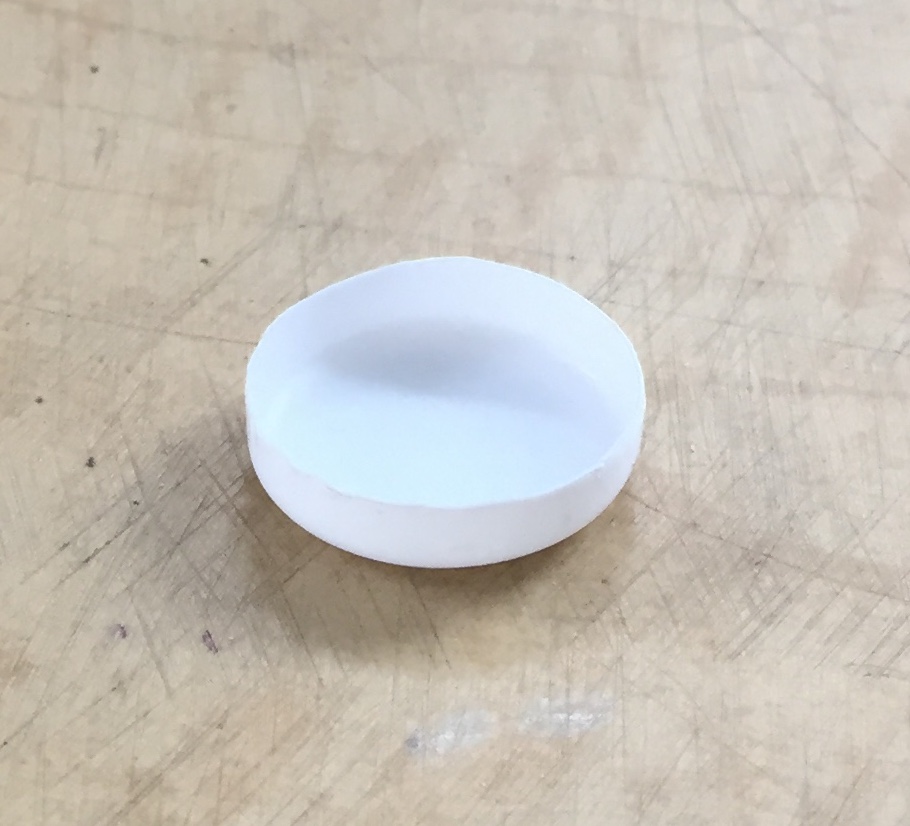
I left the dowel/plastic in boiling water for about five minutes (might have been able to get away with less time, one of these days I’ll have to experiment to see) before taking it out to let it cool. While those parts were cooling, I chucked another piece of 3/4″ (19.05mm) dowel into the lathe and turned the flattened dome of the top, then glued it onto a pedestal and attached it to my vacuum molder:
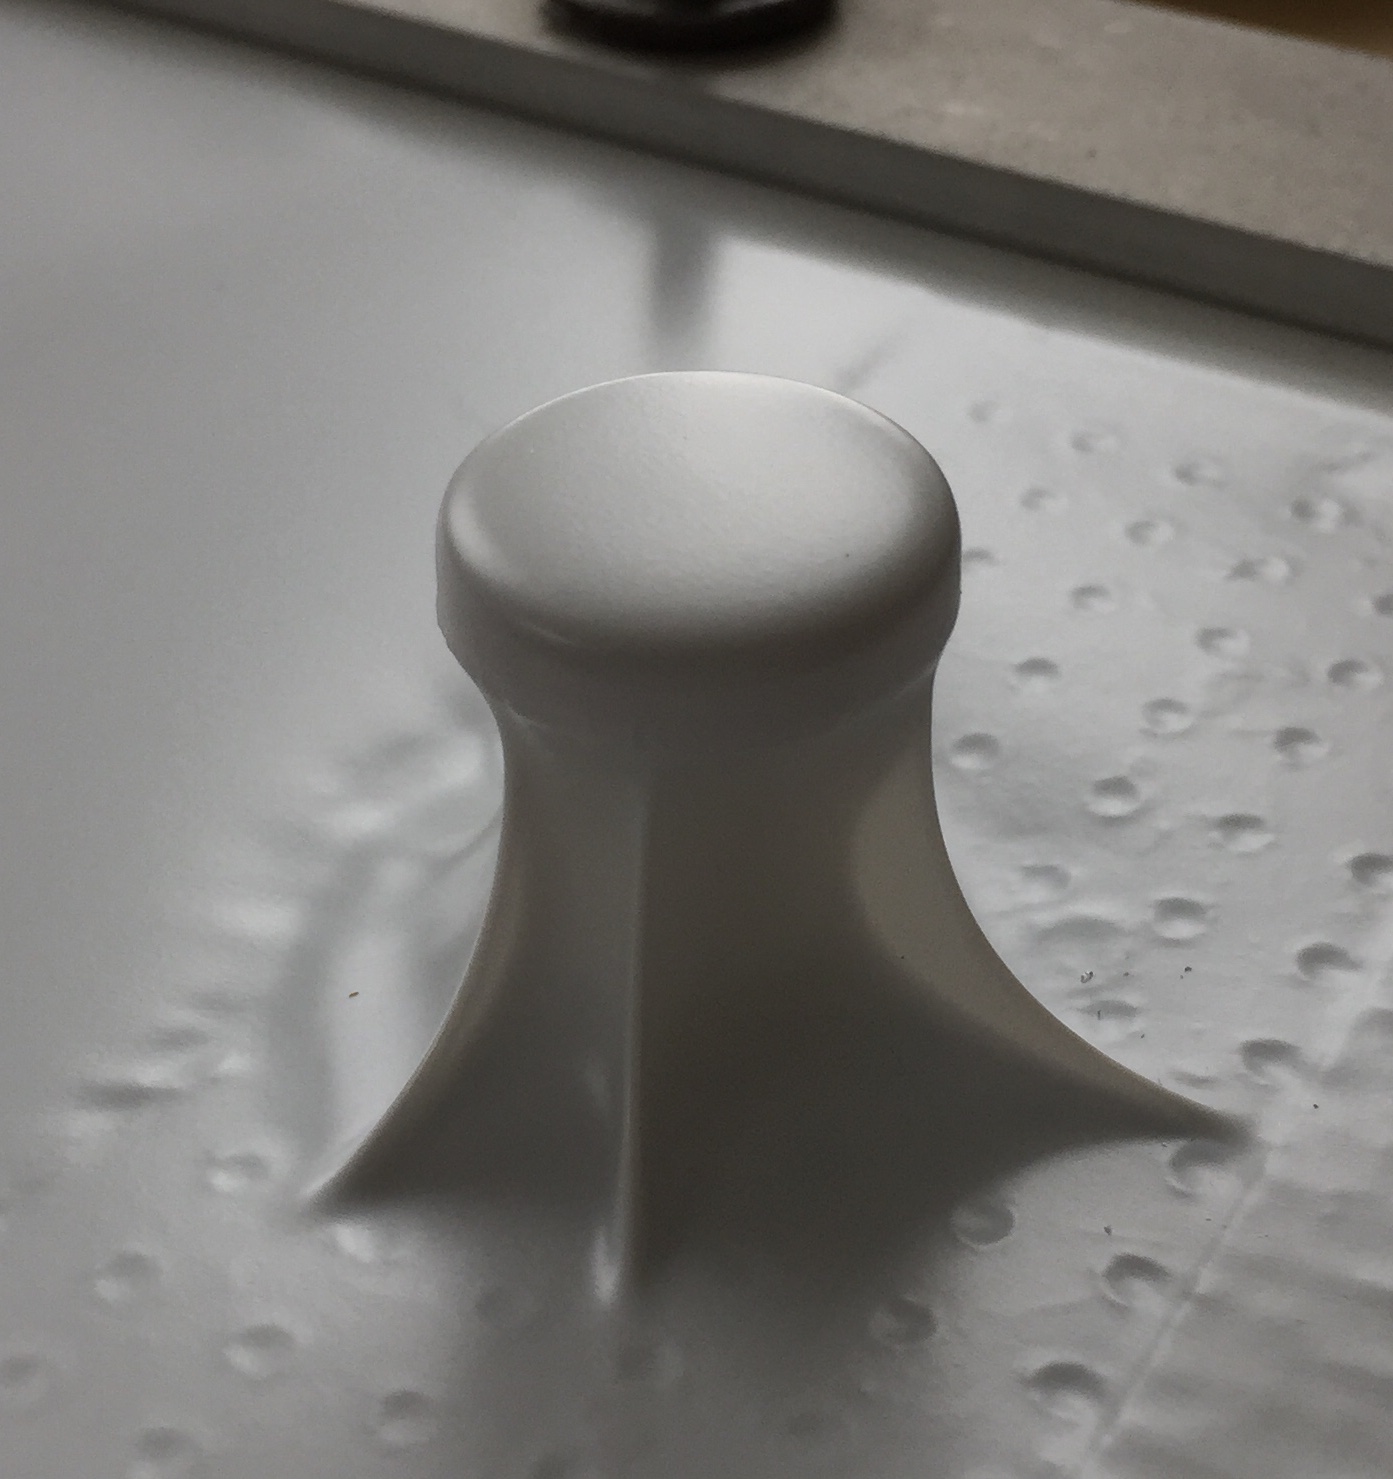
Done twice, I ended up with both the caps I needed:
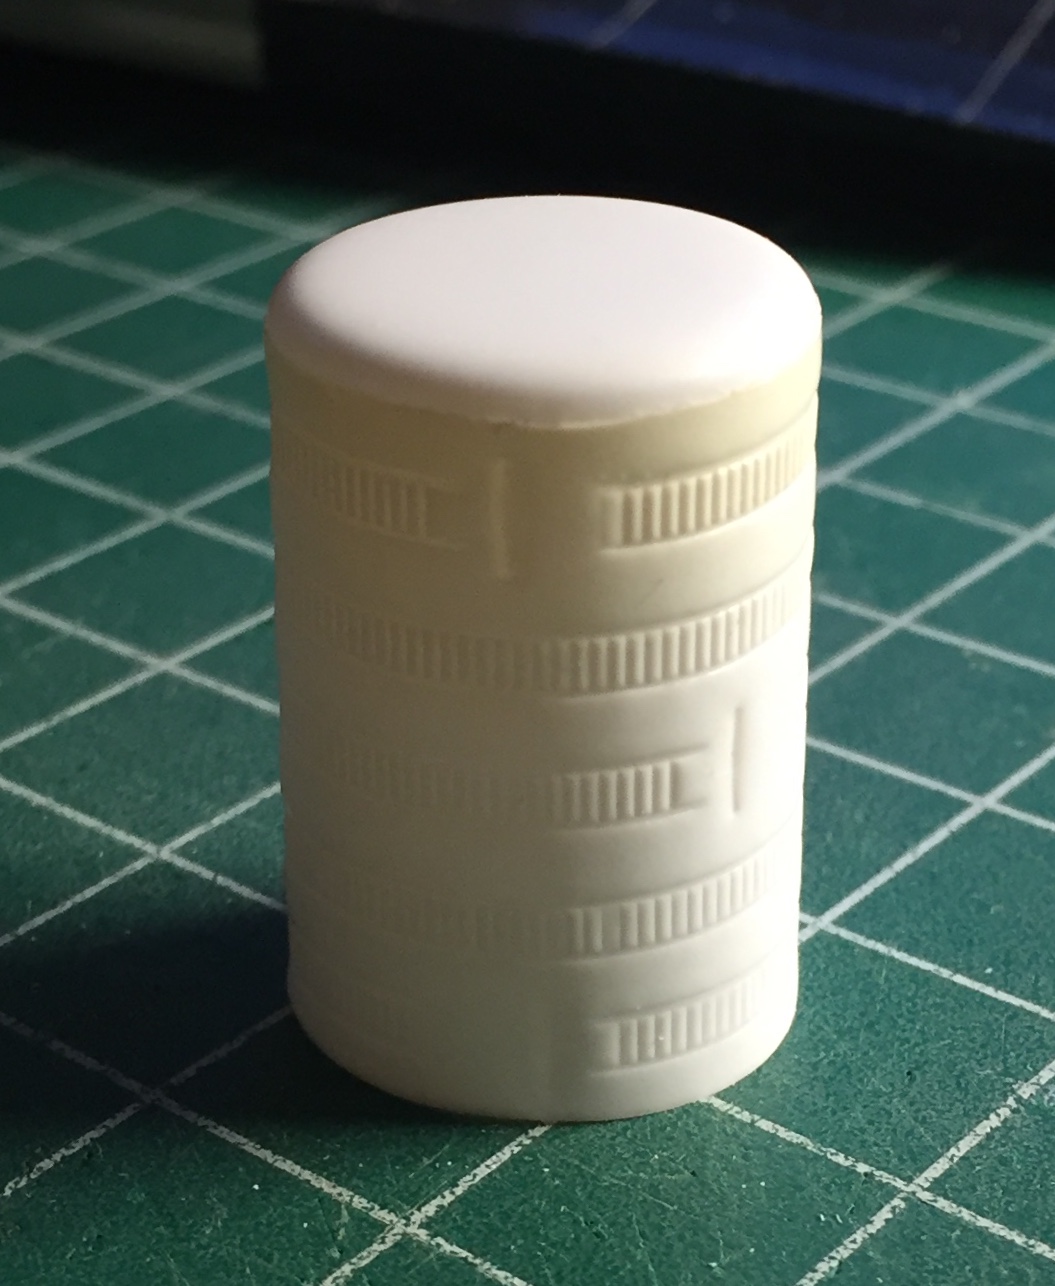
When I snipped the cable ties, I found that they did indeed hold the plastic tight to the dowel…tight enough to impart cable tie impressions to the outside and wood grain to the inside (something I must remember…because I could use that texture to scratch-build ammo feed chutes with ammo or a corrugated surface texture!). Not ideal but also not a deal-breaker, either. The caps were trimmed and glued onto the cylinders, then the ends of the cylinders glued closed (later the openings in the blast shields will be cut into the cylinders and take away most of the seams):
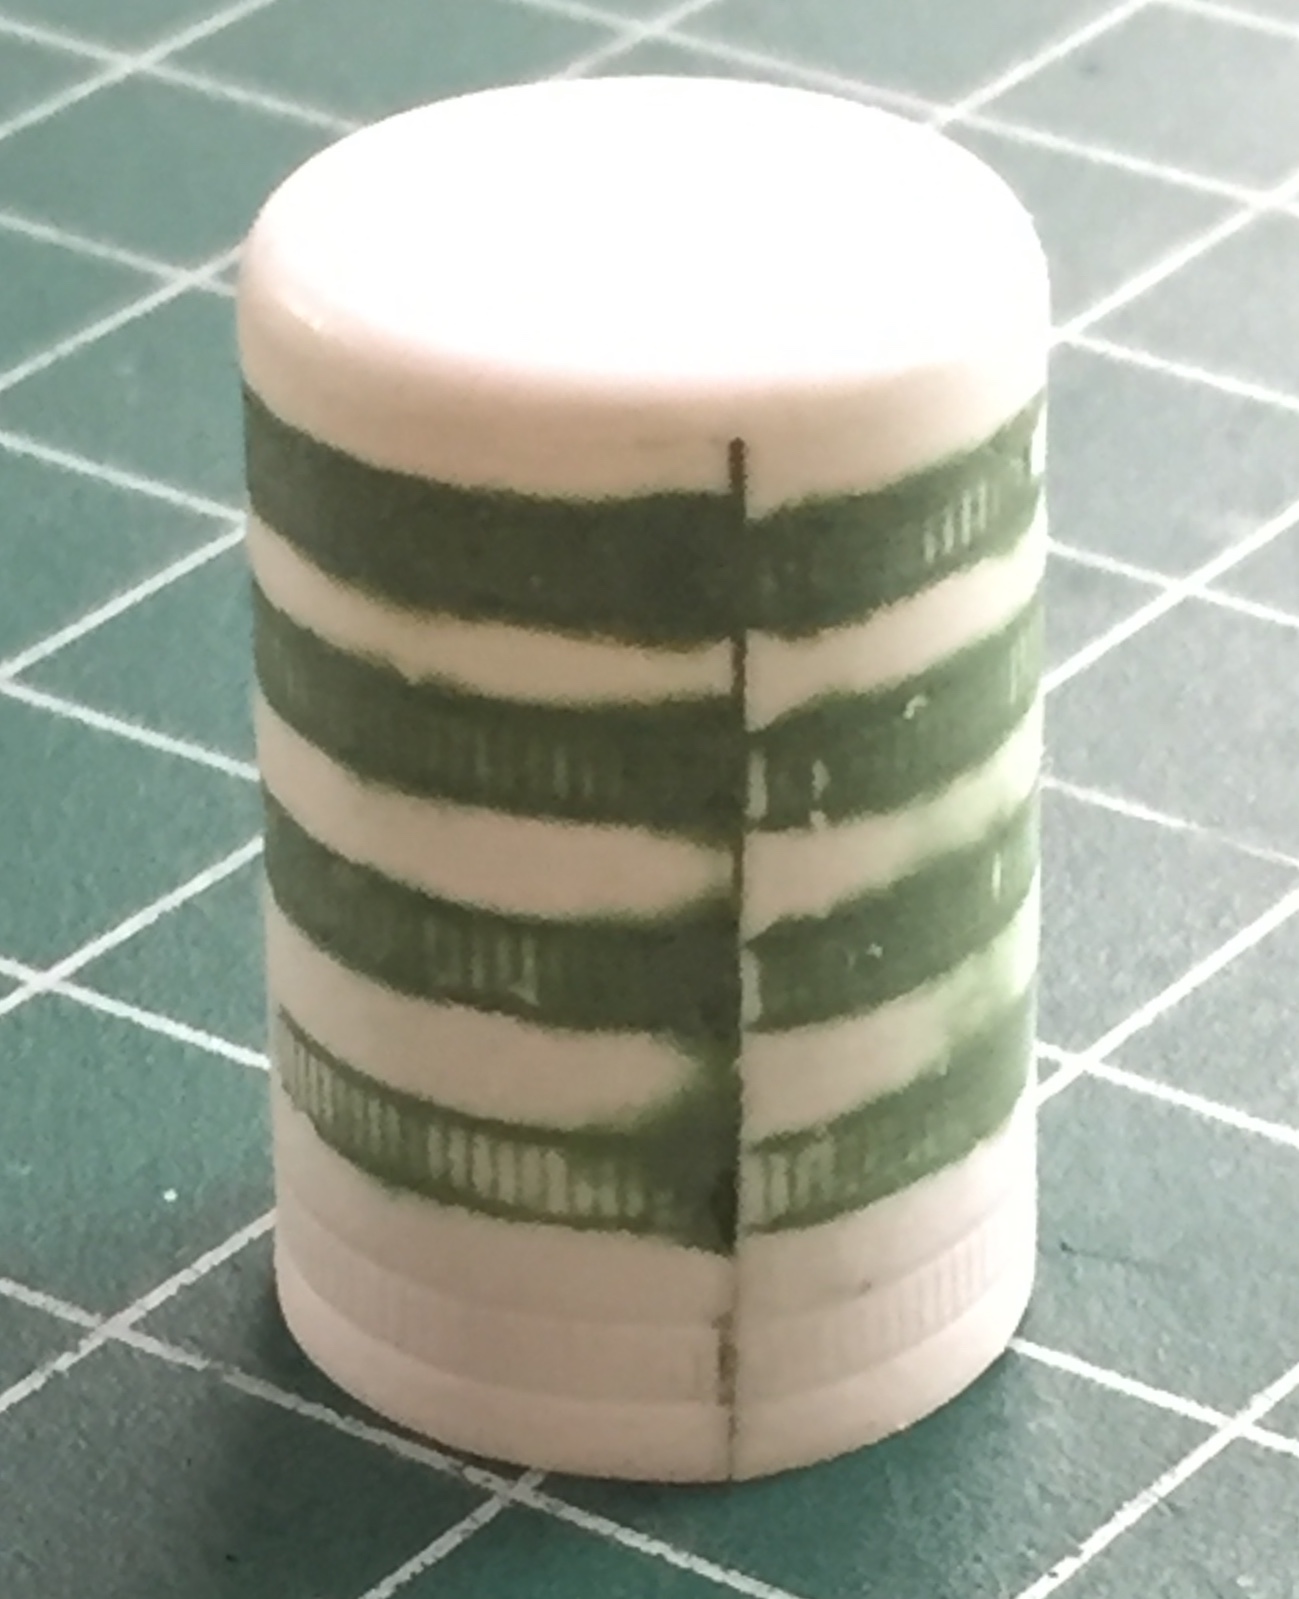
A quick test fit showed that the dimensions work:

Time to putty the impressions of the cable ties:
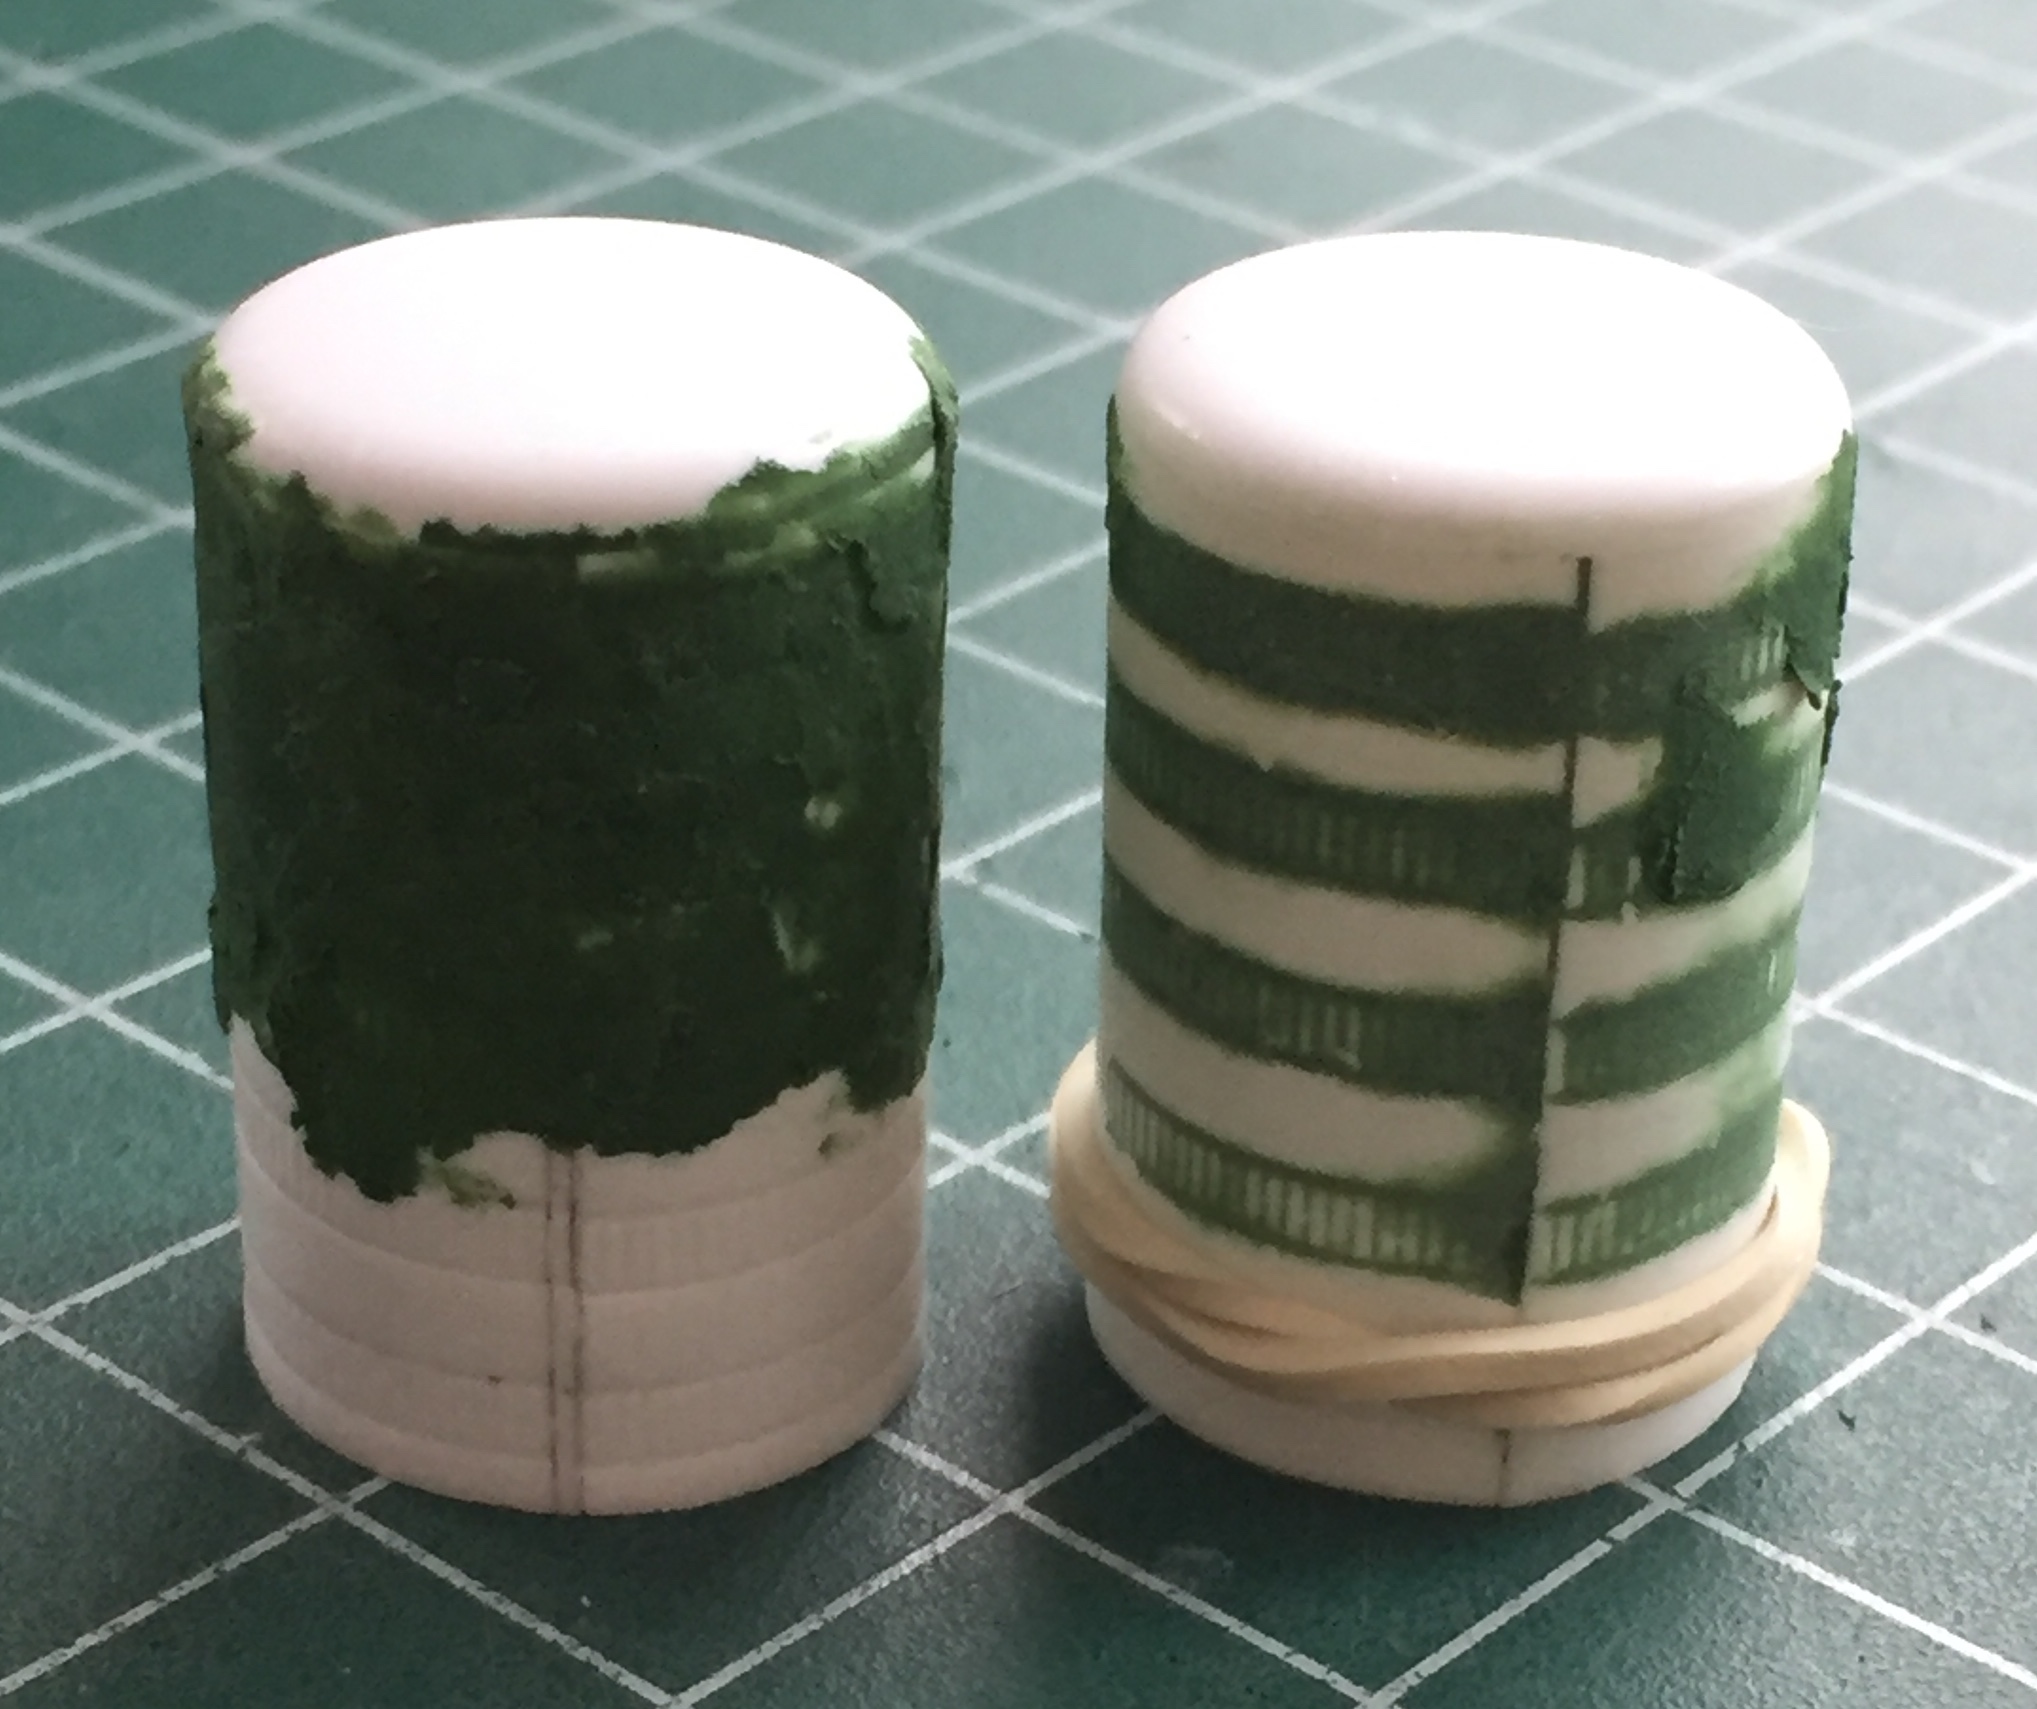
Sanding putty on these parts was sort of like doing body work on an eggshell.
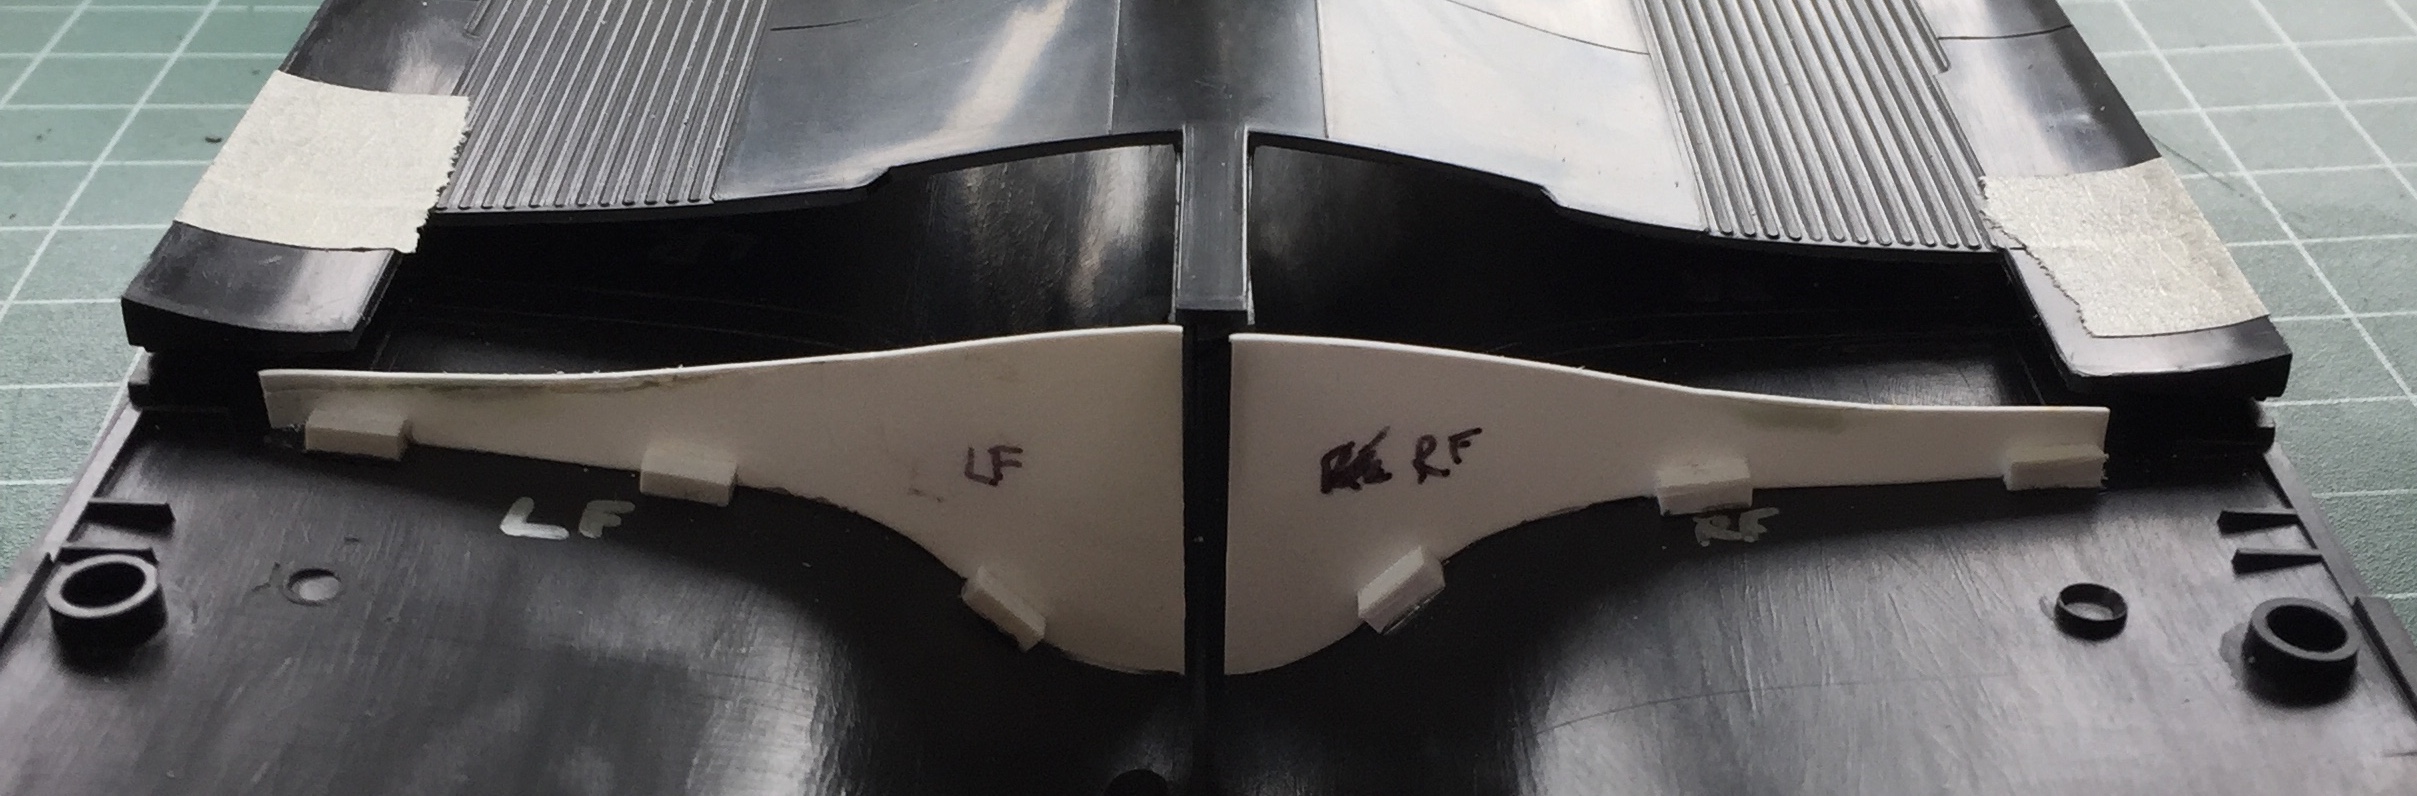
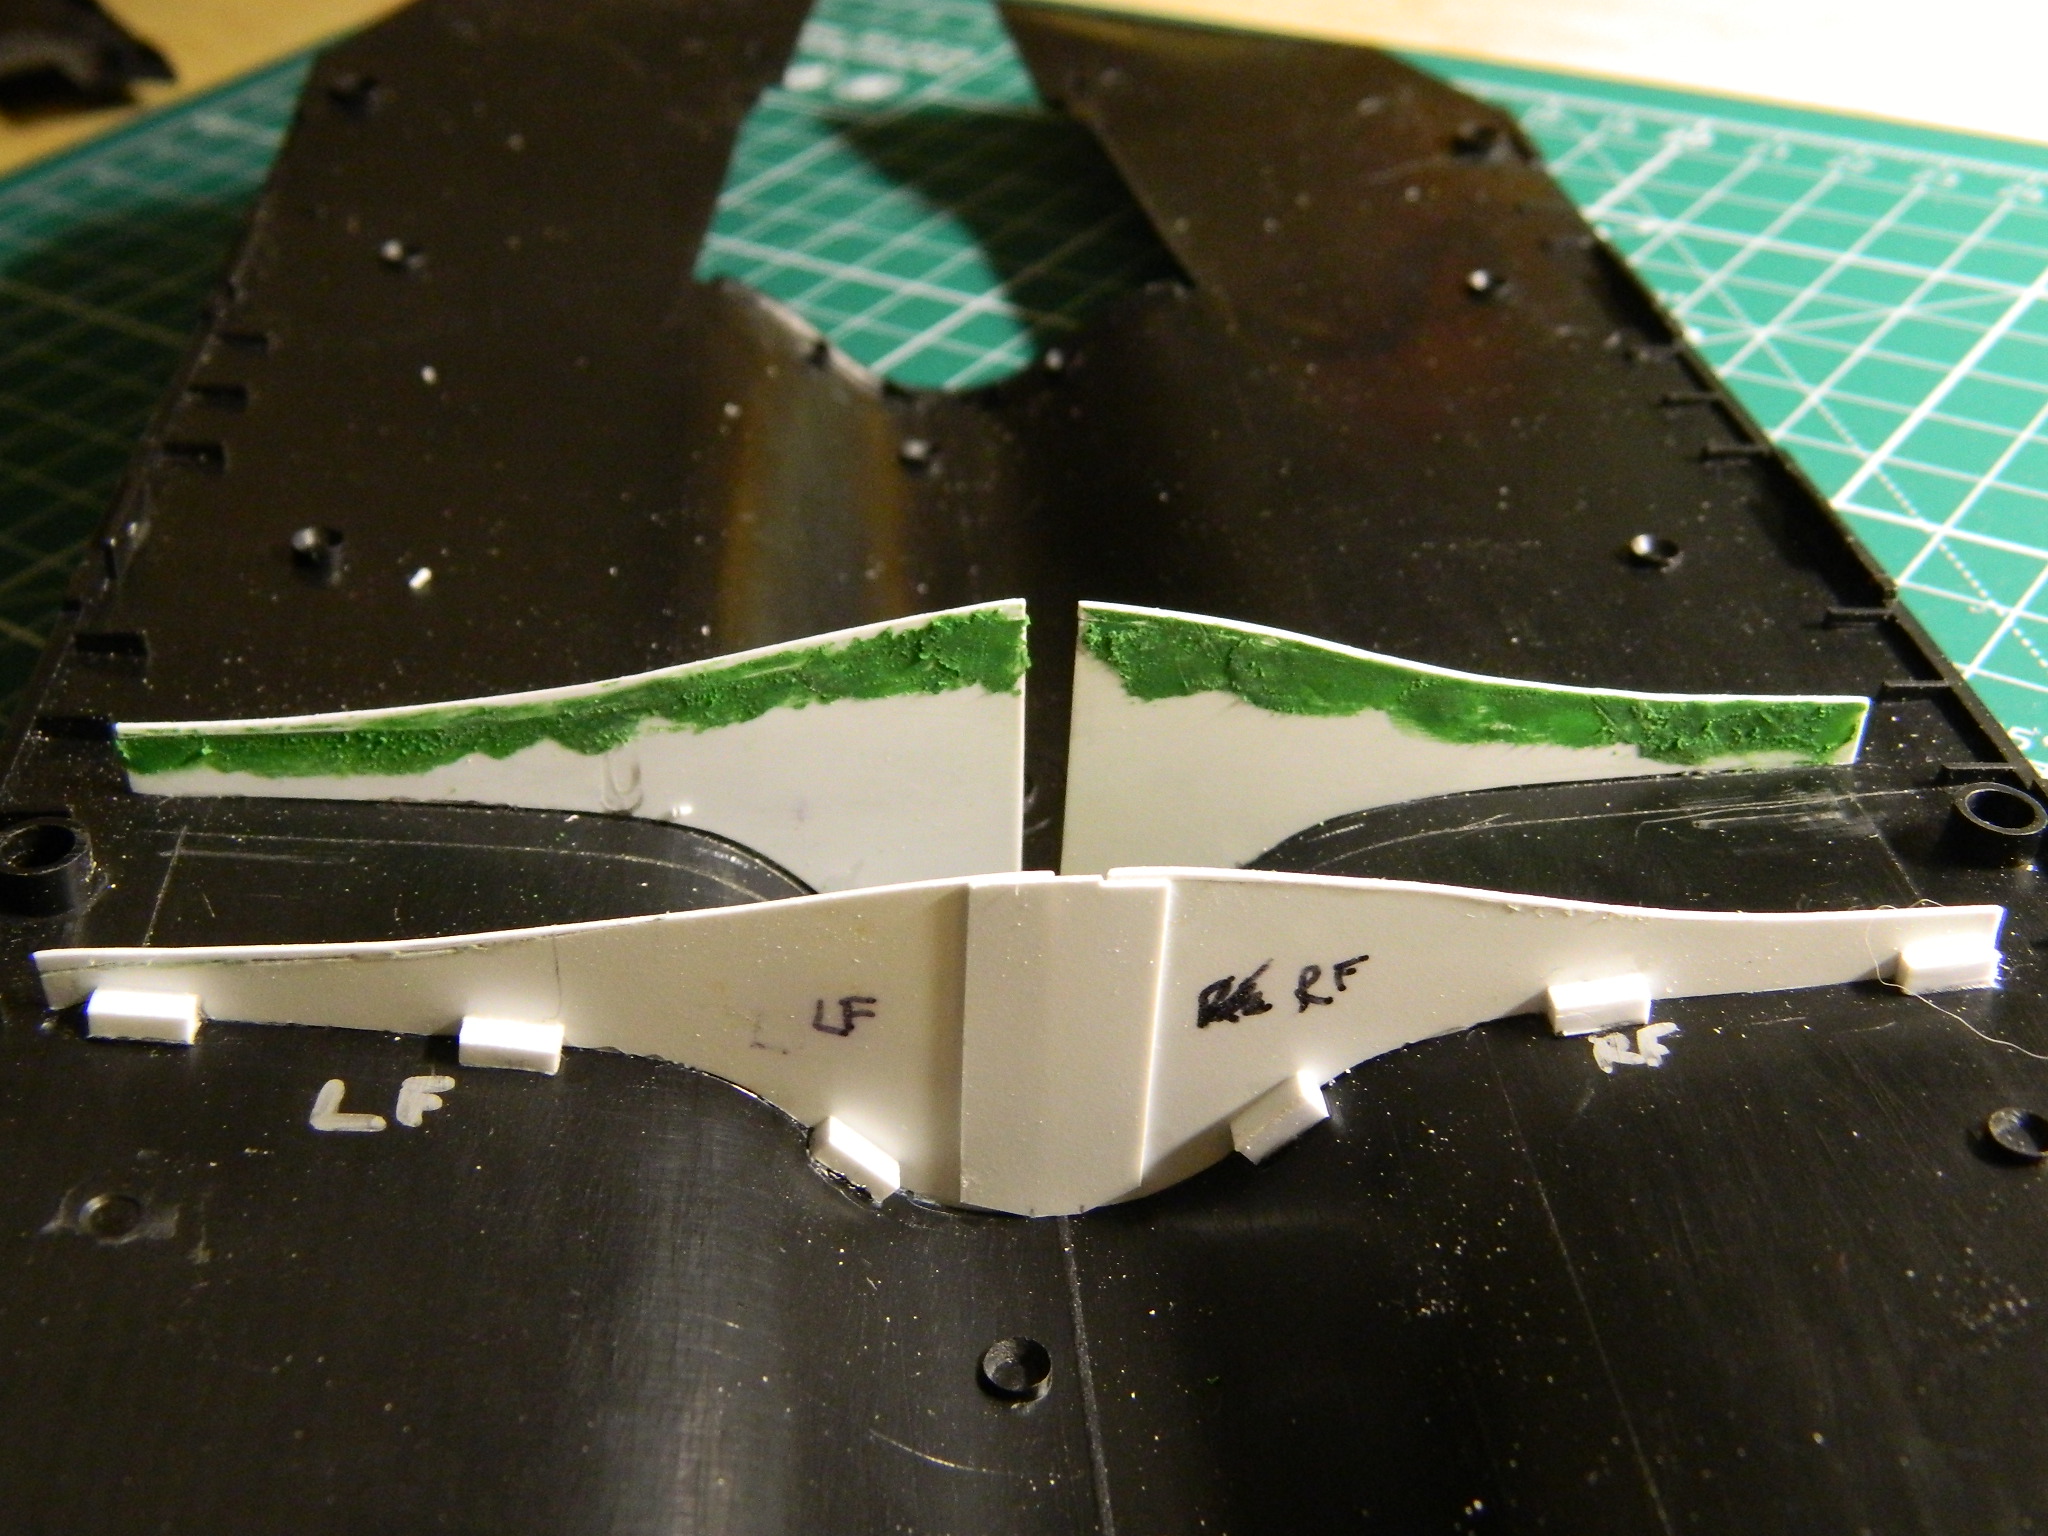
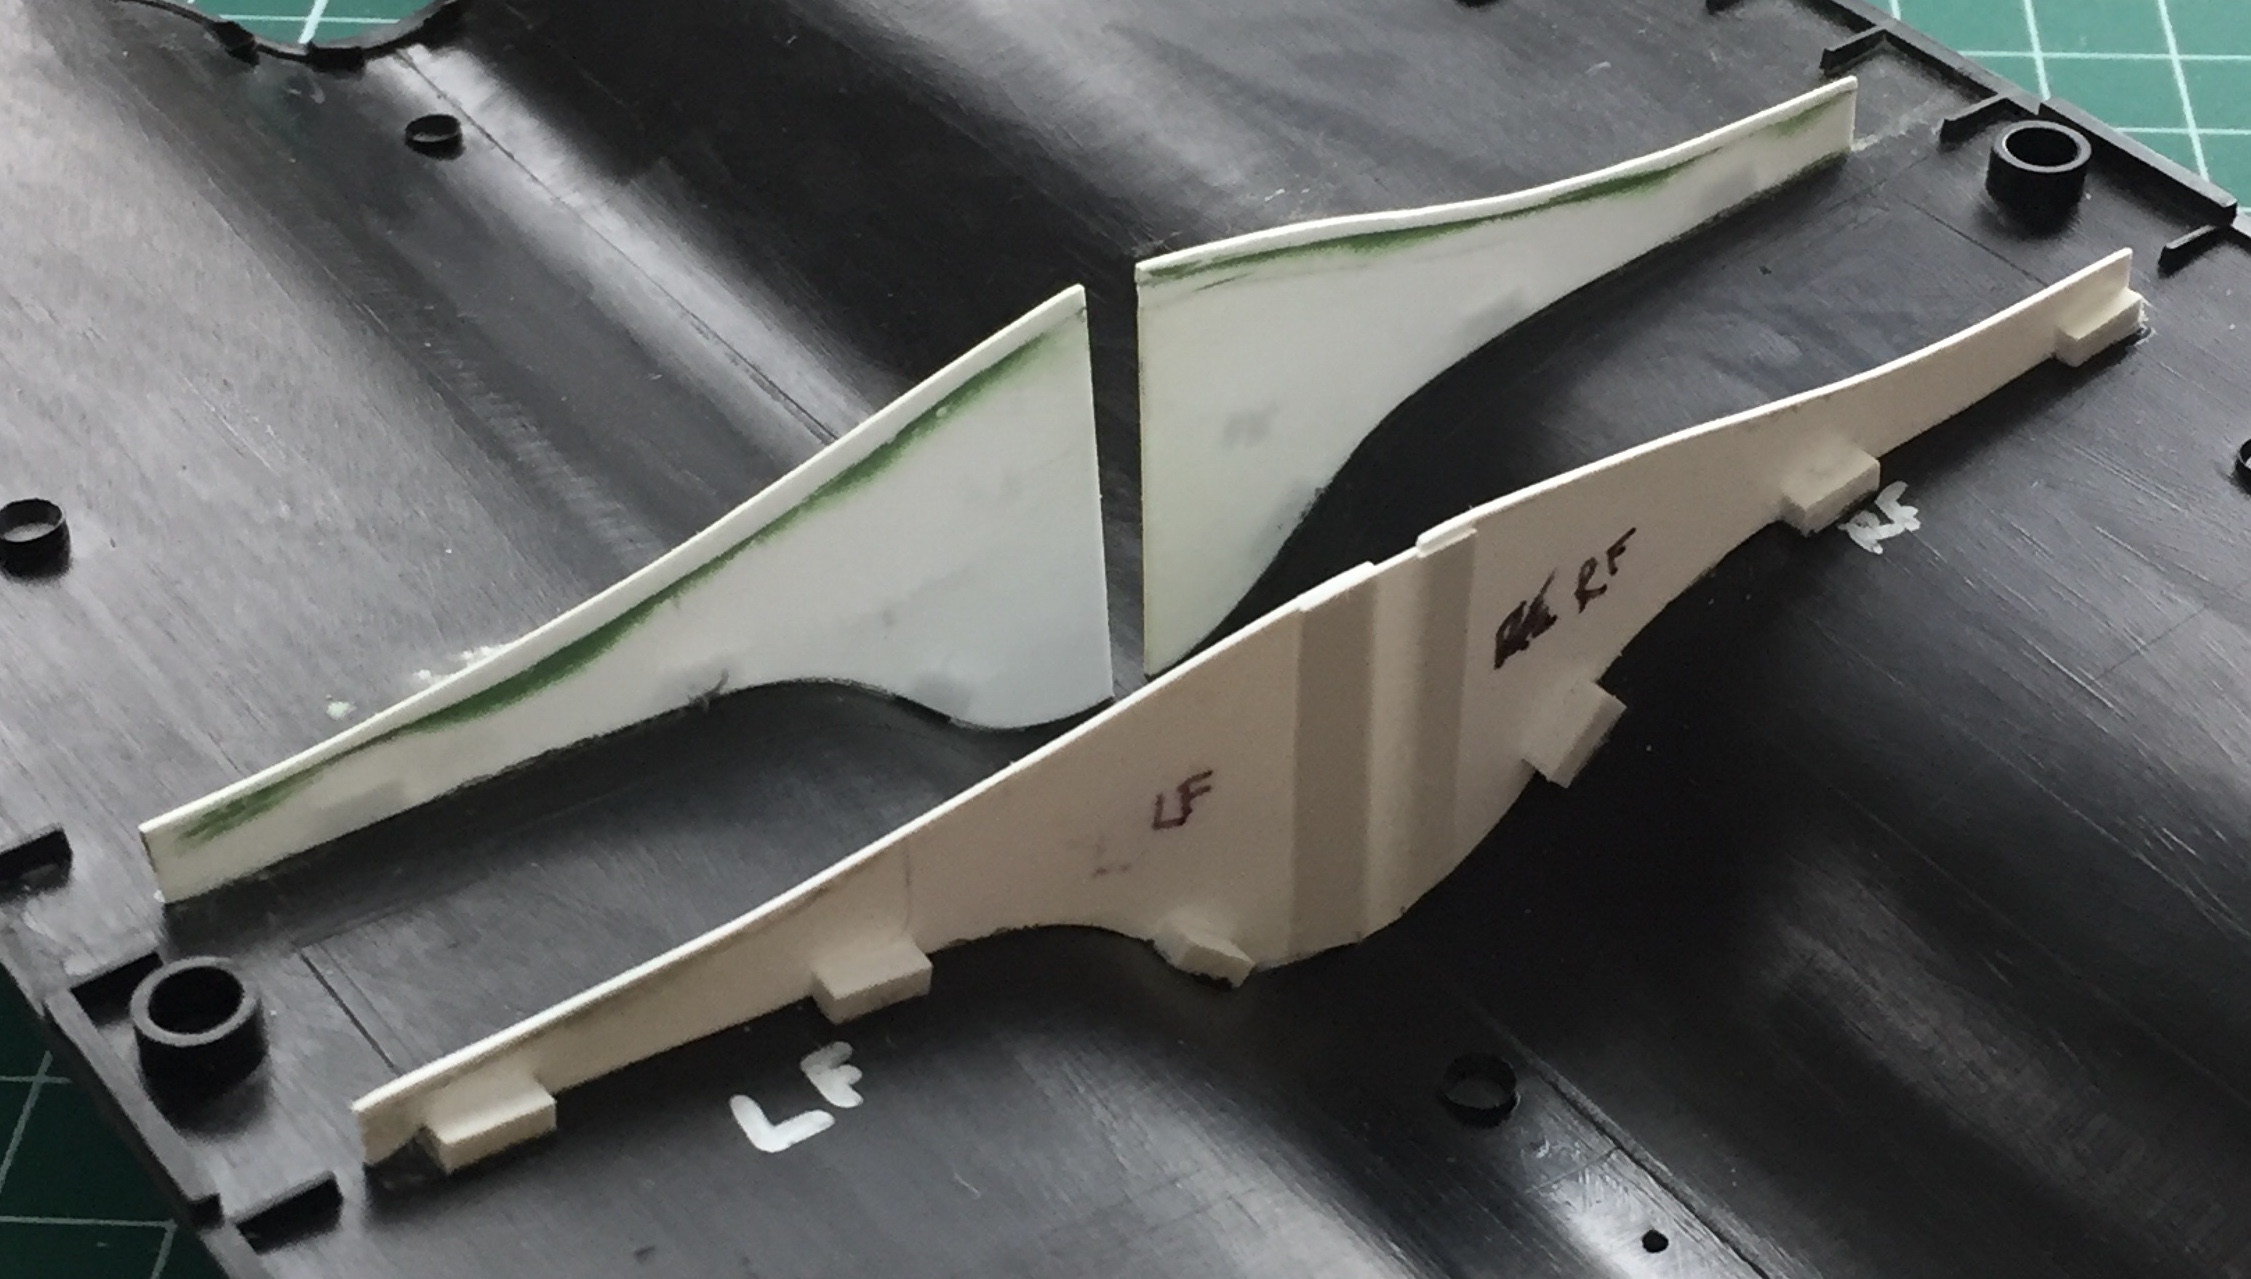
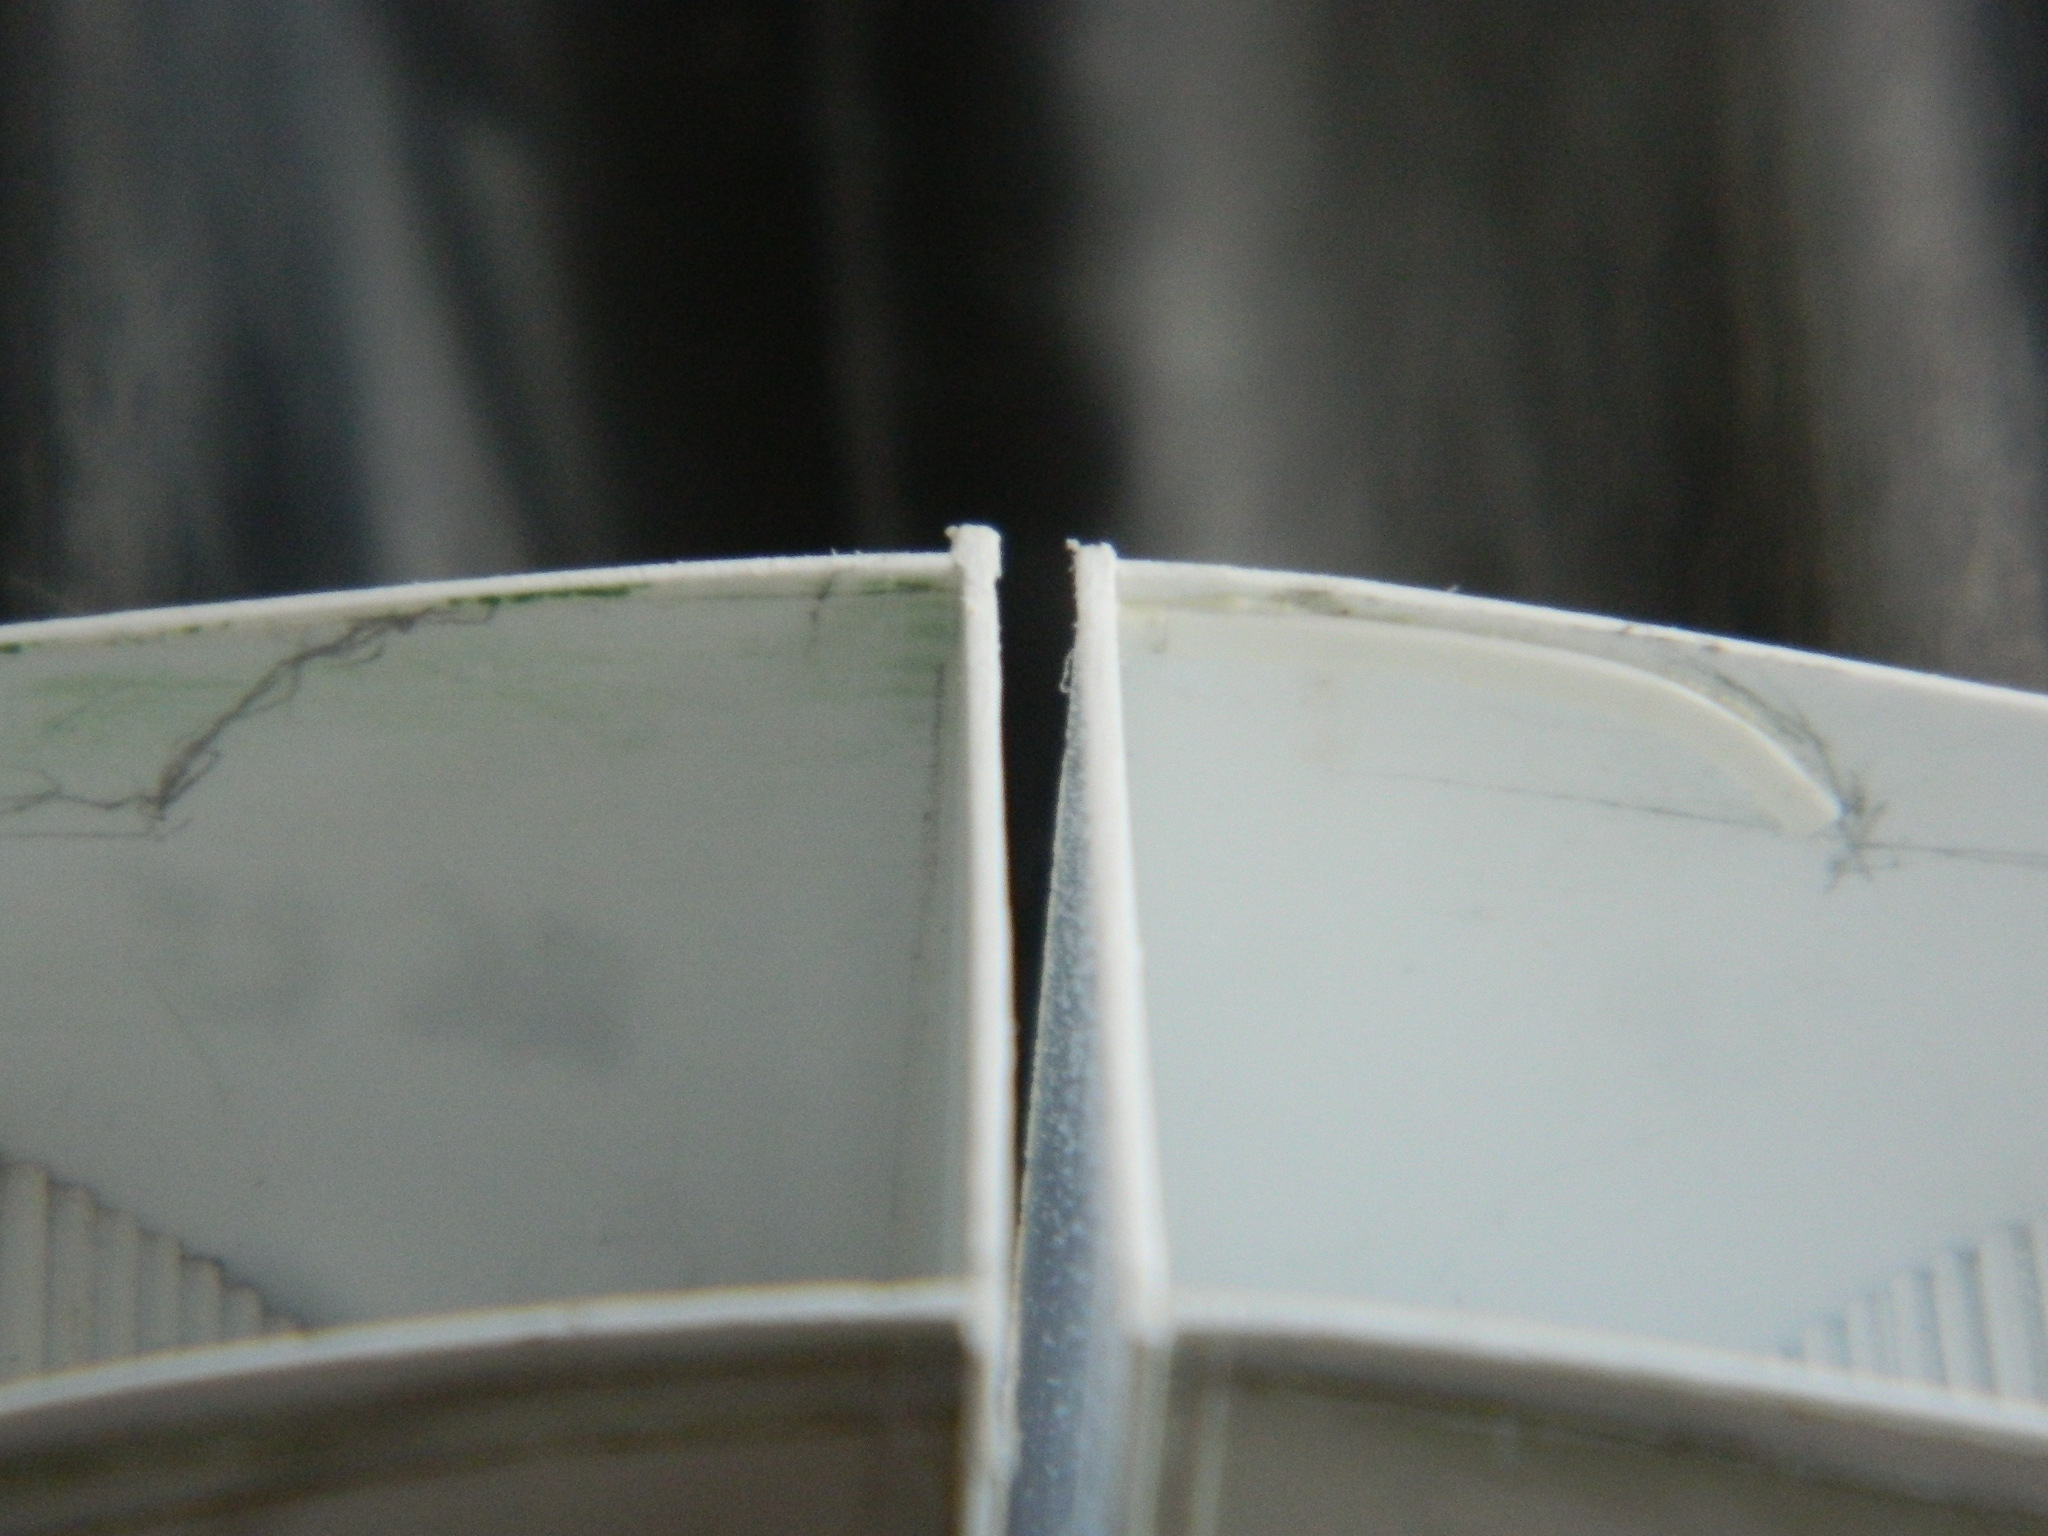
The first two bulkheads went in with some fitting. Yes…I got the tops and bottoms to match the interior curves of the upper and lower fuselage halves well enough. Getting the distance between the upper and lower fuselage halves required some more fitting. And then I tried doing the next two bulkheads. As it turned out, I failed to notice that the front of the landing gear bays is narrower top to bottom than the rear of the landing gear bays are. Once again, I found myself with a couple of parts that I couldn’t use as they turned out (he says as if these things made themselves). I needed to add plastic back to make them fit properly.
So I did (you will see that I had to add plastic back more than once):
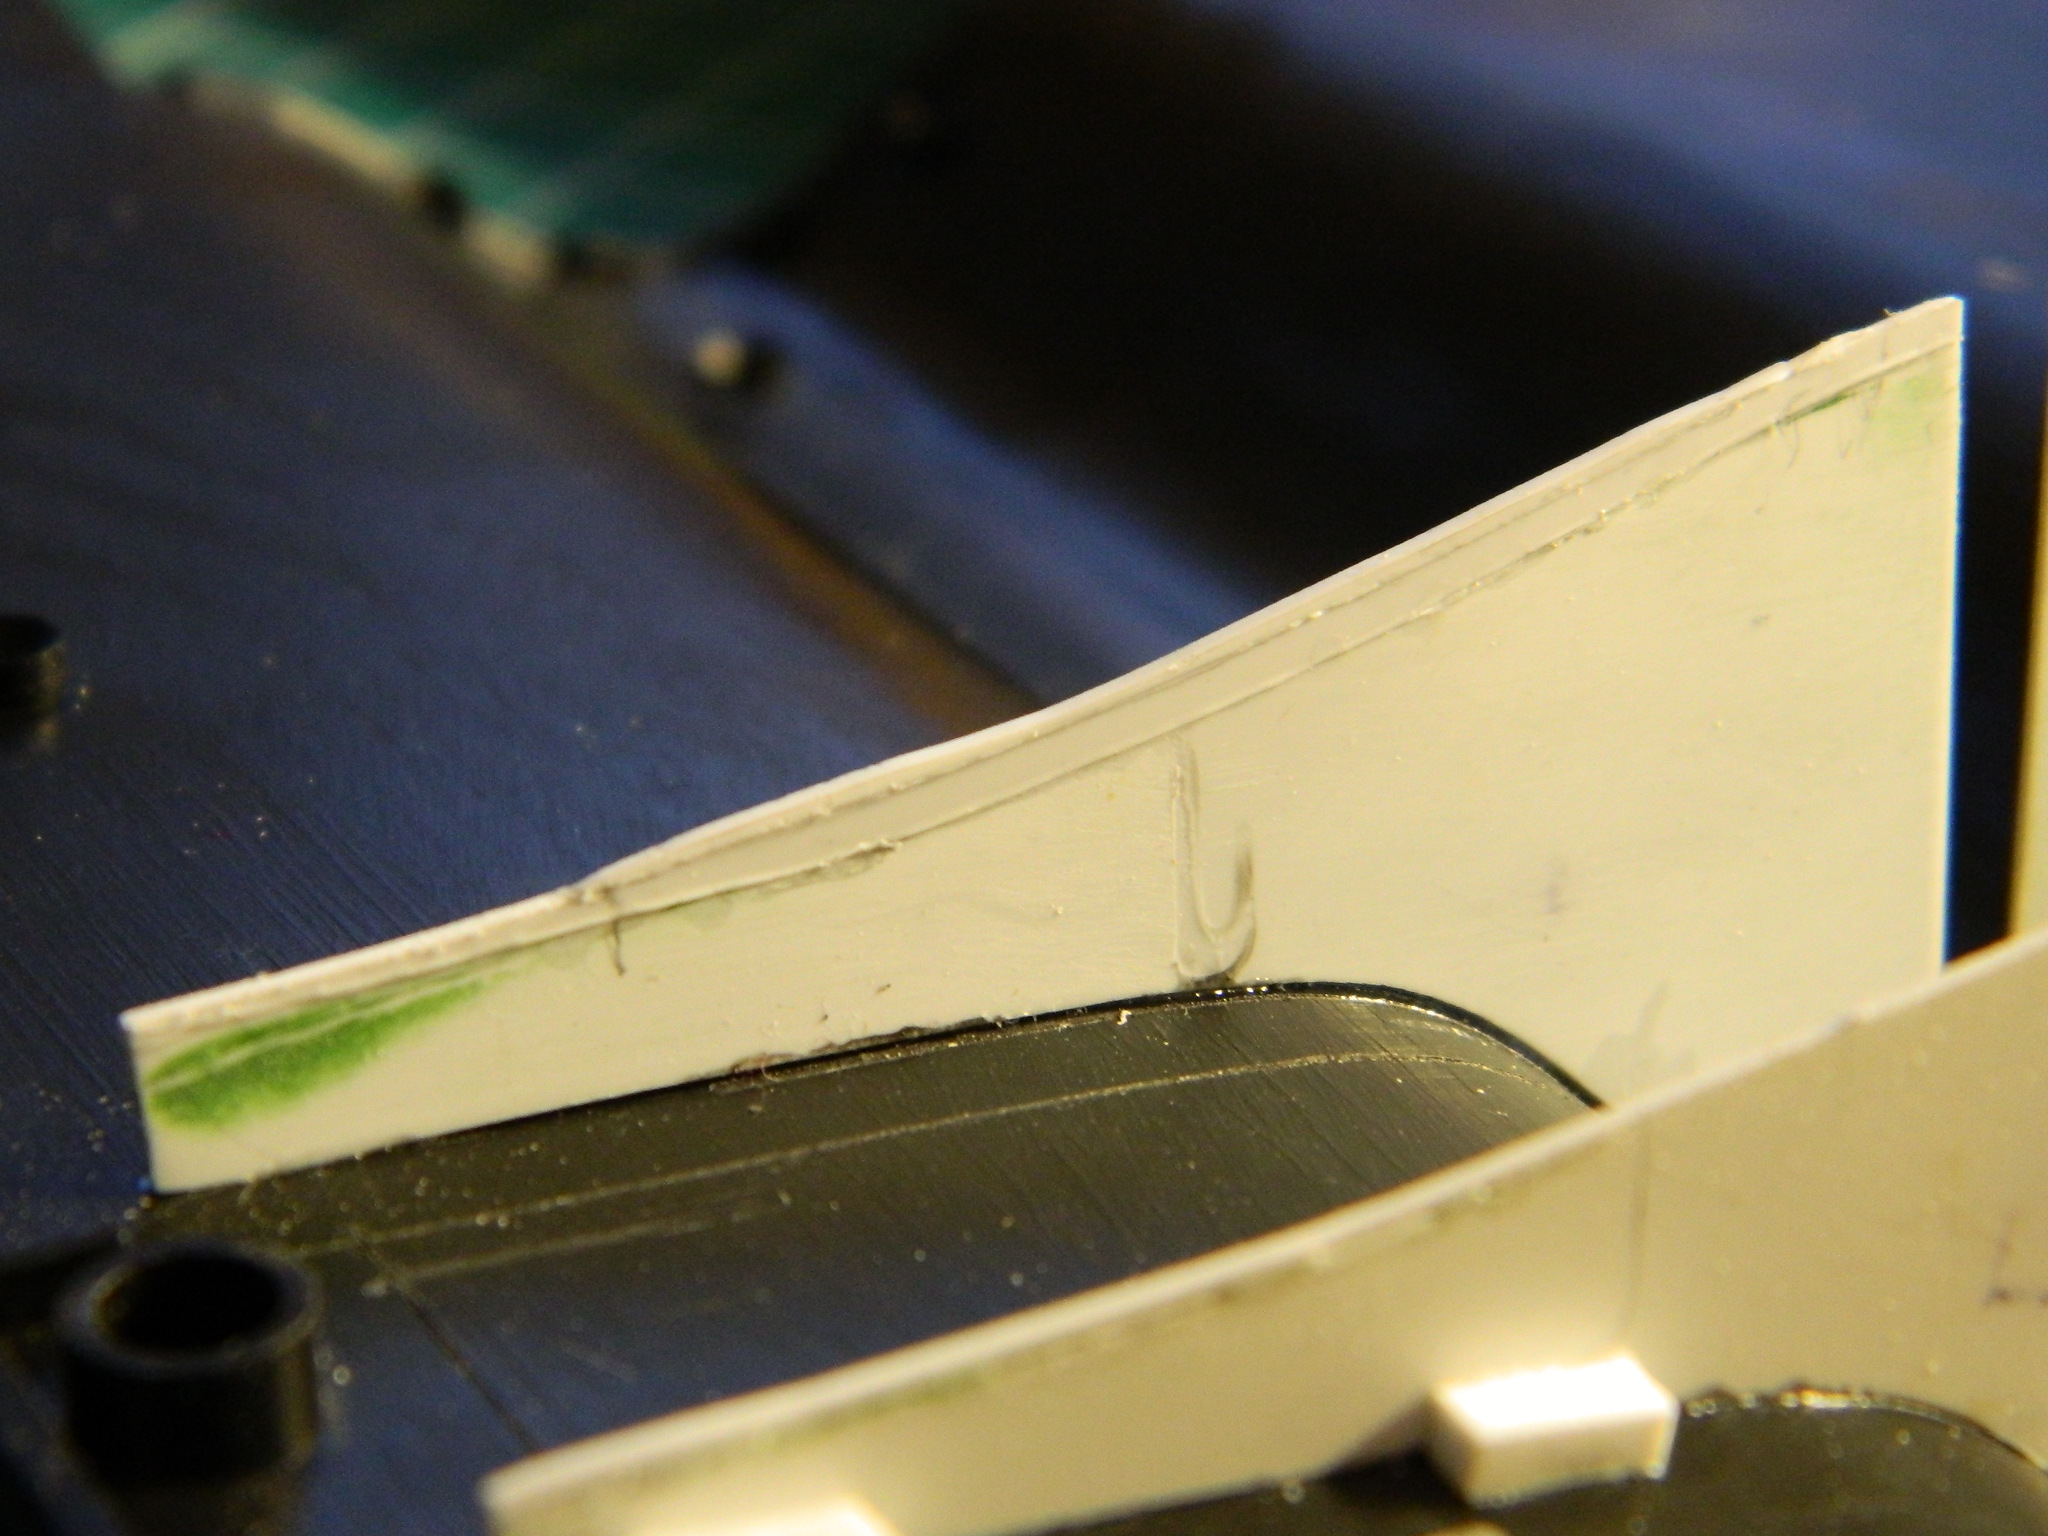

Since the joints are visible, they were puttied and sanded:
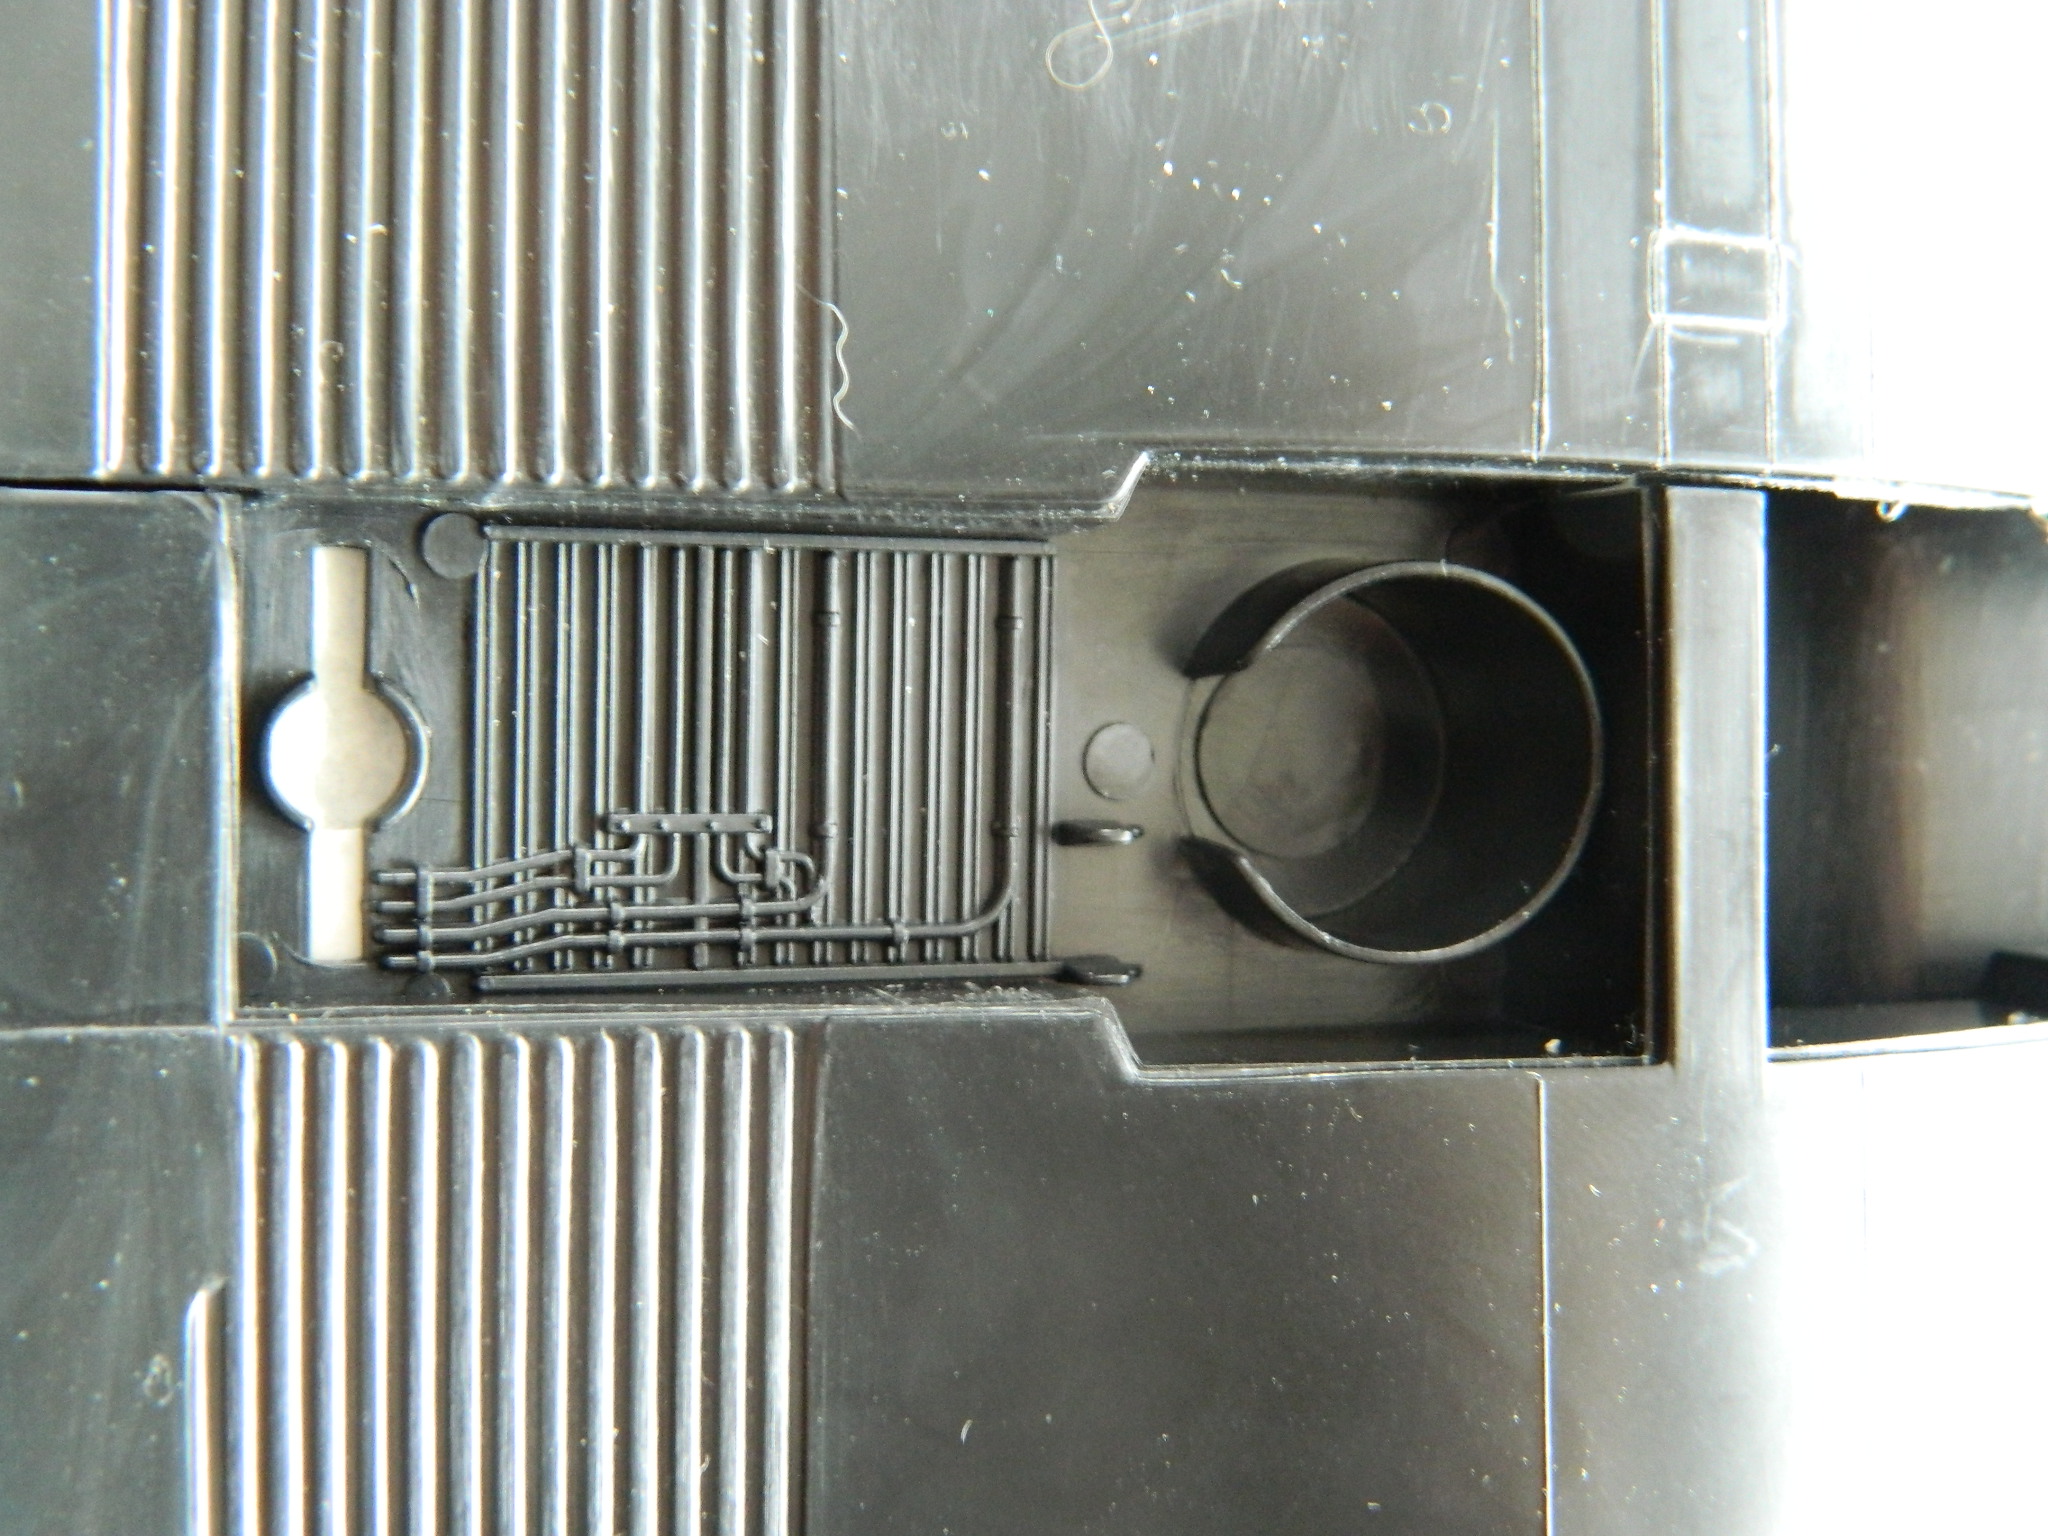
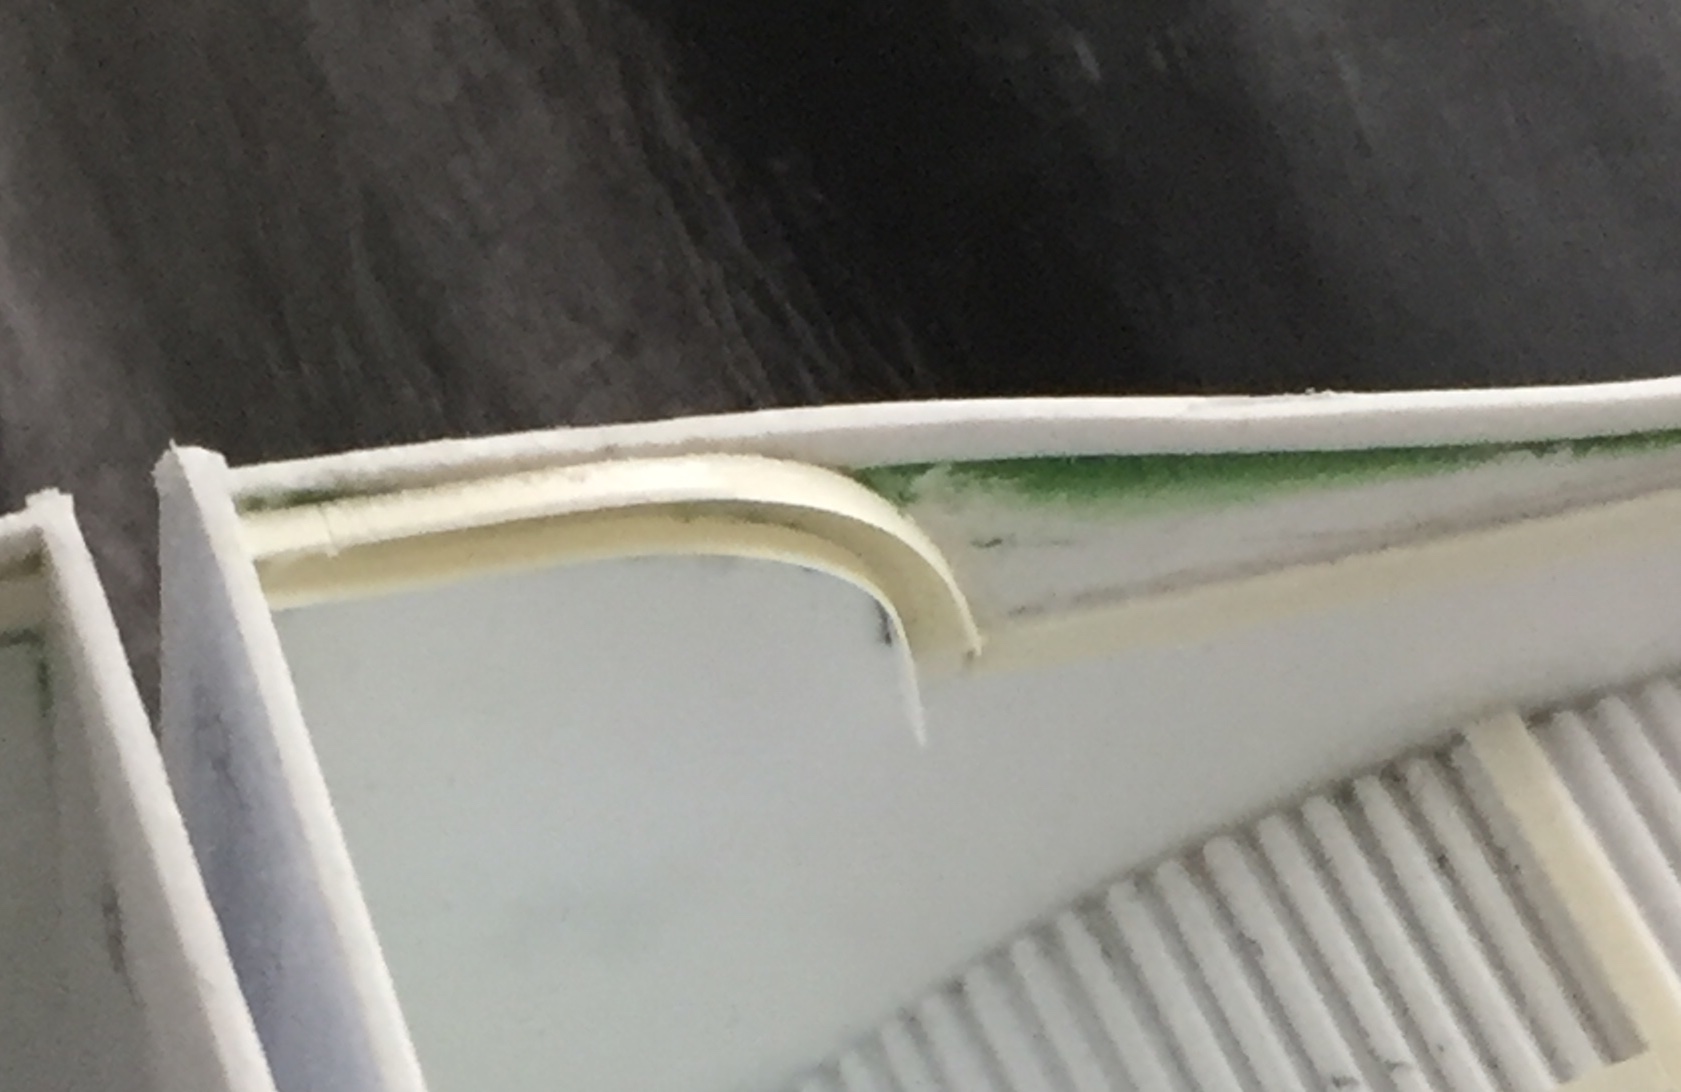
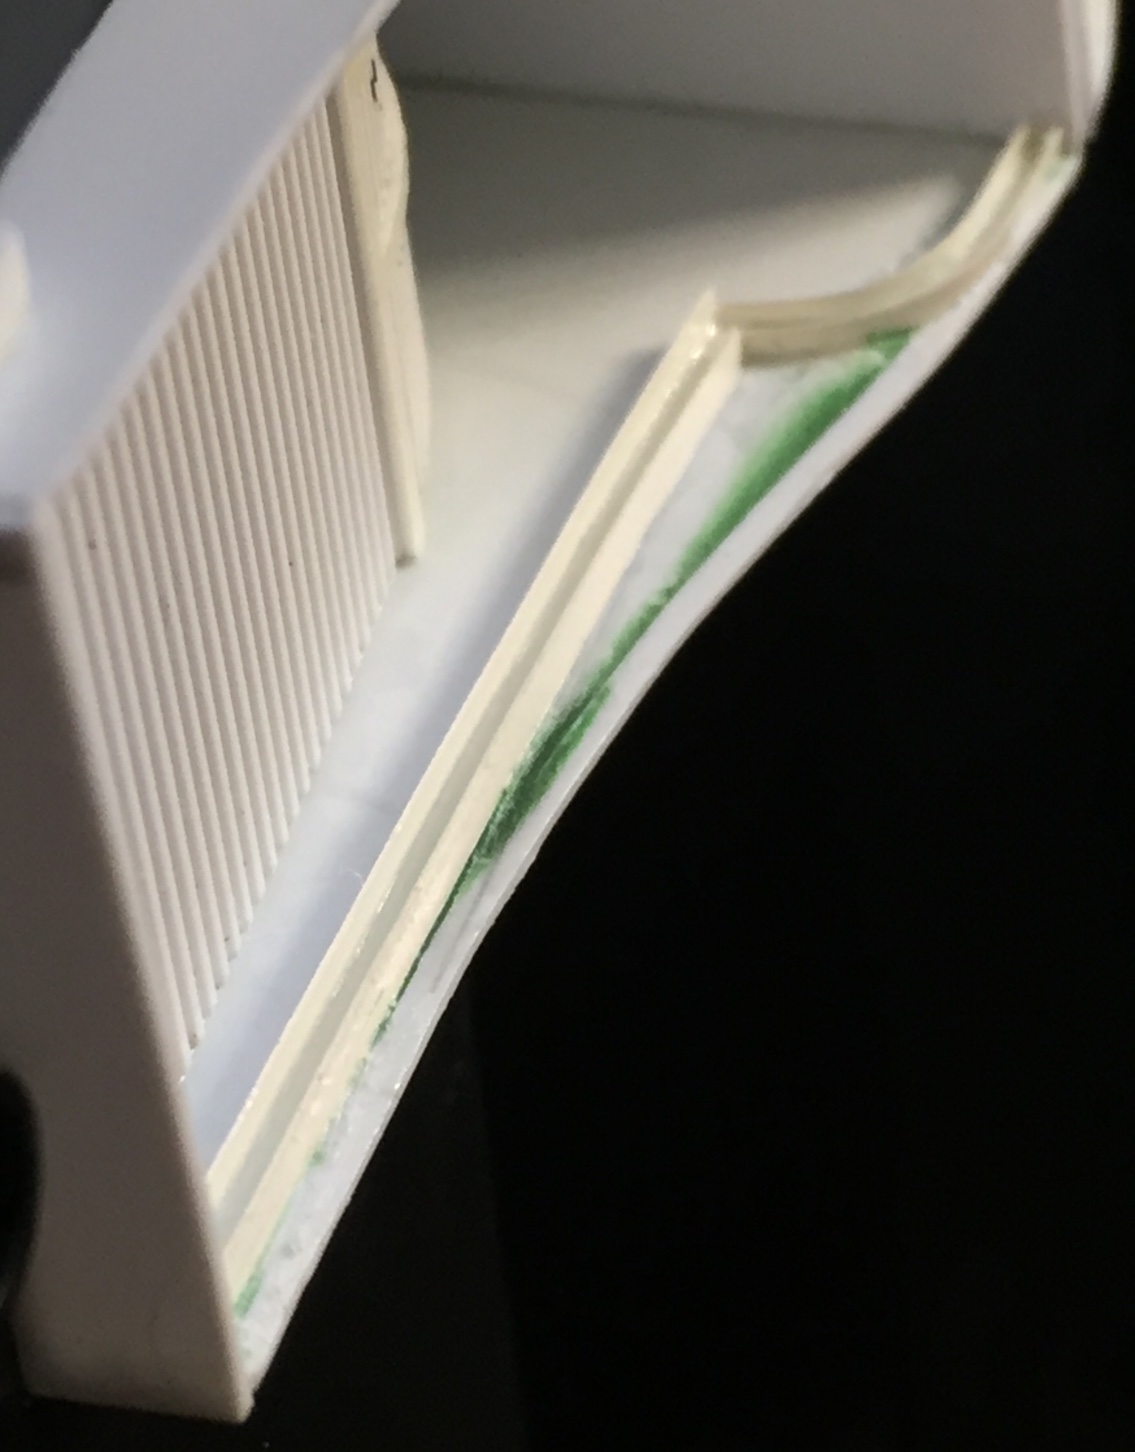
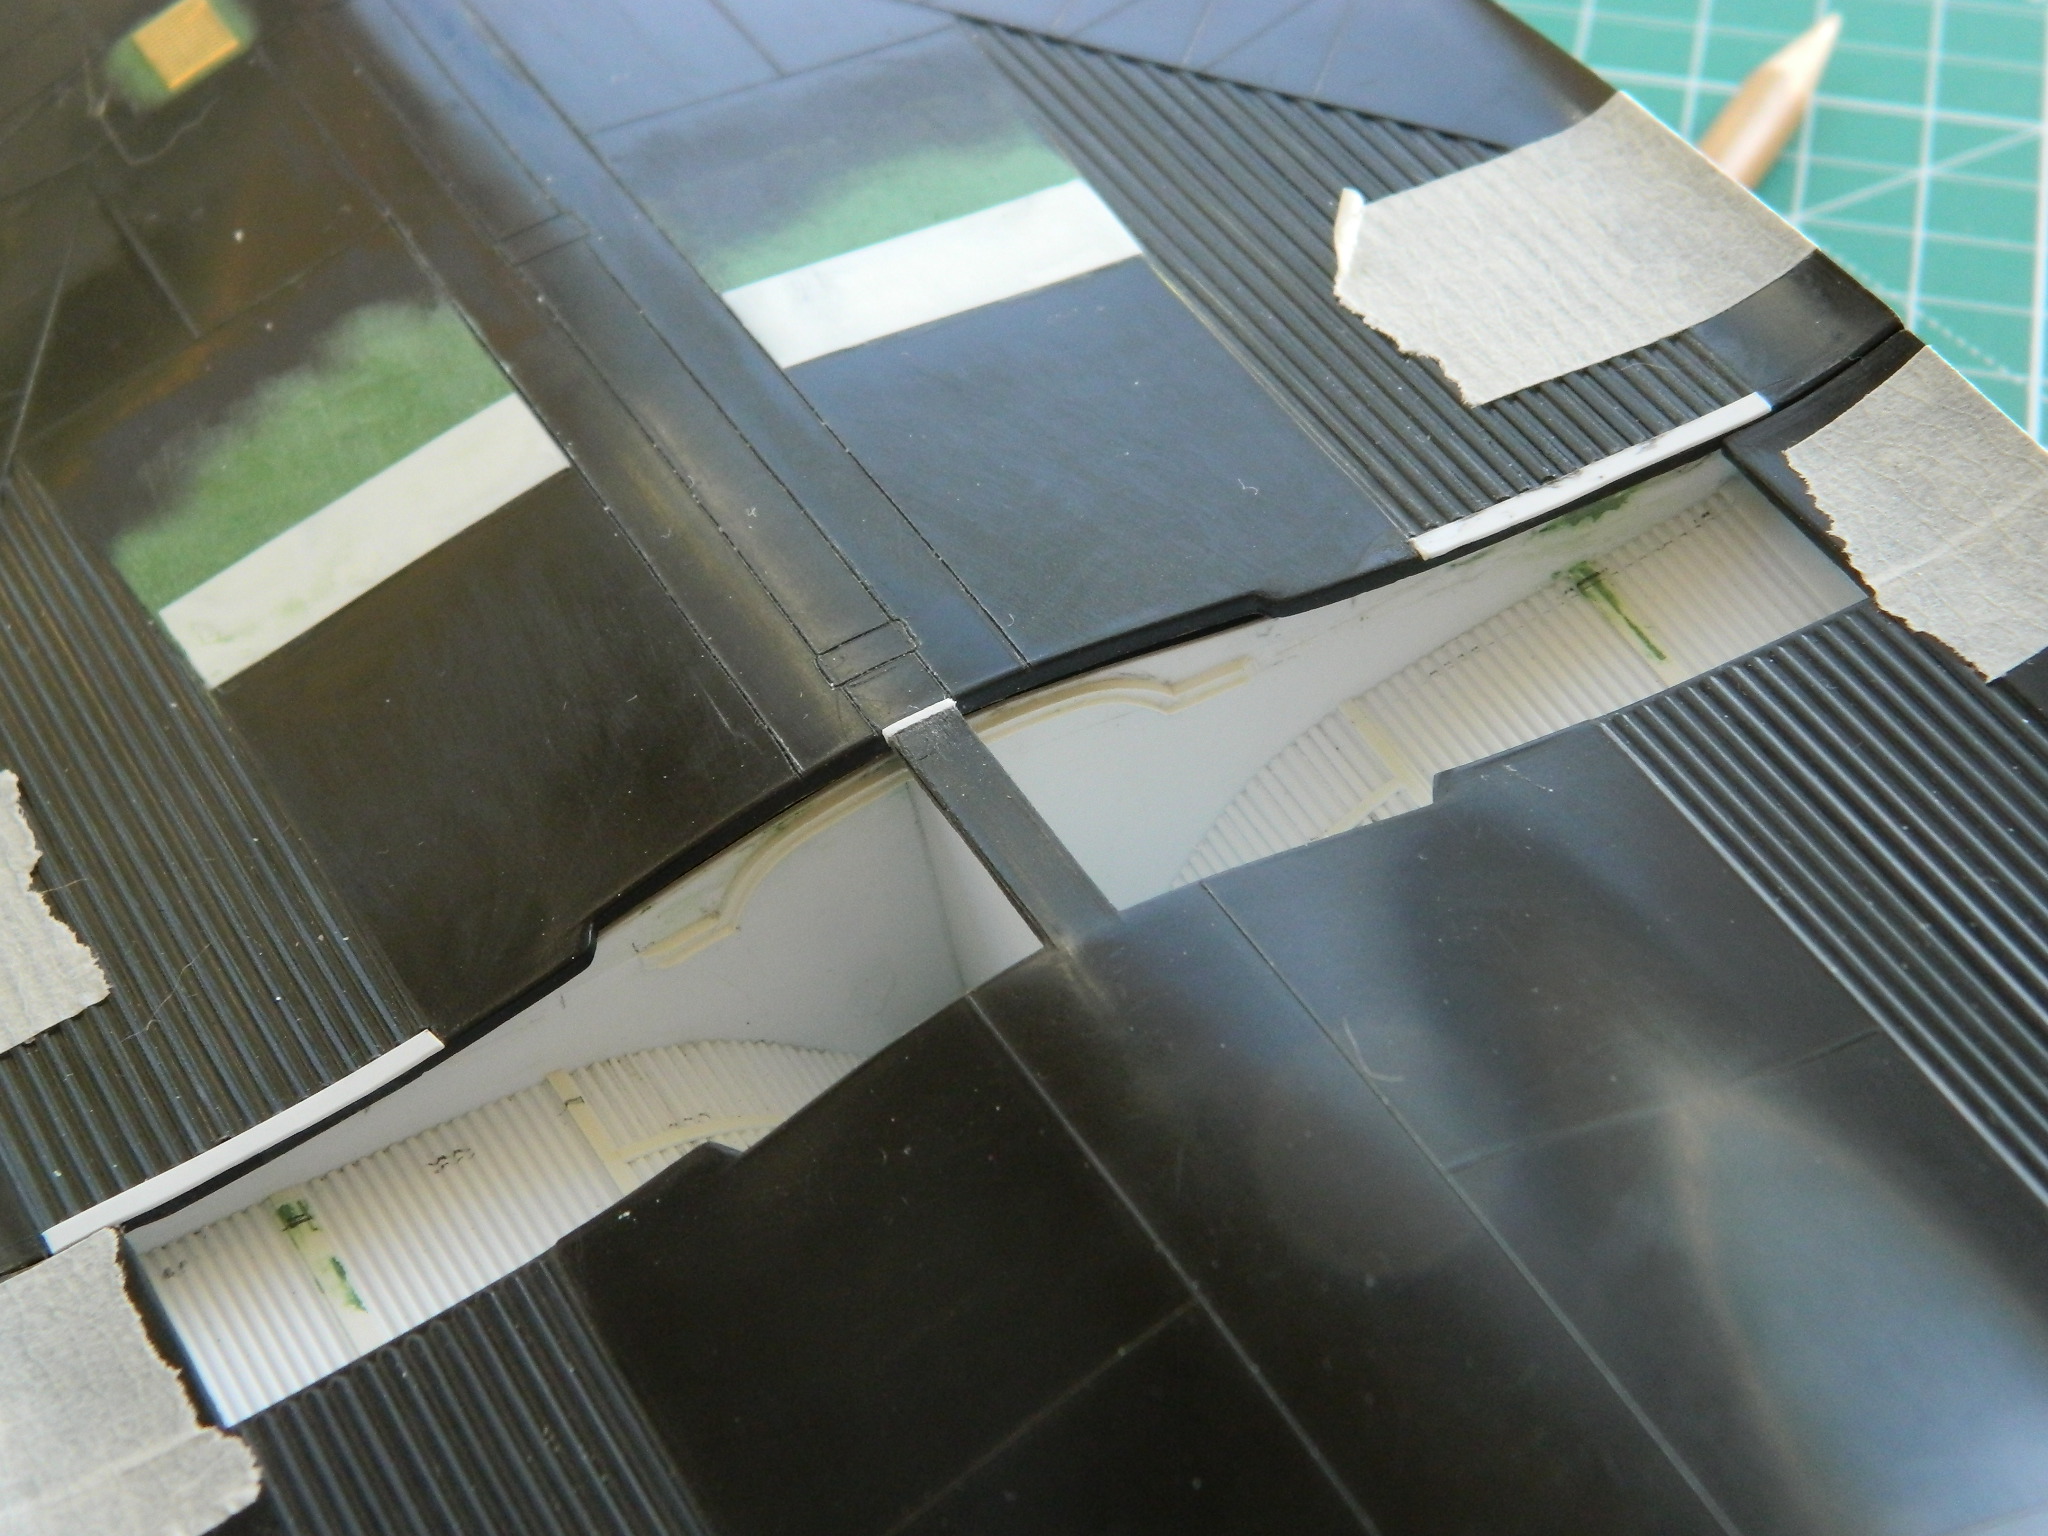
My initial plan was to use the top of the fuselage from the spare kit as the inner top of the landing gear bays to make use of the details there (the top of the fuselage over the landing gear bays is also the inner top of said bays). When it was time to make this clever plan a reality, I realized that there would be A LOT of sanding and filing to thin these fuselage sections to a usable thickness. The company I buy my plastic stock from (Evergreen Scale Models) also offers corrugated flat stock. I checked the measurements of the corrugations and though I couldn’t find an exact dimensional match, I bought a sheet that came very close. I cut sections to fit and glued them in place:


With the basic boxes made and installed, it was time to add some of the structural details:
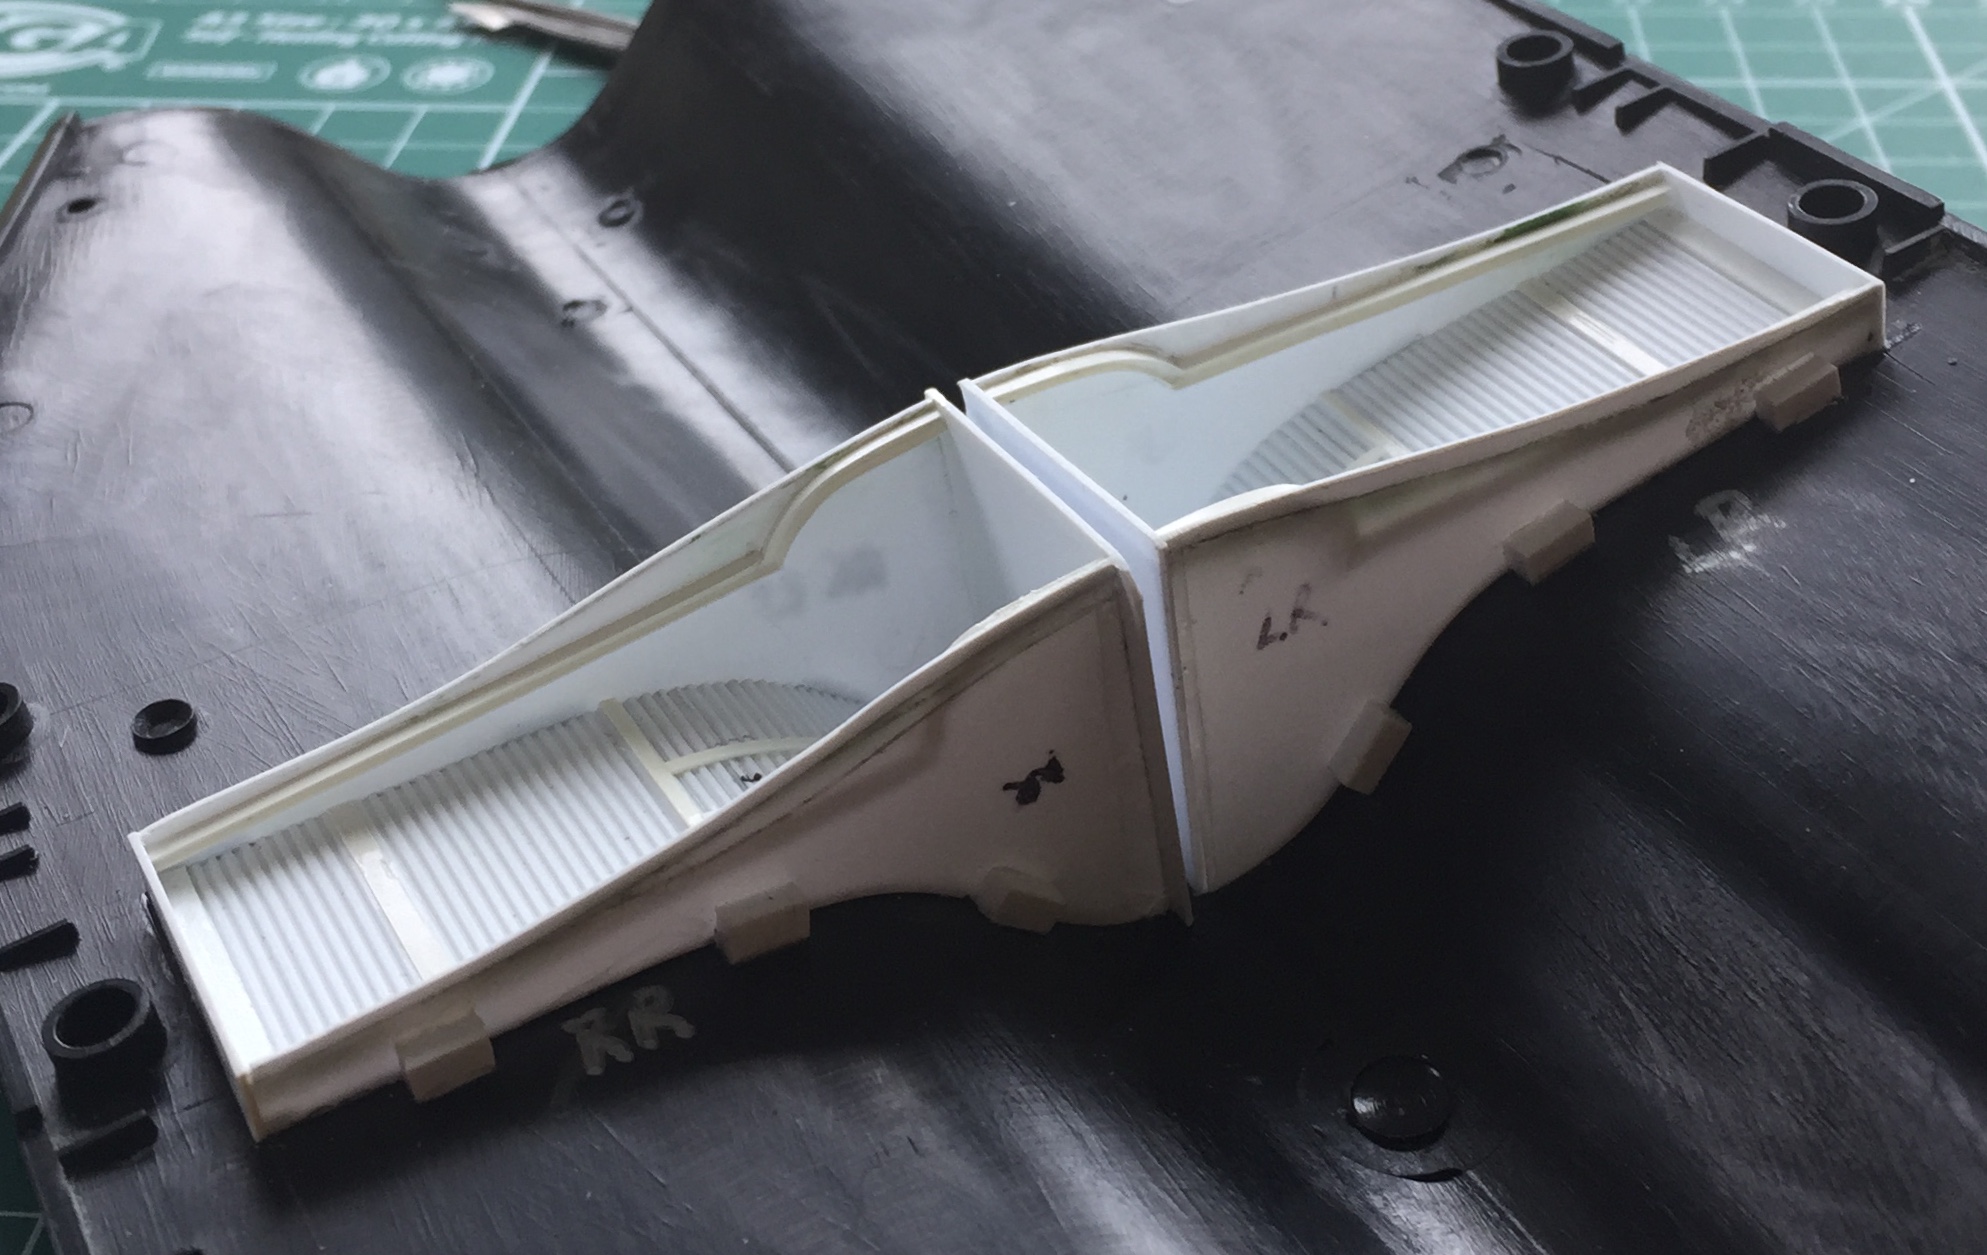
When I was looking for the corrugated plastic, I noticed that Evergreen also has preformed stock. Making the c-channels took a long time, mostly spent waiting for glue to cure so I could work the parts. There are some stiffening ribs I wanted to add and instead of taking a couple of days on a small detail, I decided to buy T-section extrusions and use those instead:
As I was readying myself to start adding more of the cylinders, lines, and wiring that goes in next, I noticed that the c-channels don’t extend all the way to the outsides of the bulkheads. ::sigh:: Okay…those get trimmed to the correct length:

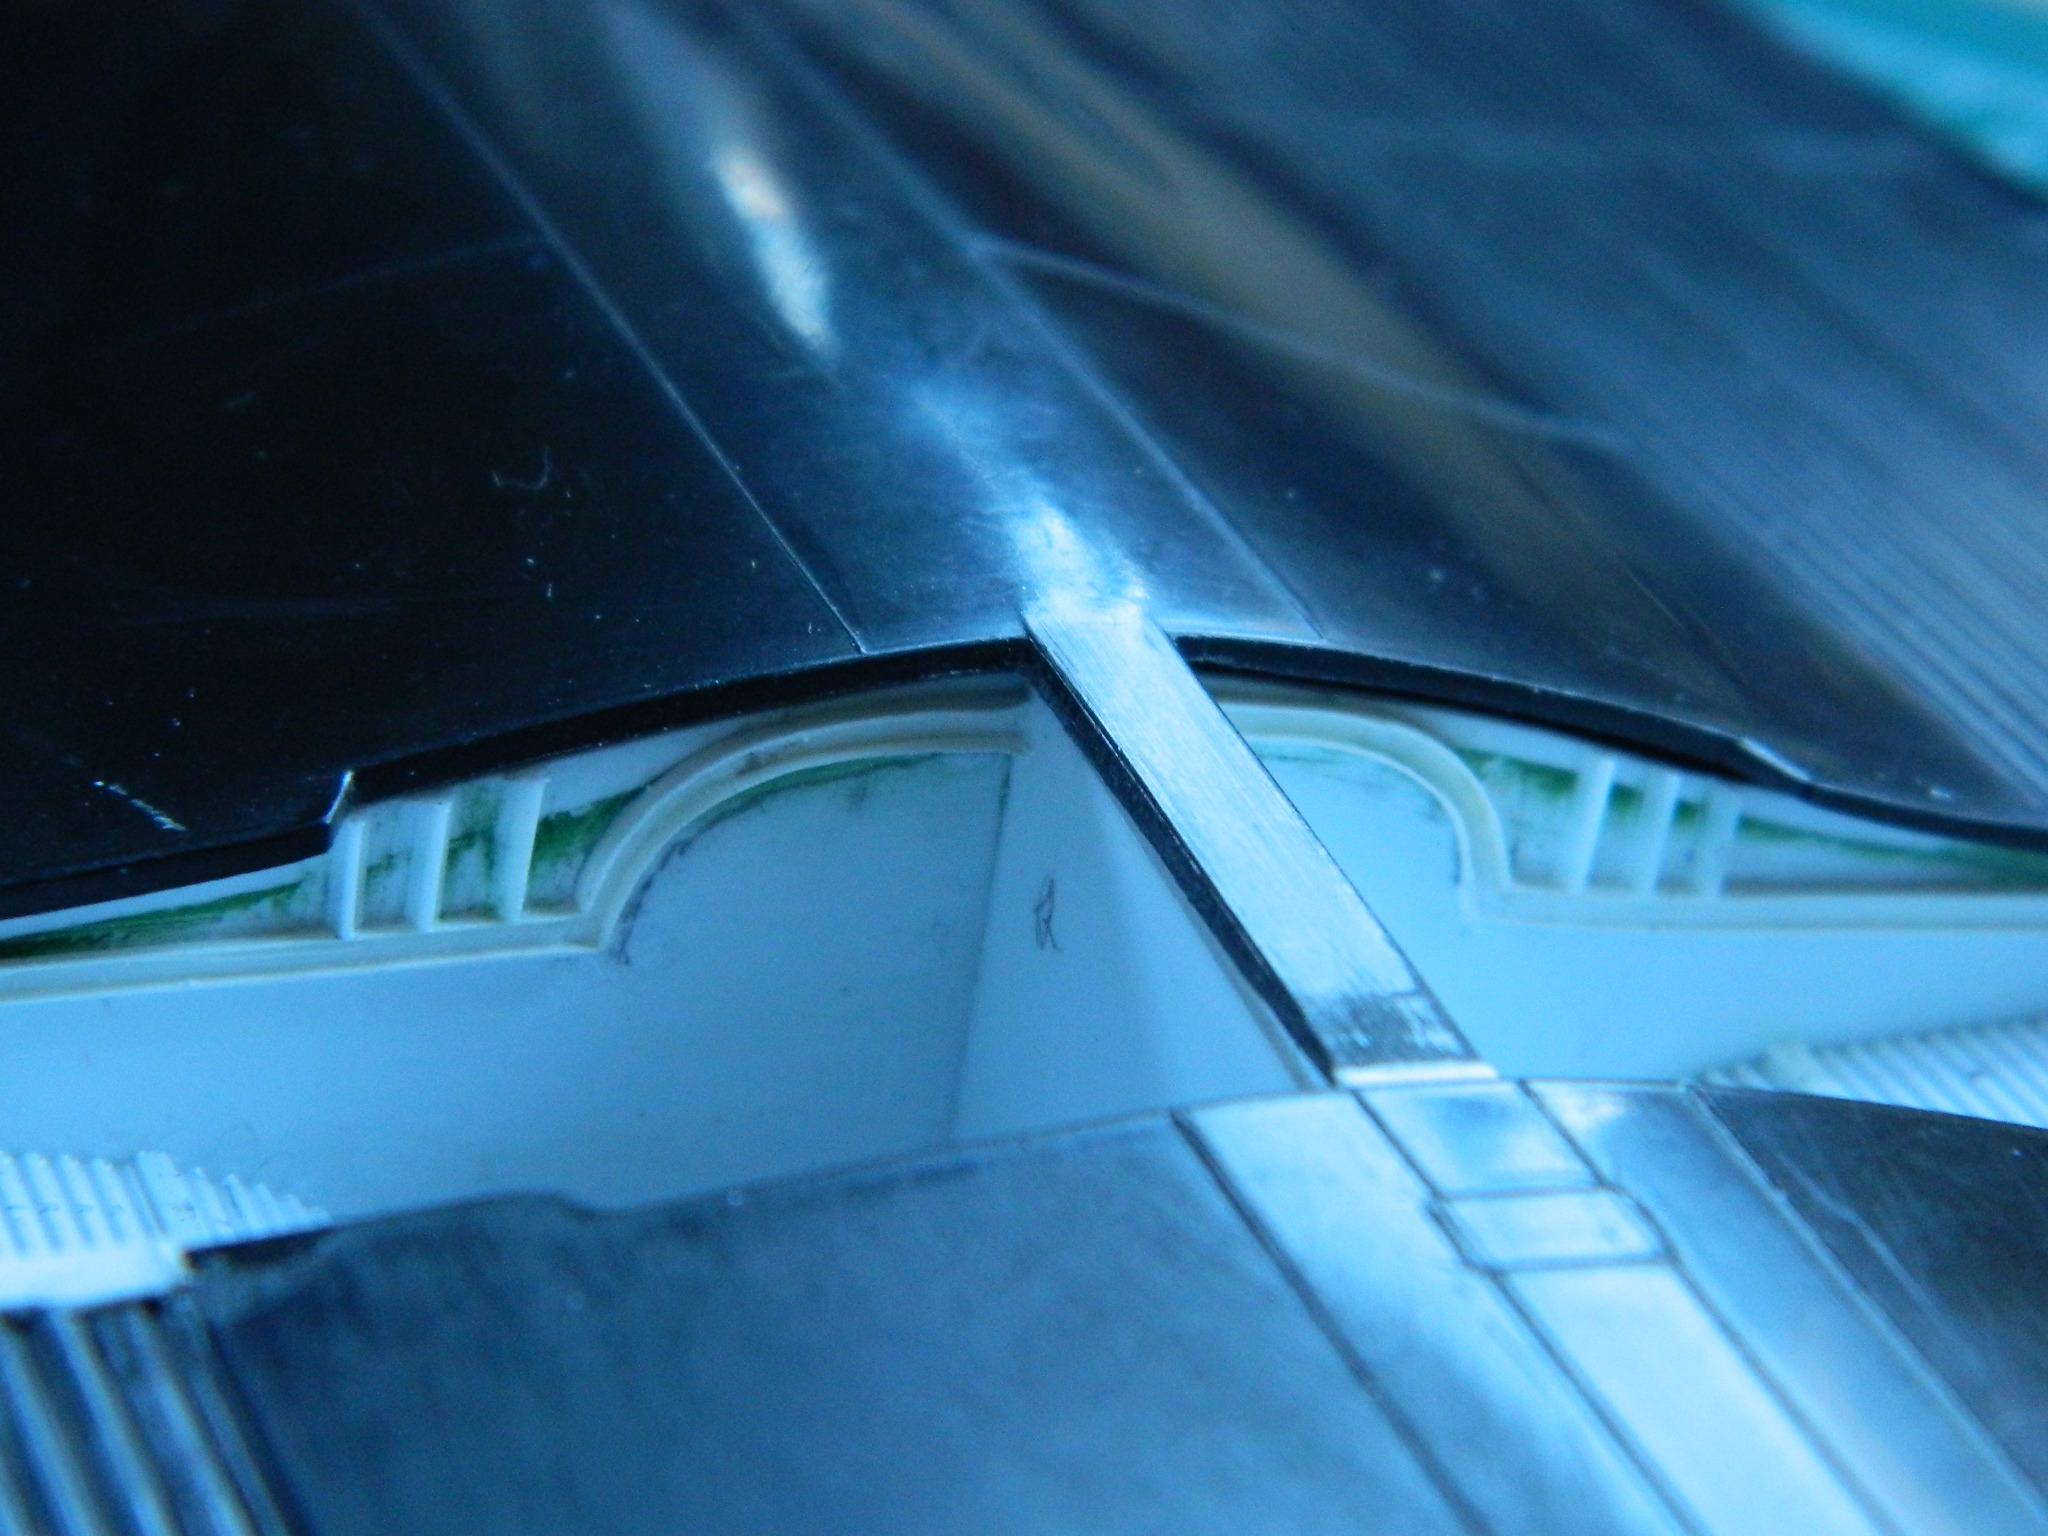
It’s not necessary to sand the areas where the c-channels were removed to absolute flatness; most of those areas will be populated with cylinders, lines, and wiring which will obscure the surface. One last check with the fuselage panels in place to make sure I’ve gotten the look I want:

Yep…that’s about right (he says hoping he’s correct this time). Time to start filling these boxes and the major reference point is the landing gear.
Time to make the landing gear.
