This post will be different from how I usually start things off. I don’t have to do a “Brief Overview” for it because I did that for the M4A3 and why do it again? “Same” tank, same info. What is different this post is what I wanted to do before I get to do what I want to do.
When I did the M4A3, that was my first build after a 23-year hiatus. That build was to see what had changed in the hobby (EVERYTHING), what had changed between 1991 and 2014 with my eyes and hands (EVERYTHING), and what would it take to remove the mental brakes and just go for it (everything ELSE). One of the first mistakes I made (of a few…) was with the AM set I purchased for the interior. I wanted to do a later production A3 and that critter had a wet-stowage interior. Instead I purchased a dry-stowage interior set from CMK. Well, duh. Fine. Stored it away, got the correct AM set from TWS, and off to the races (in a doddering and tottering sort of way) I went. What I remembered was how detailed and amazingly produced the CMK dry-stowage set was. It was so well done that I wanted to show the interior off when I got around to doing a dry-stowage M4. I’ve seen tanks with cut-out sections and though I like them, I don’t want to live with one because DUST AND CAT HAIR ARE NOT IN SHORT SUPPLY HERE. The notion, though not gone, sort of languished in the (massive) bin of all the other Great Ideas I’ve had and not gotten around to doing yet.
My back is shot. Utterly. That means laying in bed awake and waiting to (see if I can) get to sleep. My mind will wander during those (frequent) times. I took a break from the bench in June and just about the time July arrived, so did a notion from the Boys in the Back. Y’know, if you want to use that CMK set you’ve had on the shelf for over a decade, now, why not build an M4 with transparencies replacing the opaque instead of cutting holes in the hull and turret?
What a great notion! (FYI, a “great notion” isn’t necessarily an “easy” notion. Just thought I’d throw that in here.) That’s what I’ll be doing with my next build. Cutting holes and plugging them with clear plastic/resin. NEVER have to worry about DUST AND CAT HAIR getting in that way (open hatches not withstanding).
The CMK set is so nice that I wanted to be certain I could get another set because this M4 won’t be the only Sherman I’ll be doing (assuming I live that long). And it’s a good thing I looked because well, bugger-all, I can’t find any available! Pity I don’t know how to make molds and pour resin because…uhm…wait a sec. I do know how to make molds and pour resin! I’m actually all tooled up to make molds and pour resin.
That’s what this post will be about, how Modeling Magic happens and how utterly magical it is when something goes gloriously off the rails… So. That said…
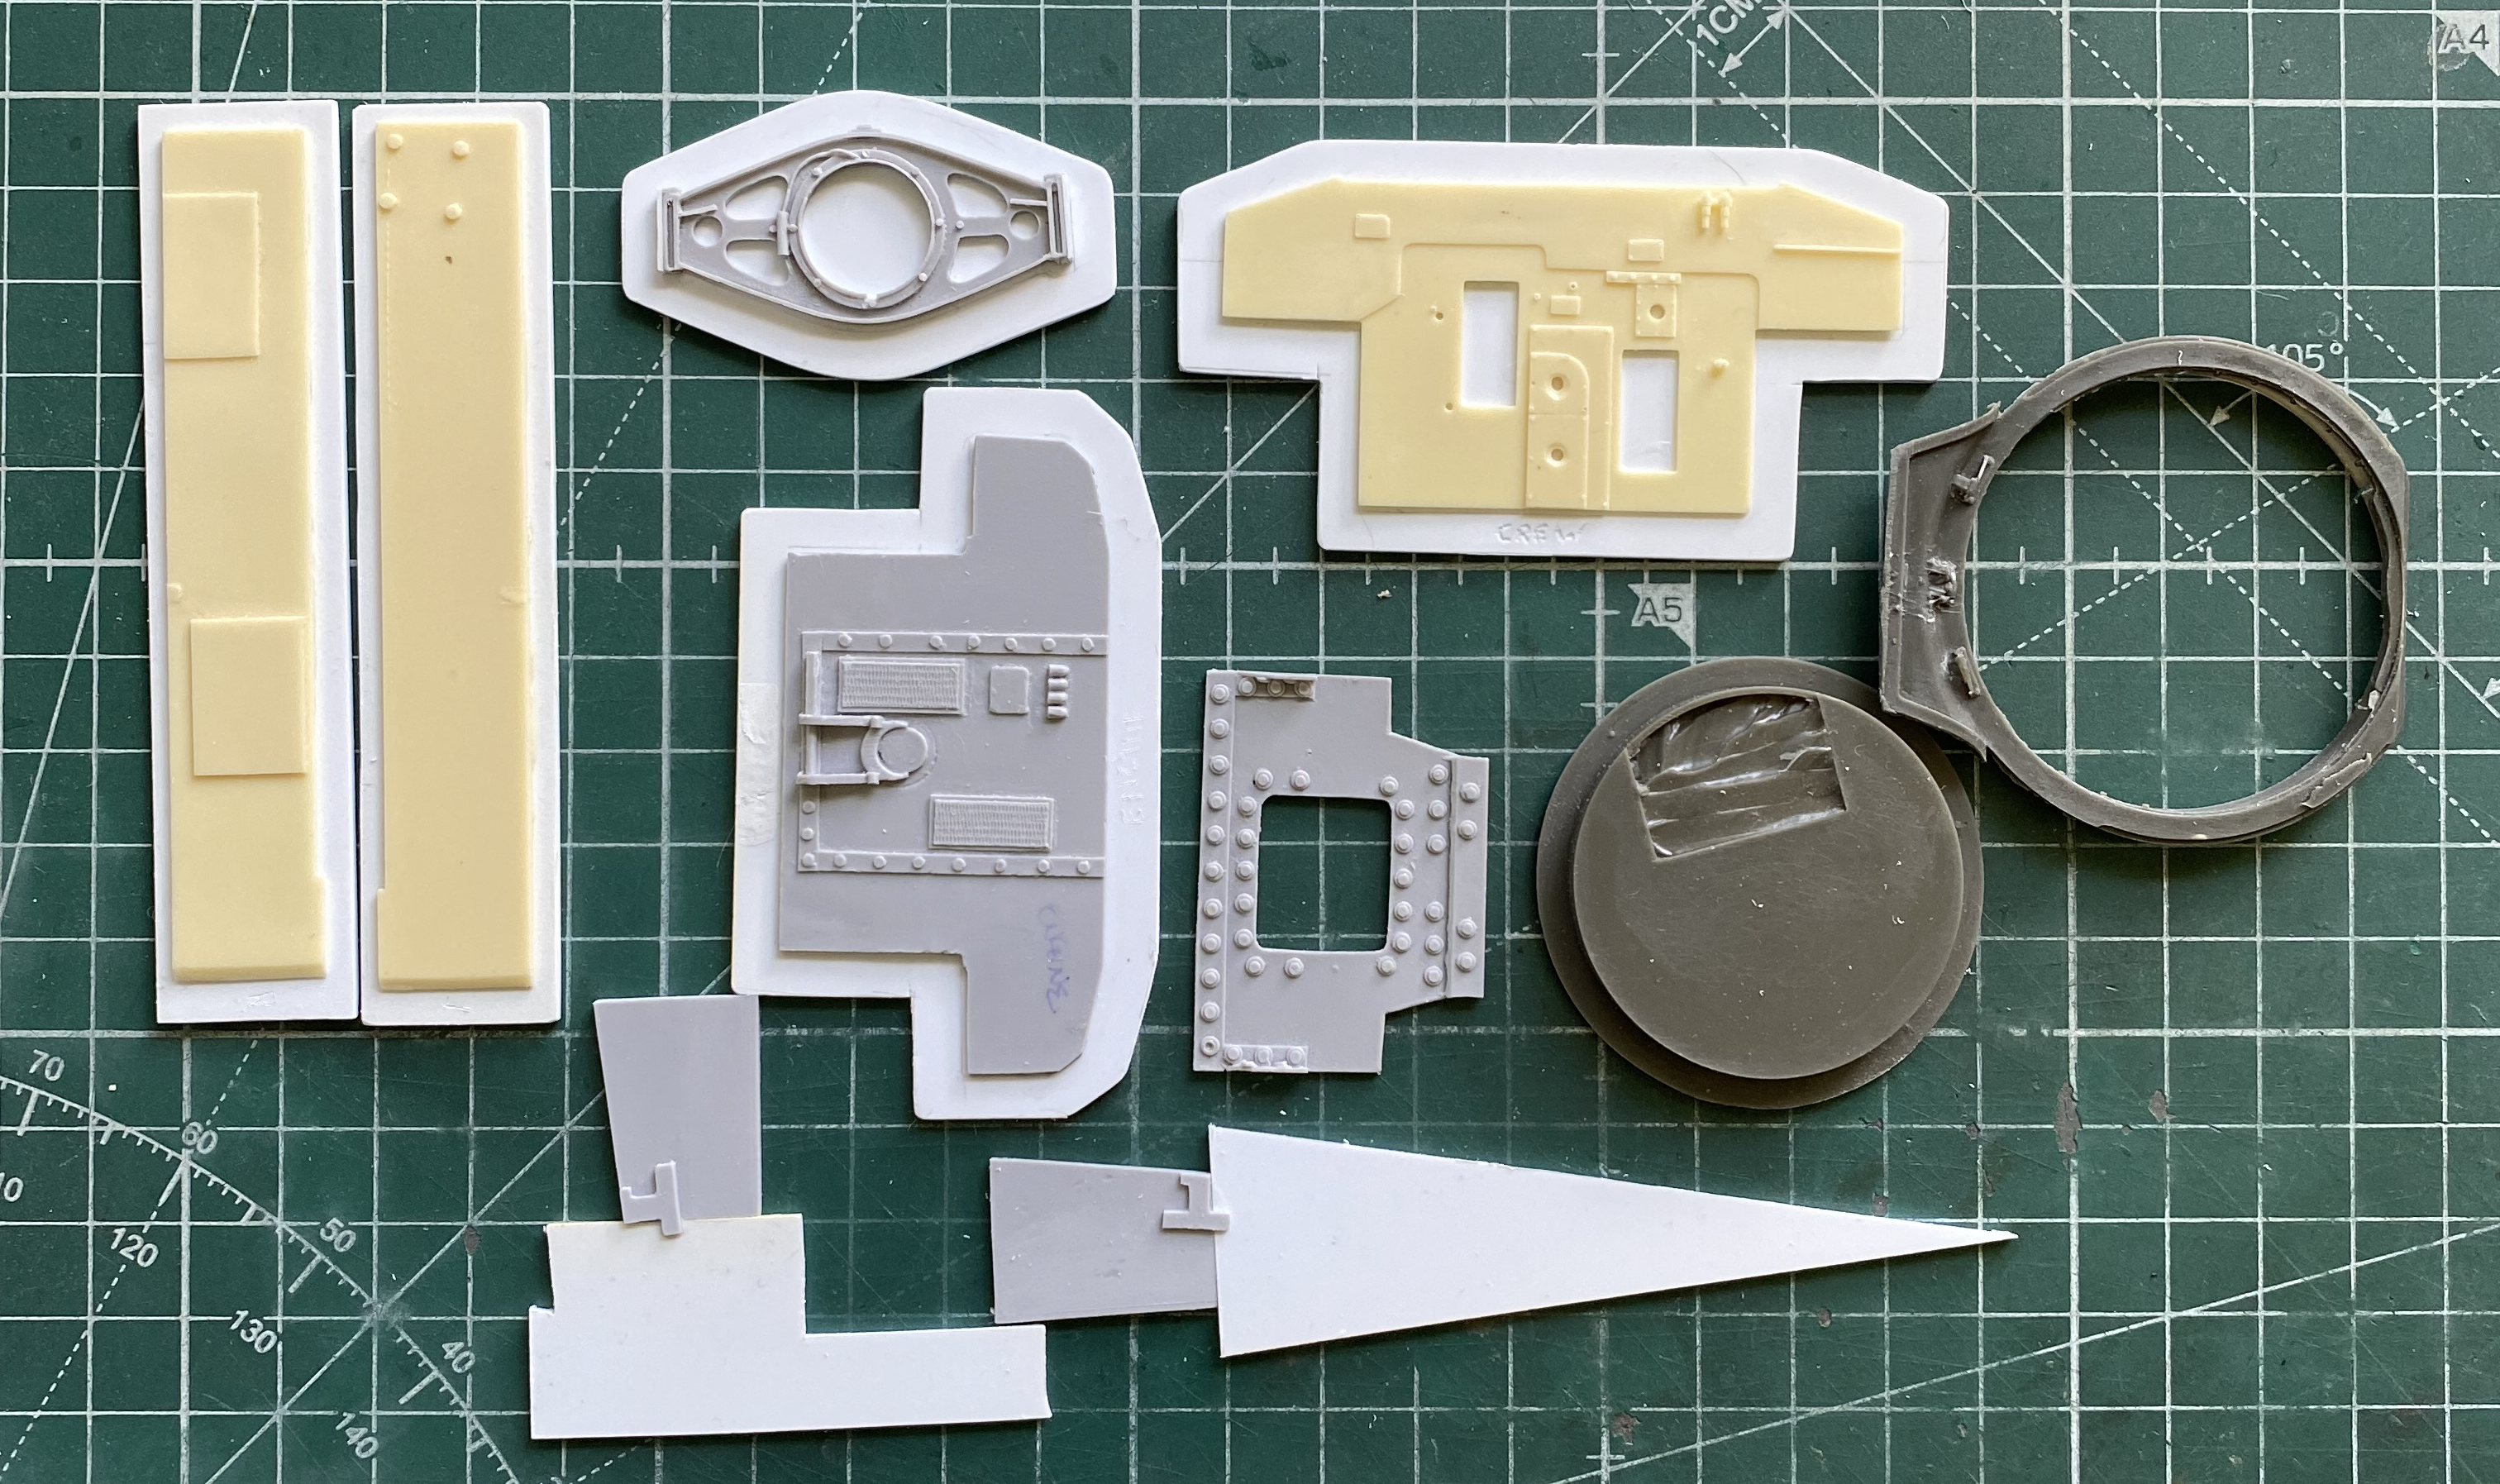
This is the CMK turret AM set I’ll be copying (#3027). I will also be copying their inner hull detail set (#3026)*:

I get my molding/casting supplies from Smooth-On. I use their Mold Max 14NV silicone rubber compound. It’s a fast curing tin-cured (he says like he knows what the aerial intercourse “tin-cured” means) low-viscosity compound that will flow into any crack and crevice and, unless one takes the proper precautions, between those cracks and crevices also (more on that later). Pot life is 40 minutes and cure time is 4 hours. I use Smooth-On’s polyurethane resin, Smooth-Cast 322 Off-White Liquid Plastic (which it really isn’t). Pot life is 10-20 minutes with a cure time of 2-4 hours depending on the mass the the part. (more on that later, too). The rubber compound is mixed with a hardener using a mix ratio of 10% hardener by weight. The resin is a simple A and B arrangement and it’s mixed 50/50 by volume. When the resin cures, it ends up with an off-white color that I’ve found my failing eyes don’t like; it’s hard to see details. To remedy that, I add Castin’ Craft Color Pigment in black. The goal is a medium to light gray (or grey, if you drive on the wrong side of the road as a national thing and are right fond of tea) but due to the consistency of the dye and that it is very concentrated, getting it the same color each time I pour resin thus far eludes my meager skill-set. (I persevere, which means I don’t give a snort what color it ends up so long as it’s not white.)
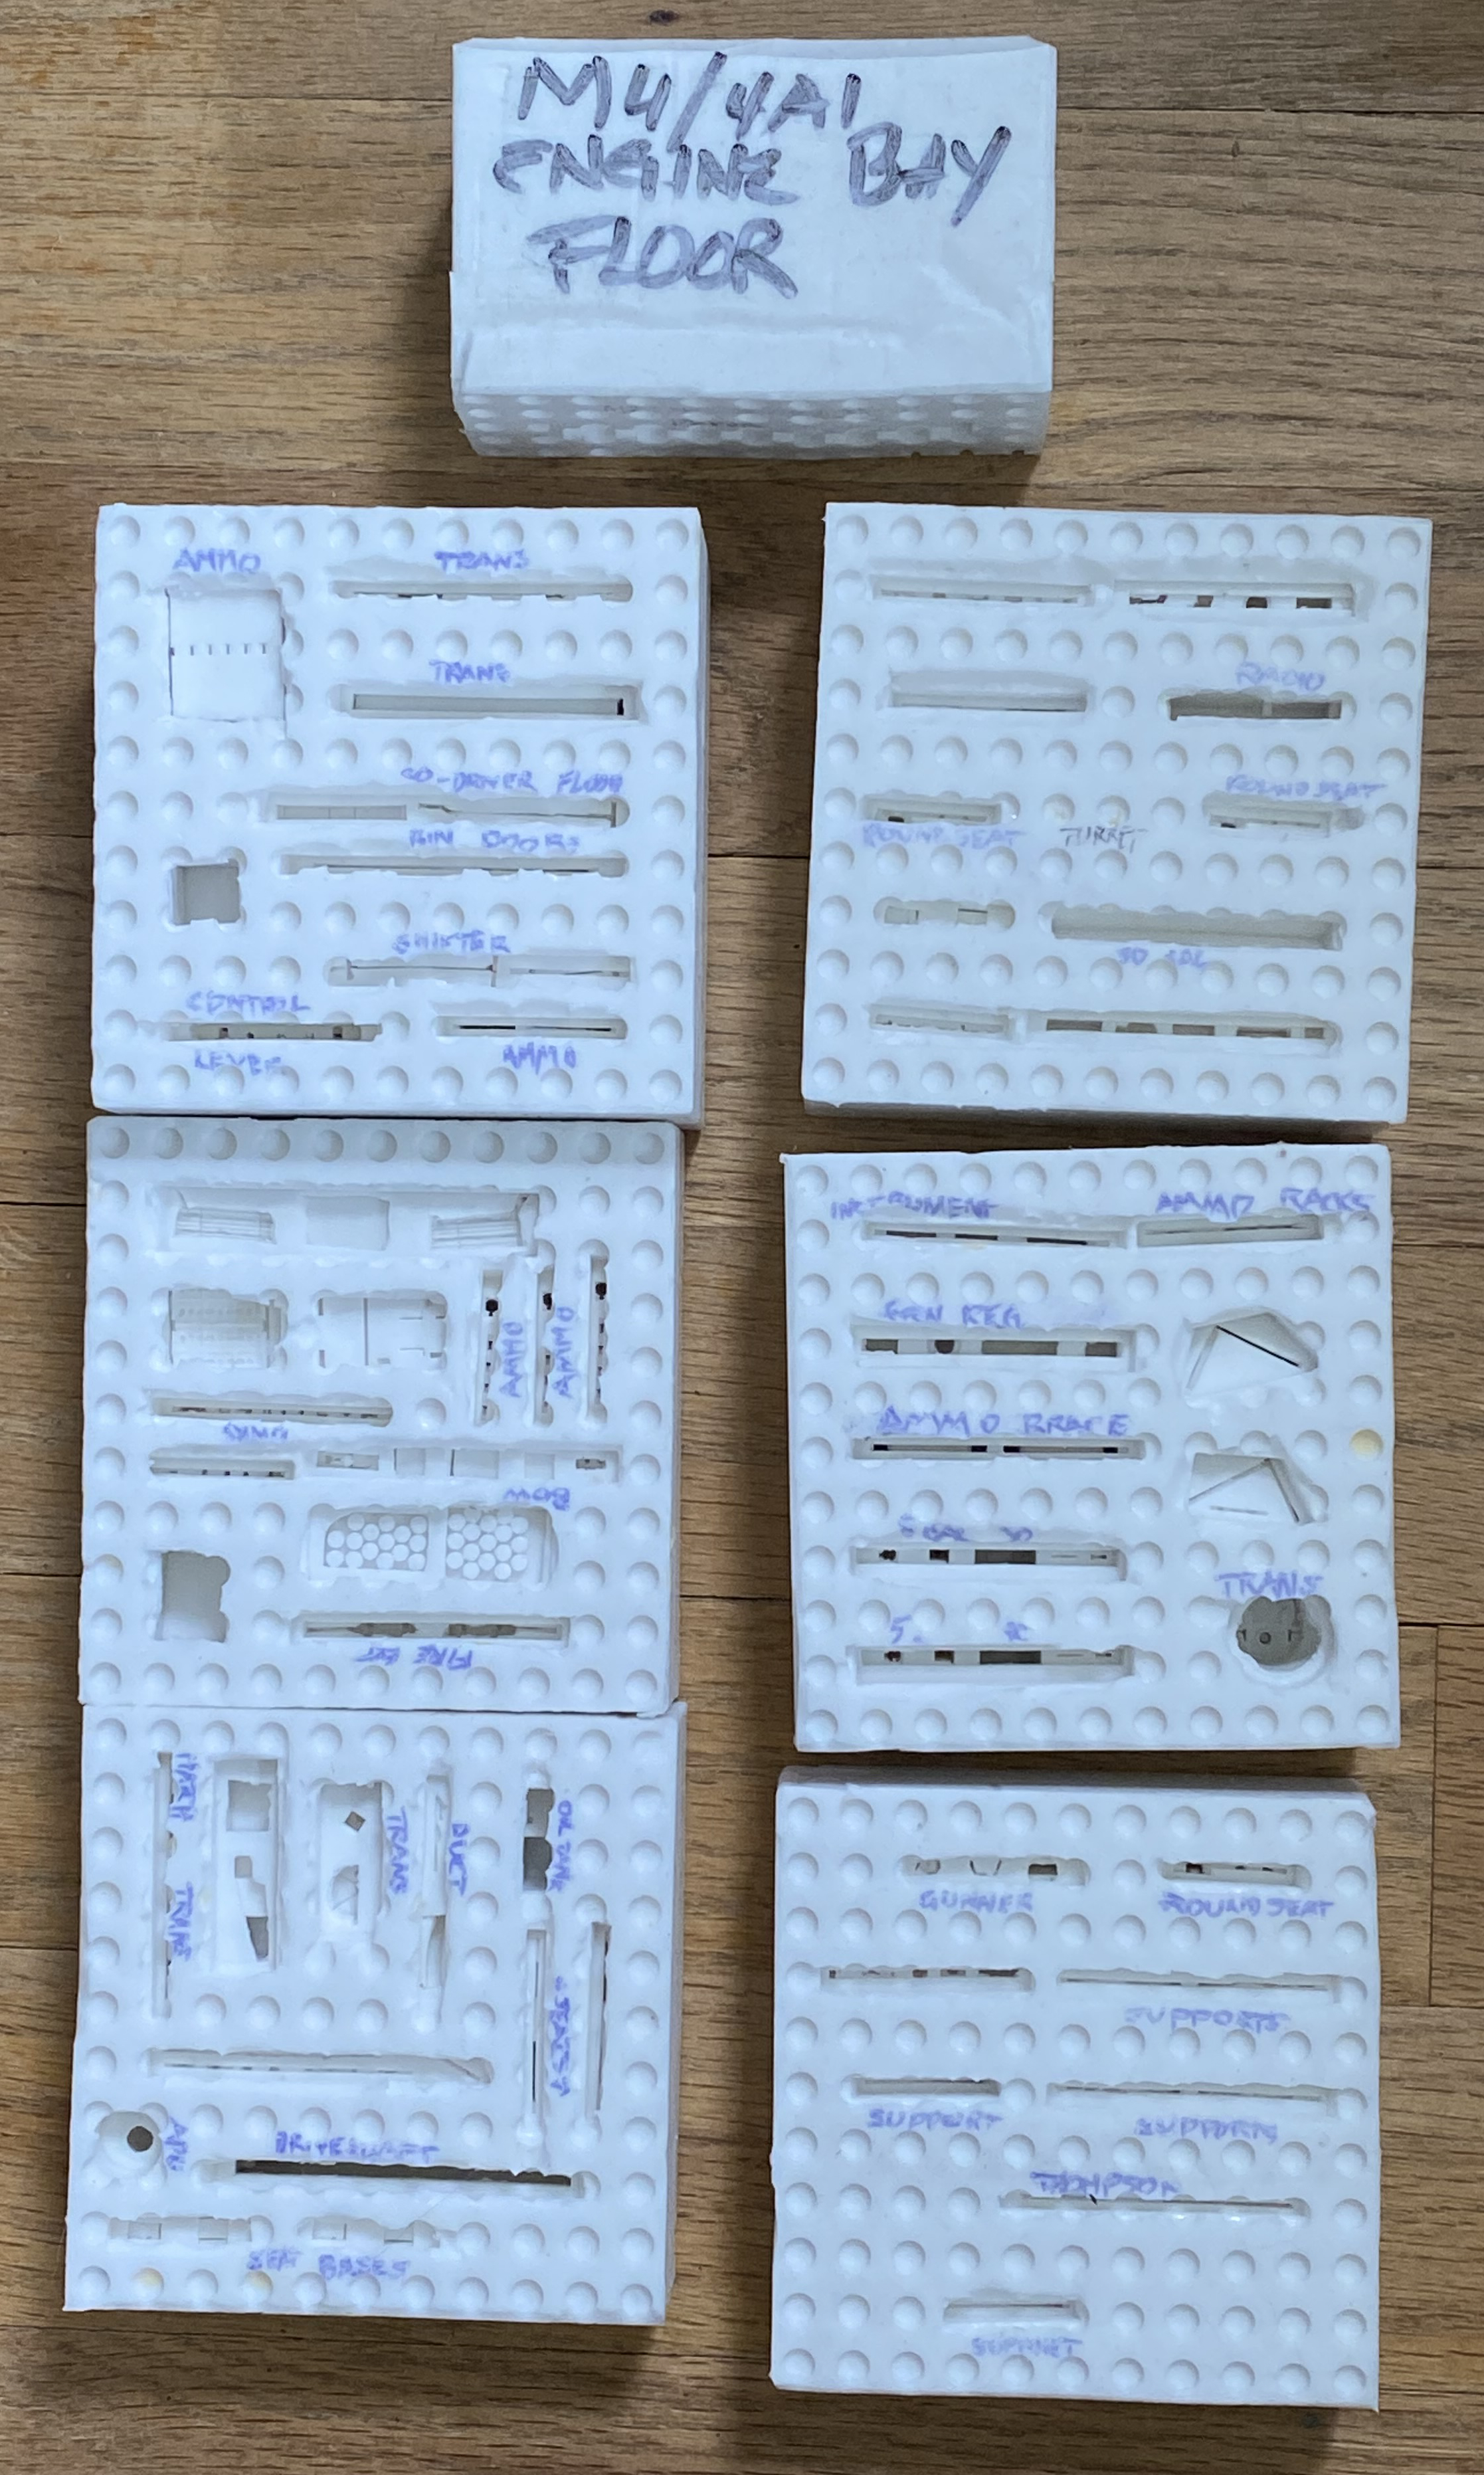
The molding compound isn’t the most expensive thing I’ve tossed shekels at but, being a parsimonious git, I hate wasting money. I want to get as many molds as I can out of the stuff. Because I really cannot use 5 gallons of the stuff before it goes off (yep…it’s got a shelf life), I buy the molding rubber compound in two pound (0.91KGs) lots. I also use modified Lego blocks and base to construct my mold boxes, so I have a mock-up that lets me, well, mock up how the mold will be laid out. To maximize molds with the minimum amount of rubber, I molded turret parts and crew compartment parts at the same time (and a few years from now when it comes time to make more of these parts I’m going to have SO much fun figuring out where what is…clever of me, eh?):


With a game plan in place, it was time to build the mold boxes. I’d made brief mention of the fact that I use modified Lego blocks. I have to for one major reason: The molding rubber has to be degassed (you do know that there’s a glossary on the site for those WTF words, right?). Air, being a gas under what we egocentrically assume to be “normal” circumstances, gets into everything. Degassing entails exposing the item we want to remove air from to vacuum (really low air pressure, not that thing that you scare the cat with). Lego blocks are neither air tight nor water (or in this case, rubber) tight. To keep from drawing air through the mold (which is why I’m degassing this stuff…to get rid of the air) where I don’t want it, I have drilled holes in what I want to be the outside of the box (and if you go this route, look inside each block because they aren’t all built identically…sometimes multiple holes have to be drilled so that no air is drawn up through the mold):

If I don’t attach the parts I’m copying to the base-plate they will float (which you will see evidence of shortly). I use white glue (PVA, if I’m showing off) to temporarily attach parts to the base-plate. And because the rubber will seep through any gap, no matter how small, and continue to seep through said gaps until it hardens (4 hours, y’know), it’s possible to have all the rubber seep out of the mold. Two pounds (0.91KGs) of the rubber costs me about $75 dollars (forget currency conversions, you’re fortunate enough that I convert Imperial size to Metric, so don’t get pushy) and wasting any of it doth vex me most puissantly. Look at the photo above. You will see gaps between the blocks. I line the inside of all my Lego mold boxes with “scotch tape” to block the rubber from seeping out. However, I also make a gasket of PVA (or white glue if I don’t care what you think) around the outer edges of all the blocks that come in contact with the base plate to form a seal. I have learned to let this seemingly pour-ready mold box sit overnight so that the glue (whatever I call it for whatever reason) will set up as well as it can. Here is a Lego mold box all sealed and ready:

I use this scale to get pretty accurate weight measurements:

I don’t have any photos of the actual process of pouring rubber, adding hardener, because I don’t have all the hands I would need to be able to mix and operate a camera (or phone…welcome to the 21st Century). The rubber is poured in first. According to the settings on the above photo, I’m going to use 200g of rubber. That means I have to add 10% of hardener due to the 10/1 mix ratio. The rubber goes in, then the scale is adjusted so, using the above photo as the example, I then add 20g of hardener. As soon as I start adding the hardener I start the timer and then start mixing. I use a paint scraper and mix thoroughly, and that adds a lot of bubbles to the mixture. Bubbles are Bad Things and they seem to always congregate where important details are (because aren’t all details “important”?). To rid the mixture of them the mixing container is put into a vacuum chamber for 5 minutes to remove the really big bubbles:
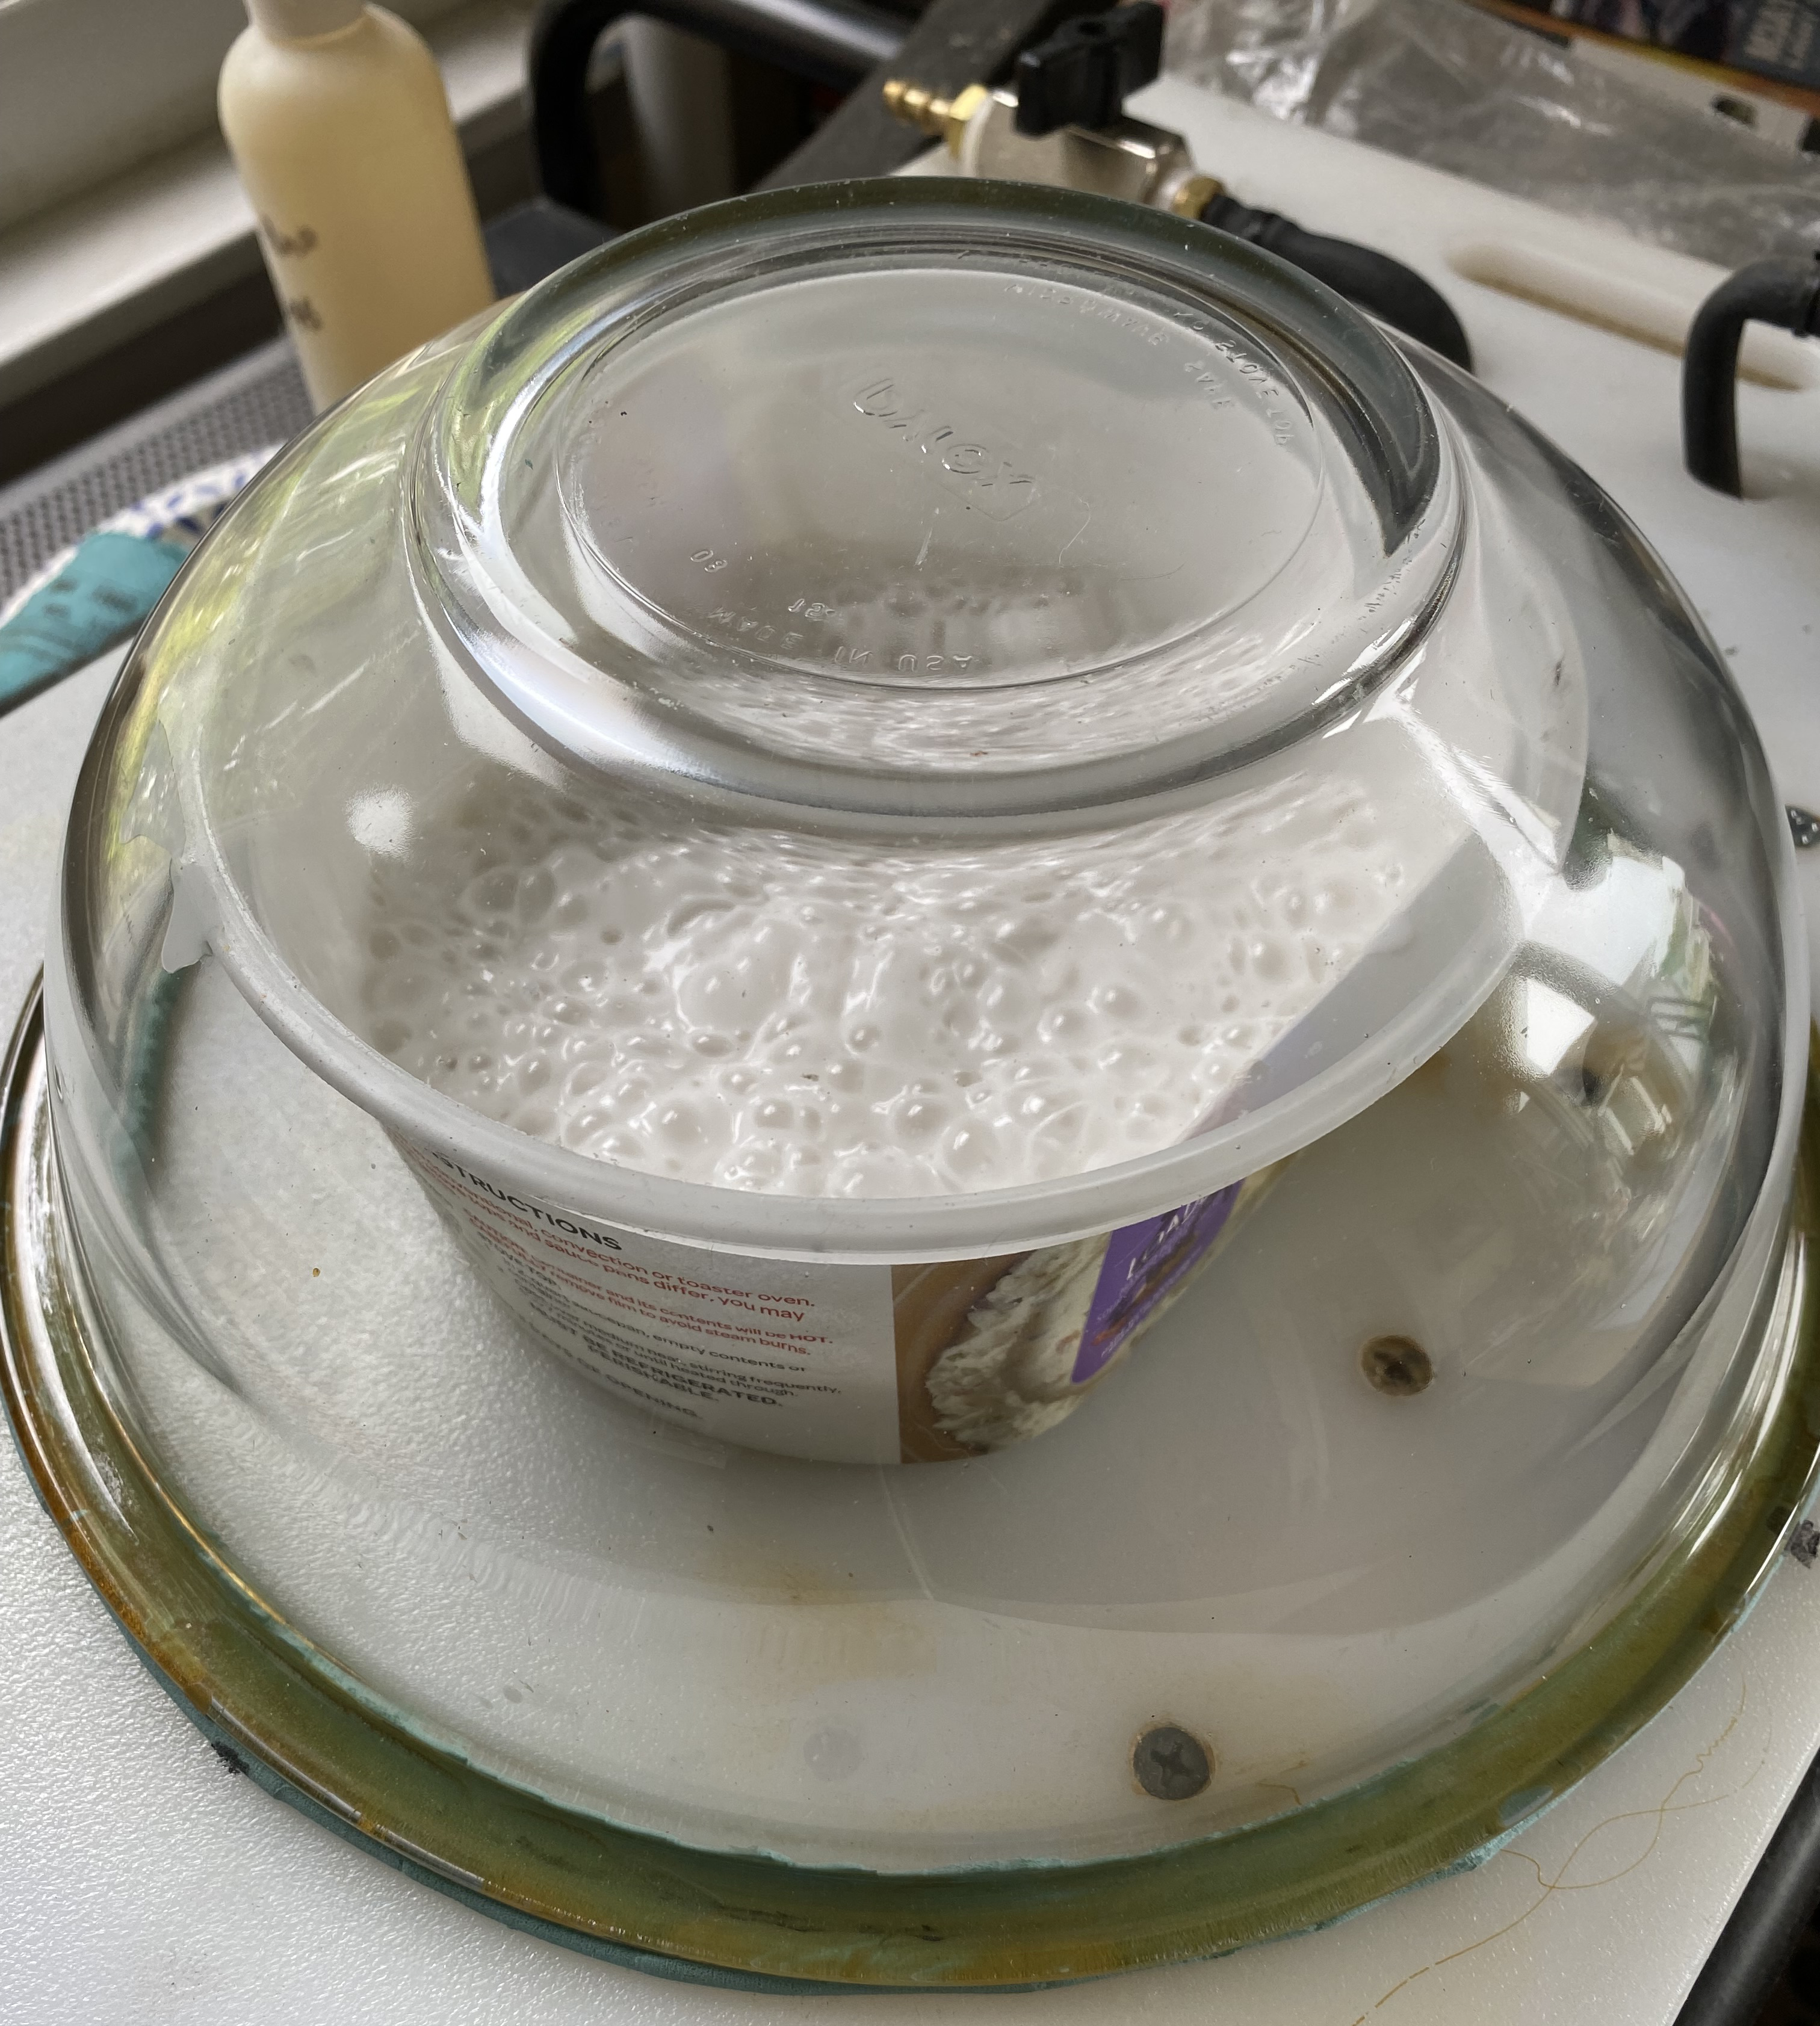
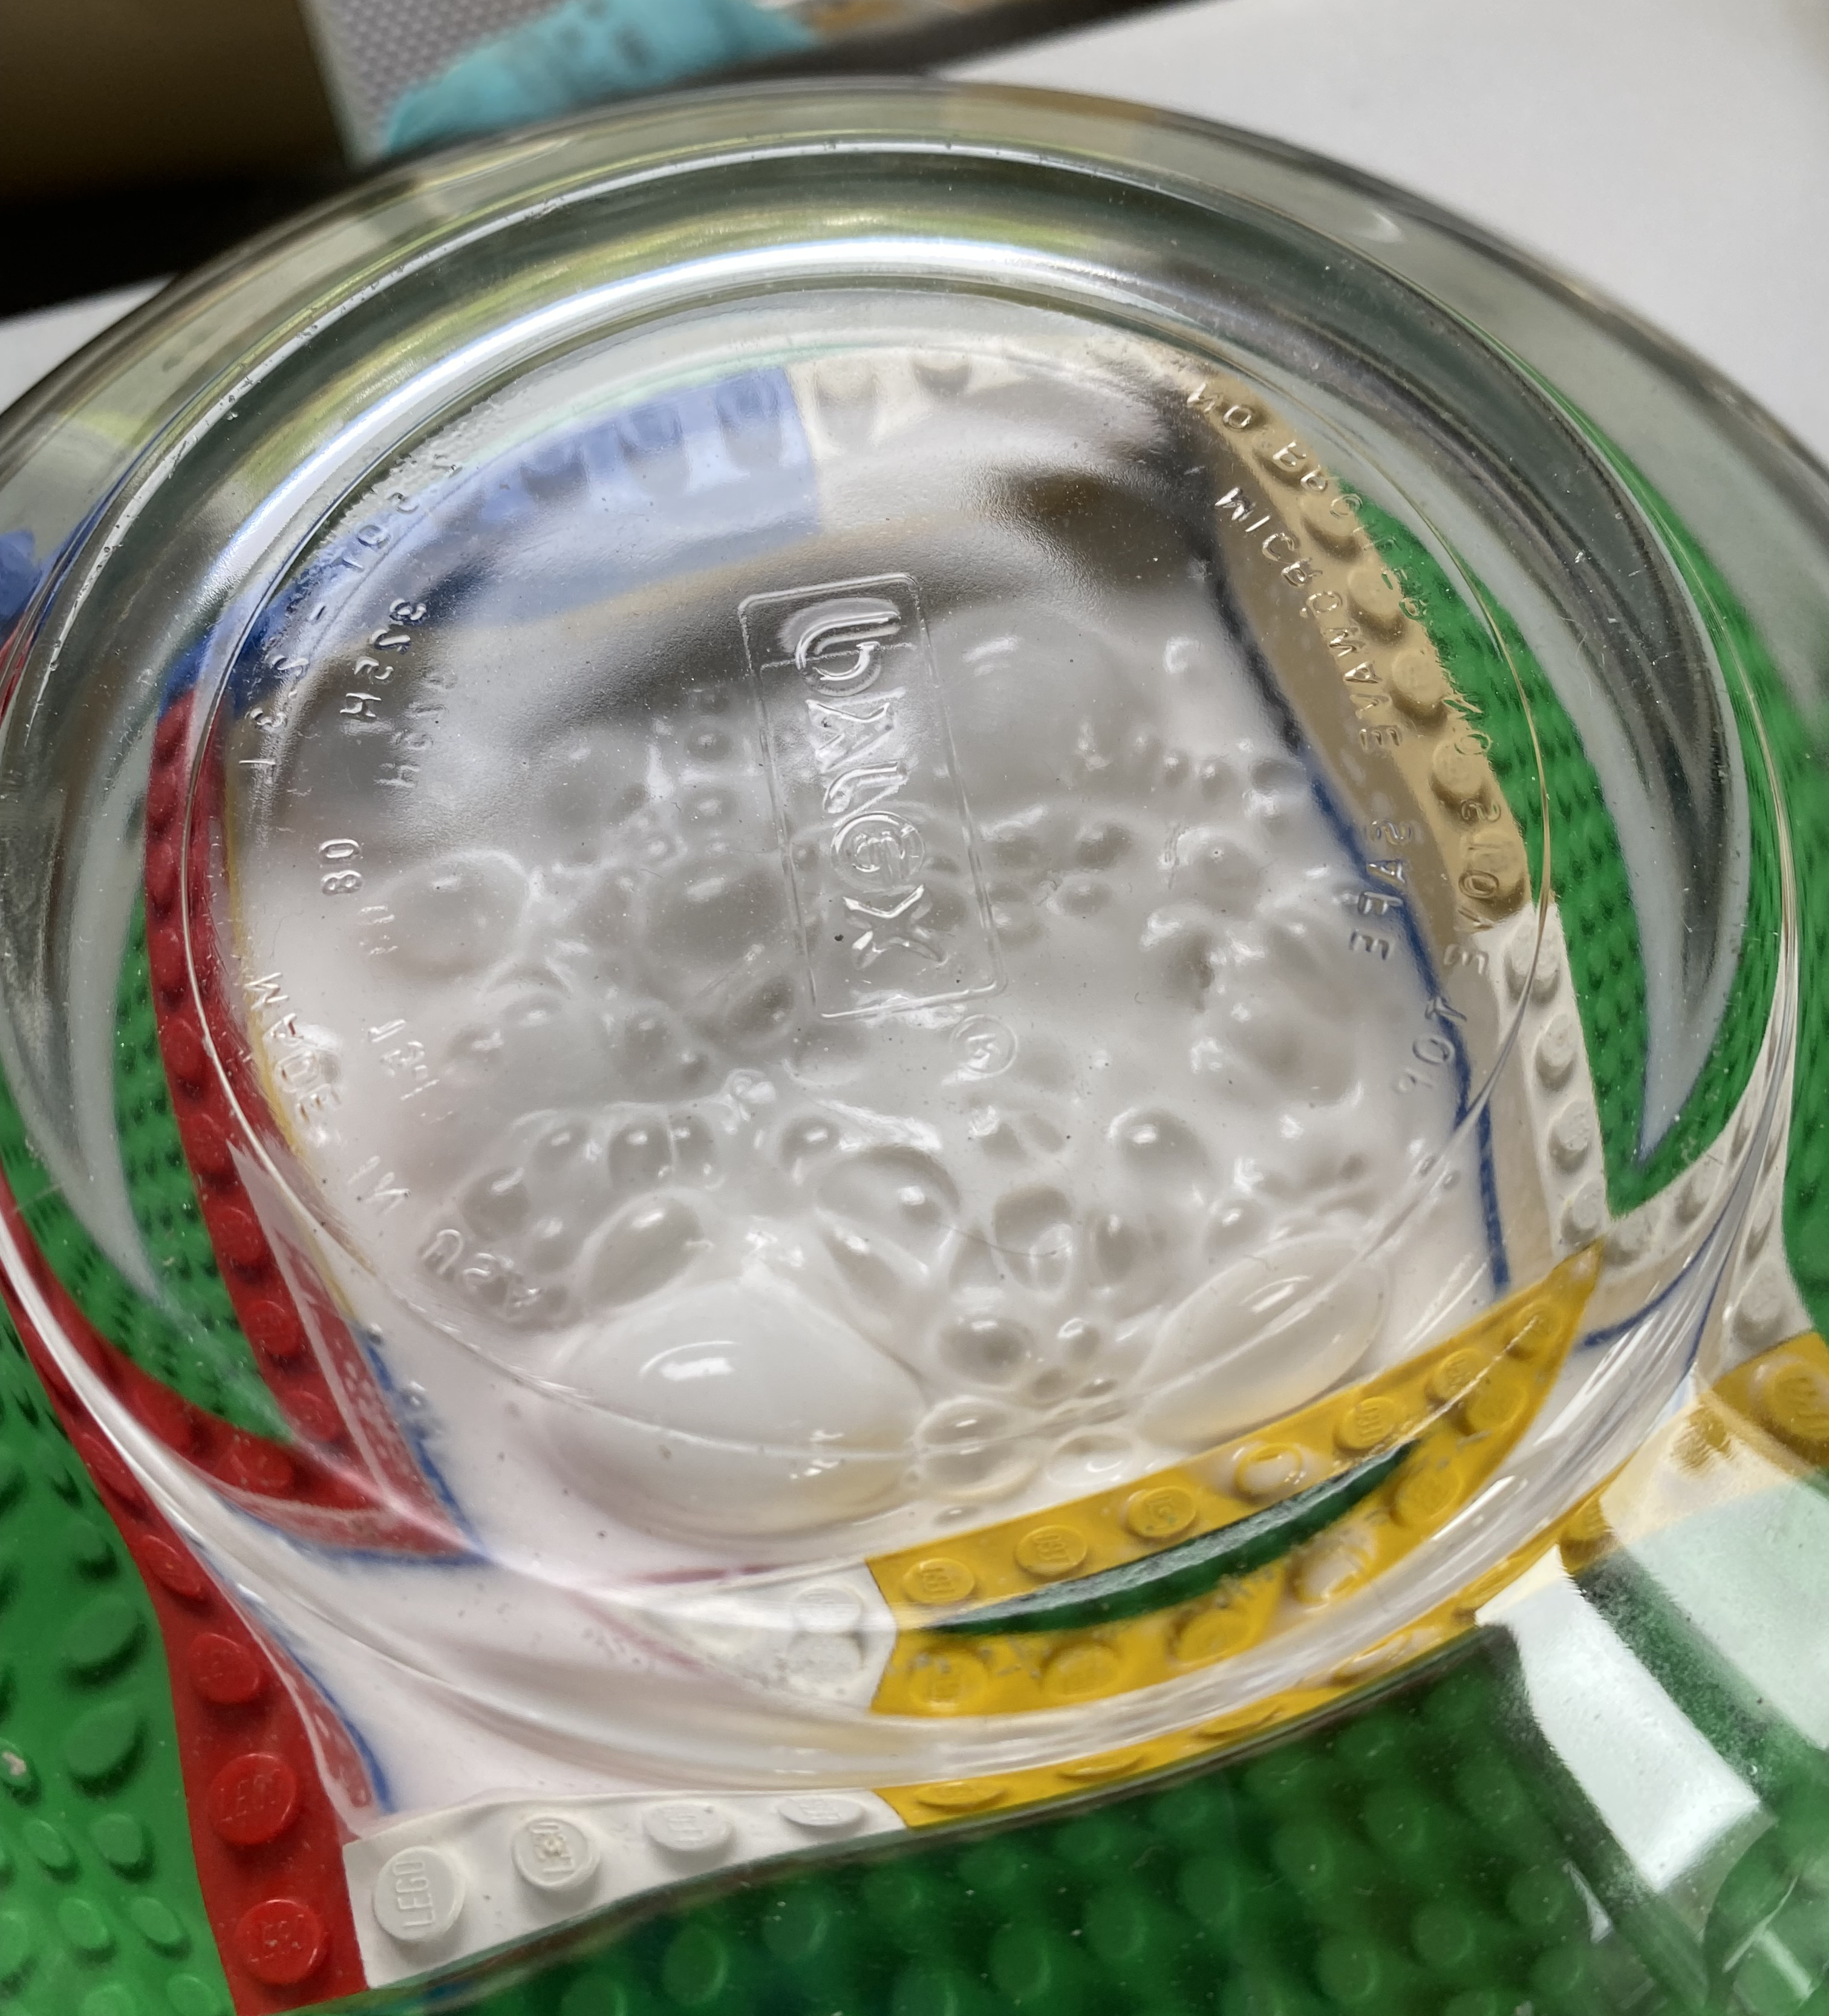
Four minutes at 29″ of vacuum gets this result:

Which results in this once the vacuum is released:

Mixing takes about 2-3 minutes and the first degassing lasts four minutes. With a 20 minute pot life, I still have about 13 minutes to pour the rubber into the mold and degass it:
I prefer to remove the mold box from the vacuum chamber 5 minutes before the pot life limit. This allows the rubber to settle in around the parts I’m making a mold of.
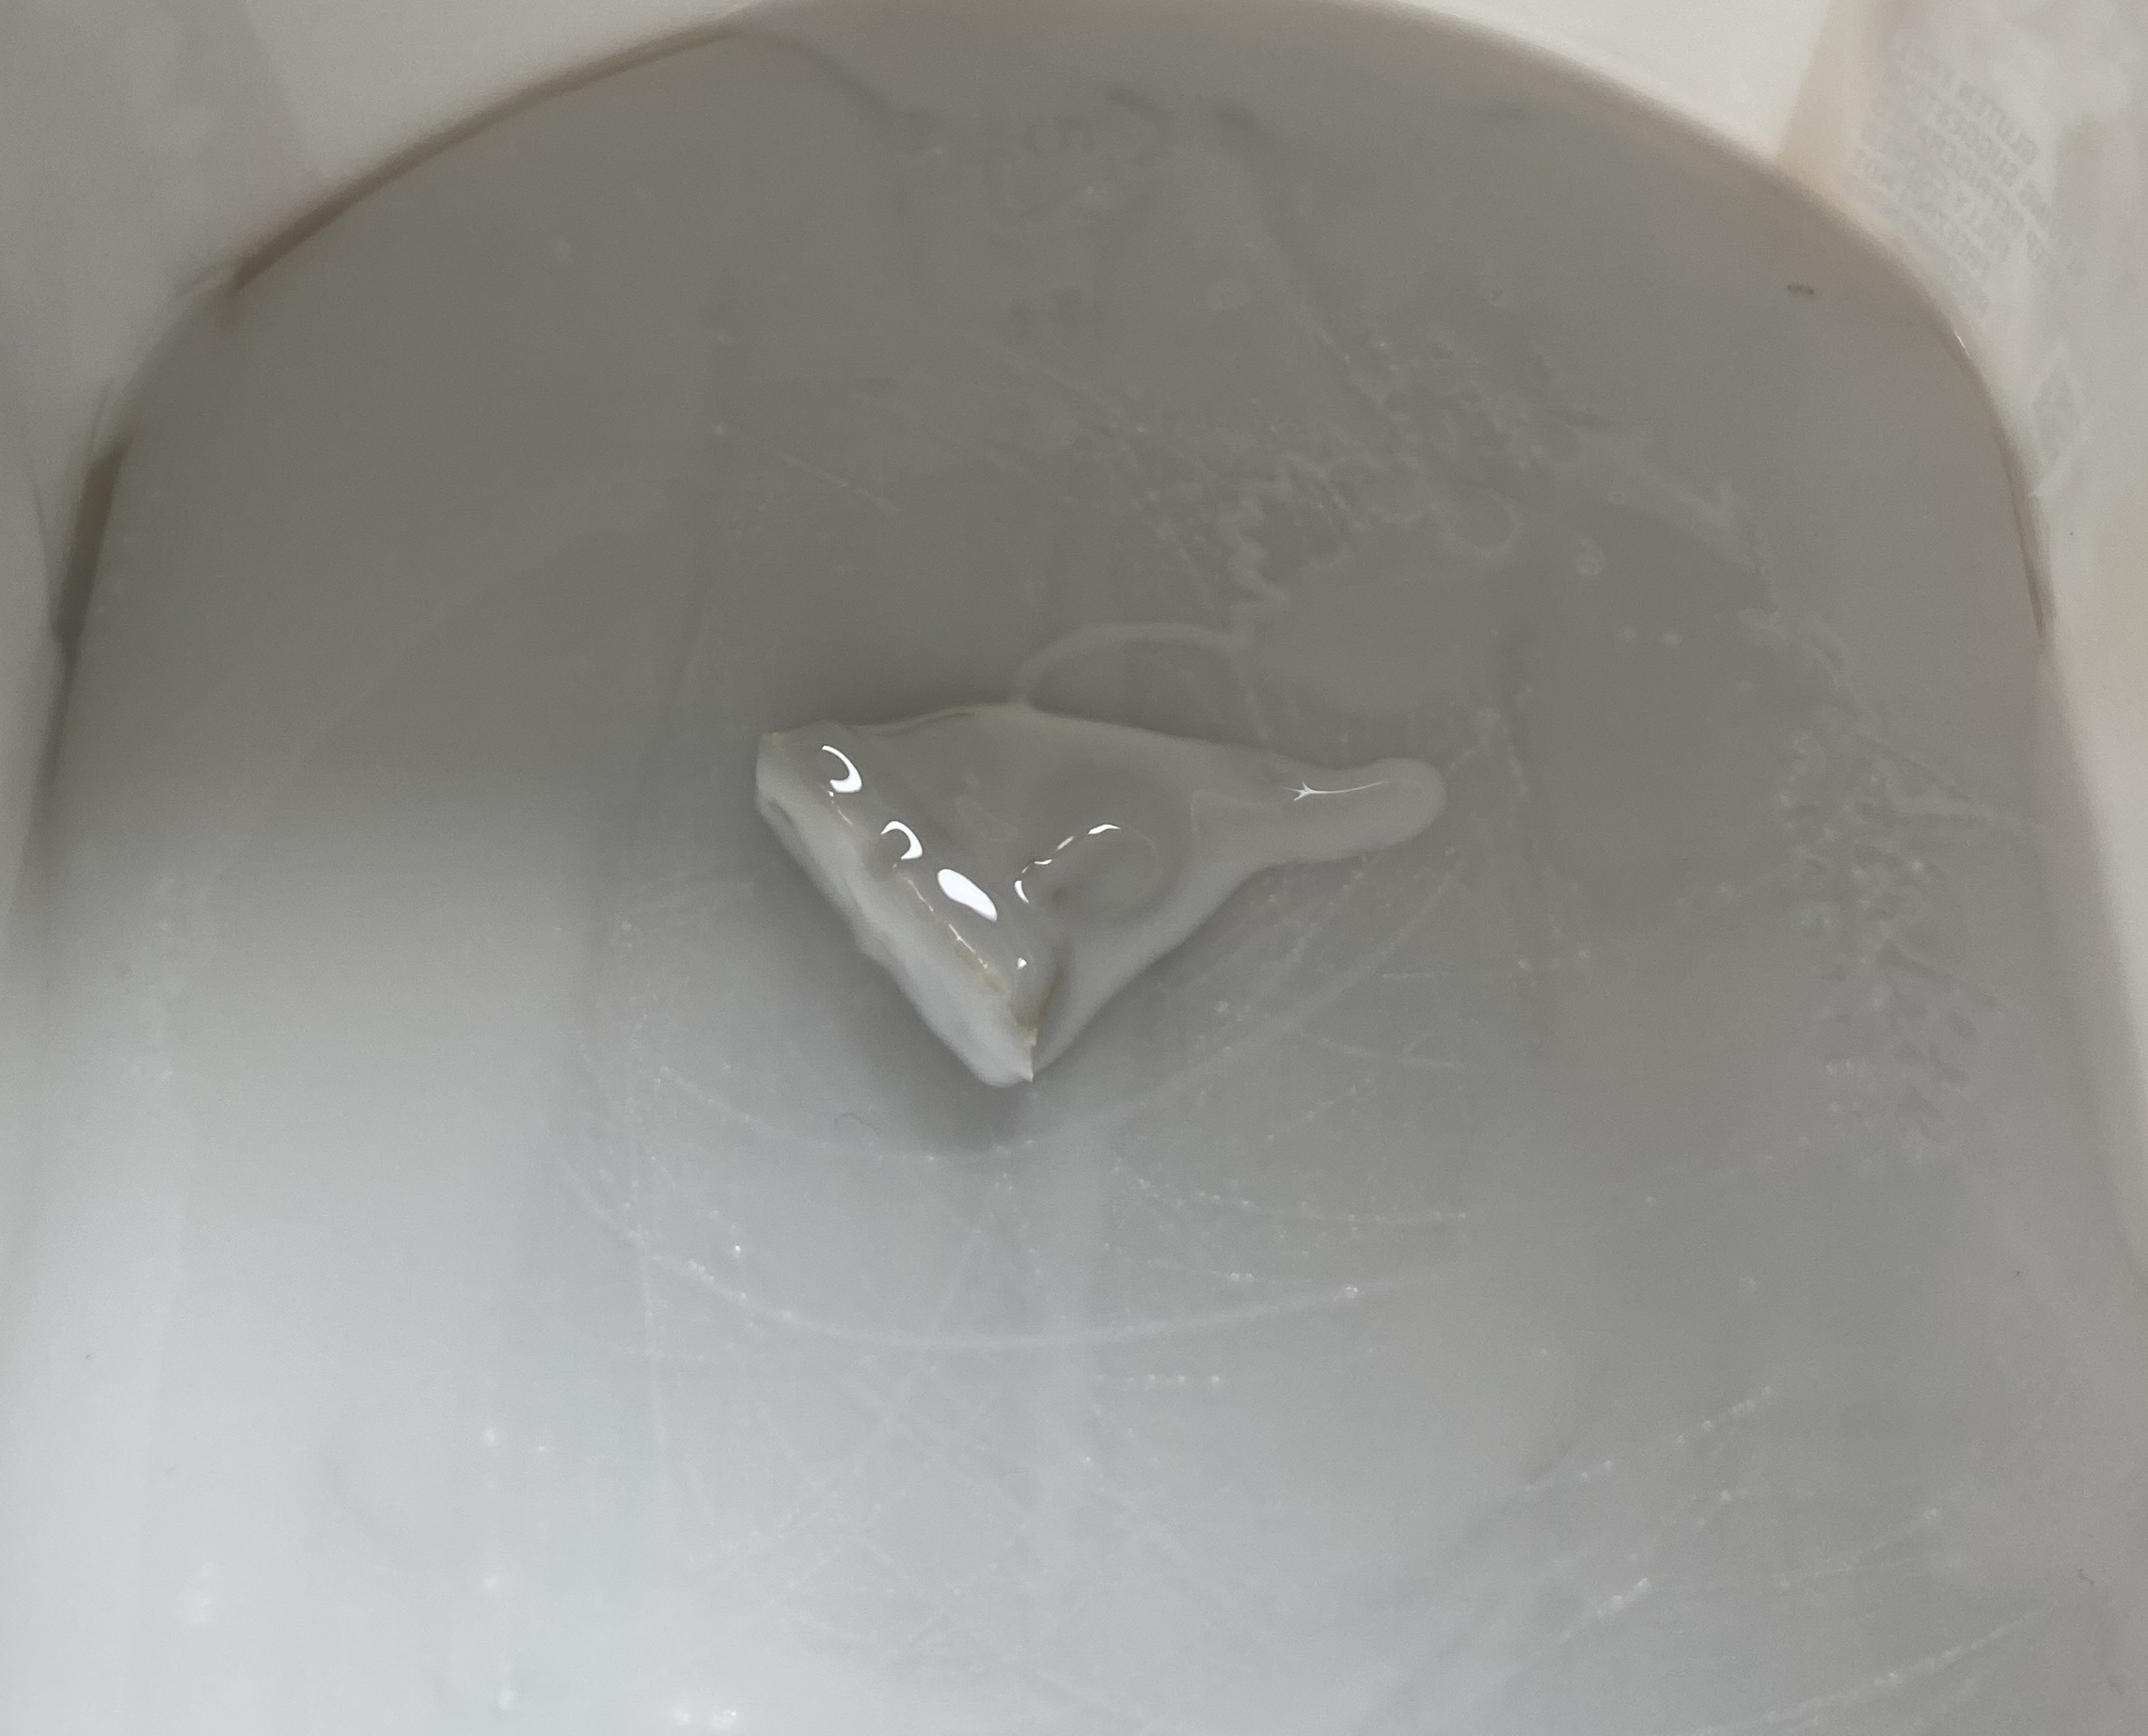
I had mentioned earlier that if a resin part being copied comes loose from the platform it will float to the top of the rubber. Guess what happened:

Should that happen, just use tweezers to pull the dislodged part out of the rubber and set it on something to allow the rubber to cure. Once it has you can cut the rubber away and try again:
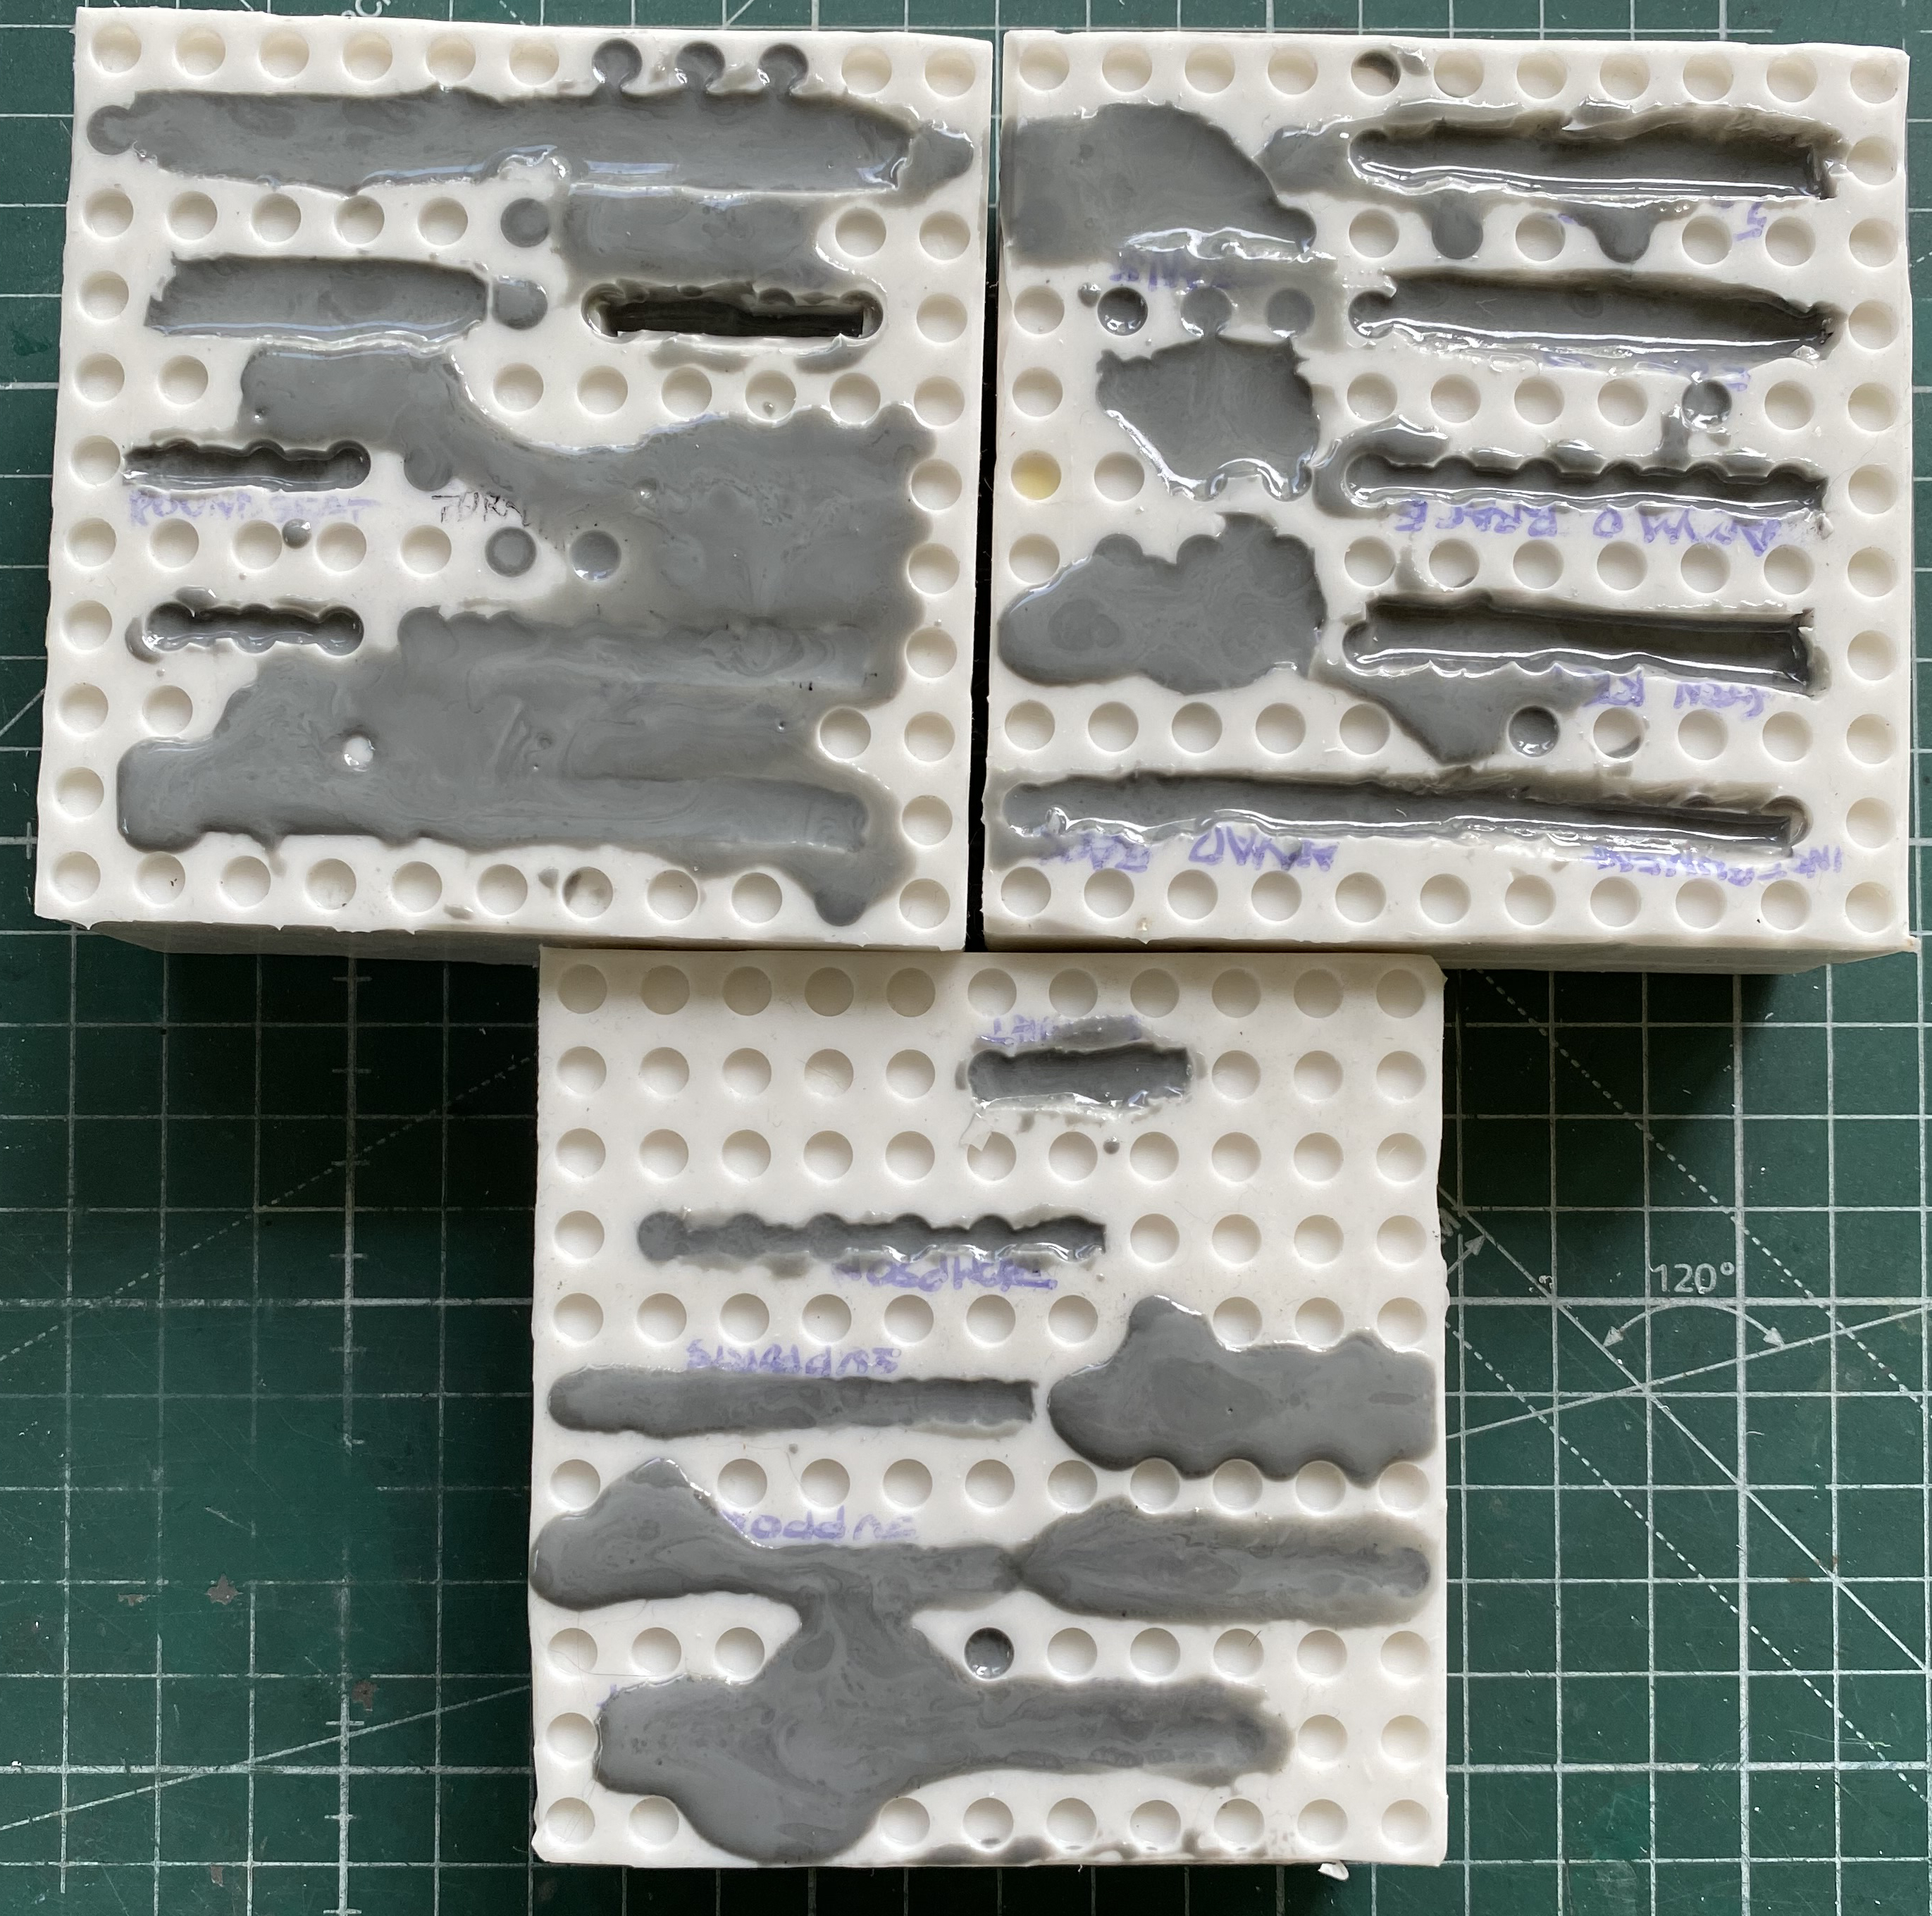
Four hours later the mold box is pried away from the base and then from the top down I start removing the blocks until I have this:
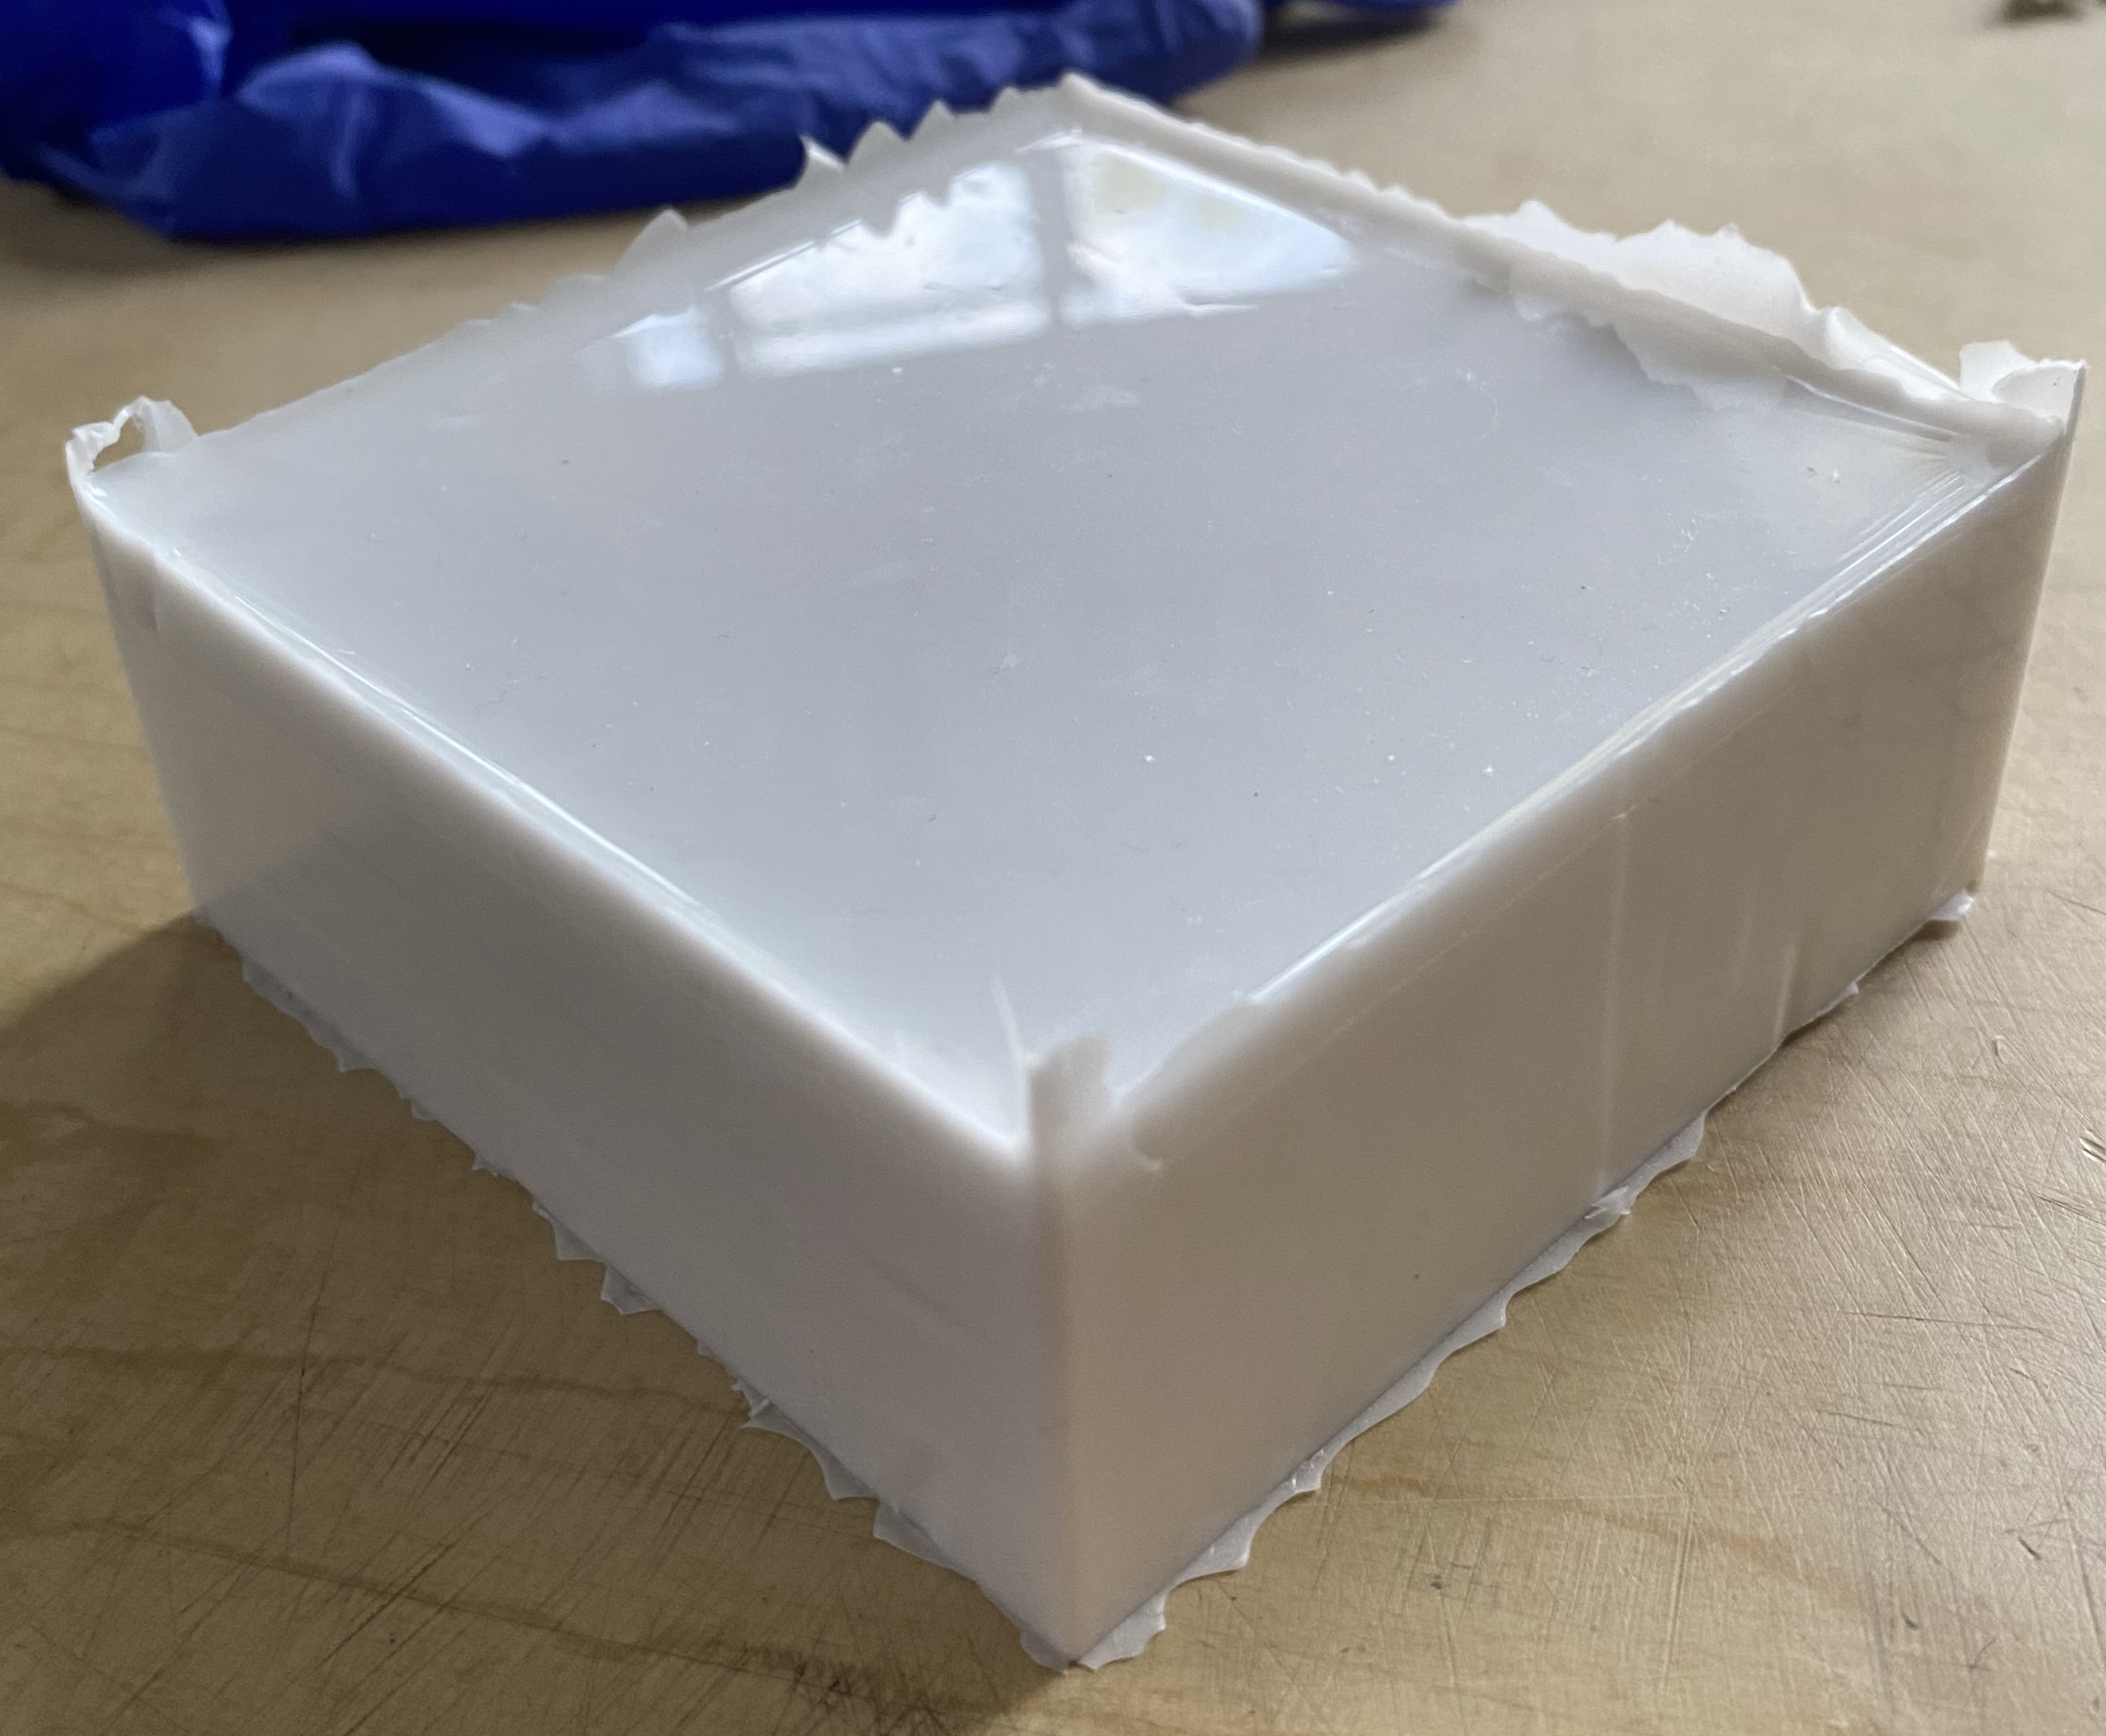

I clean up the mold by using scissors to trim each of the 12 edges. Once that’s done, I start cutting the parts in the rubber block out. Most times I can just cut around the base to extricate the part:


And there it is.
Being observant, of course you look at that and wonder, “How the hell will I remember what this mold will create?” Glad you asked. Mark it with a ballpoint pen (you will discover as I did that silicone rubber doesn’t like being written on, the ink never dries, and the merest rub across the surface eradicates whatever was written on it. Before the mold is filled with resin, use your phone to take a picture of it so that you can redo the labels later after all the labels you started with are gone.):
The molds show so far are what I call (because I don’t really know what They call them) “encapsulating molds.” The part molded and copied end up completely encapsulated by the rubber. Sometimes one will have to cut a mold open to retrieve the encapsulated part. Don’t cut the mold completely! If you do, it becomes a stone bitch to align the two parts and the slippery resin to get something useful. Won’t work. I cut only as much of the mold as necessary to extract the part, leaving an uncut “hinge”. Most times that’s just down one side of the area where the part is. Sometimes it requires both sides to be cut. The cut sections will snuggle up to each other quite tightly if the mold is stored correctly. Silicone rubber has a memory. If the mold is stored under stress, as in, not utterly flat, and left that way, you will find that that is how the mold stays…and that means the part you’re trying to copy is deformed as well. Since the vacuum deforms the Lego platform slightly during degassing, I store my molds with the smooth top down. That works.
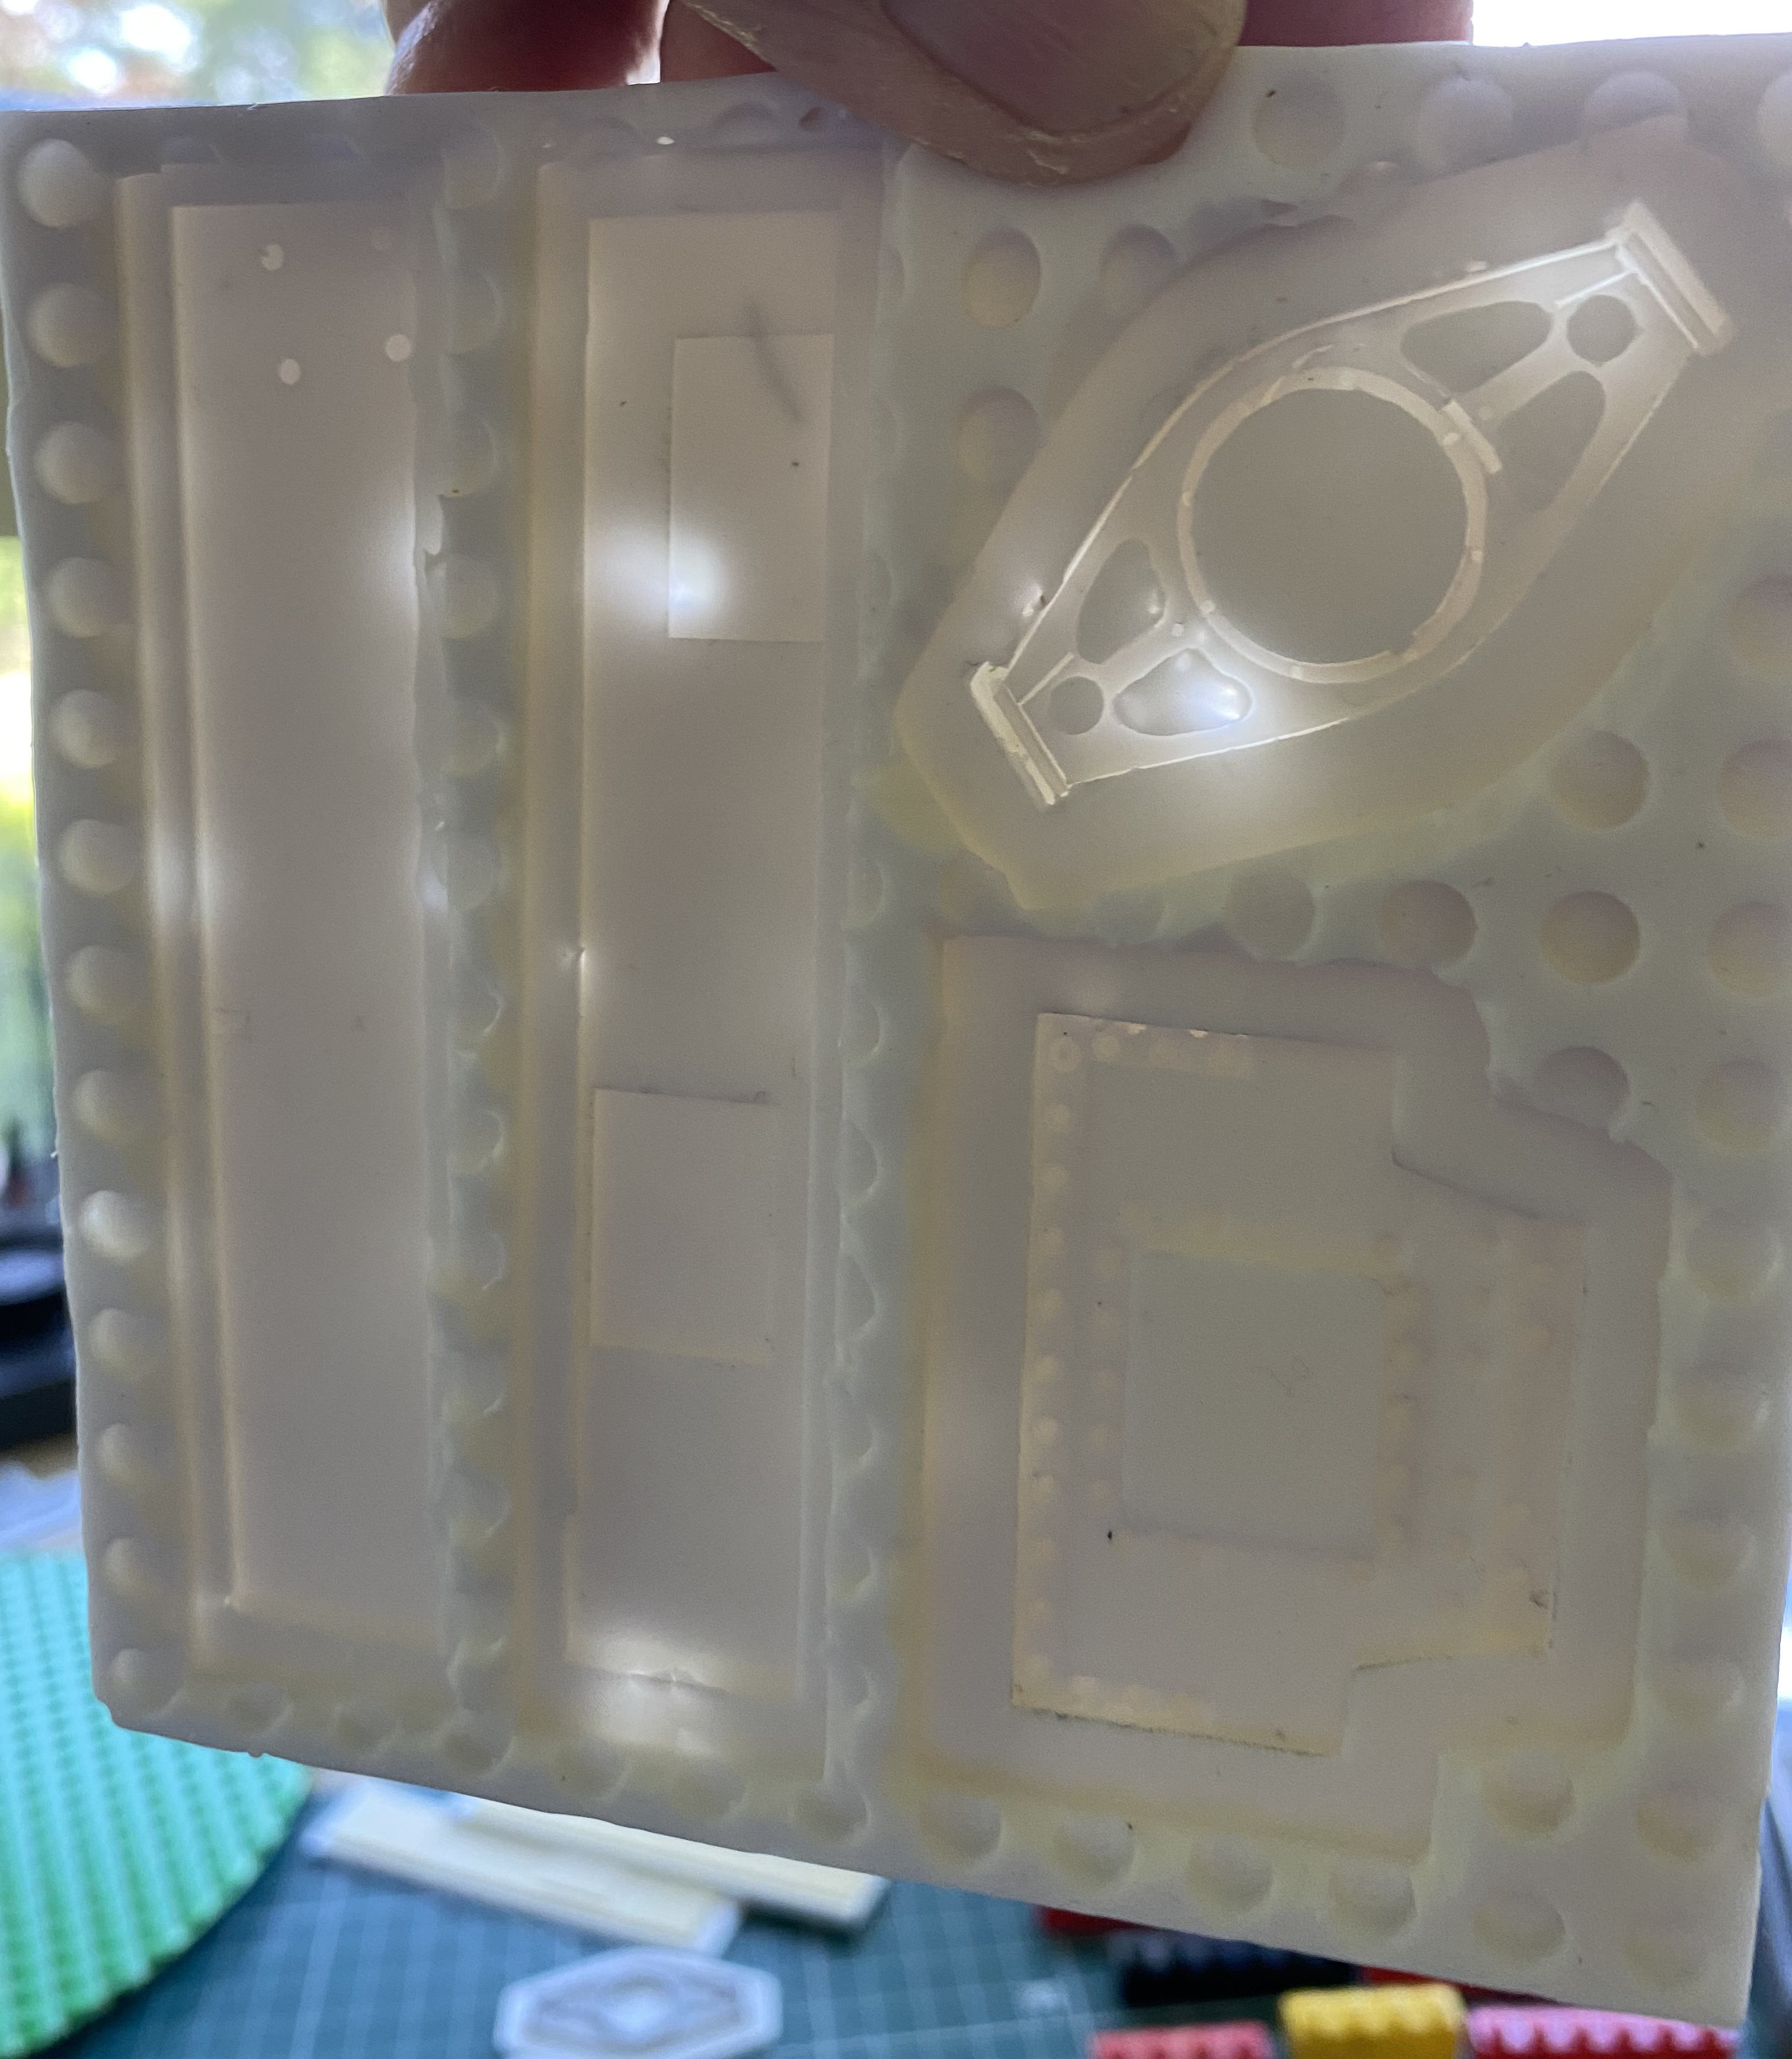
Another type of mold is an open-back mold, which, oddly enough, is exactly what the name implies.
These parts do not require an encapsulating mold because I only need the details from one side:
You will see that some of these parts have been attached to a white plastic back (the parts that haven’t been attached to a back will be prior to molding). This makes removing the pouring block so much easier. (Later you will see the mistake I made with the resin pour.) The gray parts at the bottom of the photo have oddly shaped plastic attached to them. The reason for that is because though I don’t exactly know how long they have to be to fit, I do know that they are too short as is. Before molding they were trimmed.)
Making the mold box and attaching the parts to the platform are all done in the same manner that an encapsulated mold was done:


Rubber compound was mixed, degassed, and poured likewise:


A note about degassing.
If you will need to degass something to make a mold of it, make sure that thing is solid. It matters less what the thing being molded is made of (as long as it’s not super-porous like a marshmallow is), but it certainly matters if there are air pockets inside it. Guess what happens if there are air pockets inside it and it’s then exposed to vacuum.
An explosion (okay, technically it’s an IMplosion but if you can afford the camera that can show the difference, can I borrow a lot of money from you?). Possibly a violent explosion. (Hmm…is there ever a delicate explosion?) (Okay, okay…orgasms…but that topic is for a different website.)
Be certain your master (the thing you’re molding…again, a different website for a different definition of “master”) is solid. No voids.
With all molds made, it was time to mix the resin and fill them.
Resin is a different beast than rubber. Rubber molds require degassing (regardless of what the manufacturer will sometimes state to the contrary). If the rubber compound generates heat (if I’m being fancy I’ll call that property “exothermic”), it’s so little that I have never noticed. Resin is a different beast! It is obviously exothermic. I had an “interesting” experience the first time I mixed resin. The result looked more like a medium to support bubbles and nothing like something that wasn’t supposed to have any bubbles. So I blithely degassed it.
Well.
Being exposed to lower air pressure really allowed the exothermic compound to create a bazillion bubbles and then the short pot life froze that frothy mixture solid. Fascinating texture and if I ever need/want to create that texture I surely know the process now! But since I do not, I went to the Interwebs and googled “resin casting.” That’s how I learned how different a beast resin really is.
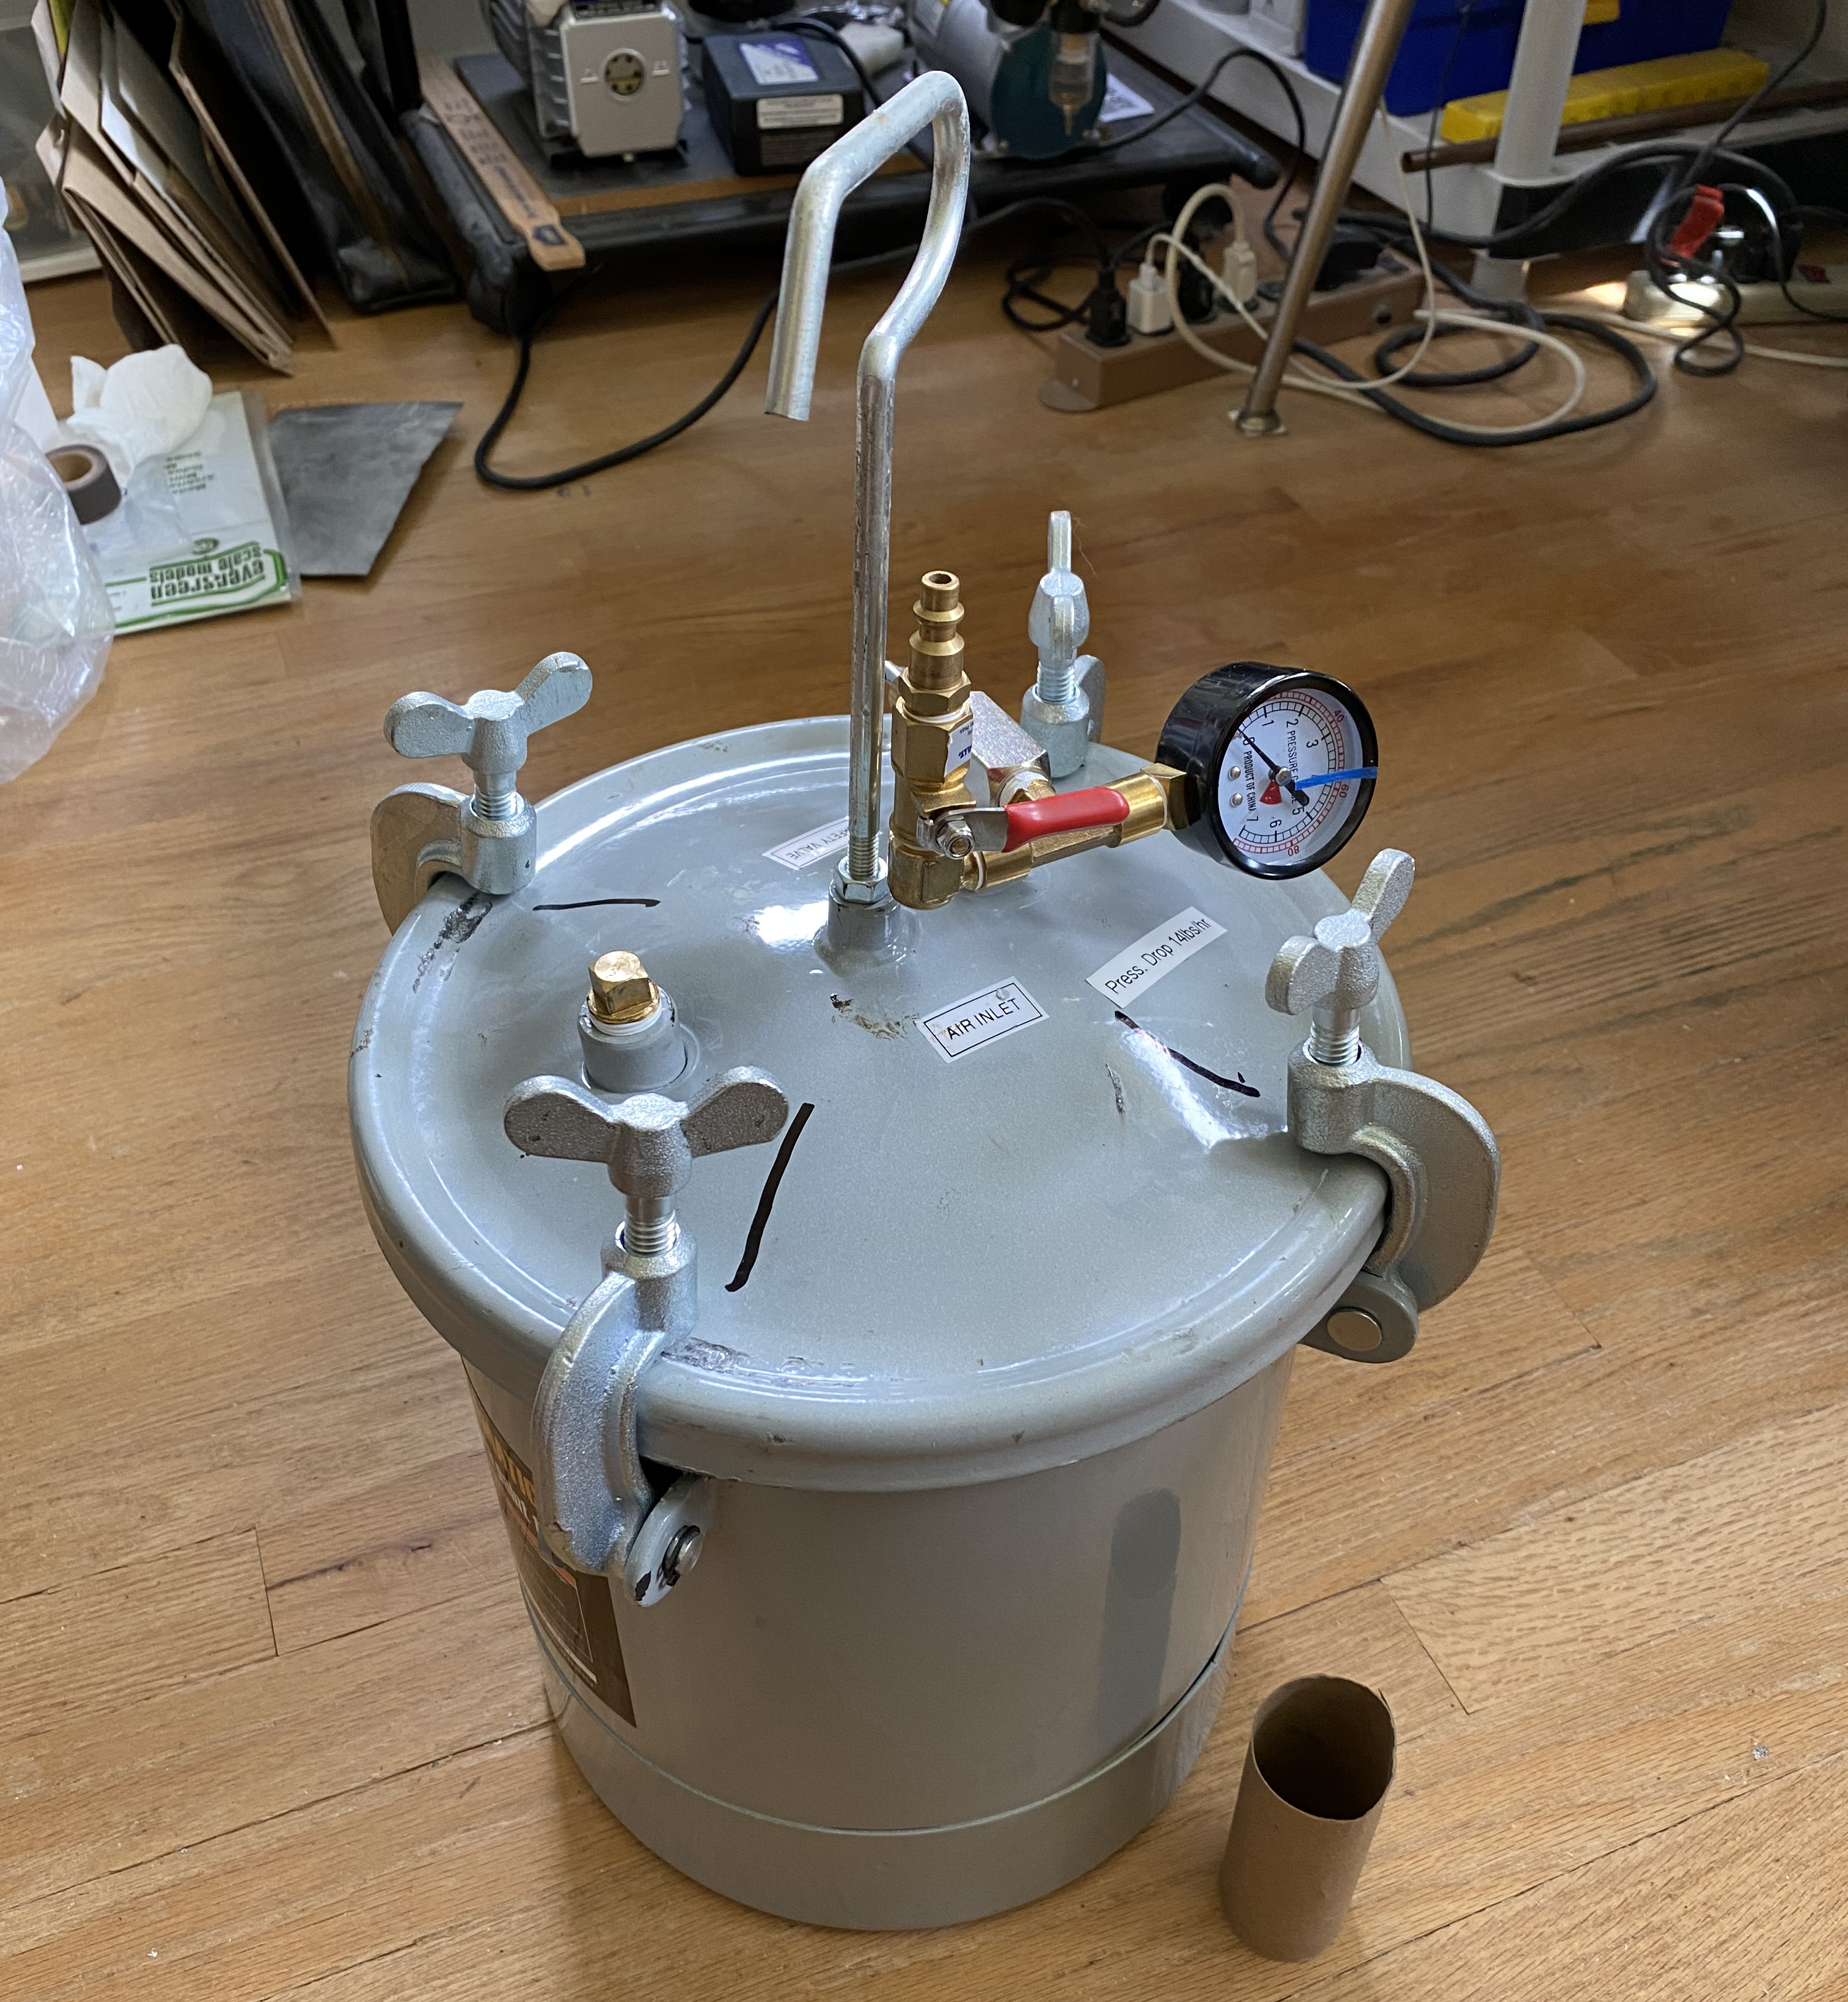
Once the resin compound is mixed, to get a bubble free casting the compound is put under pressure. 15 pounds is normal atmospheric pressure, the weight of the air above us, at sea level. Where I sit is not that much higher. But normal atmospheric pressure is not enough to squash all those bubbles. That meant that I had to acquire a pressure pot so that I could raise the air pressure. More wandering around the Interwebs showed me an excellent way to acquire a pressure pot and still have money left over for beer (rum, scotch, bourbon, mead).
There are pressure pots intended for portable paint spraying. Paint fills the pot, the lid is clamped down, and the pot is pressurized, the hose and the spray gun are attached (think big spray can). But if one removes the siphon tube and plugs the lid, now that pressure pot can be used to pressure cast resin. I used the supplied pressure gauge, plugged the siphon hole with a brass plug, fitted a T-fitting so that I could attach the hose, and a valve to release the pressure slowly, to the over-pressure safety valve (set to blow off at 55 lbs.):
The bottom of the pressure pot inside is concave and I need it to be flat. I took a piece of laminated cardboard and made a base that would give me the level surface I needed (because resin starts as a liquid and tilting a liquid-filled container doesn’t allow the liquid to stay in the container):


I needed an easy way to put molds into the pot. I settled on using paper plates and cutting them to fit:

I also realized that I could stack levels if I used something to keep each level separate and for that I used the cardboard tubes from toilet paper rolls:

And then I realized that if I cut the cardboard tubes in half, I could fit three levels of molds into the pressure pot.
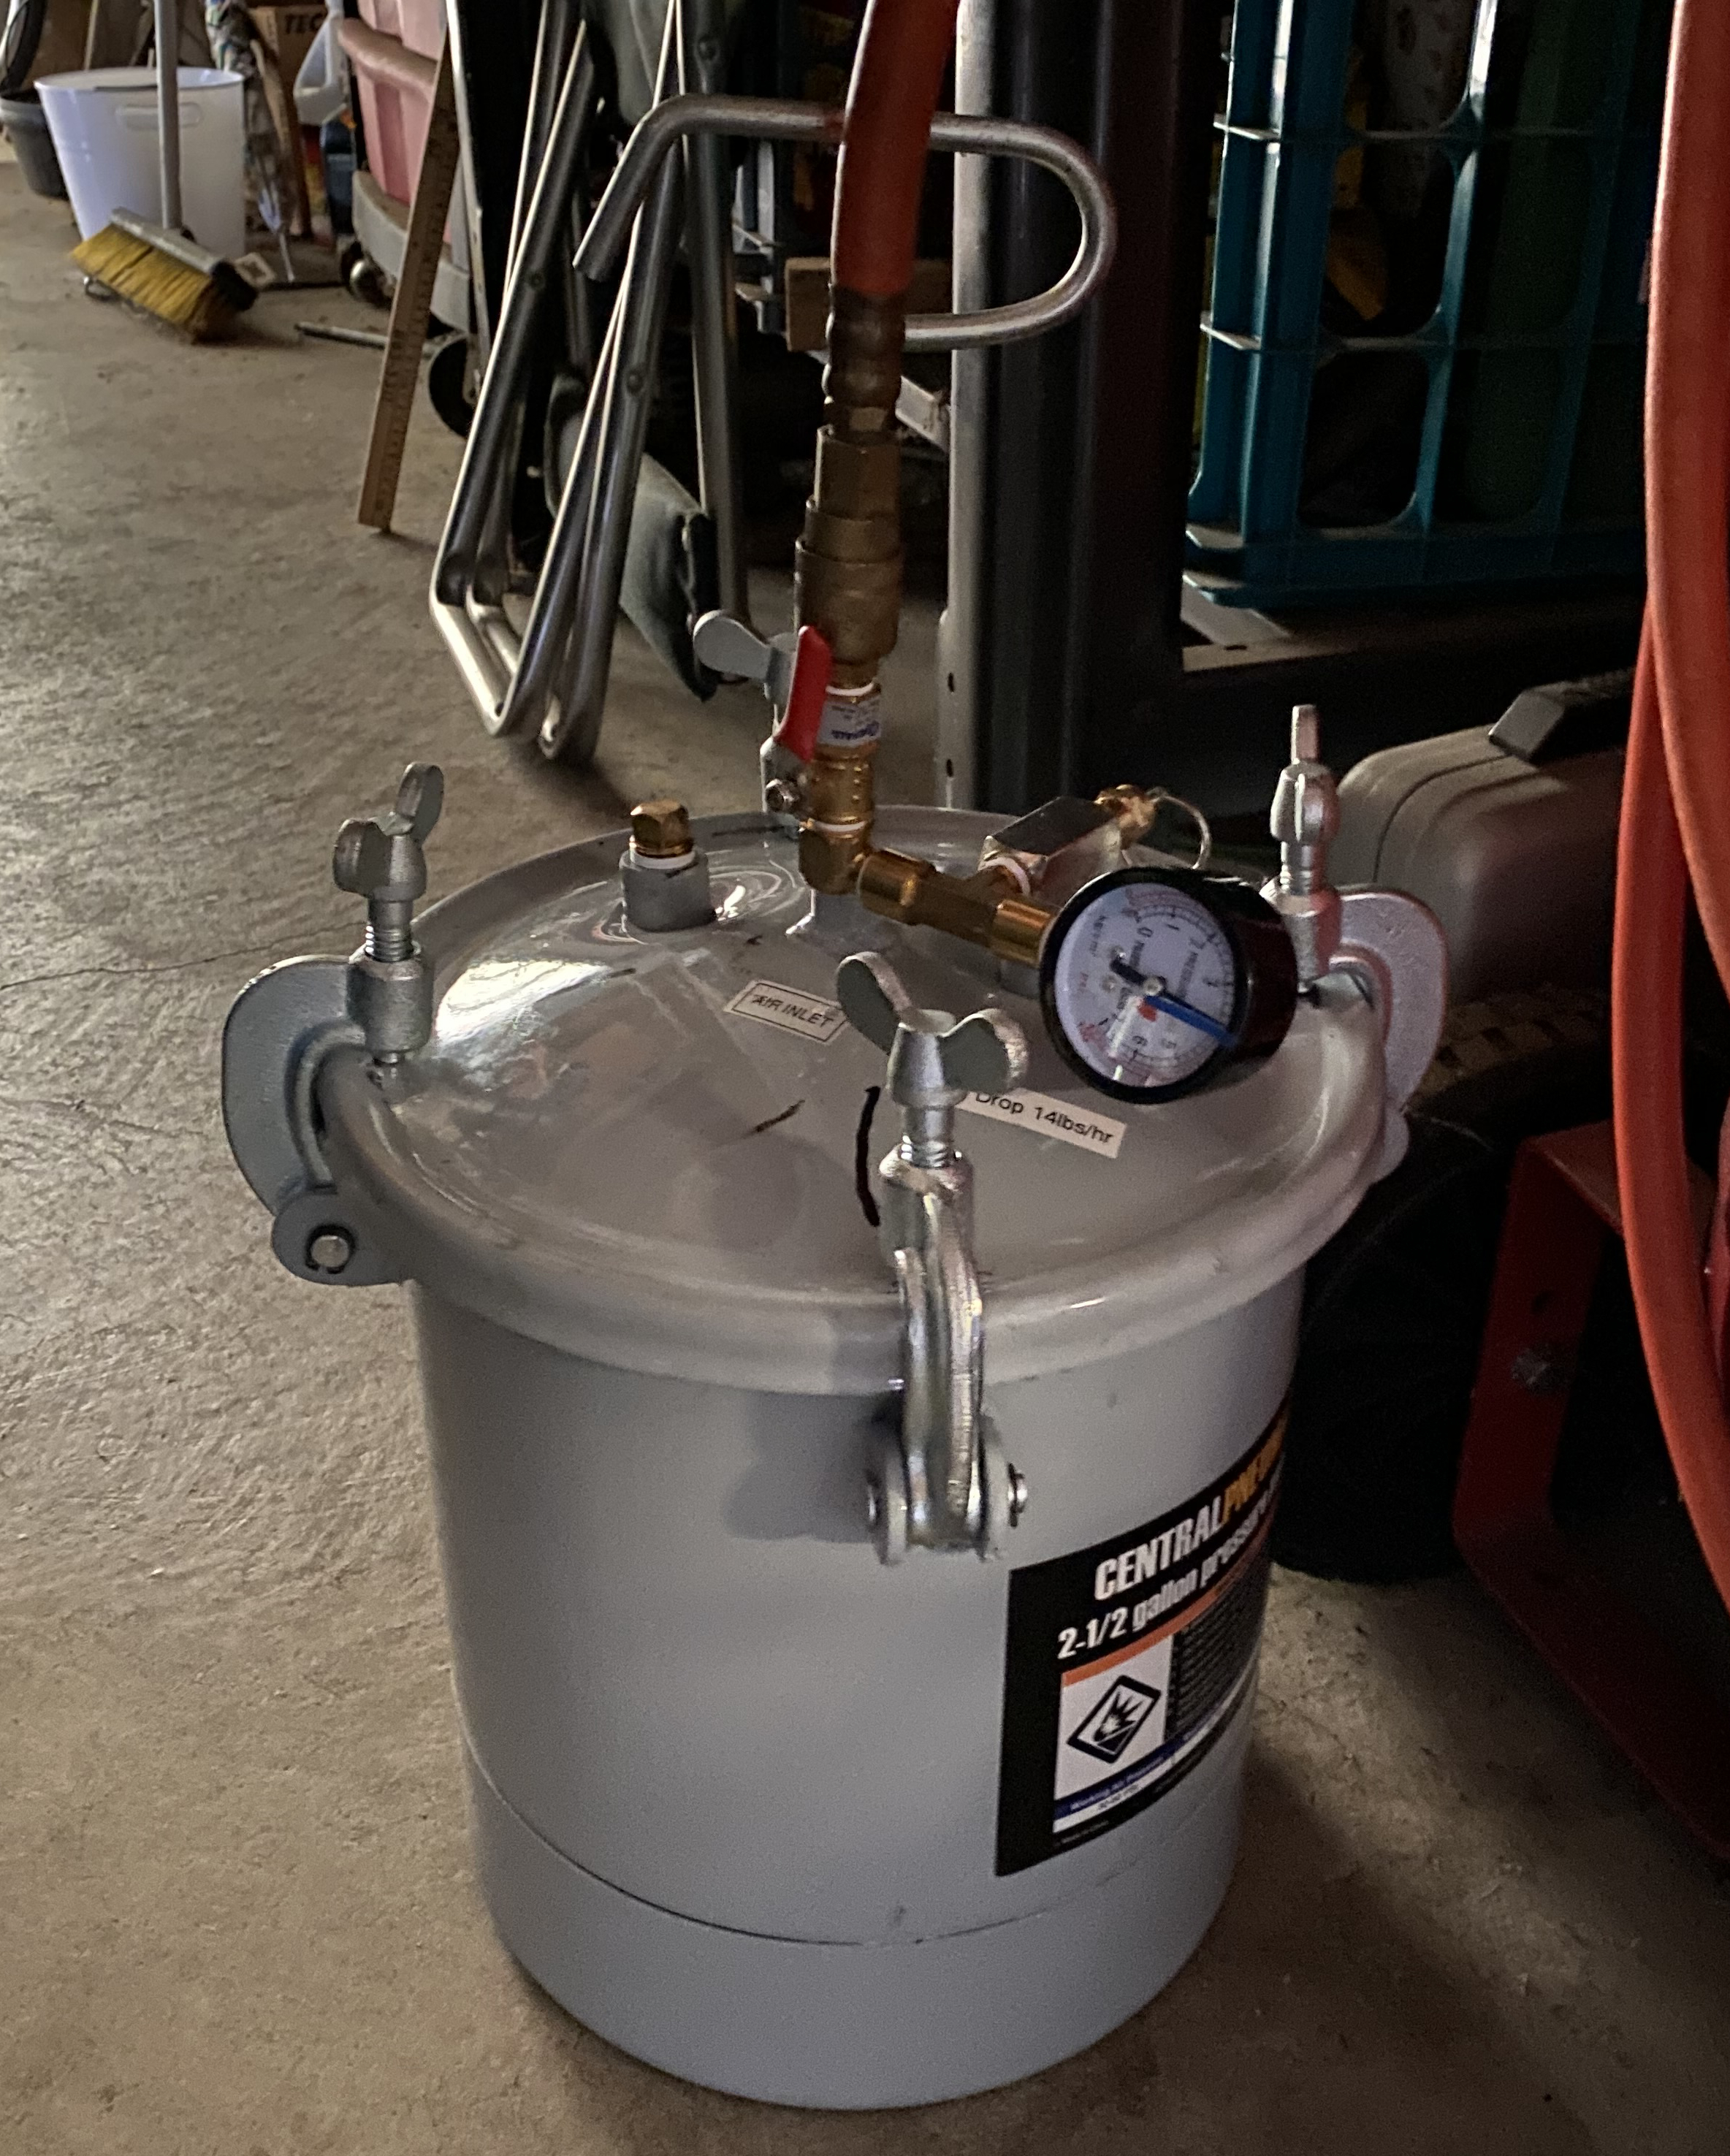
I started the compressor in the garage (adjusted to a maximum pressure of 55 lbs.), trimmed paper plates and toilet paper tubes, and laid out everything I needed to mix resin. I put 40ml of part A into a disposable mixing cup, added what I’d hoped was eight drops of black dye, started my timer, and added another 40ml of part B and started stirring quickly. Again, a shortage of hands and a short pot life precluded photos being taken, but here’s the pressure pot filled with molds/resin, pressurized, and attached to the compressor (because all seals are imperfect, I leave the pot connected to the compressor and as pressures drop, the compressor kicks in and brings the pressure back up):
A thing about exothermic reactions…or at least the exothermic reaction of the resin I use. The more massive the shape, the faster it will cure. Within minutes of the pot life expiration, the remainder of the resin in the mixing cup is rock hard (and note all the bubbles on top):

This is the results four hours later:
When the parts are demolded, the really thin parts haven’t really cured fully and they’re a bit flexible. I find this property to be very useful. Quite frequently the parts have undercuts that the mold will grab. Being slightly flexible, especially for larger thin sections, allows the parts to move a bit to escape the mold. Once they’re out of the mold, gently moving and bending them will return them to the desired shape. The really thin parts will often deflect again. A couple of days later, nothing is really flexible anymore. Heating the cured resin will temporarily return enough flexibility so that they can be coaxed back into the proper (or desired) position.
Mixing resin, filling molds, repetition and this is where things go:

You’ll note 3-4 different colored parts in that photo. The white parts are how the resin sets up without adding dye. The black parts are what happen when too much dye is added. The varied gray parts indicate just how fussy “dripping” dye into the resin actually is. The dye is a gooey substance and the drops are inconsistent in volume, making it really difficult to repeat any amount with subsequent castings.
One can never know so much about anything that there is not room to learn more. I offer this exhibit:

Most of the resin that was poured into that mold went to fill the plastic backing. I took the parts that were so afflicted (essentially all the parts cast in open-back molds) along with my safety glasses, hearing protectors, and dust mask (an OSHA grade mask) outside and ground away most of what I should not have poured in the first place. (Would that I could learn using any method other than trial/error.)
And (aside from the mistakes presented) doesn’t all that look easy? Well…for the most part. And then there are the various excursions sideways.
Sometimes I err (I know, I know…just work with me here). In this sequence I will show you what can happen should a caffeine-based life-form attempt to adjust the scale to add the correct amount of hardener to the rubber prior to caffeine consumption.
The ratio of rubber to hardener is 10/1 respectively. Easy, yeah? I needed 200g of rubber, so that would be 20g of hardener. No problem. Started the timer, filled, added, and mixed, then I degassed the rubber, filled the mold, degassed the mold, and went off to the rest of my evening. Got up in the morning, fed the cat, consumed my caffeine, and went into the shop. A faint “uh oh” whispered in the back of the mud-infused thing my brain is at that time of day because the mold box came up easily which is unusual since when the rubber hardens it grabs both the box and the base. Usually. This time this is what happened (because there was no solid rubber anywhere in this pour to grab anything):

There was a little hardener in the mix, but nowhere near enough. How I screwed up basic math I have no idea…but clearly I did. The mold box was broken down and the Legos cleaned. Then the parts were pried from the base and cleaned:

And what a gooey, miserable, let’s-stick-to-EVERYthing, mess that was. I had to salvage these parts because the reason they’re being copied in the first place is because I can’t get more of them (the part in the above photo is a TWS part, who’s closed their business). Between soapy water and lighter fluid and hours of very annoying attention, everything was finally cleaned (wonderful way to spend a day, right up there with root canal and the day prior to a colonoscopy):

Having gotten the cleaning accomplished, parts glued to the base, another mold box was assembled, and I went through the mix and stir process (CAREFULLY) of getting the mold rubber ready to pour, and then did so. I did say “carefully,” but evidently I didn’t act “carefully.” I degassed the rubber, poured the mold, put it in the vacuum chamber, and then my bladder delicately informed me that I had 30 seconds before a soggy mess ensued. When I came back about two minutes later I found this in the vacuum chamber, all nice and solid:

Nope…it’s not any variation of focaccia bread (thanks, Geri). Neither is this:

I thought I was careful! (How many surprised soon-to-be-parents have uttered that phrase?) Clearly not. That textured cock-up occurred within 10 minutes of the rubber being degassed and since I obviously did not have the 30 minute pot life with this batch, all I can consider is that this time I put WAY too much hardener into the mix. About the only good part to this sideways excursion is that it’s an open-back mold. I wanted to see if there were places where the bubbles went all the way through and it turned out that there were:
The lighter areas are thin places in the rubber. The really light areas are holes. I patched the holes with discarded rubber bits from previous molds and when I poured the last mold I needed to I dribbled a bit of the excess rubber over the patches hoping that this would render the mold usable to an acceptable degree. Finally I got something right and the mold is usable.
Now that this is all taken care of, I can start the build.
*I’ll bet your forgot all about that asterisk near the beginning of all this. Well, this is your reminder.
The reason for the asterisk was to have a place where I can talk about theft of intellectual property.
I am not unaware that copying someone else’s work could be seen as doing just that. Obviously I do not see it like that.
A) I am not passing this off as my work. Mold making? Resin pouring? Definitely my work. The commercially available parts that I’m using as my masters? Not my work.
B) I will not be selling the parts I’ve copied to anyone, anytime, at any price. I copied these for my private use exclusively.
If you are a practicing lawyer who deals with this matter and disagree, please contact me that I may not be fitted for an orange jumpsuit!

“Delicate Explosion” makes me think of an operatic metal band with a soprano lead singer.
Seriously, though, your persistence is remarkable.
LikeLike
“Operatic metal band.” You mean, like, Wagner?
Well, thanks. Knowing when to quit isn’t something that comes naturally to me and if I don’t pay close attention, I can overdo most anything.
LikeLike
Hey what’s up
LikeLike
All the usual crap. (At least it’s the crap I’m used to.)
LikeLike