I was correct; this has been an interesting month. I didn’t realize how close I was to the end of this when I started this month’s work. The finish always seems to take me by surprise (largely due to my difficulty switching from micro to macro view).
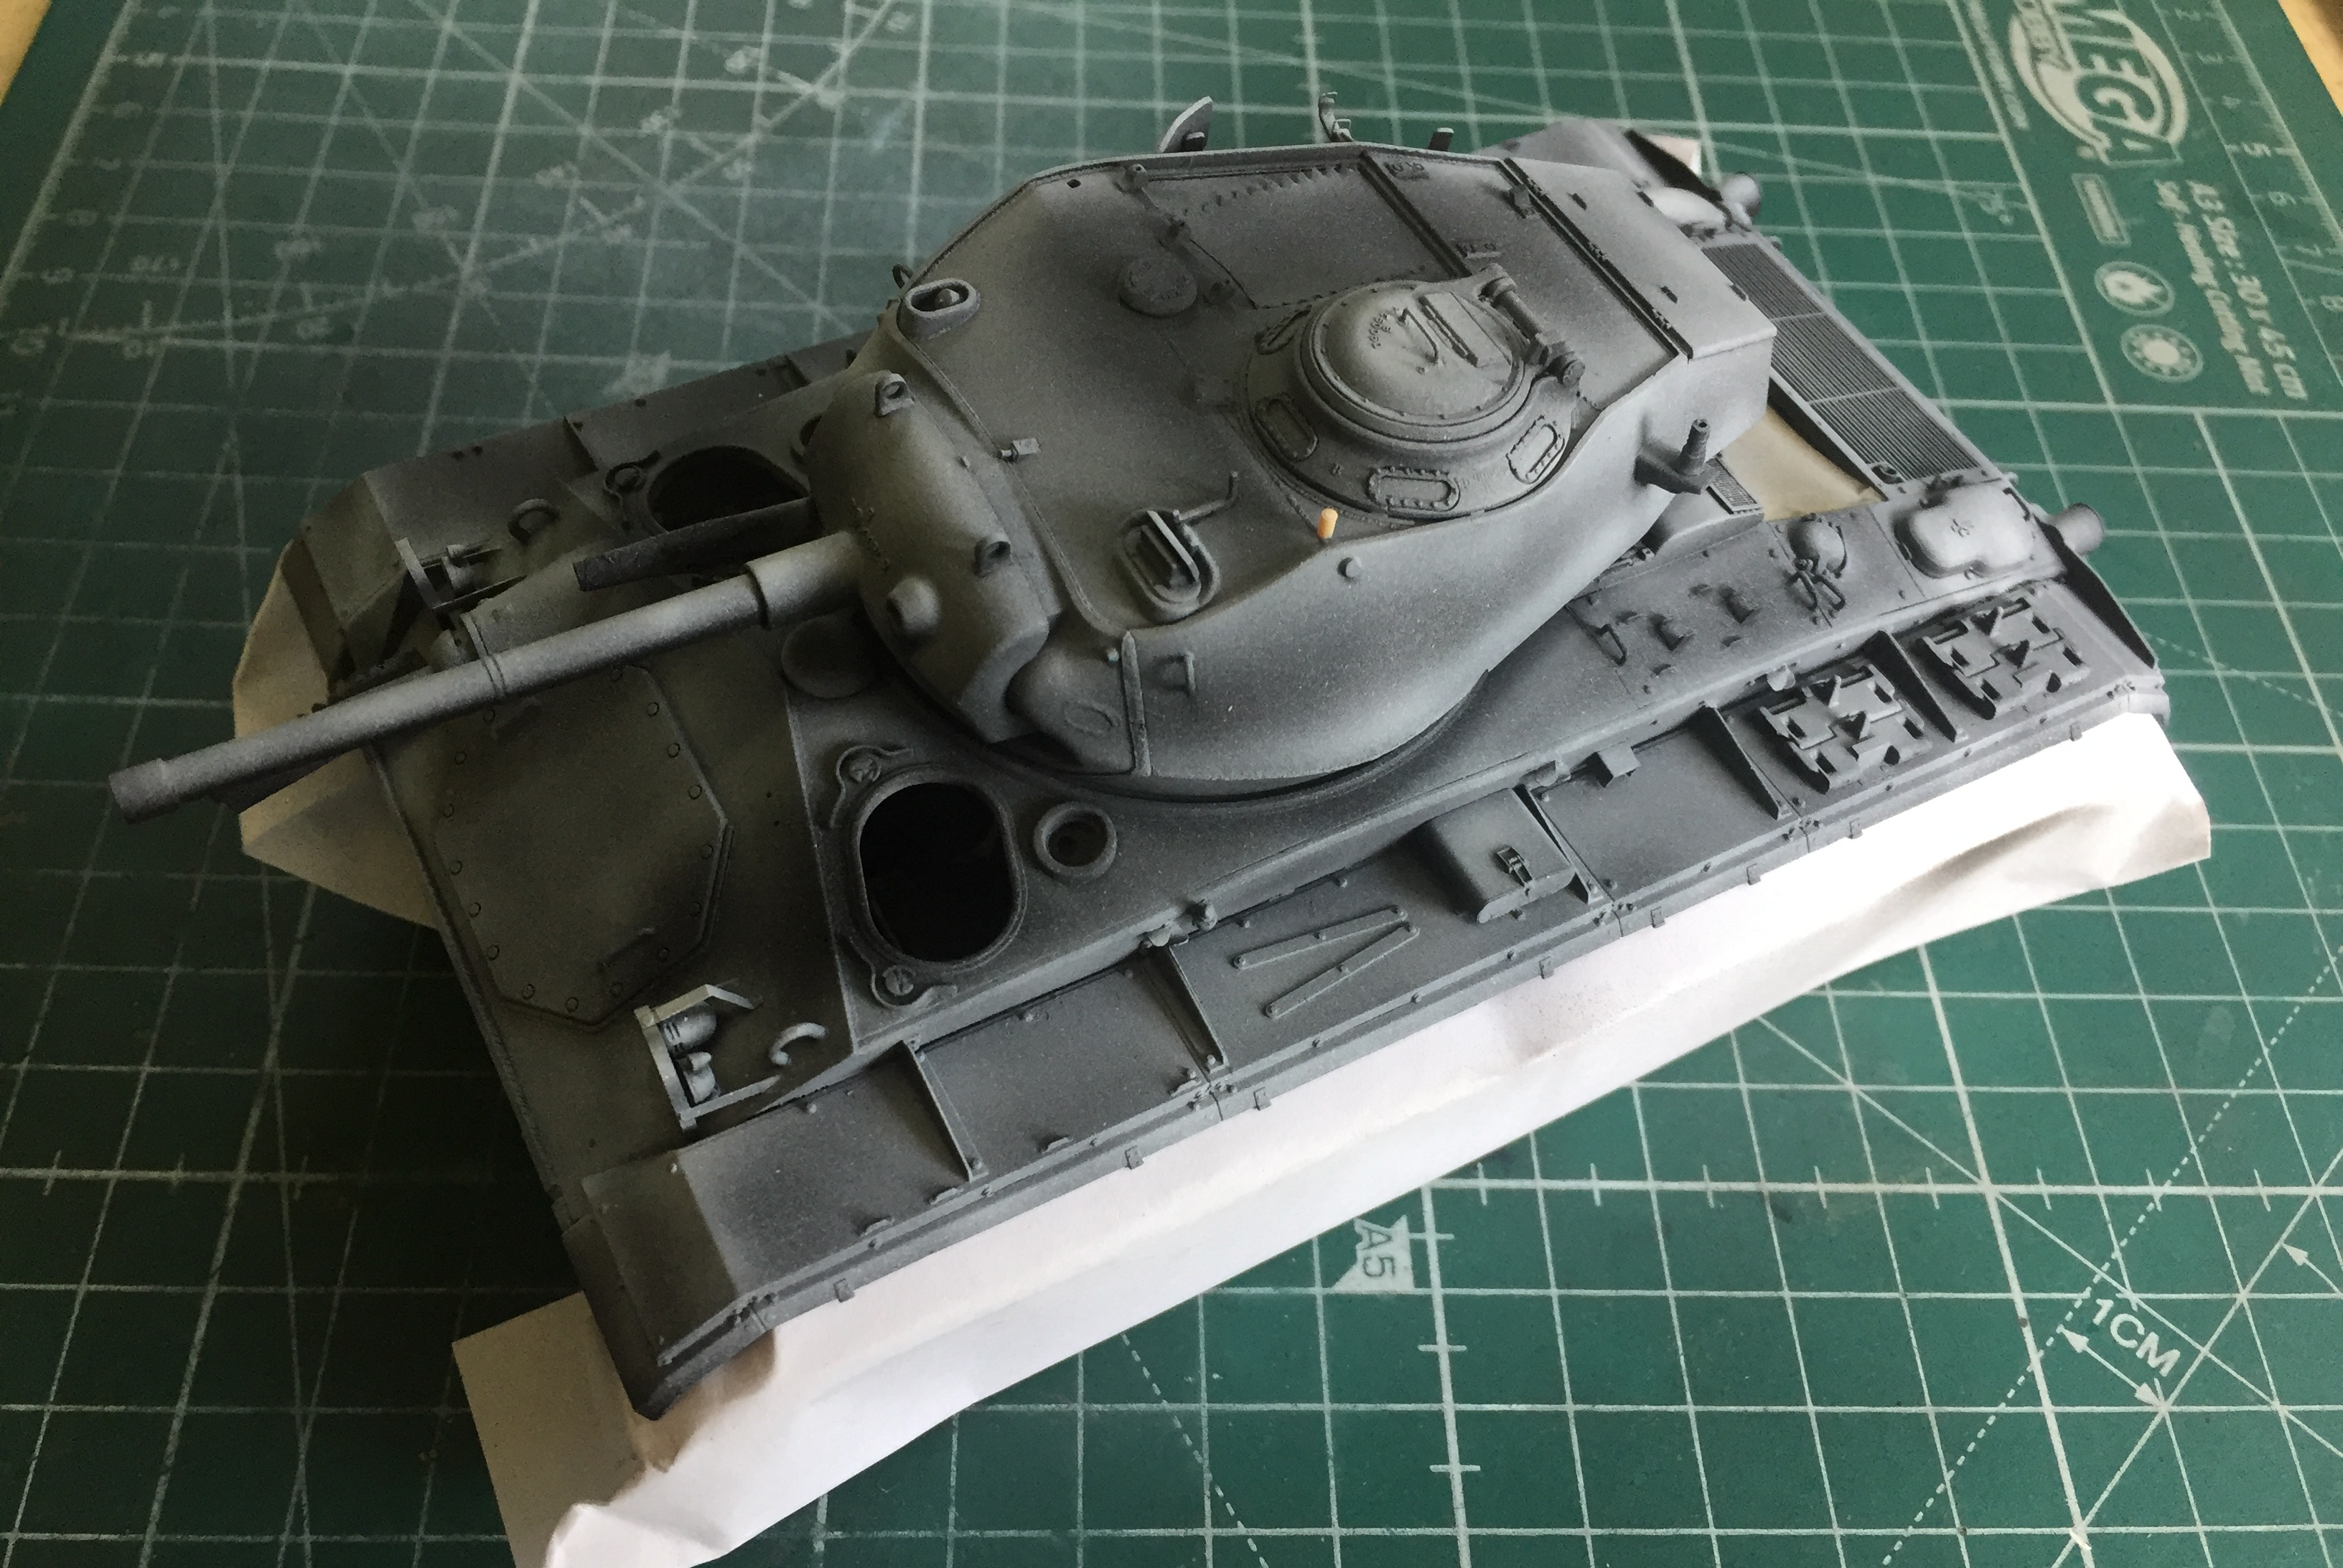
Frankly, I dreaded doing the suspension. I had started assembling road and return wheels early in the build and was impressed by Bronco’s ability to over complicate anything! The “Uh oh” alarm started going off about then because not only were things needlessly complicated, the parts were very, very, delicate. I’m all for scale fidelity, but there comes a point where practicalities have to take precedent over scale. Odd times like actually building the damned thing. (I will go into all that in the After Action Report. Preview: I’m less than complimentary.)
Yeah, so, the suspension. Finicky. Far too delicate (more on that when I get to the tracks). VERY ANNOYING to get everything in place and aligned.
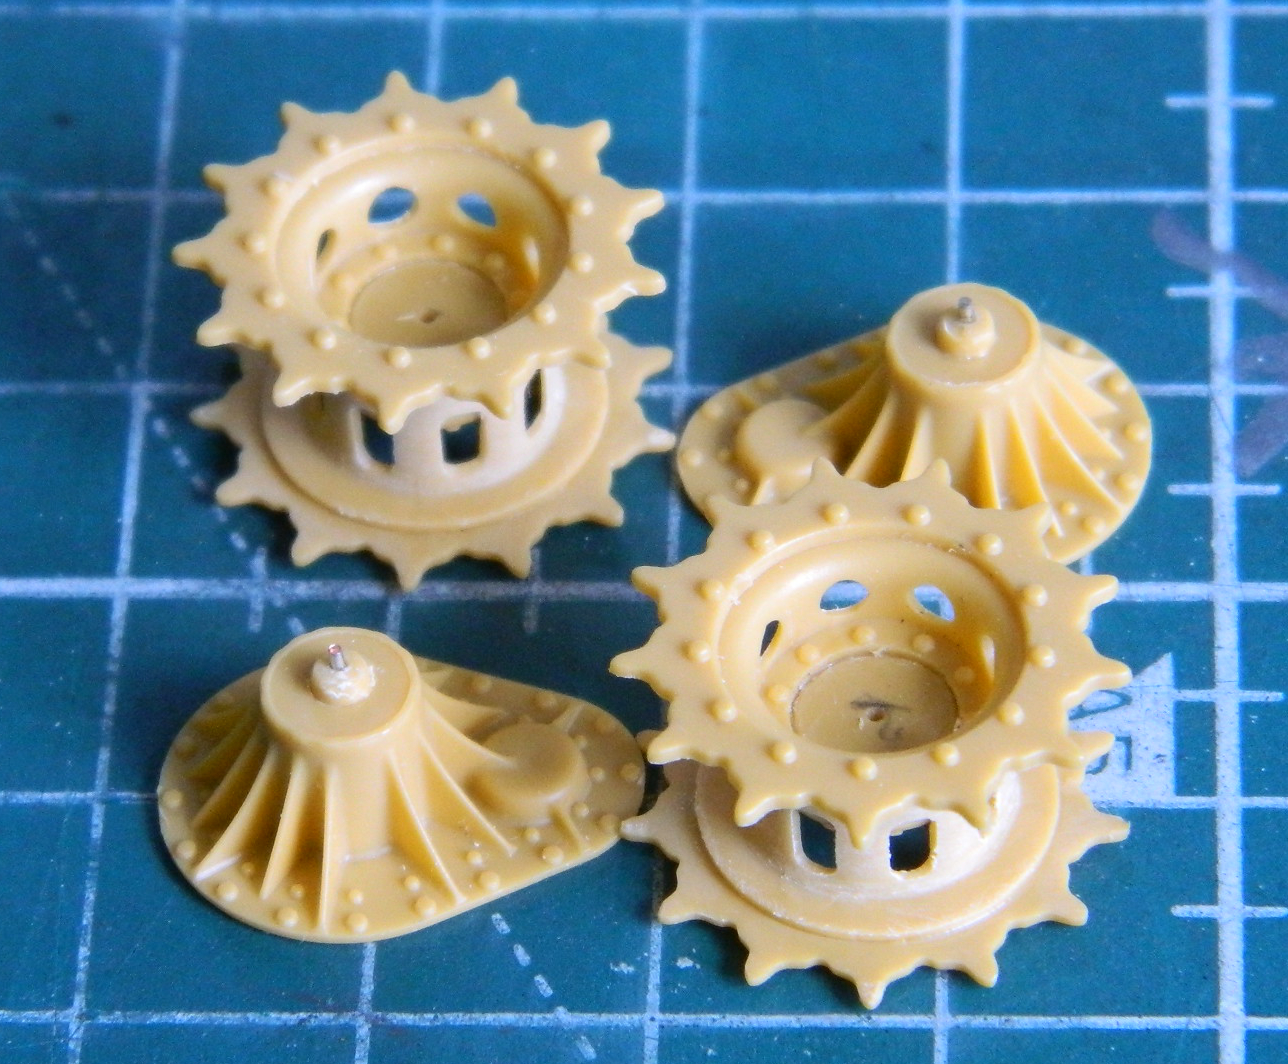
I started with the drive and idler wheels. I wanted to pin the drive wheels to make getting the tracks less annoying to put on:
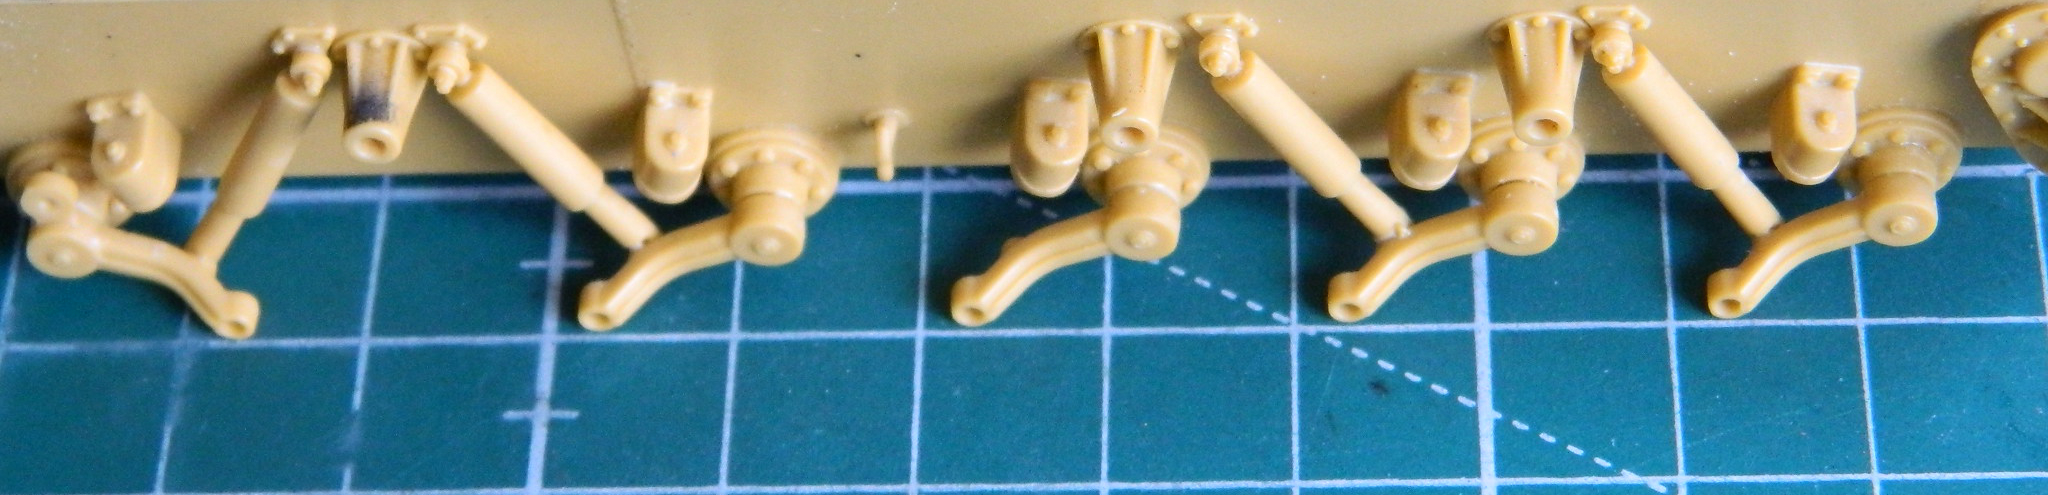
The came the joyous event of attaching the suspension arms and shock absorbers. There was no definitive, and aligning, points for the suspension arms to attach to. Due to unintended variances in how I mounted the torsion bars (because who freaking needs torsion bars…they will never be seen), the rotational alignment of the arms were all over the place. I rounded off the square ends of the torsion bars where they extended from the hull because as location devices (which I mistakenly assumed they would be) they were as effective locating the arms as a screen is in holding water. I used the lines on my cutting pad to align the arms longitudinally and my Eyecrometer to align them vertically. What “helped” was the limited stroke of the shocks because Bronco molded them as two-part items (not counting the top and bottom mounting bolts which were STUPIDLY delicate):

While waiting for the glue to cure completely (because these parts are delicate enough without having to dick around with them to realign them if they get bumped/nudged out of place), I did something I wish I’d taken more photos of.
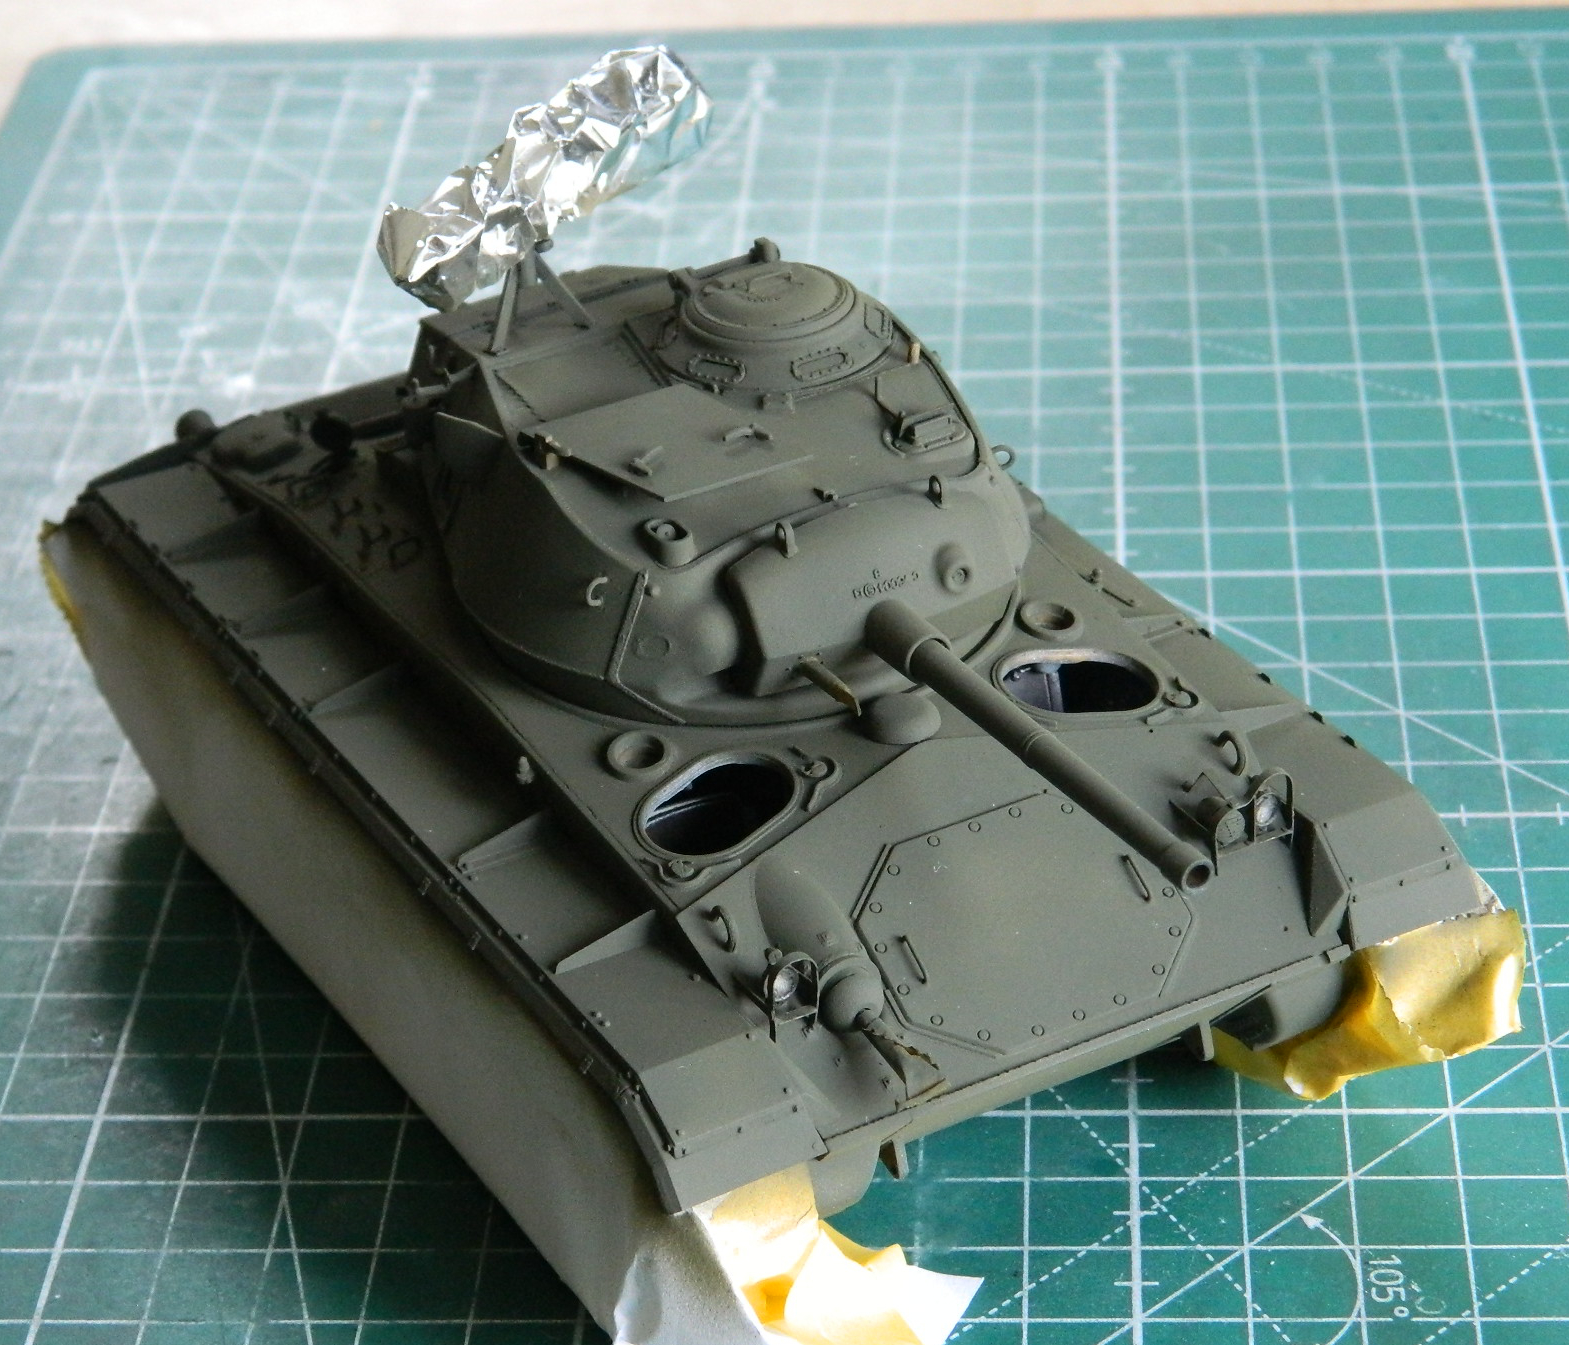
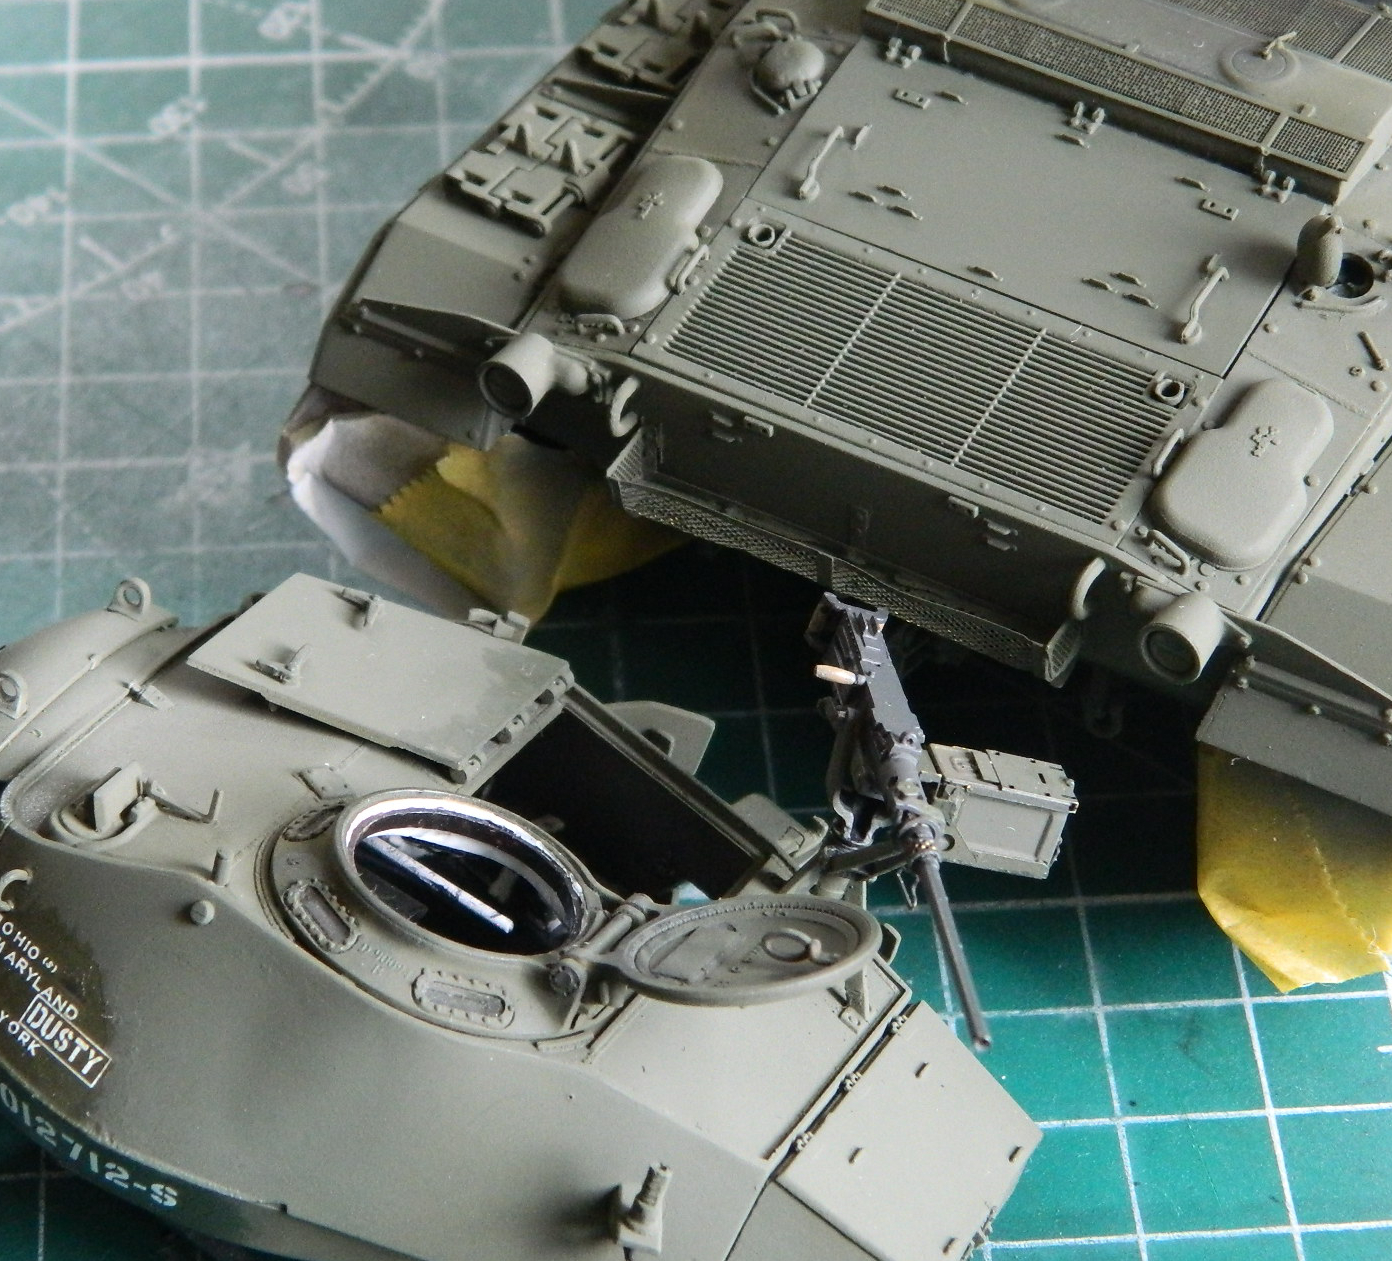
The .50 caliber (12.7mm) on the turret roof has a travel lock. That’s a hinged arm with a clamp that will swing up and hold the 80 pound (36.2874kg) machine gun in place so that it doesn’t brain someone during travel. The kit offered the travel lock, but they set it up so that it’s not holding the gun in place, it’s down with the clamp lying on the turret. I wanted to show the gun in the locked-for-travel position. That turned out to be easier than I’d thought it would be. All I had to cut open was the clamp and then add a small piece of stretched sprue to replicate a longer bolt. I liked how Bronco did the machine gun and used it instead of going to AM parts for this. Slide molding provided a hollow cooling shroud and a muzzle bore:


Bronco did not provide the “butterfly” trigger so I made one out of heavy aluminum foil:

Having done all that, in order to keep from snapping the gun and its mount off, I sawed it off and set it aside to add later on when the amount of handling will be much less.
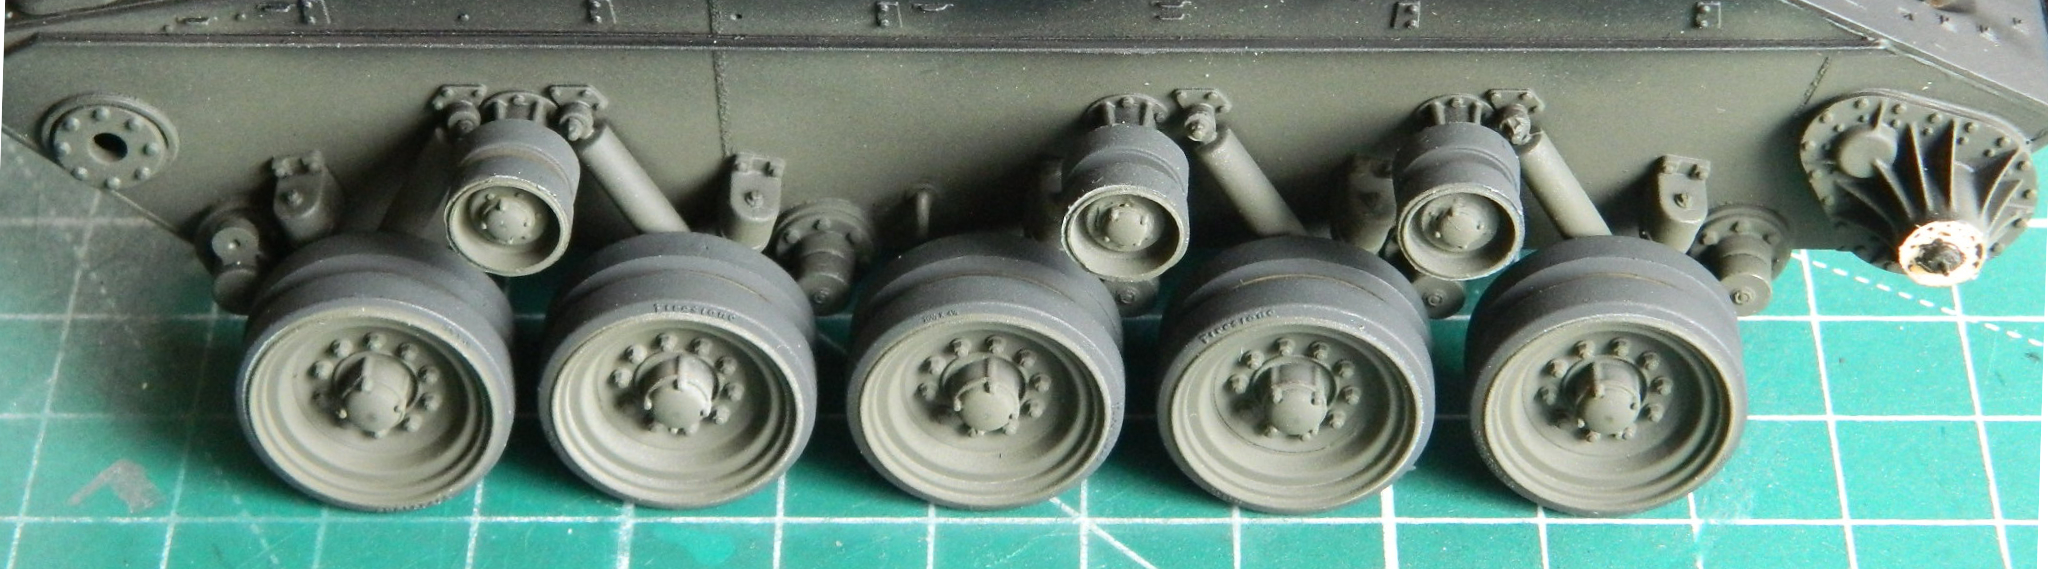
I’ve seen a number of builders who will assemble the tank and then paint it. I am in awe of their masking skills (I assume because I don’t know how they do it). Mine aren’t of that caliber; I have to paint before assembly. I painted the road and return wheels black first:

Then added what will be lighter areas using flat white, “masking” the rubber portion using an artist’s template:

Finally dusting Tamiya XF-62 Olive Drab over it all, using the artist’s template again:

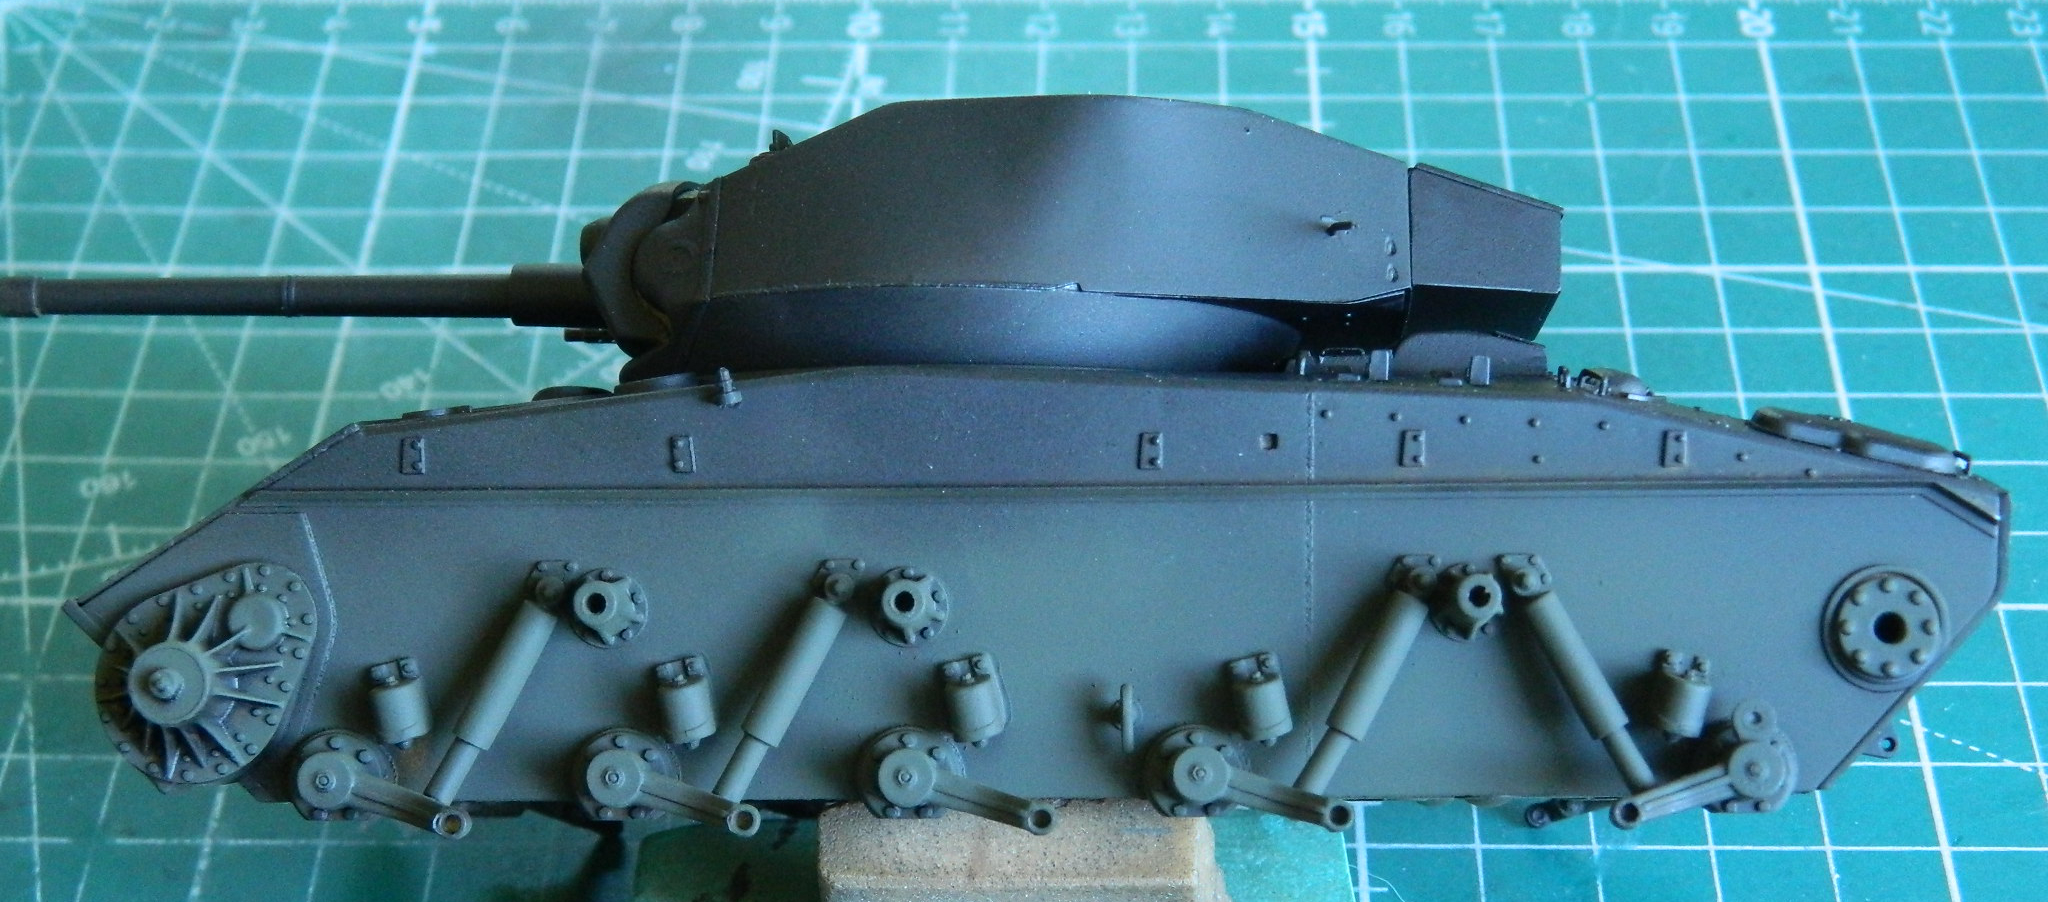
Once I was totally convinced (and so far so good) that the cement had set up completely, I preshaded the tank using flat black, then lightly misted OD Green over the black under where the fenders will be:
Then I glued the wheels on. Six little words that took a looooong time to get everything aligned for the same reason(s) I had to work to get the suspension arms aligned. There are no positive alignment aids engineered (if I dare use that term) into the kit:

During the fitting of tracks, I broke two wheels off once and one wheel off twice. It’s nice to see that engineers that flunk out of college can still get work.
I had intended to use the metal tracks from Fruilmodel. Yeah. NO. No, no, no, no, NO. I don’t think this delicate suspension is up to supporting the weight of them, so instead I went back to the (now familiar) delicacy of the kit’s tracks. I started by painting them Humbrol Metallizer #27003 Steel (using double-sided tape to hold the track runs in place). The long runs are what Bronco suggested, 72-73 shoes per side. When I fitted them to the suspension, it was more like 75-76 shoes per side. The “extra” links came from the short run of track below:
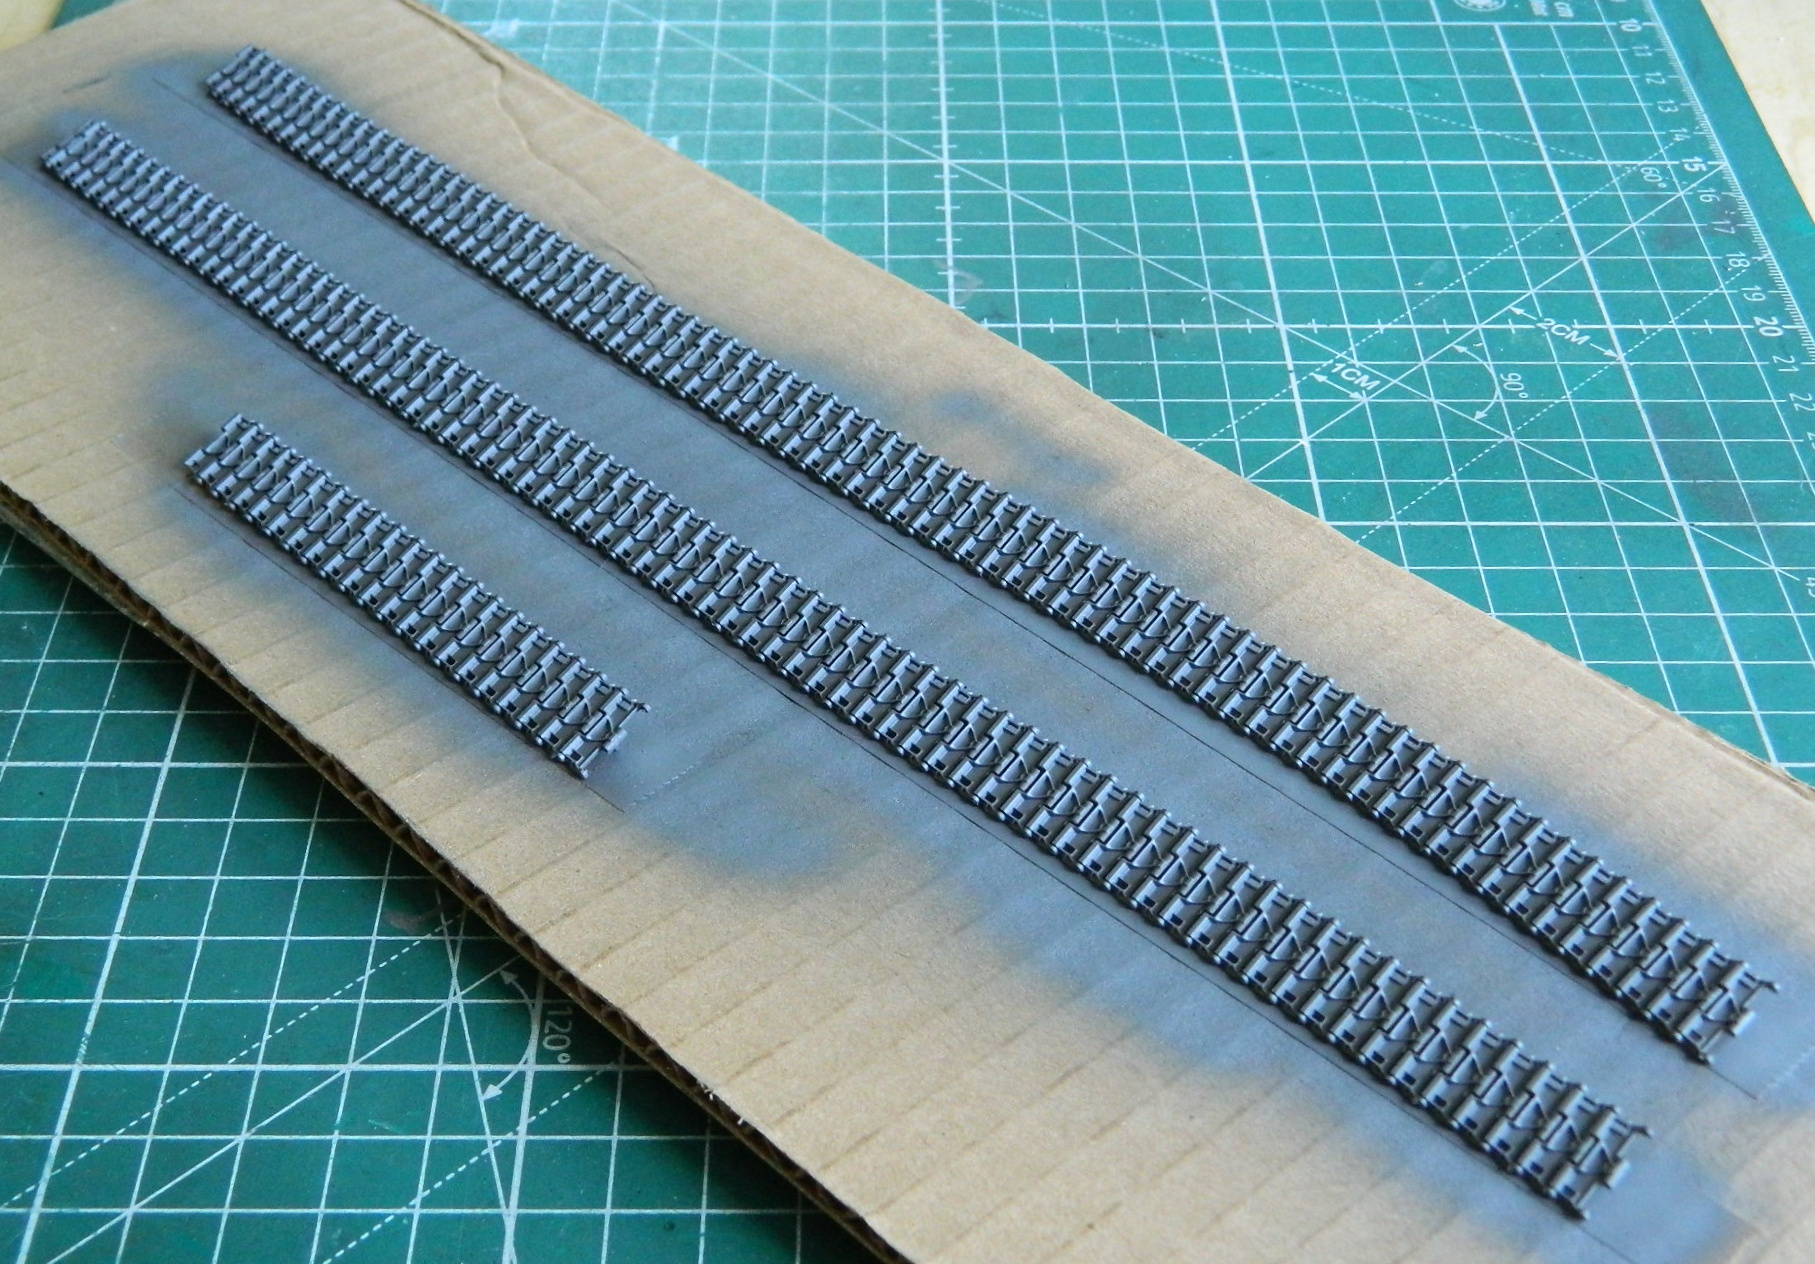
Once the paint dried, I buffed the faces of the shoes where they would contact (and thereby wear) the ground:

With all the contact points buffed, I painted the tracks using Tamiya XF-68 NATO Brown (14 parts), XF-69 NATO Black (3 parts), and XF-7 Flat Red (which has become my go-to mix for tracks). I used a chisel-tipped toothpick to remove the acrylic paint from the enamel of the steel paint:

I love the look of individual track shoes, I don’t like the tedium of getting them to the way I want them.
That led me to the point where there was nothing left to do but mount them onto the suspension. There was about 15mm worth of play in the tracks. What that means is that if I compressed them longitudinally, stretching them out to the extent of their play gave me 15mm, or a little over half an inch. That enabled me to get the tracks as close as possible to being almost sag-free and aligned on the sprocket wheels and road wheels before gluing the pivot points of the shoes. Having separate fenders made putting the tracks on MUCH easier than trying to snake them under sponsons, over return wheels, aligned on the sprocket wheels, and then adjusted for sag:

With the tracks on, it was time to mount the fenders, mask the suspension and tracks, and paint them black:

Then it was time to start adding all the surface details. I started with my traditional two-piece antenna mount:

And then I encountered THIS little lovely. The basket on the rear of the hull. Bronco TOTALLY screwed this part up, making it a two-piece part because why would they ever do something FORNICATING GODDAMNED SIMPLE?!? It simply bit and gnawed on the short curlies and what I ended up with was better than nothing (I assume, because it’s fornicating there) but NOwhere near “good”. This part should have been produced in ONE piece so that the long edge where the body of the basket mounts to the back of the basket (or at least tries to) would be a simple damned fold, NOT A LONG PART WITH NO REAL SURFACE FOR EITHER GLUE OR SOLDER TO ADHERE TO. In the process of finishing the kit after this piece of garbage part was “attached,” I got to REattach it several times…and each time I did it looked worse and worse…all because some beef-wit couldn’t engineer the damned part correctly:

I assure you, in case you missed the subtext here (and in several other places), I am not remotely fond of how Bronco engineered this kit. I have no tolerance for amateurs that masquerade as professionals.
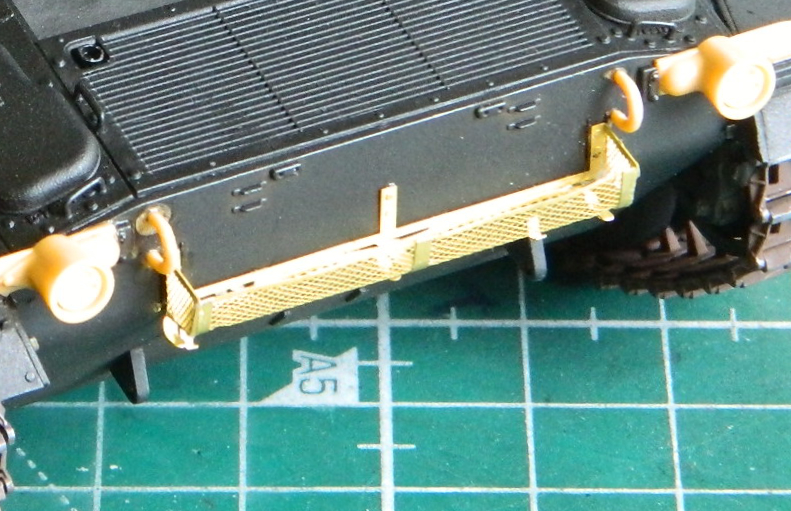
The remainder of the small detail parts had varying degrees of ease and annoyances, but I adjusted my medications, then waited until I was (somewhat) sober, and persevered (the small gray cleats are TMD parts):
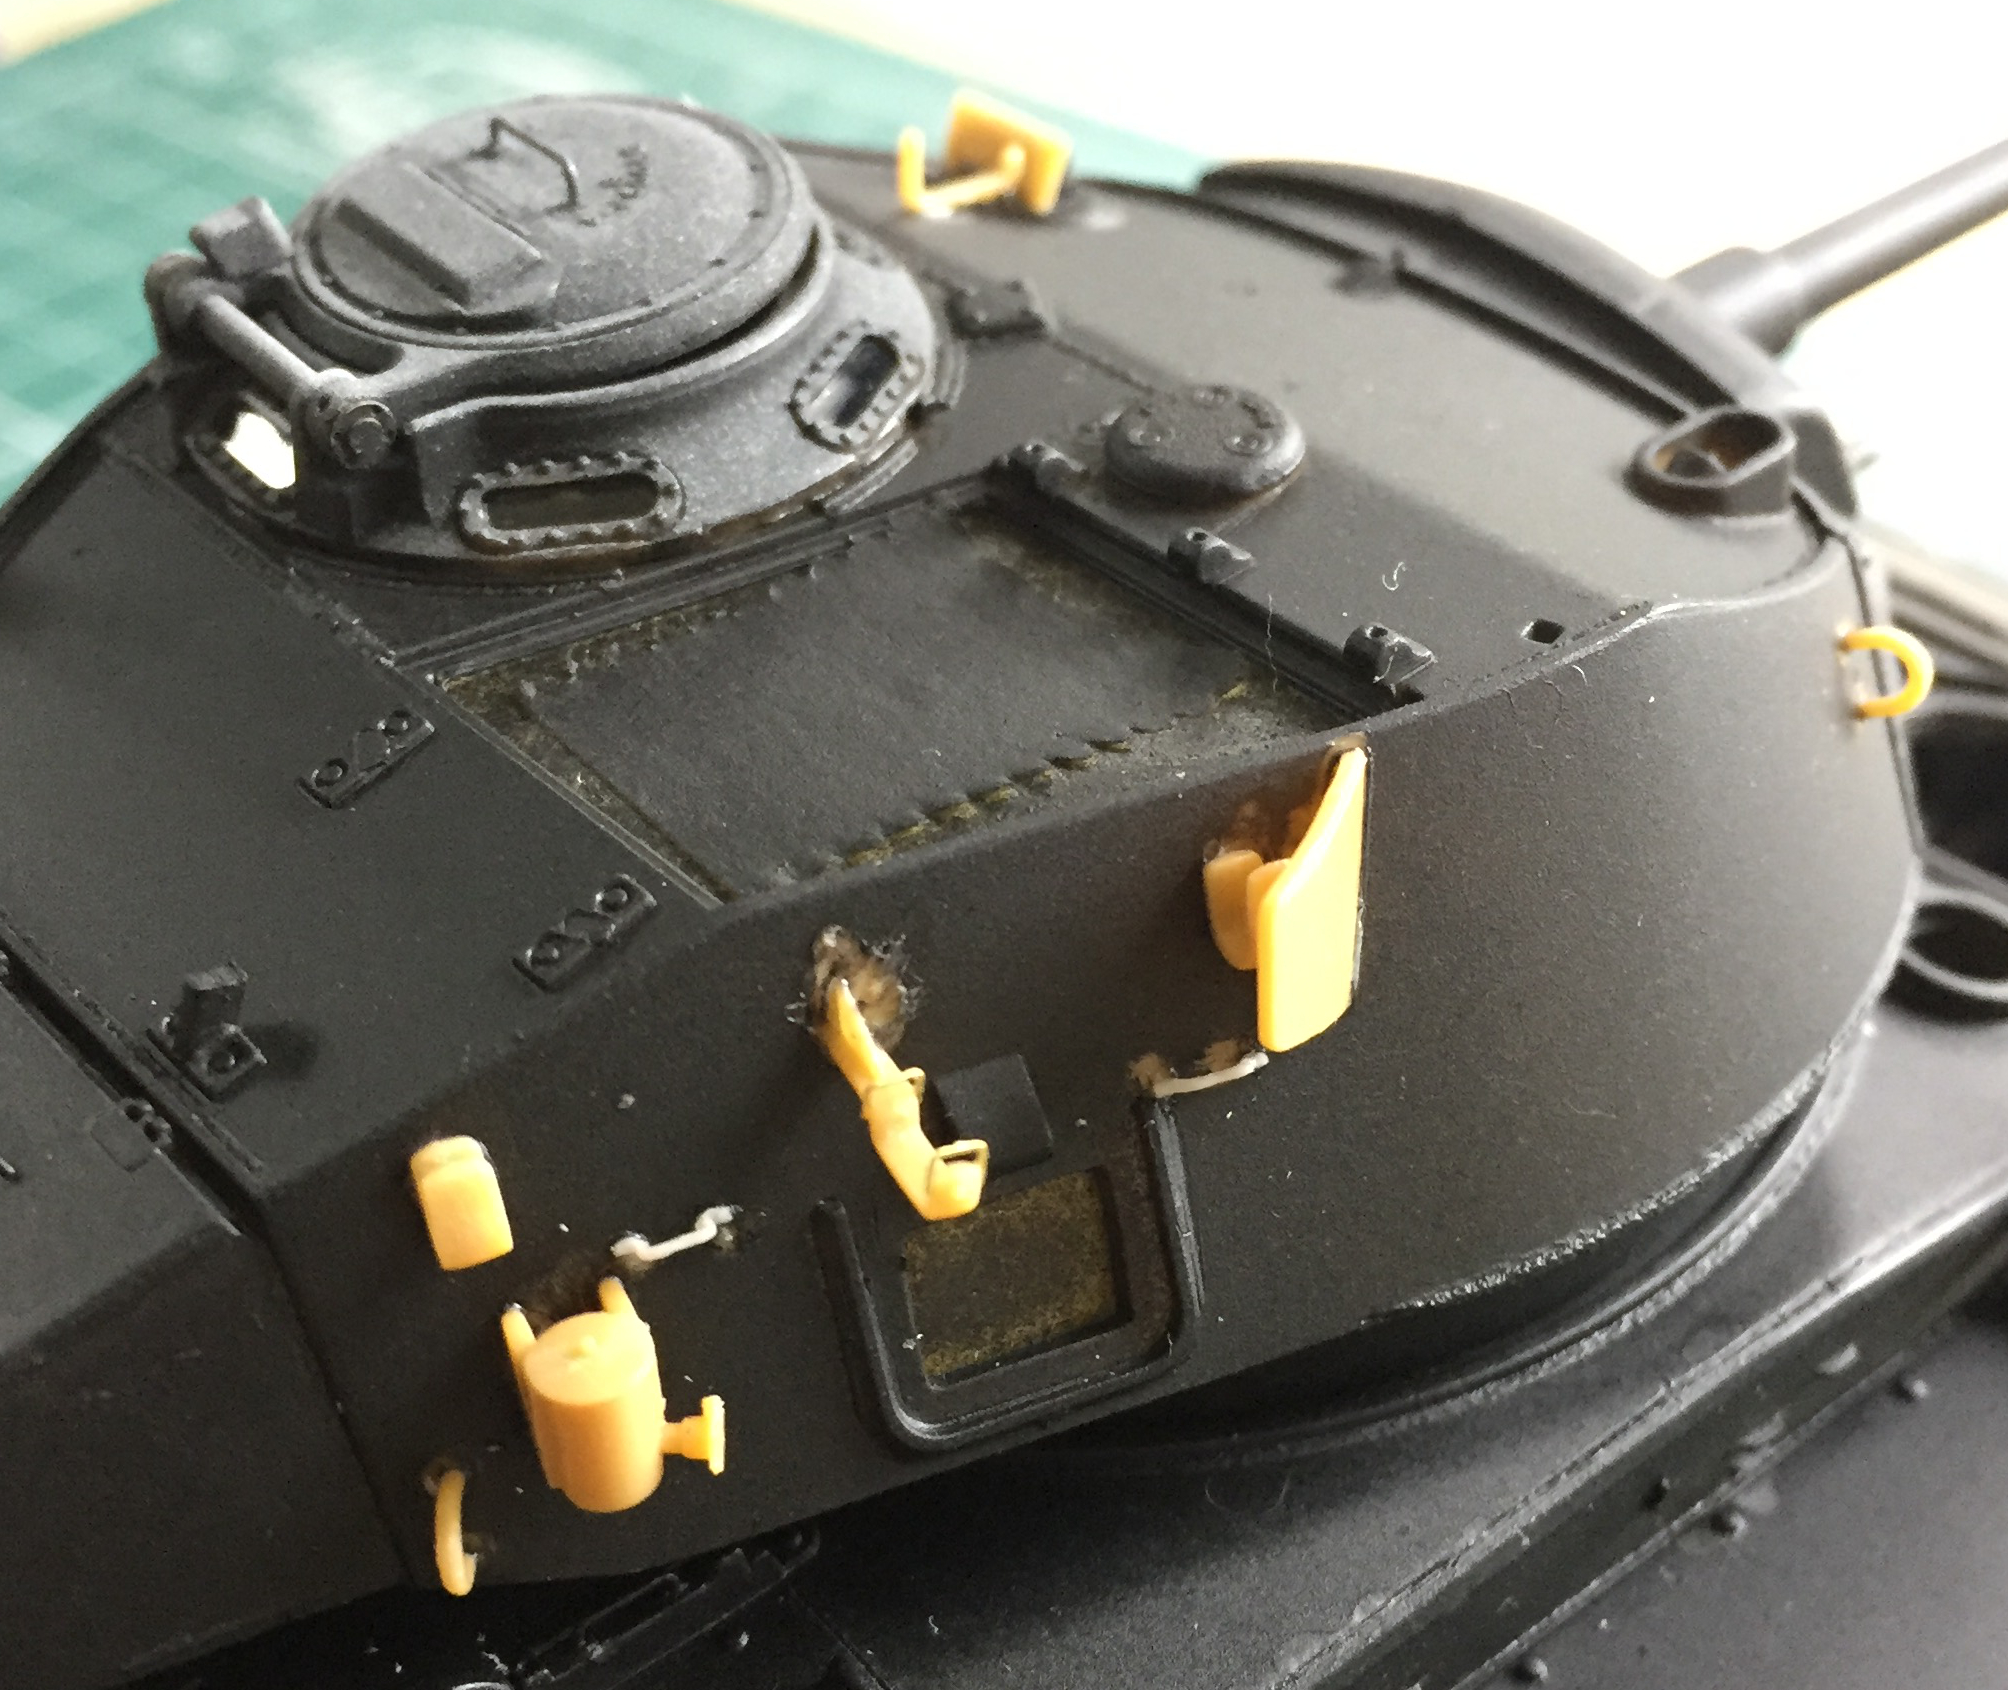

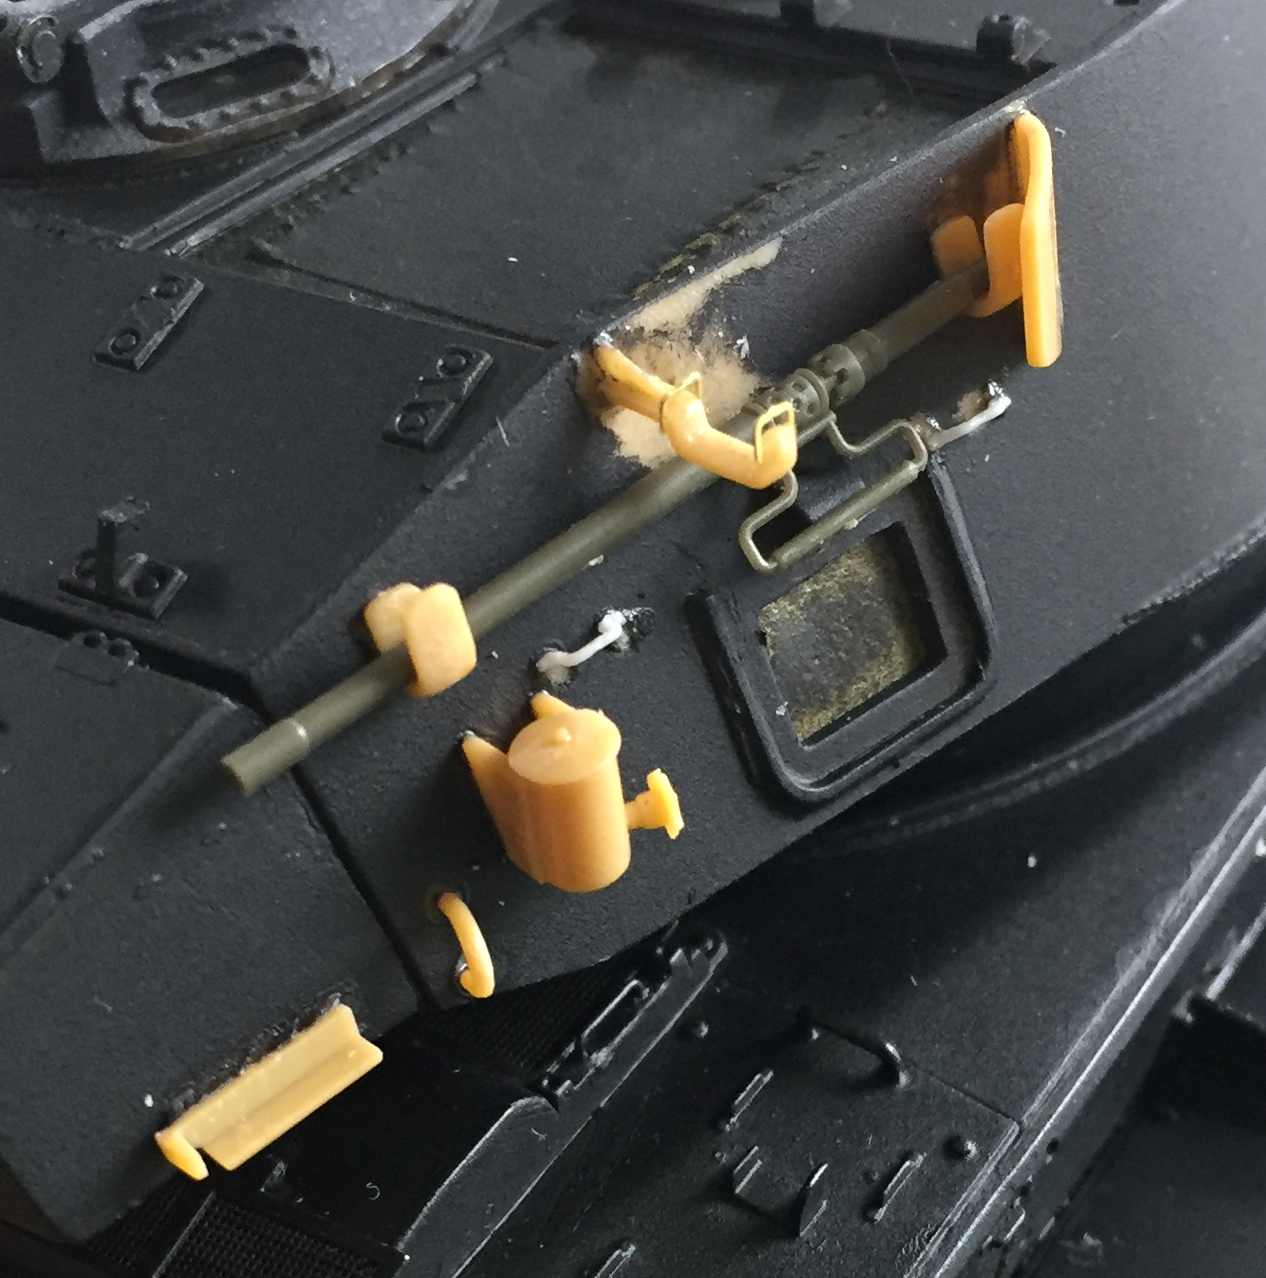
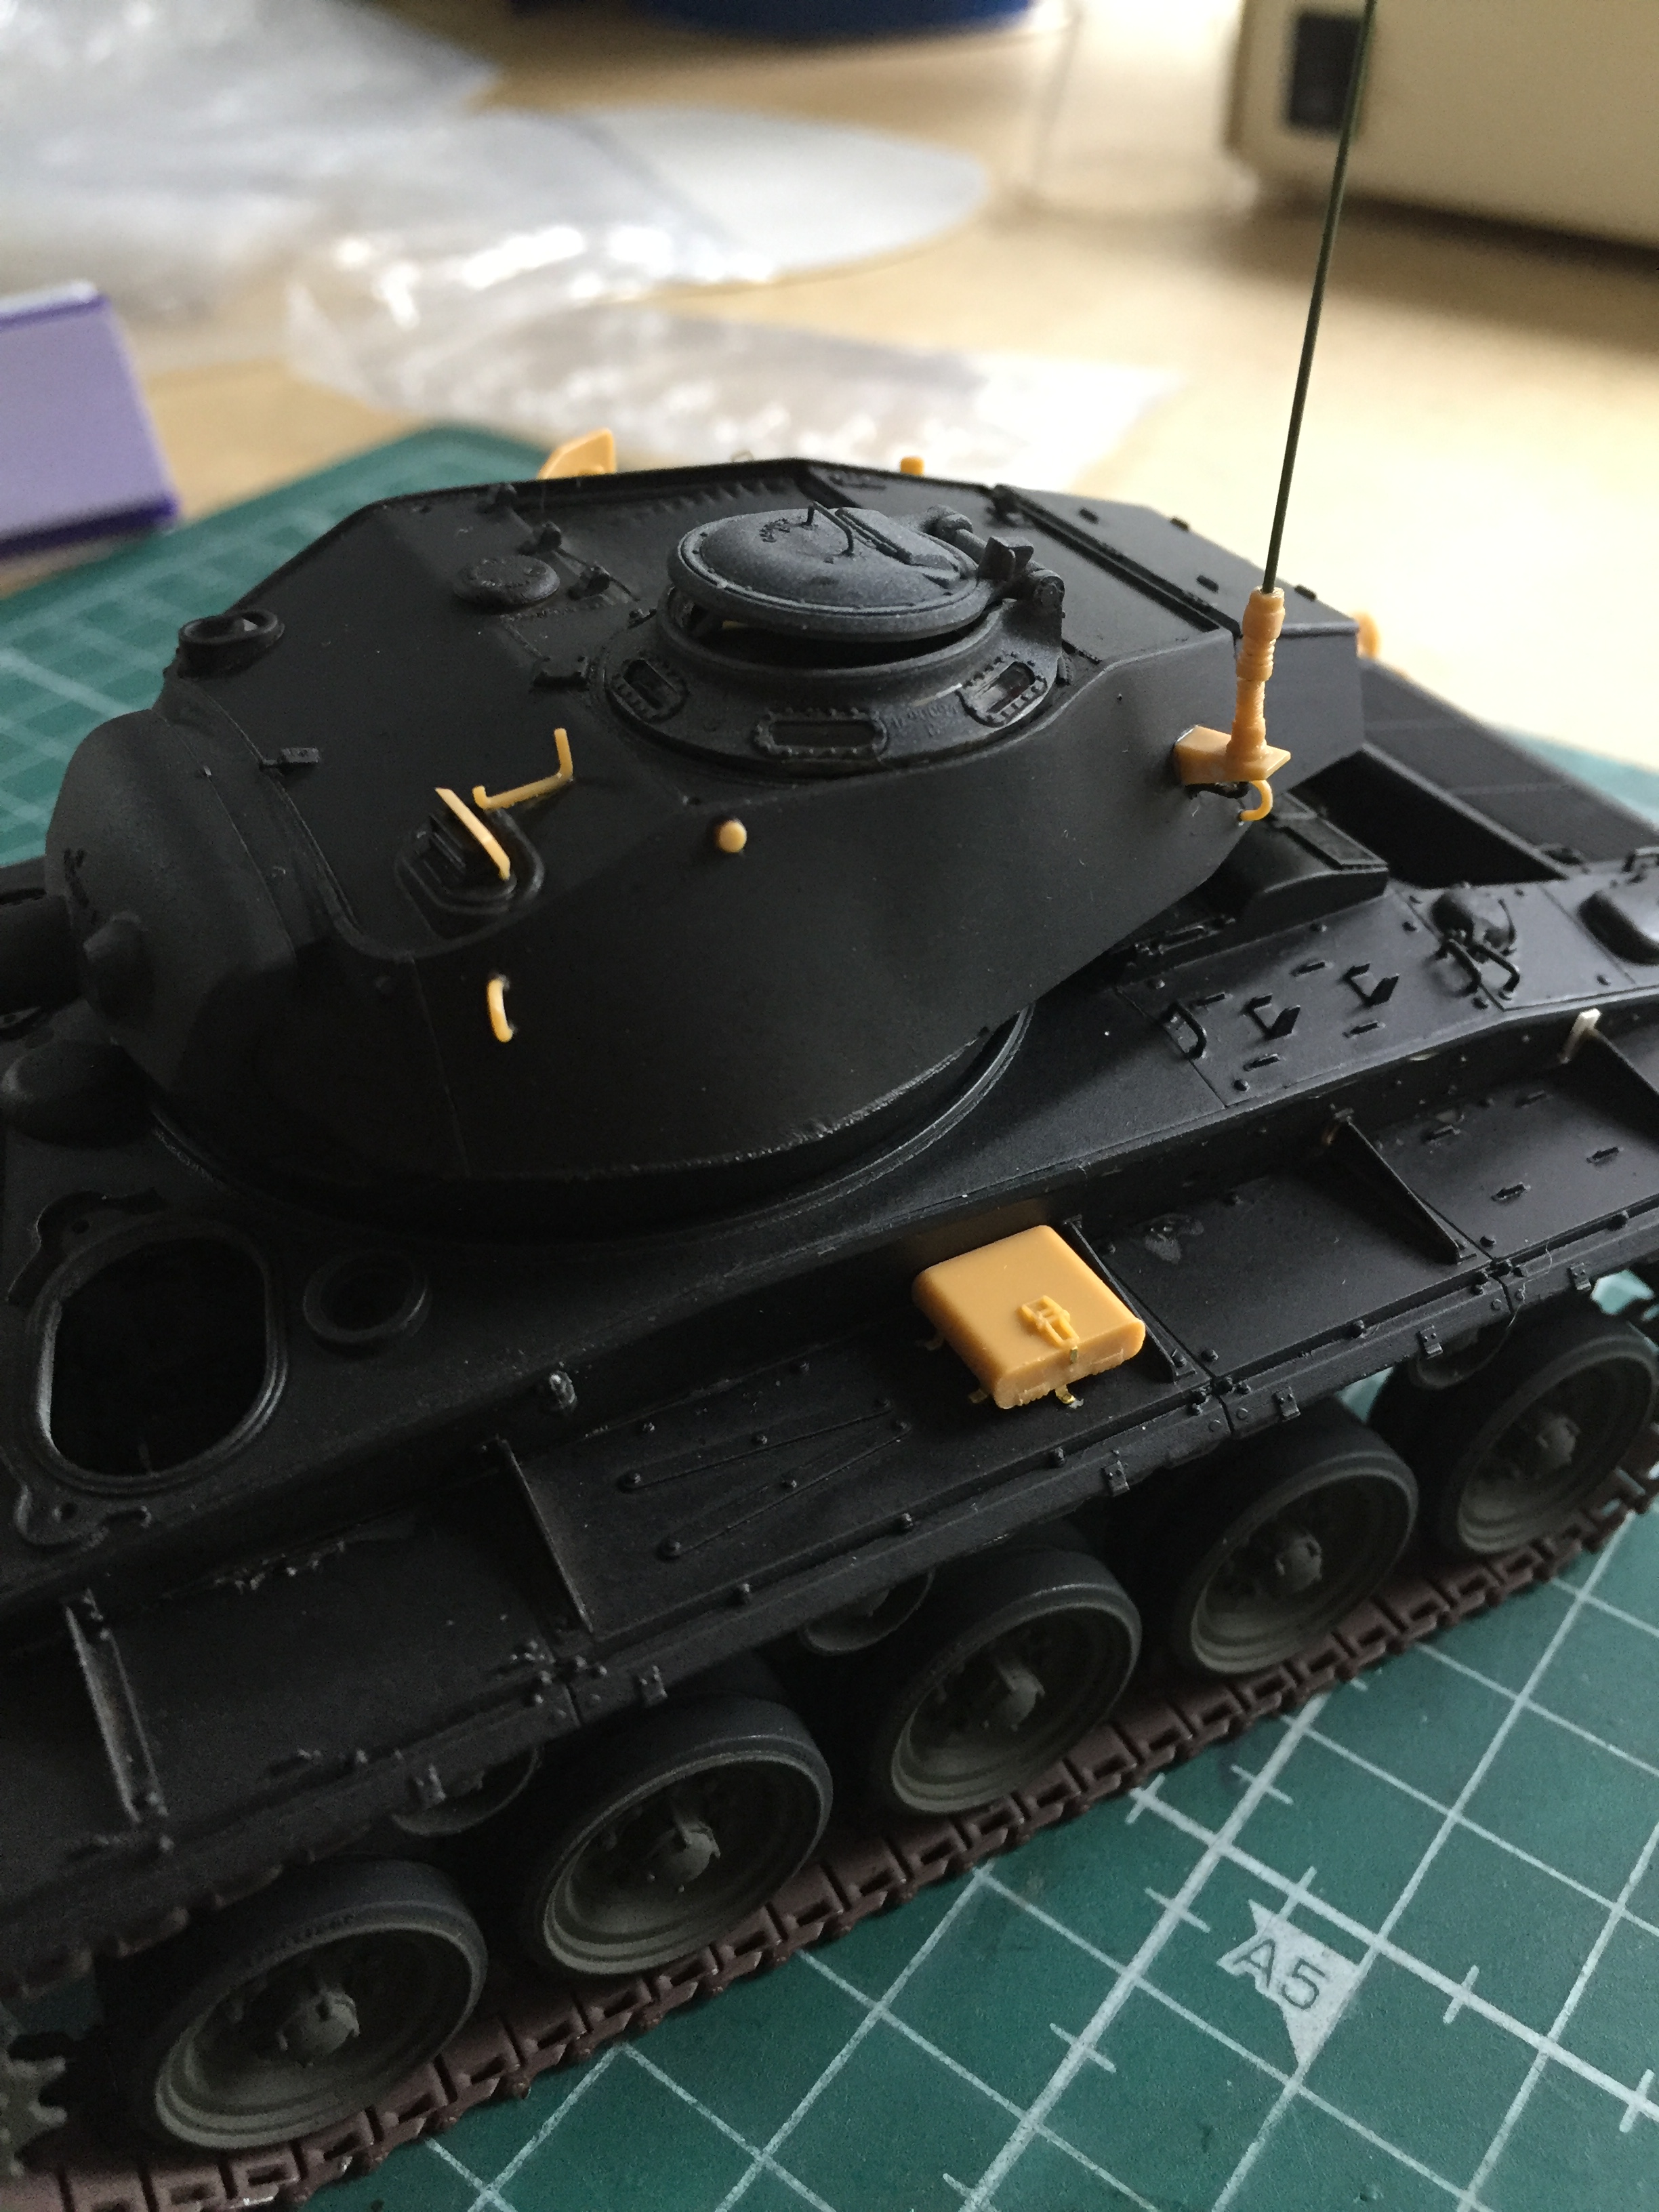

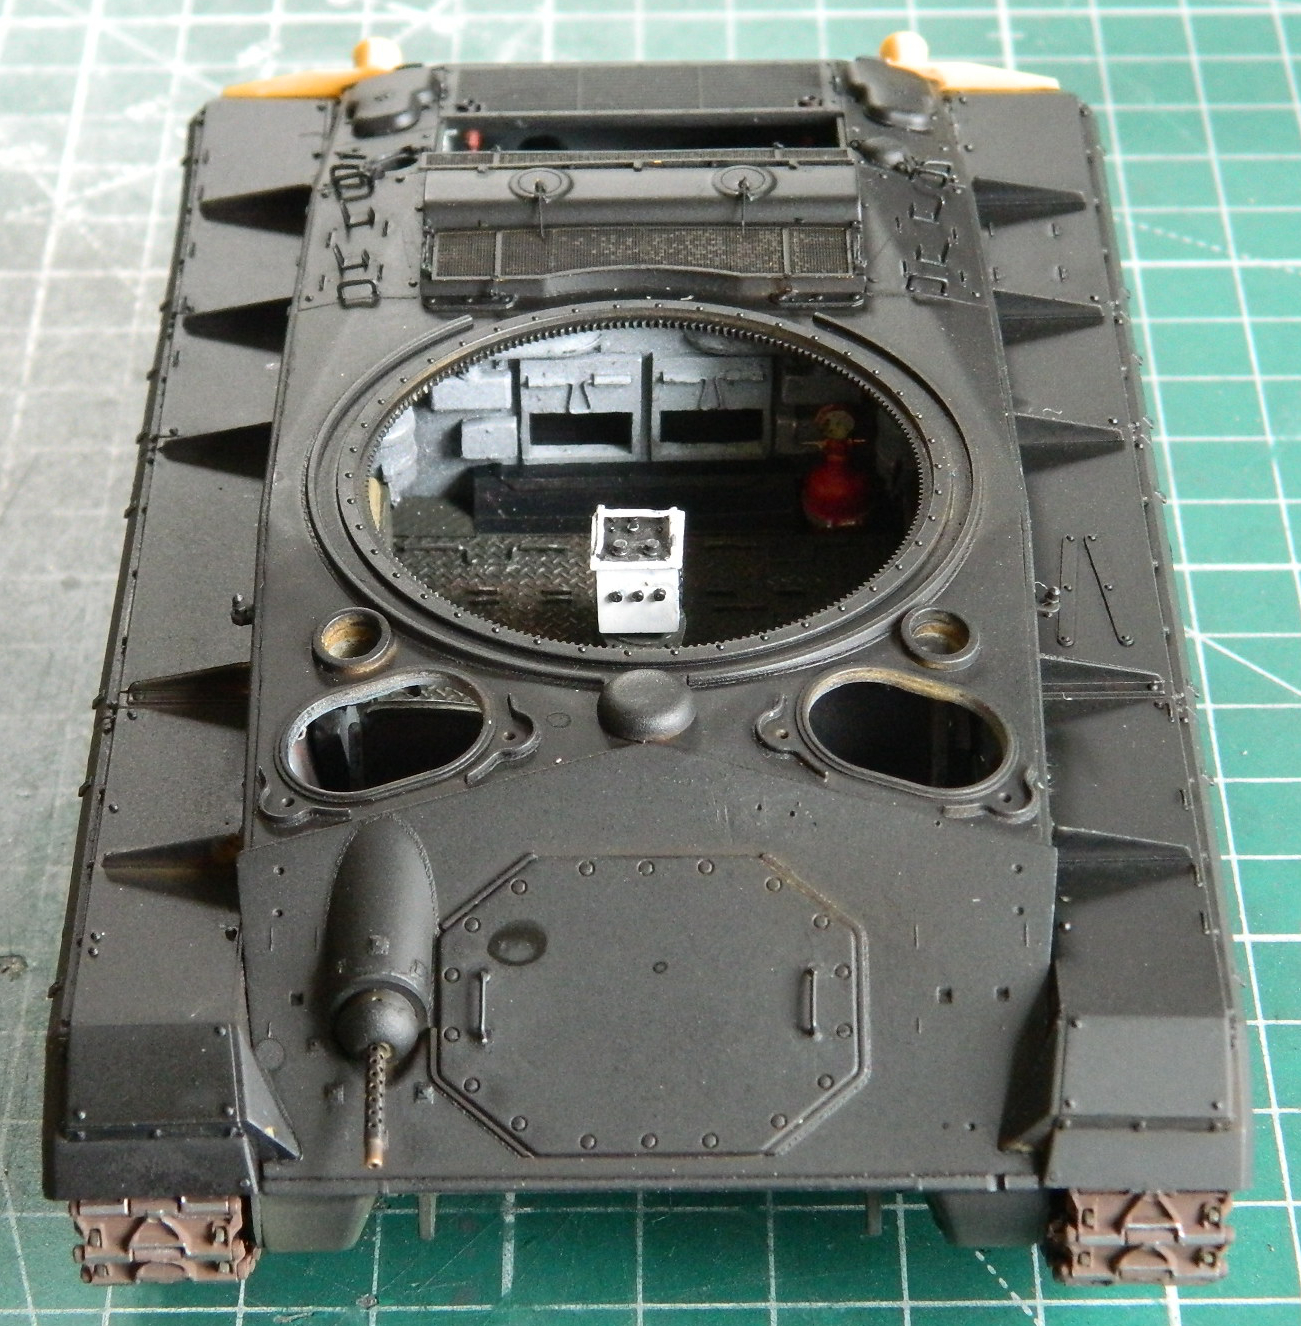
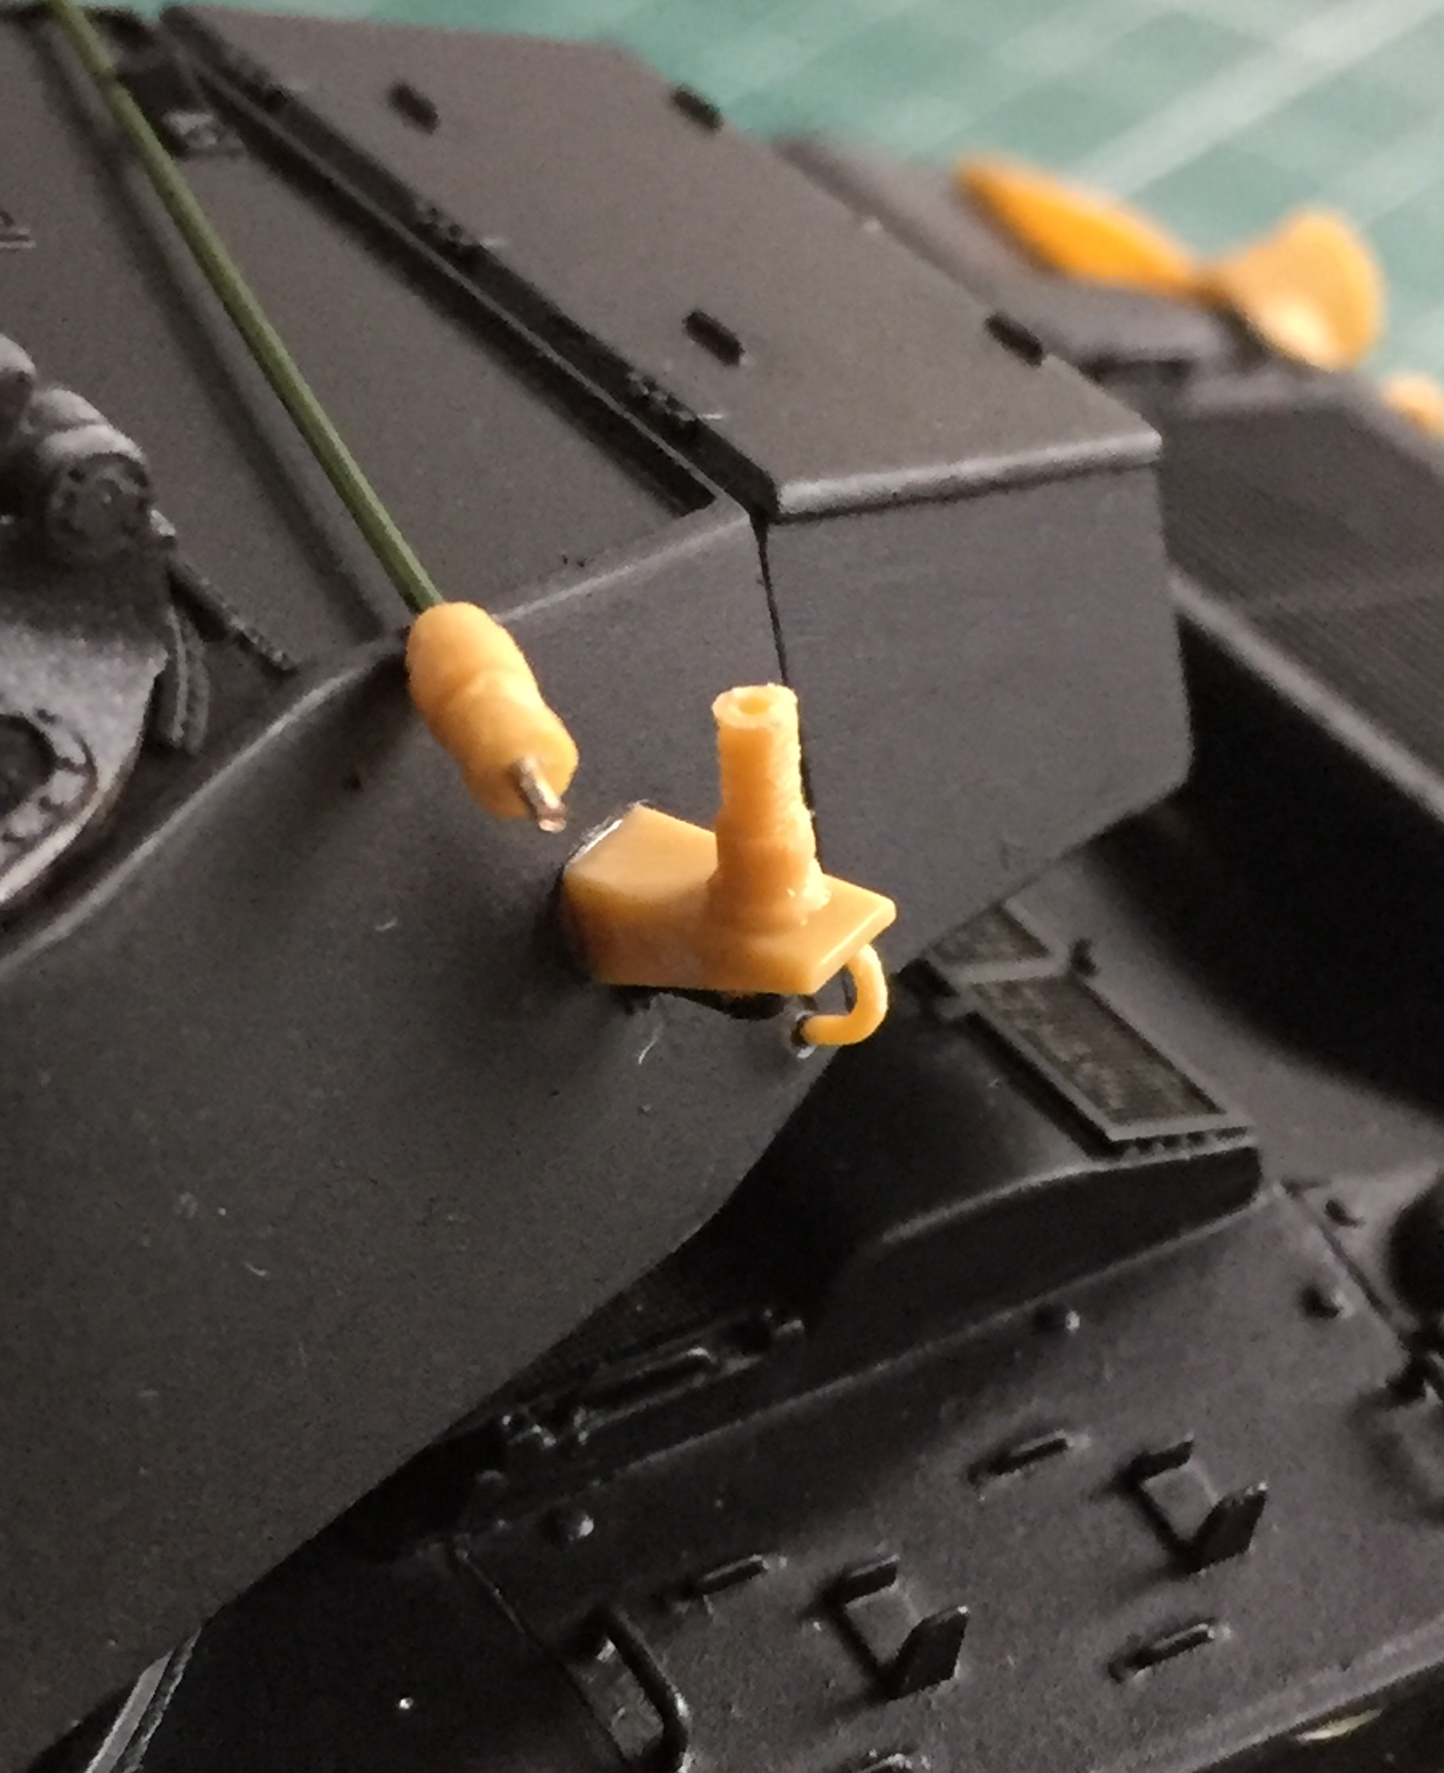
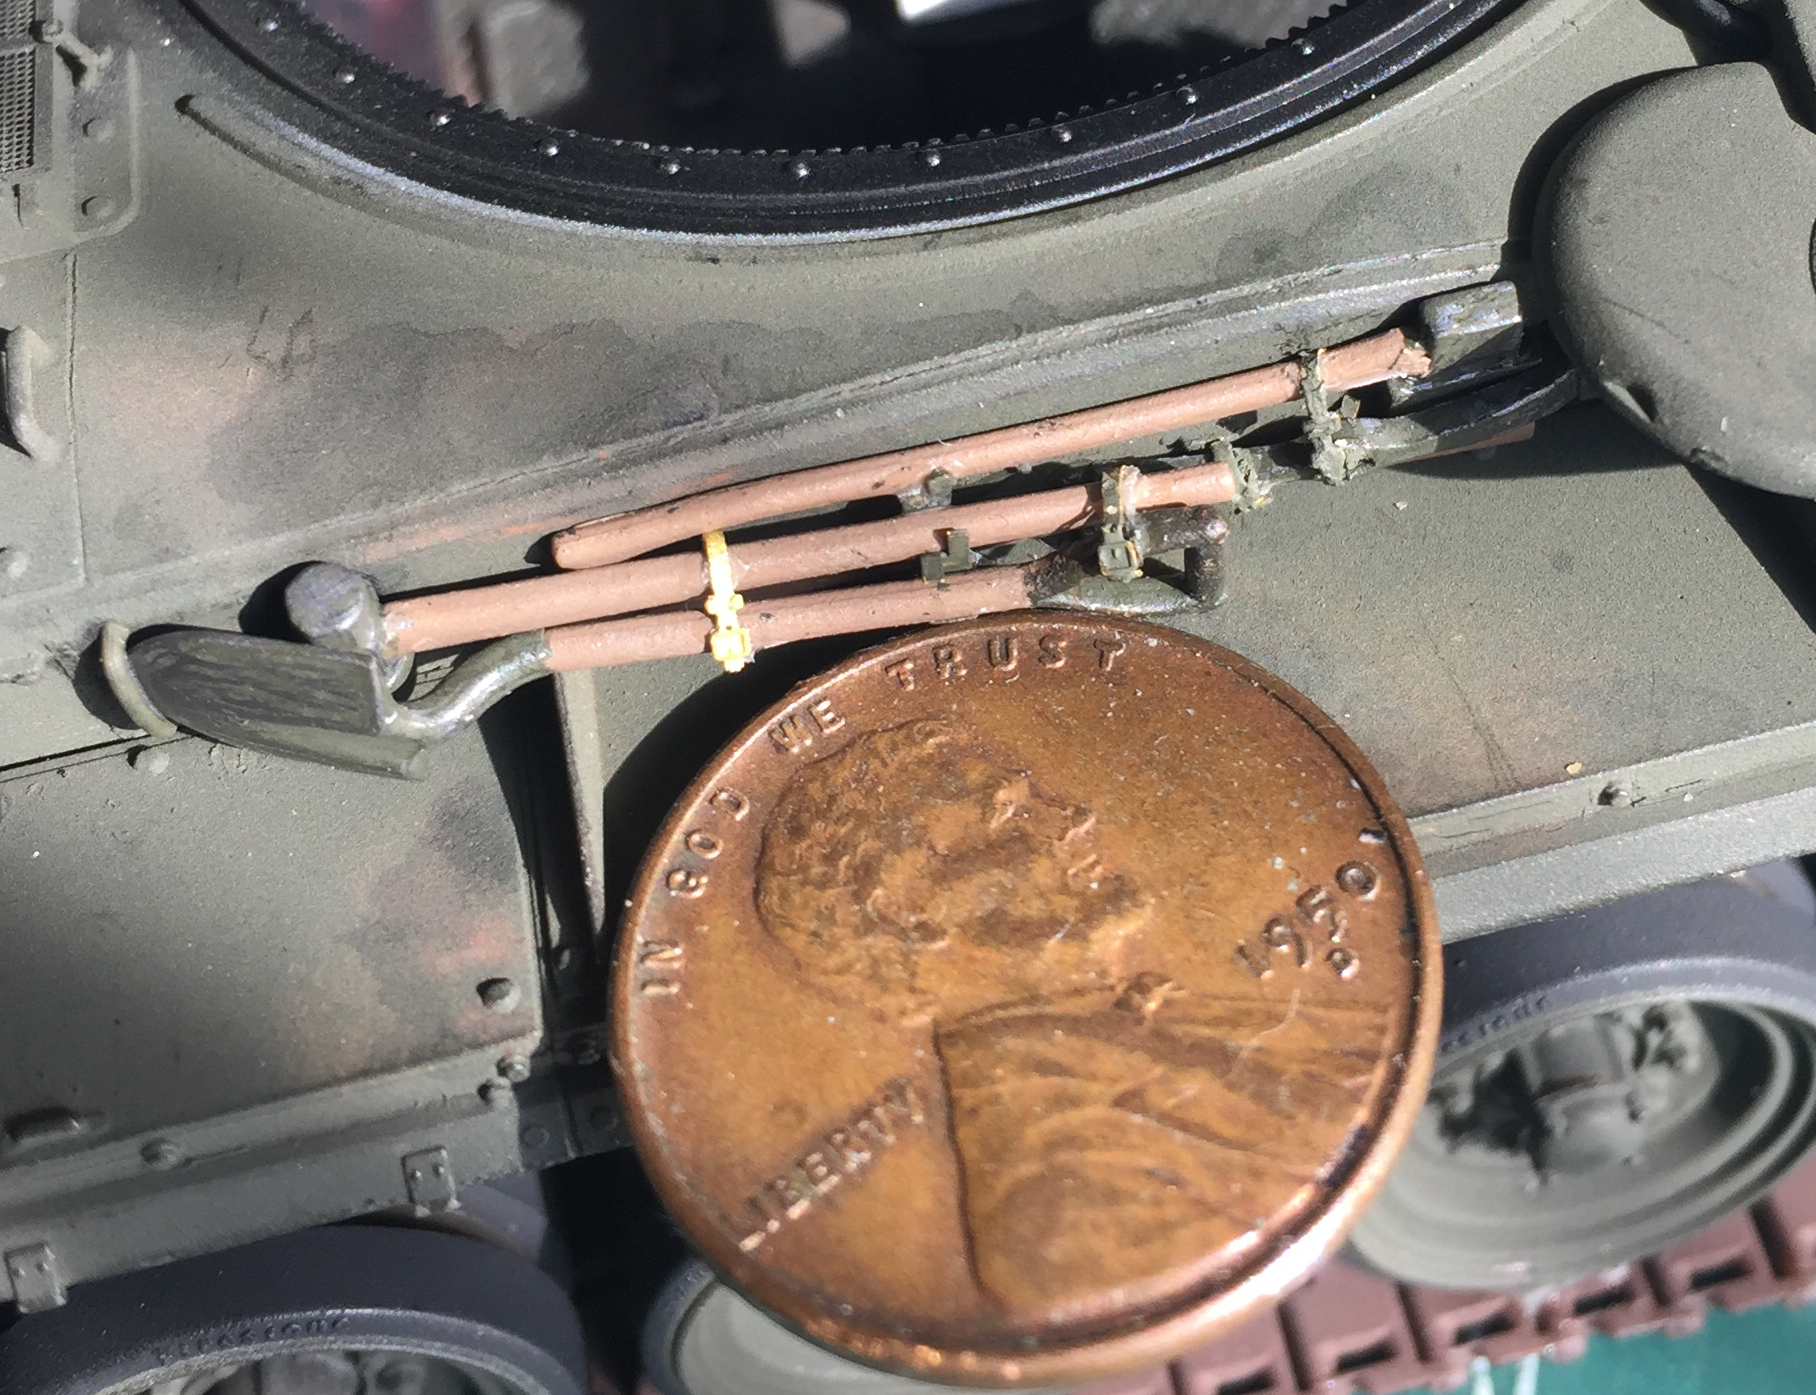
There is a large fire extinguisher that mounts to the bulkhead between the crew and engines compartment. There is also an external T-handle that someone outside can use to activate it. The kit provided the shroud, but amazing me completely, missed an opportunity to make a RIDICULOUSLY small part that’s a sodding NIGHTmare to remove from a sprue and clean up…so I made one from stretched sprue:

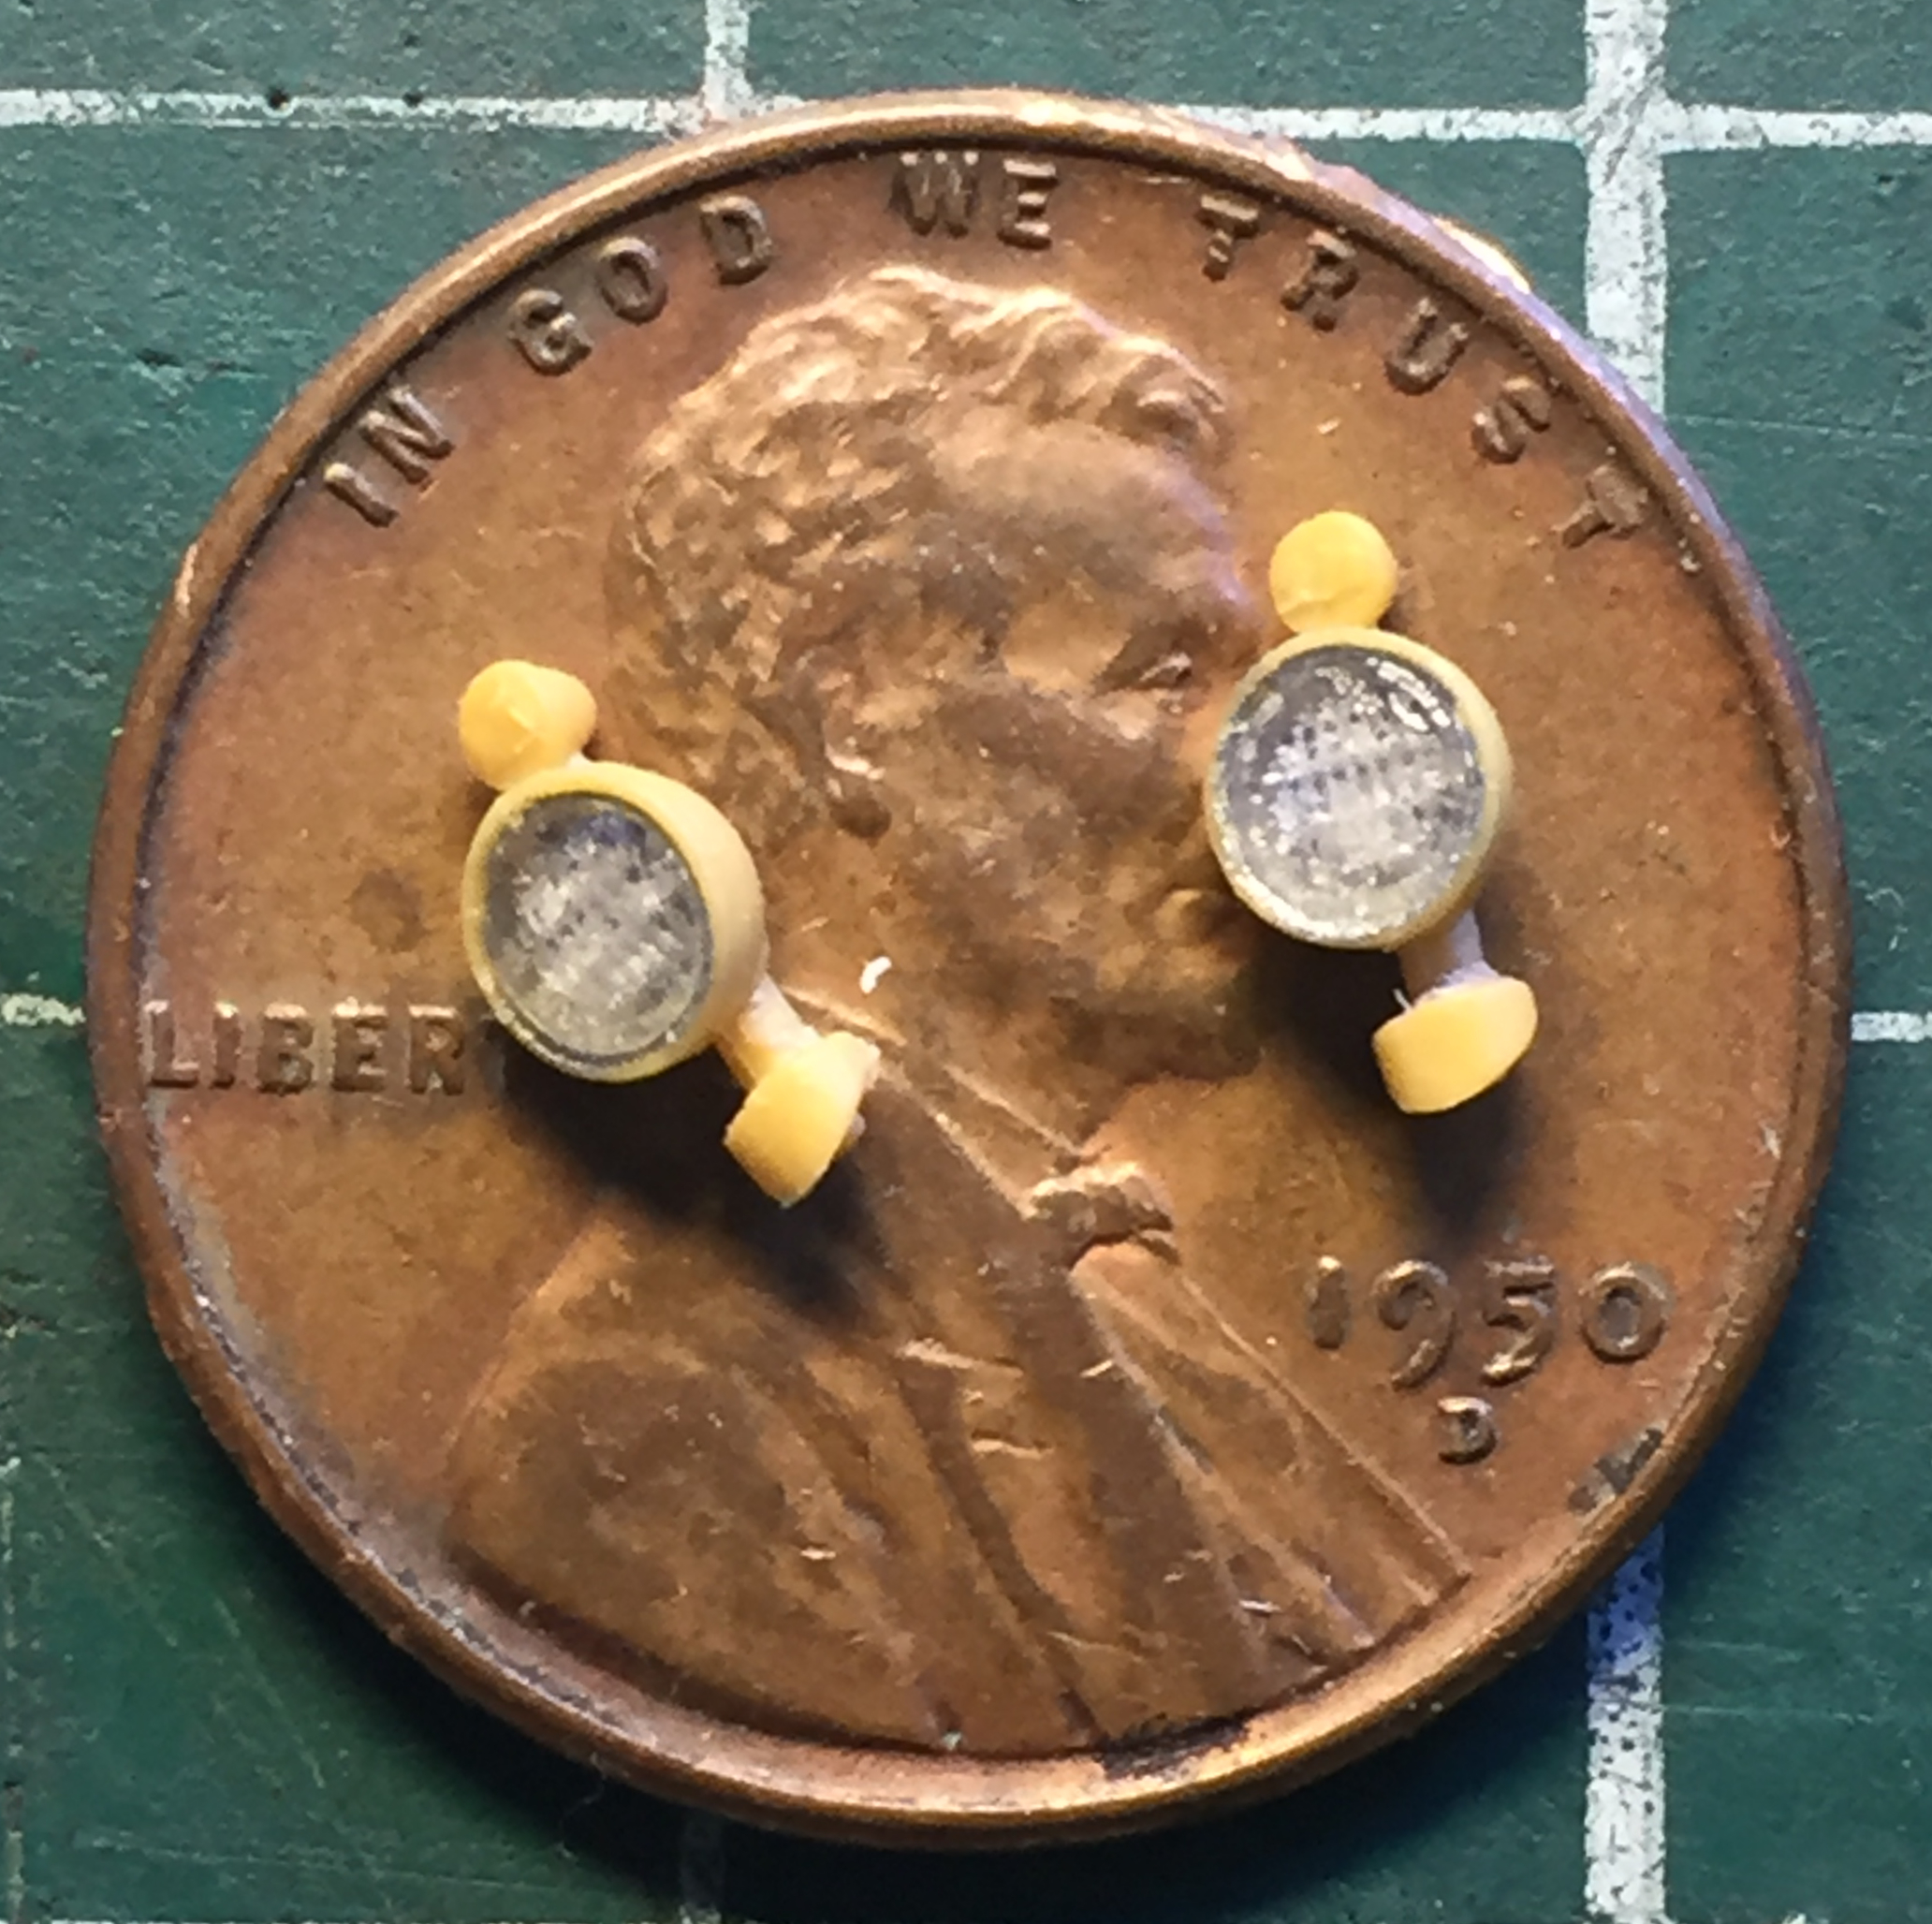
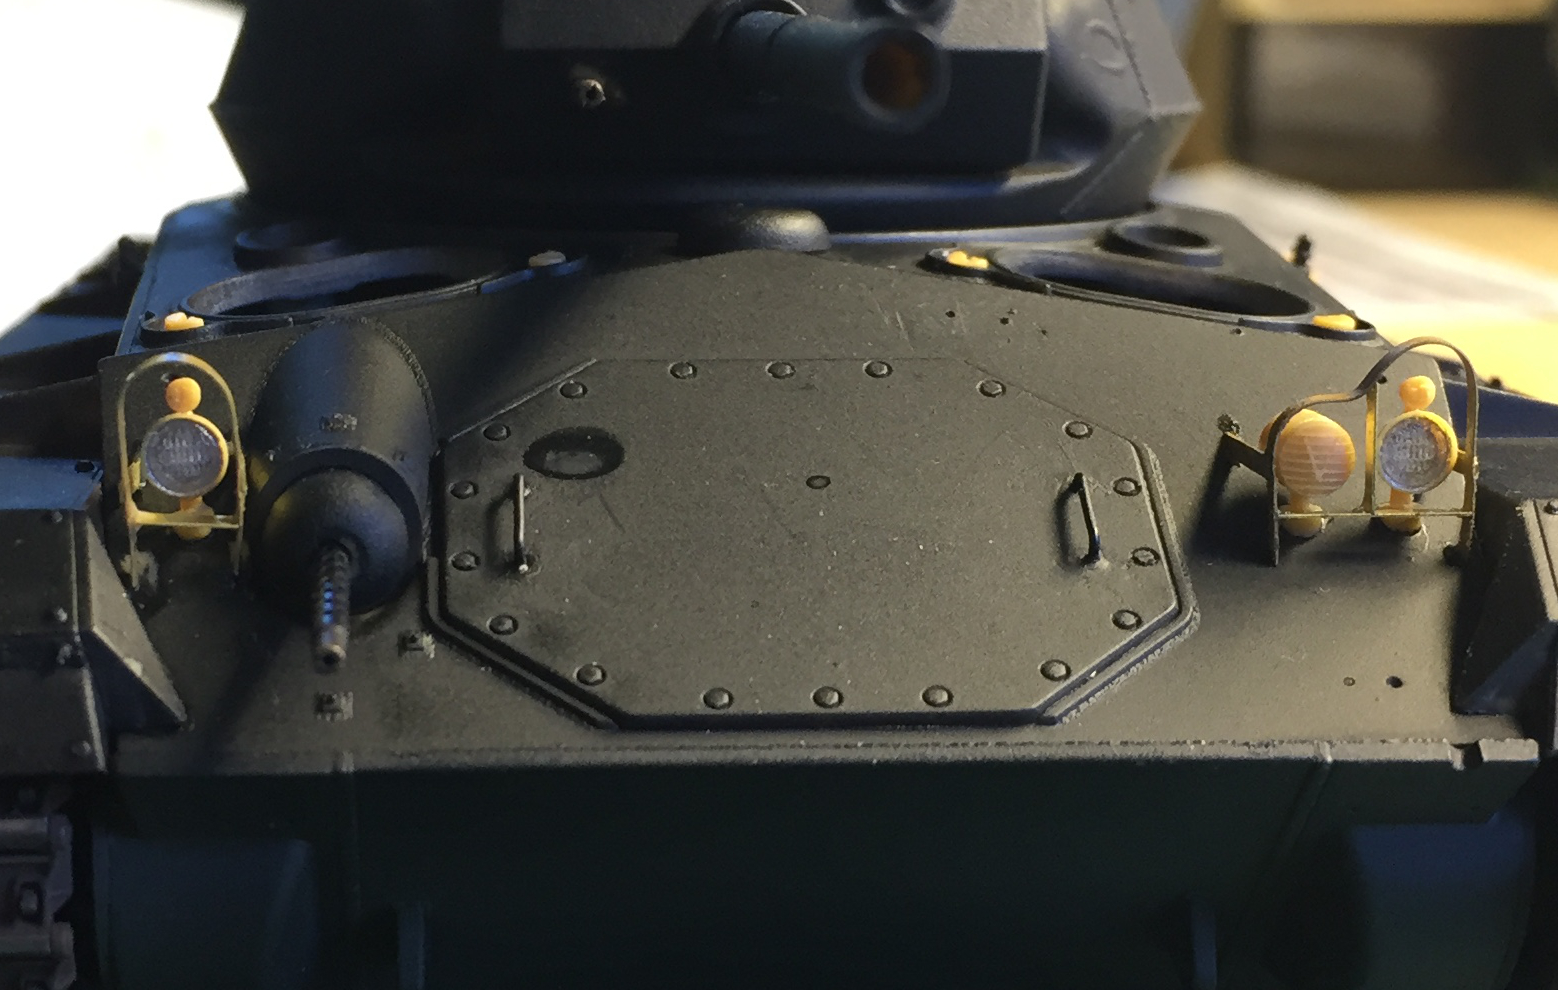
Amazing myself completely, I did not break these delicate headlight assemblies during construction, attachment, or painting. Amazing:
With the headlights in place, it was time to do the same thing with the headlight guards:

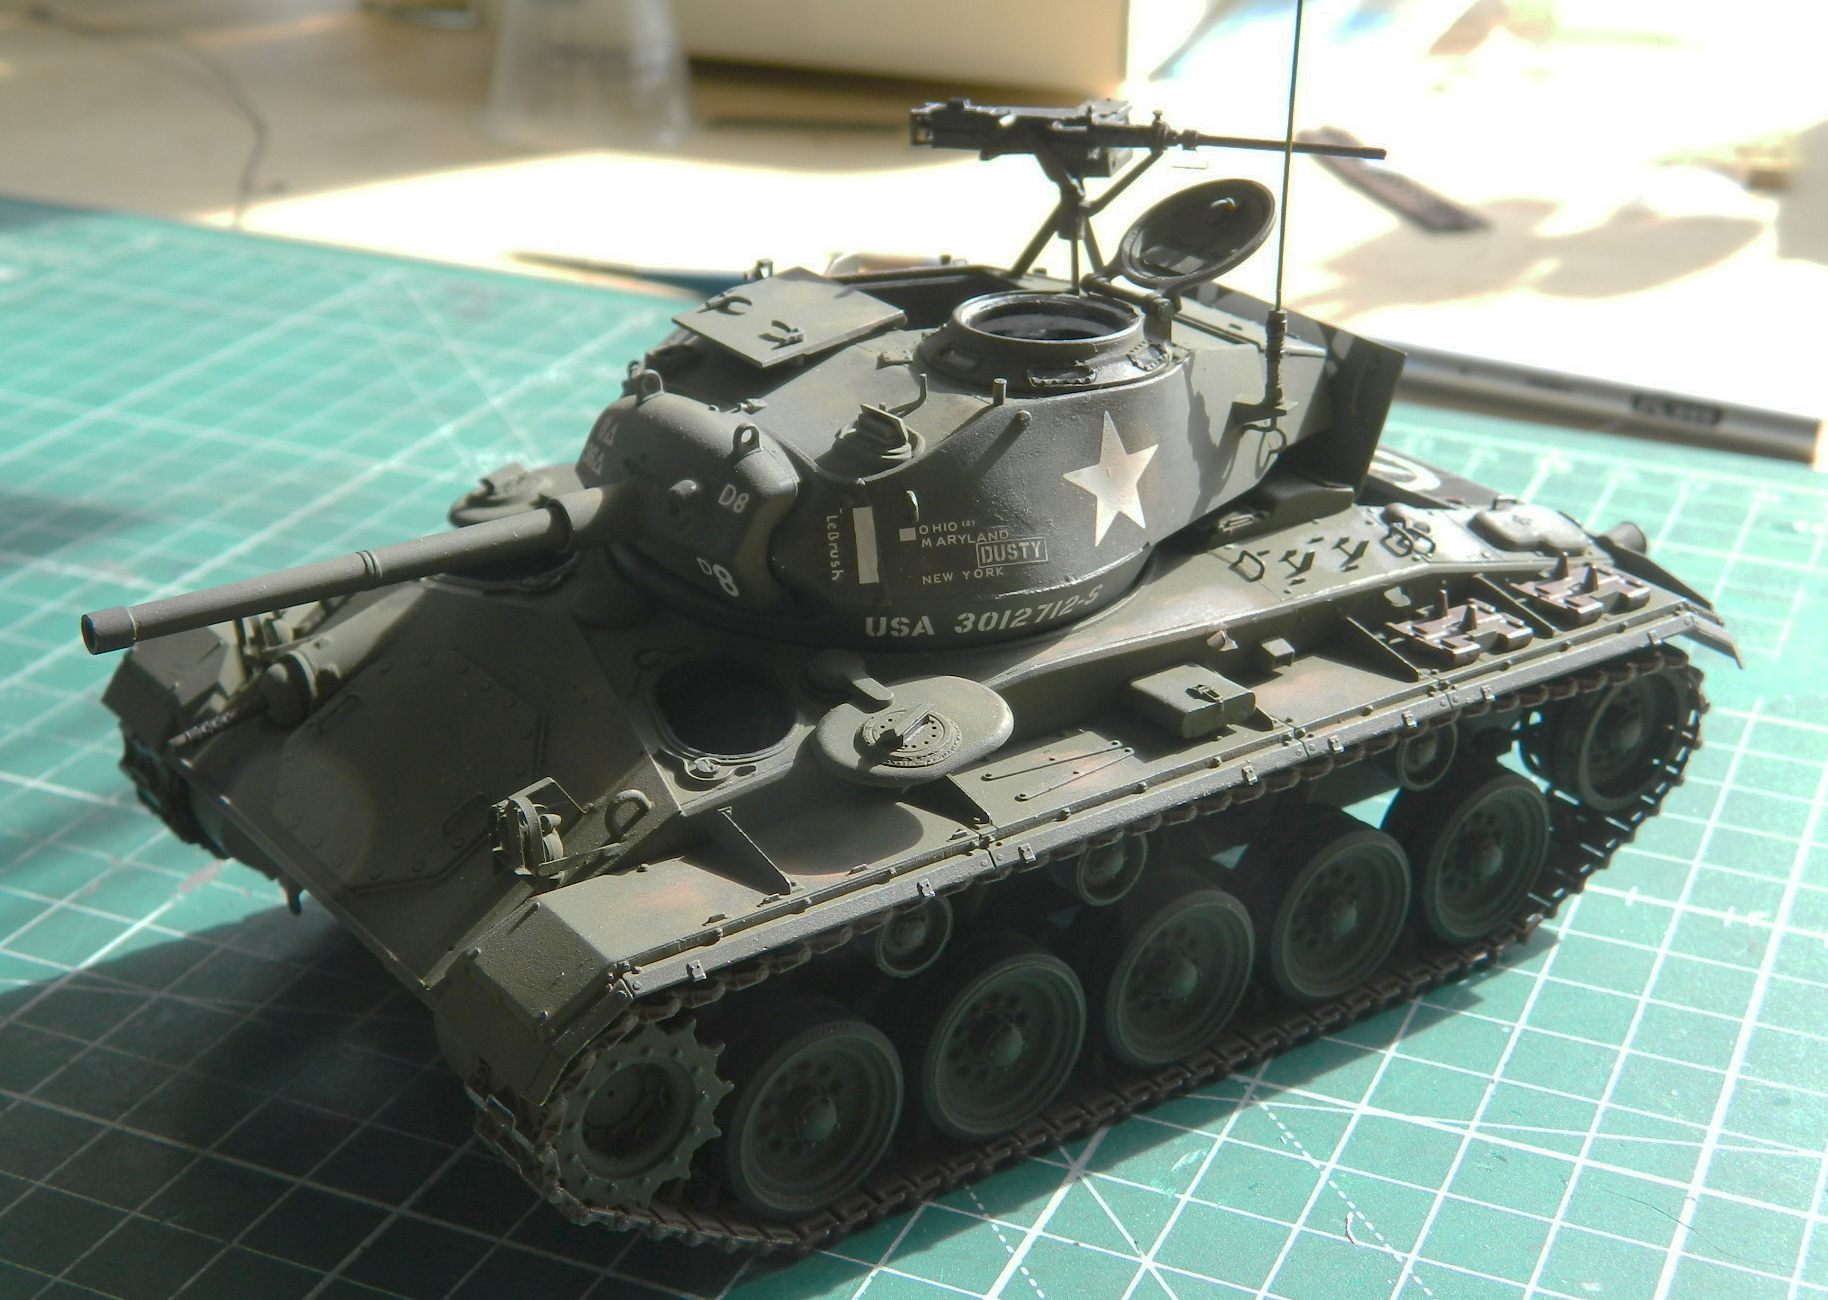
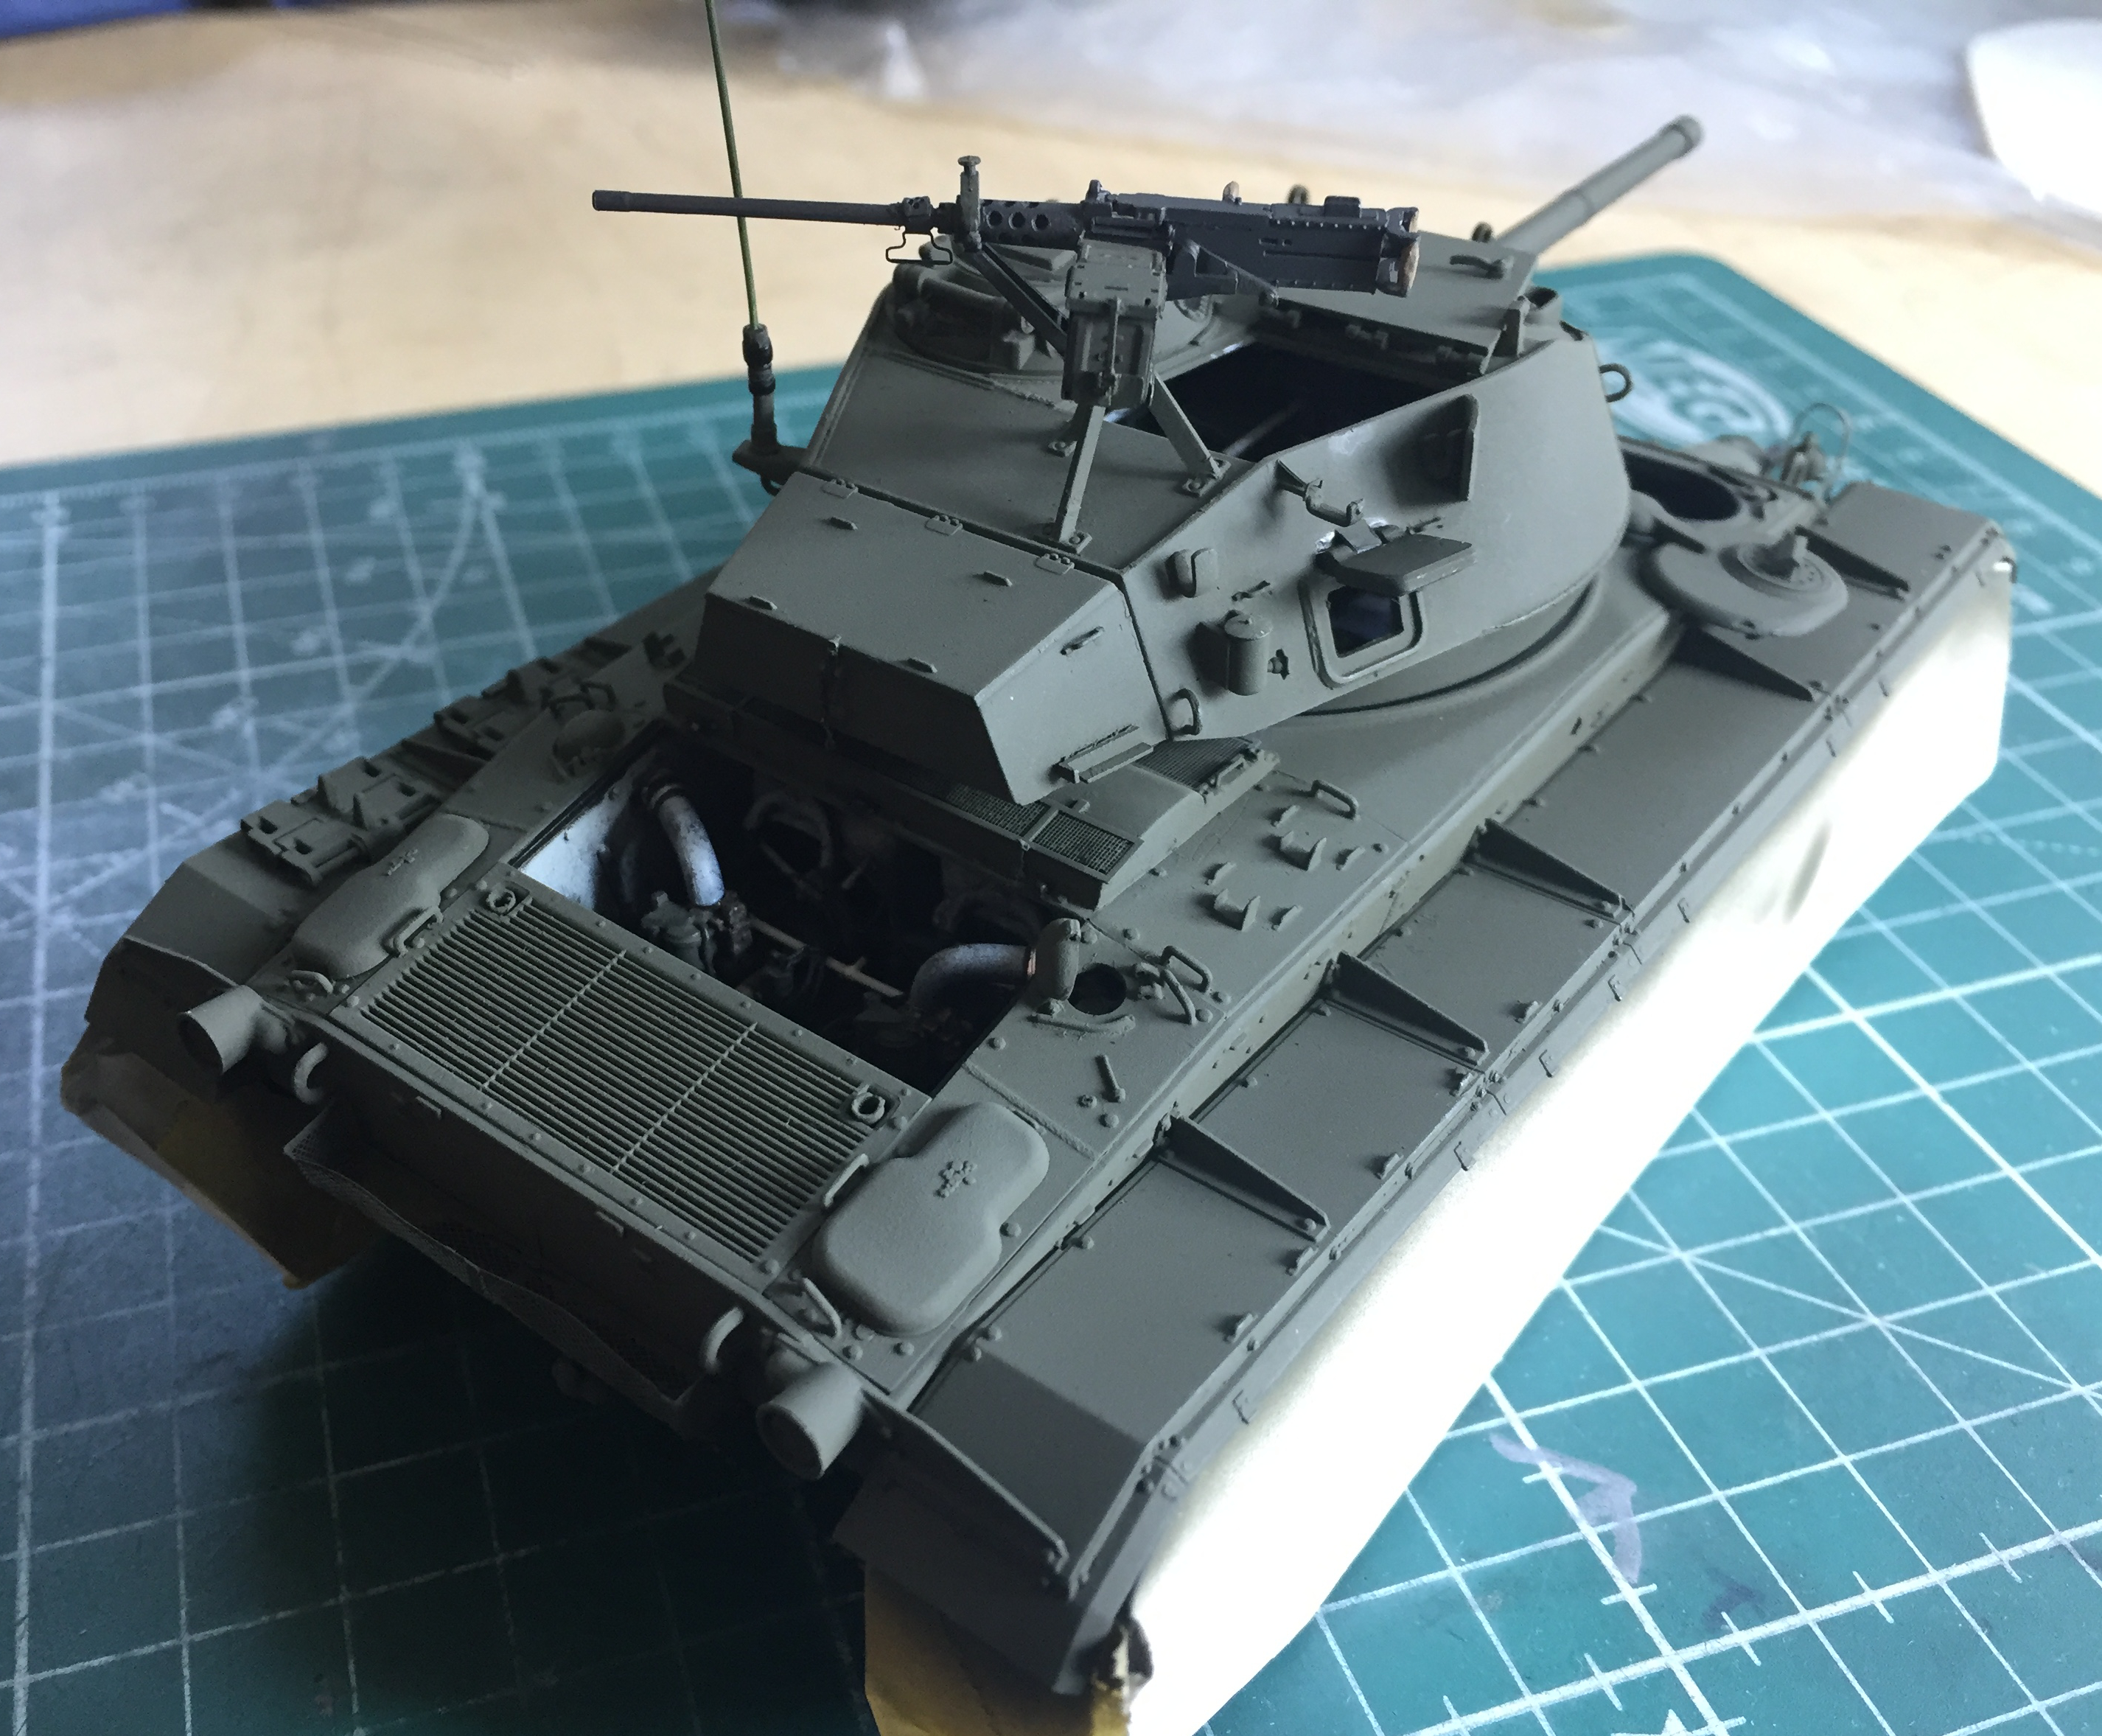
More from dogged persistence than for any other reason, I eventually got all the small bits on and the whole thing was ready for paint (which is another way of saying, “Discovering the small things I forgot to add before painting”) (the engine cover is just placed in the closed position to serve as a mask for the engine compartment):

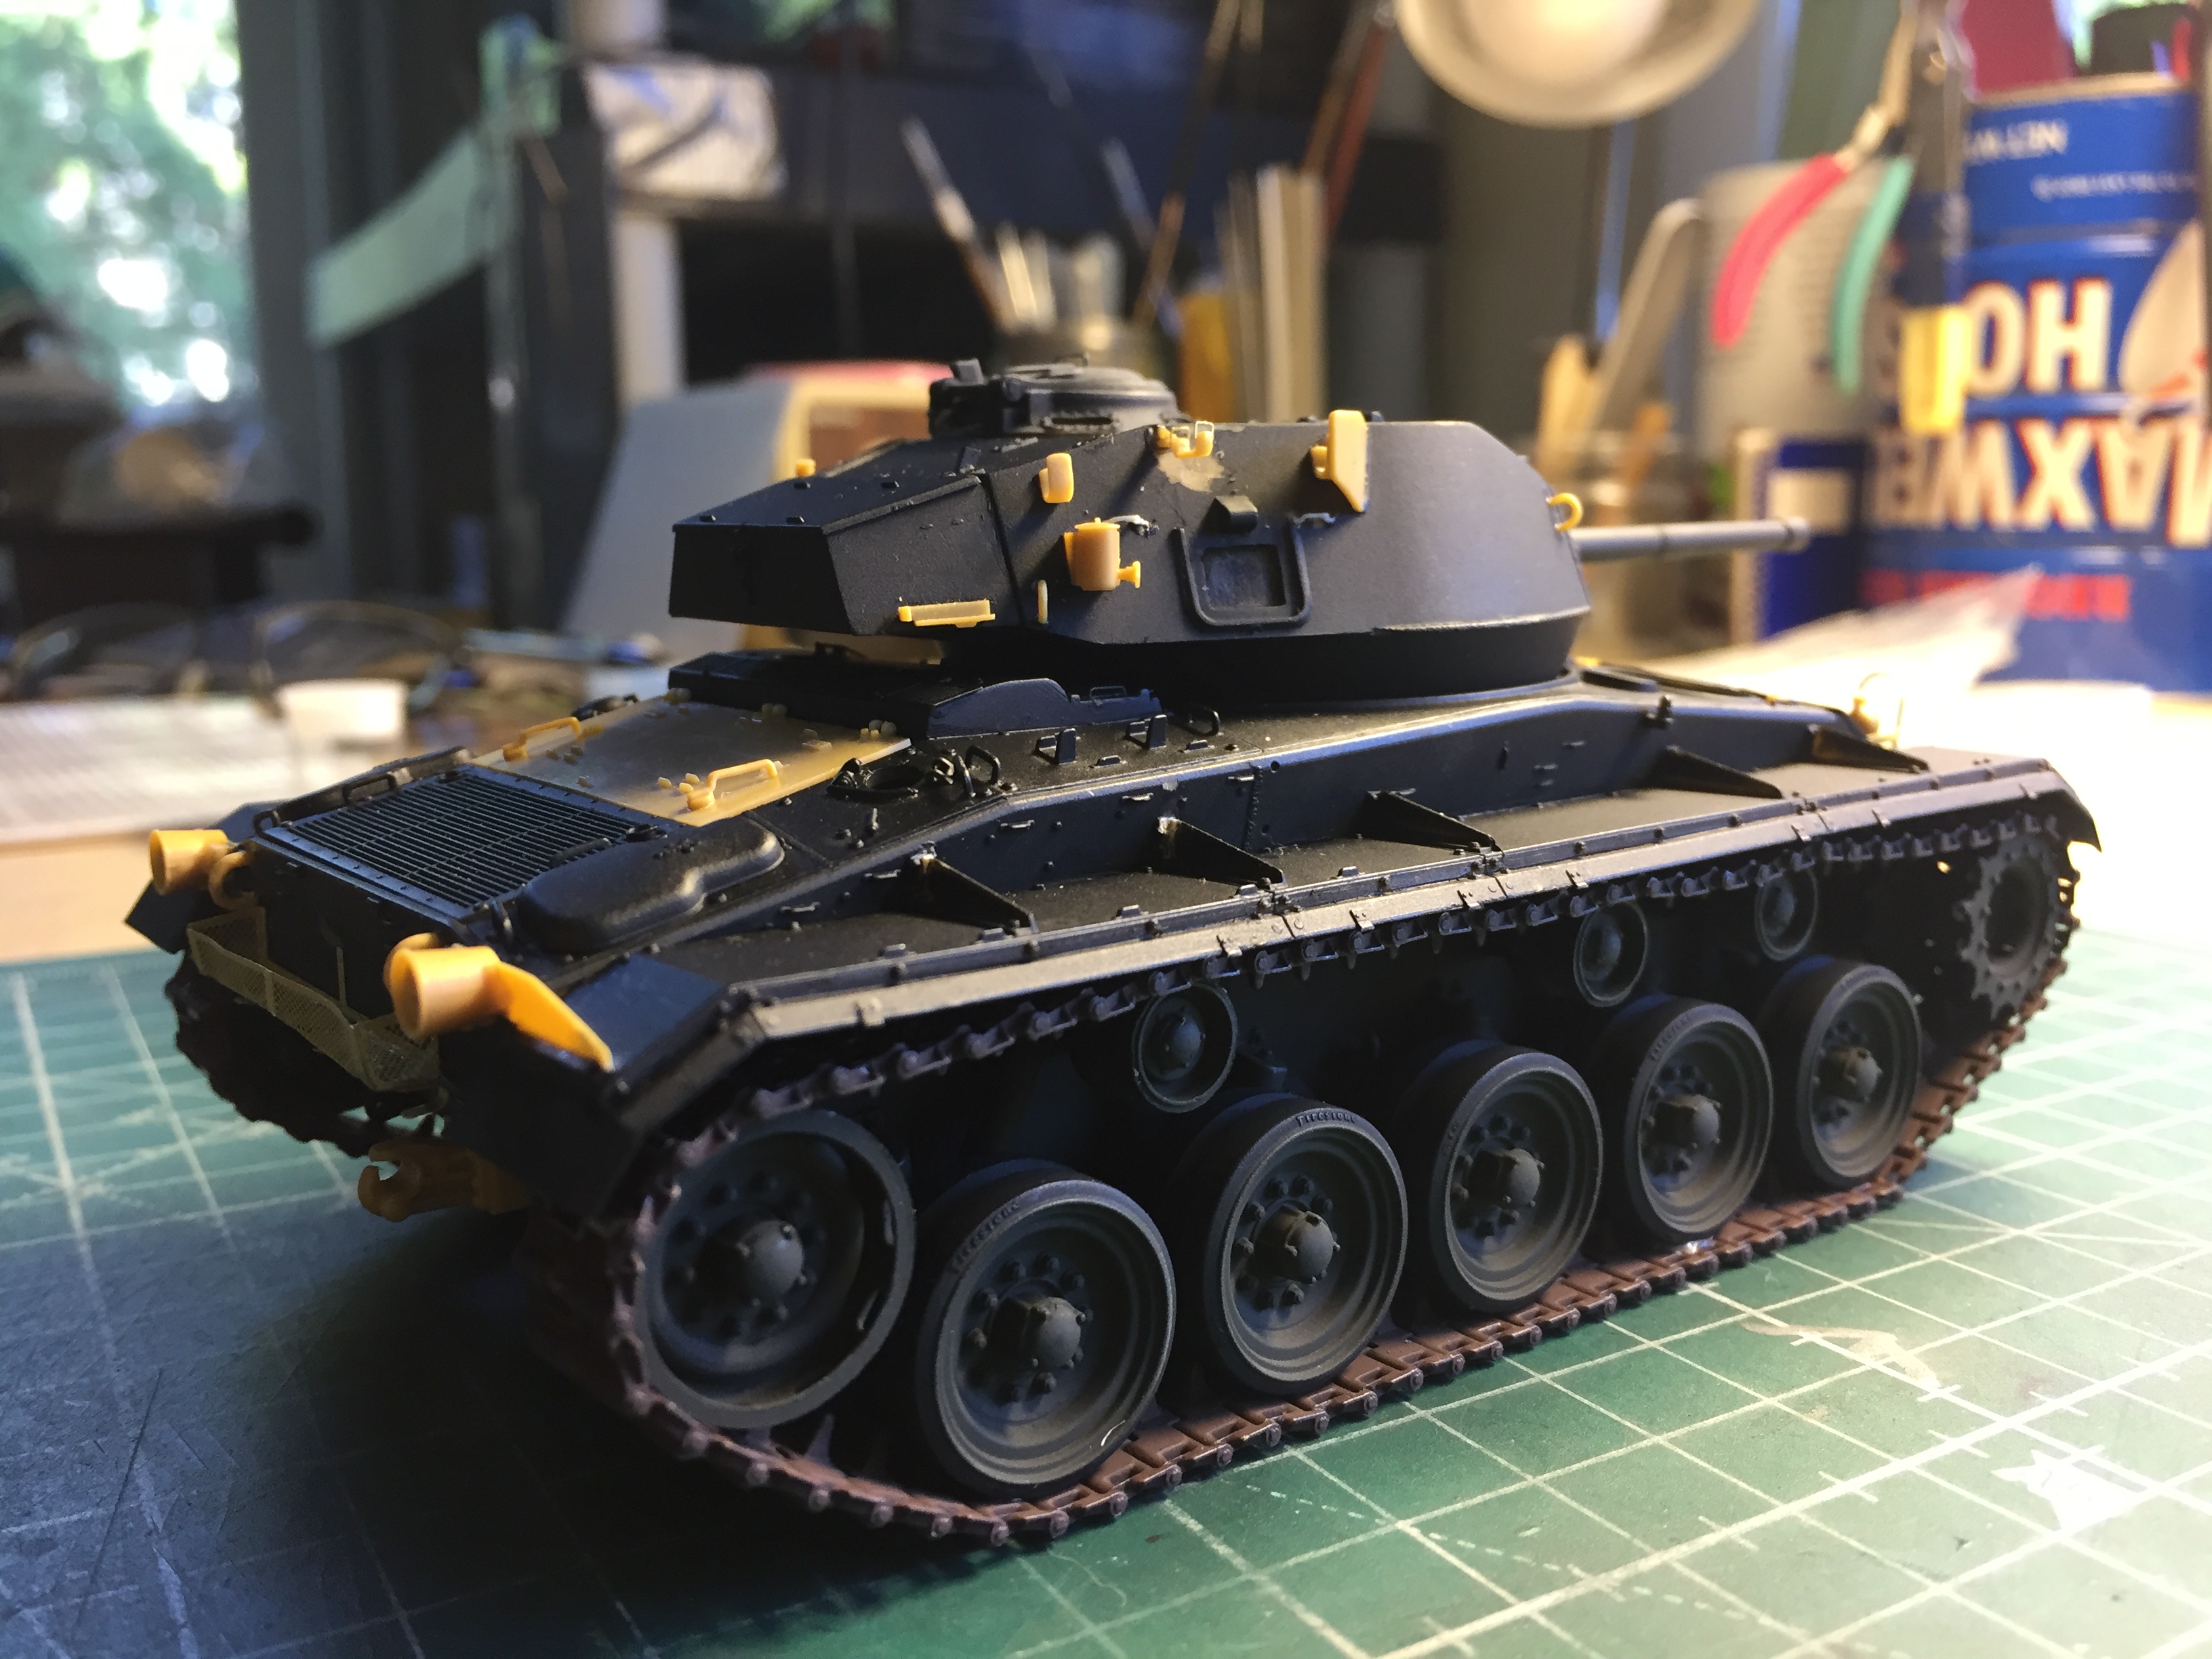

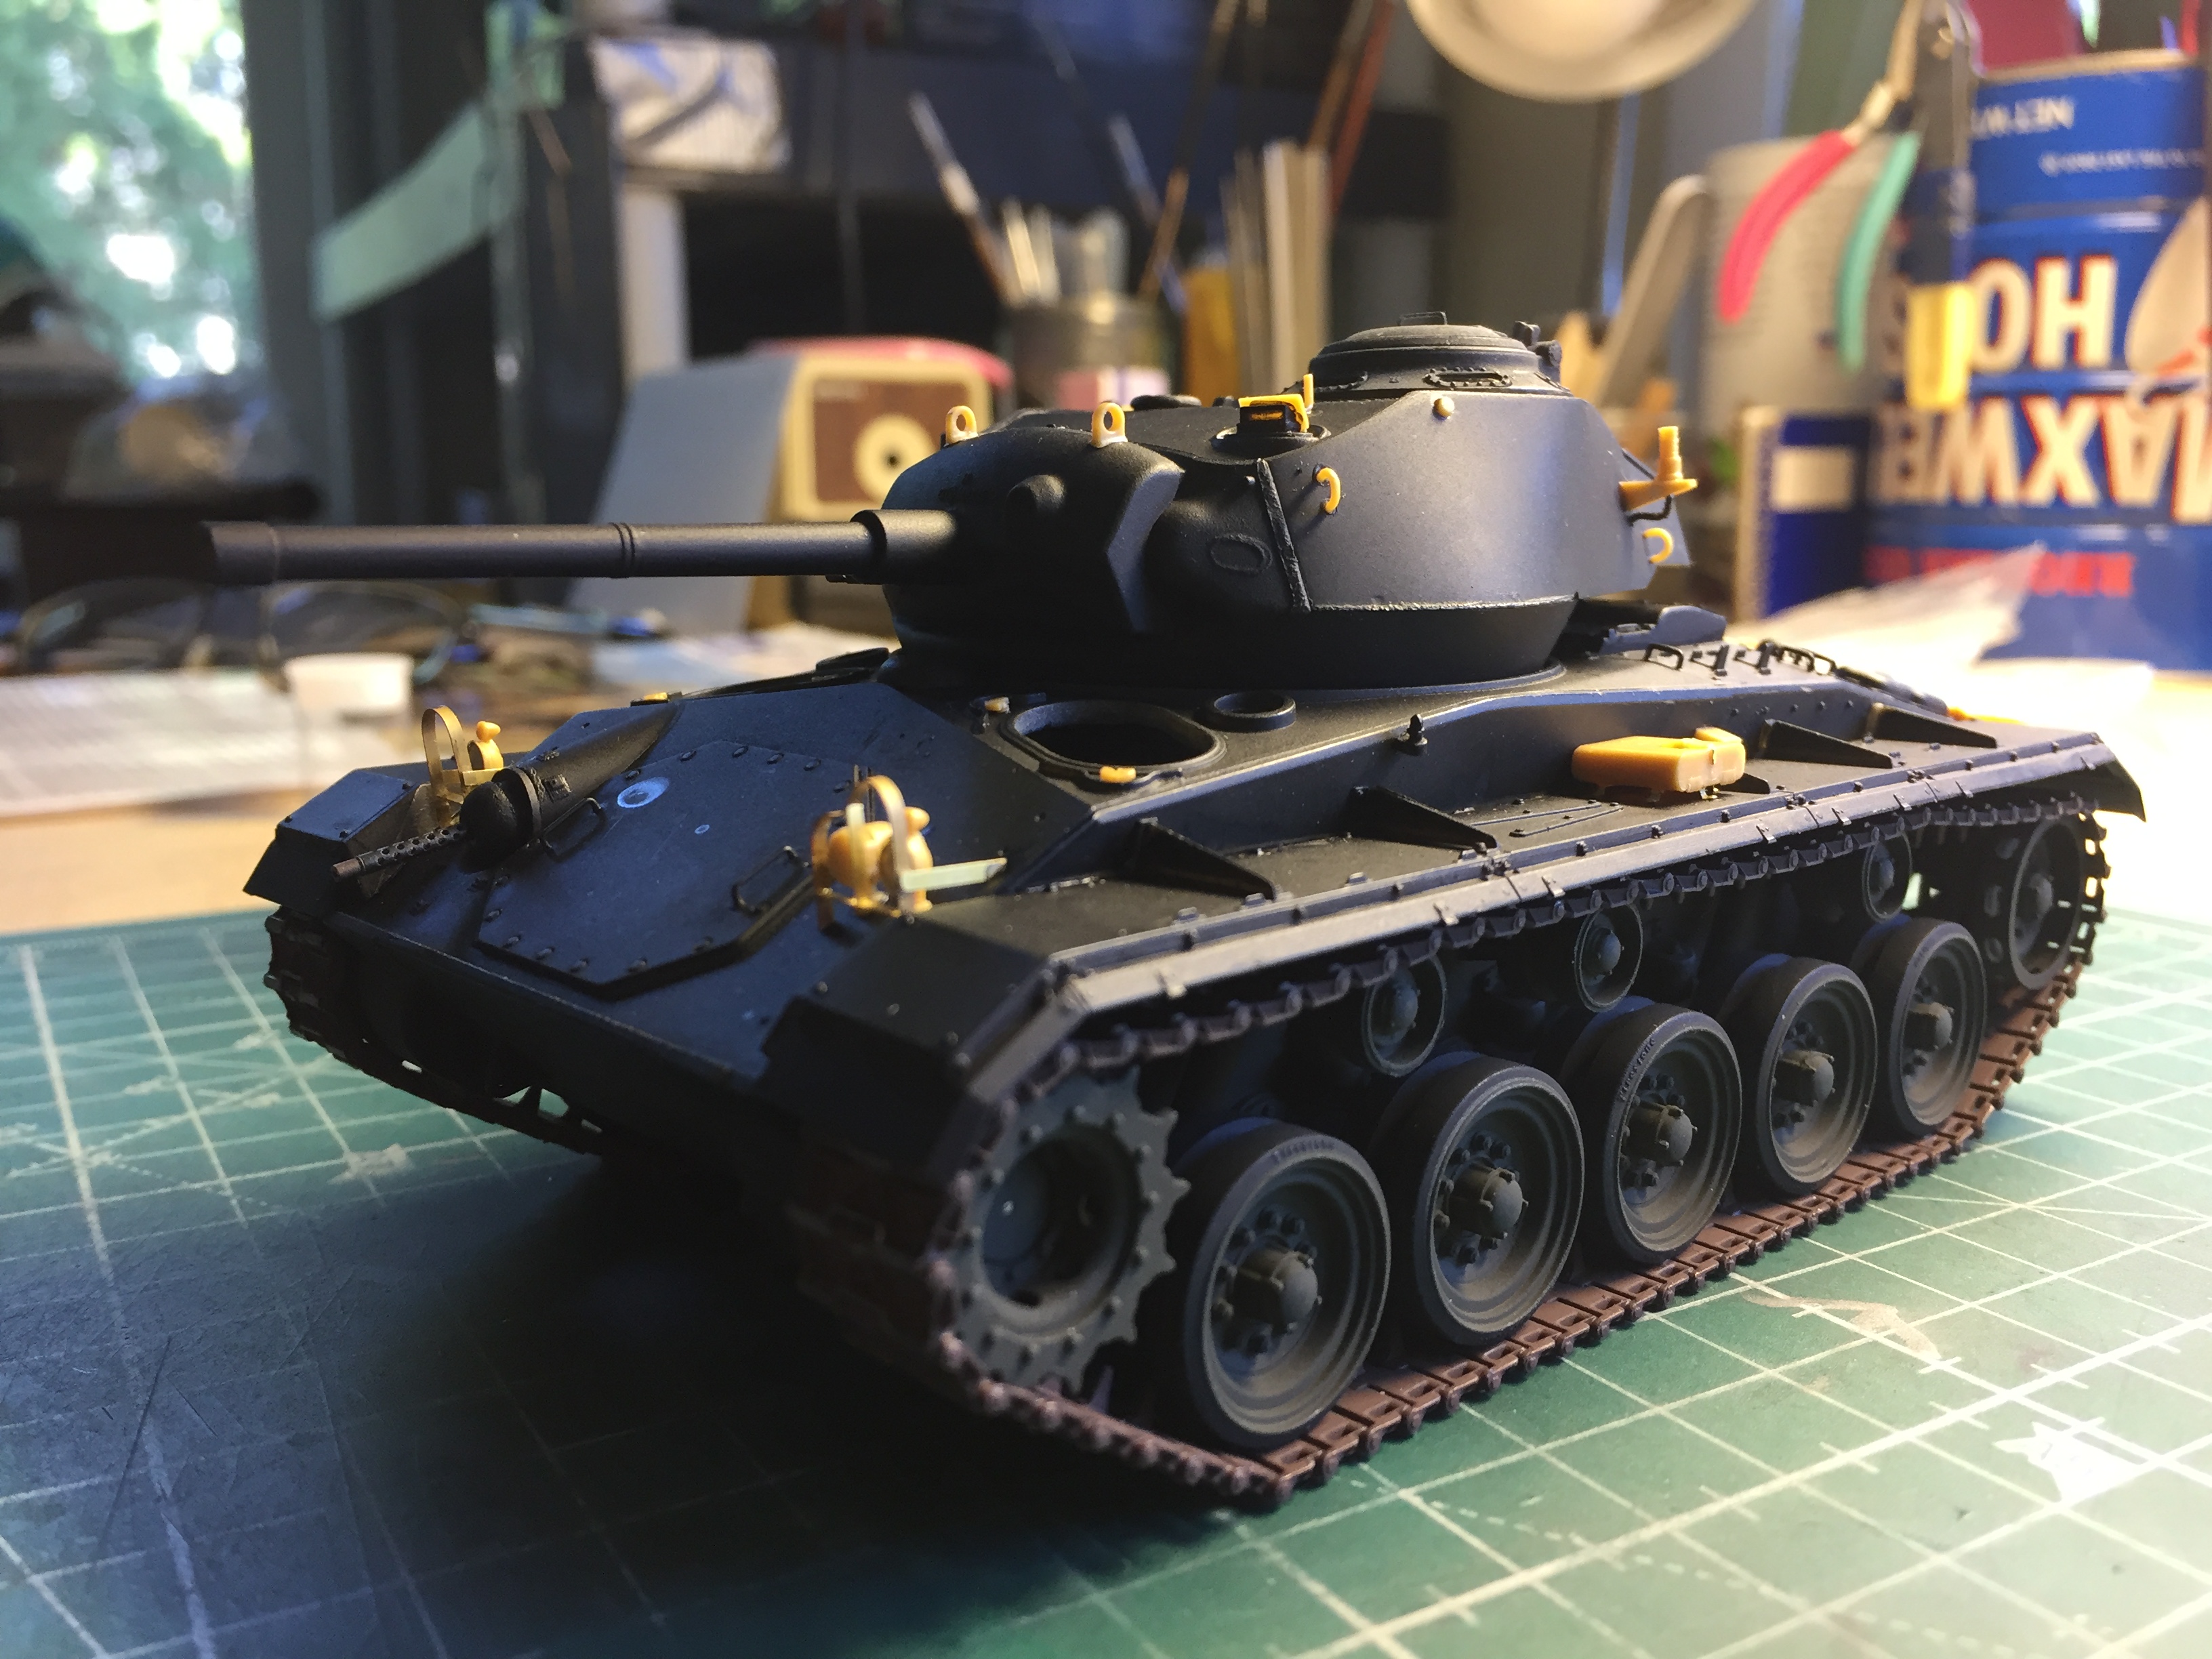
Right! Well, now that it’s been pre-shaded (all the tan parts were hit with Tamiya XF-1 Flat Black), it was time to add the highlights (Tamiya XF-2 Flat White):


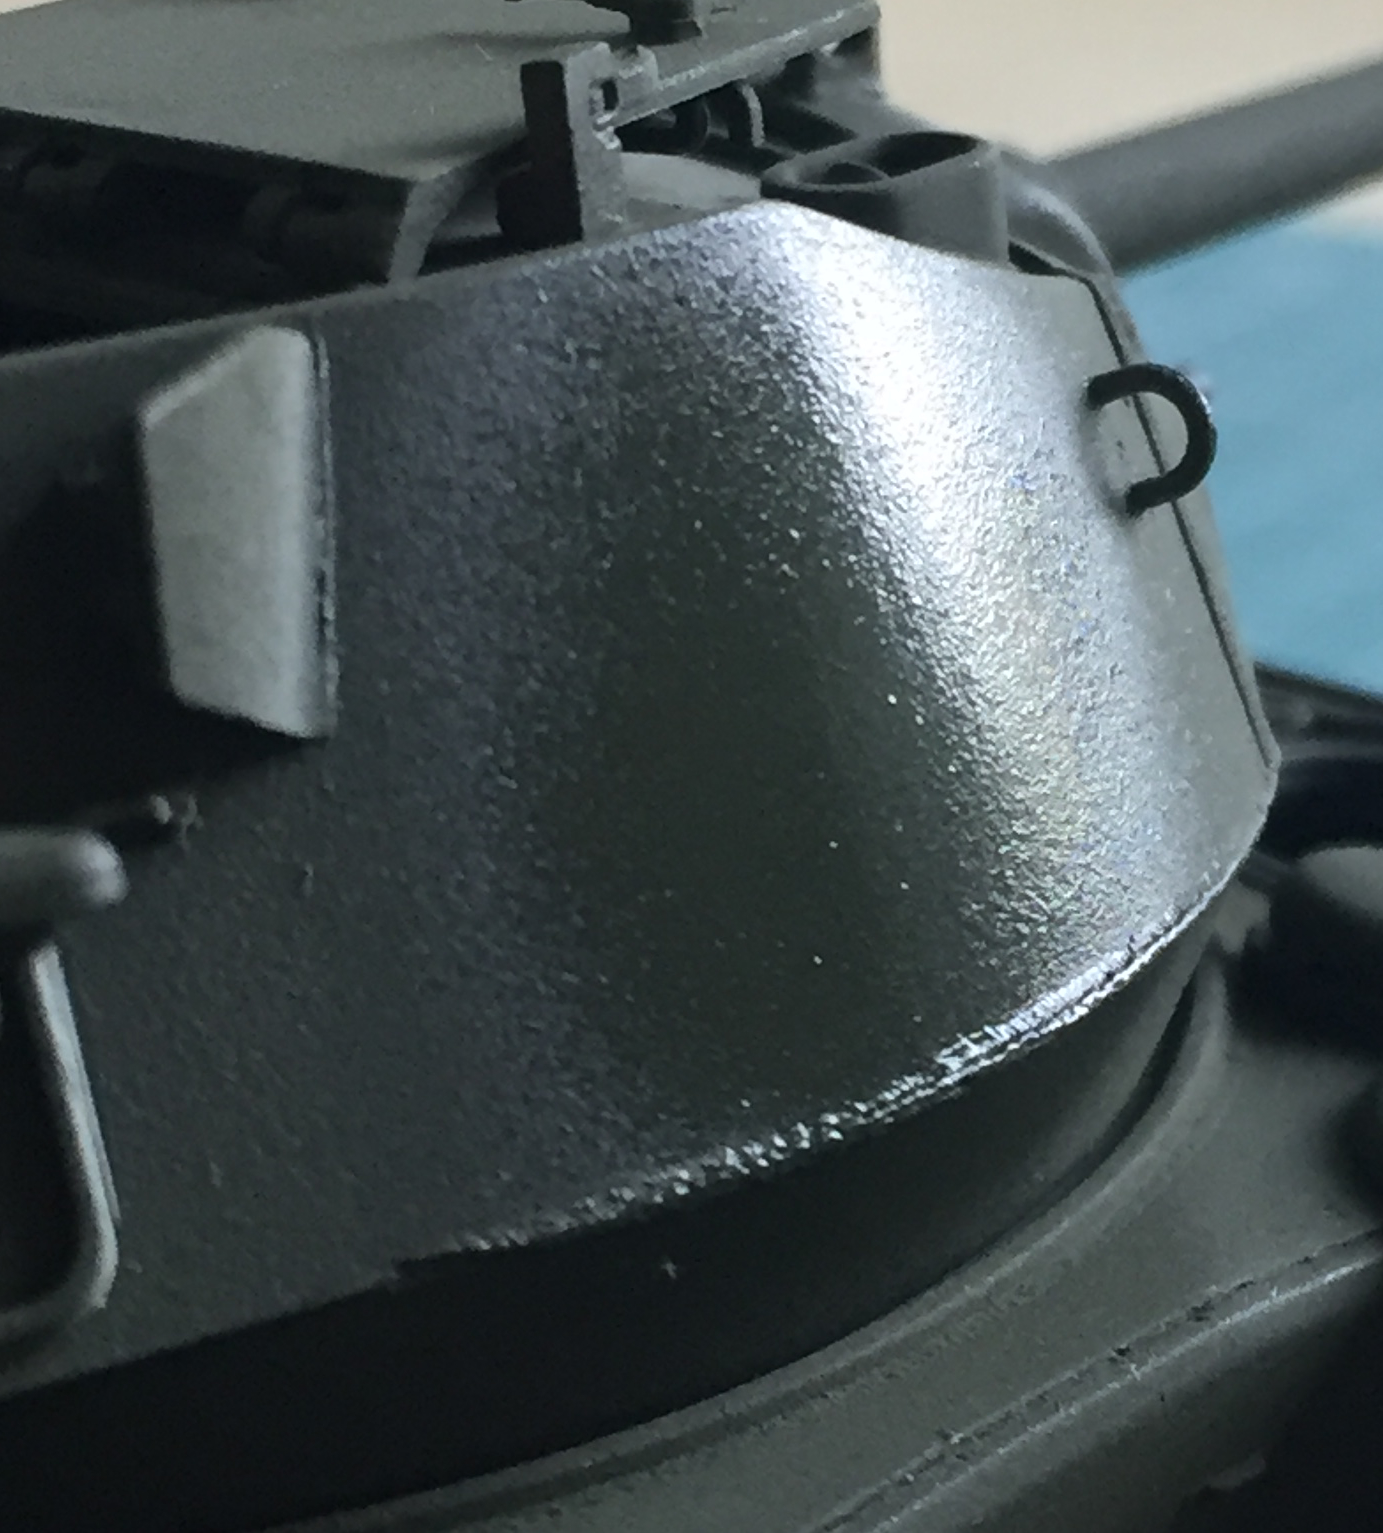
Time for the base color coat (so that it blended in with its new home, at this point I reattached the .50 caliber (12.7mm) and masked it with aluminum foil):

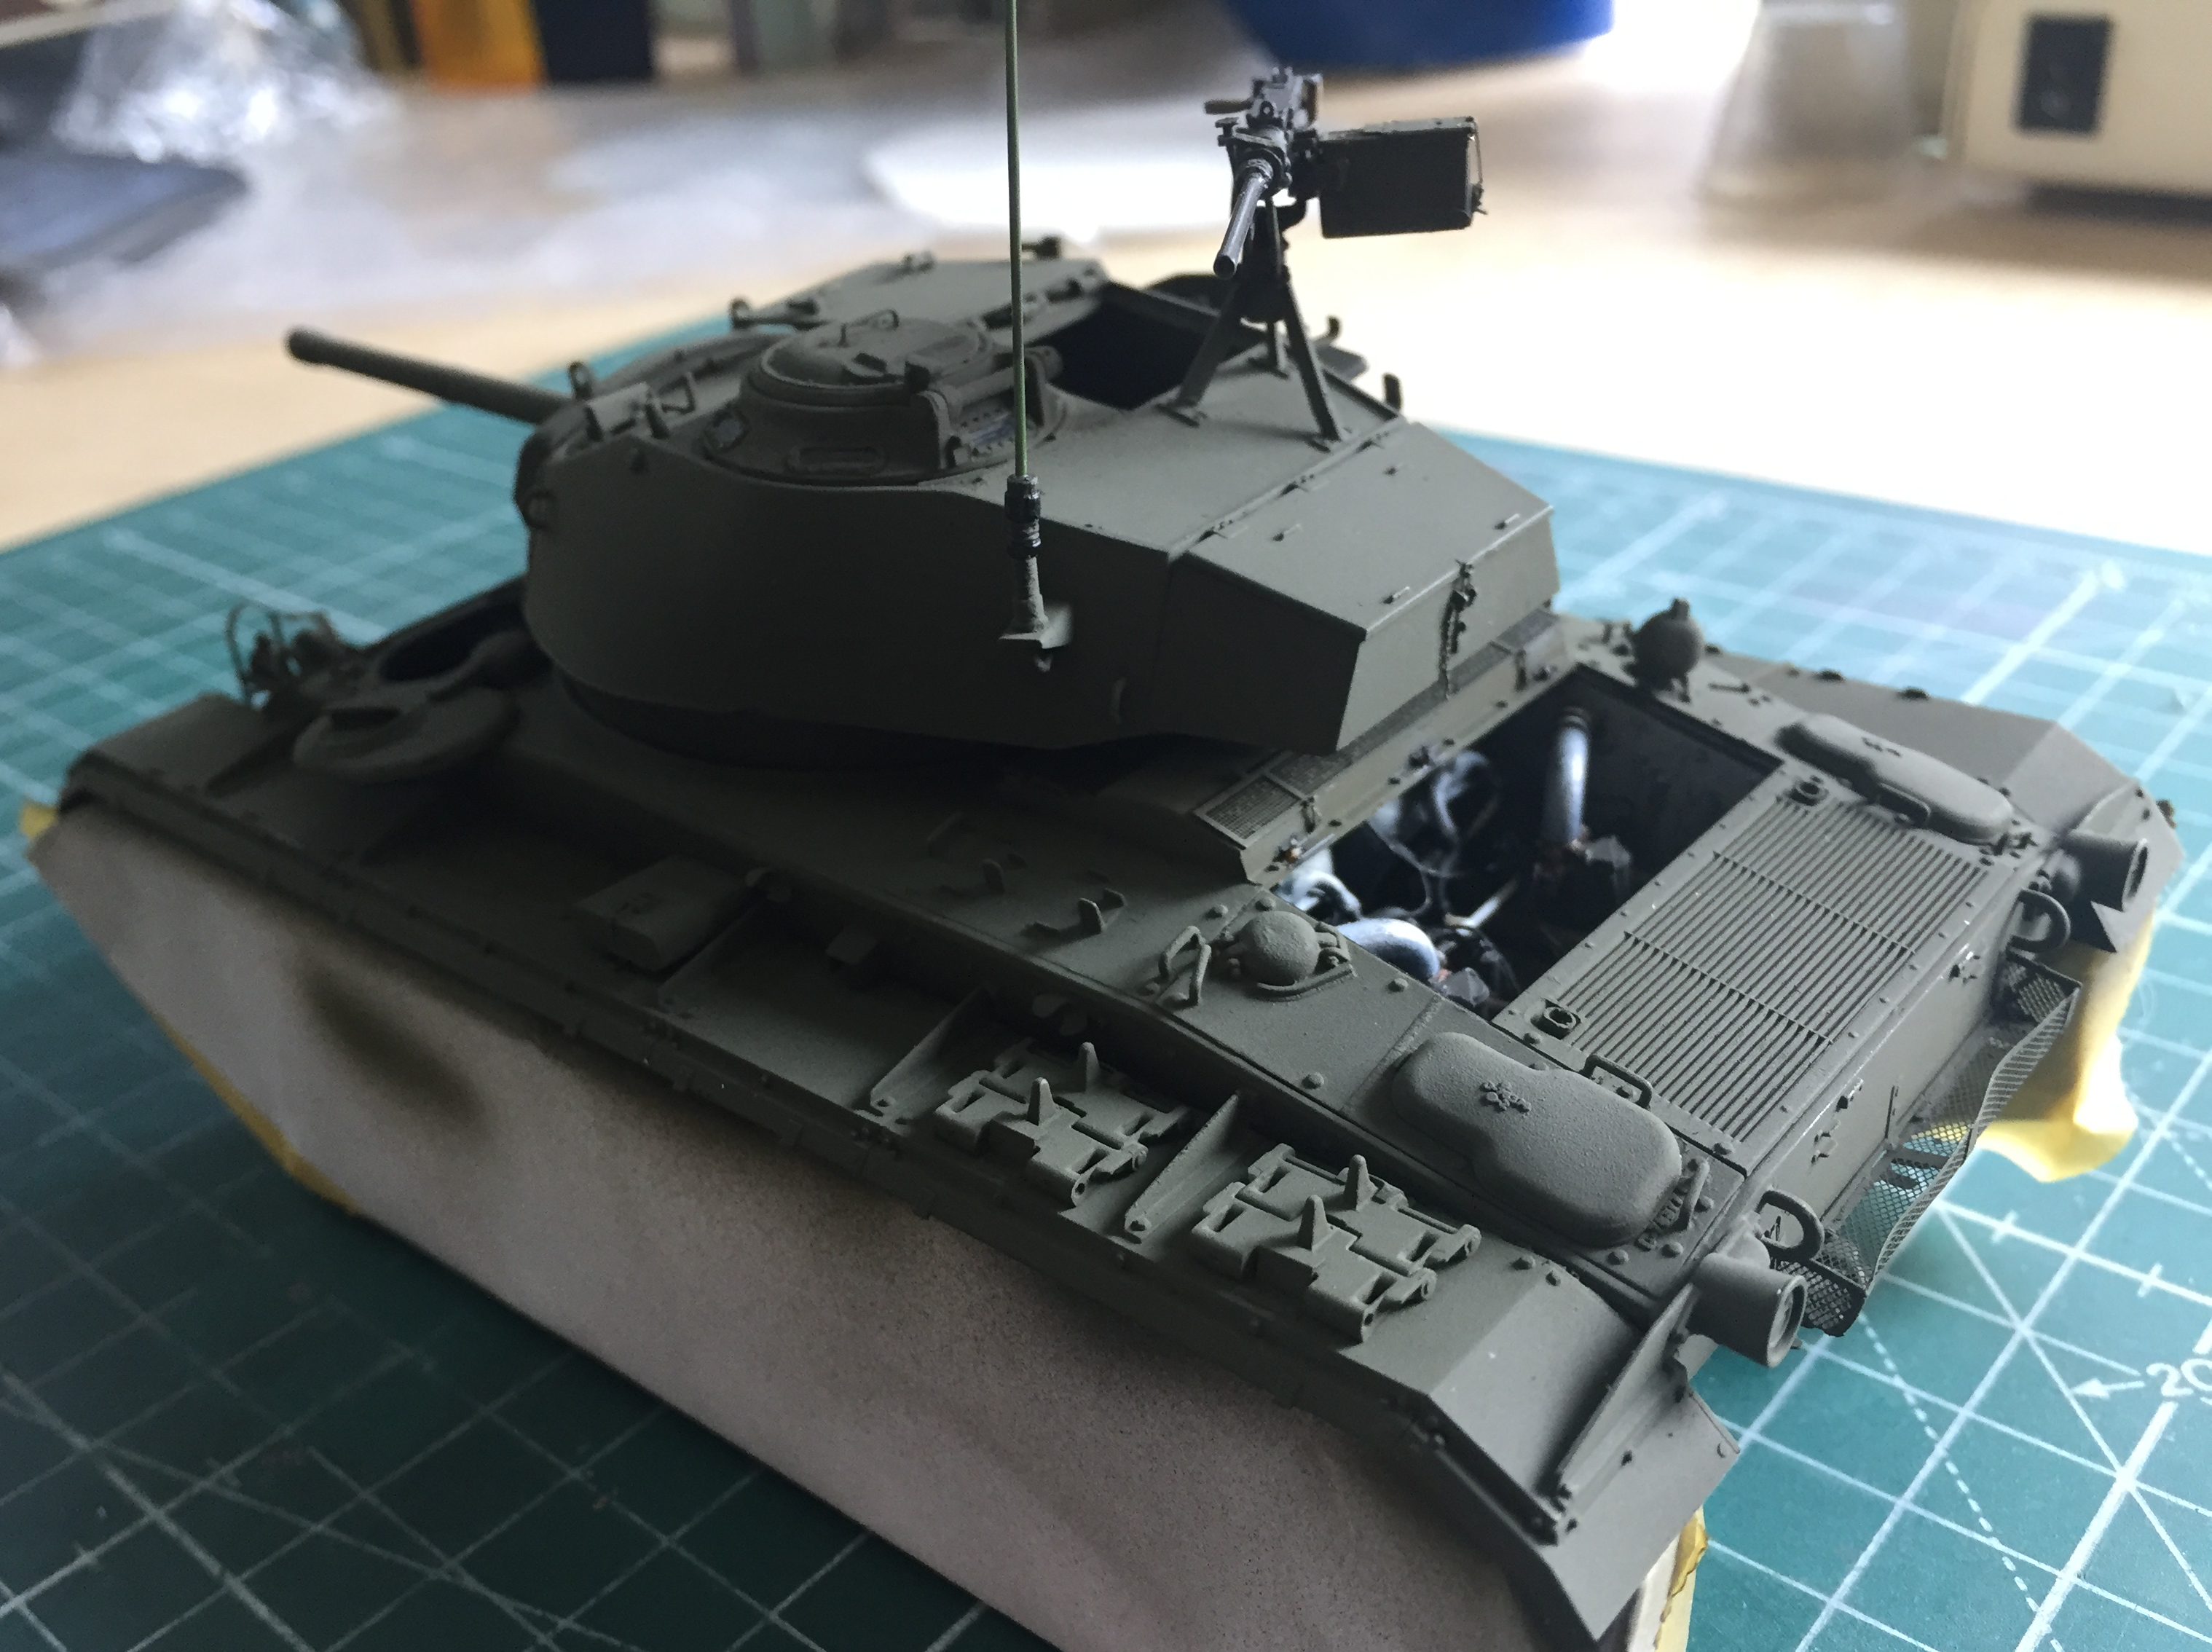
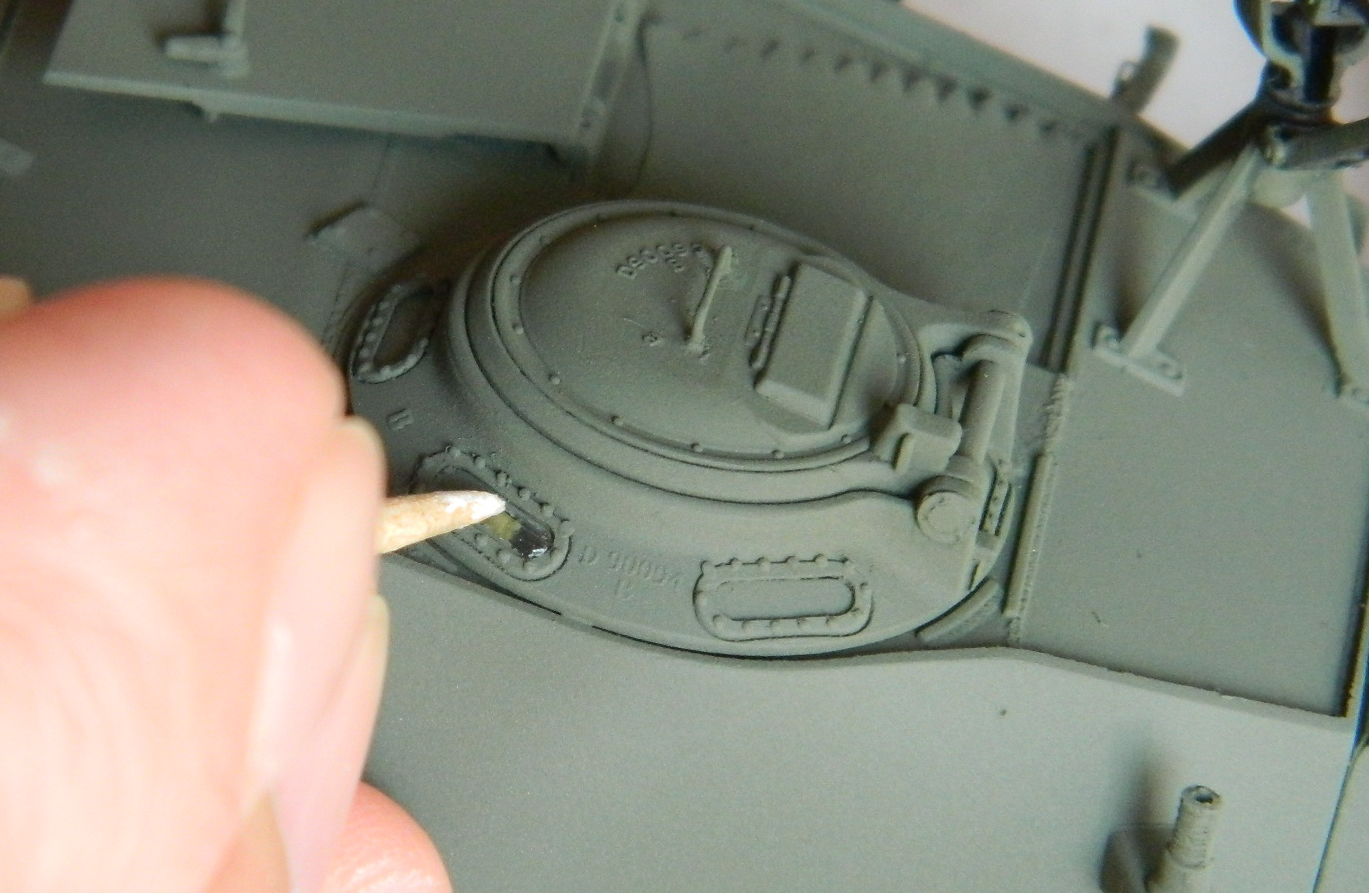
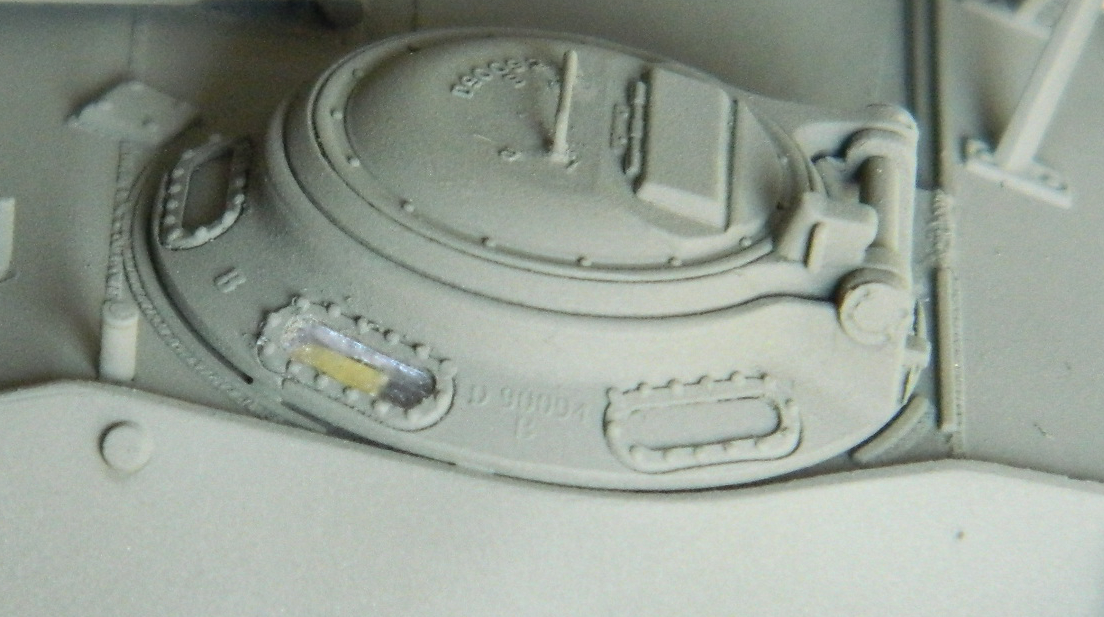
It was about this time that the novelty of having an operational commander’s hatch wore off. It’s not a toy and it was a gimmick. A touch of glue fixed that.
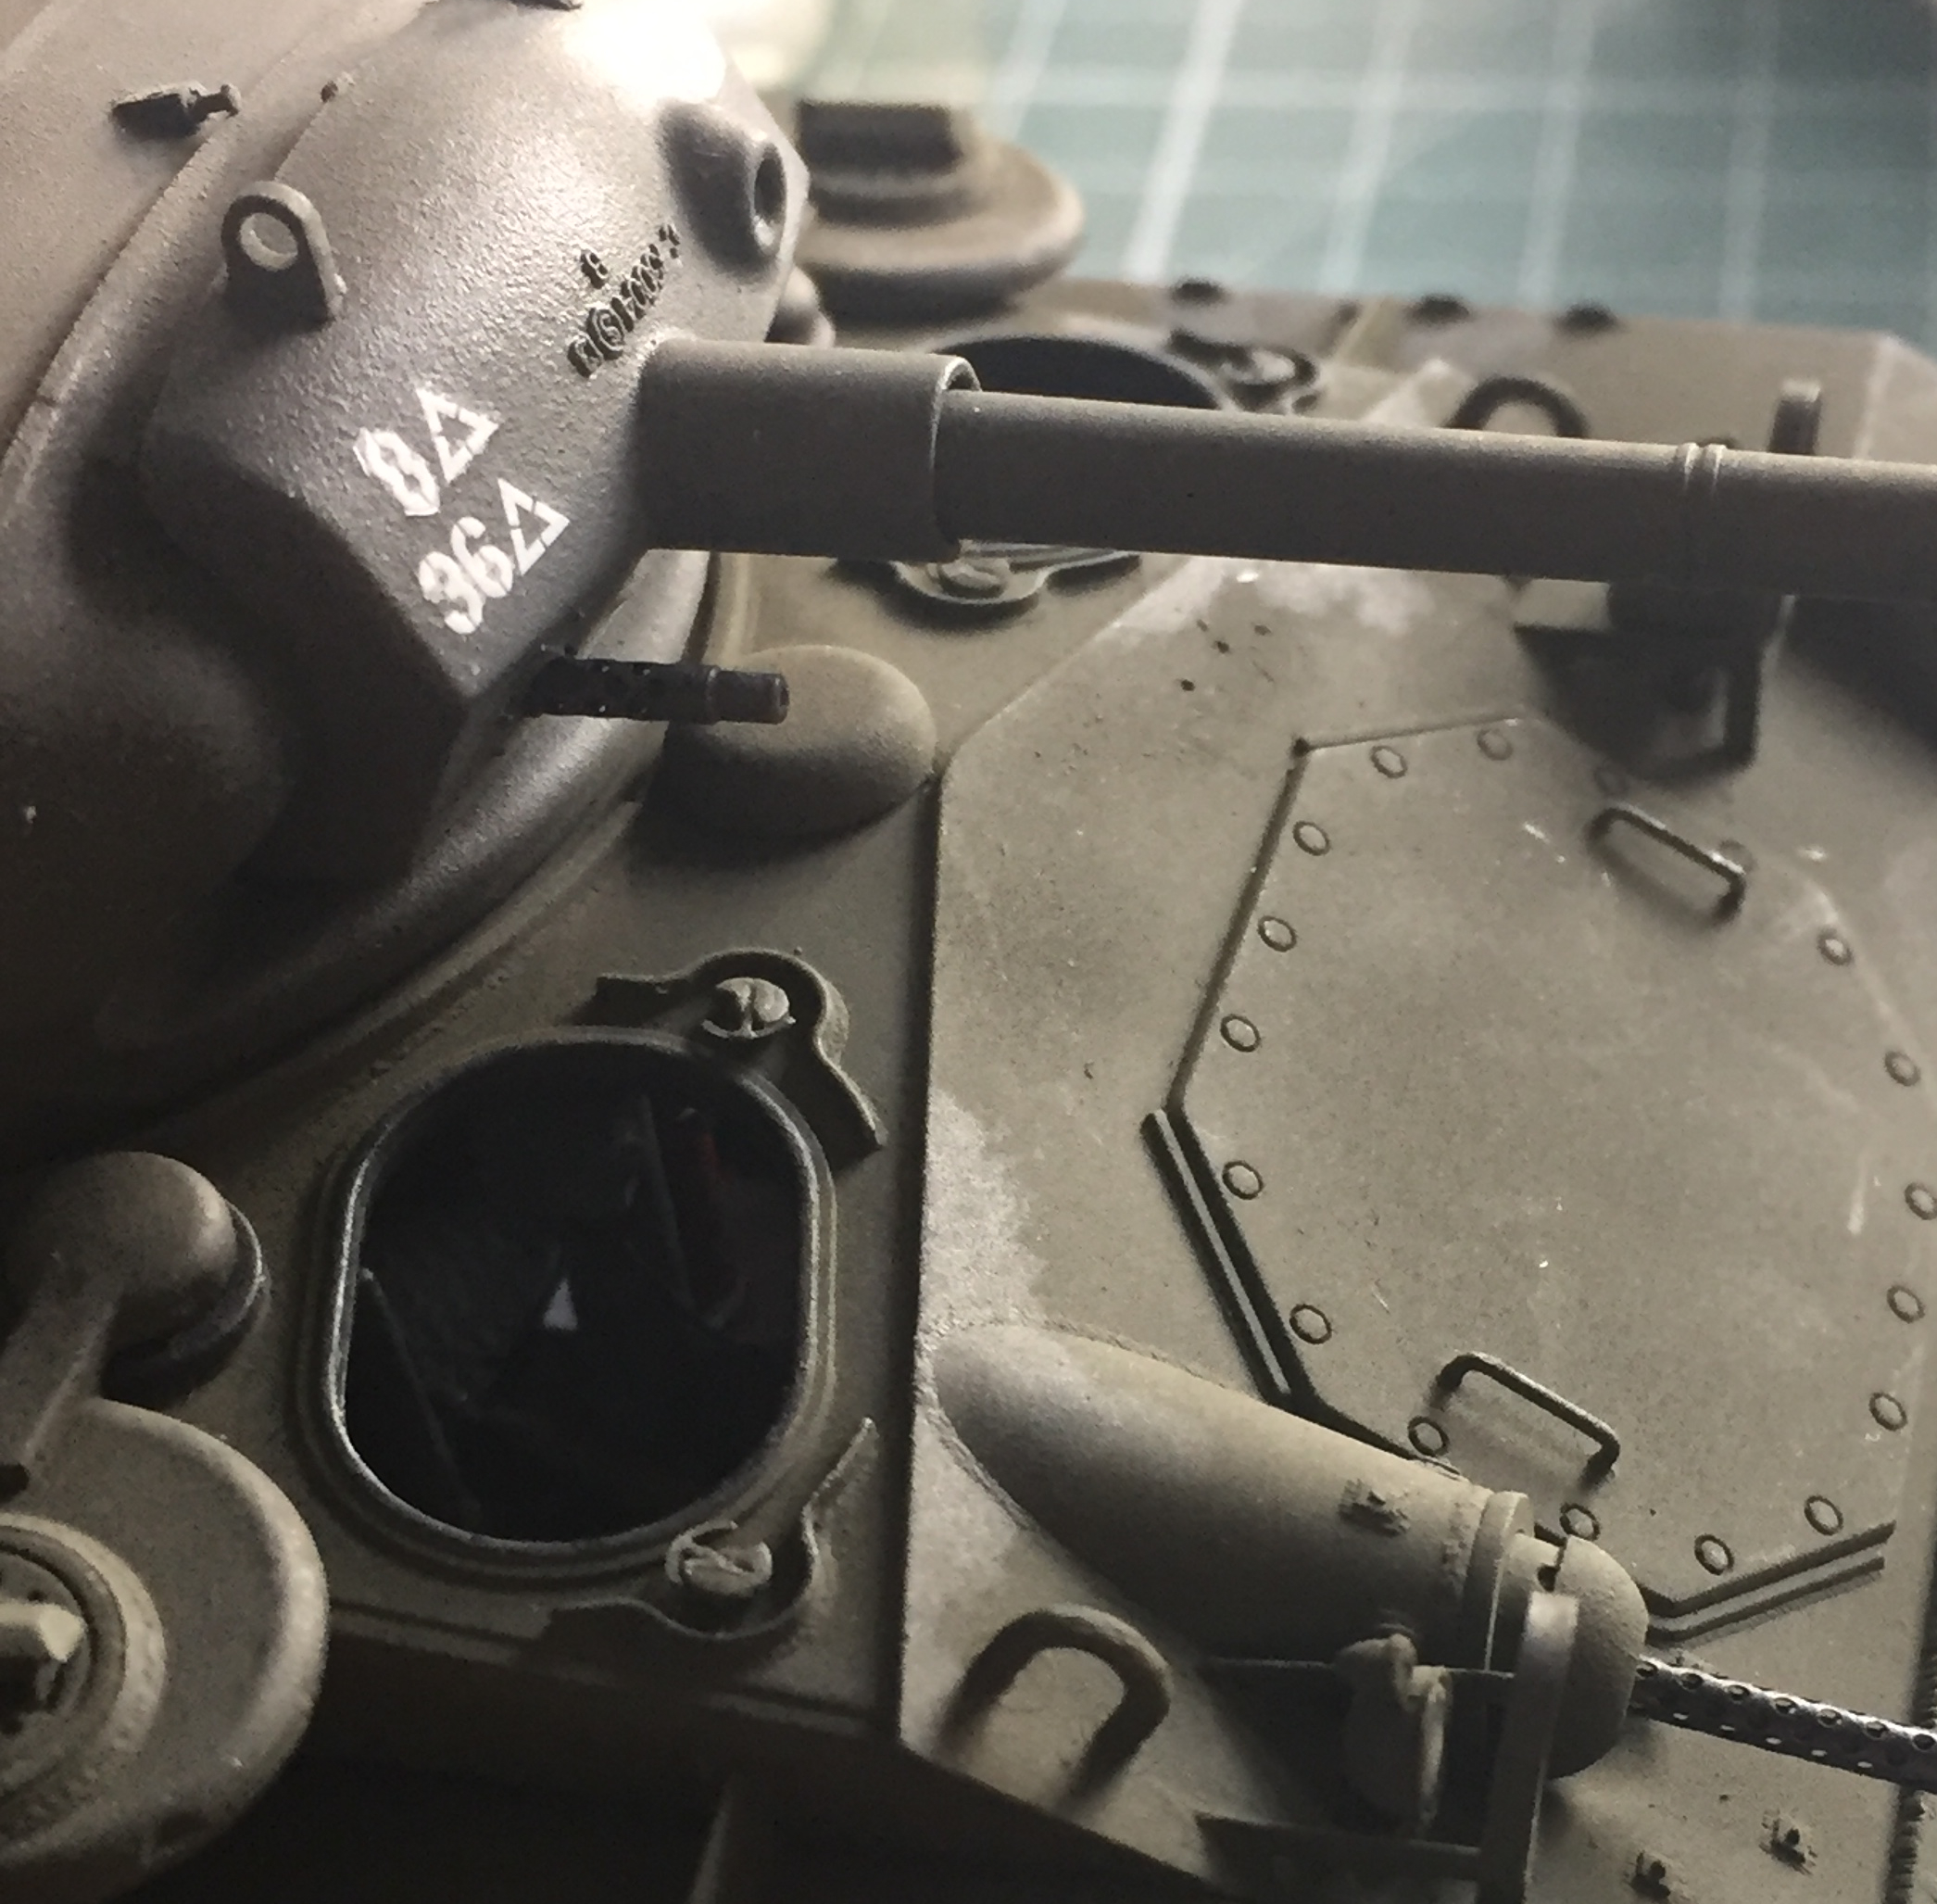
I mask where necessary to get the results I want. Sometimes I don’t mask at all because the mere attempt, usually with something very small, is more hassle than the results are worth. I can adopt that attitude because I paint with acrylics and they are relatively easy to scrape off what I would otherwise have masked…like the vision blocks of the commander’s cupola. I use a toothpick that’s been sharpened to a chisel point to remove paint from unwanted locations:
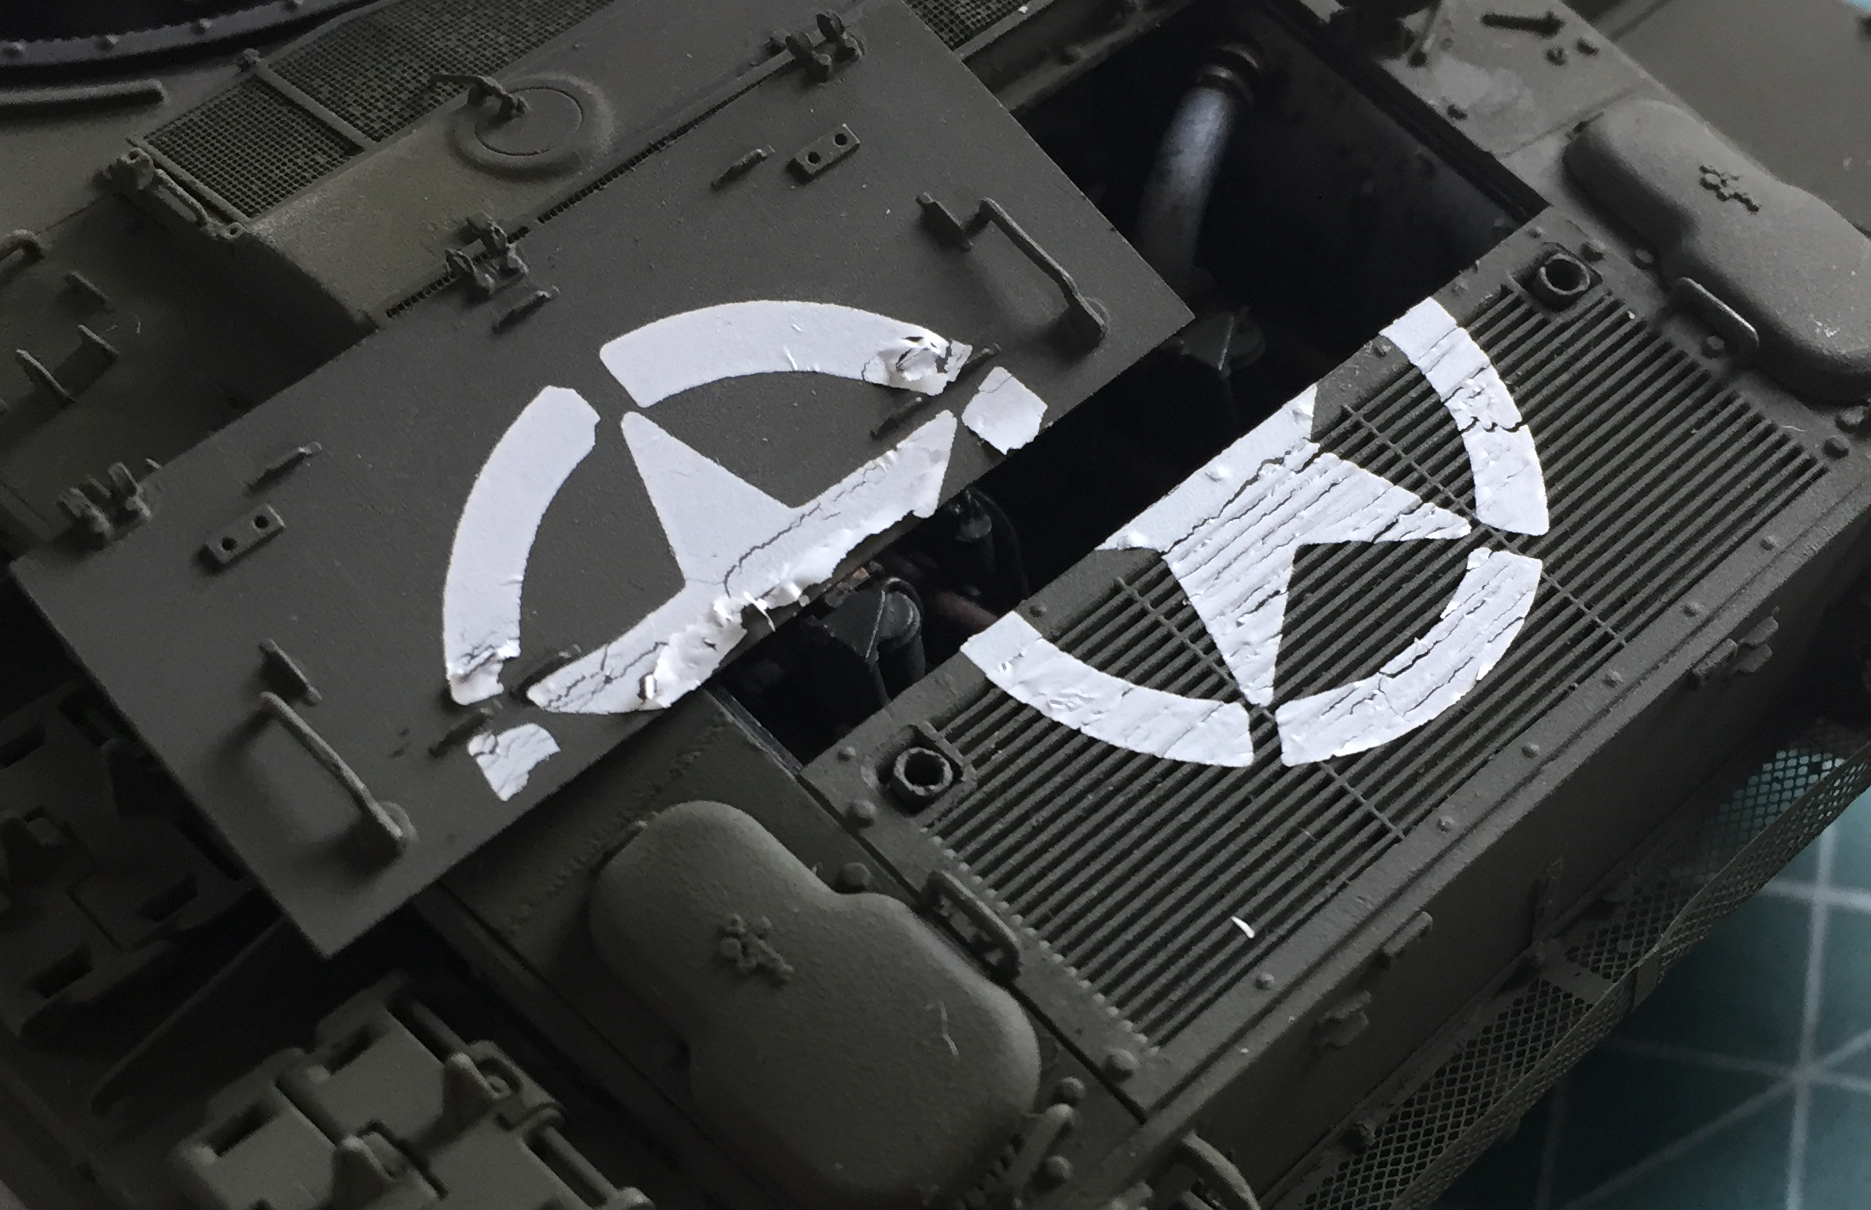
The paint/decal call-out shows this for the star over the engine deck:

It’s not centered or aligned vertically. Screw that. I was going to do mine centered and not rotated off vertical.
For the decals, clear gloss goes down:

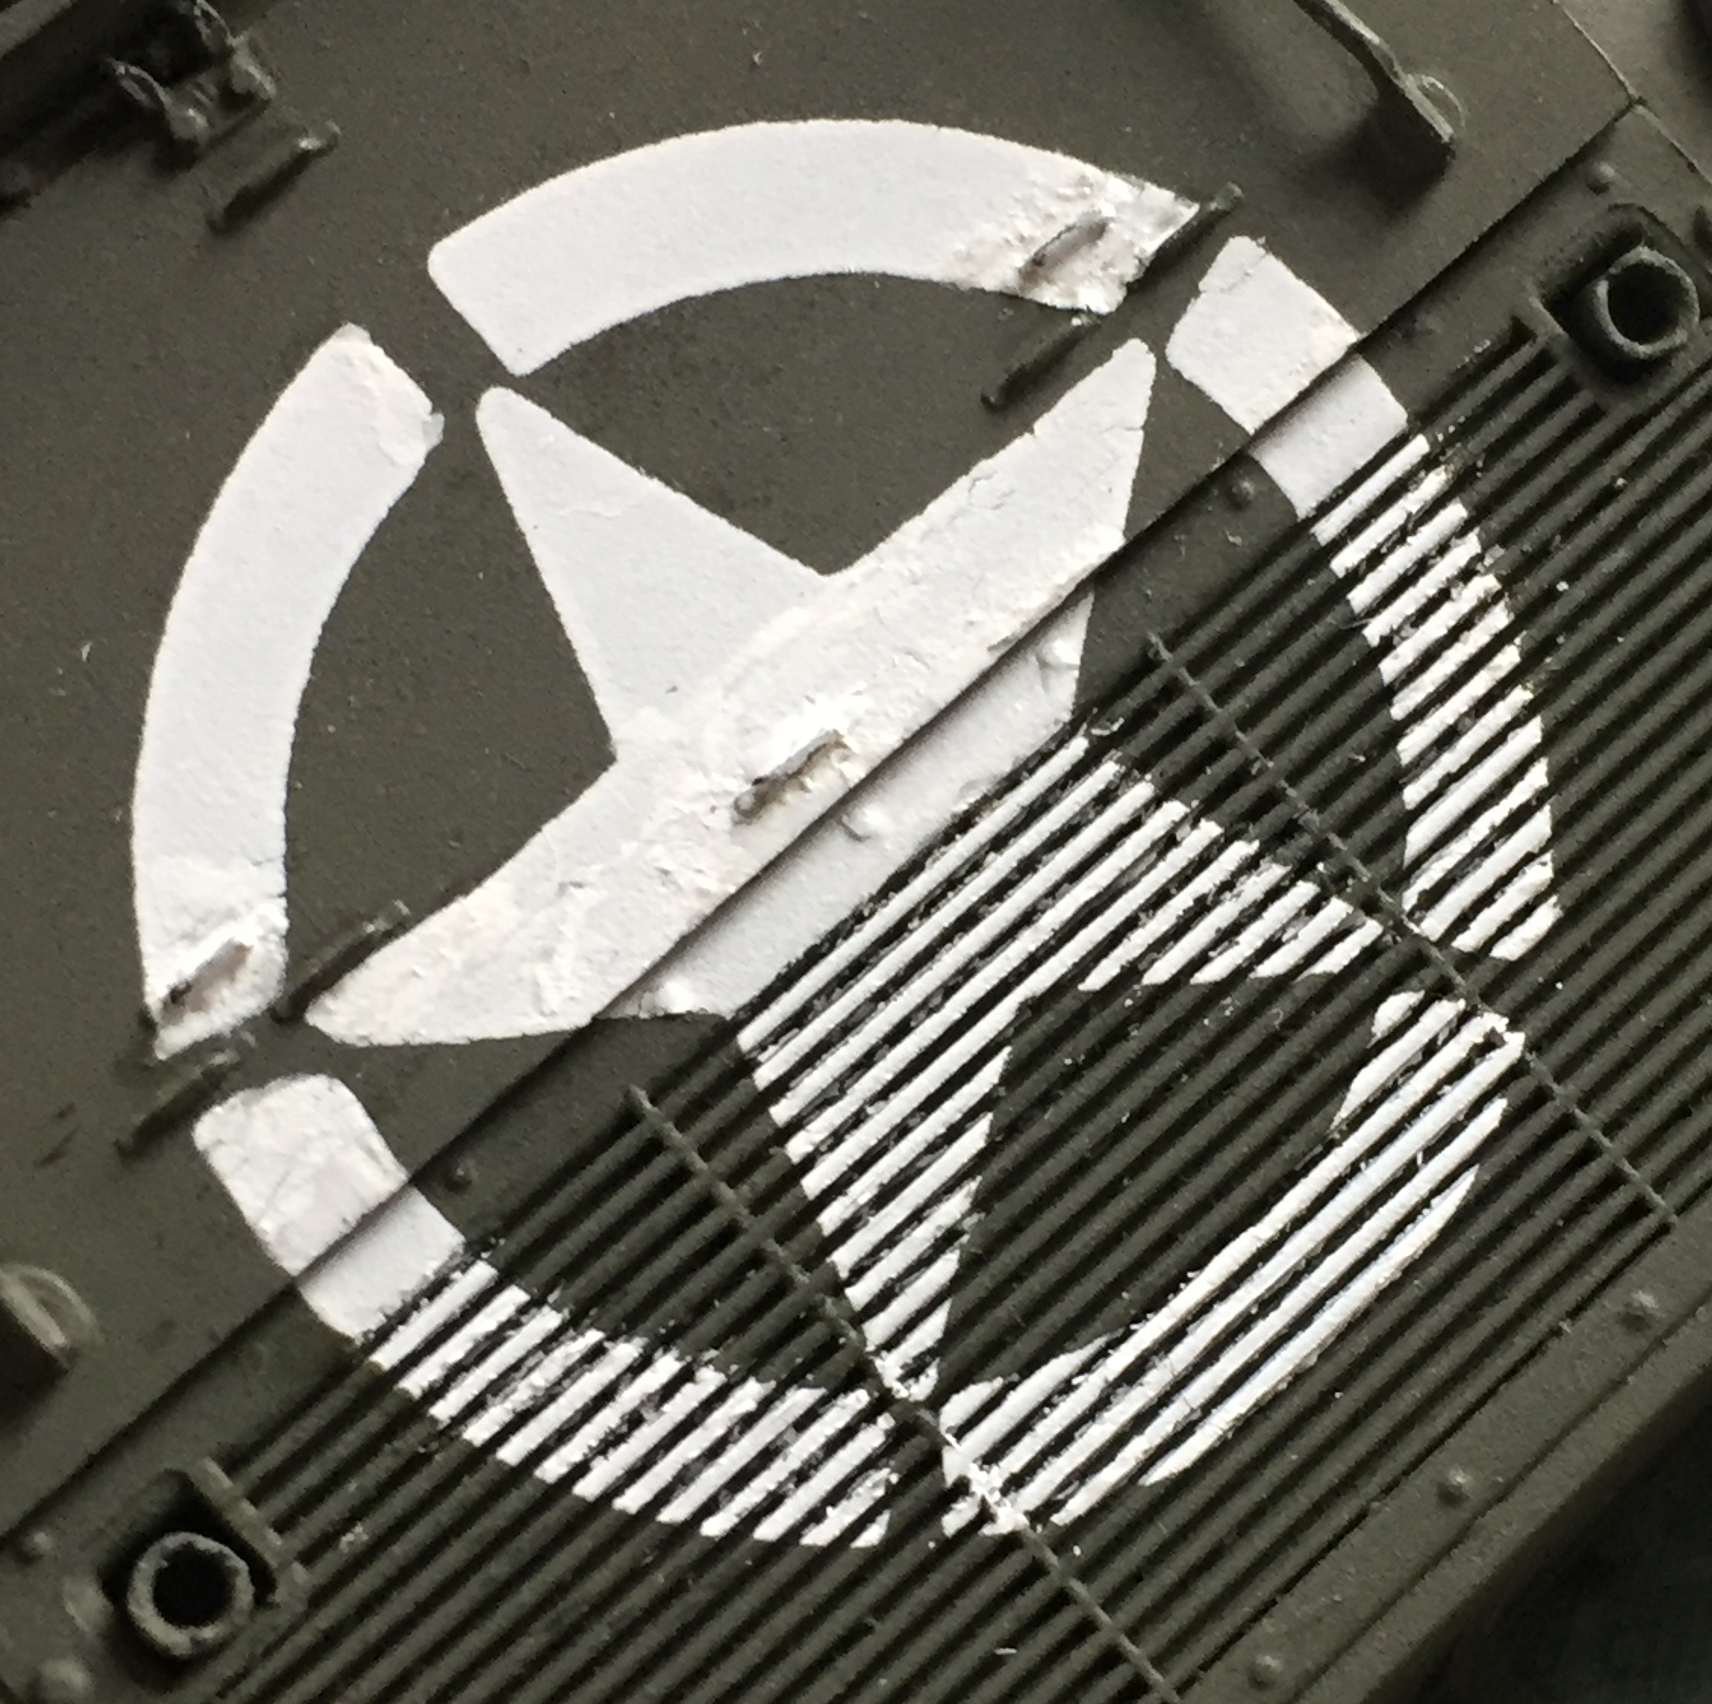
Then I applied decals. This is the star over the engine compartment. More than half of the decal is supposed to rest on top of the vent grate. One would think that whatever [DELETED] made the decals knew that it would need to be slit to replicate paint on the grill, not bridges over the grill openings. Well, I would think that…that’s not how it was done. The decal went down, Micro Sol went over the top of it, and I waited:
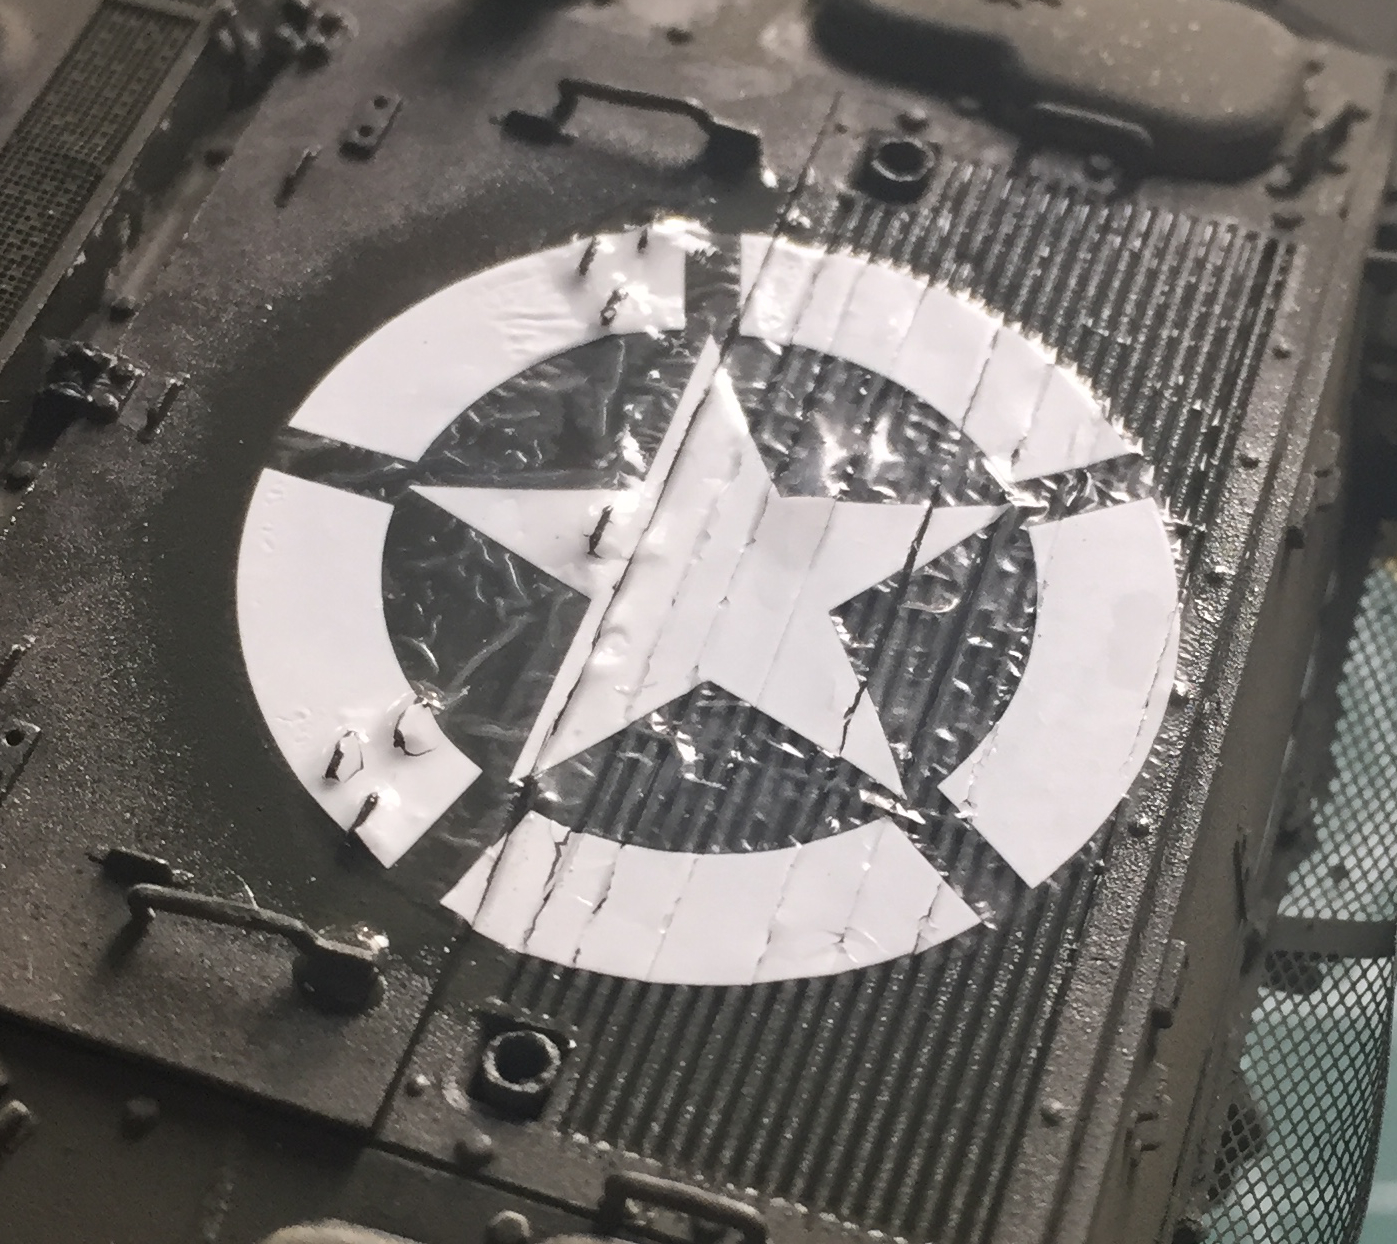
I waited a loooooong time. I waited for nothing. Even using the hottest decal solvent I have, Solvaset, and multiple applications, and waiting another loooooong time only resulted in this unacceptable outcome:
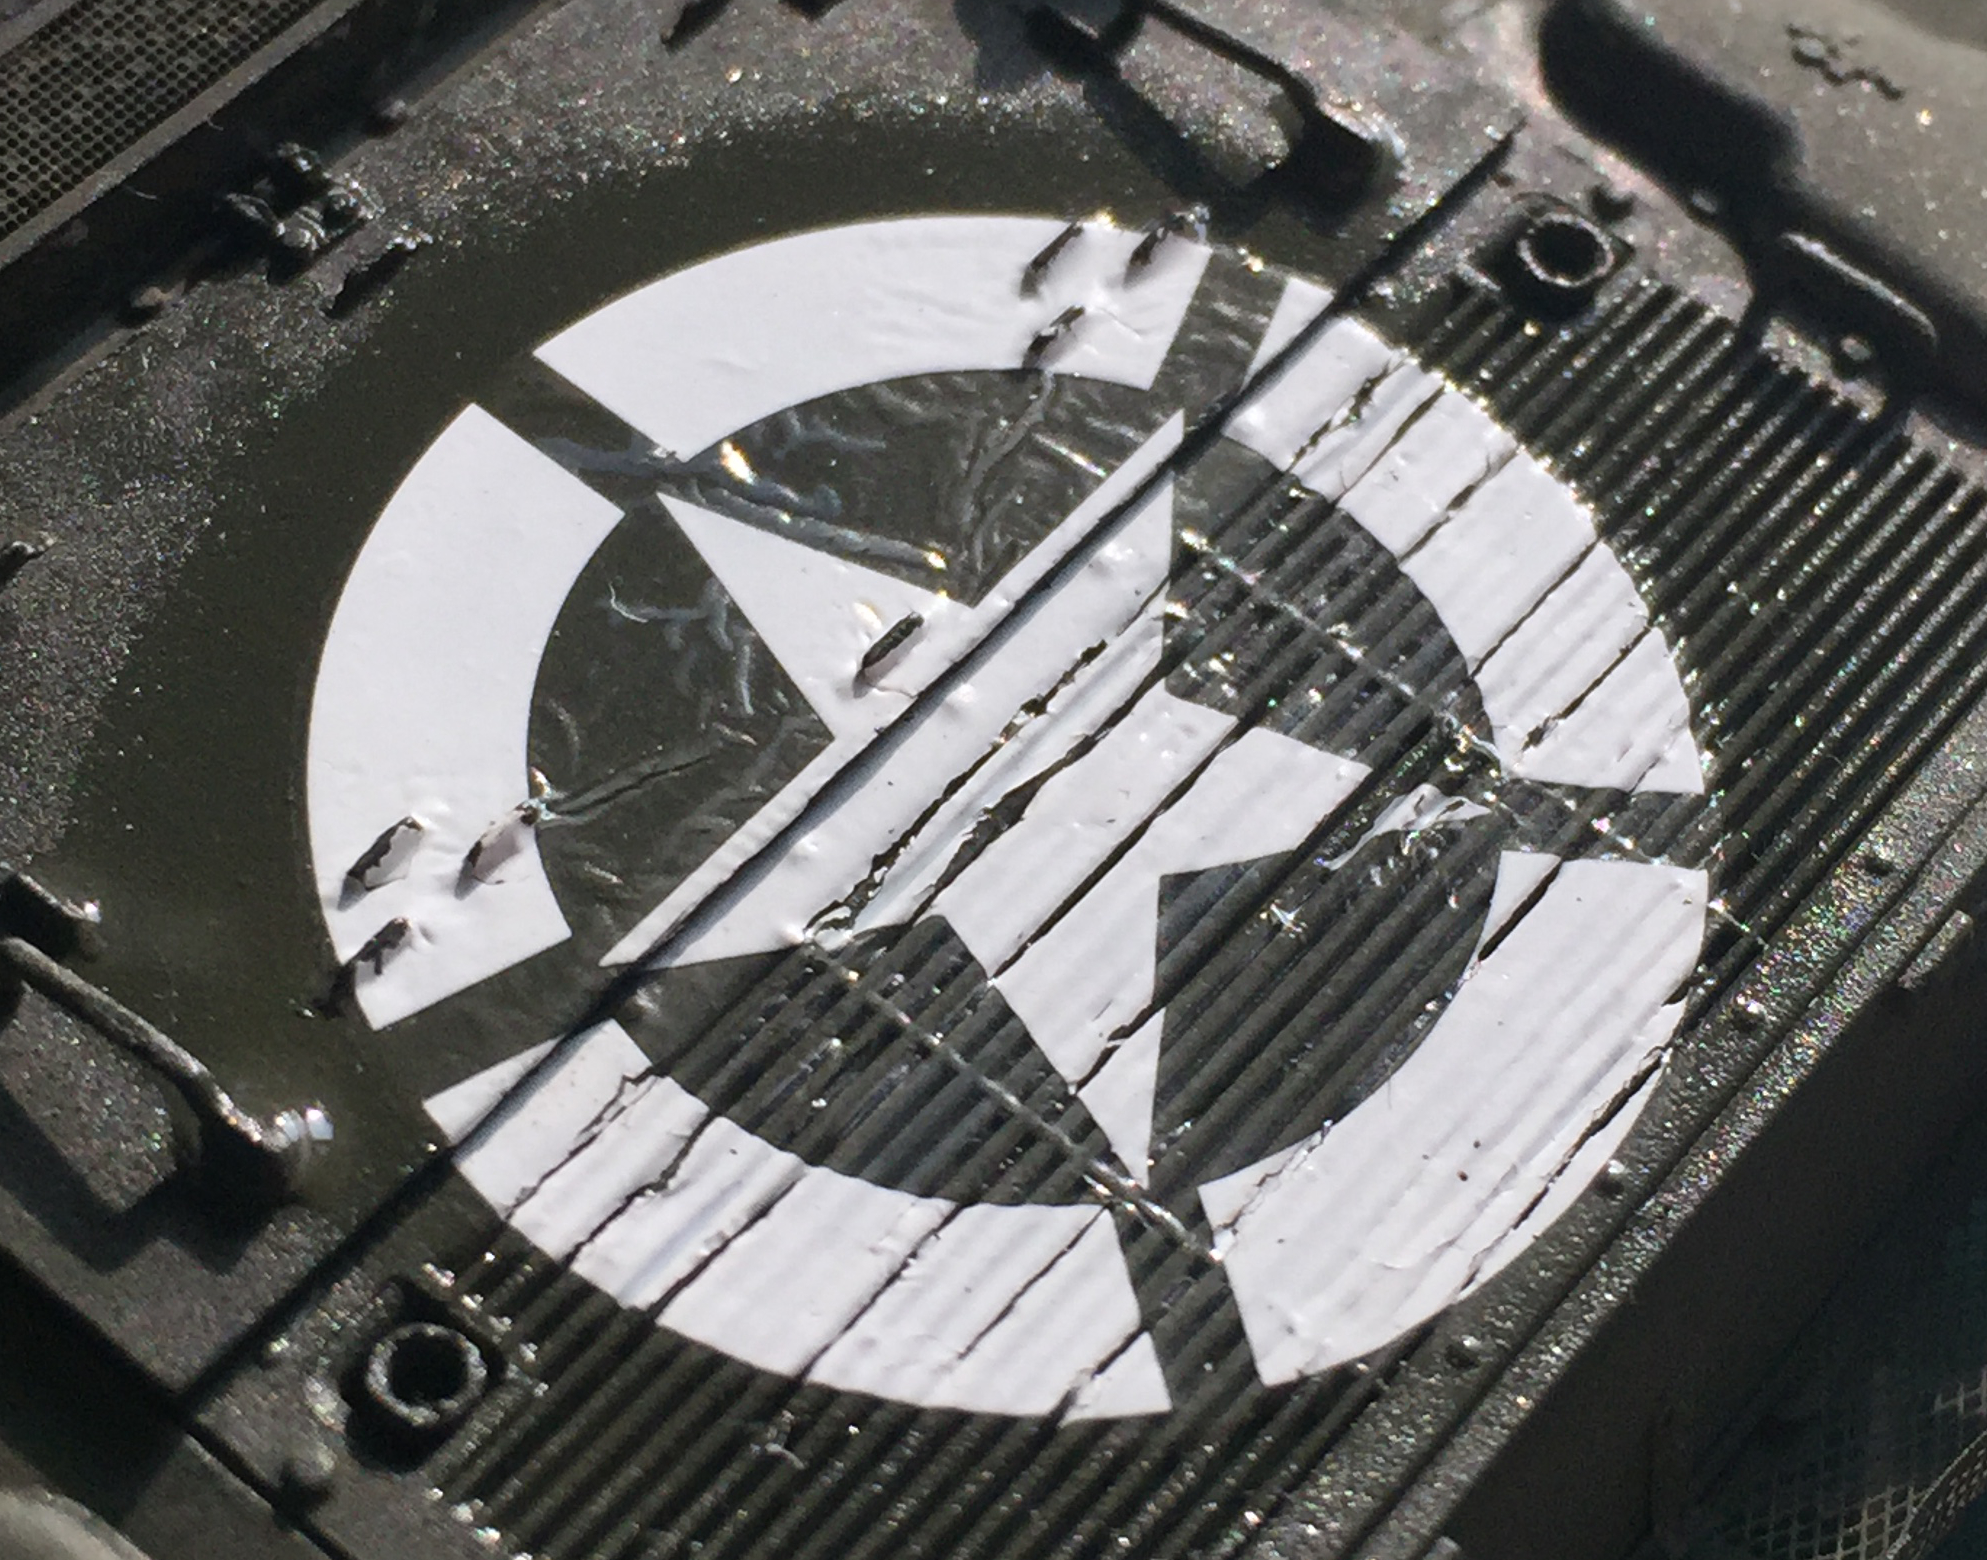
Which resulted in me doing this:
The stars on the turret’s sides weren’t any better. They refused to snug down. The grill and the turret sides got the same treatment as the engine cover above:
Then I laid down more Tamiya XF-62 Olive Drab:
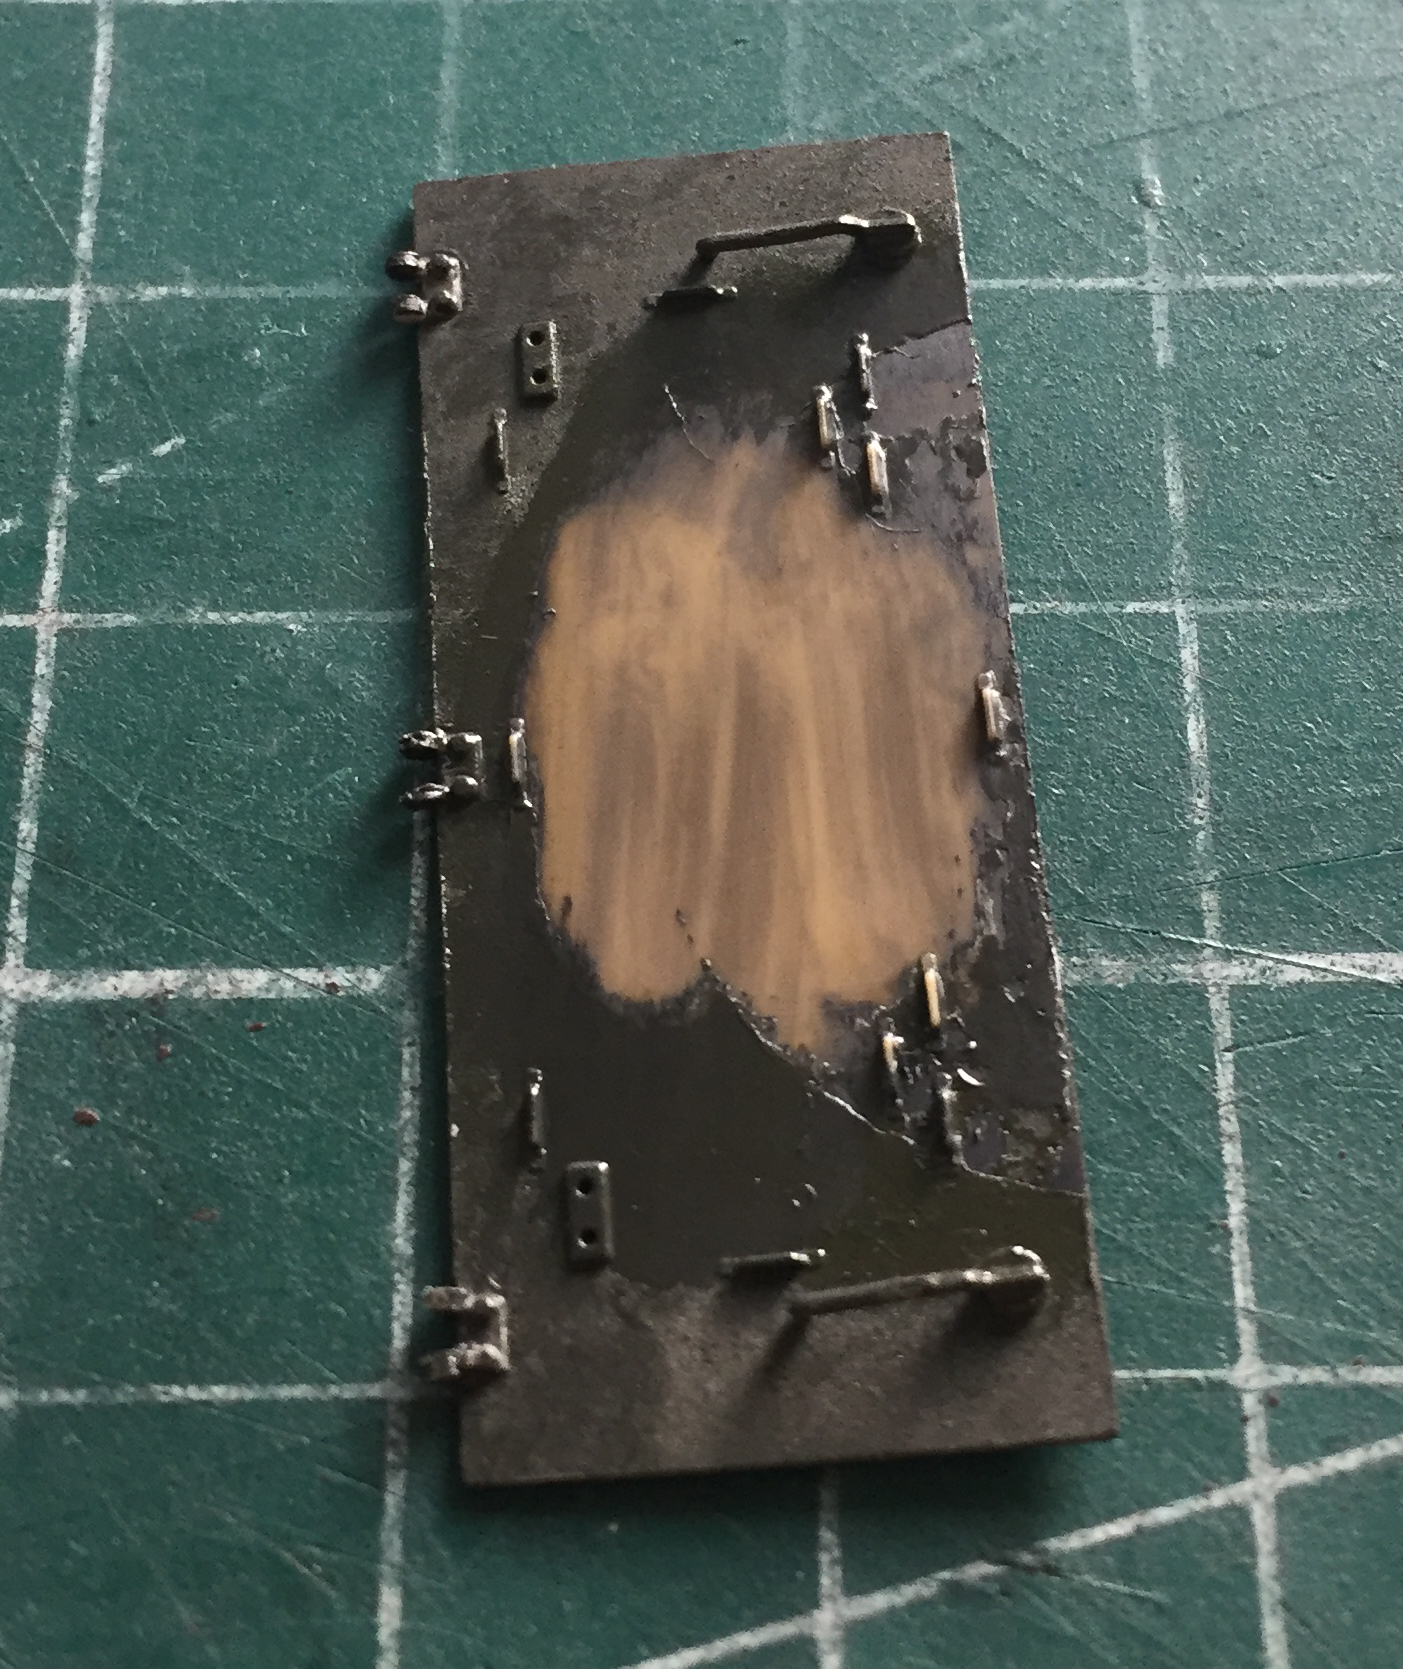
Having destroyed (gladly!) the decals in the process of removing them, I resorted to dry transfers for these markings. Decals and transfers each have their own quirks. I figured the transfer for the engine deck would most likely shatter in the process of being laid down and that’s what happened:

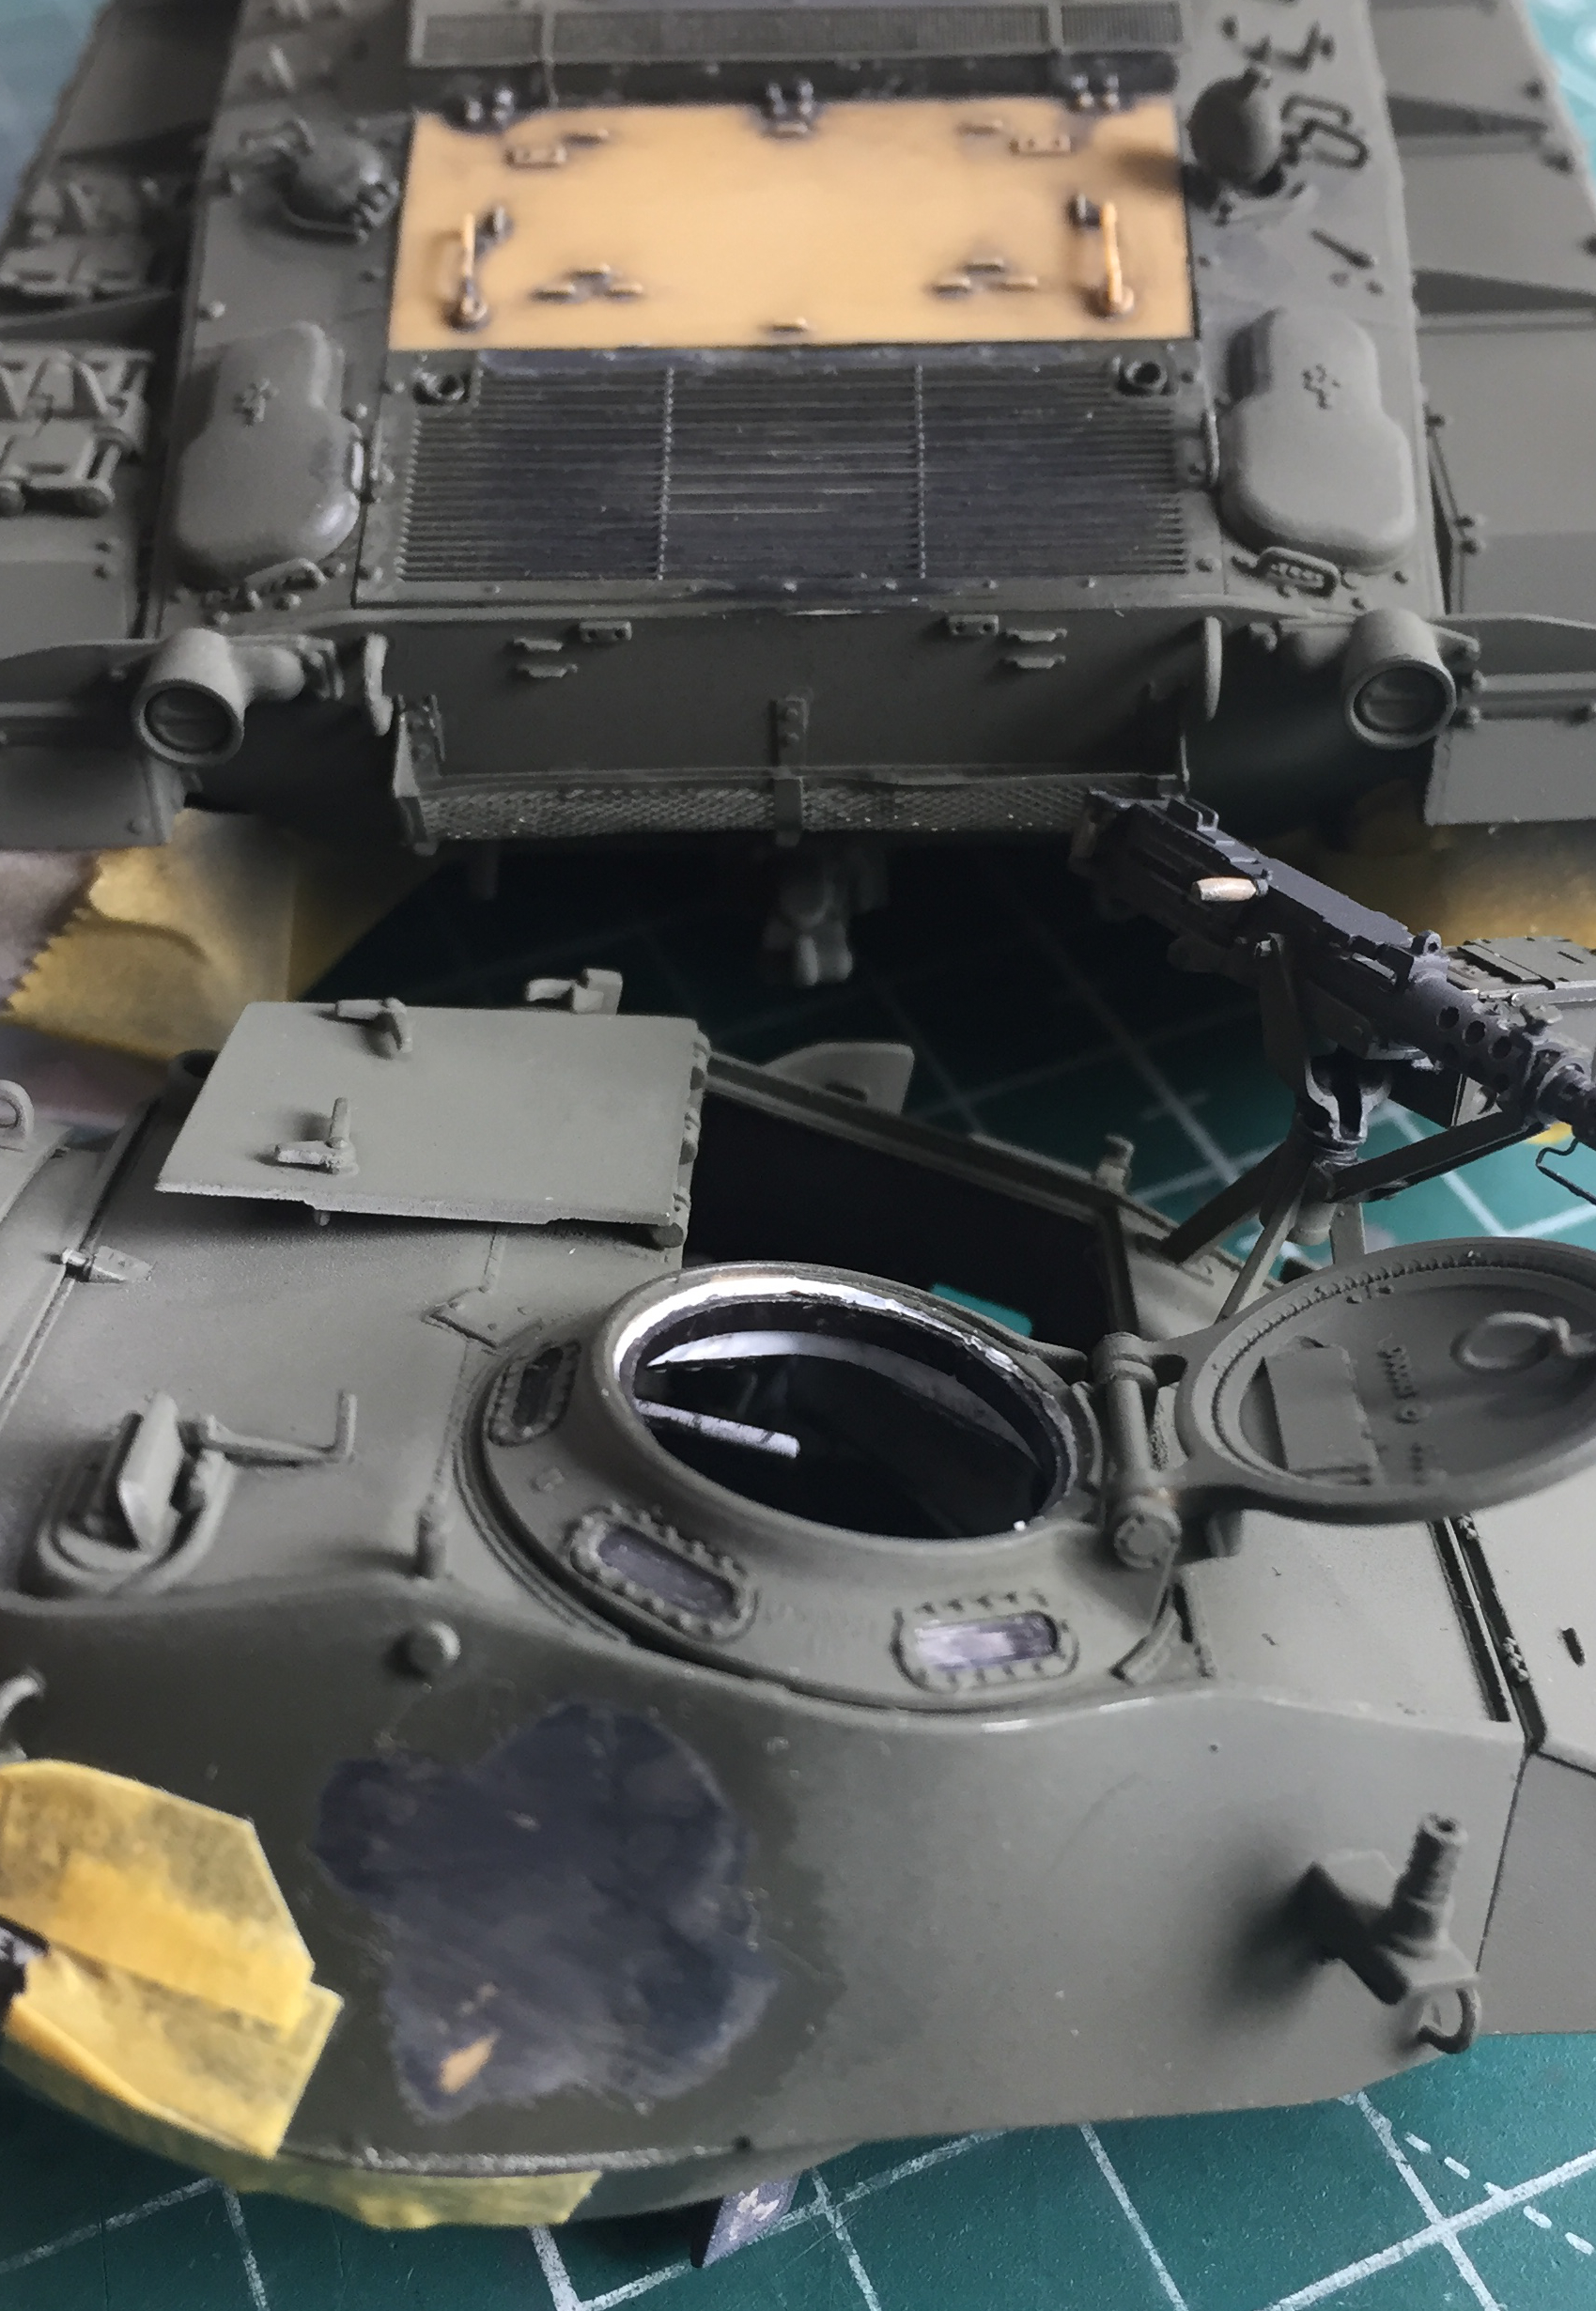
I pressed the transfer down where it had lifted up, then used a sharp single-edge razor blade to clean up the areas over the grill, then used Tamiya XF-2 Flat White to retouch the areas that need to be white:
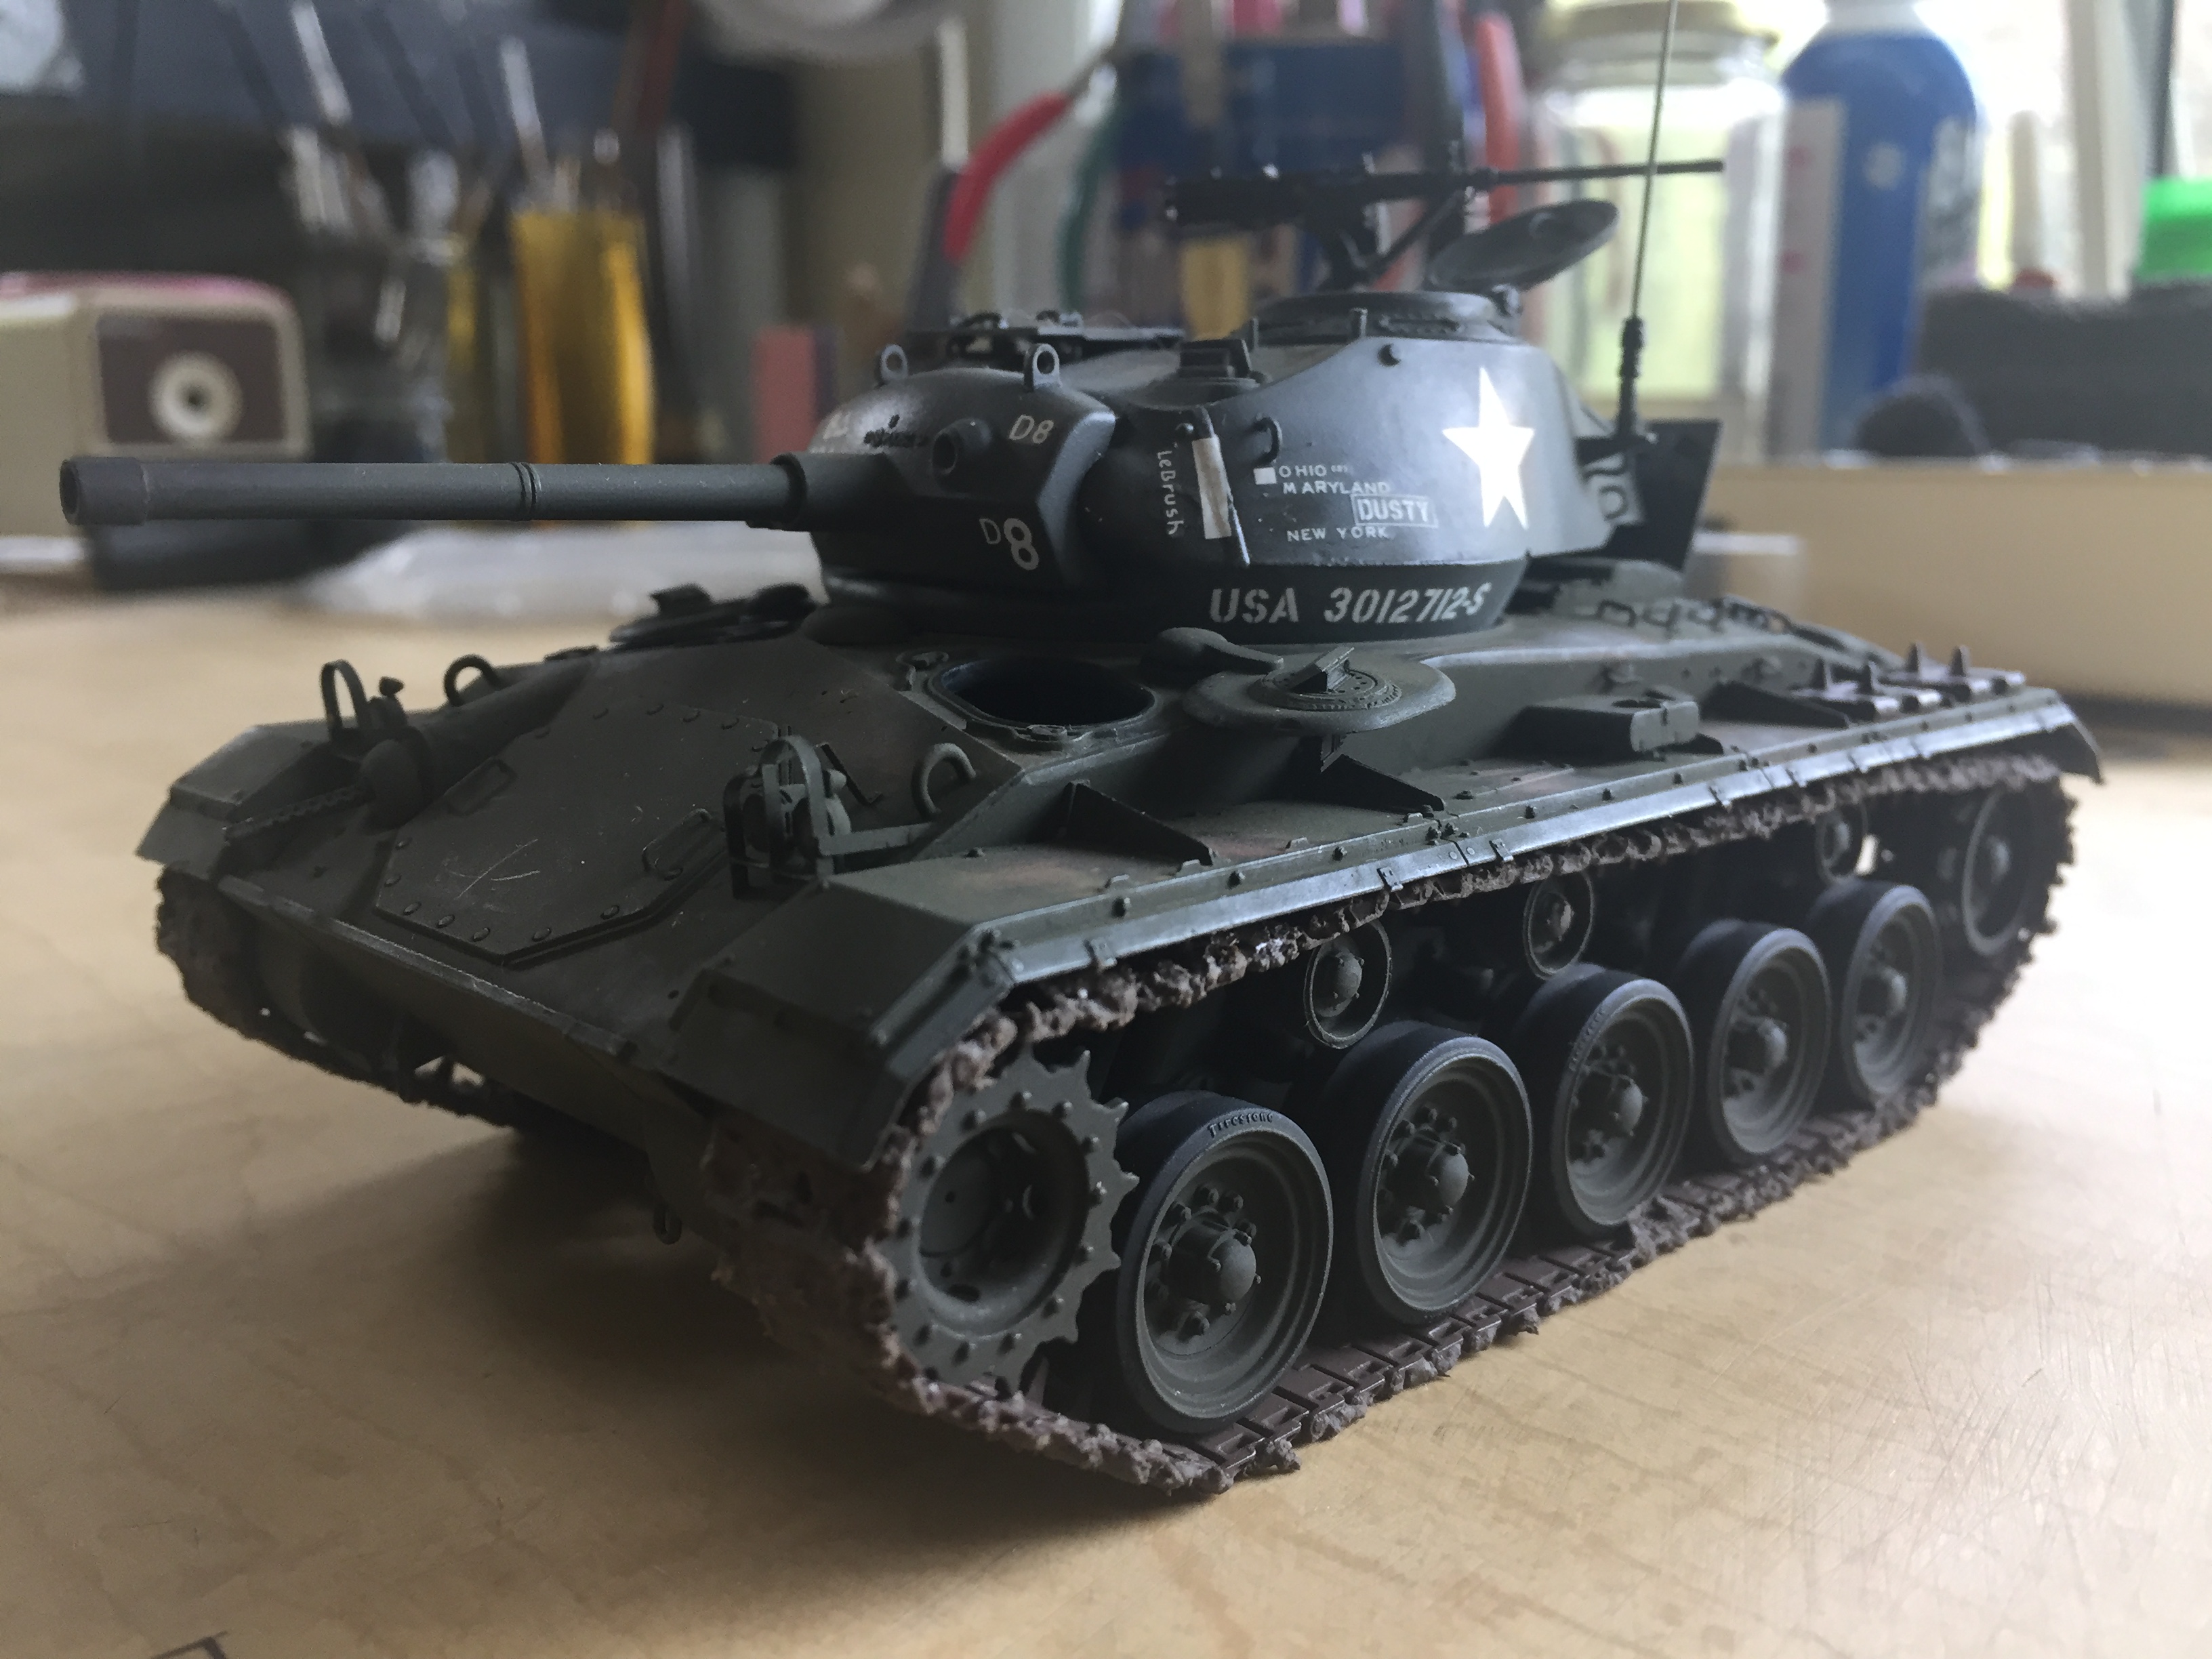
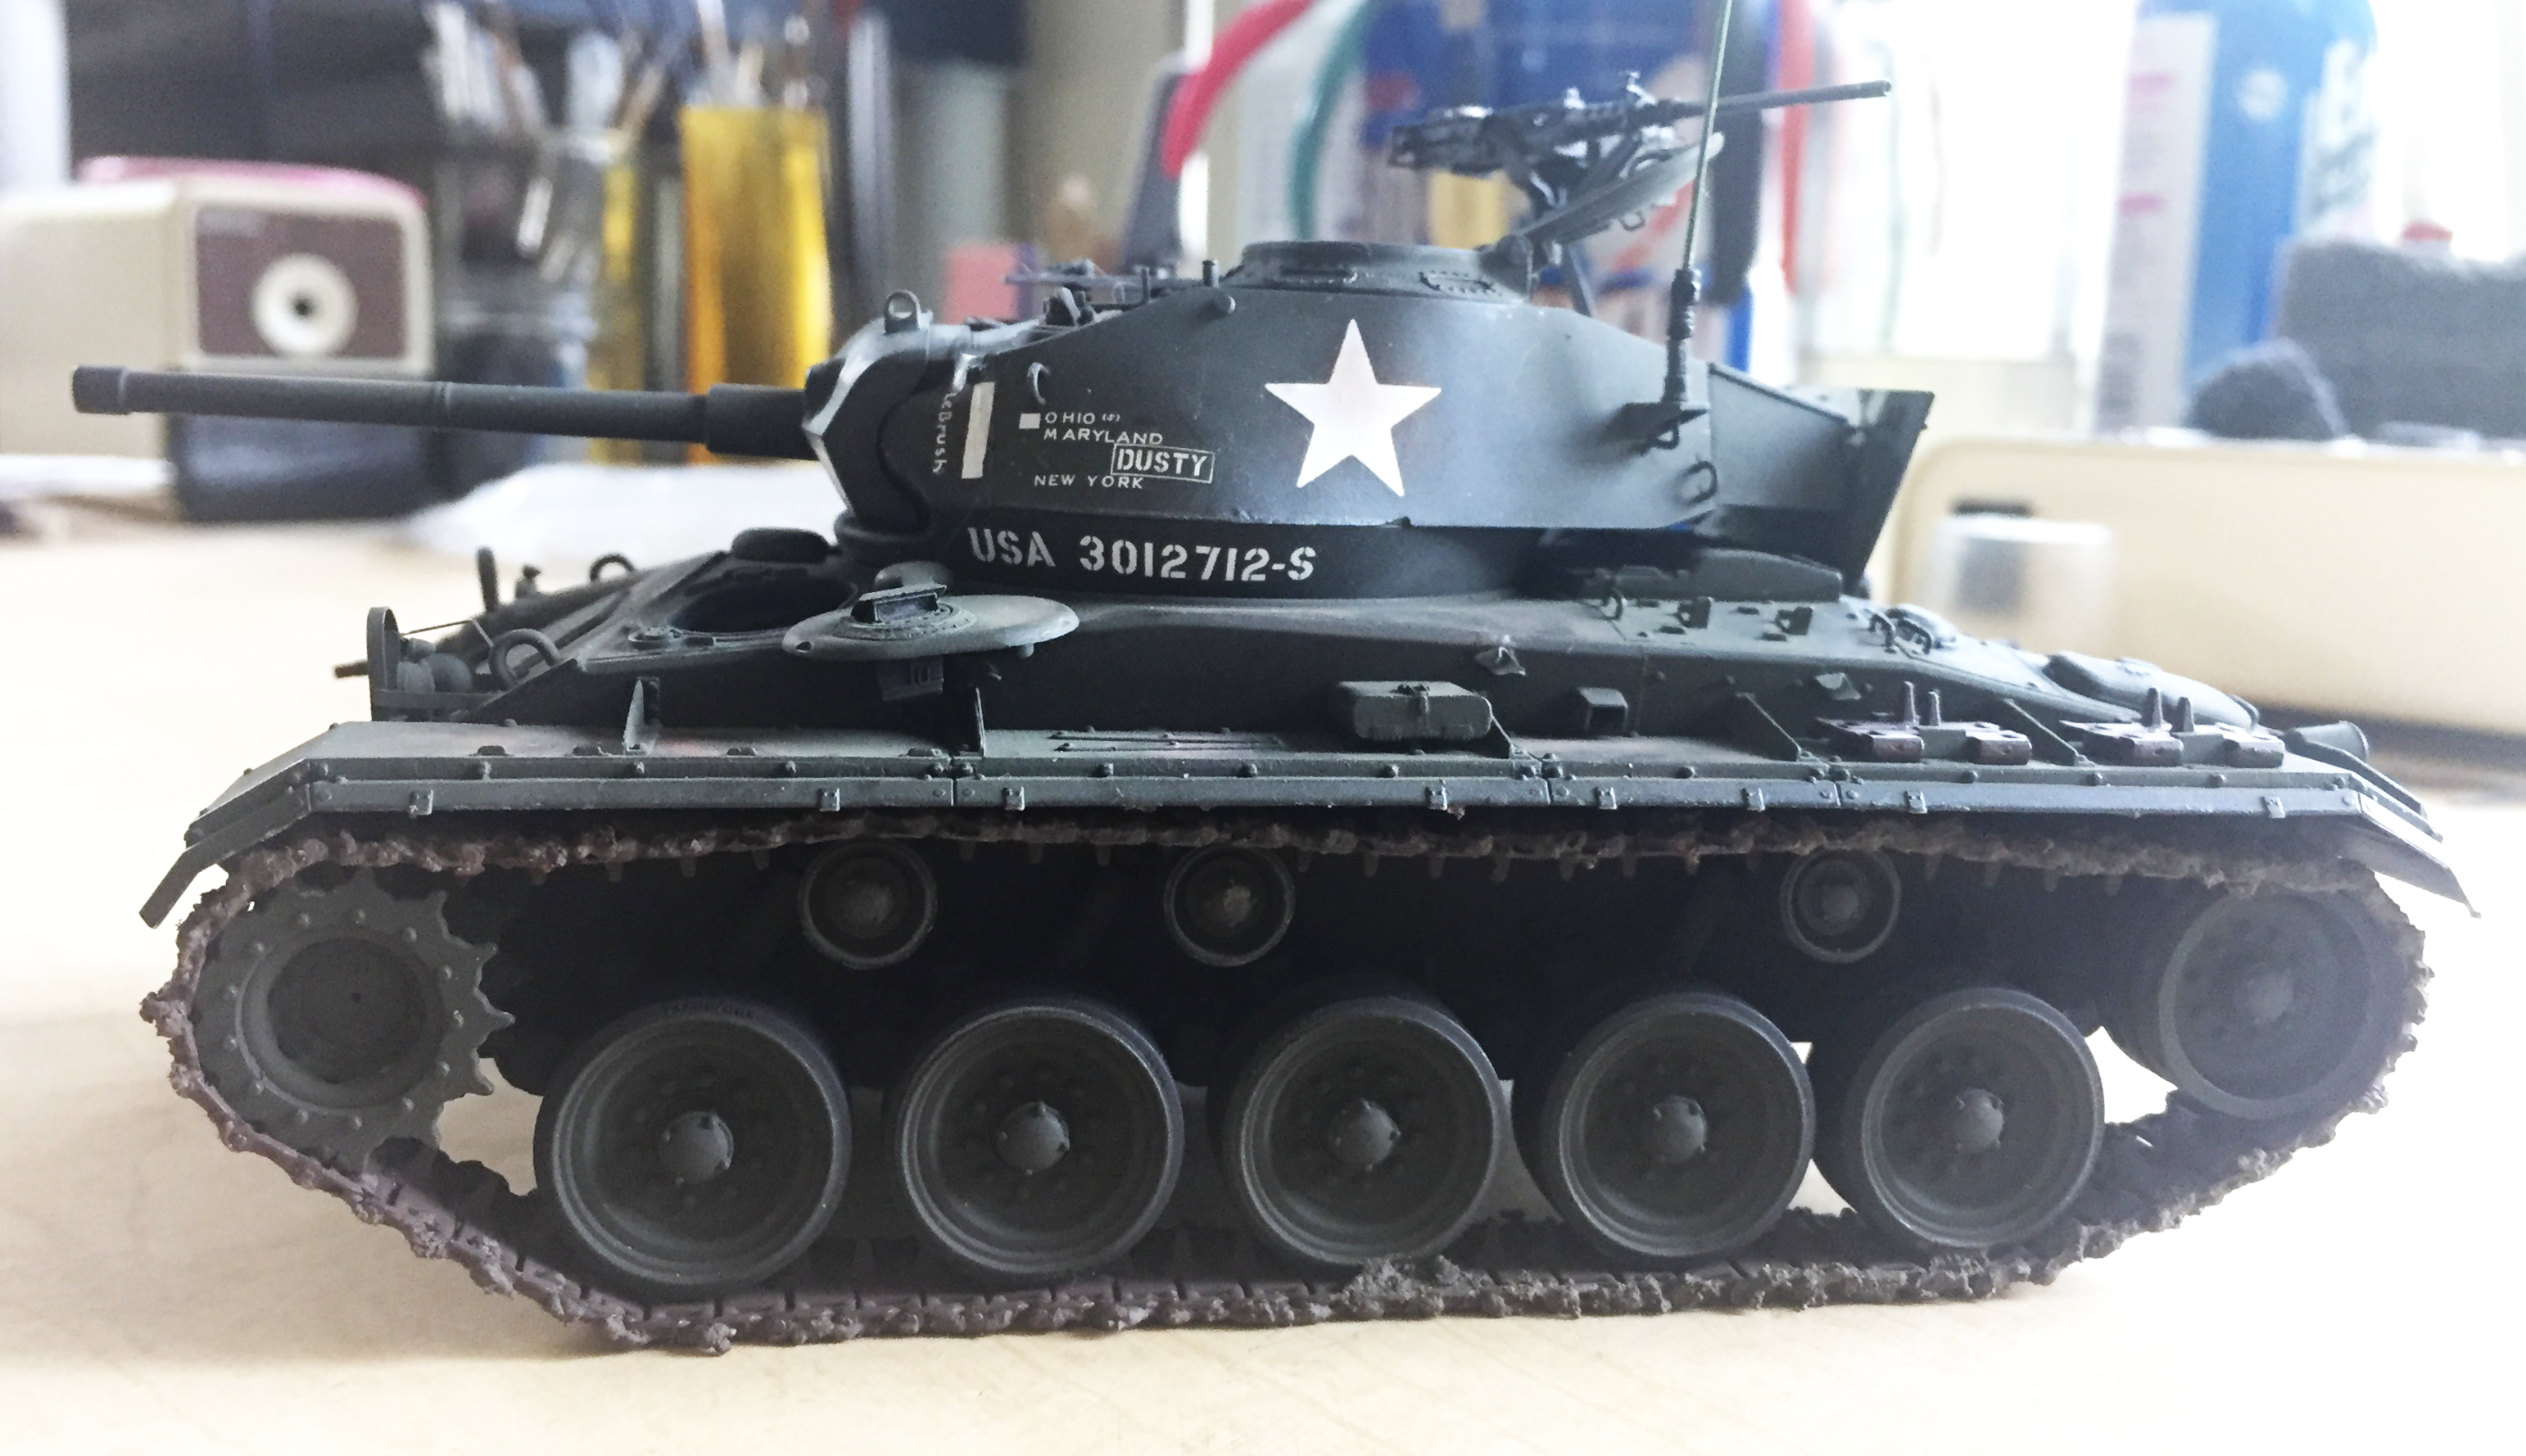
Because of the camera’s magnification, the above graphic looks much rougher than it does to the eye. It’s certainly better than the decal Bronco provided. Oddly, most of the small decals went down well. The major exception was on the left front side of the turret where there are states painted onto the turret. In the gap between “Maryland” and “New York,” there is supposed to be “Calif.” I have NO idea where it ended up. It was on the carrier film when the decal went into the water. When I applied the decal, it was missing. It’s not the first time I’ve had a decal come apart on me and normally, though a hassle, is often not insurmountable. Not this time. I’ve NO idea where “Calif” went. It was not in the water, on the paper, or anywhere I had the wit to look. Okay. Moving on…
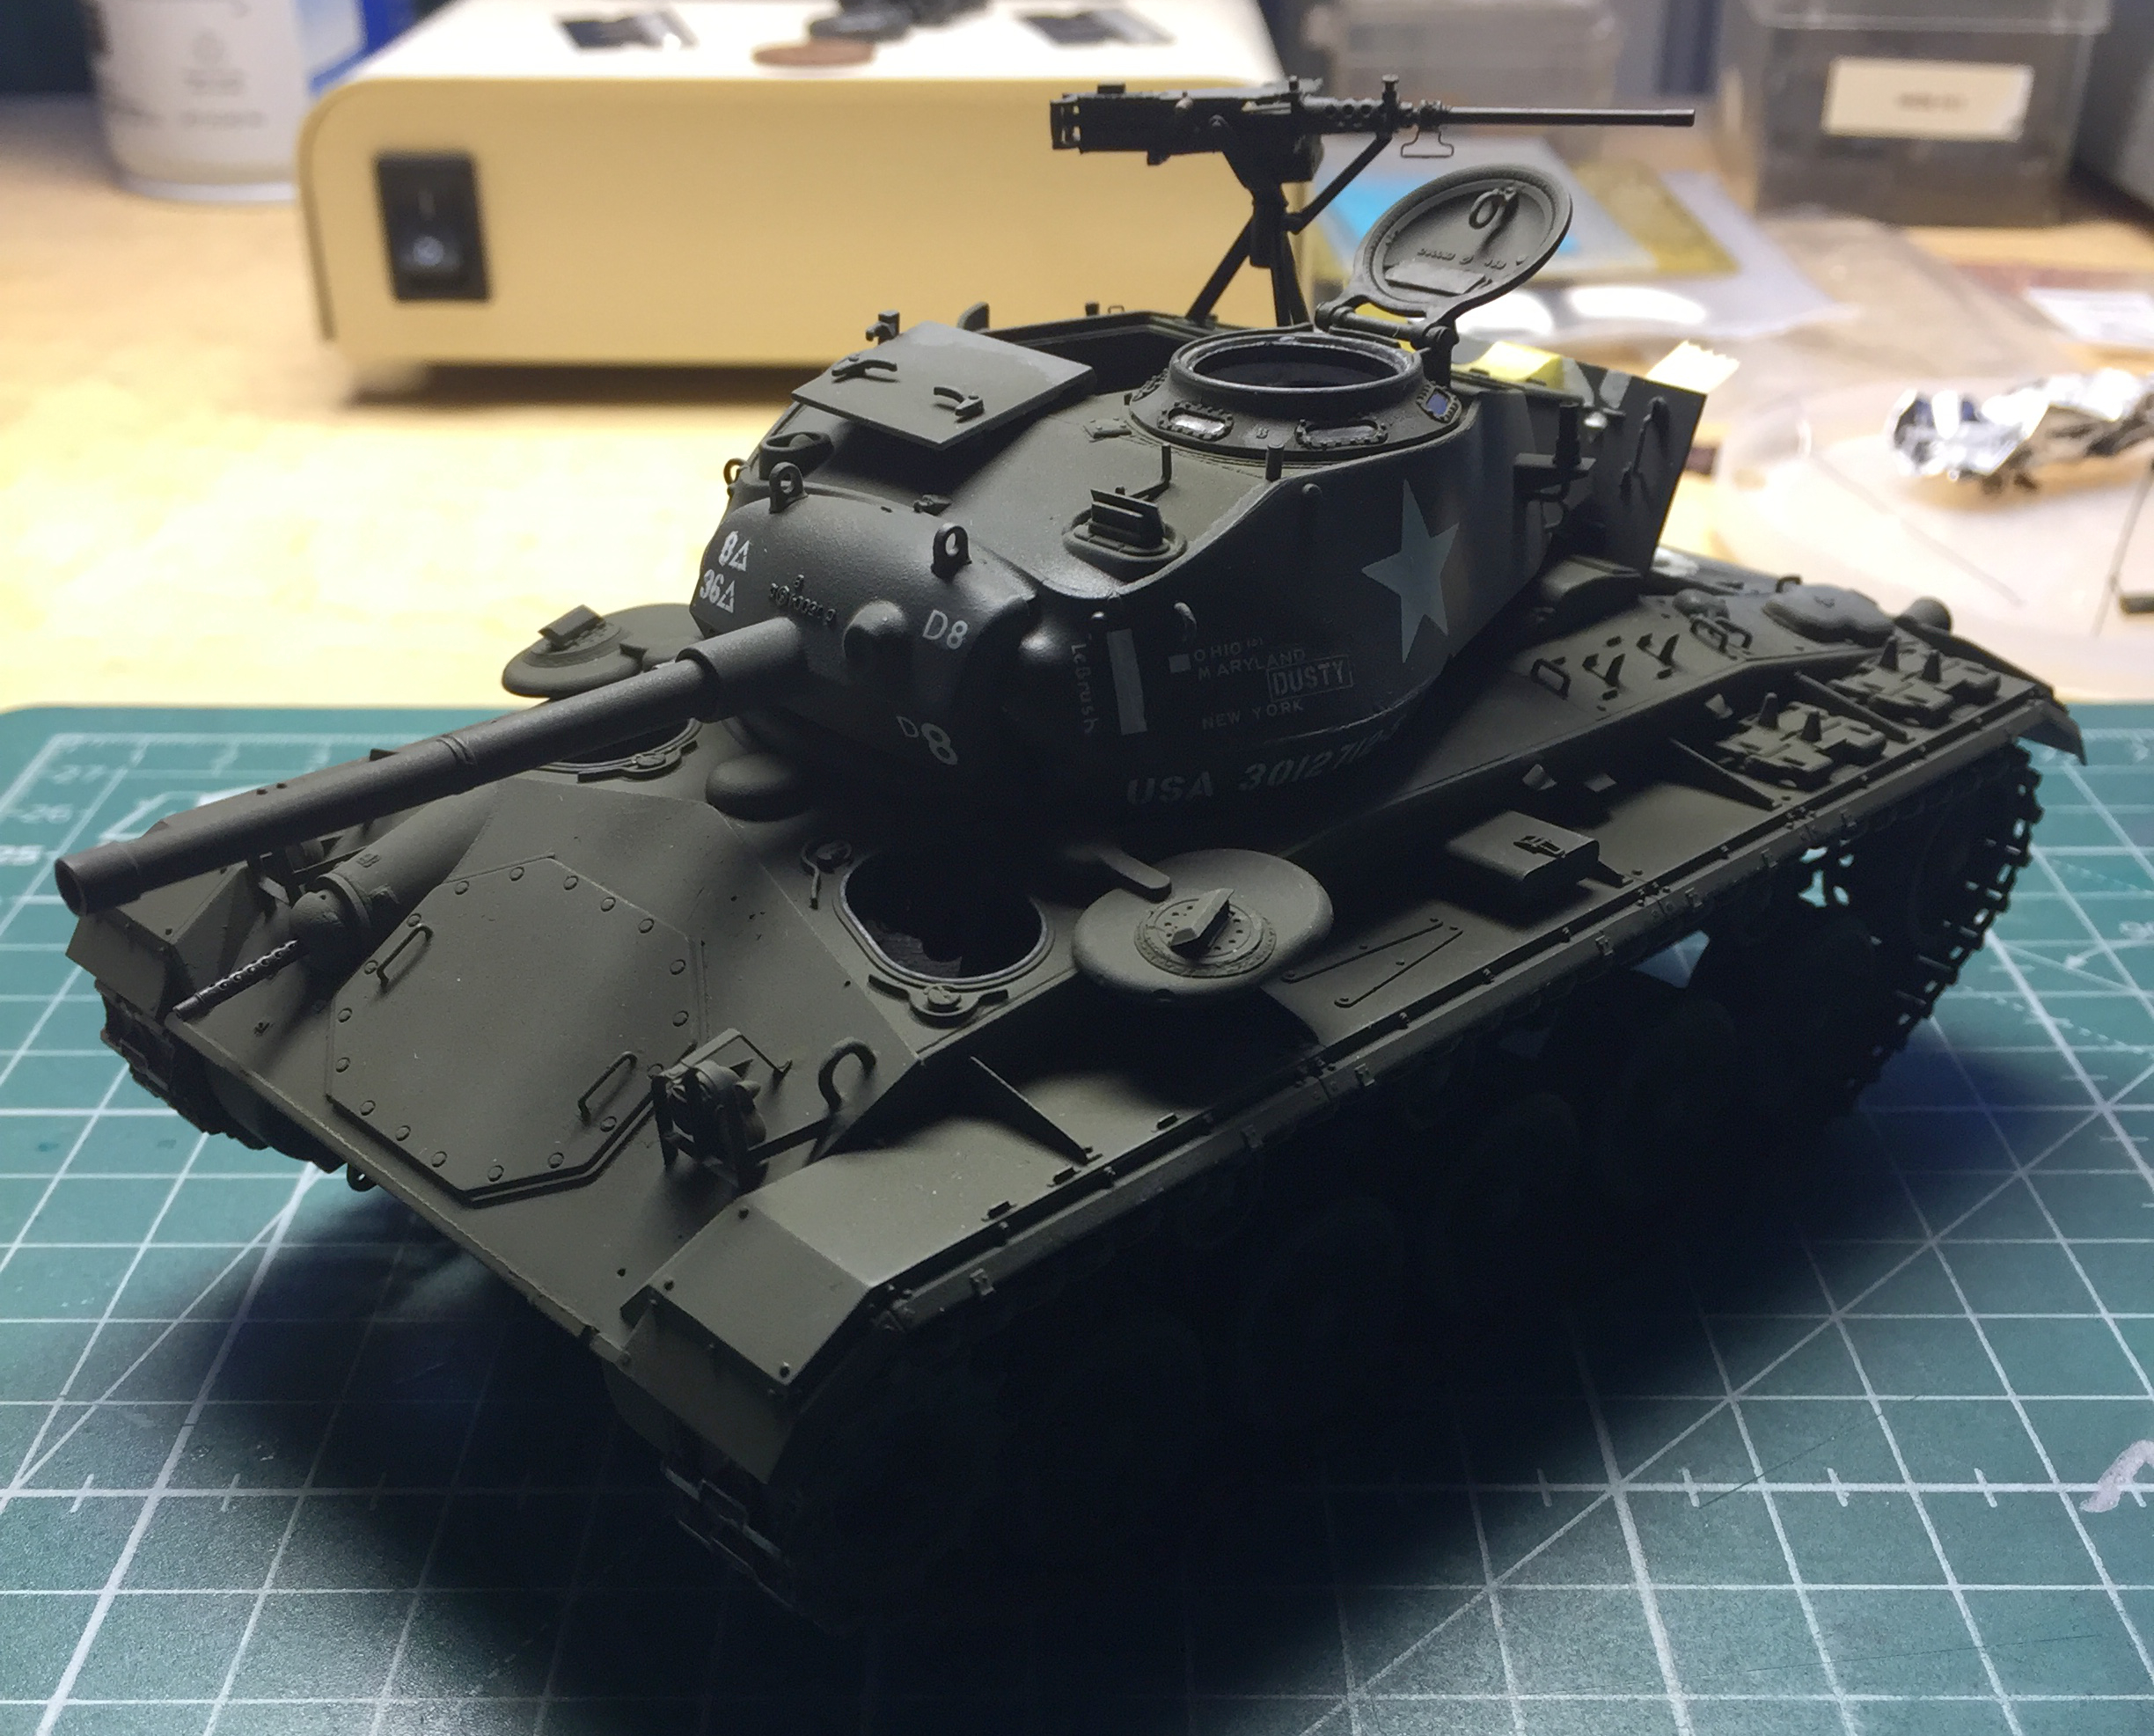
It’s got its decals:

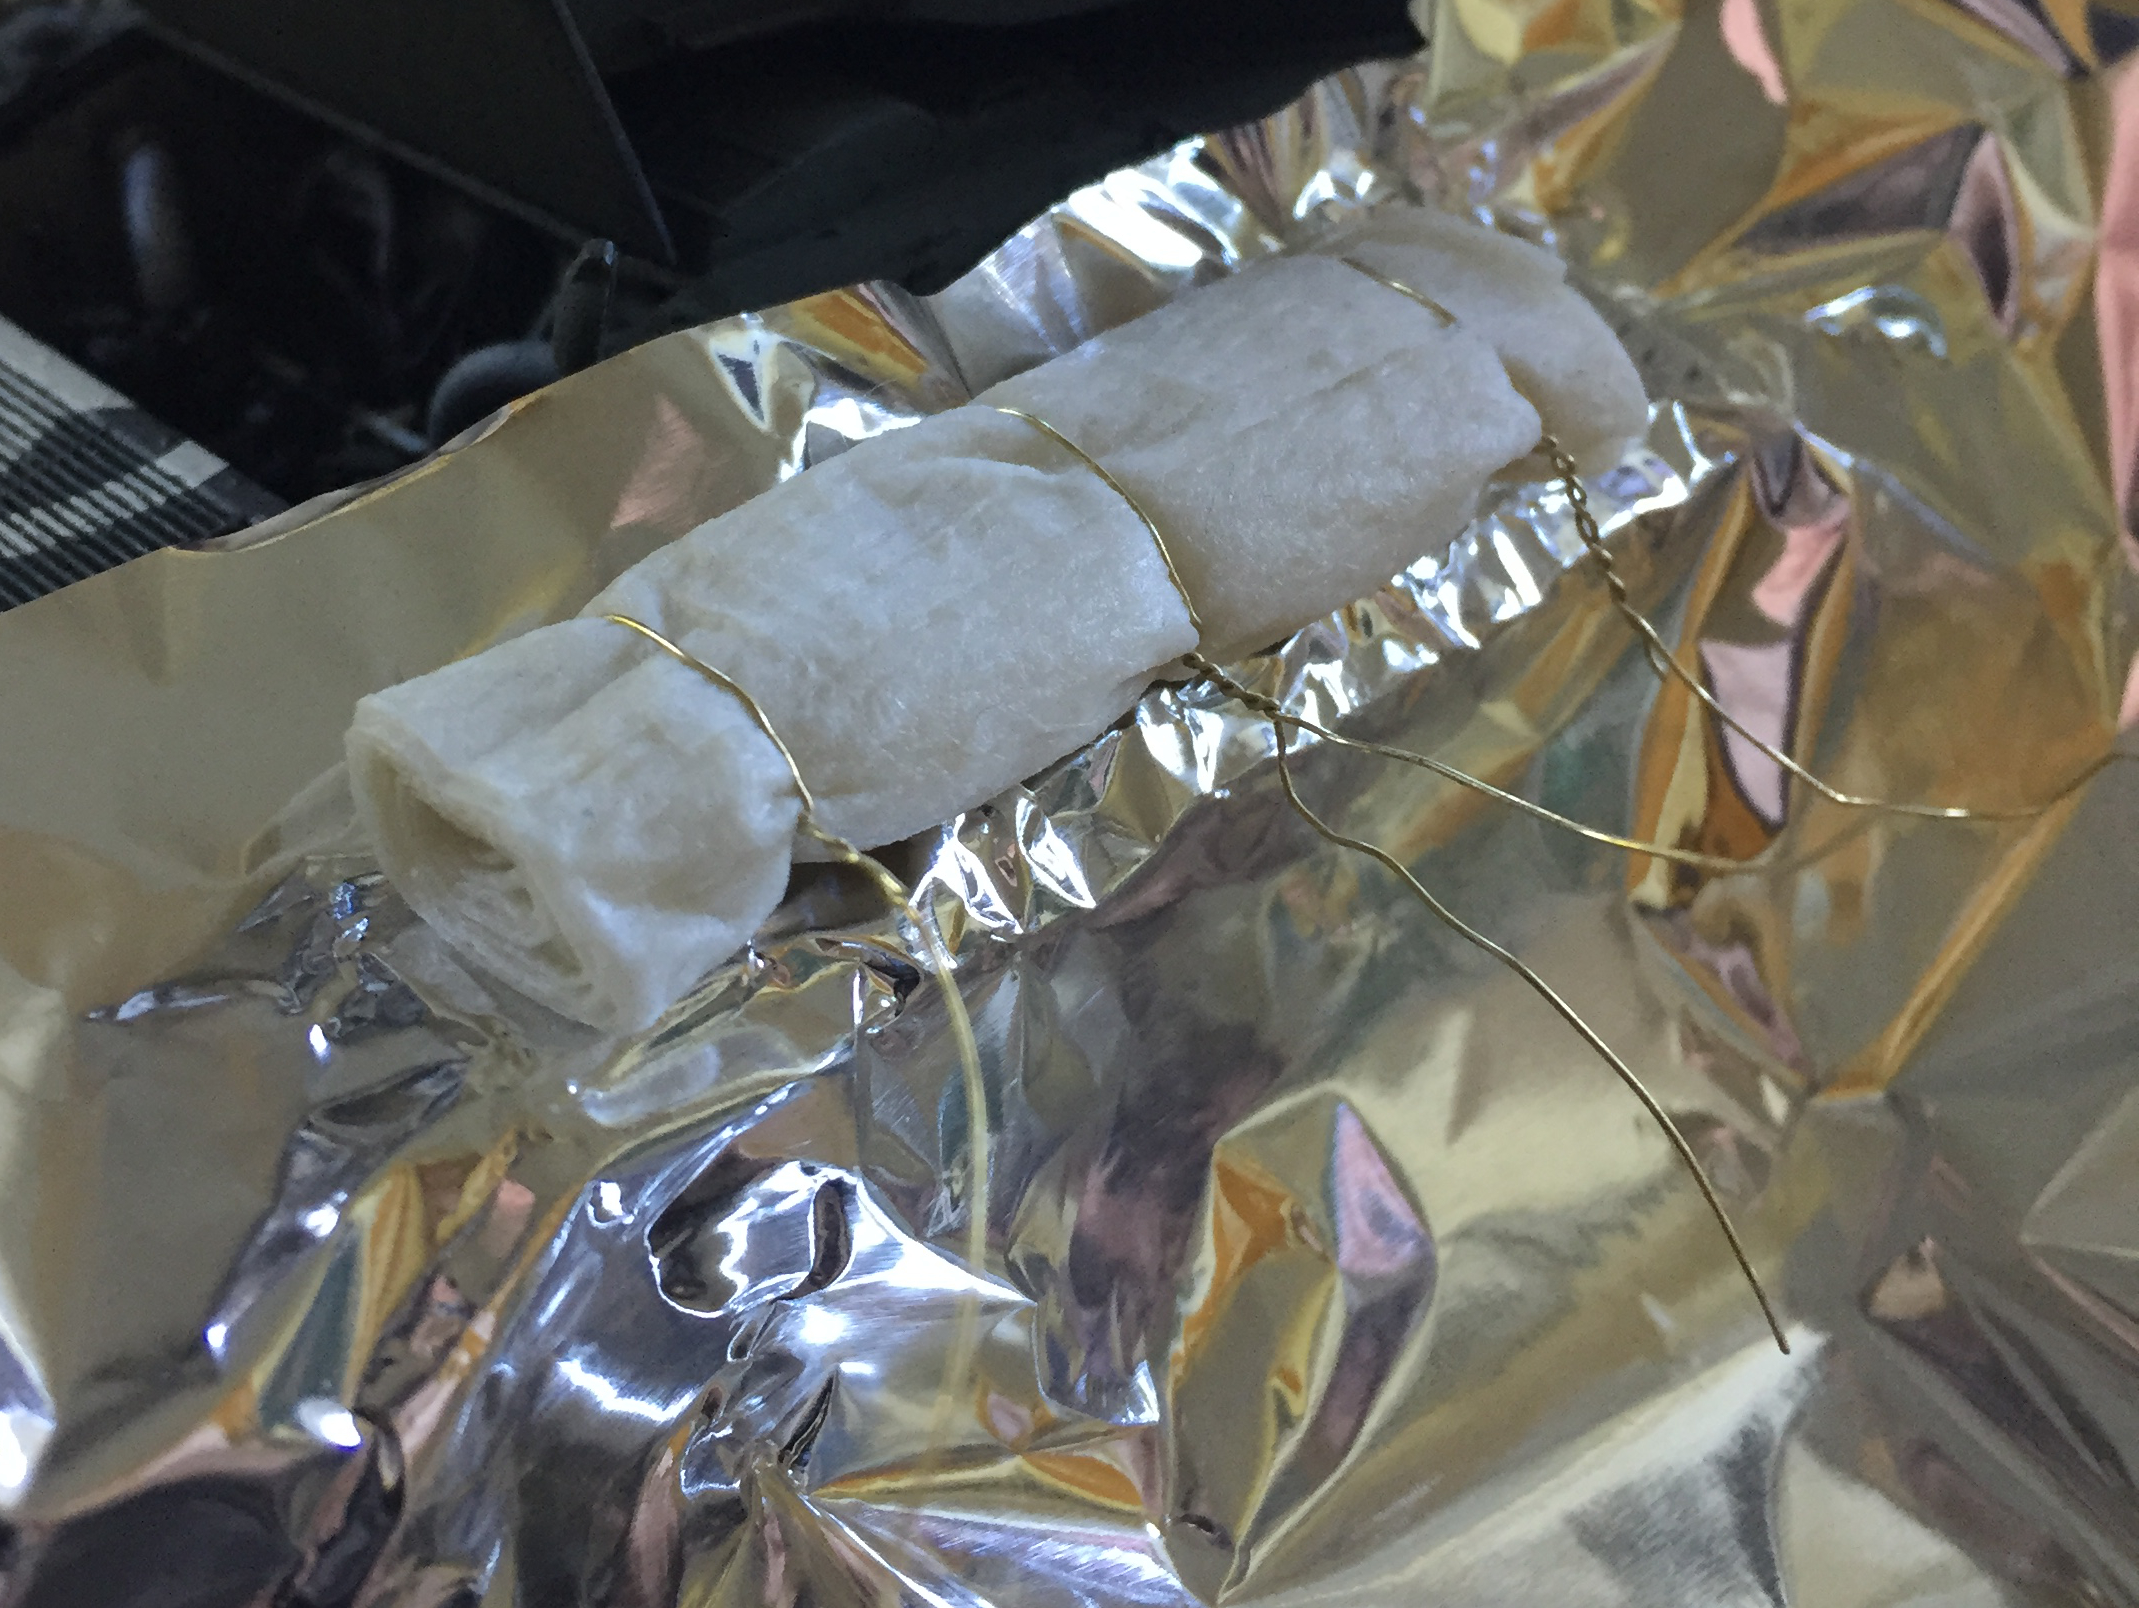
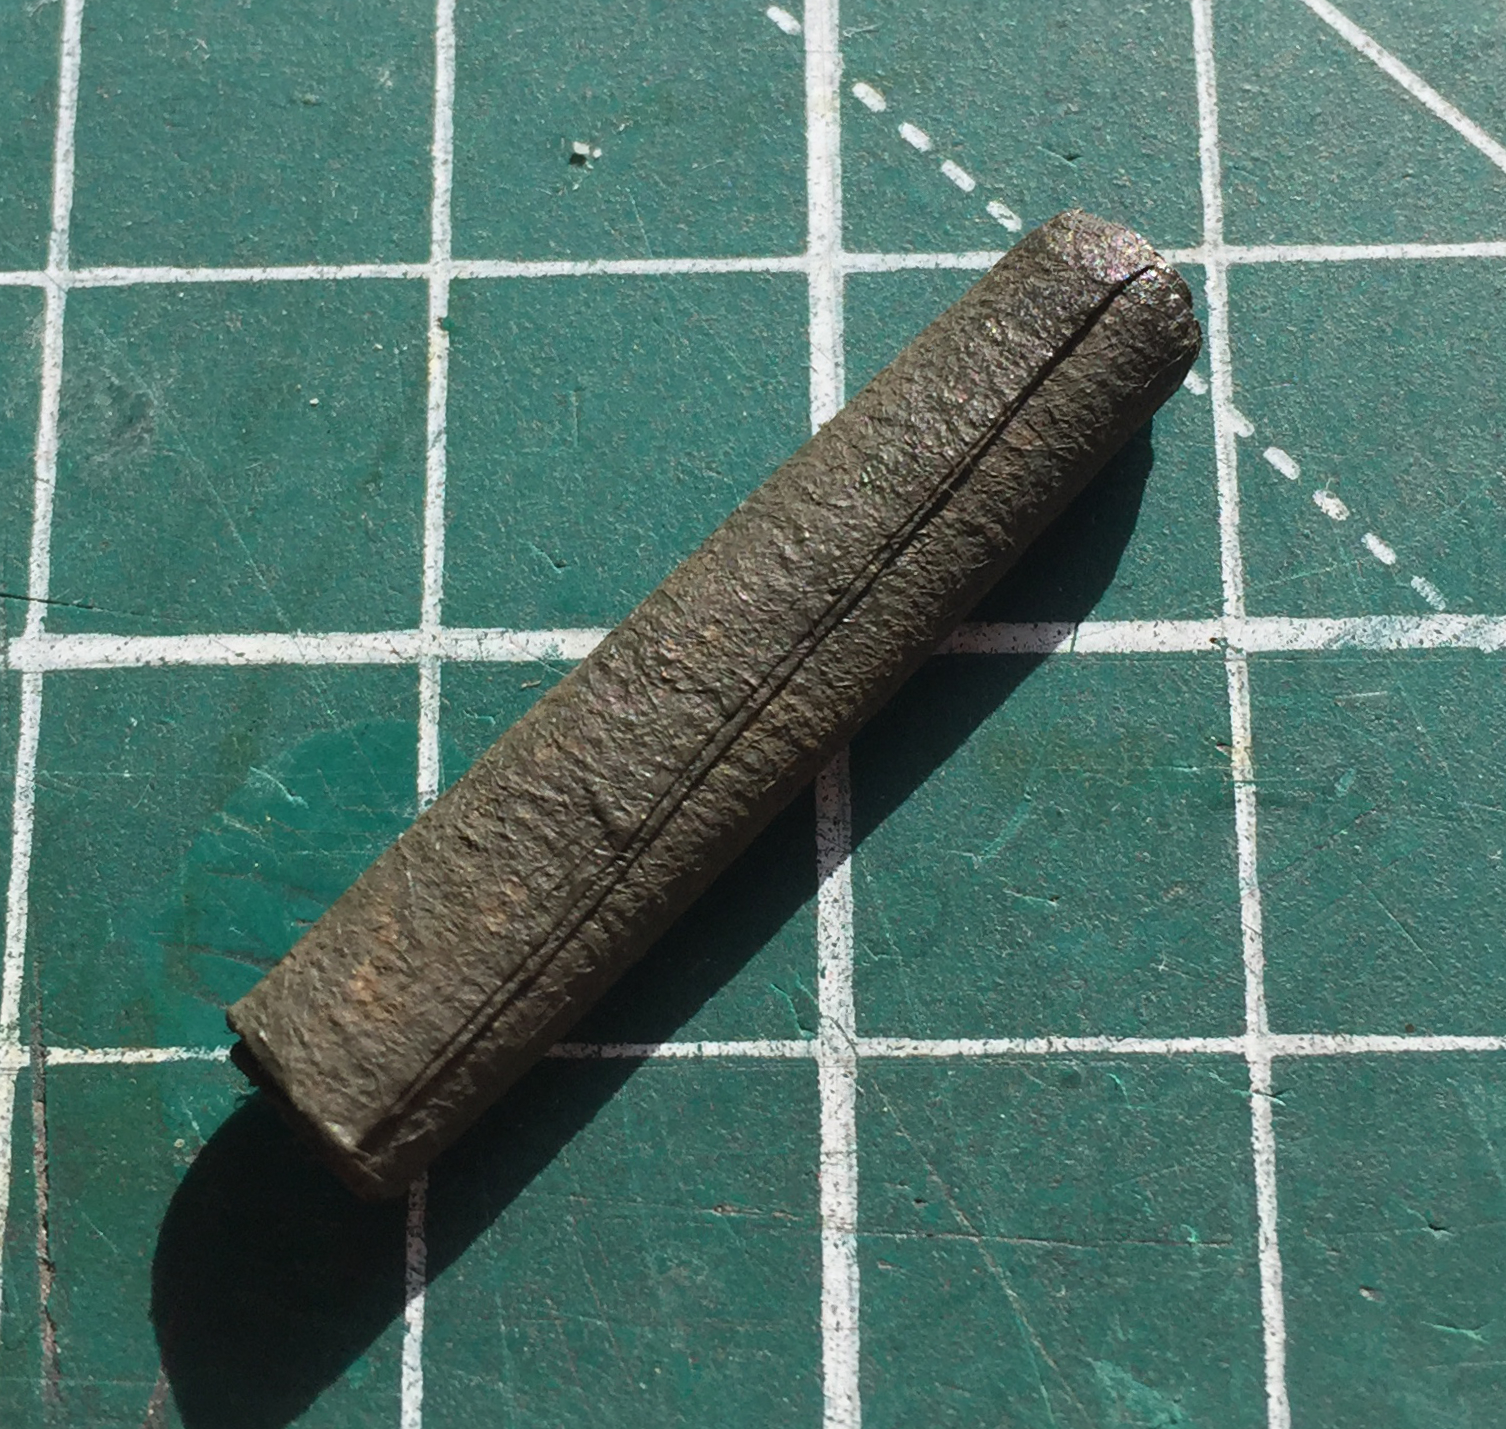
I rarely like kit-supplied tarps (or even resin AM tarps) and prefer to make my own. It starts with a dilute solution (suspension, actually) of white glue:

I get paper towels and toilet paper from public restrooms. Why? Because it’s cheap and has no embossed texture. I laid out a sheet of it, ironed it (y’know…with a steam iron) to get rid of unwanted wrinkles and folds, then used a scale ruler to define a 25′ x 50′ (7.62m x 15.24m) “tarp.” I folded it lengthwise in thirds, then rolled it up. I waited a few minutes for the fibers to take a relative set, then unrolled it and ran it through the diluted white glue. It gets rolled back up and I use wire to form the tarp to conform to the straps I’ll put on later. Since I want the tarp to fit over an uneven surface, I used aluminum foil as a mask to keep the glue from staining and adhering to the paint, then waited for the glue to dry (in this case, three days, which is typical):
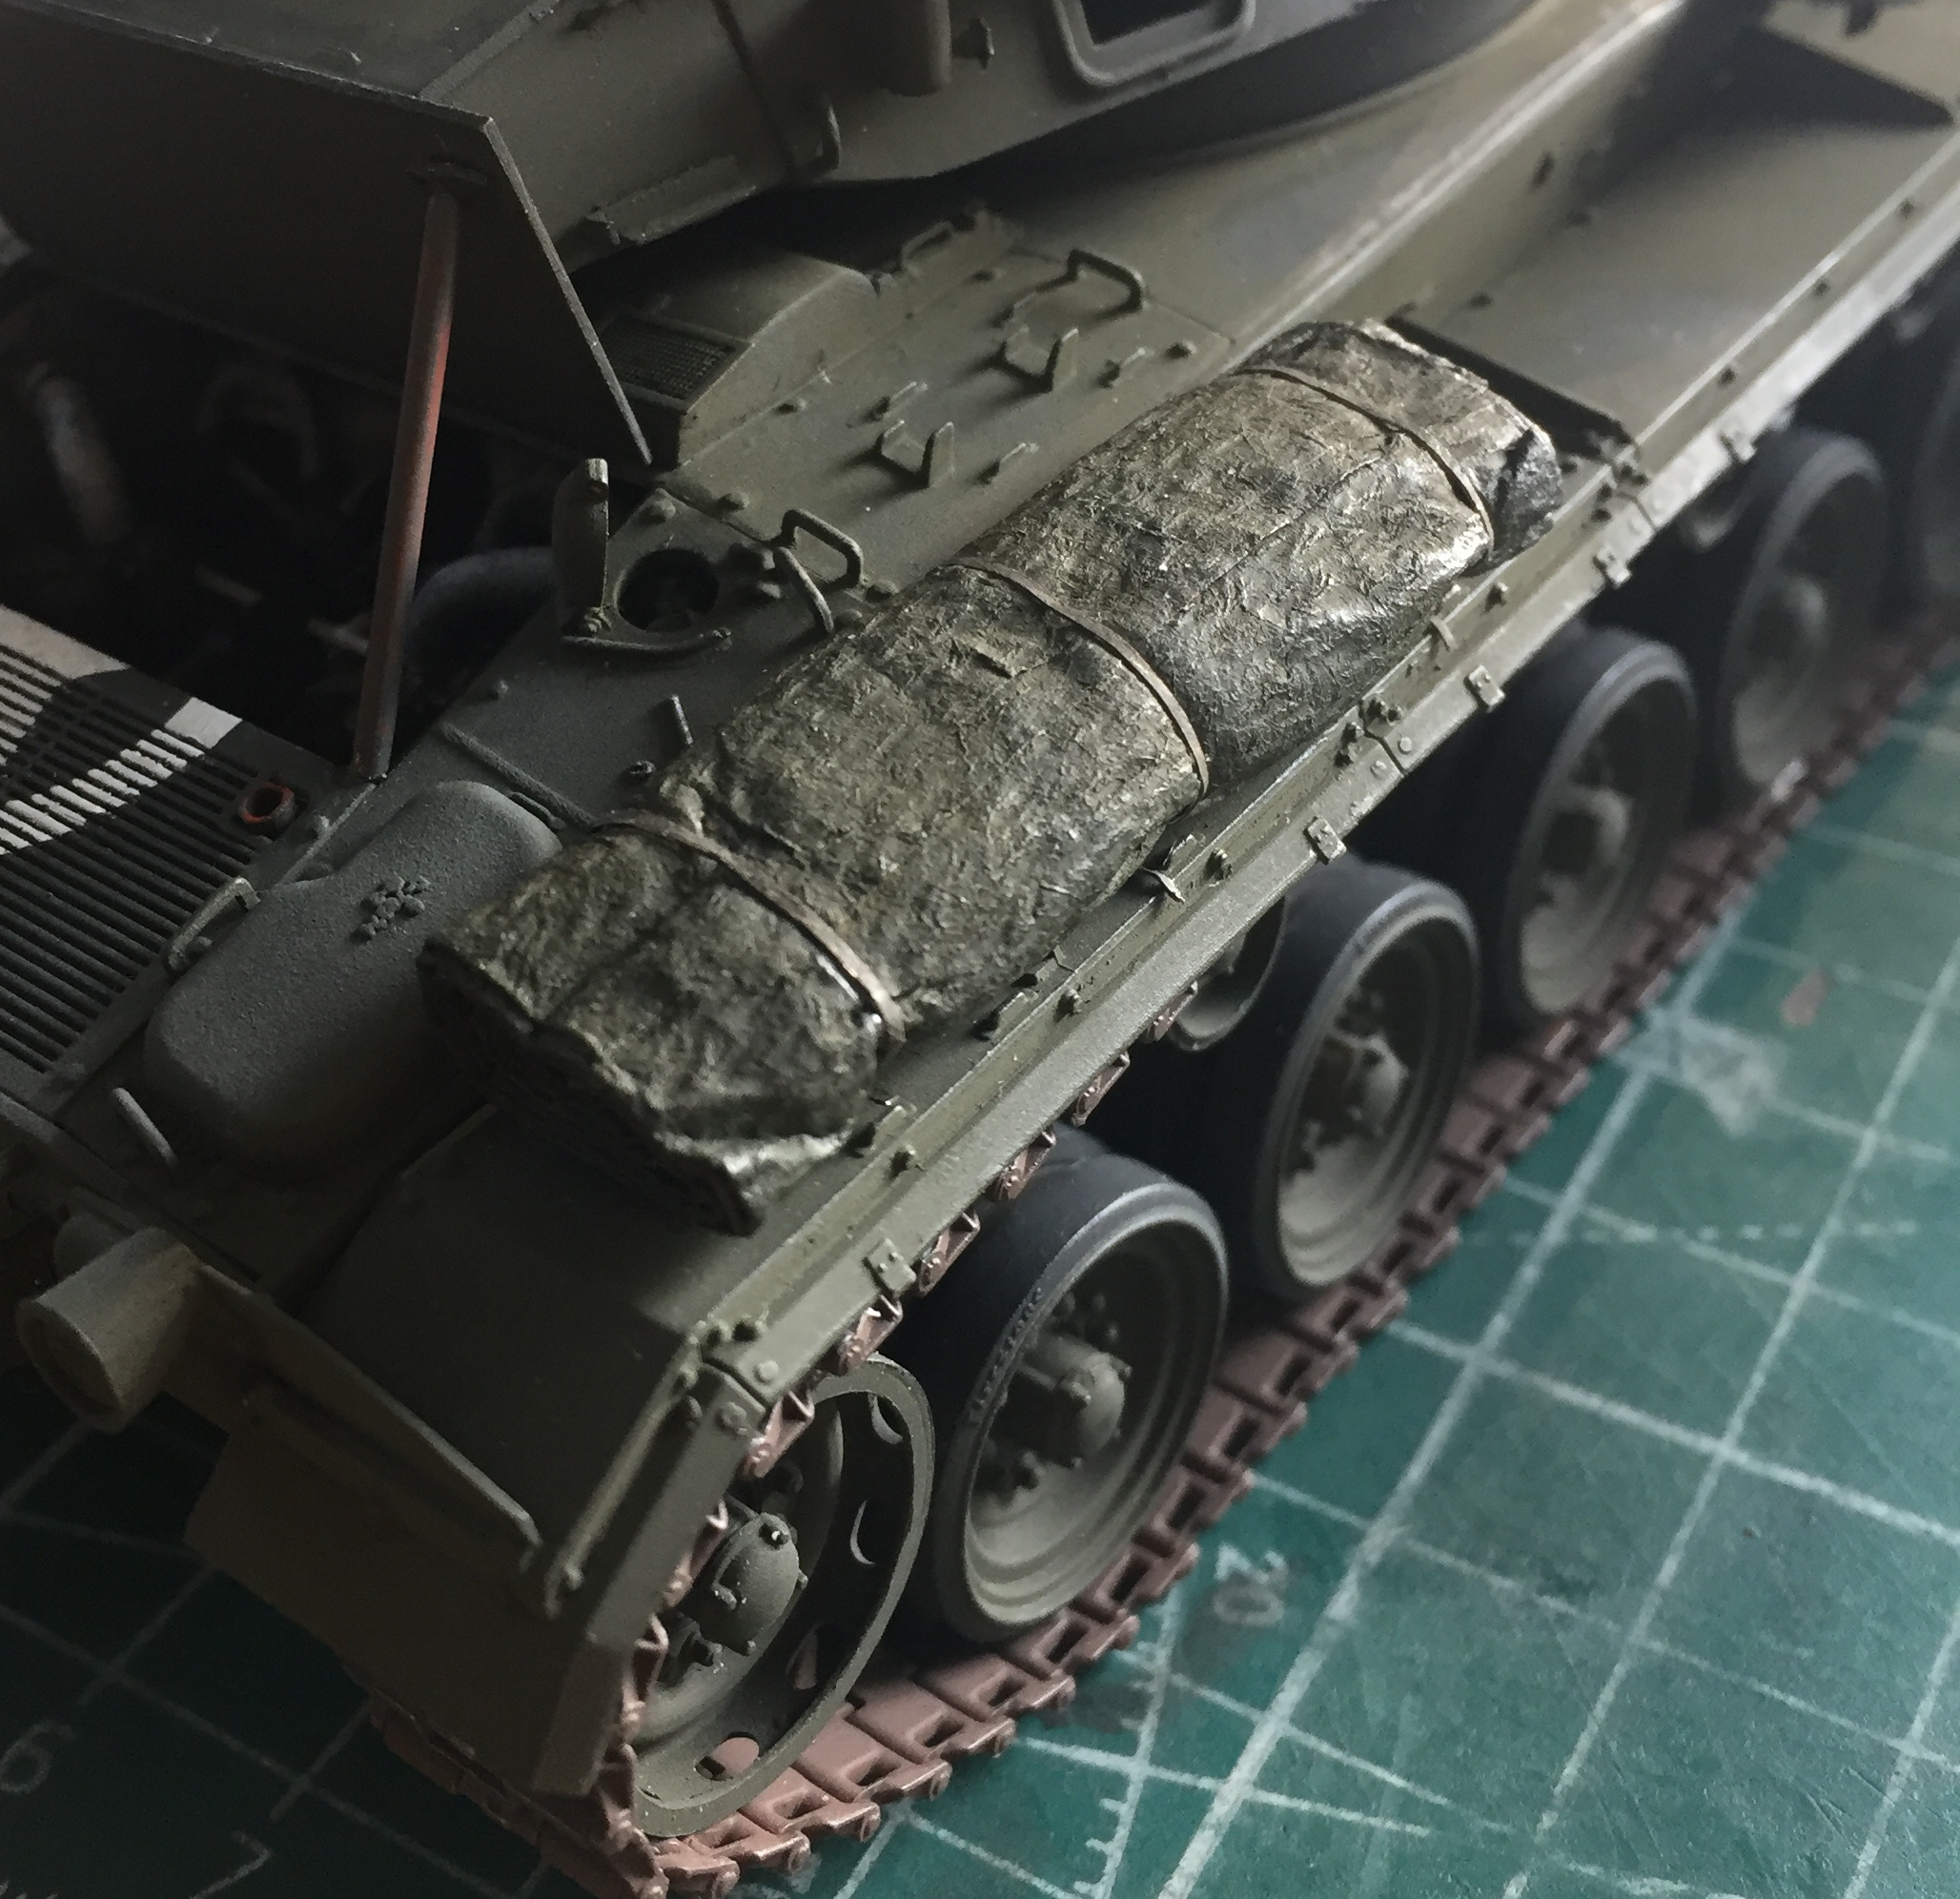
After it had dried, I painted it Tamiya XF-62 Olive Drab and then added straps made from lead foil (from a wine bottle neck):
Then it was time to weather and wear the beast.
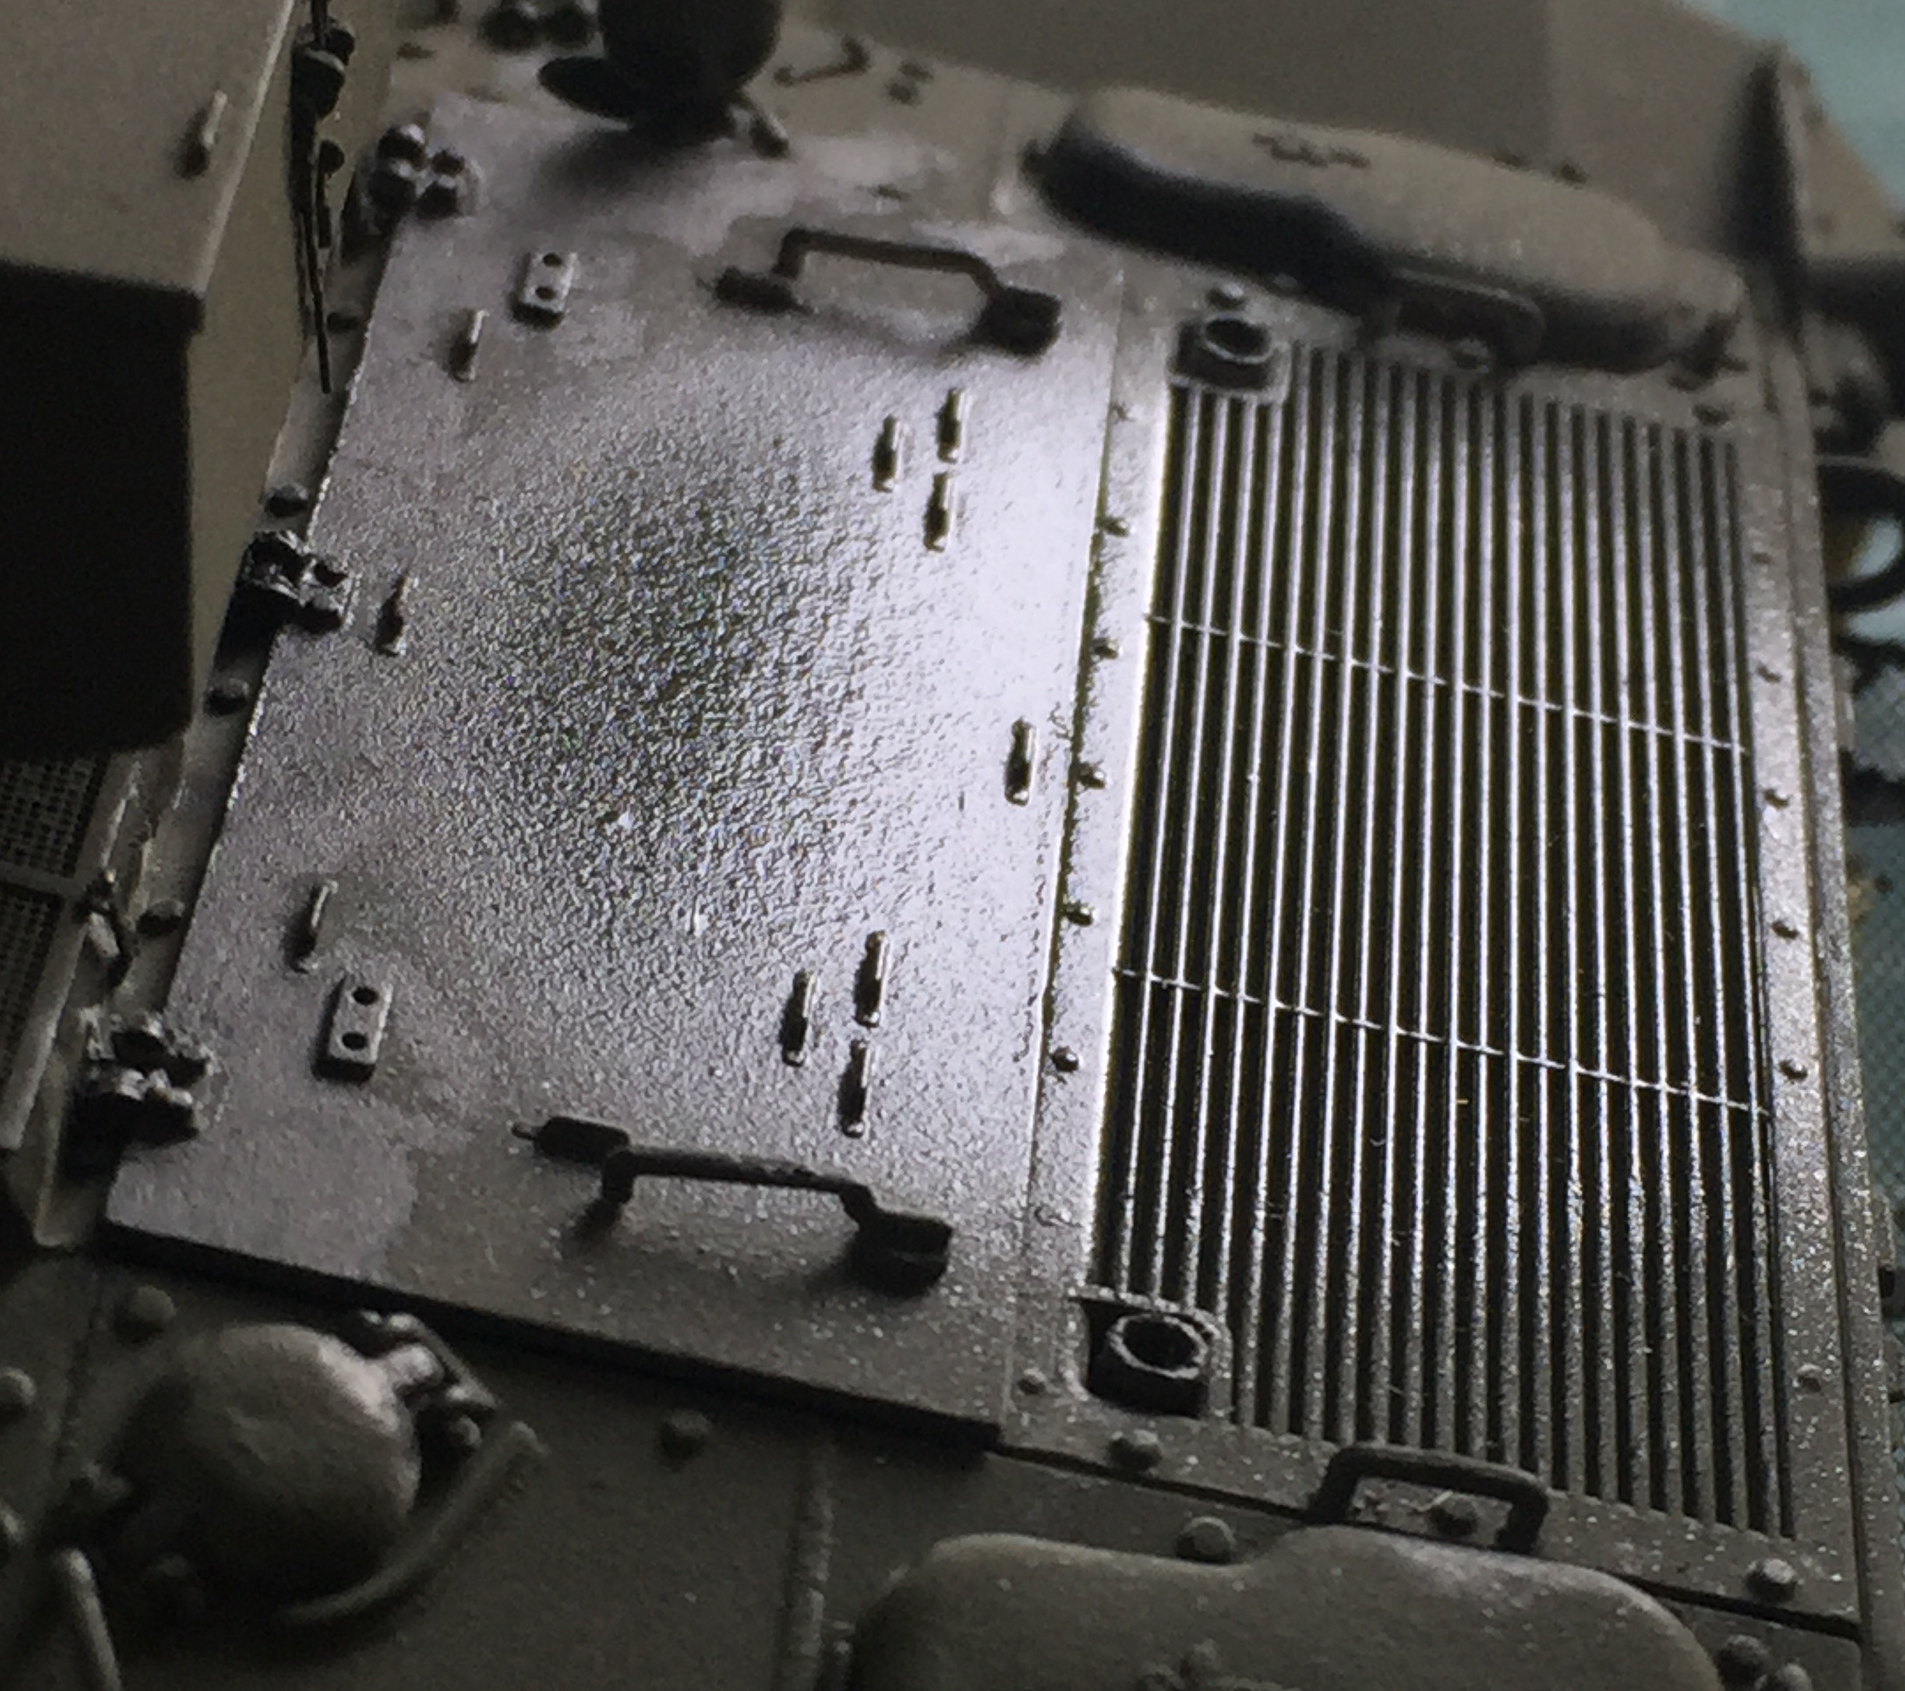
I discovered that if I moistened a cotton swab with denatured alcohol, NOT wetting it as wetting it leaves stains, I can replicate areas where generic surface dust and crud are worn away by the crew using that area. It’s a subtle effect and it’s very easy to overdo. If you think one more pass will do it, it’s time to STOP right there. If you look at the texture and reflected light, you can see the darker areas delineated by the alcohol:
The effect is more subtle than the above photo would suggest. I took that shot for how the light reflected and ease of seeing. In reality it’s a bit more subtle.
I don’t use dot filtering because my color vision isn’t ideal. But I get good service from using pastels and the added benefit of ease of removal if I screw it up. I also use color pencils for bare metal wear if the area is REALLY small, and I use a regular pencil for that dark worn-surface look painted armor often has.
That blood pressure raising basket on the rear was becoming more and more abysmal as I had to reattach it over and over. To hide the absoLUTEly lousy job I did with it, I made another small tarp to drop in there to obscure as much as possible.
The paper, measured and rolled:
The paper soaked, re-rolled, dried (instead of waiting three days for that, I hurried things along with the microwave and it worked perfectly, 30 seconds at a time), and painted:
And once in place in the basket, it goes a LONG way in hiding the rotten job I did with that basket:

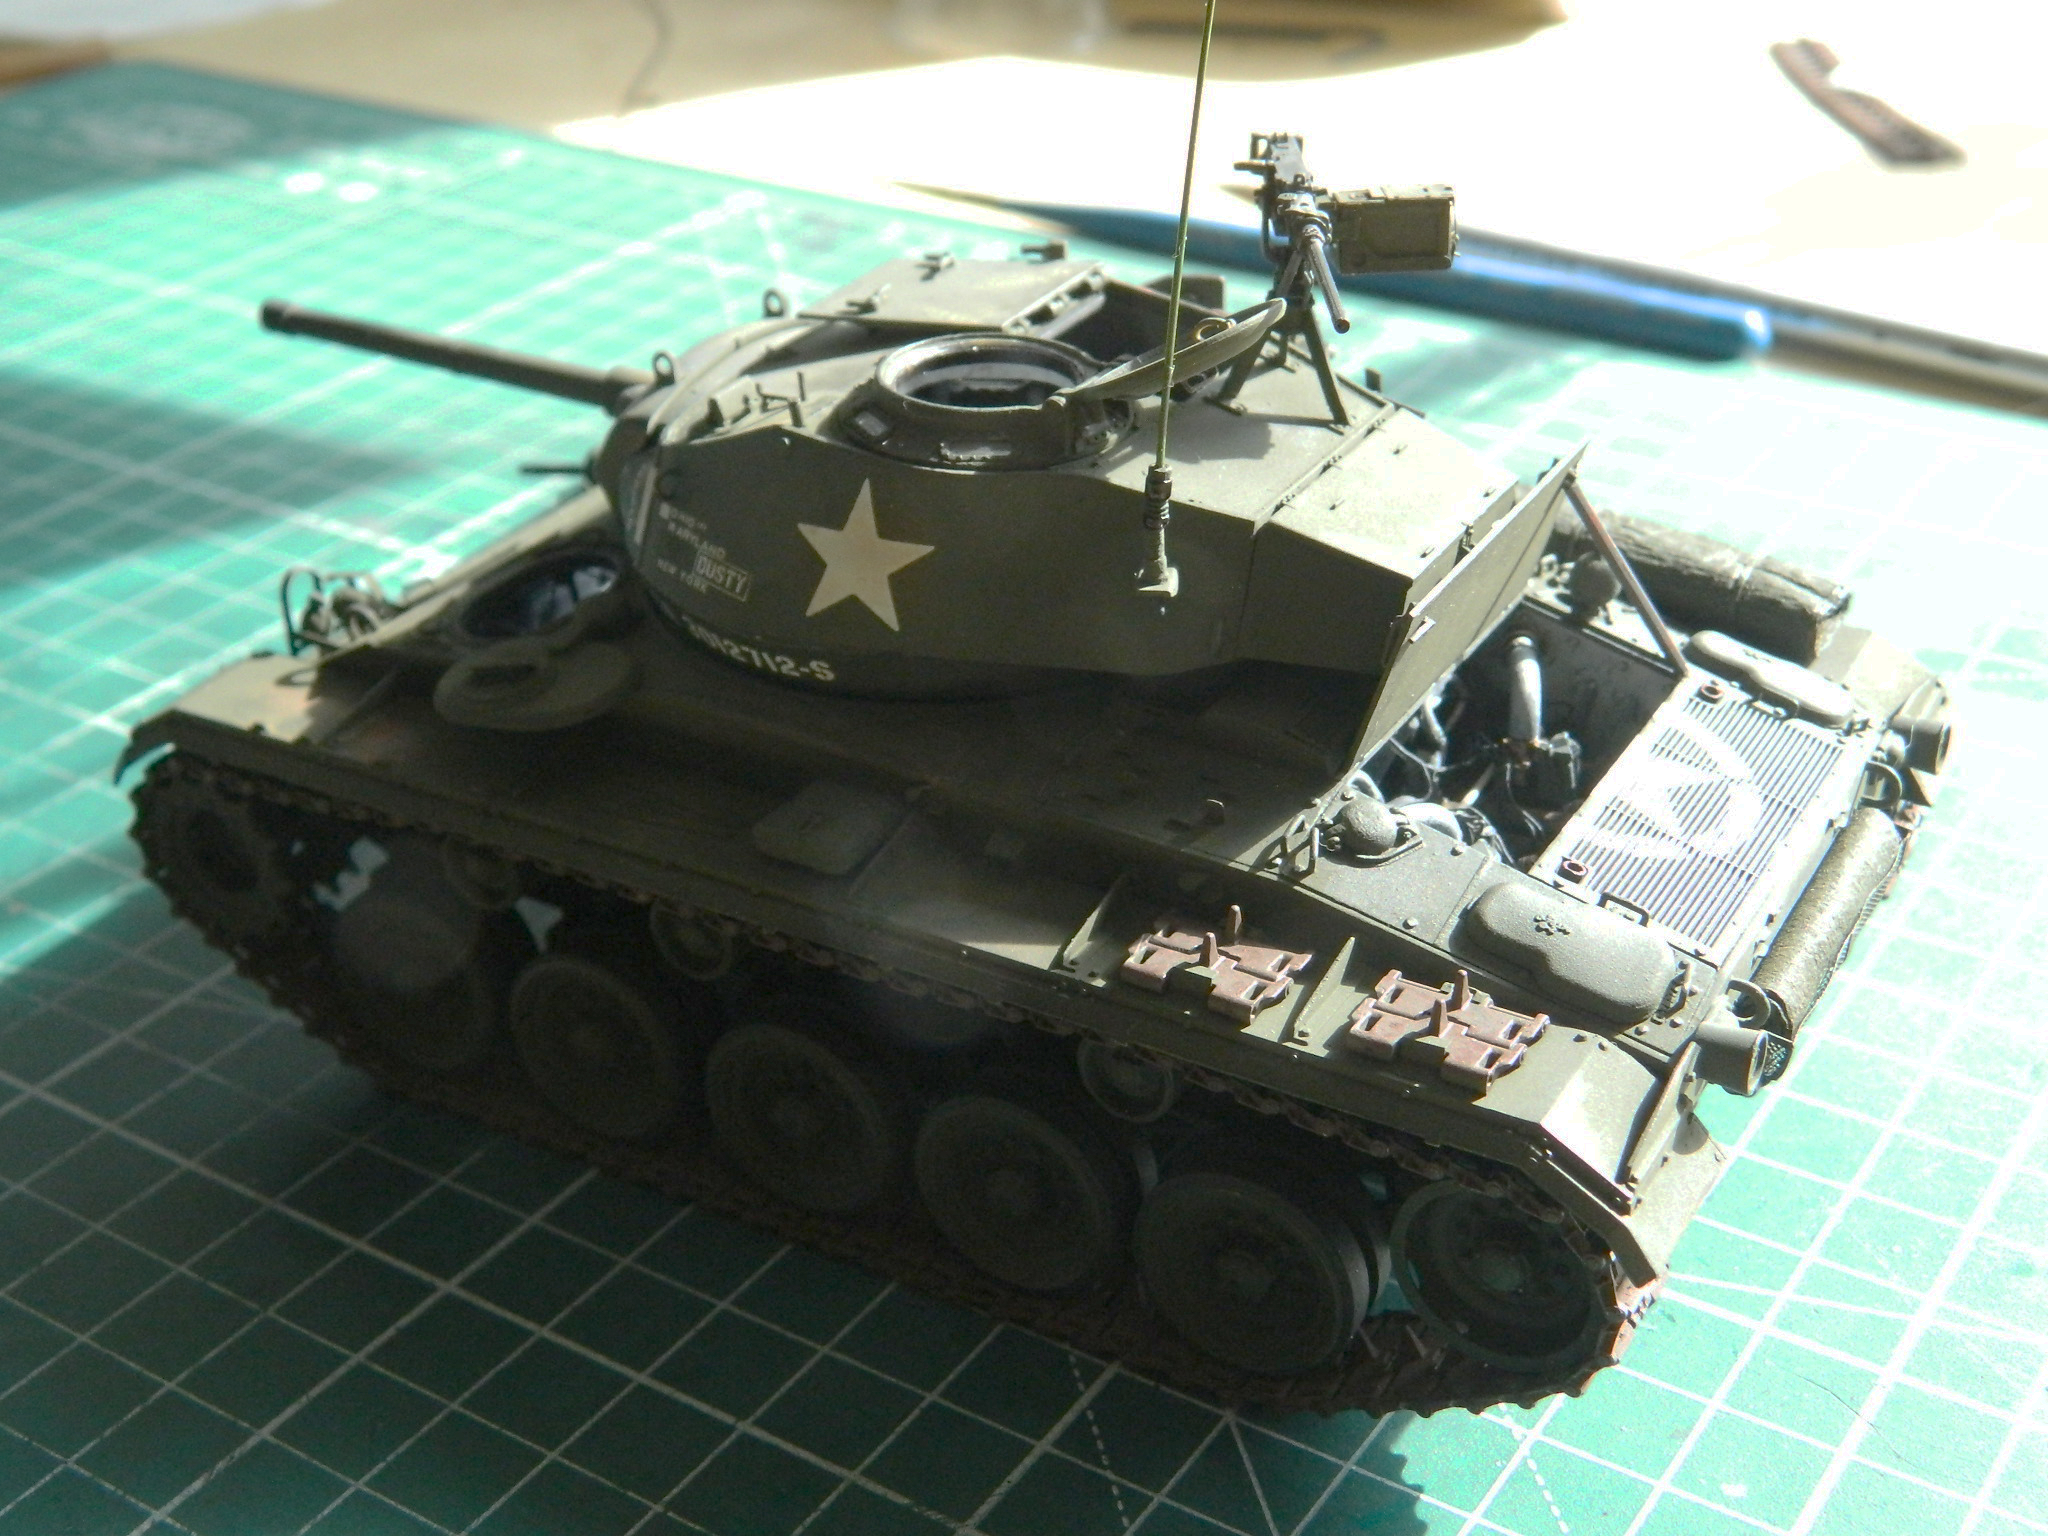
The last nightmare was adding the pioneer tools. Again, Bronco over-complicated things and made the job magnitudes more annoying than it needed to be. I mean…four hours for this (and above the tools on the hull and next to them on the fender you can see how alcohol replicates the surface dirt being worn away by traffic):
I wanted to replicate a pipe being used as a prop-rod holding the engine cover open. Initially I was going to use plastic rod, paint it steel, and then dry-brush surface rust onto it. Then I saw an old paperclip sitting on the bench. It was steel, old, surface discolored from age, and the exact diameter I wanted. Clip, snip, file, fit, dry-brush red, and it’s done and glued on.
Finally the next thing was…erm…ah…sacred excrement! This thing is DONE: