I let this sit for a couple of days to be certain that the glue had completely cured before I finished it off:

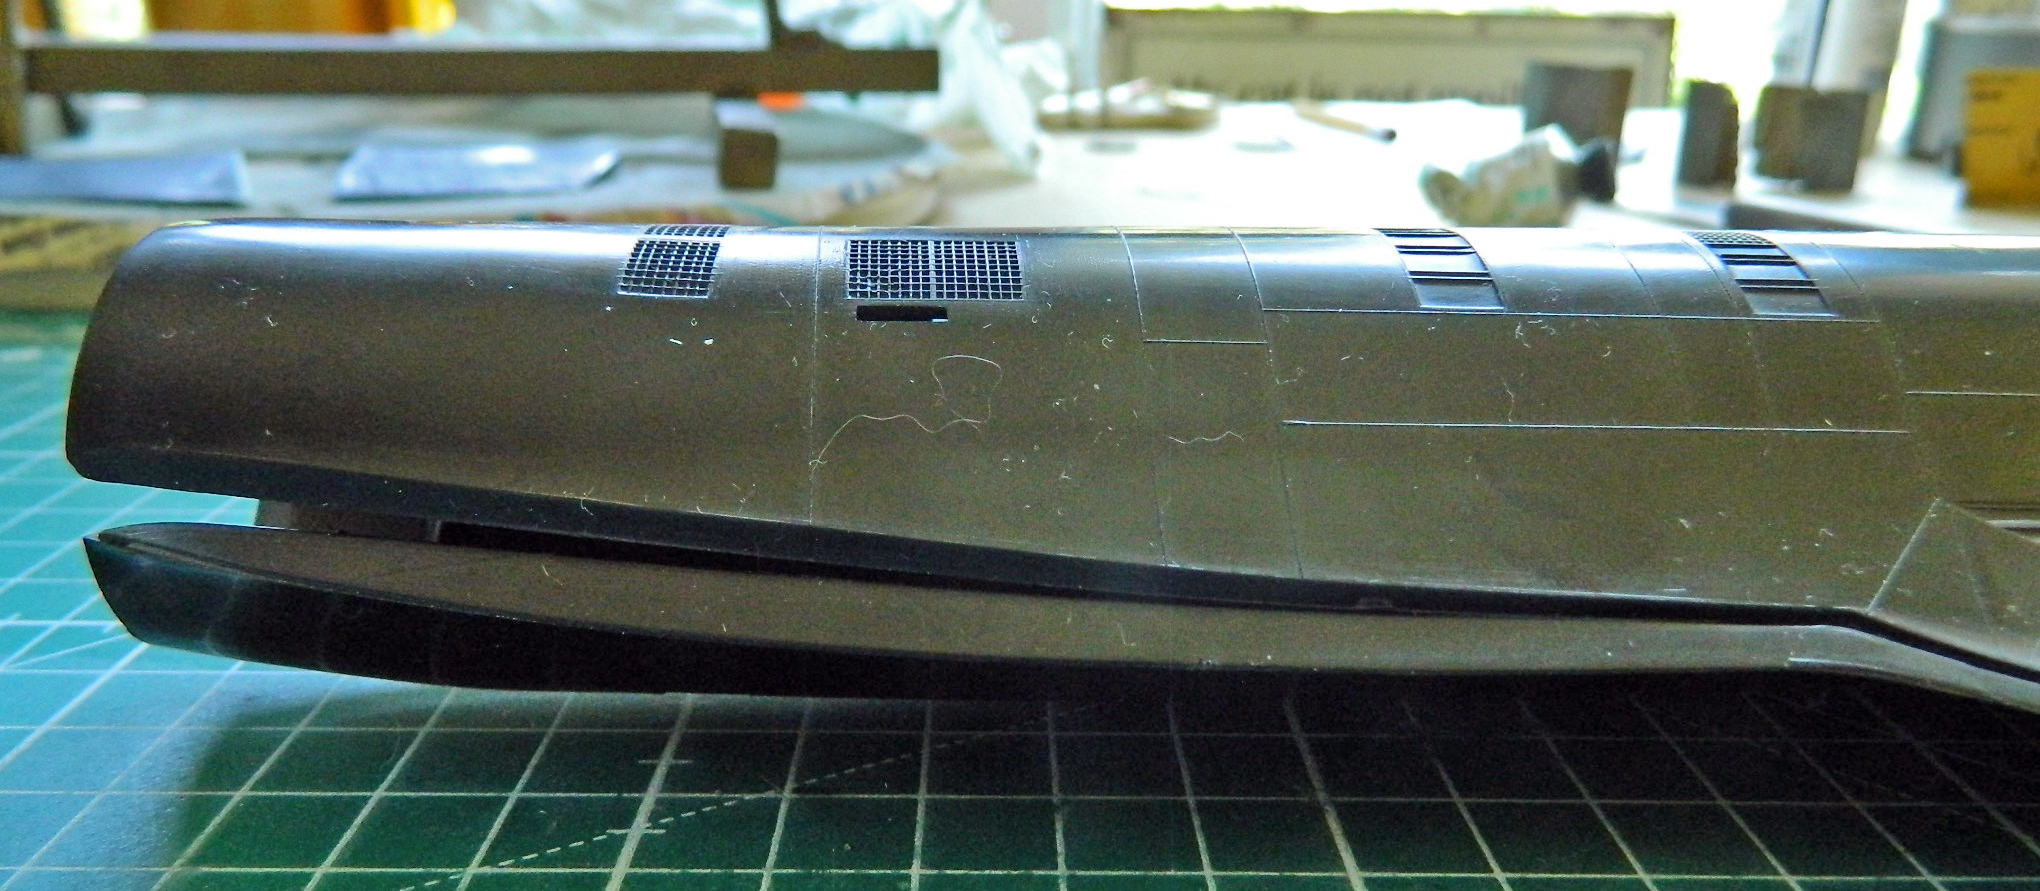
I don’t know what they are, but I know what they look like and where they go. There’s a couple of blisters under the nose/cockpit area. They’re triangular in shape with a recess in the front. After flipping through the various reference photos, I put down some masking tape and outlined the places where they go:

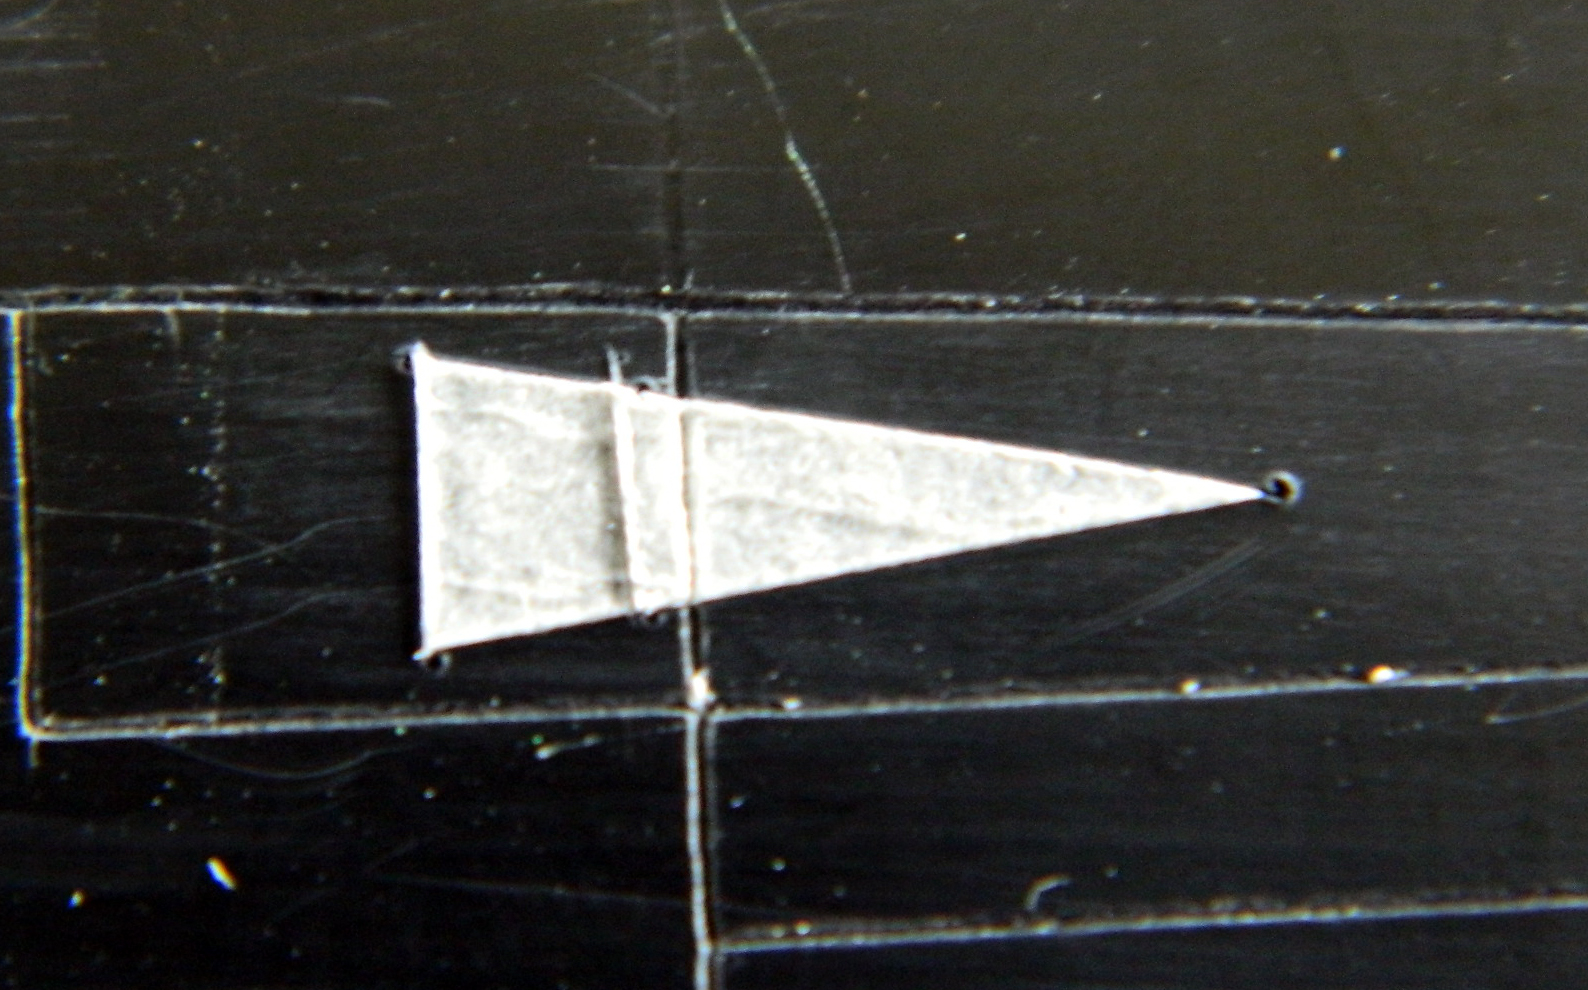
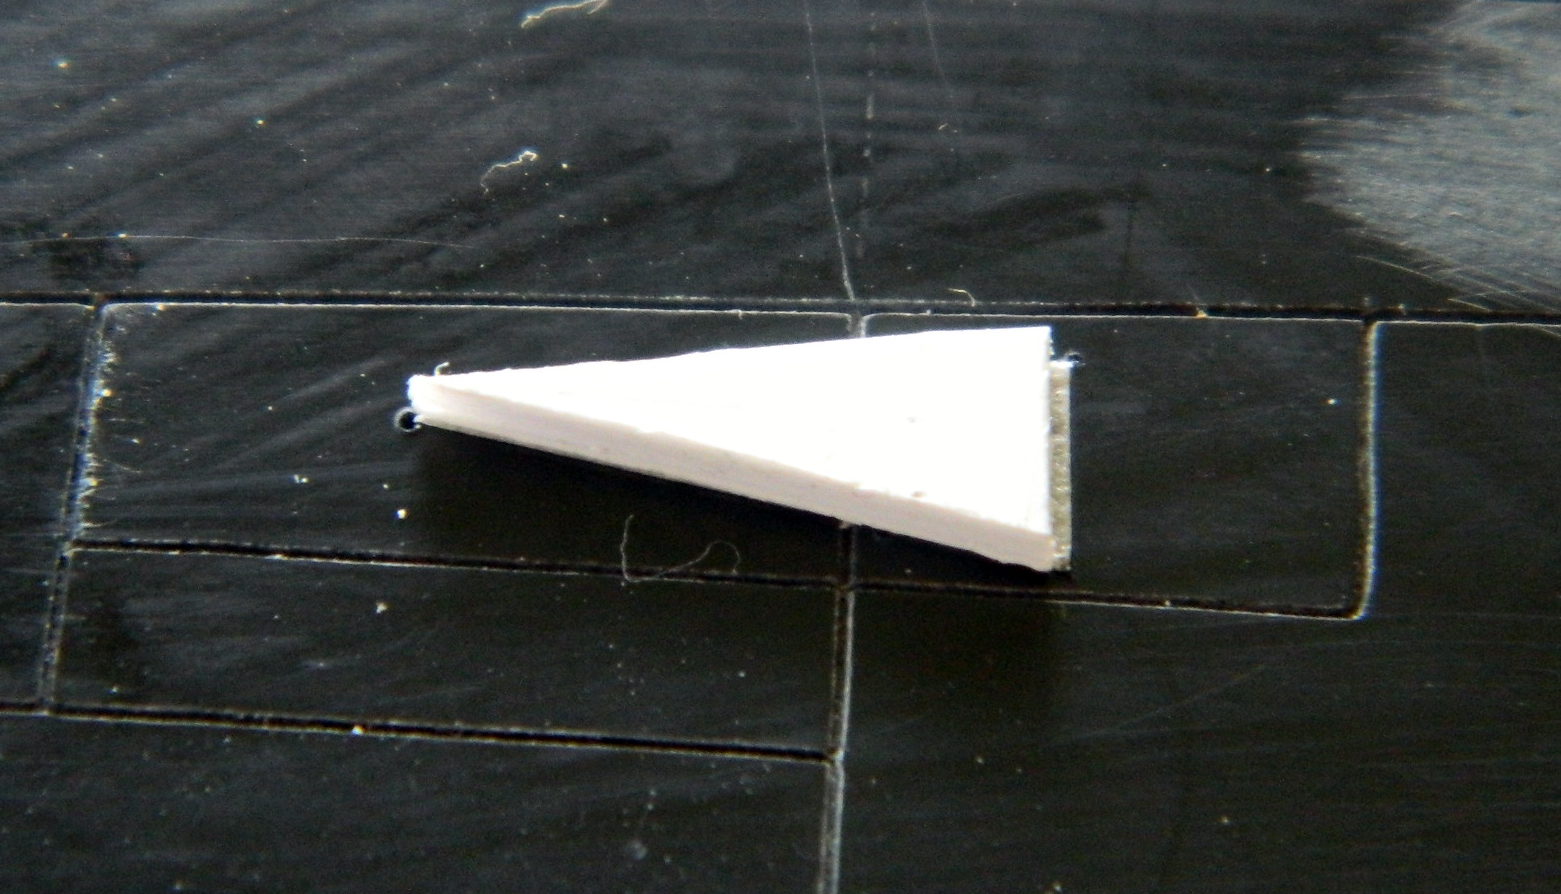
Then it was a matter of finding the styrene that stood off from the surface far enough and transferring the dimensions; as you can see, I used .040″ (1.016mm):
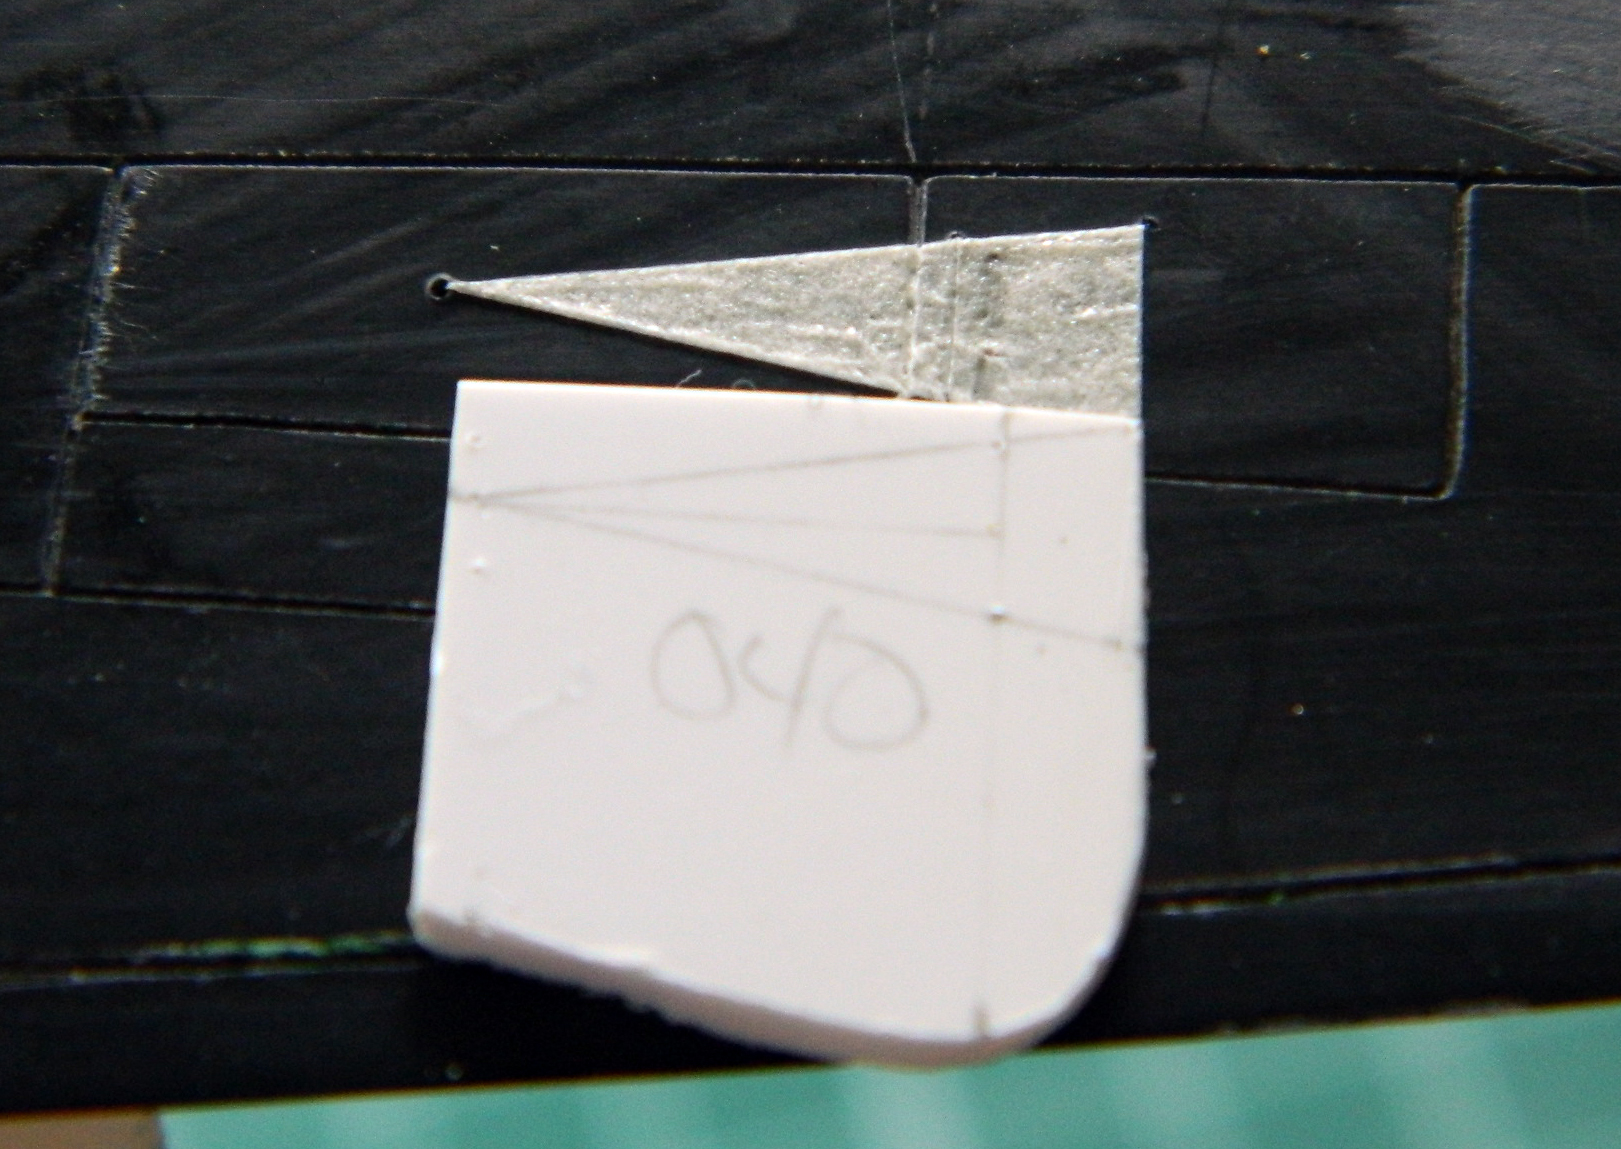
Then two were cut and glued in place:
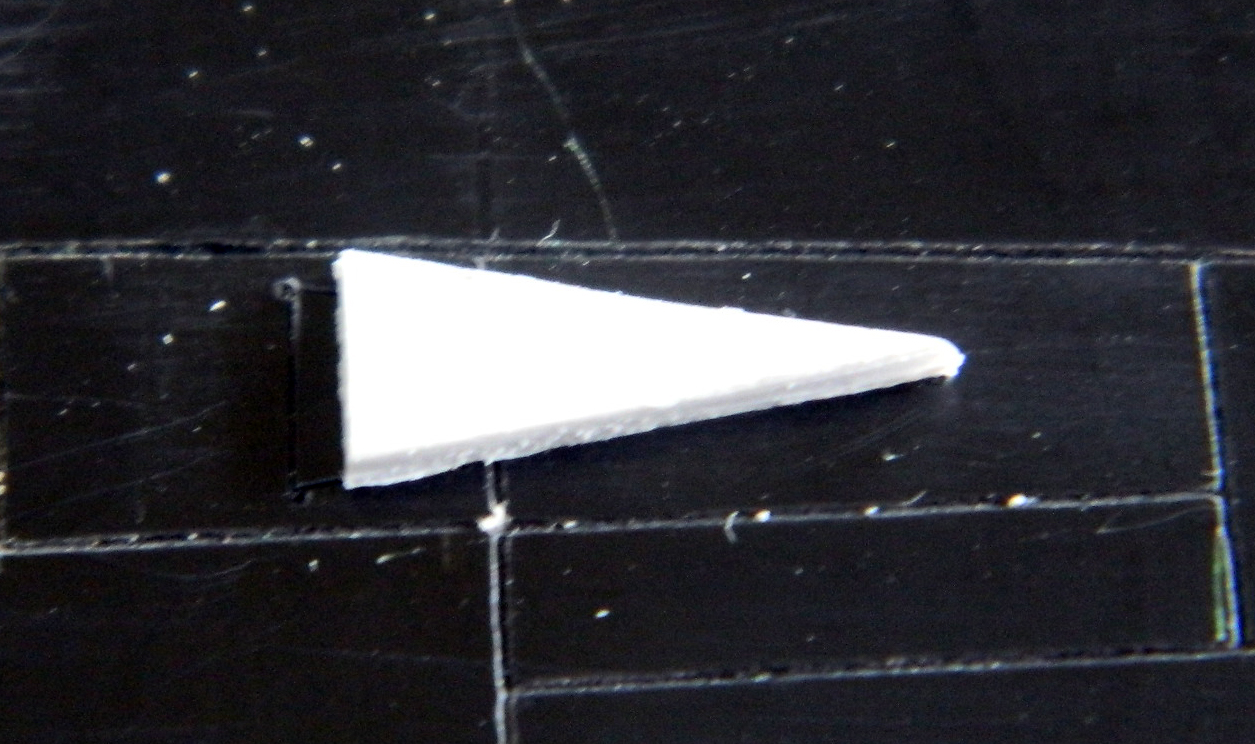
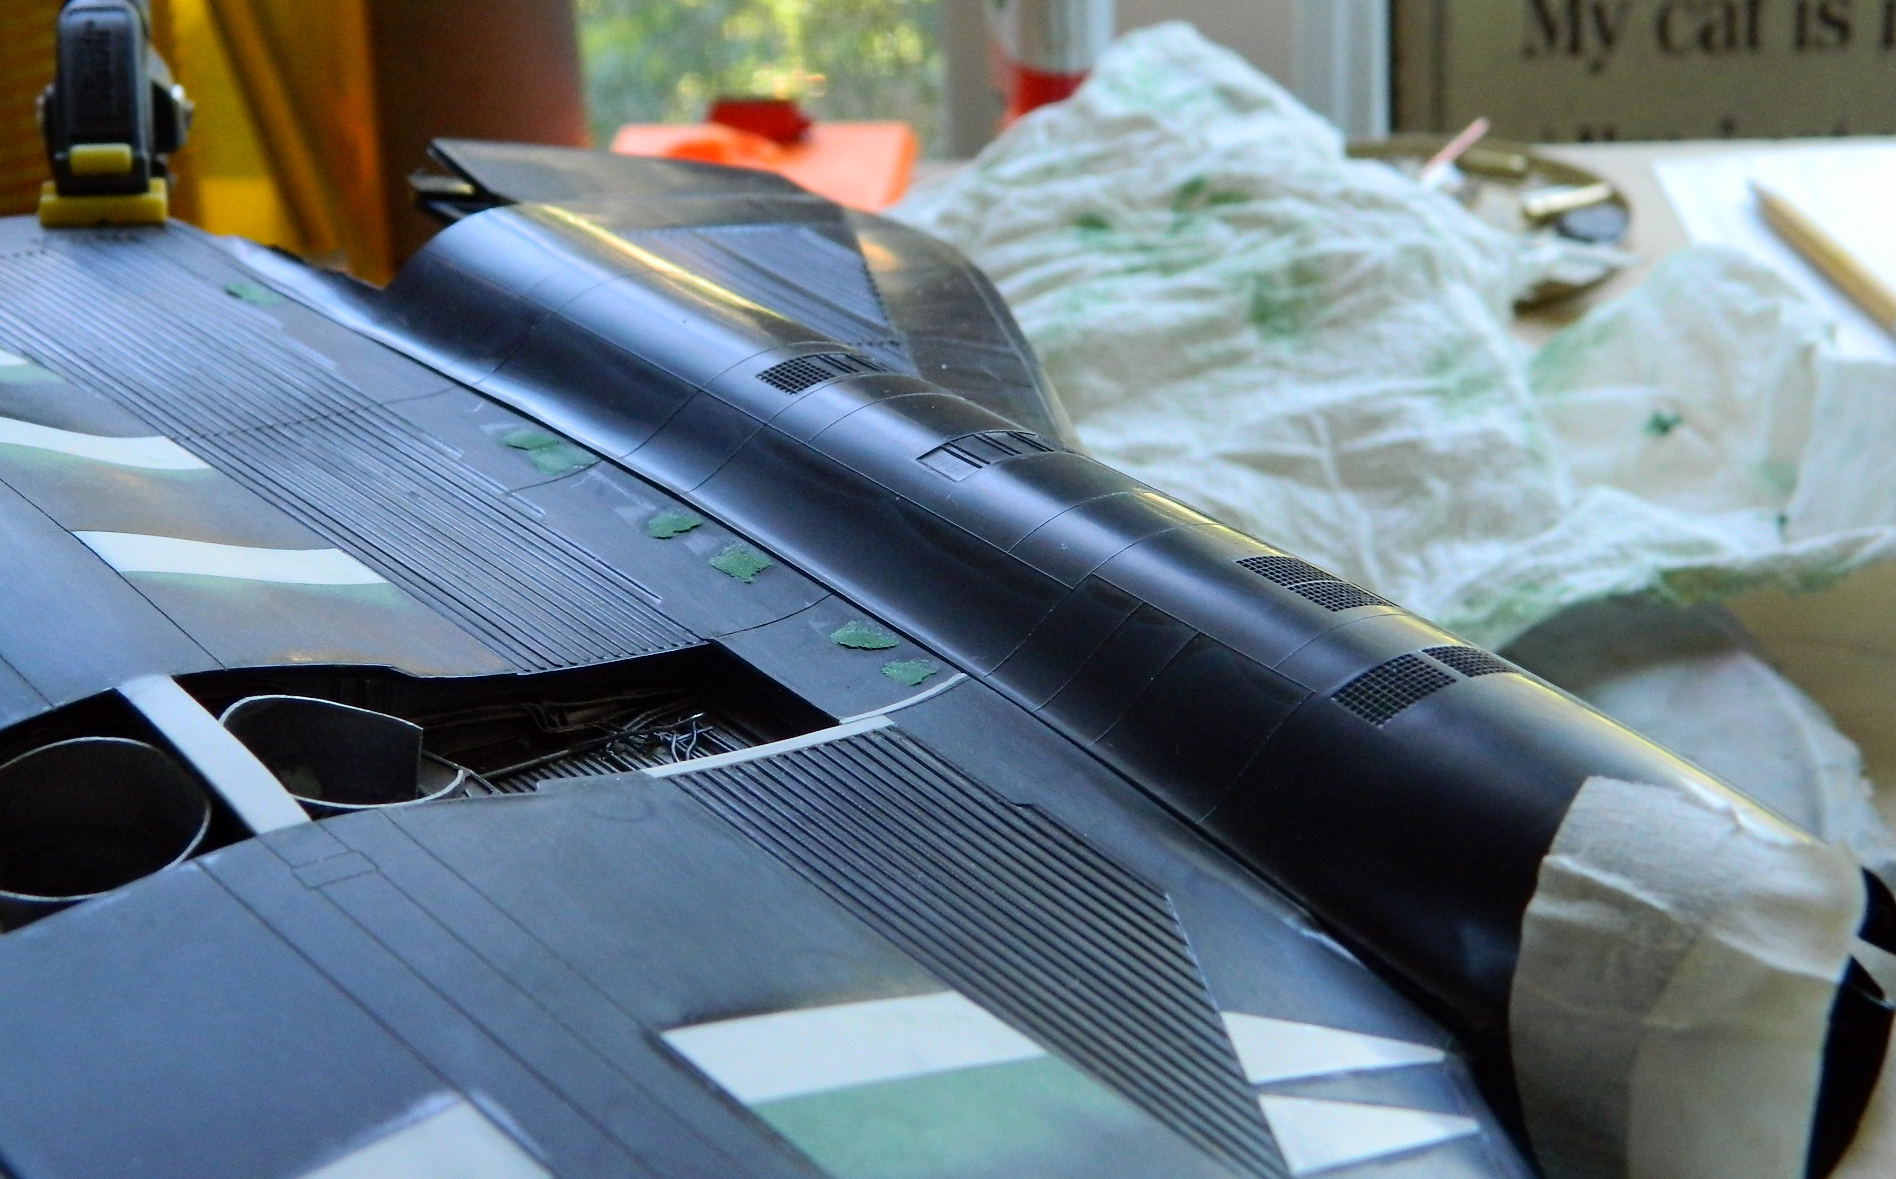
Adding tape, removing tape, working the surface, and so on, will certainly show the builder where something wasn’t quite glued on properly, so yeah…that got redone:
At this point, I needed a break from the tedium. I figured since I was just about done with the fuselage (sometimes I crack myself up, I’m so funny), I’d turn my efforts to the next tasks which will be the engine nacelles, the outer wings, and the varied details that need to be added and upgraded. The first step is to see how bad the fit of parts will be.
Well, the fit isn’t exactly the best, and adding a couple of decades of sitting around in a box, migrating between shelves, has caused just about every part IN that box to warp, which is what is keeping the two surfaces at the top of the next photo from meeting:

In addition to having warpage to deal with, well, there’s also the “fit” that’s been an ongoing feature of this kit, too:


The nacelles attach to the main wings. So that they would align later when it’s time to attach them, I used the main wings as my gluing jig (MANY other things aren’t going to fit, but at least where these parts attach to the model will) (and my goodness didn’t later experience show me how naive that comment is!):

While I was gluing the upper outer wings to the bottoms, I got a little bit too enthusiastic with a clamp. The curved line in the photo below is where the glue had softened the plastic sufficiently for the clamp’s pressure to flatten out the curve that’s supposed to be there:
I was far too thorough gluing these parts together. As I was trying to separate them, it became obvious that the amount of damage I’d do to this section would be significant. Having a second kit, though, provided me with the parts I needed to redo this section properly:

Even Dick Bong, Chuck Yeager, Erich Hartmann, Glenn Cunningham, Robin Olds, and Gordo Cooper wore parachutes…
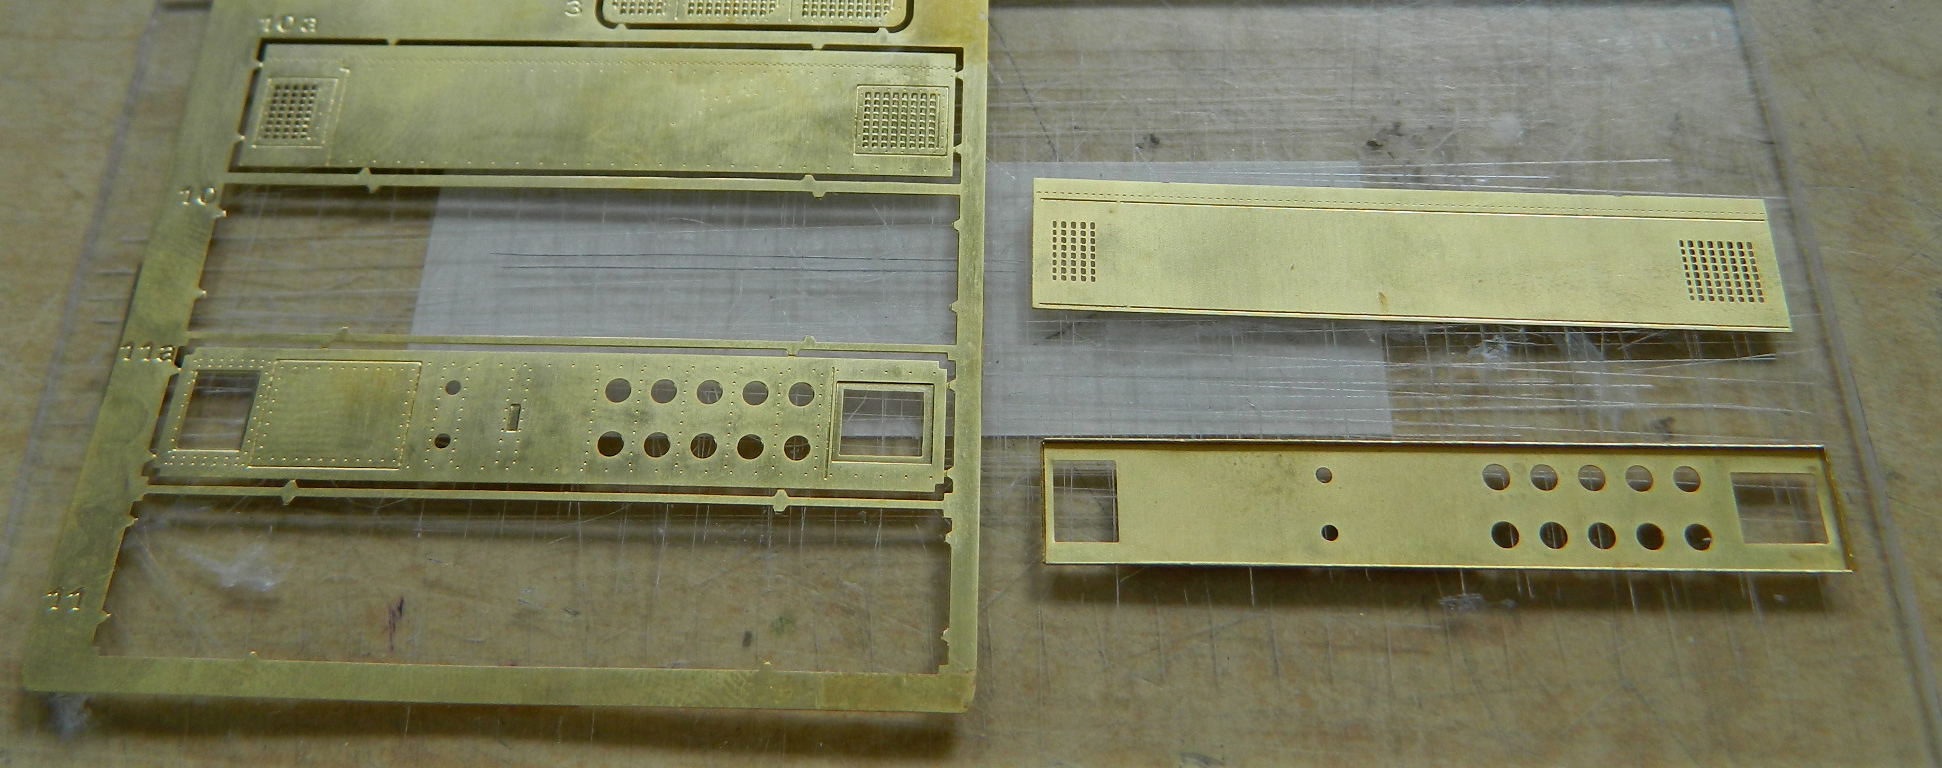
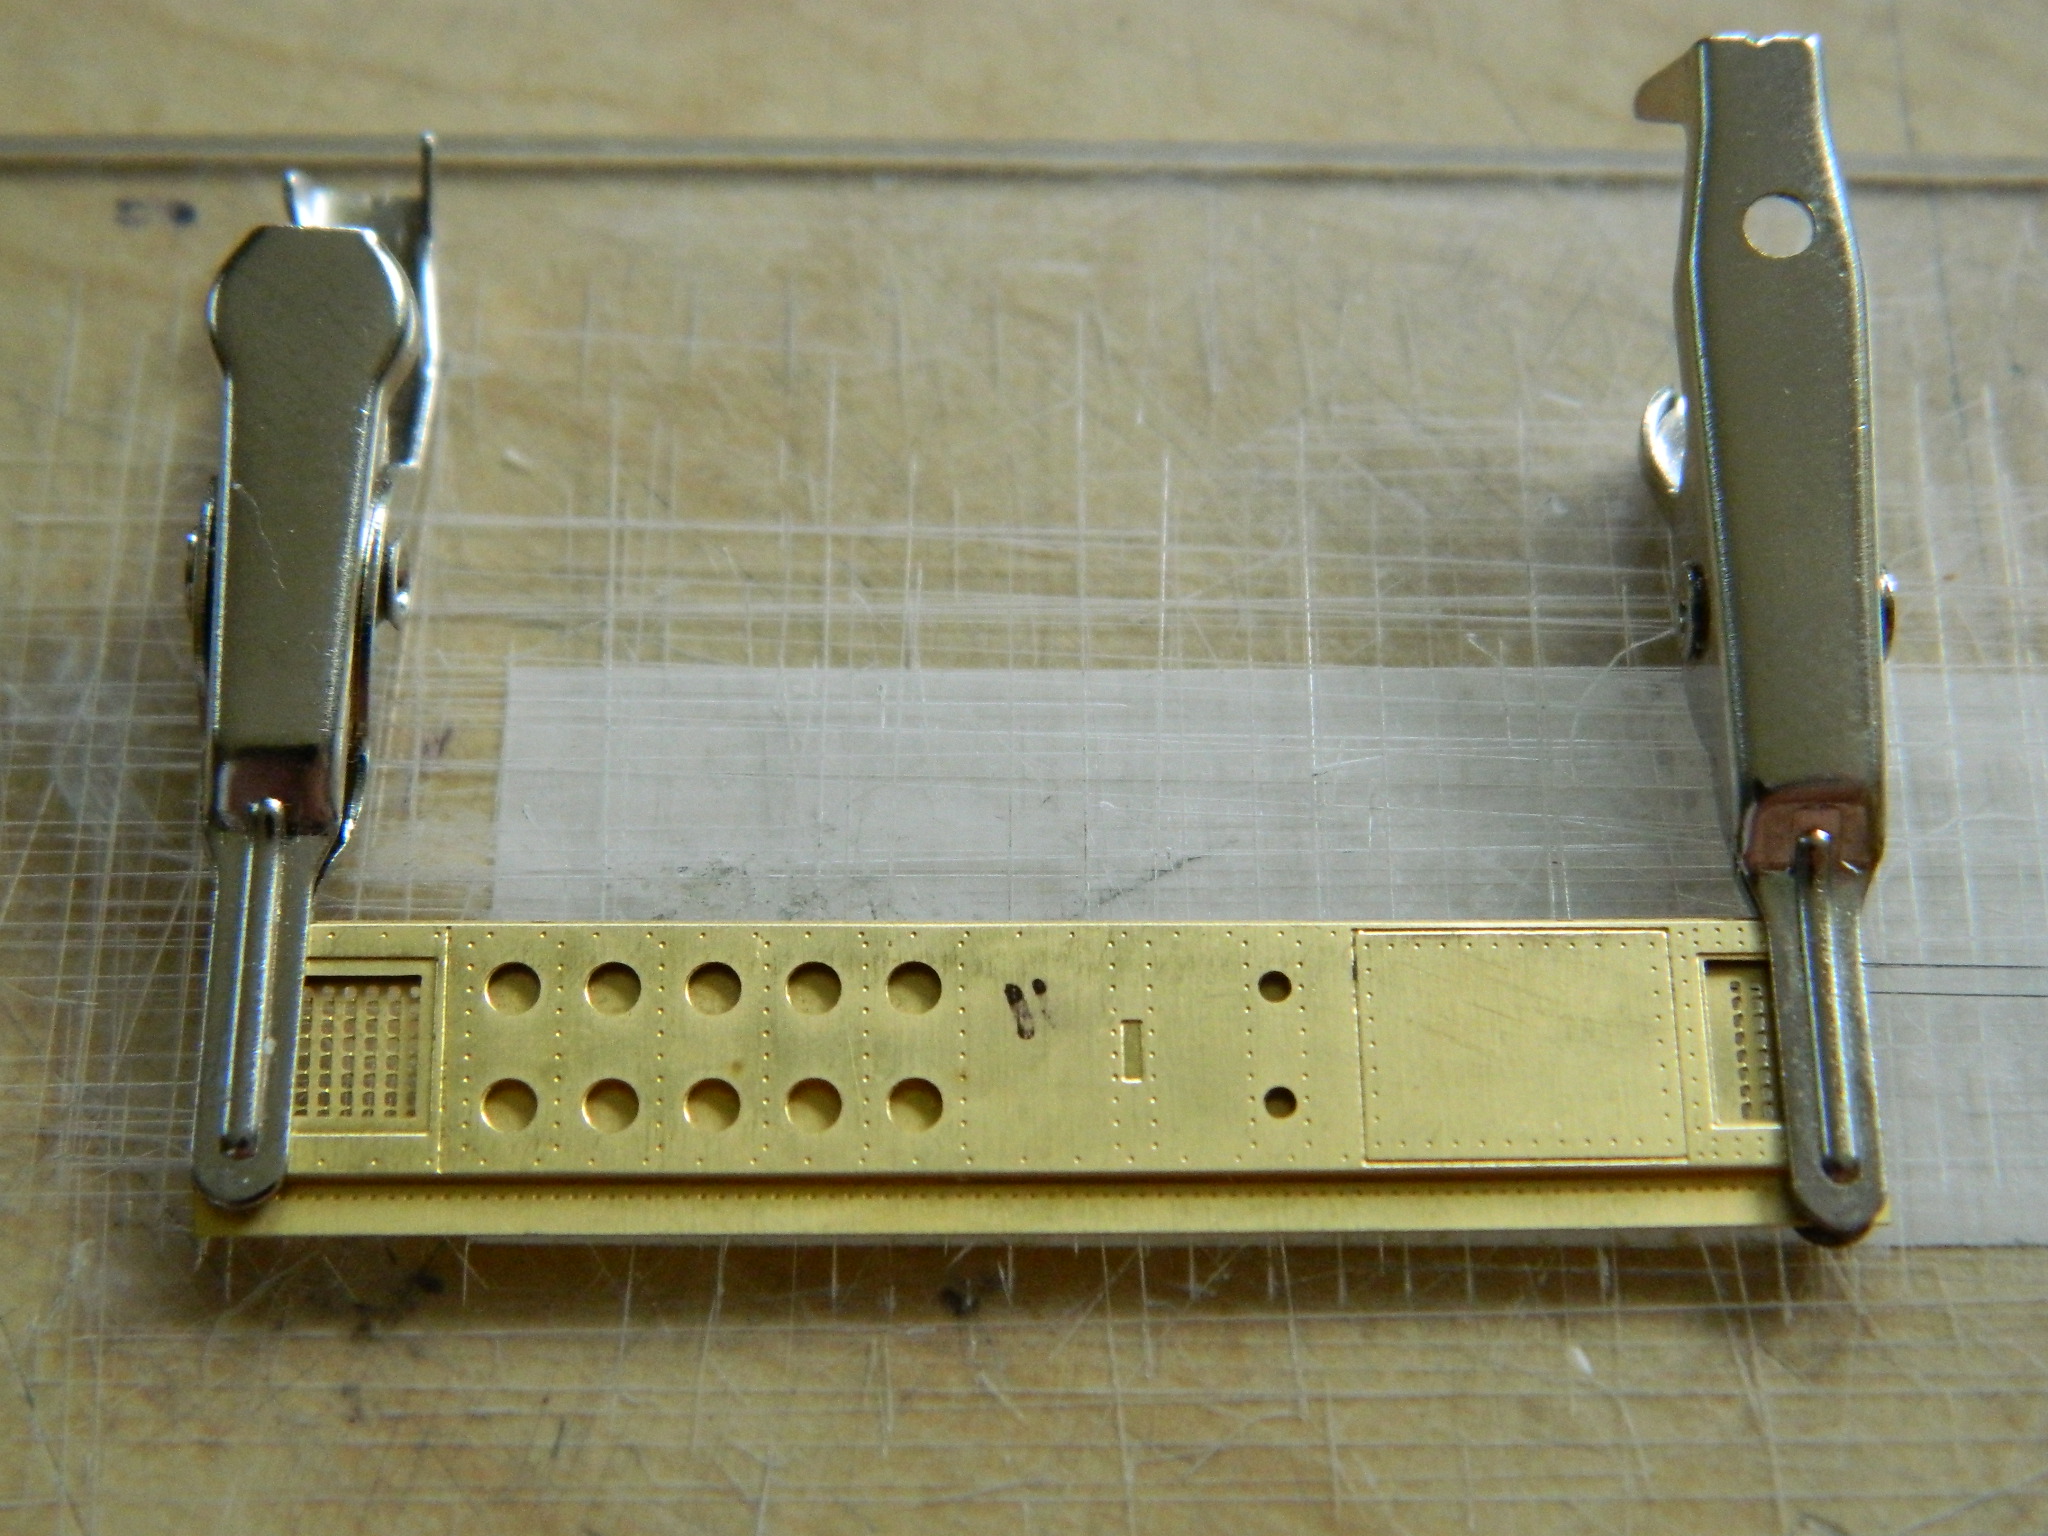
With that oh-god-damn-it moment passed and dealt with, I decided to work a few PE parts and I started with the nosewheel landing gear bay doors. That started by cutting the parts away from the frets and folding them:

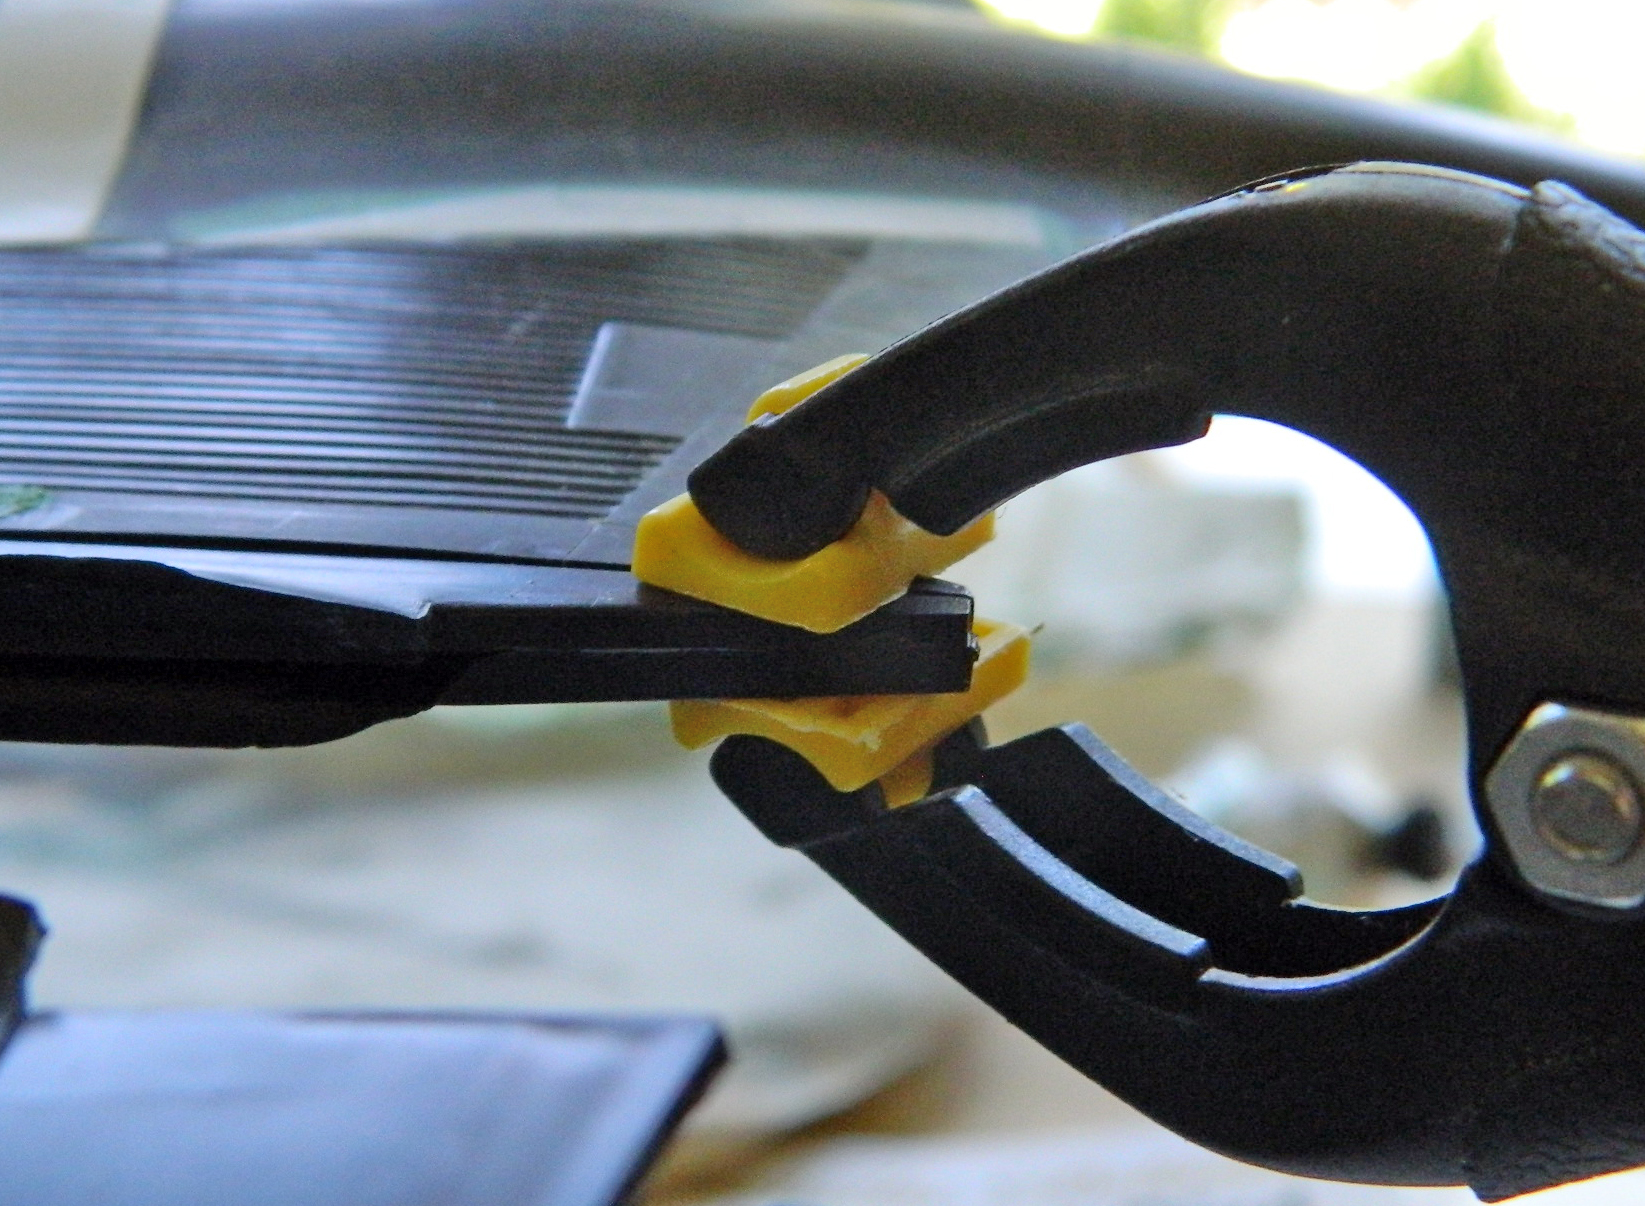
With both sides folded, alignment is checked (I love these flat-jawed clamps):
Satisfied, soldering flux is applied, and then the solder is cut (the lines of the cutting pad are in millimeters):

Then the parts are realigned, clamped, and thin slices of solder laid along where I want the parts joined:


A quick pass with the butane torch liquefies the flux, melts the solder (which follows the flux), and it’s attached (and yes…I had to file off a small bit of solder that wandered):

A couple of more VERY tiny parts are added and the doors are done:

While I was on a tear, I decided I’d do the “turkey feathers,” the movable vanes at the engine outlets, of the afterburners next.
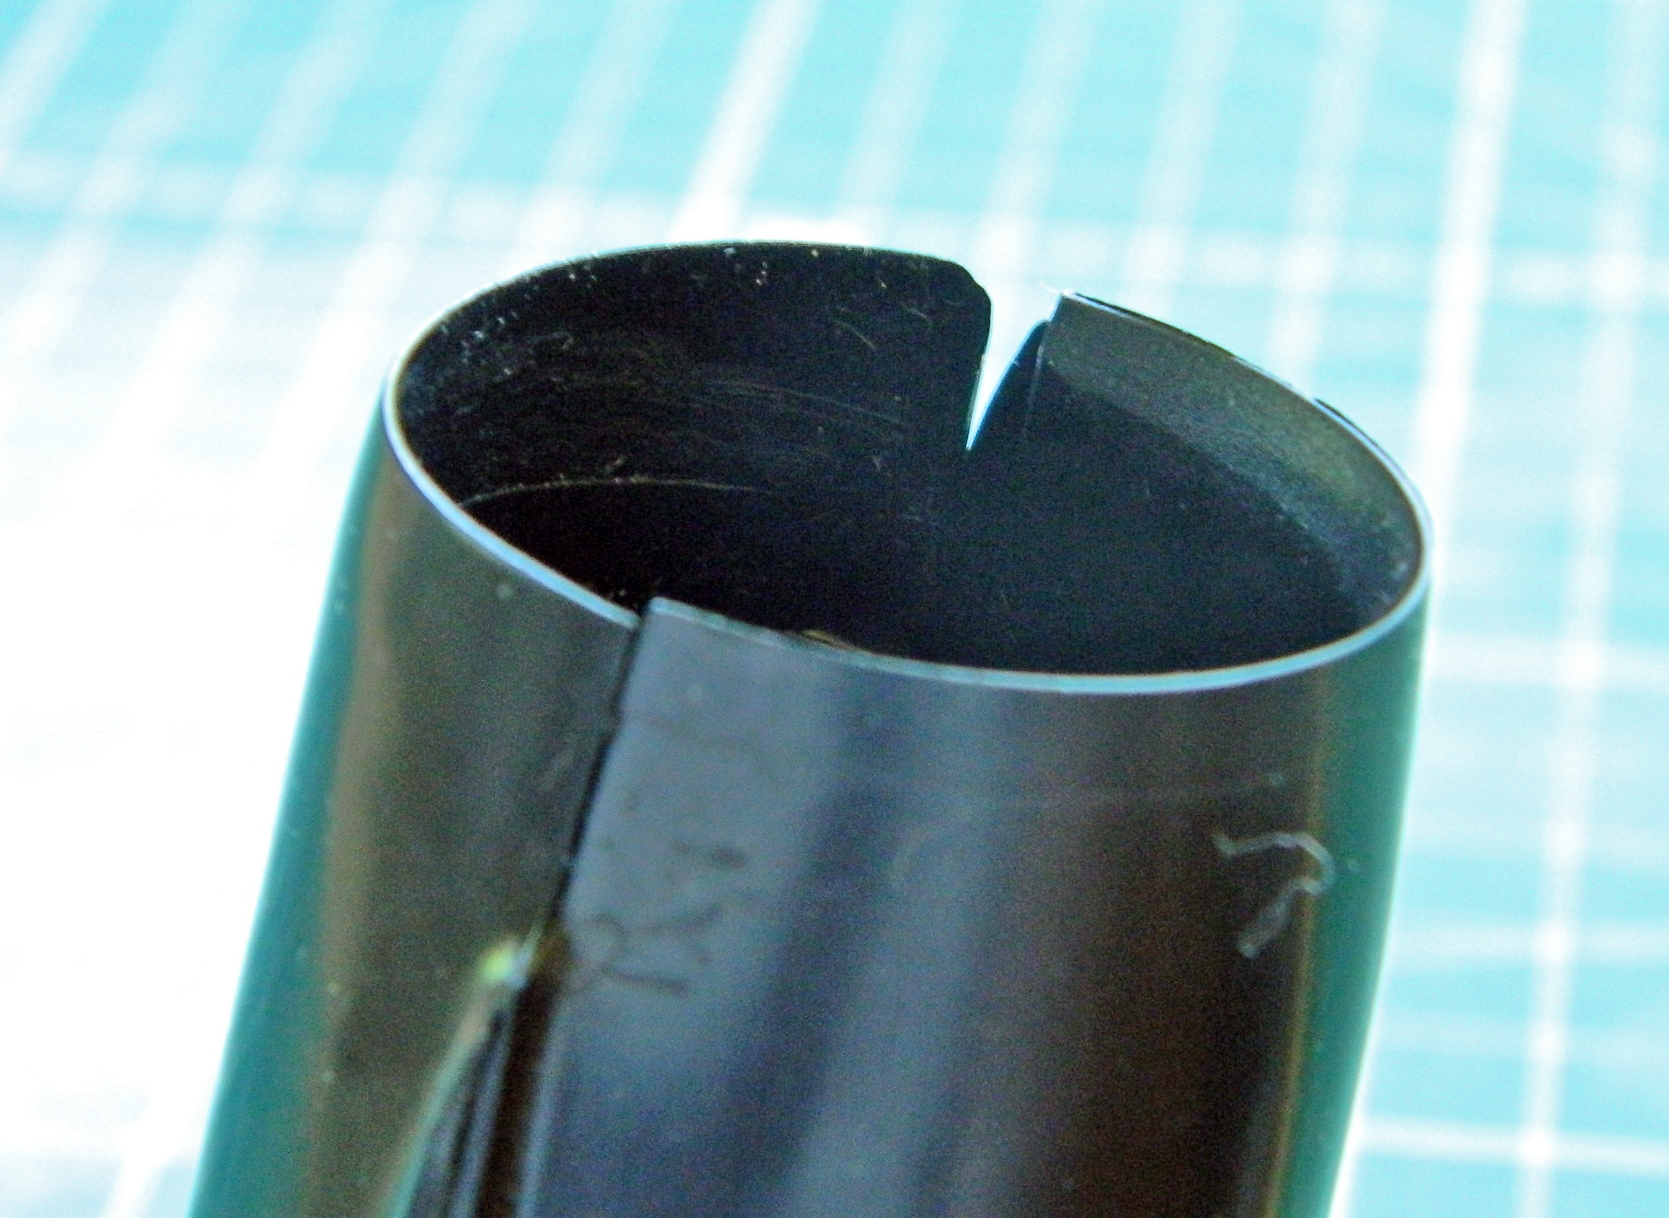
Well, once again “confidence” rose and bit the body part I use to sit on. “Confidence” can sometimes diminish the caution and care that must be taken. While I was trying (unsuccessfully) to solder the exterior afterburner vanes into a truncated cone, I smelled burning plastic.
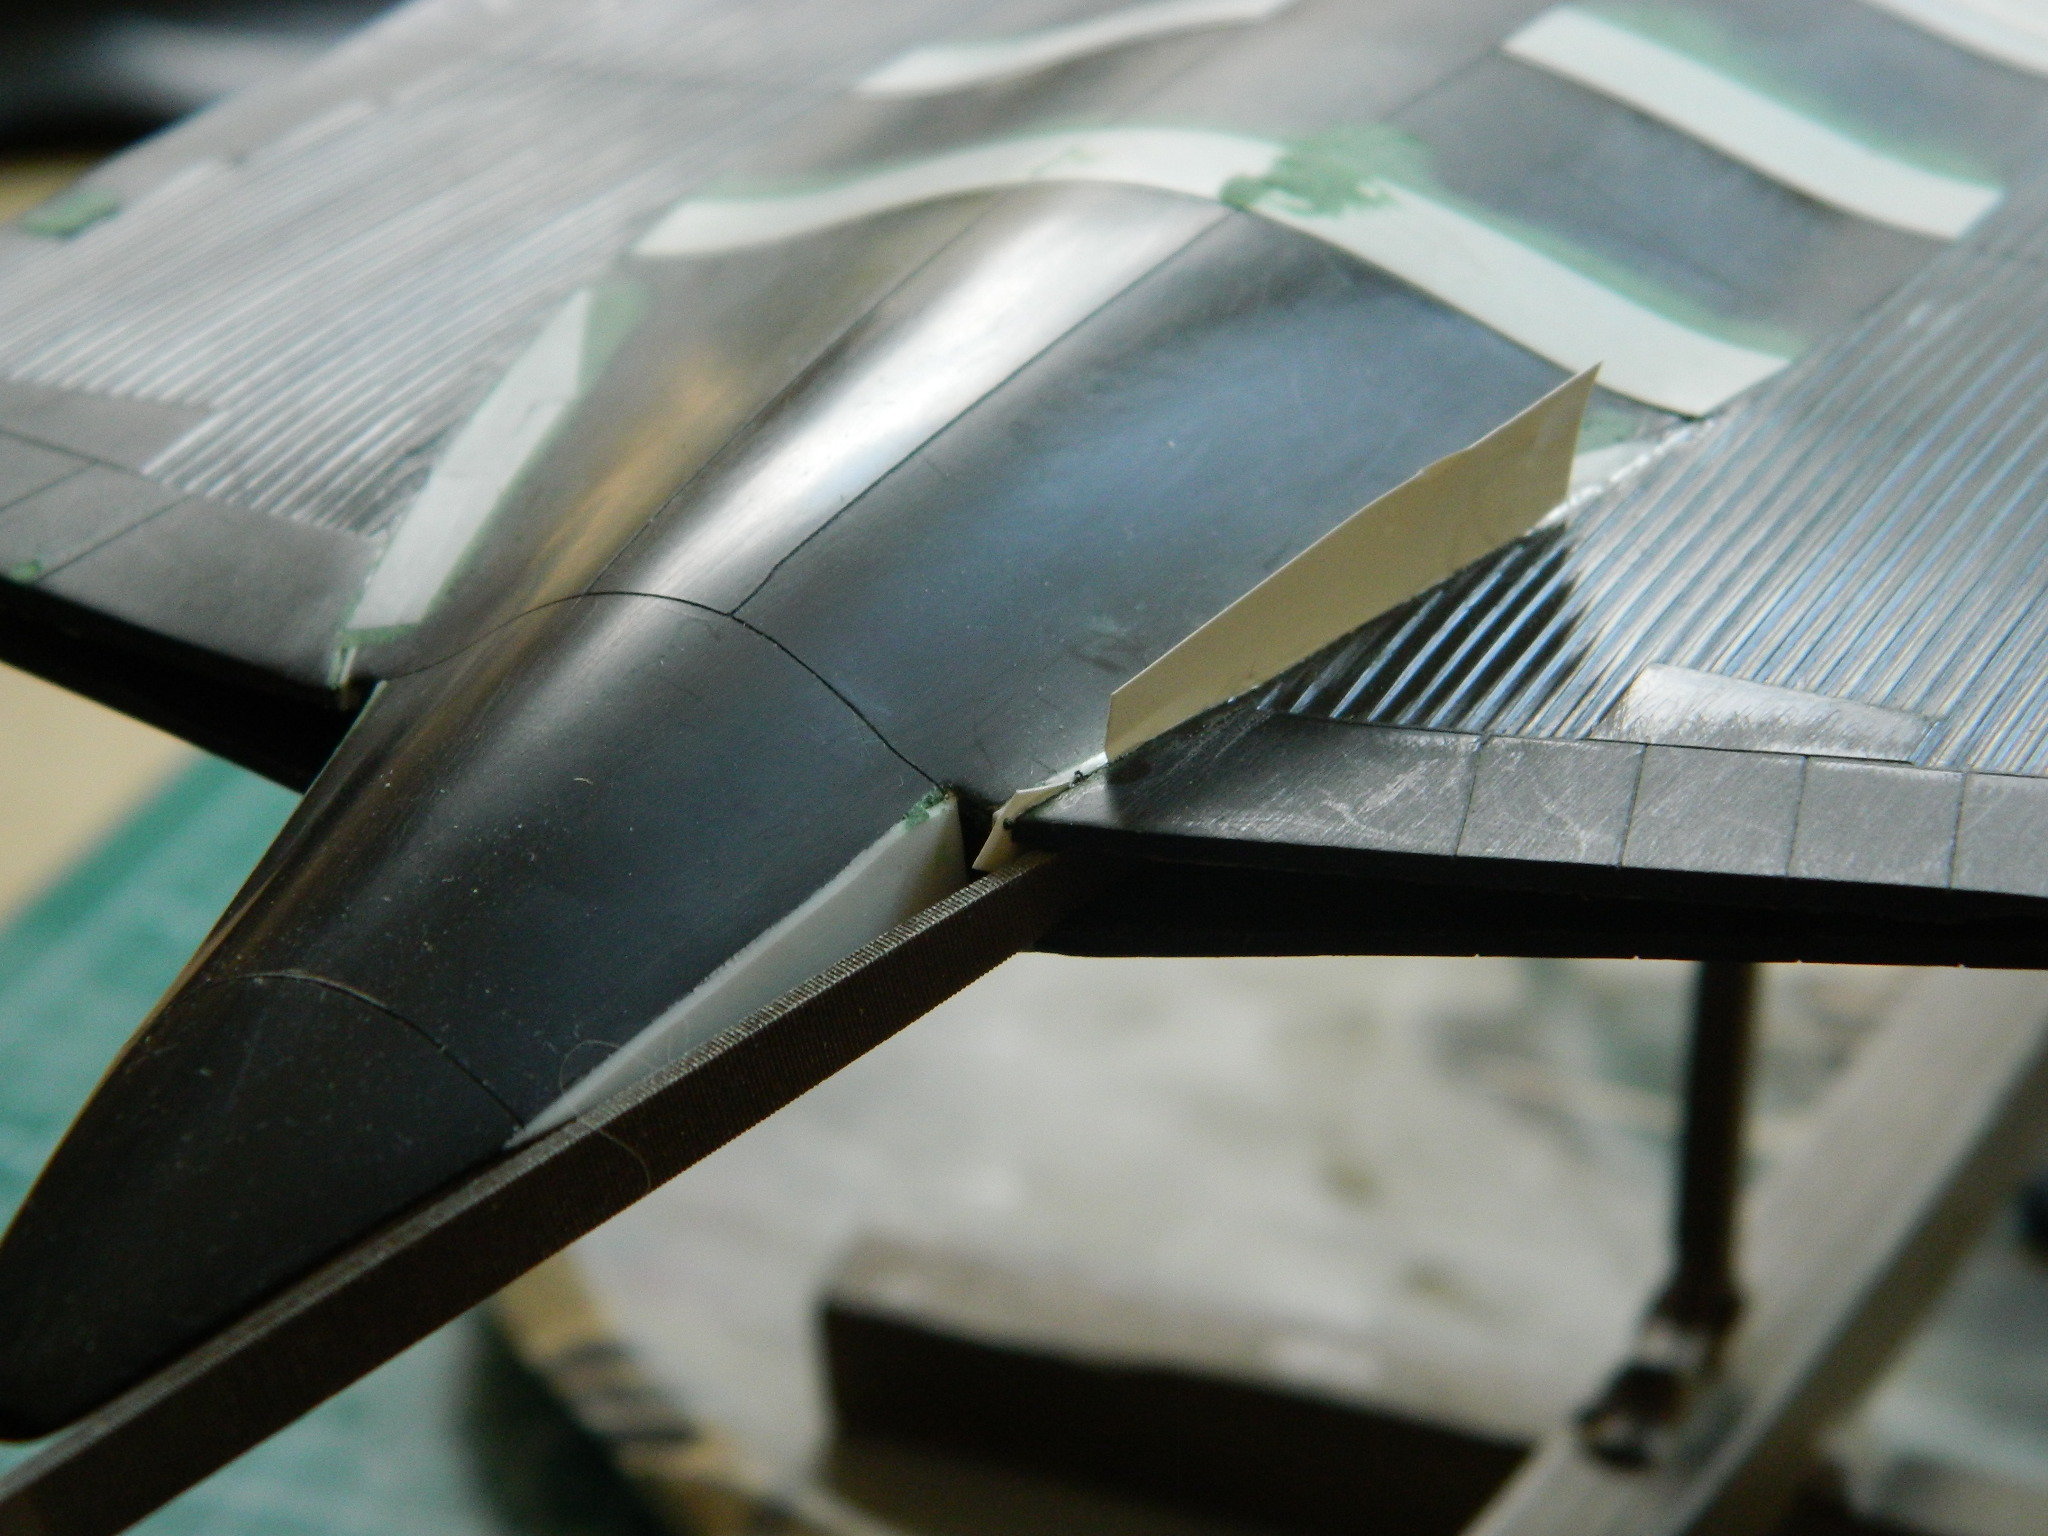
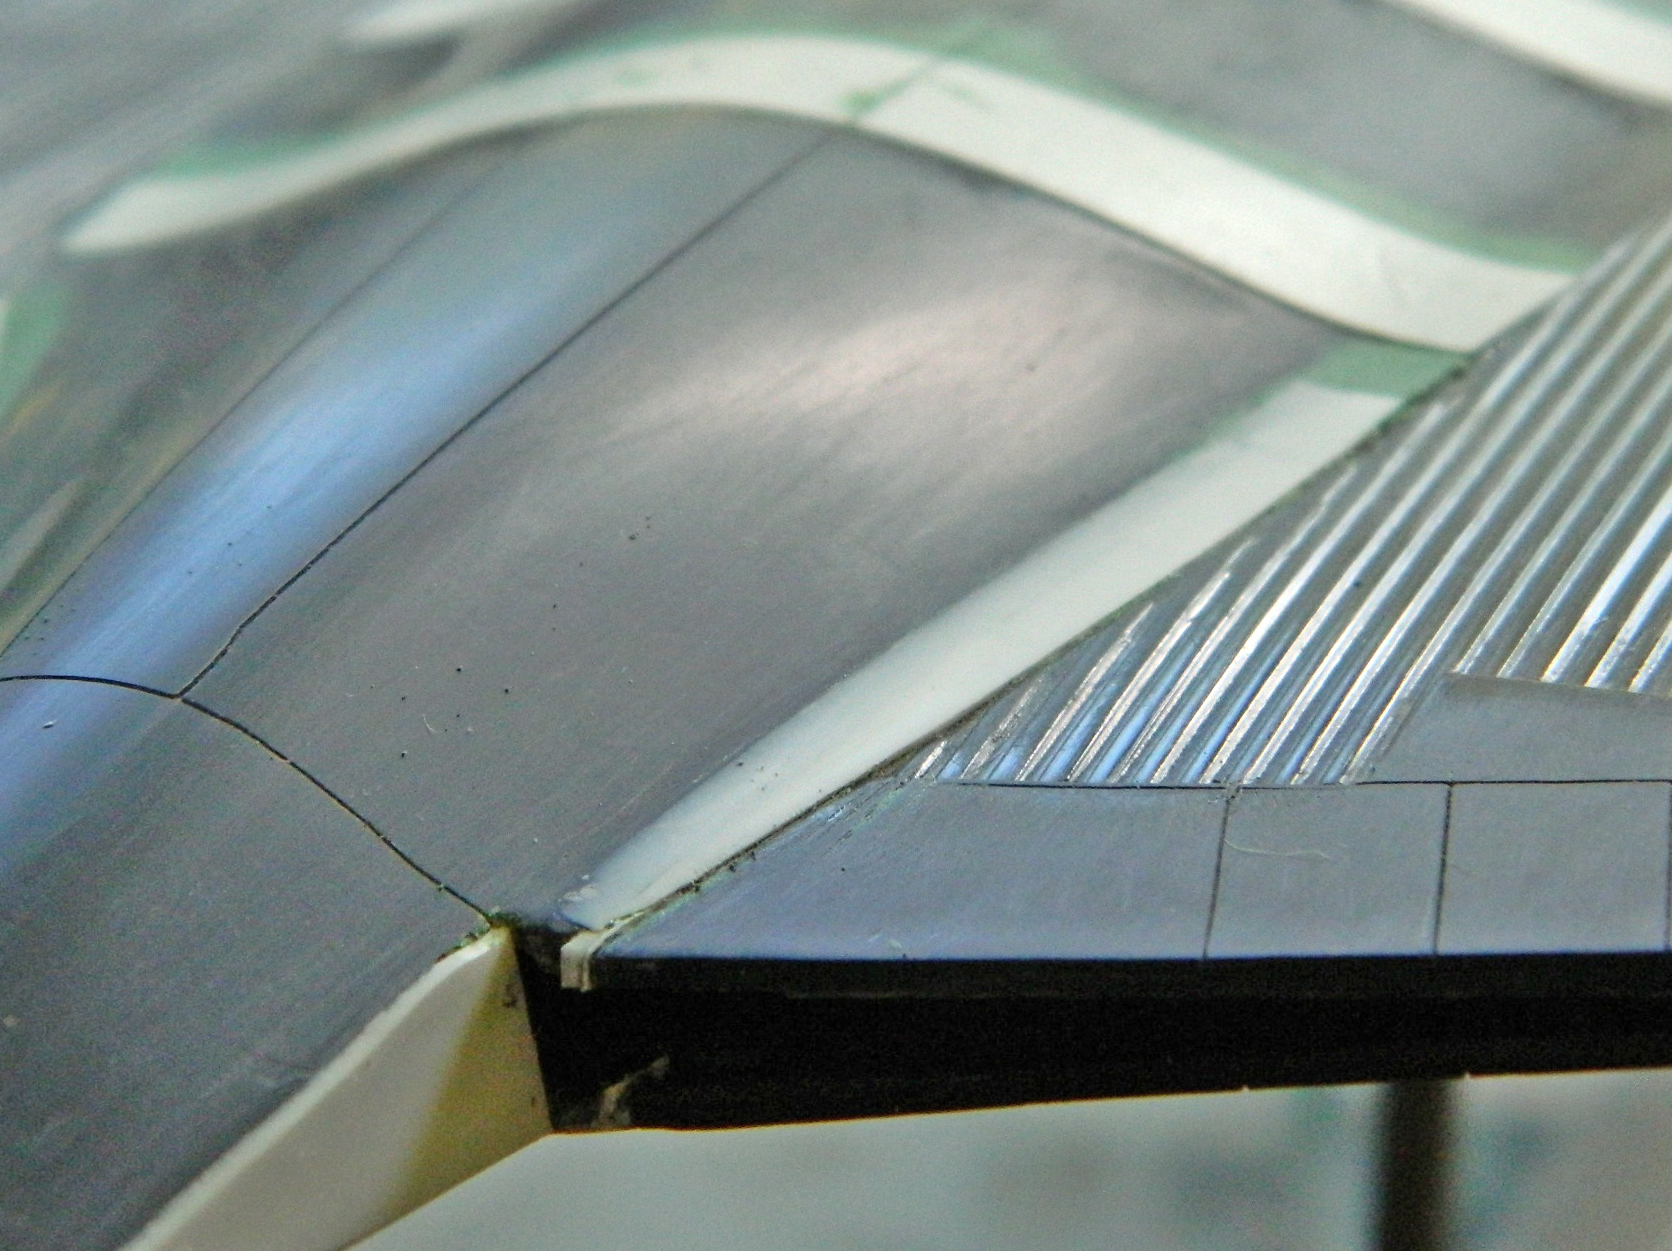
Unless intended, which this was not, burning plastic is never a good thing. I followed the line of the torch, since that was the only heat source around, and discovered this:
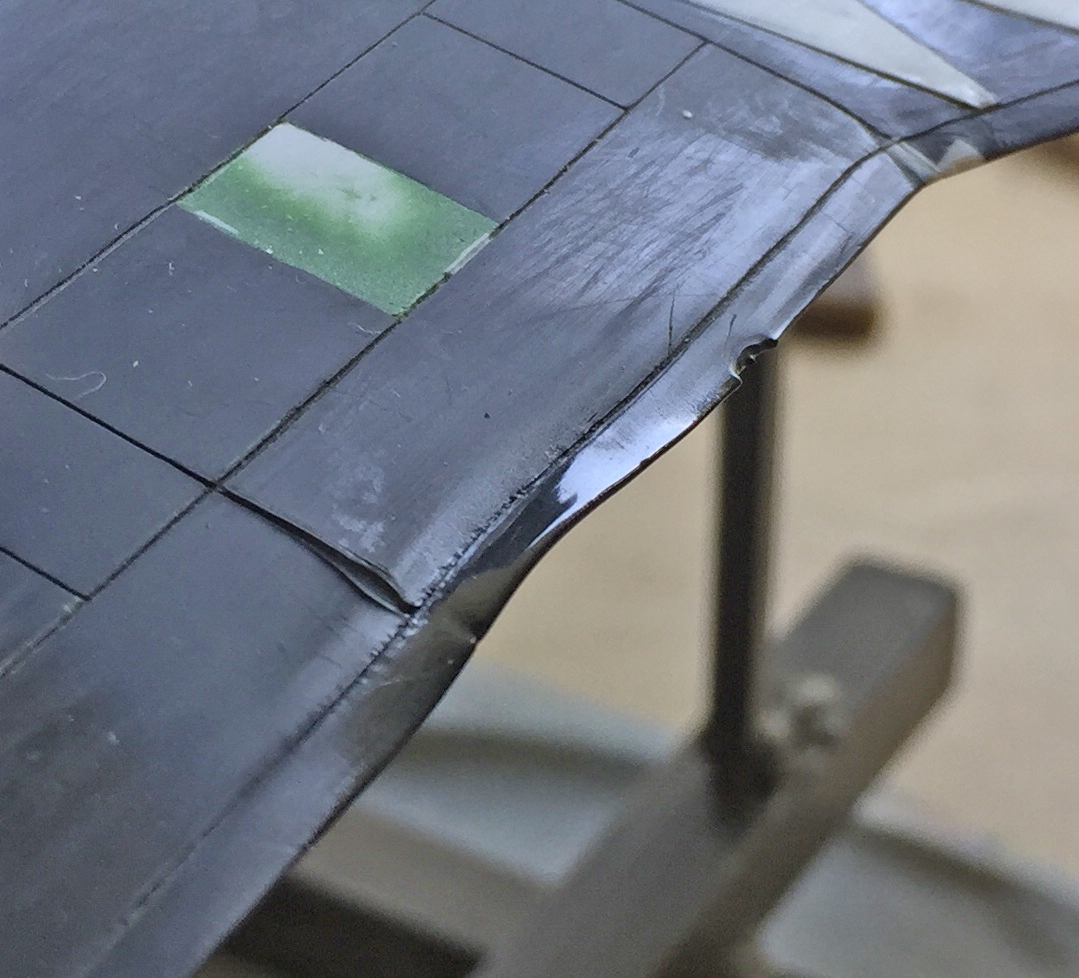
“This” is the edge of the fuselage chine. At least I didn’t smash this thing. I turned off the torch, apologized to the cat (wherever she’d run off to in panic) for screaming, and went off and did something else for the remainder of the day.
So. The next day, I put the soldering stuff away and decided that this time I’d use superglue to hold these [MANY DELETED EXPLETIVES] together. Getting the curve gradual and even was quite the chore. Twice. And then I had to do the INside. TWICE. As if that wasn’t enough fun, I had to fit the inside parts to the outside parts. But I got it done and I’m mostly satisfied with how it all fits.
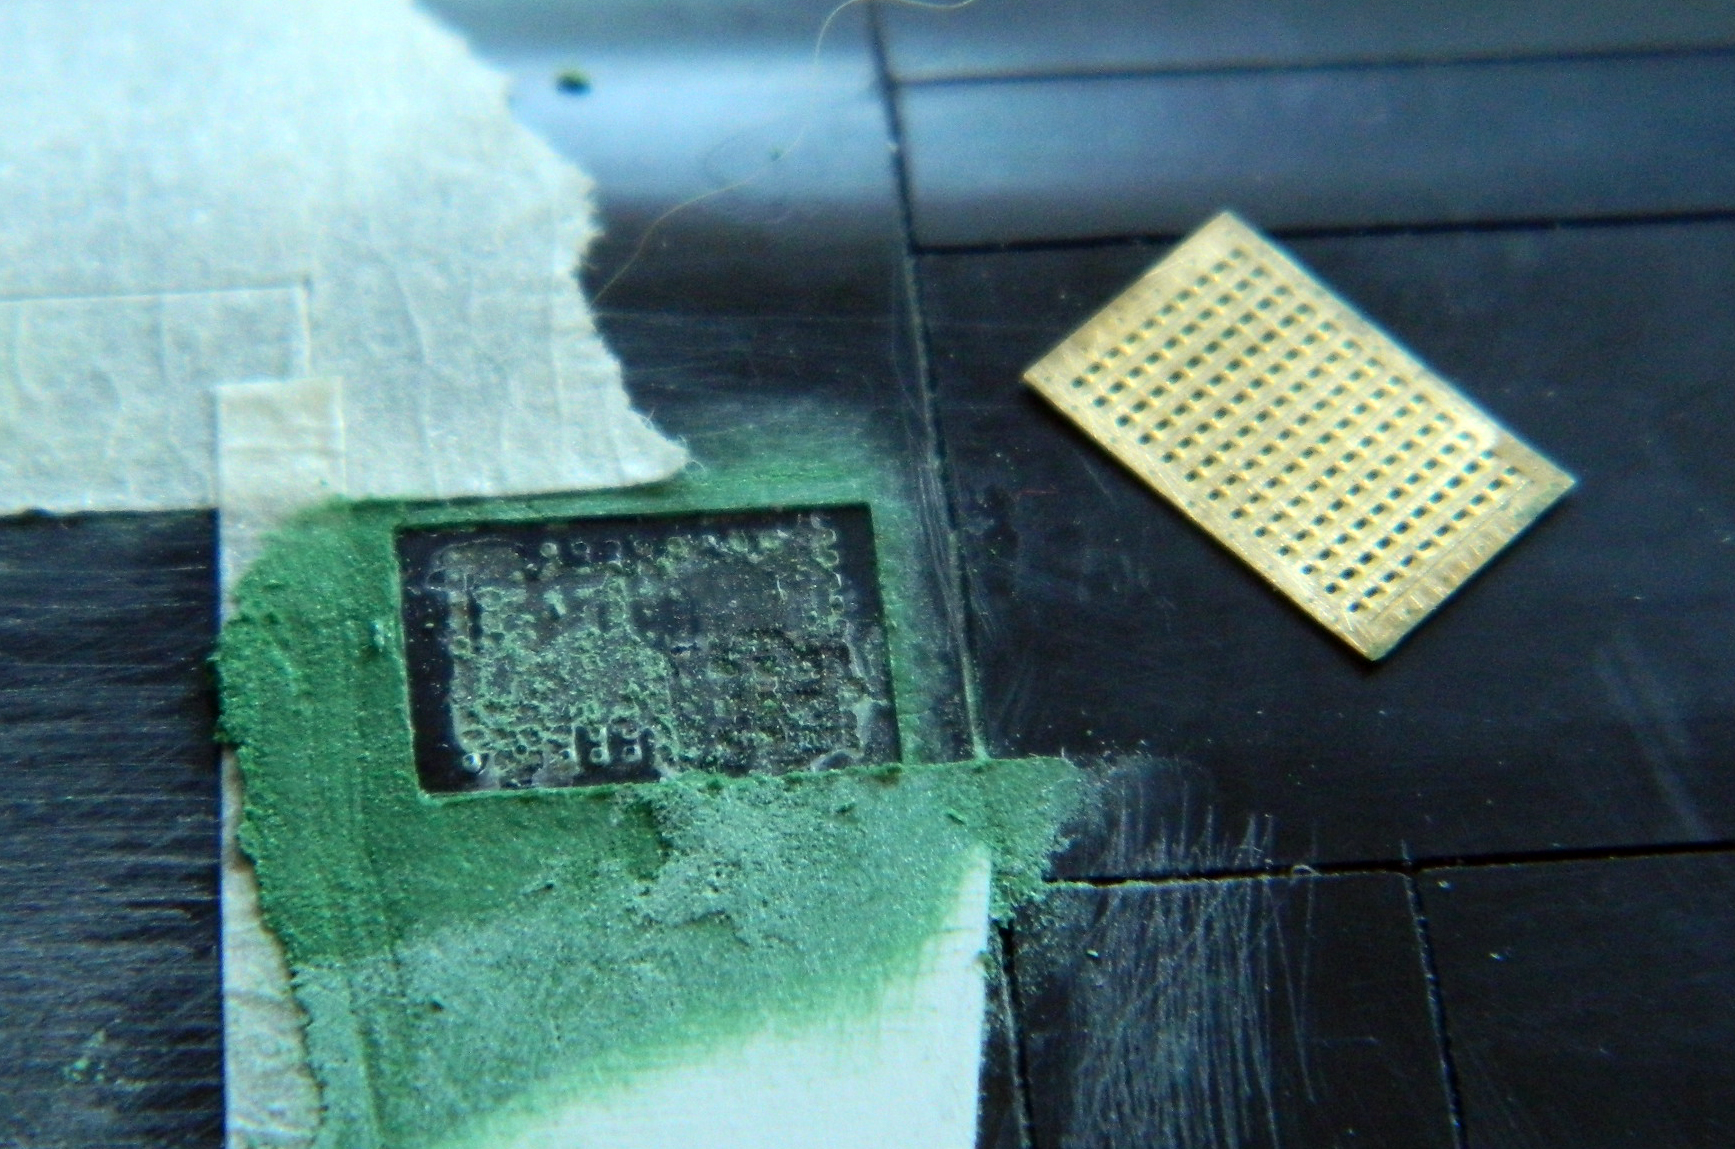
These are the brass PE parts compared to the kit’s part(s):
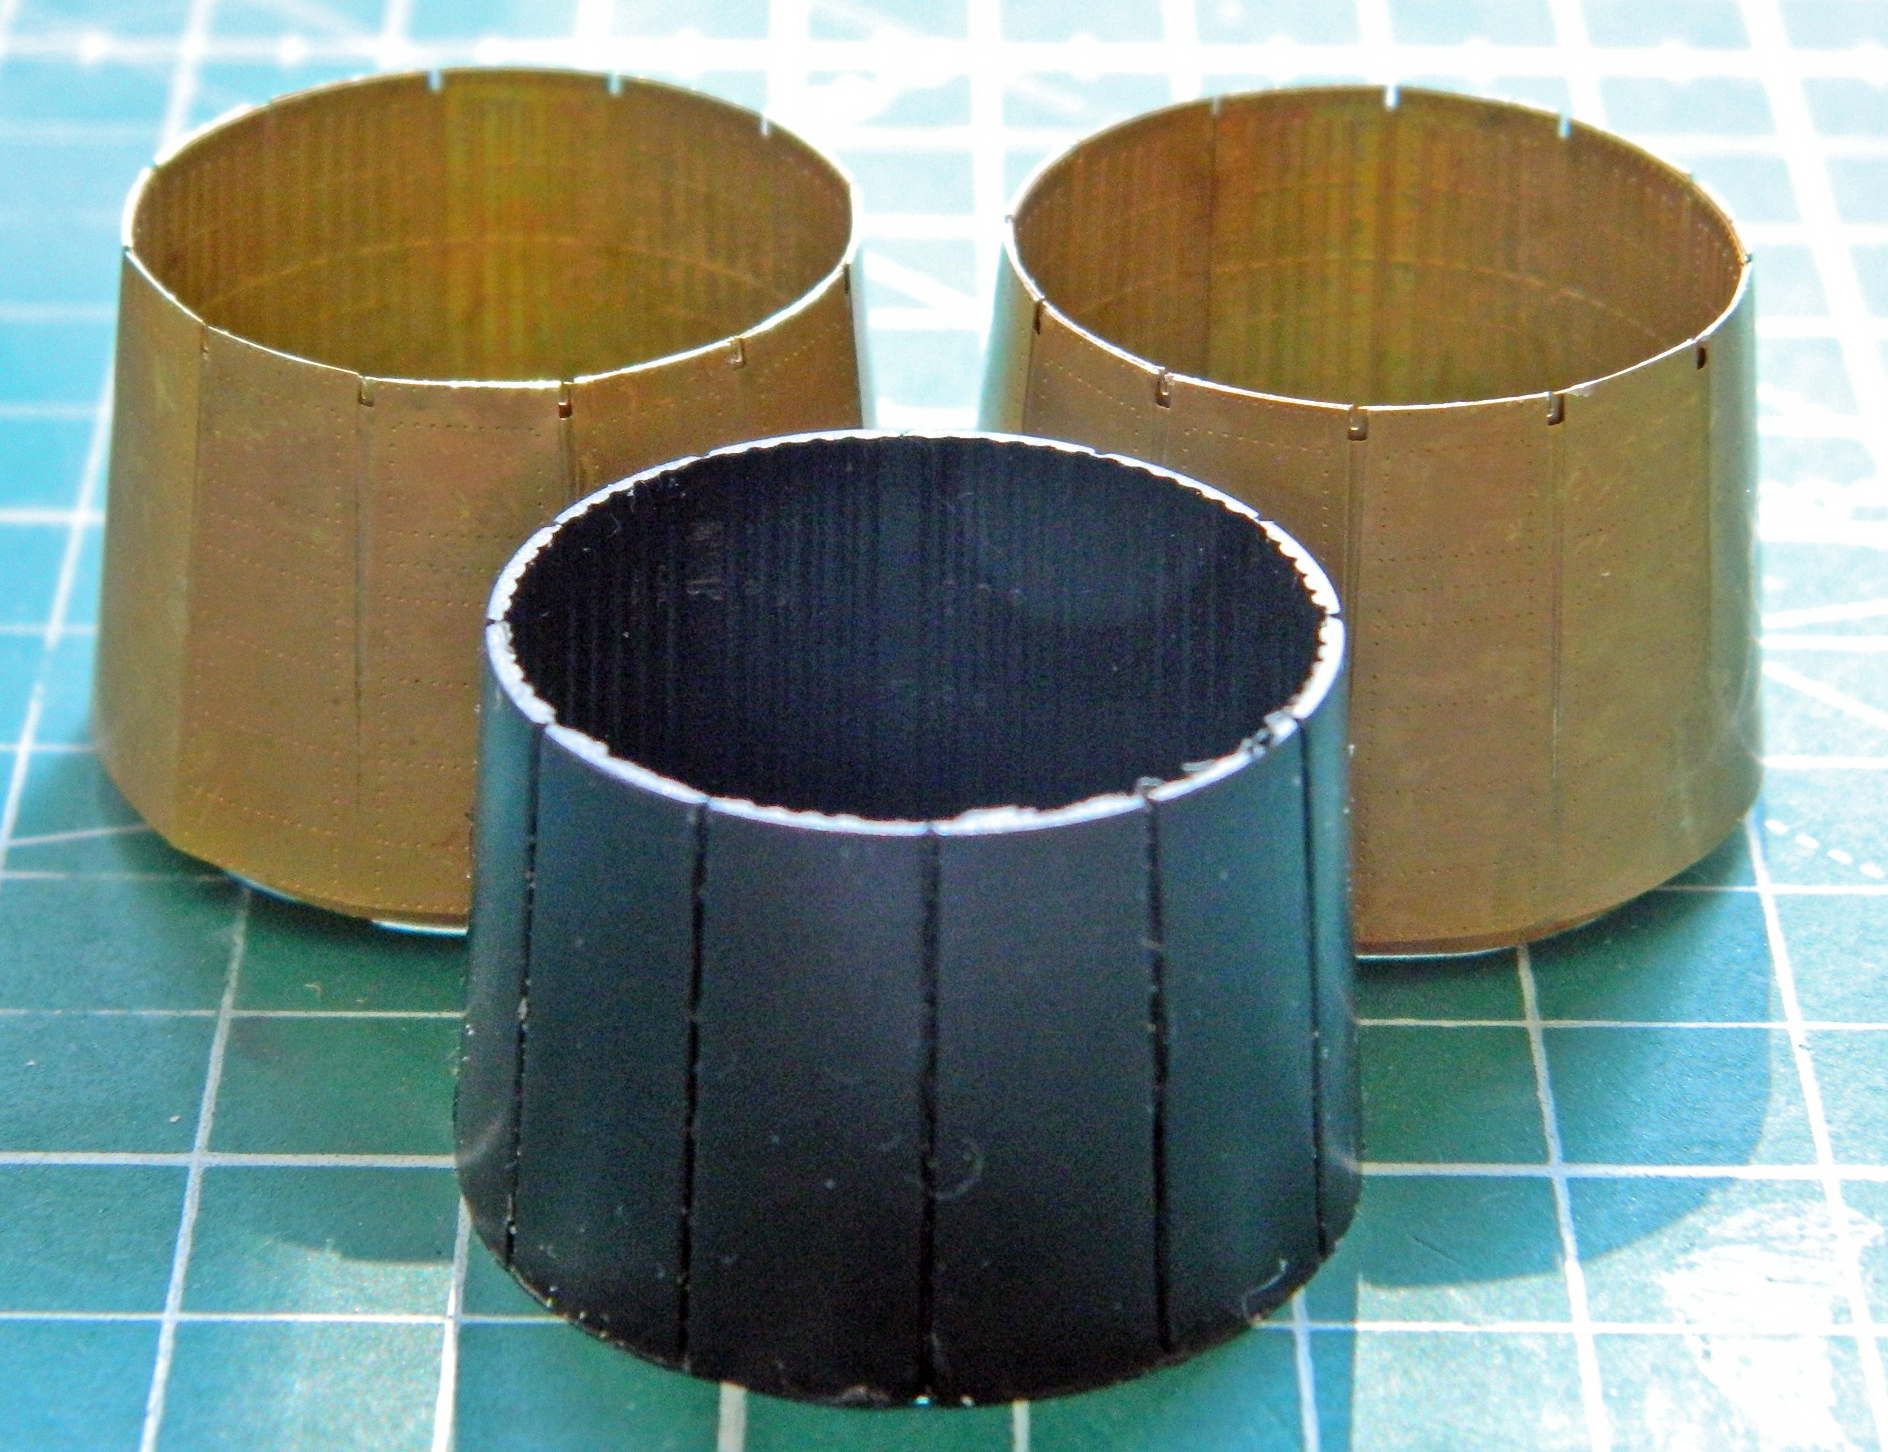
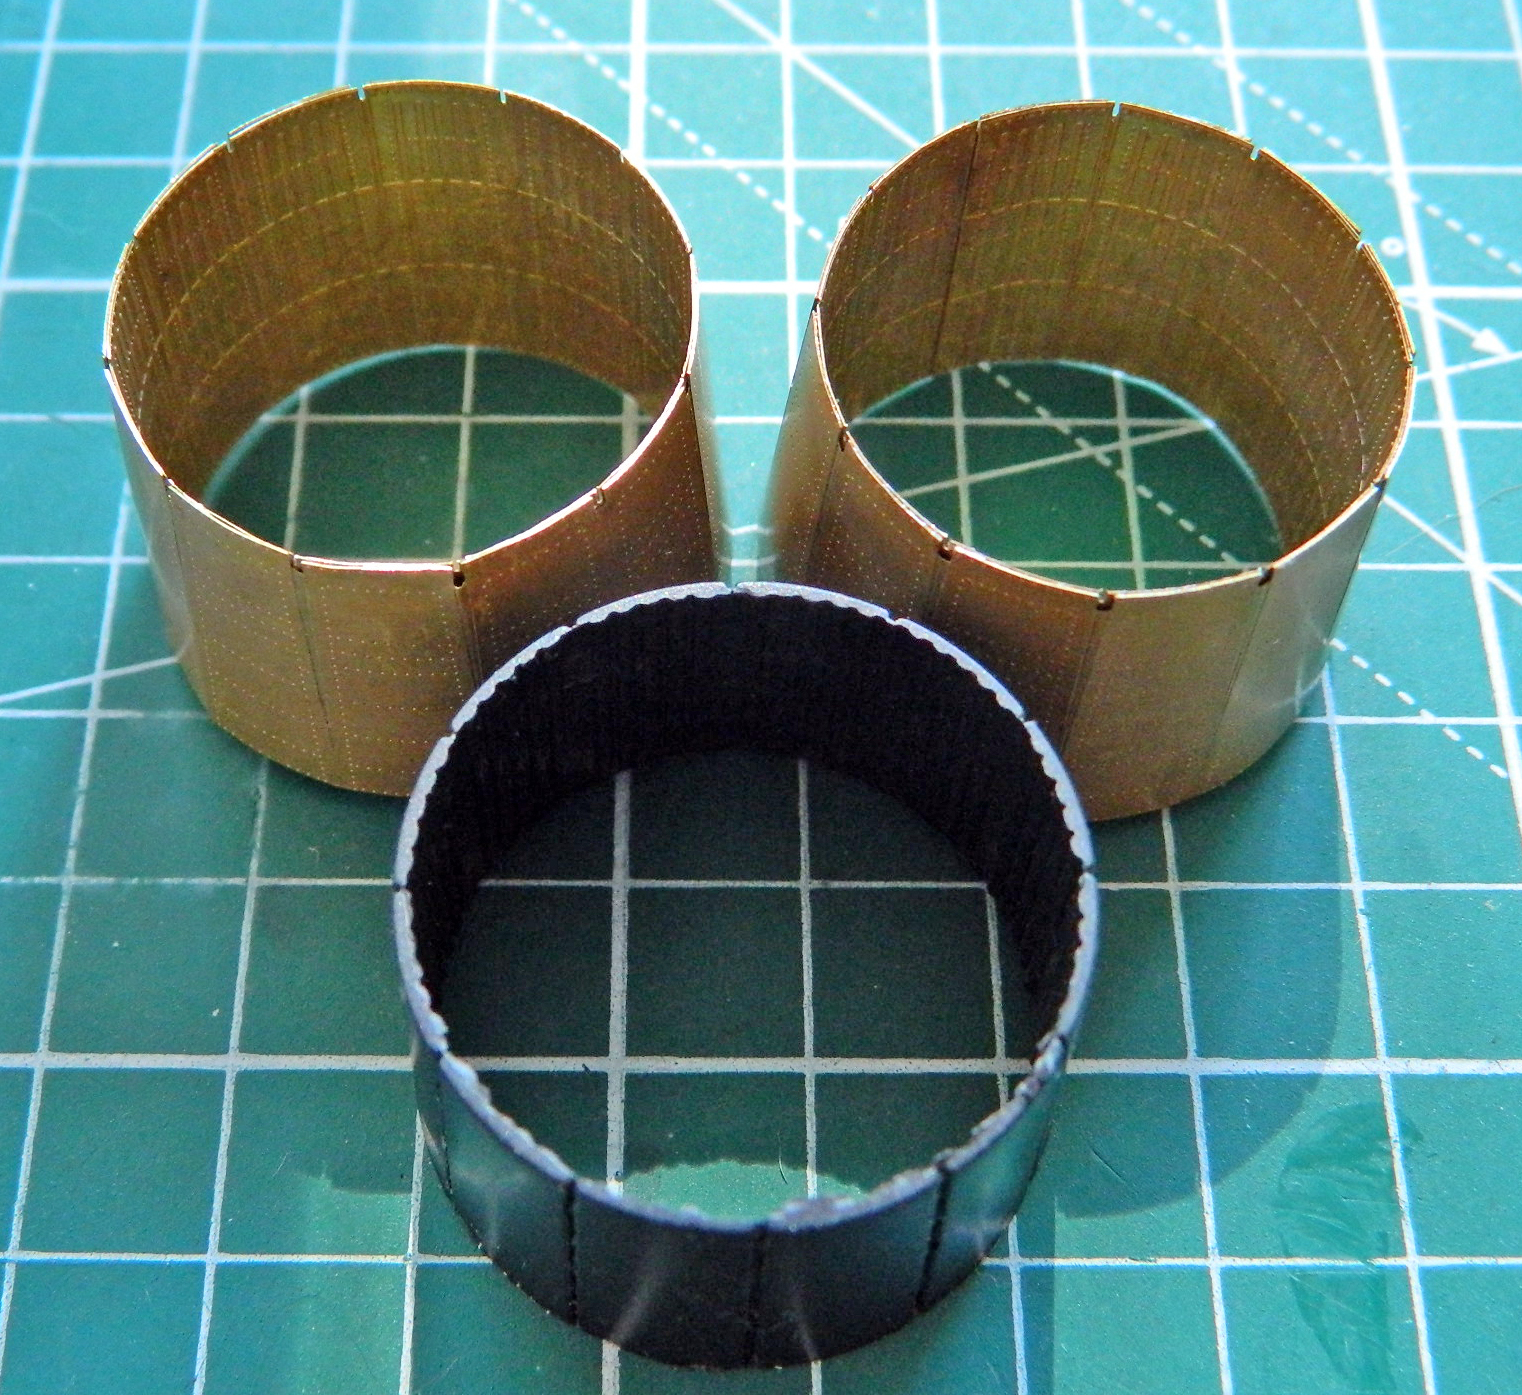
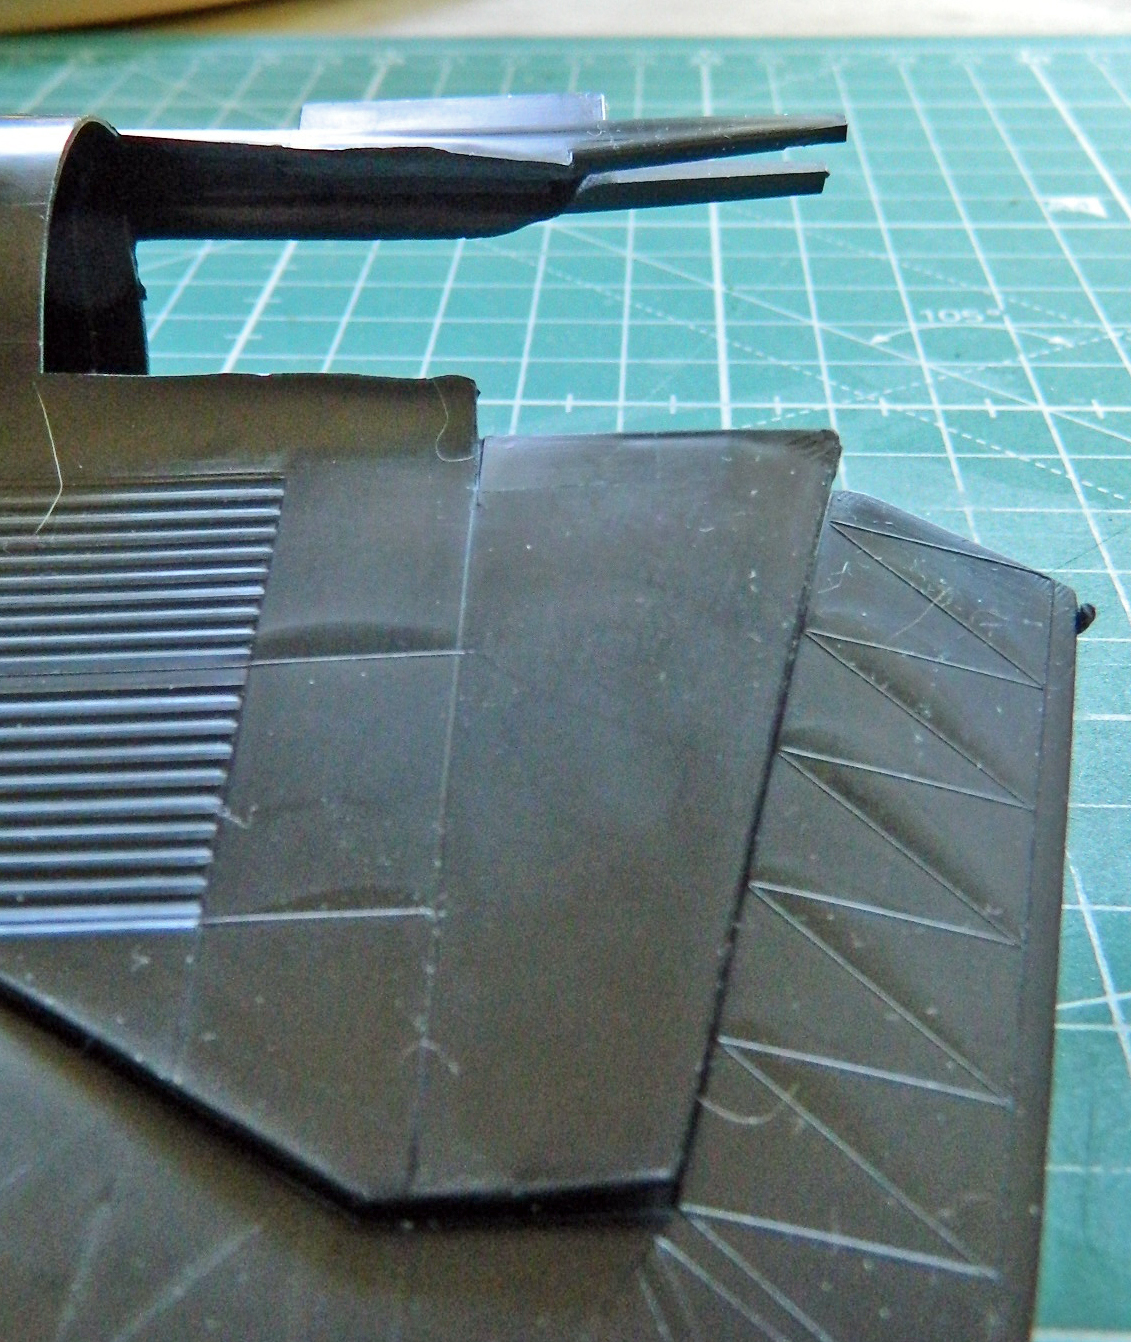
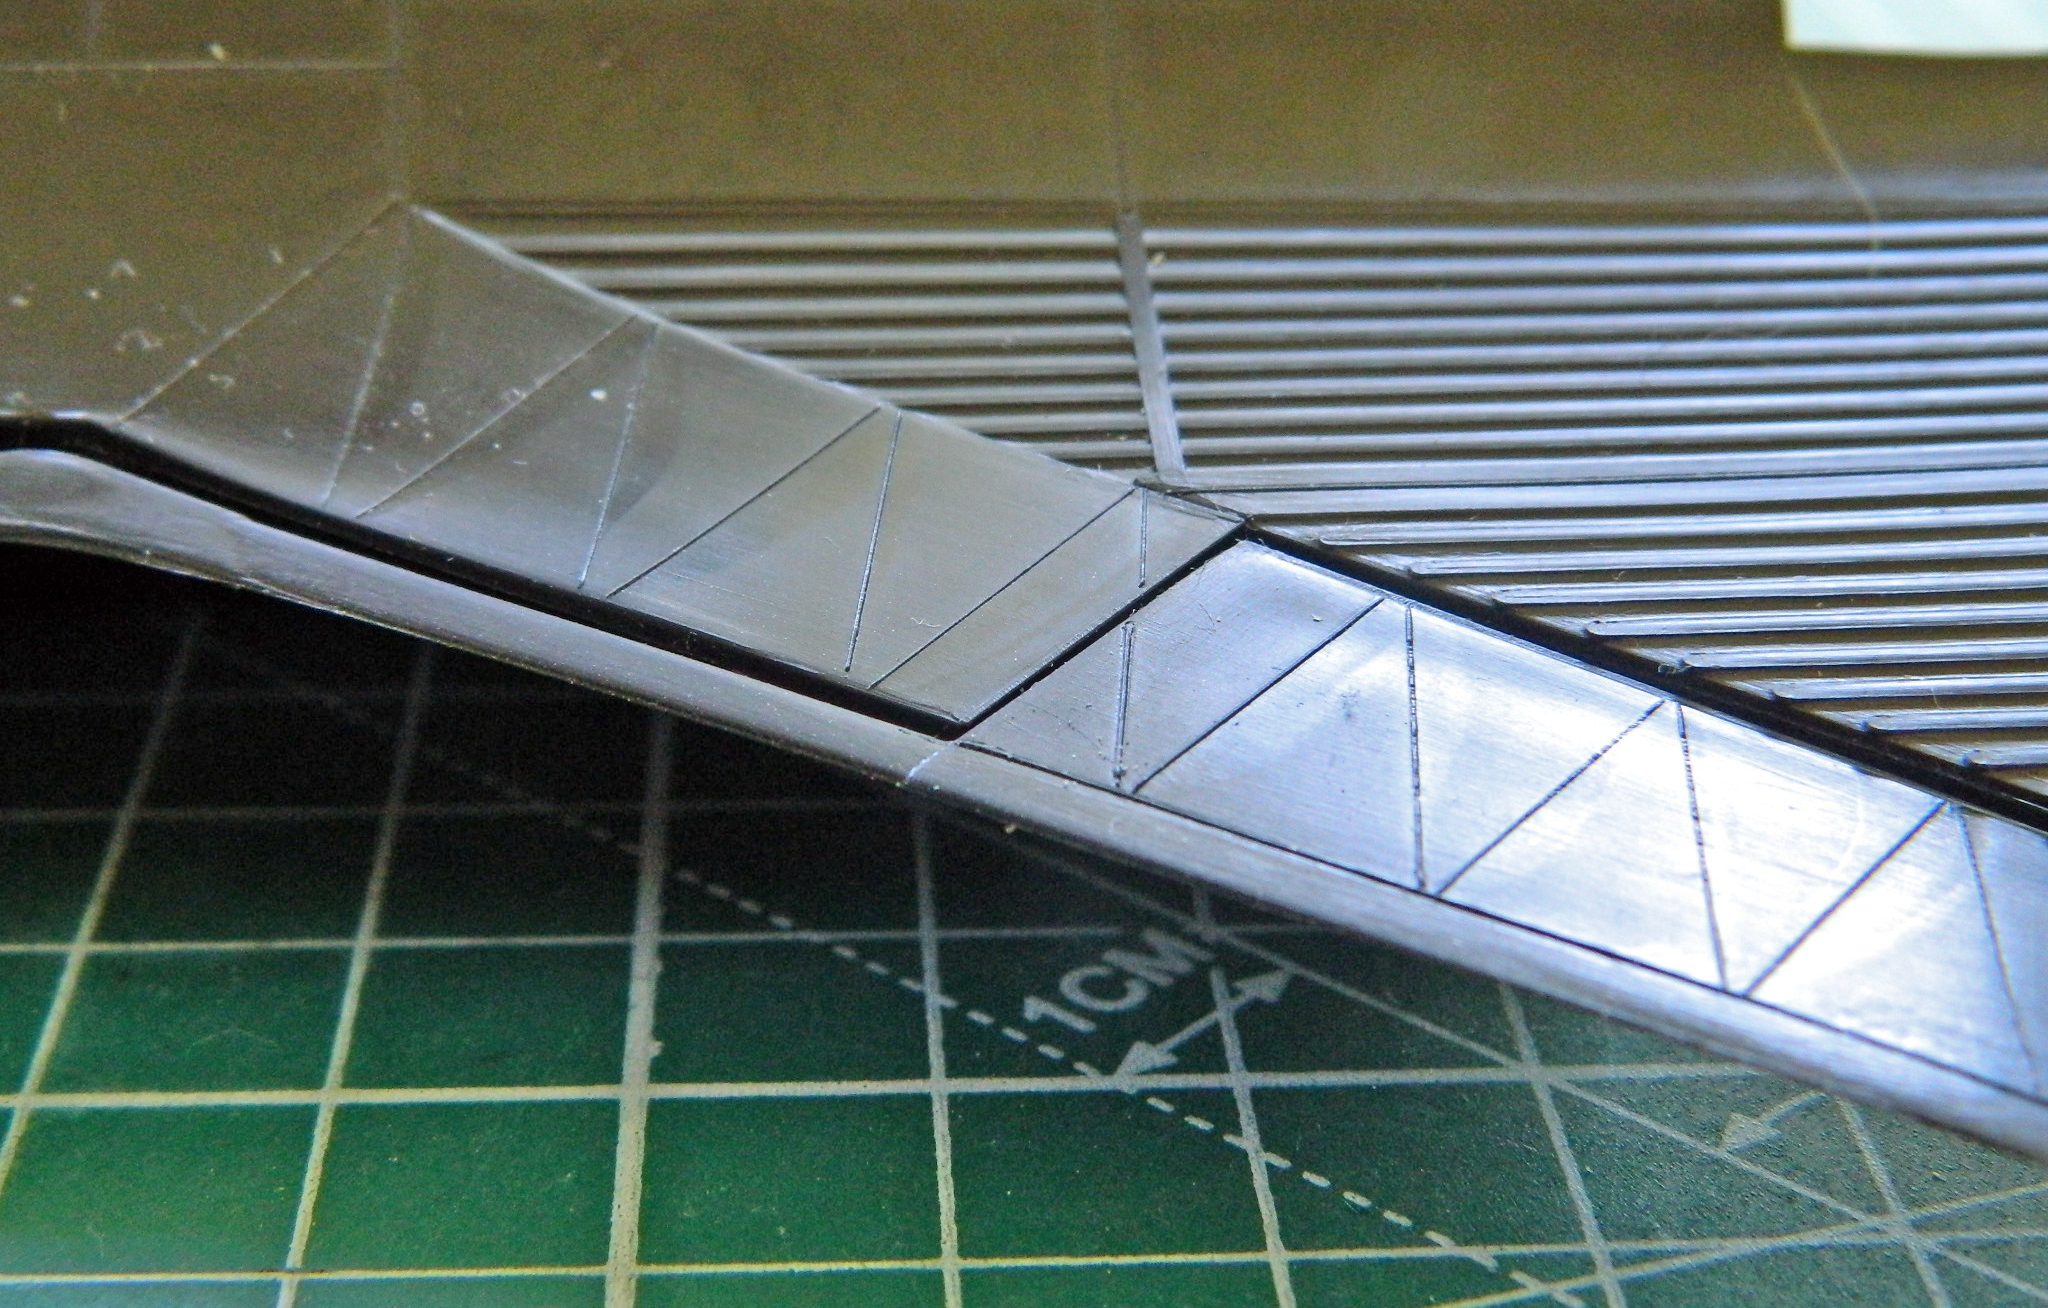
And here are the tail feathers in place against where they attach:

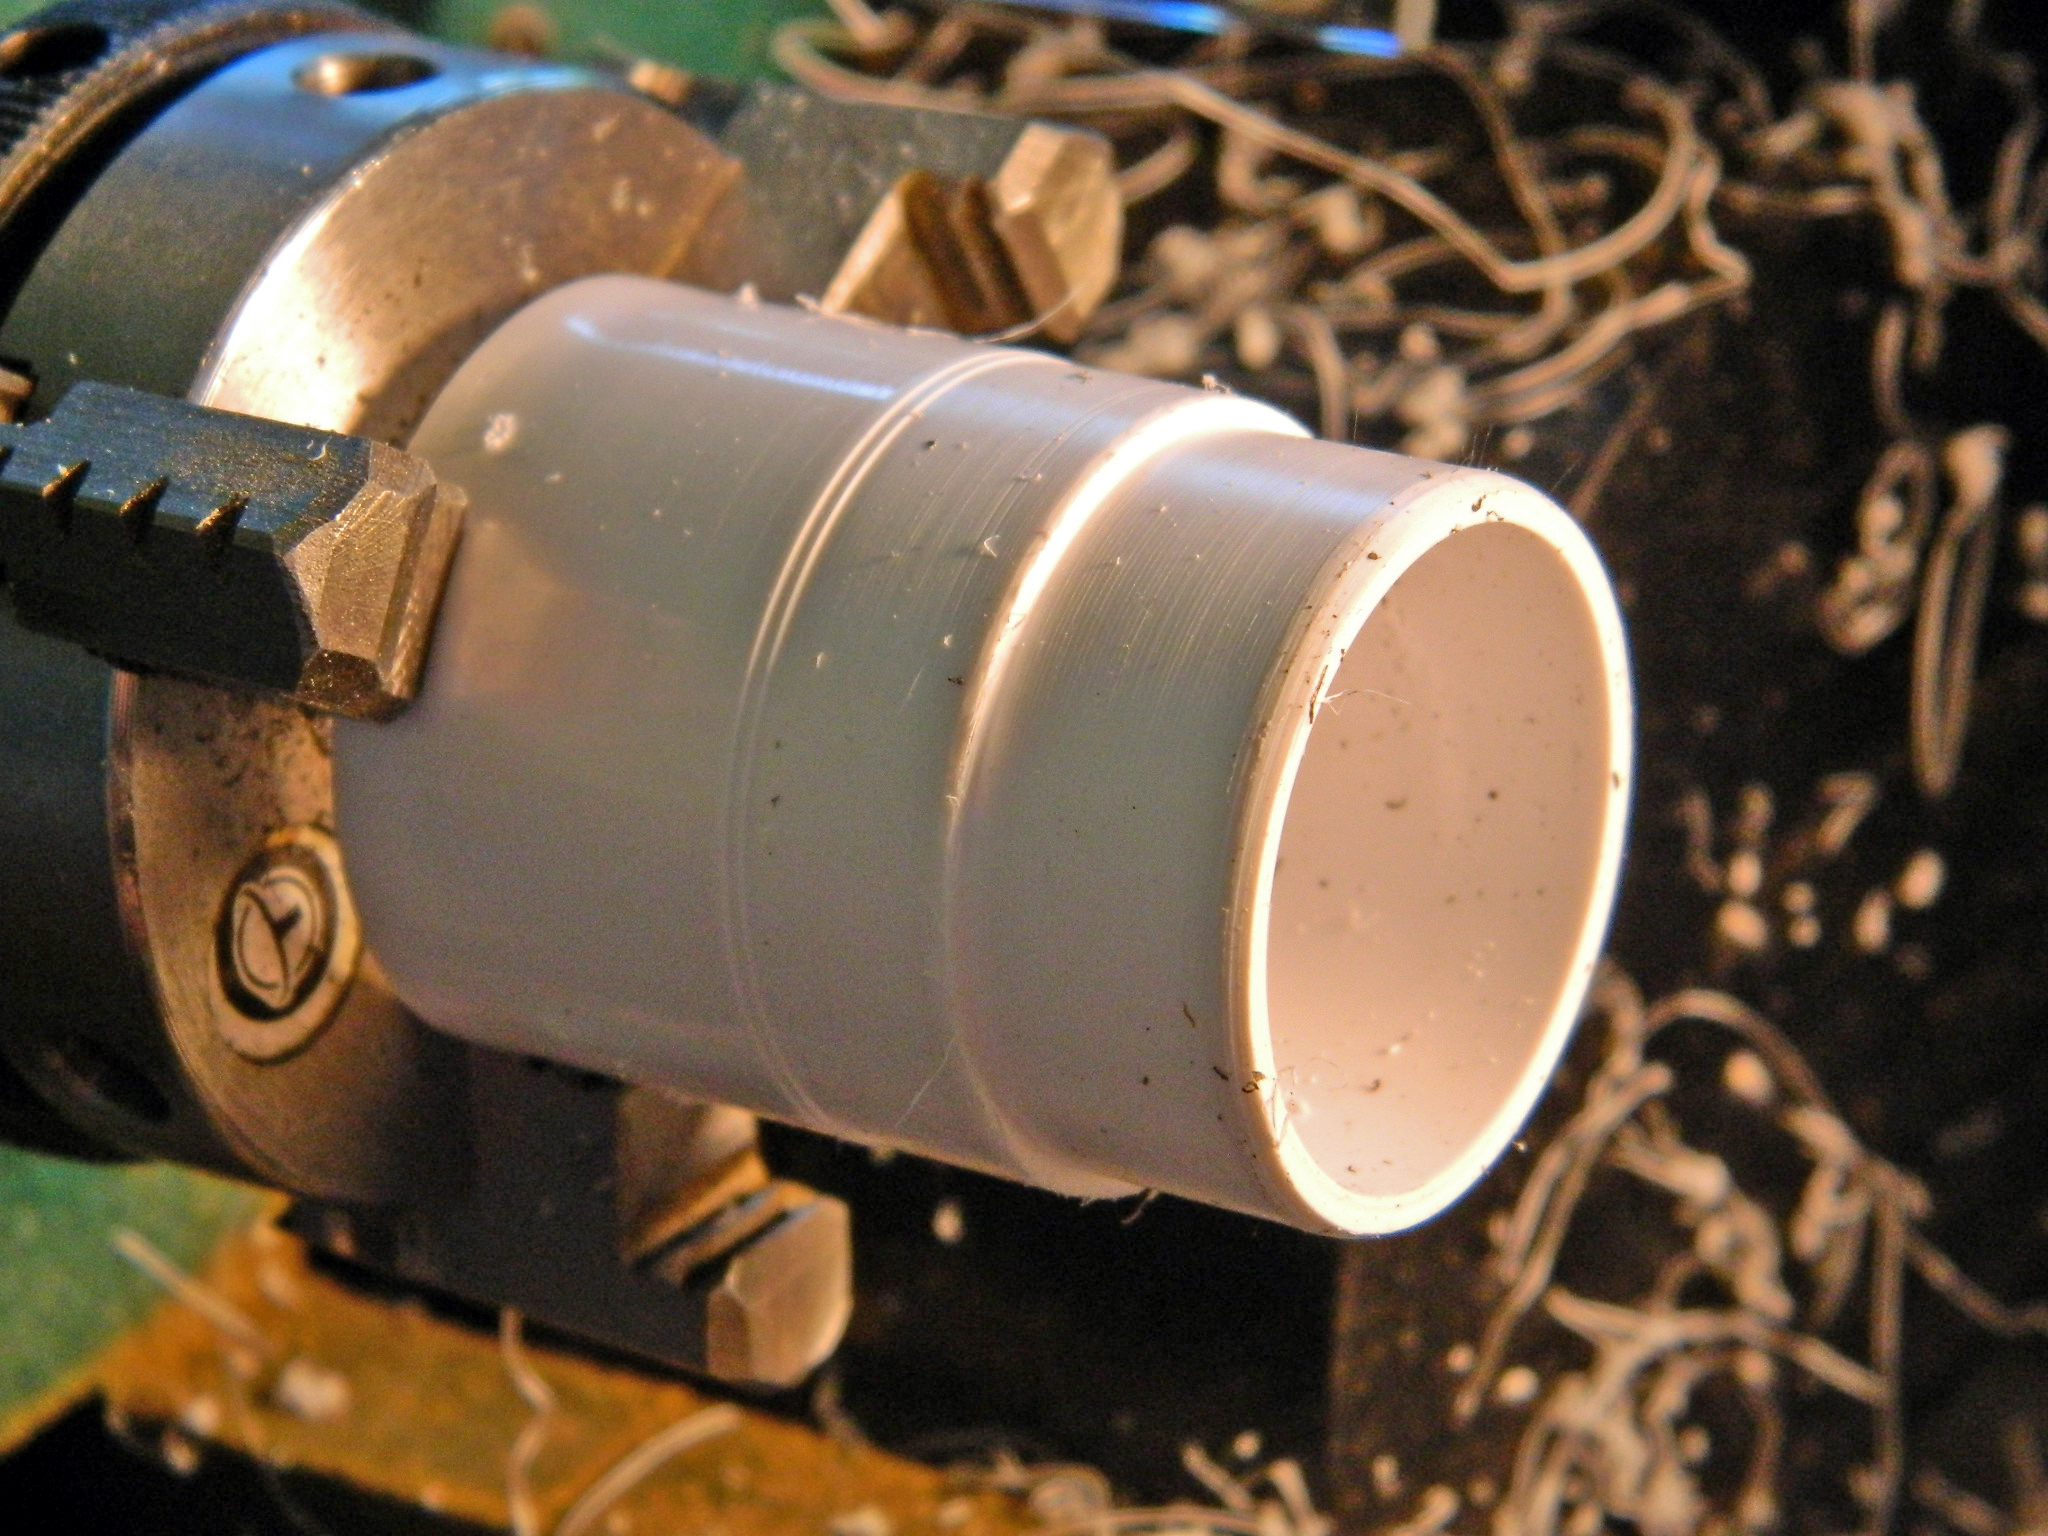
When I dry-fit all these things together, I noticed that the depth of the internals was off. If assembled as molded, these things will be too shallow. So I fiddled and figgered and realized that .75″ (19.05mm) PVC extension collars from the plumbing supply department would work with a little bit of modification.
I chucked one into the lathe and started turning it to dimension where it needs to fit inside the bases that the turkey feathers mount to:

With the body of the afterburner section lengthened, I had to remove the fuel sprayers from where they were cast on the kit part so I could move them to the inner end of the PVC. I didn’t have a boring tool that would fit. And then I realized (again) that this is plastic, not any sort of metal, and that I could use the back of a #11 blade to cut the section out:
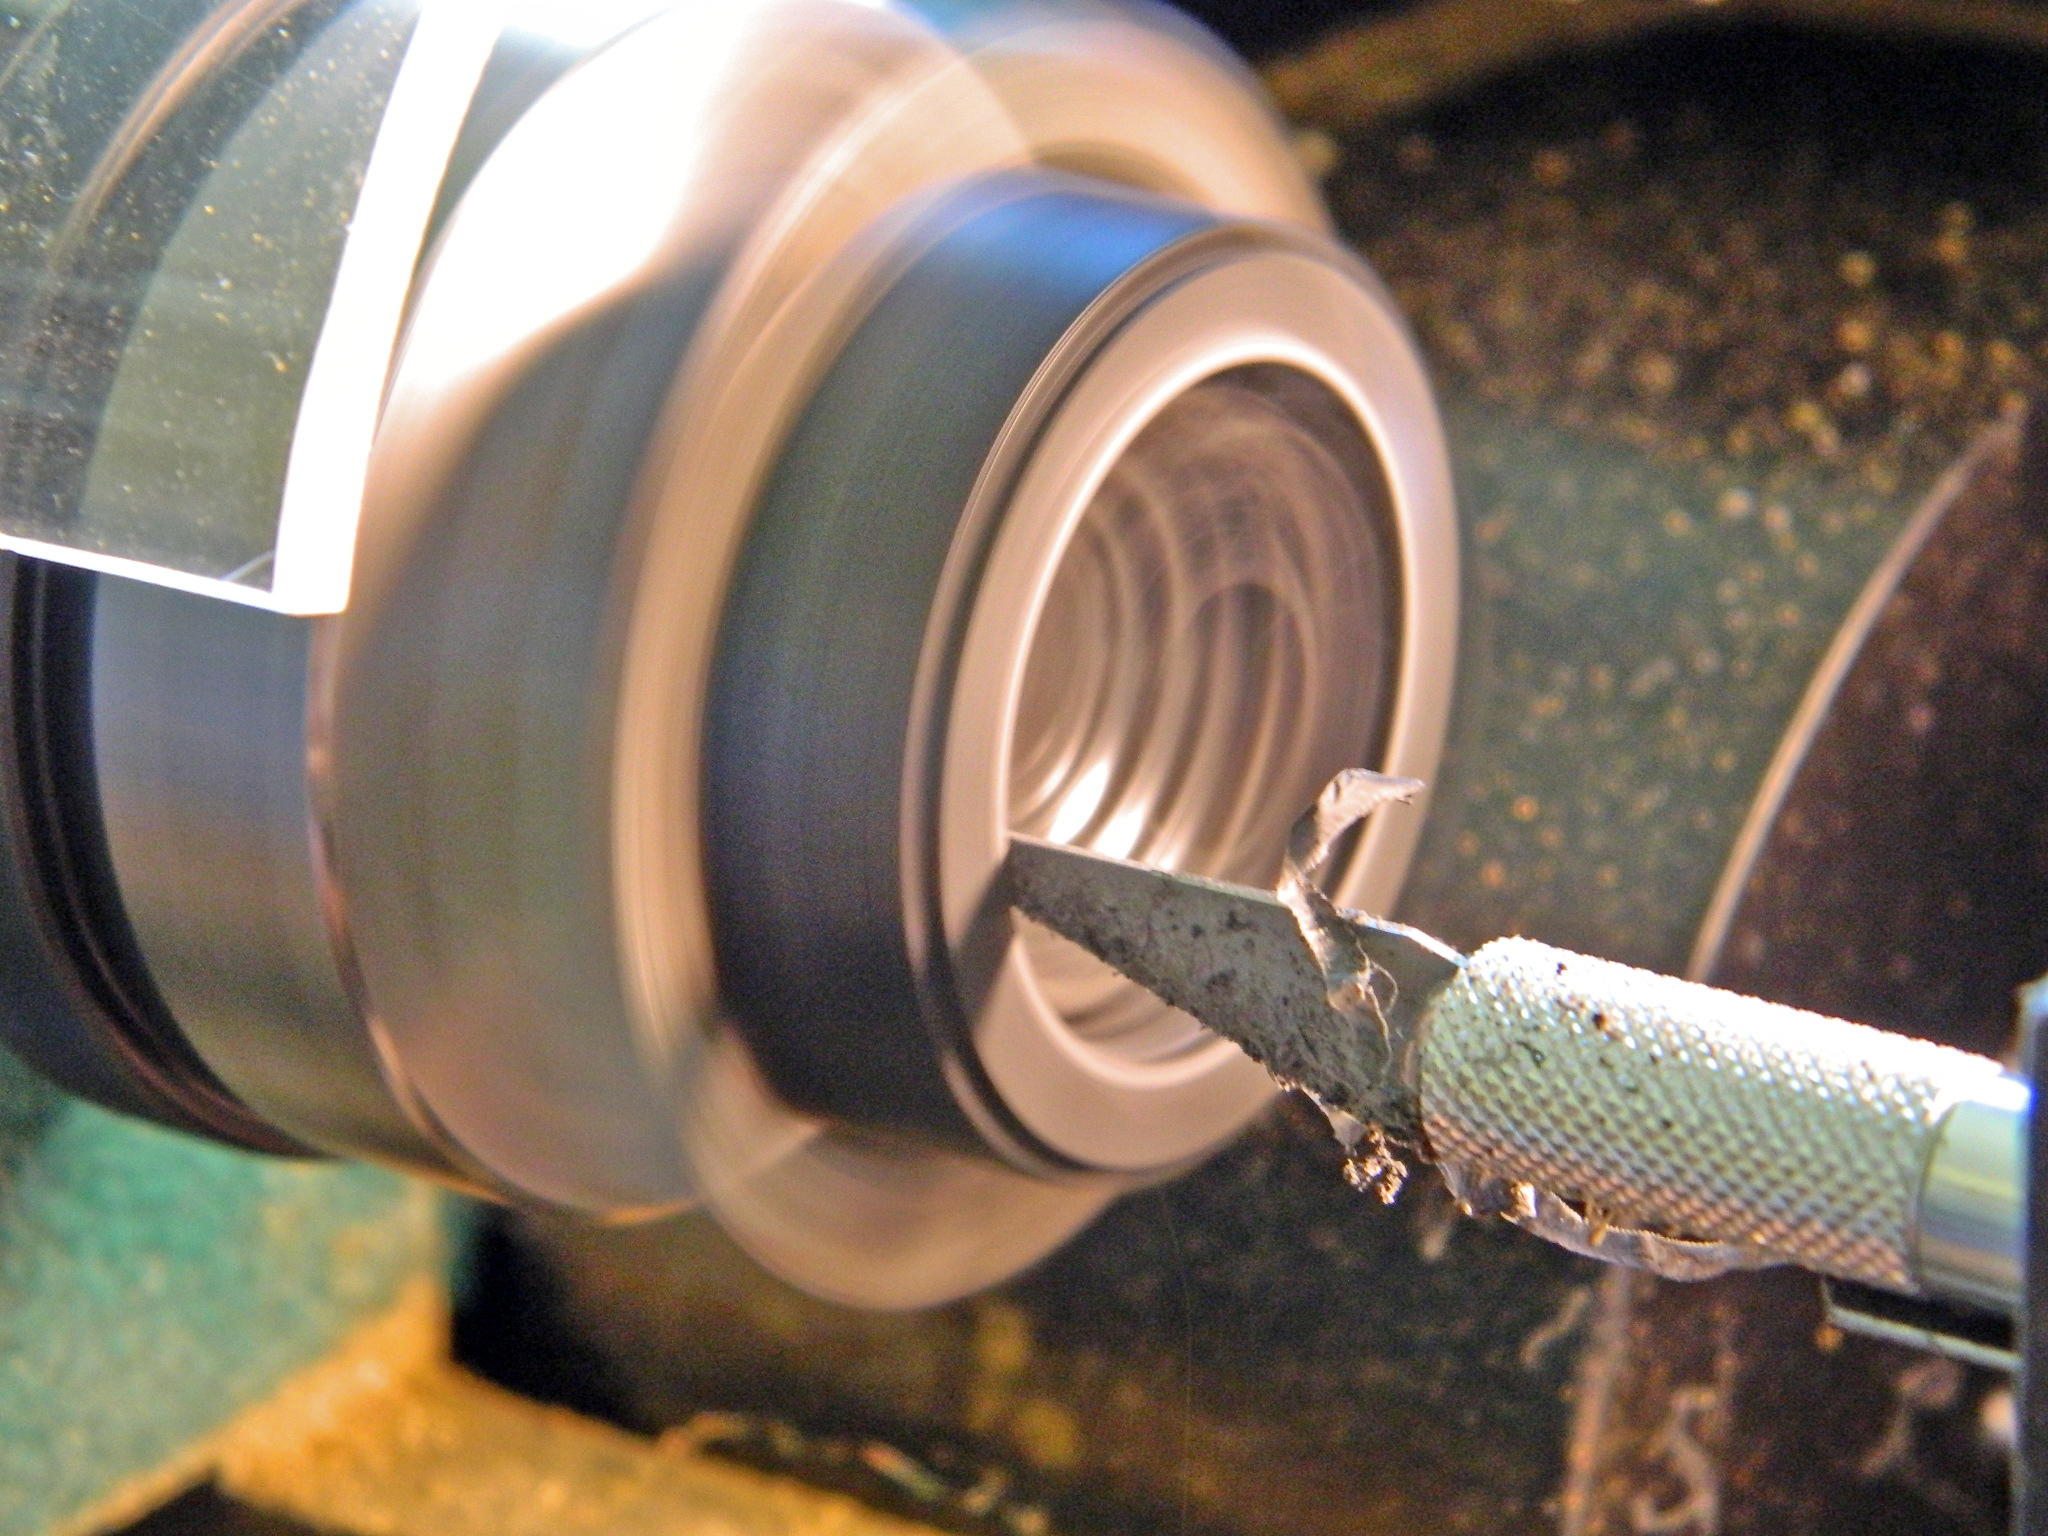
Worked fine:
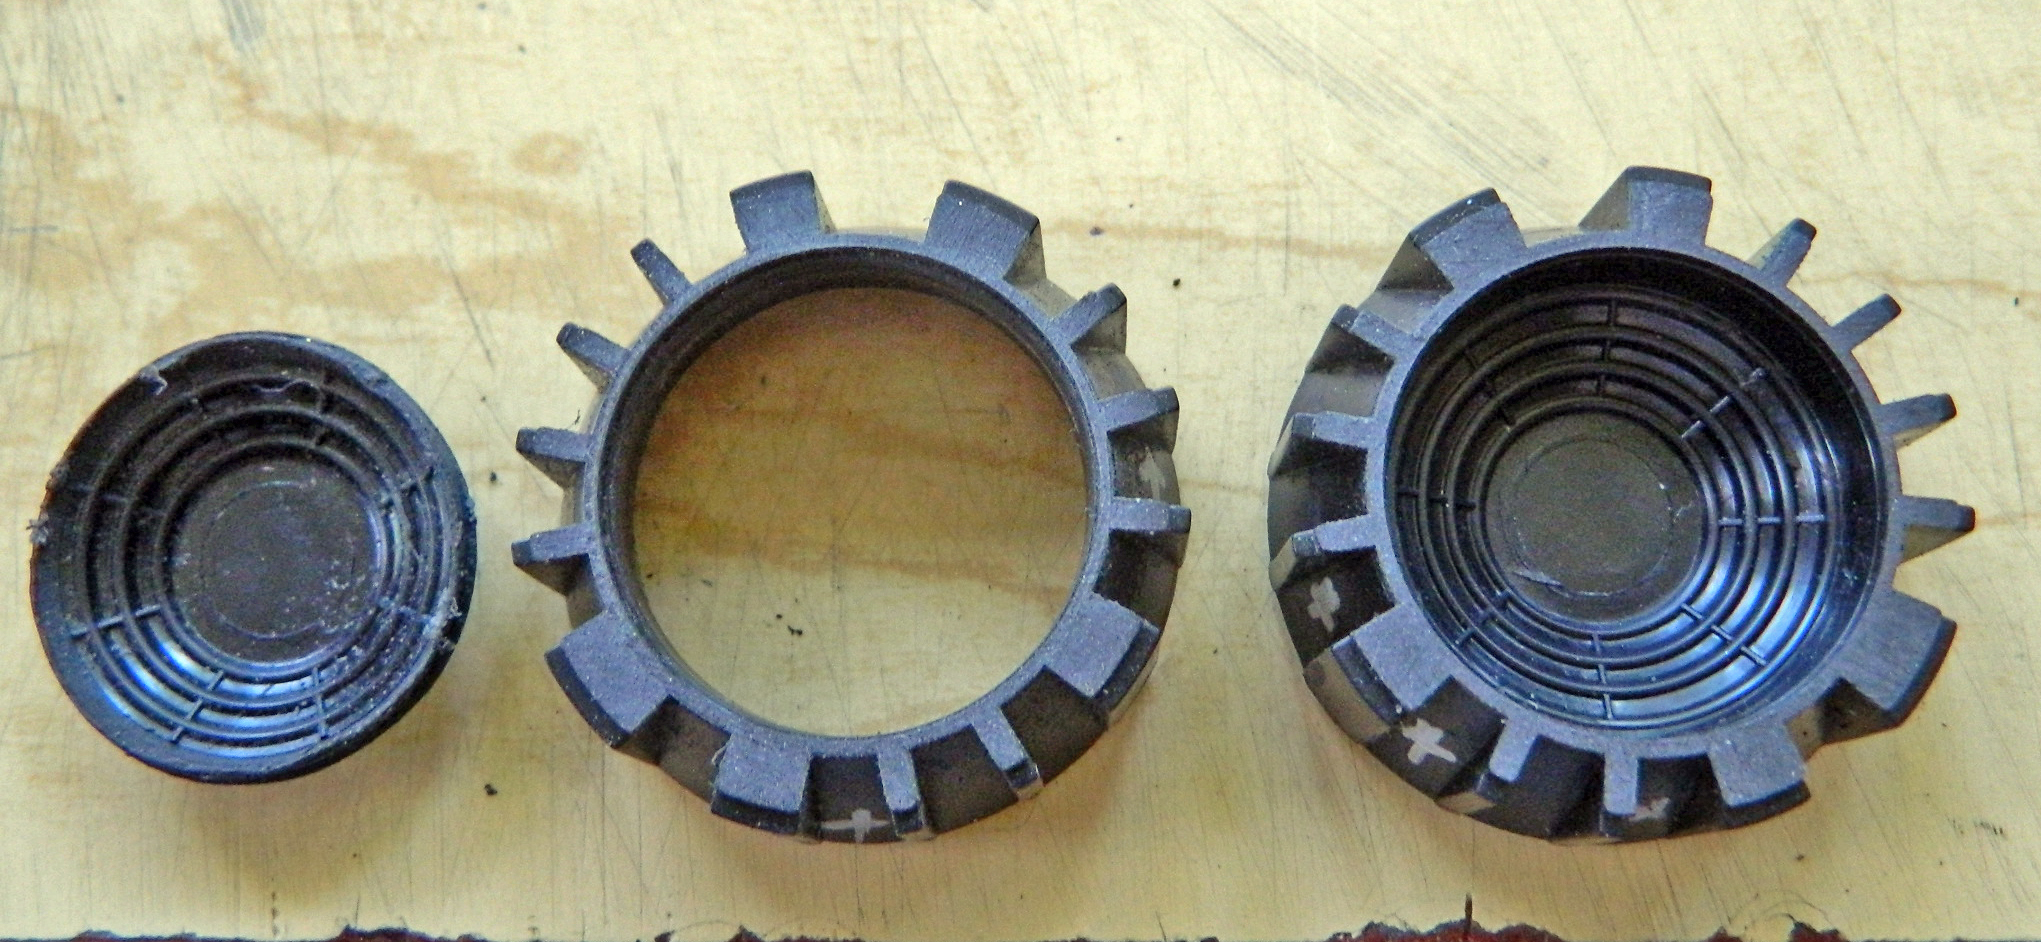
And then I did it all again for the other side. What I ended up with looked a lot better:


And…then Loki and Eris showed up. While I was online looking for something entirely unrelated to this build, I found that Lonestar Products has a resin set to bump up the accuracy of the engines:
So those parts are on order. ::sigh:: Once they arrive, I’ll cut/fit what I have between made and purchased parts to see which combination of bits gives me what I’m after.
With all that done and/or pending, it’s time to fix the melted plastic. (The cat came out of hiding a few hours after my scream. Food does that. To both of us.)
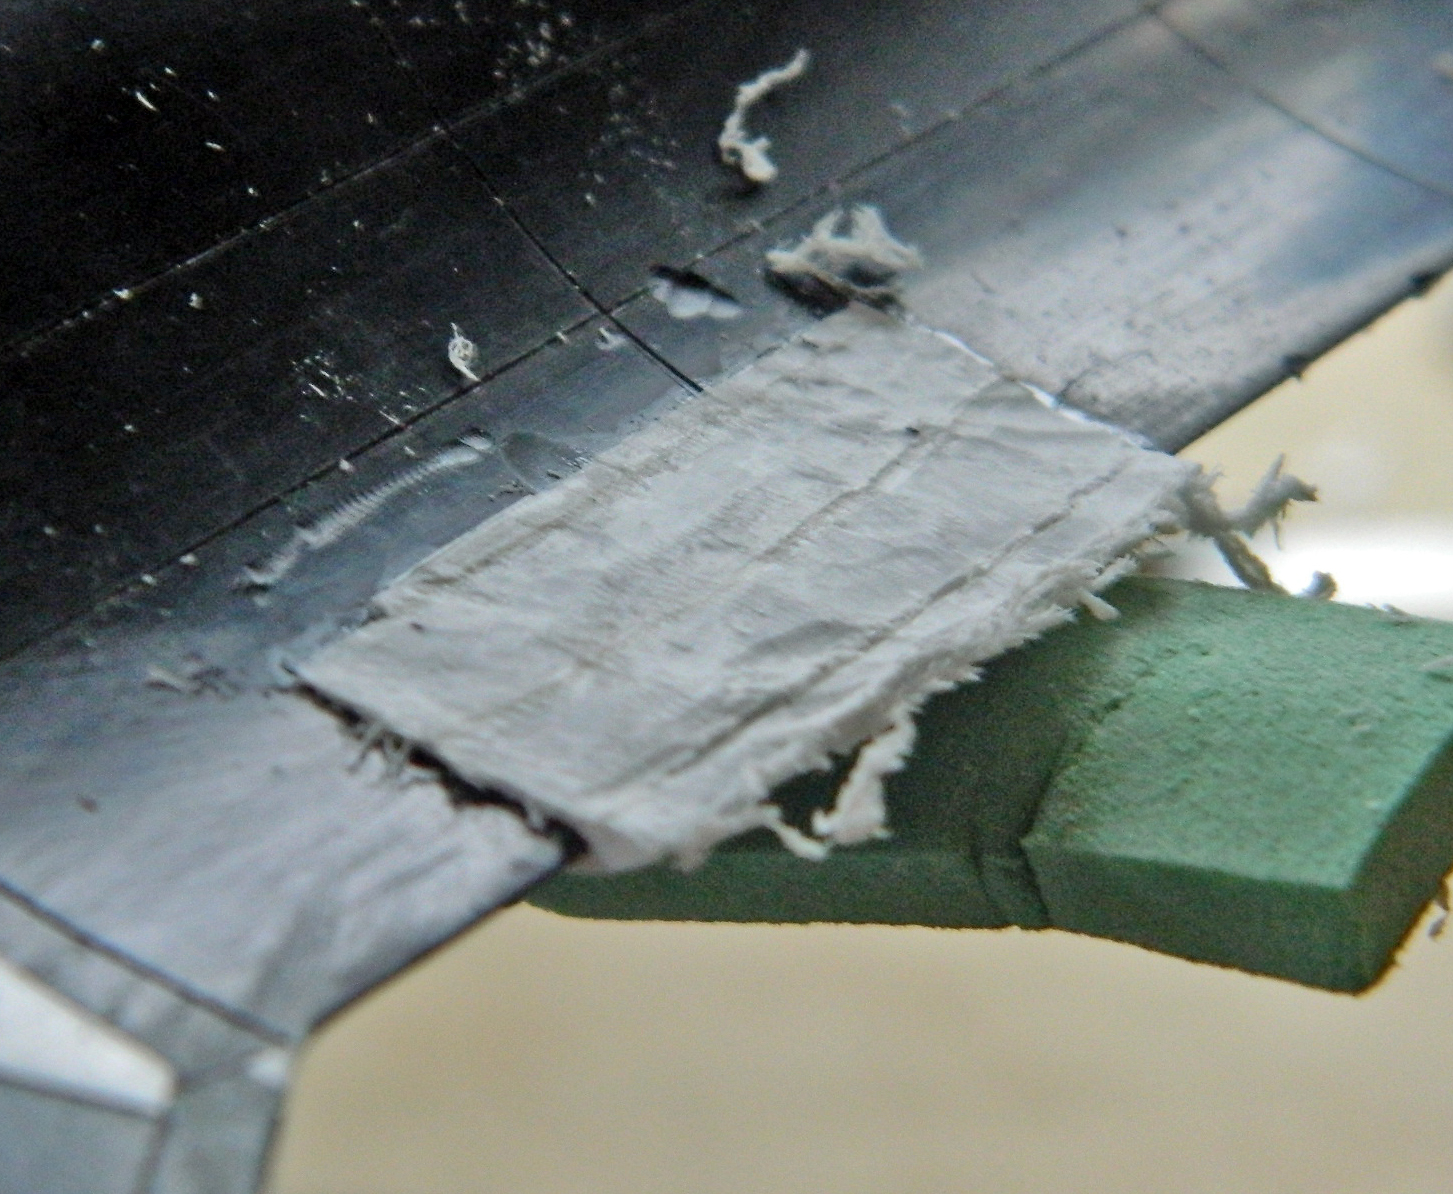
The fix started by cutting out the melted area:

Then it was time to add plastic, which in this situation was .080″ (2.032mm) sheet, to the bottom:


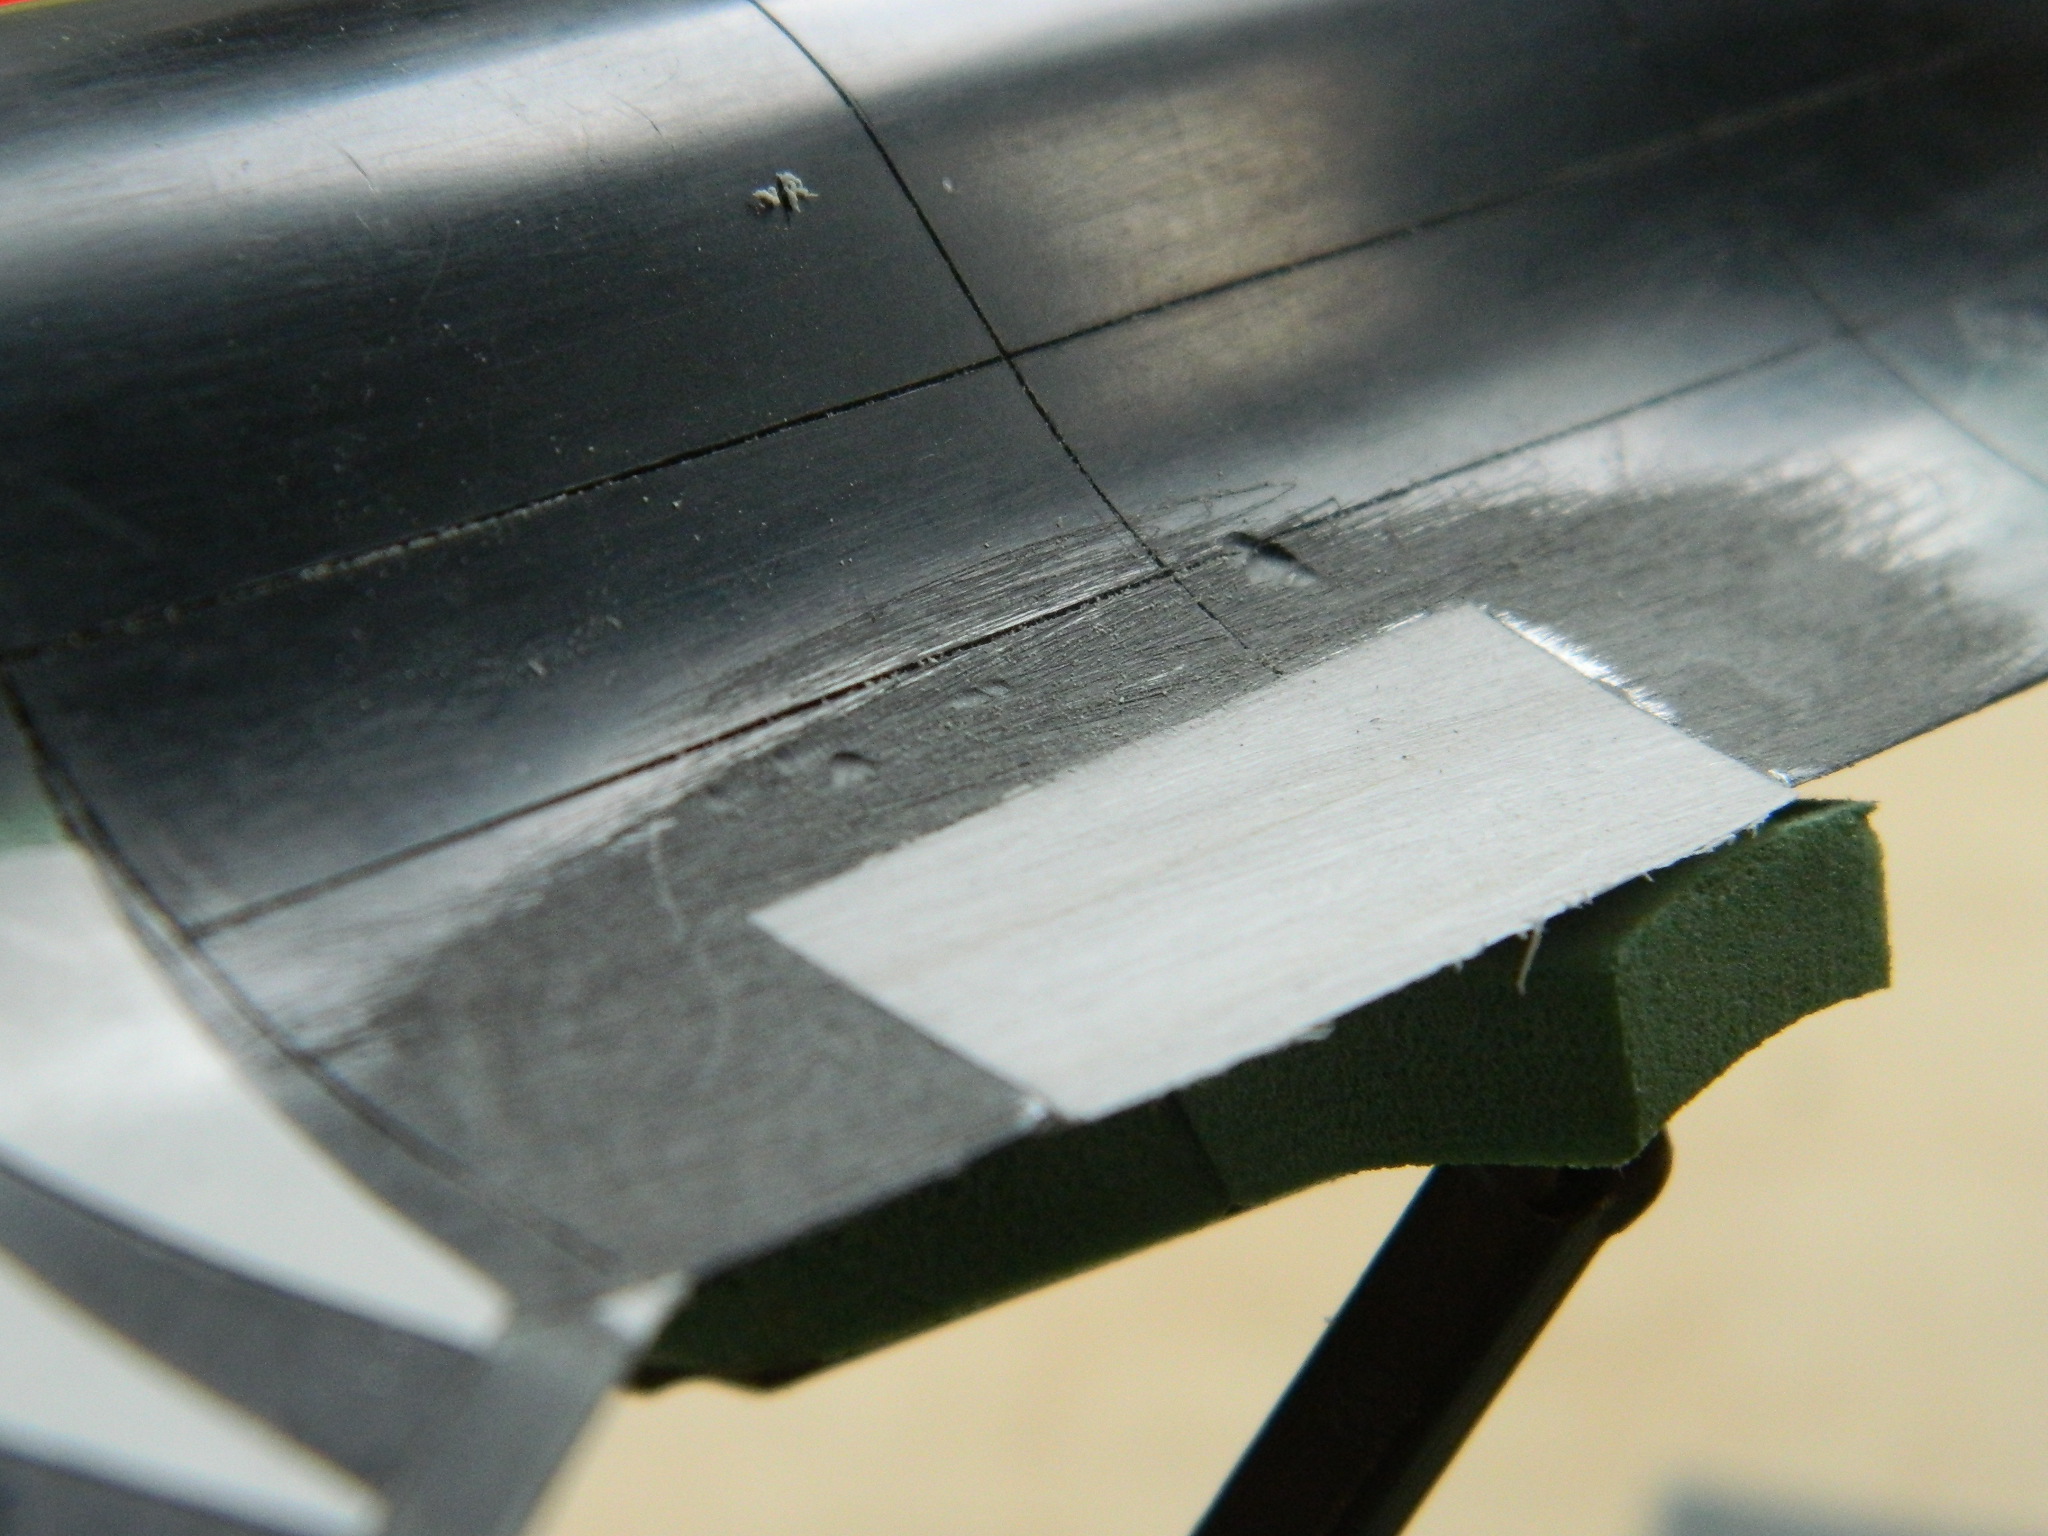
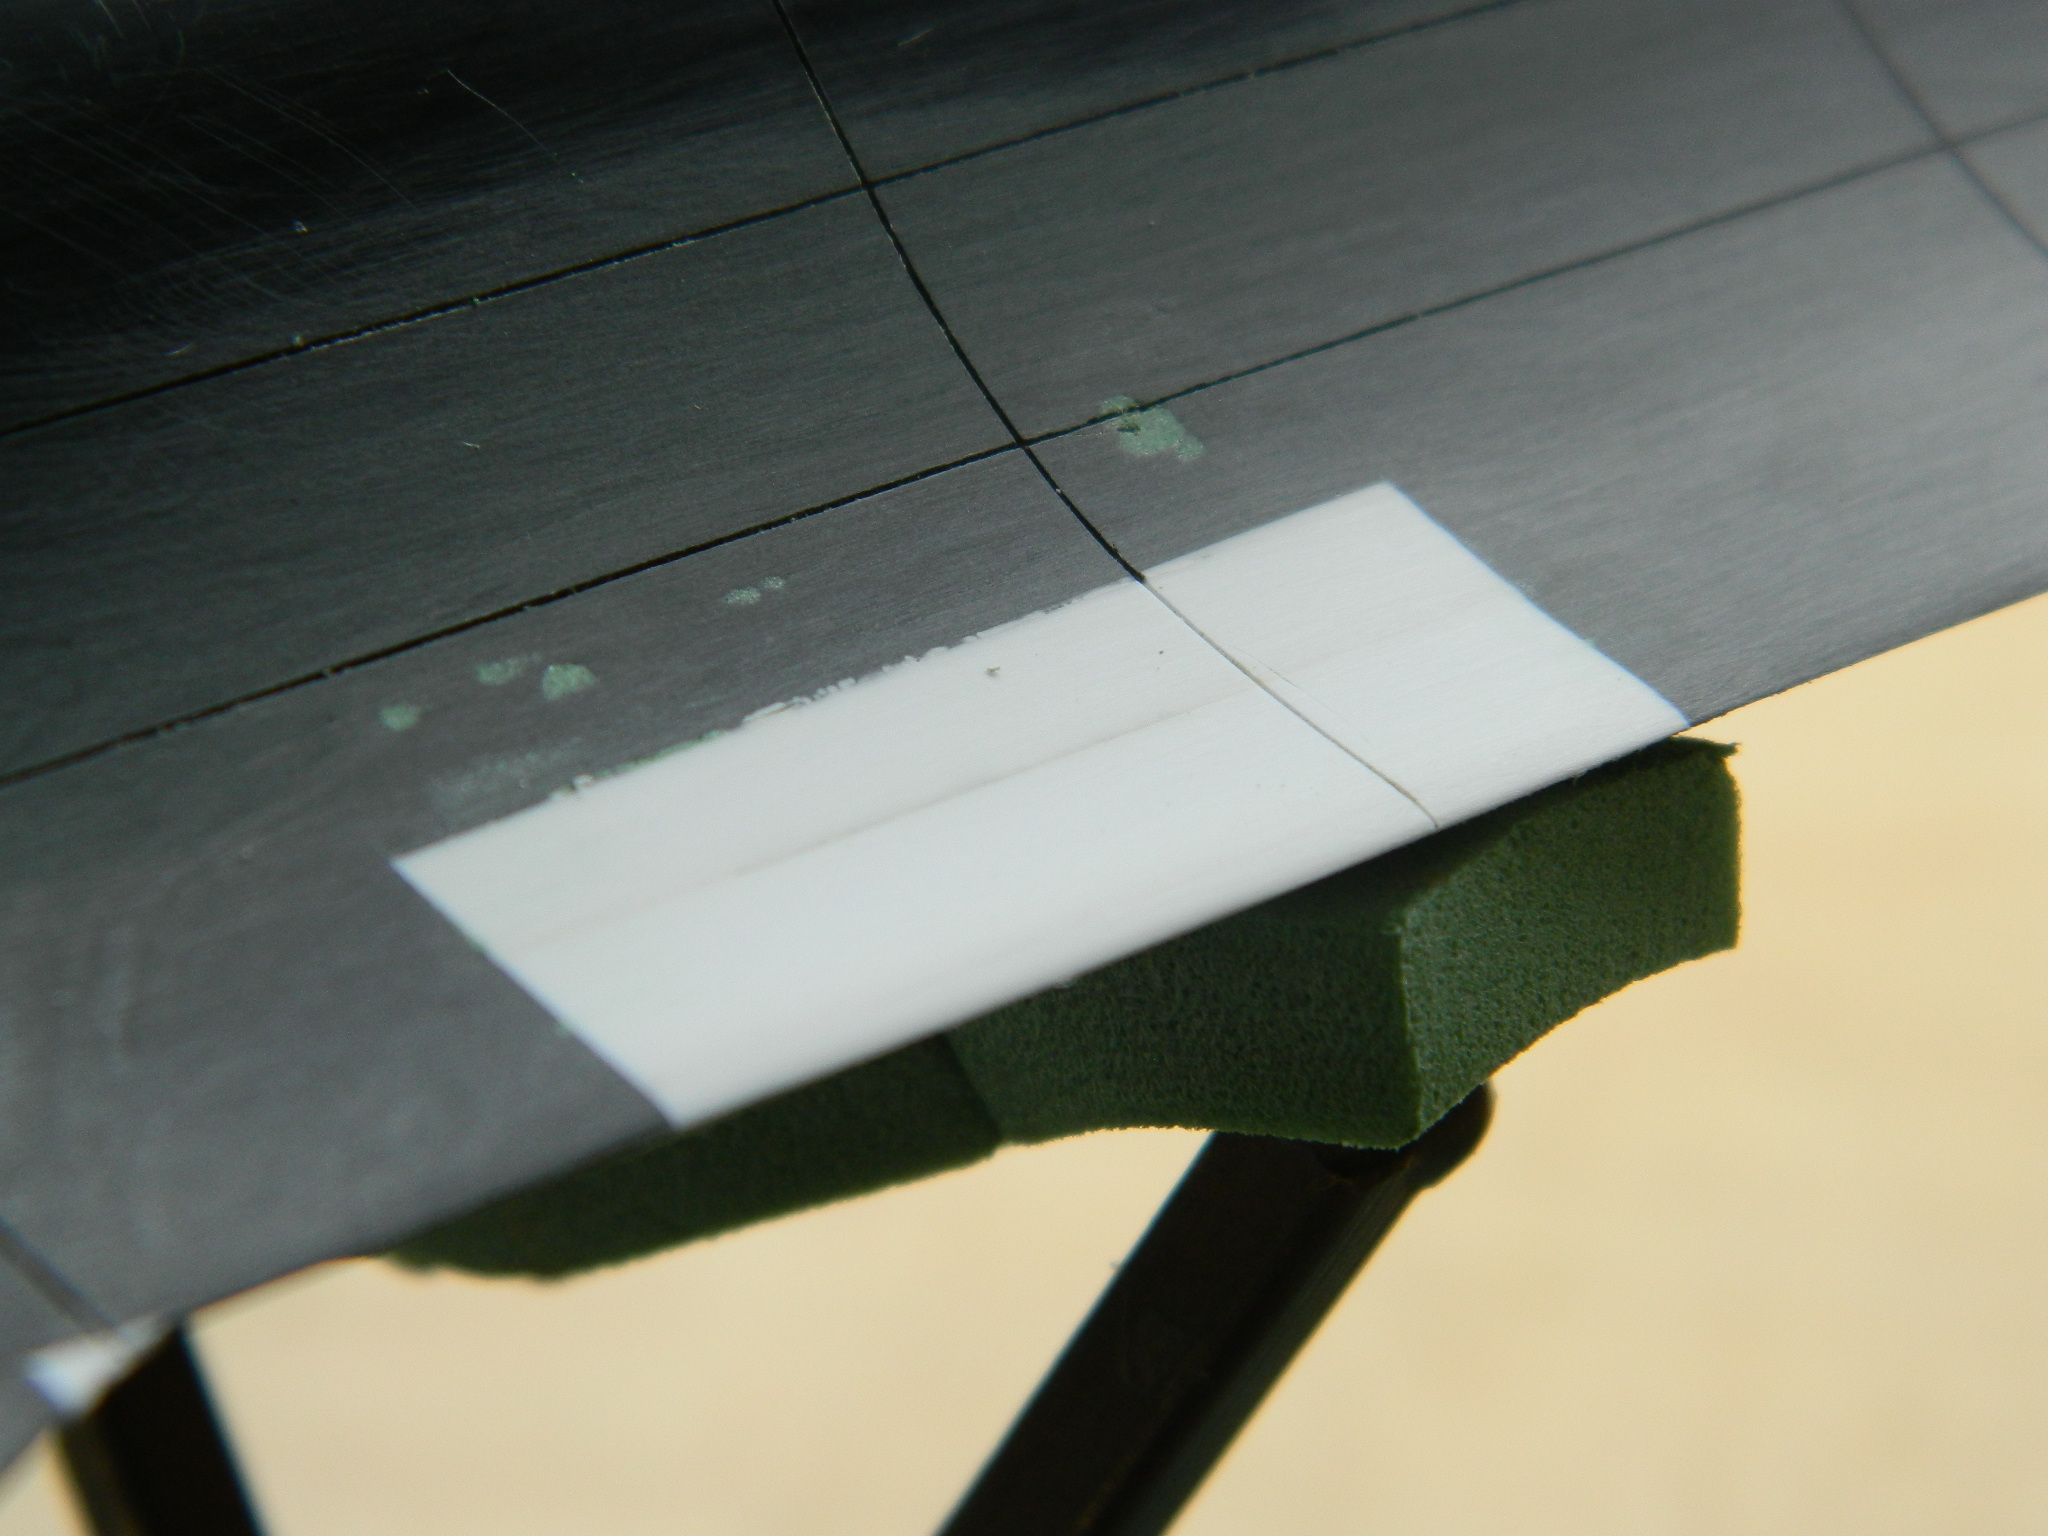
Then the hole was filled with more .080″ (2.032mm) and clamped together:

I waited a few days before I went back at it to allow the glue to cure. The first step was to knock down the excess with a Dremel tool (yeah, I got sloppy and gouged the area above it…perfection still eludes me):
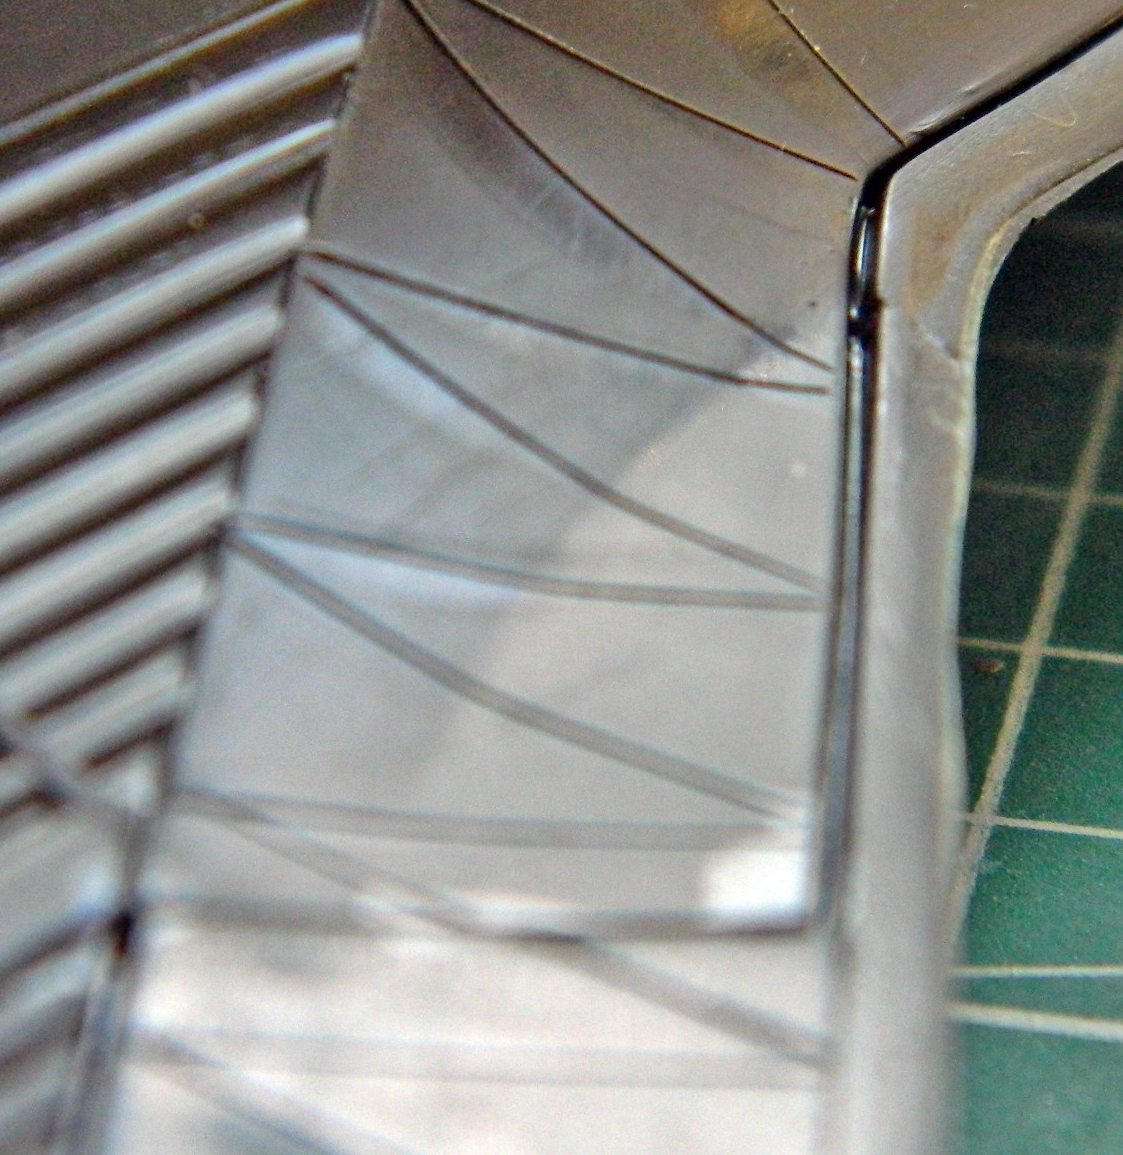
That was followed with a lot of scraping, filing, and sanding, ending with panel lines being scribed (and putty being added):
Having no (good) excuse to avoid working the fuselage again, I went back to it and discovered that one (VERY ANNOYING) section of the underside rear had snapped free, so I had to reattach it, fill it with plastic and putty, then sand, sand, and sand:
With all that done, I’ll be going back to those mystery triangular blisters under the nose. I’m hoping that the coming month does NOT have any more ugly surprises for me. But since I’m not perfect, I’m not betting on that…

Just a note to tell you someone is still reading this!
LikeLike
Thanks! Good to know. Sorry there wasn’t an update at the end of August but I did very little work that month. Looks like there will be more at the end of this month.
LikeLike