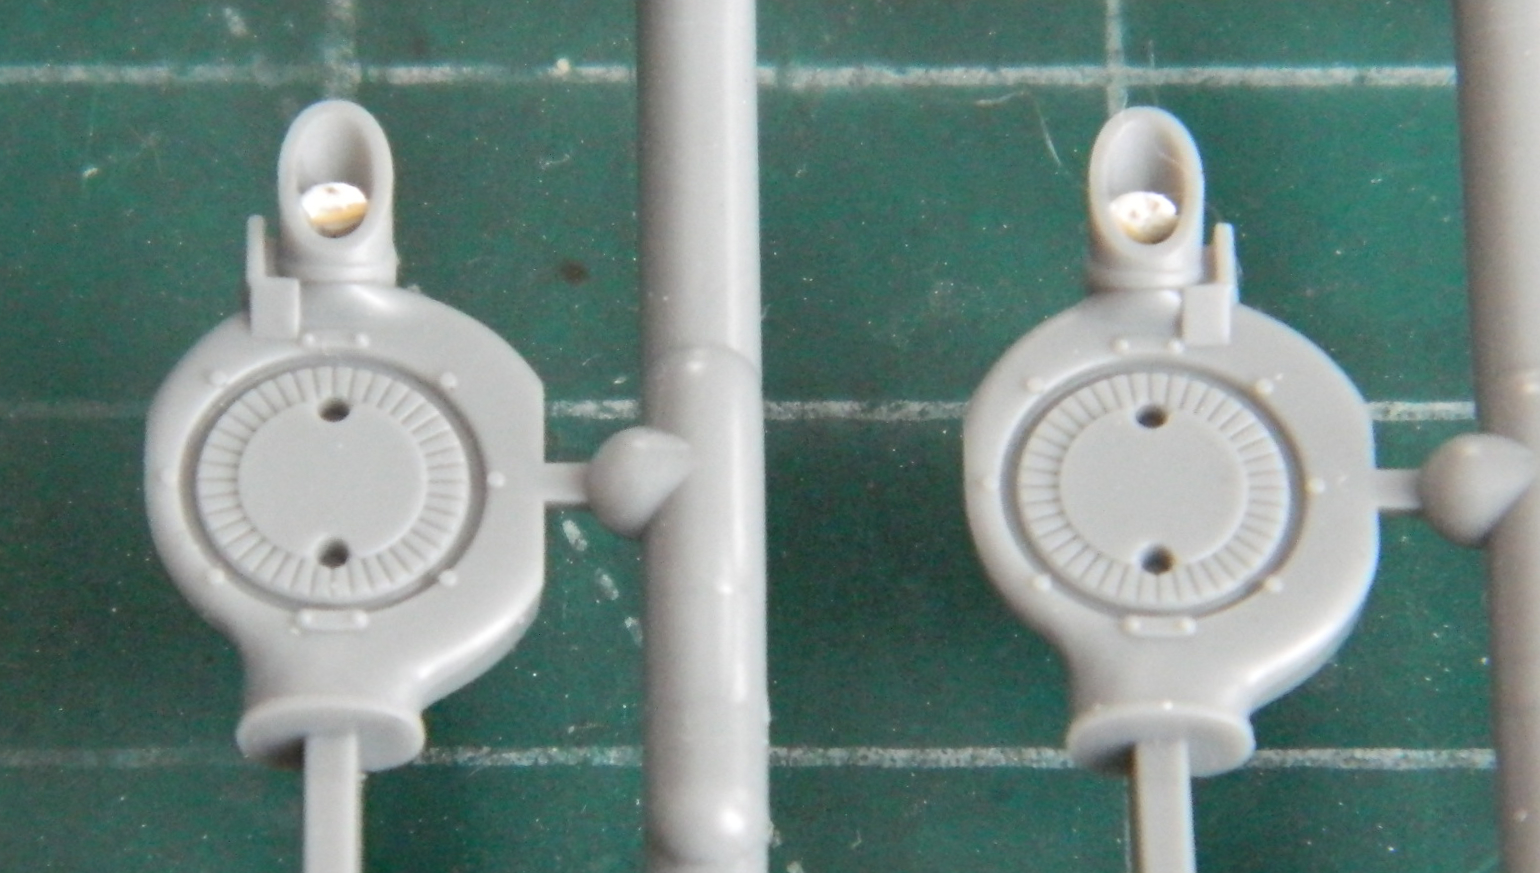
With the major bits glued together, I turned my attention to the smaller bits that need paint. Before I could attend to that, I realized that the turbos don’t have the butterfly valve that control how much boost the turbos provide. Open the valve and exhaust gasses simply exit. The more that valve is closed, the more exhaust gasses are routed through the turbine housing, spinning it faster, and providing more boost thereby. Tamiya didn’t mold in or provide those butterfly valves so I used my punch/die set and .005″ (.127mm) styrene scrap to make them. A small section of stretched sprue provided the shaft of the valves and then they were glued into place:
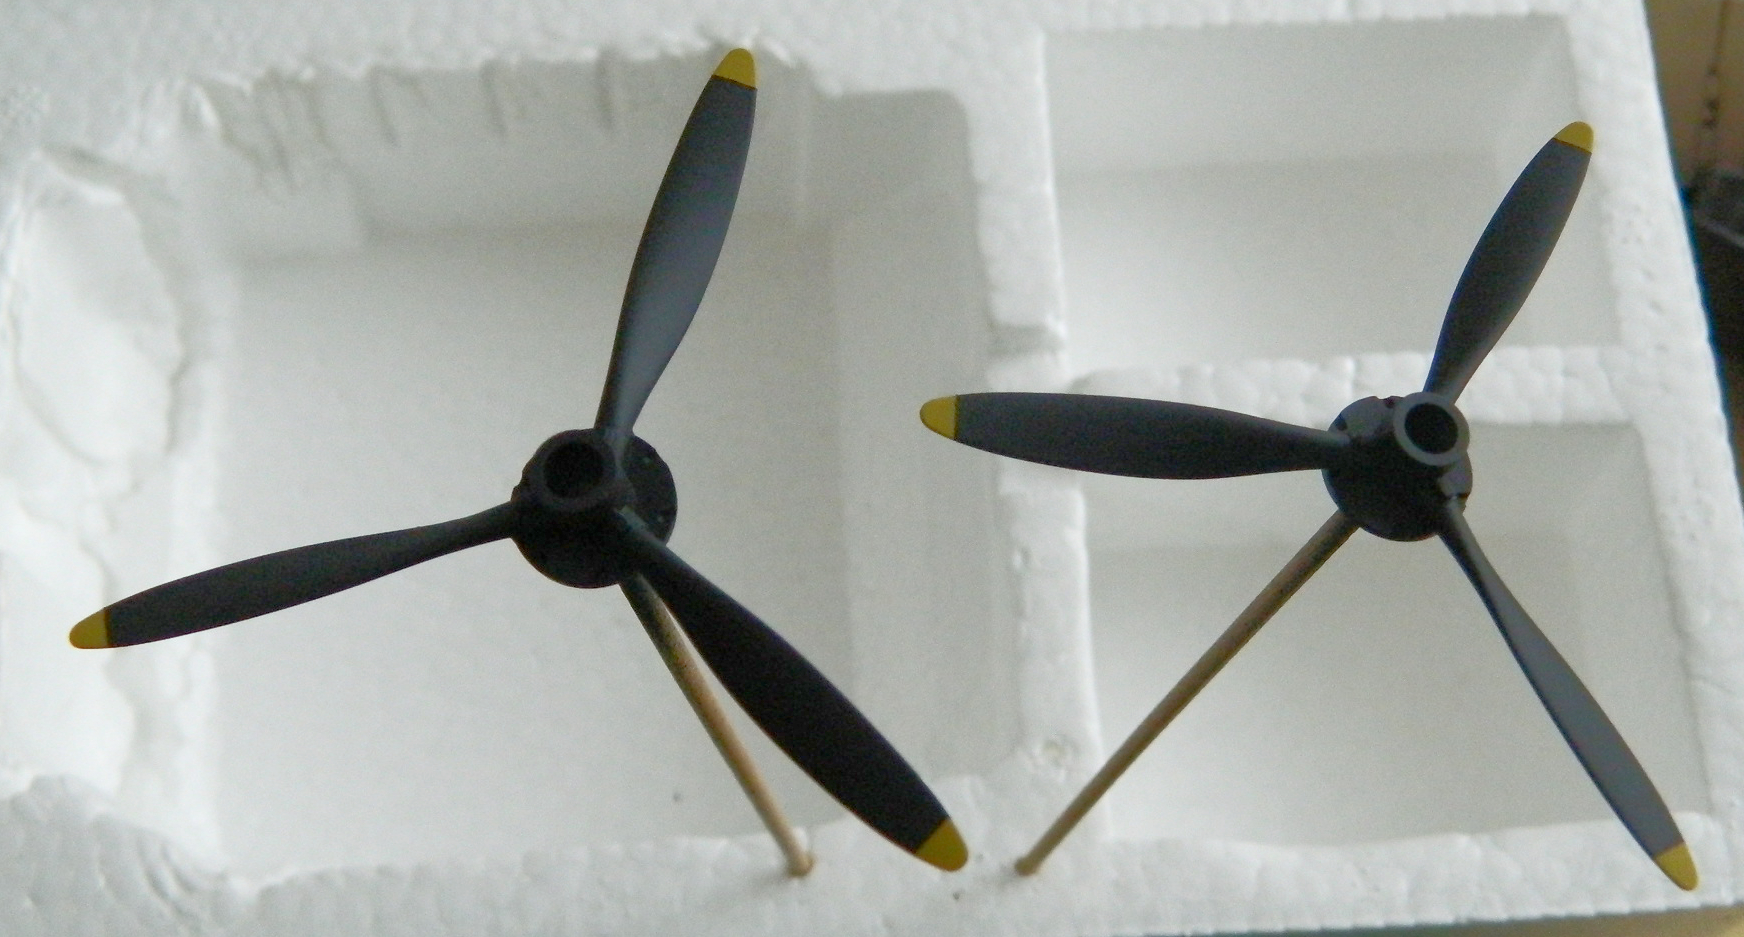
To paint the propellers, I started with a 1/1 mix of Tamiya’s XF-3 Flat Yellow and XF-60 Dark Yellow because the flat yellow alone was too bright to my eye. Then I masked off the tips and used Tamiya’s rattle-can TS-6 Matte Black because it’s more of a satin finish than a flat finish and that looks to my eye more like what the actual props looked like:
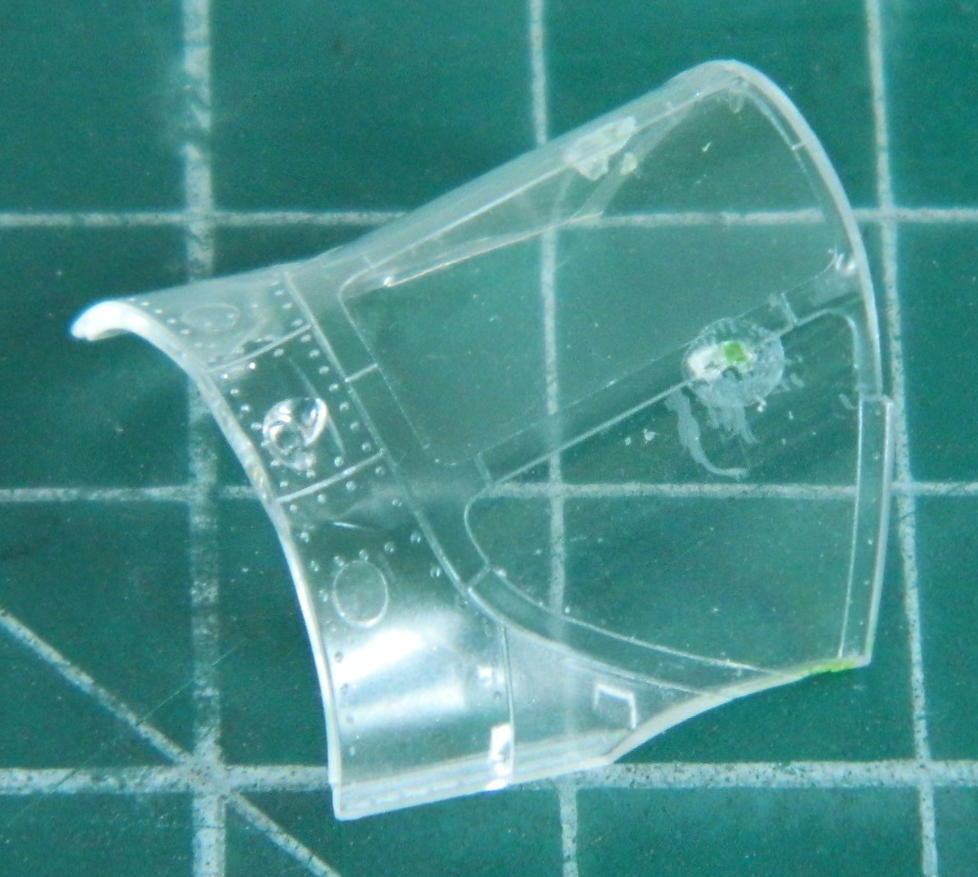
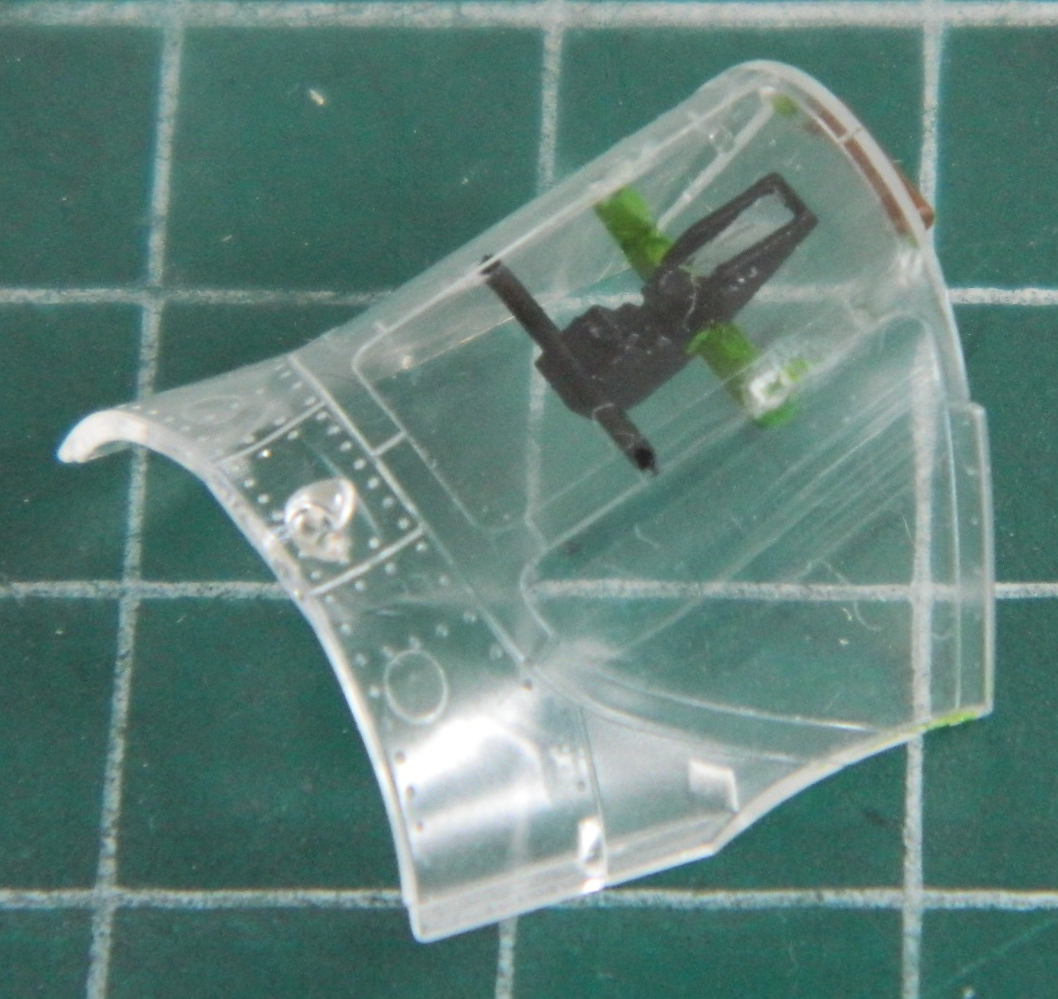
The gunsight was painted and then I tried to glue it to the inside of the windscreen and here’s where things took an unfortunate (or, more accurately, a distracted) turn. I’ve gotten pretty good at getting a very small amount of styrene cement on the applicator brush…if I’m paying attention. Somewhere between dipping the brush into the glue and wiping most of it off on the neck of the bottle I was distracted. My brain, however, lovely little lump of jelly that that thing is, told me once I’d turned my attention back to the task at hand…wiping most of the glue off…that I’d already done that. At the instant the brush touched the parts I could see that I had not wiped most of the glue off and it flowed onto the clear part:
I was indescribably thrilled. (Sarcasm. One of the many services I offer.)
Could I fix that? Yeah…probably. But I was so upset at ANOTHER case of brain fade that I got emotional. Emotions are wonderful things when a person needs to feel something, they are not wonderful things when a person needs to solve a problem. Being emotional, I didn’t really solve the problem. Instead, I went online and purchased another kit. This time it was Tamiya’s P-38H kit. No, that’s not the F/G kit I’m building. But it was much less expensive than the F/G kits available and the windscreen of the H variant was identical to the F/G windscreen. About a week later the kit arrived.
I should have realized when it arrived in a white box without the full-box graphics production kits come in that Something was different. I cut the wrapping, opened the box, and realized that this kit was a limited run kit (complete with the card from the CEO). Well, intercourse and excrement. I didn’t want a limited run kit! I wanted a spare parts kit. Now I felt (that whole emotion thing, y’know) lousy that I’d taken a limited run kit and ruined it for some collector somewhere by opening the box. So, rather than trash an entire kit for just one part, I decided (rational mind, this time) that what I should have done from the outset was to pop the gunsight off the windscreen and sand/polish the glue over-spill away. So I bloody did:

[Sidebar, obviously: Now that I’ve successfully fixed the glue spill, I have an entire P-38H kit in the stash. The H model was a stopgap model between the G and J models and wasn’t produced in very large numbers. It looks like a G model but inside it’s more of a J model, including the uprated engines. However, the uprated engines couldn’t use the additional power because the old style intercoolers inside the wings’ leading edges couldn’t keep up with the additional heat and had a disconcerting tendency to explode when taxed too far. That meant that the pilots had to be CAREFUL not to over-boost the engines if they didn’t want to swim or walk back to base. So all of that means that I’m not especially interested in building a P-38H at this time.]
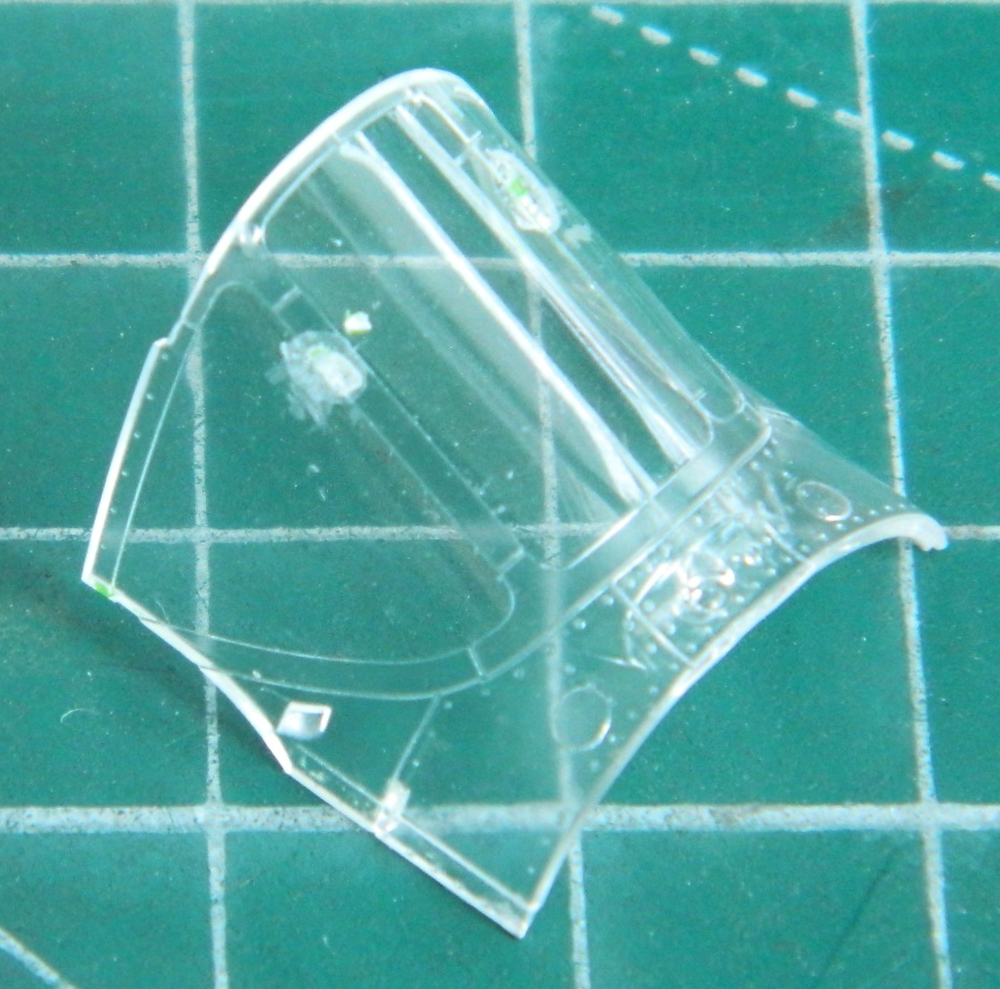
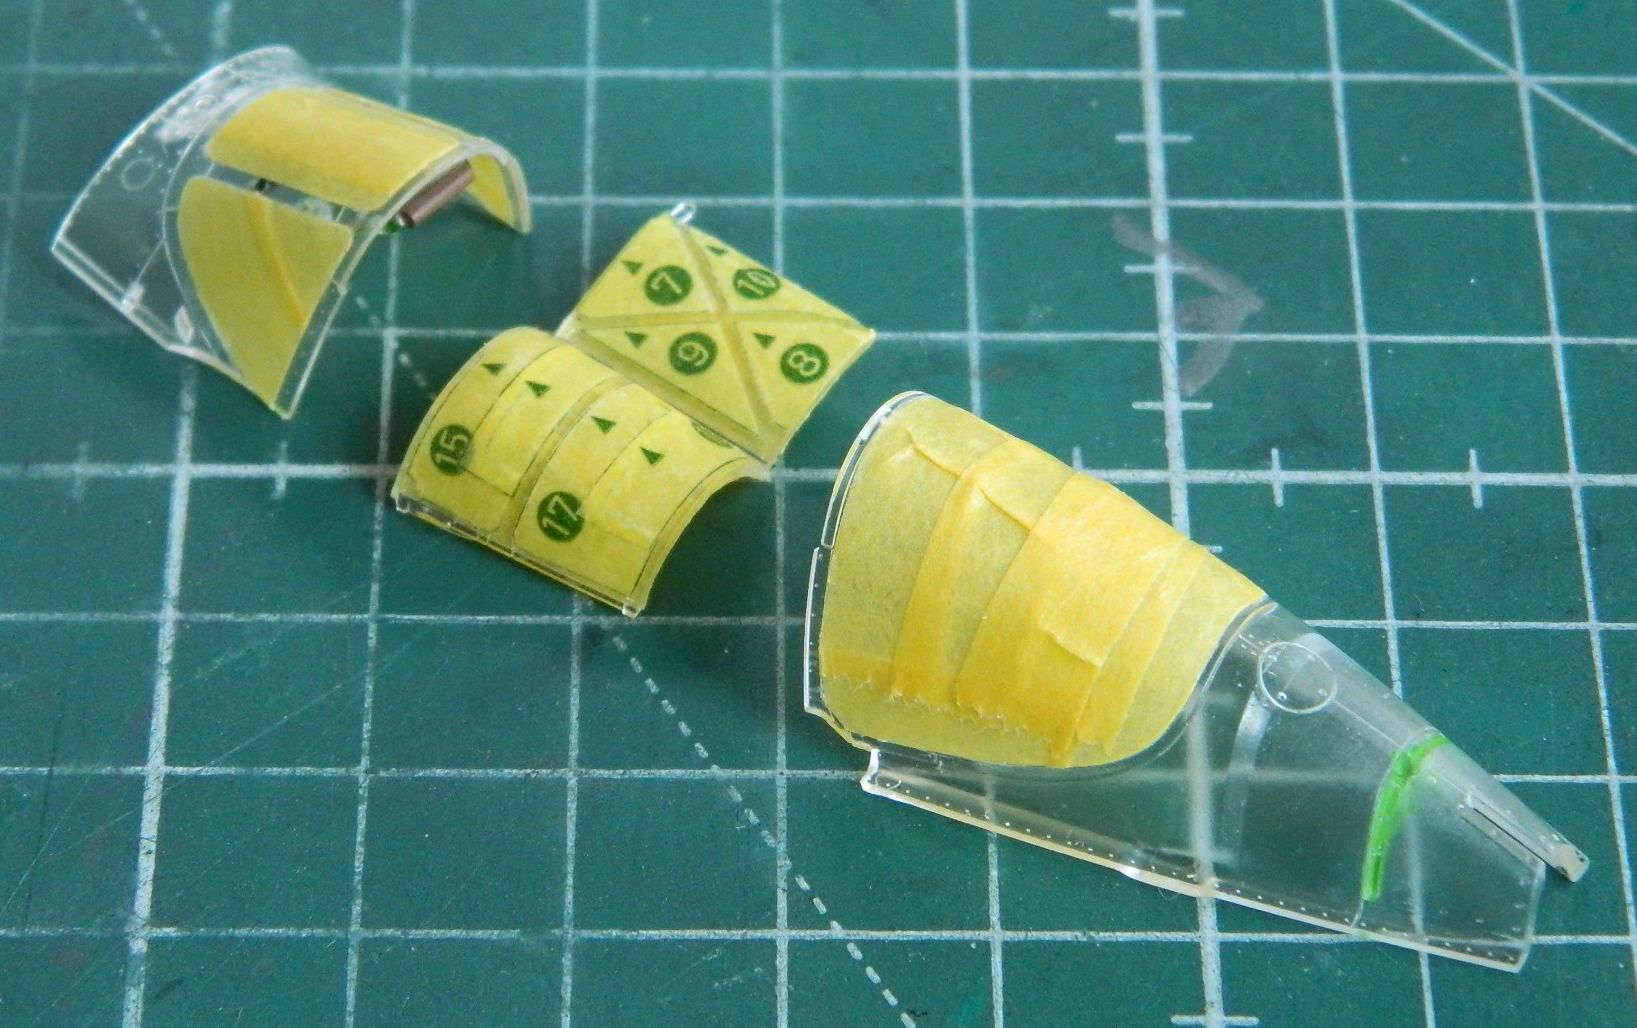
With the windscreen repaired, I masked off the canopy parts and set them aside for a bit:
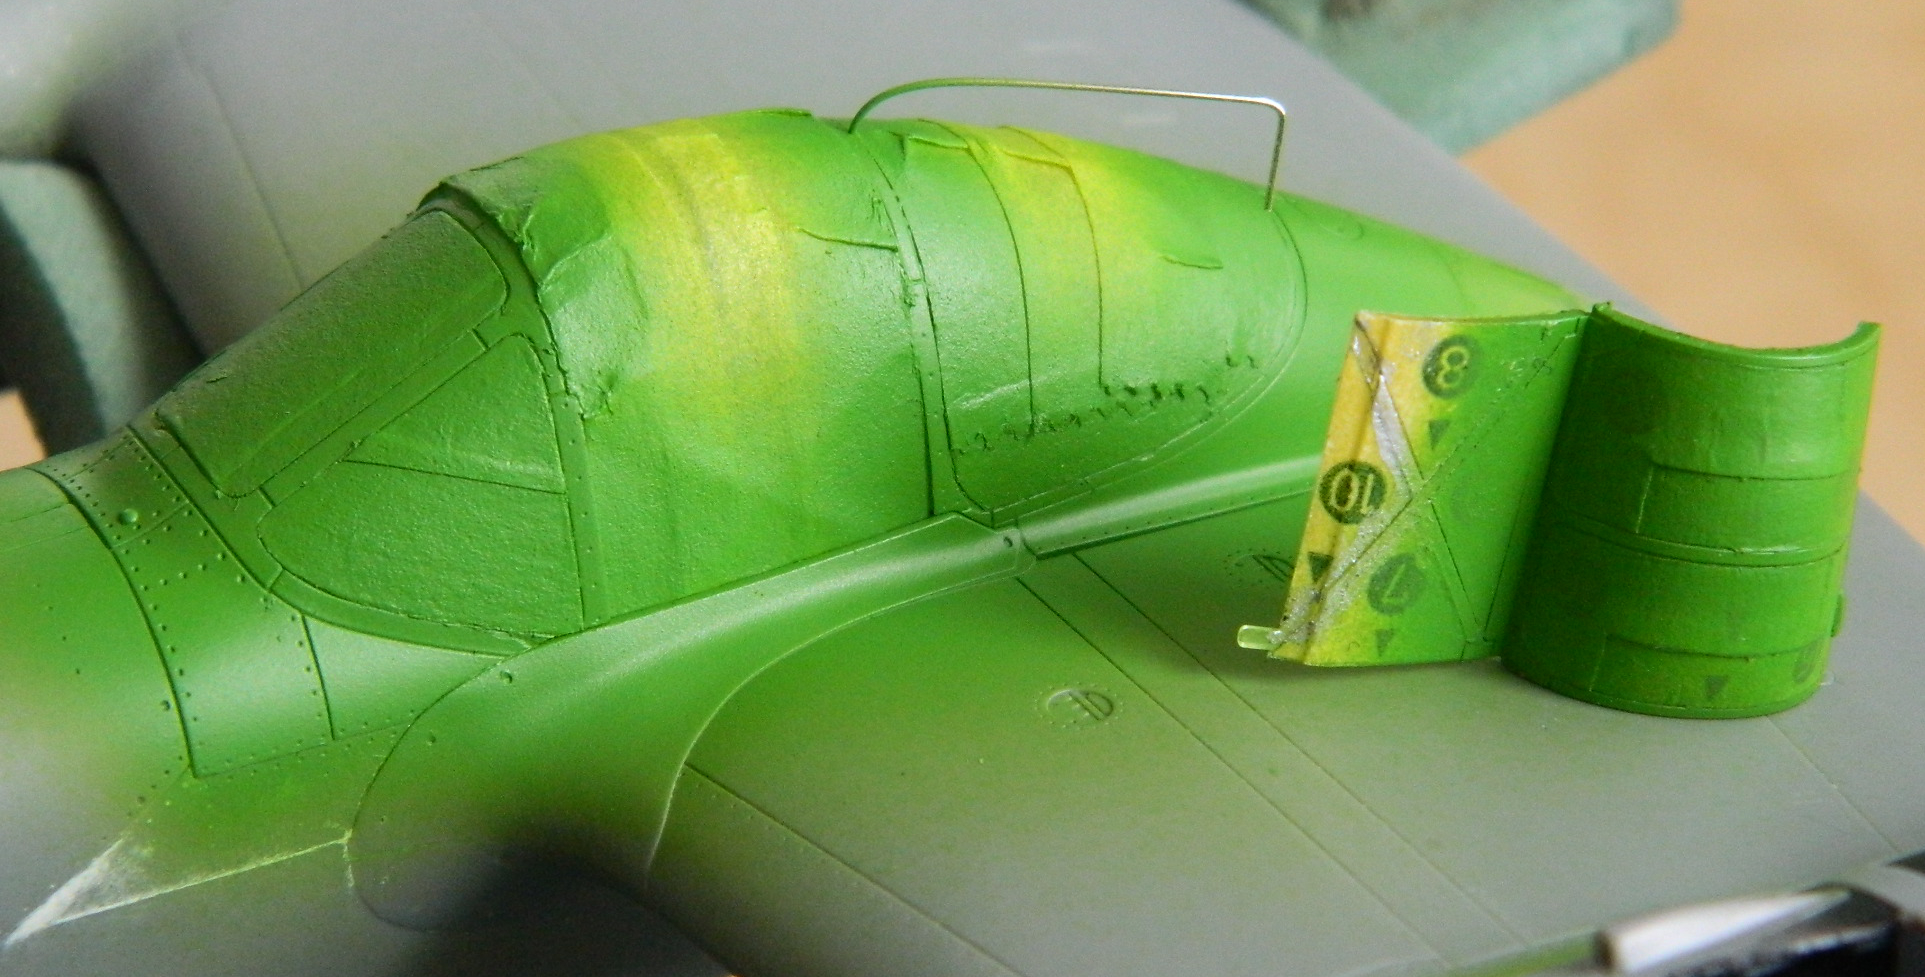
With the paint now dry on the props, the faces of the blades were clear coated and the decals applied. I used Walther’s Solvaset to get the text near the hubs to wrap snugly around the props, then came back the next day to shoot the blades with Tamiya’s Semi-Gloss clear to maintain the satin finish I wanted:
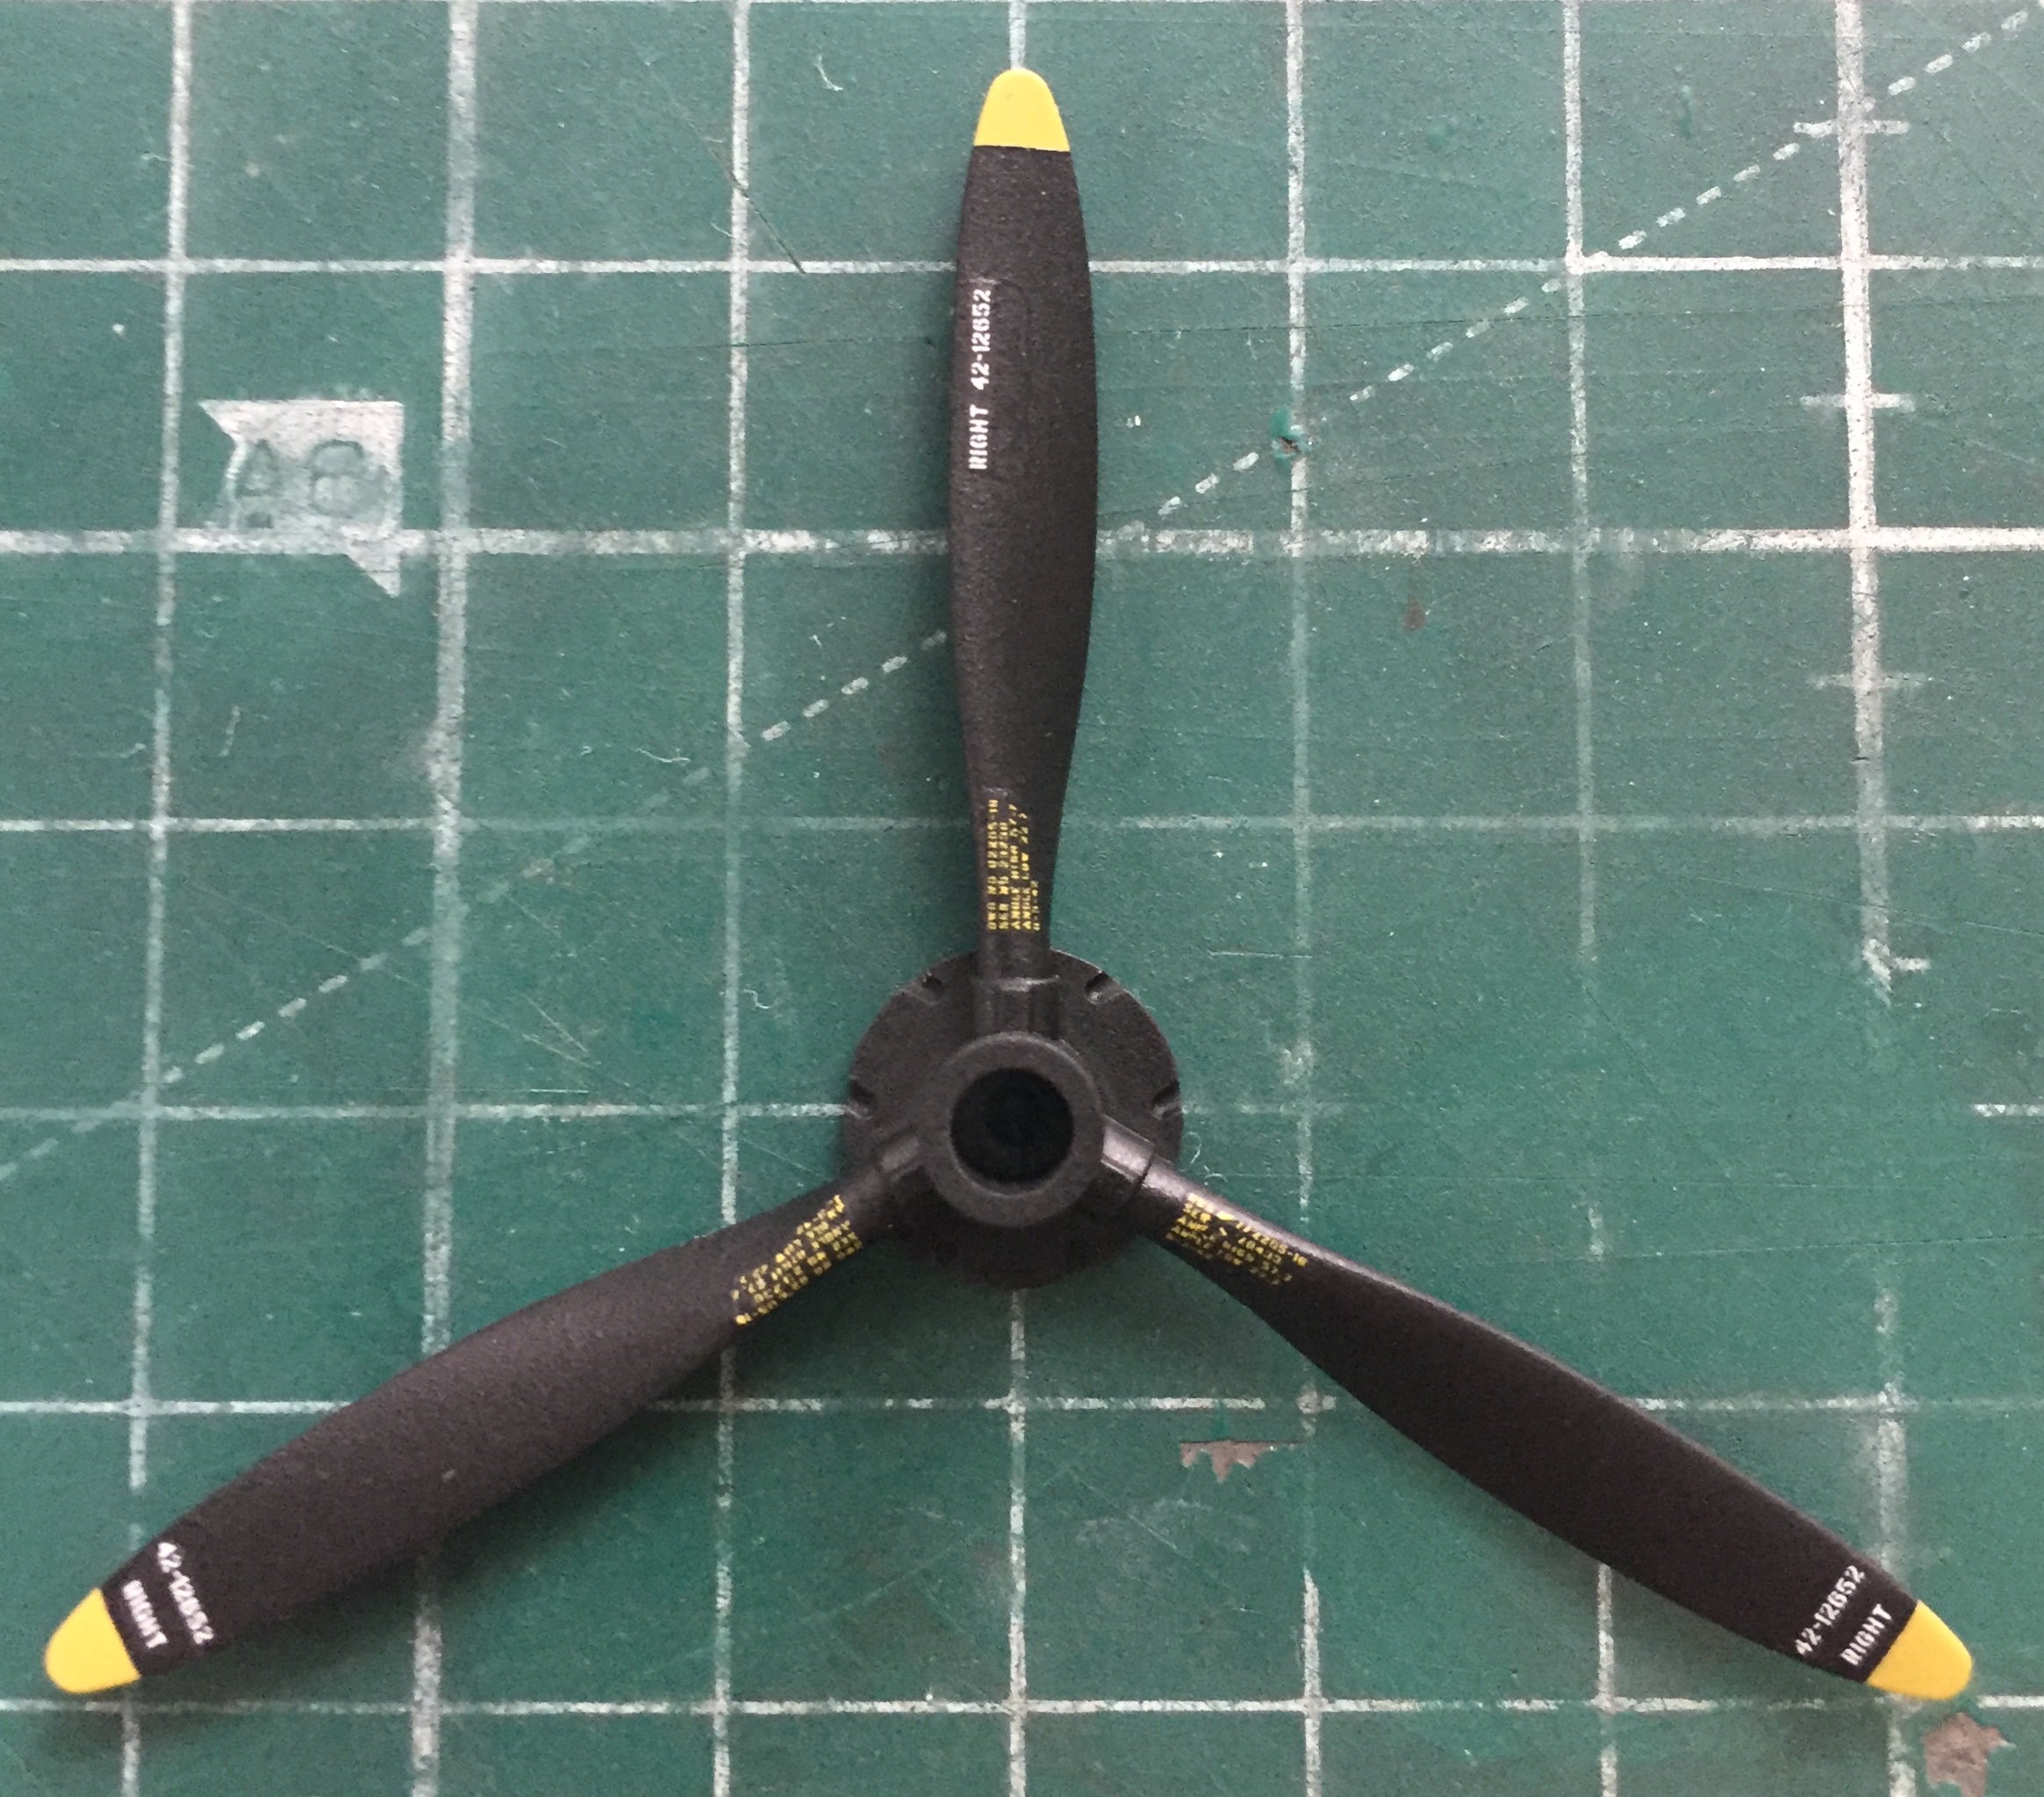
While the semi-gloss was setting, I used the mix that Tamiya suggested on the spinners of five parts Tamiya XF-14 Sky Blue with one part Tamiya XF-1 Flat white. When the paint dried, I assembled the spinners and props, then used a silver pencil to replicate chipping of the spinner parts:


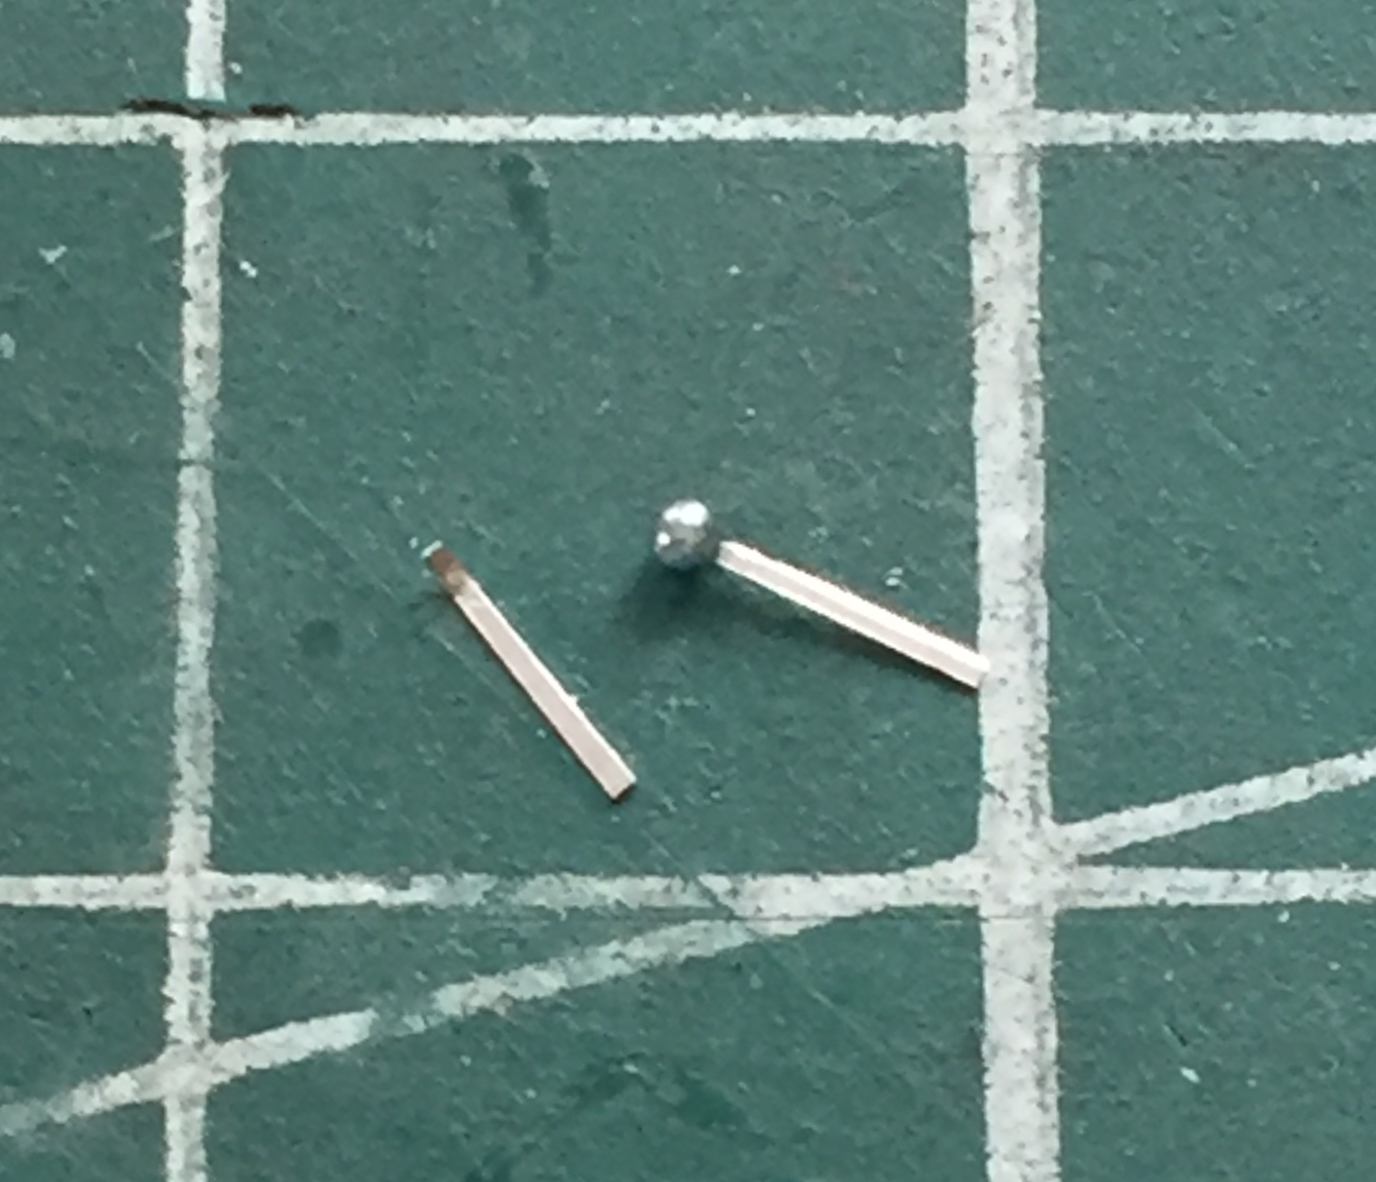
Back at the beginning of this build, I’d cut off the kit’s propeller control levers because they were not only out of scale but were also incorrect. That meant I had to come up with something in scale and less incorrect. Unsurprisingly, nothing that I tried to correct those two deficiencies pleased me very much (or at all). Once again, while looking for something completely unrelated to modeling (and my present problem of just how to make in-scale propeller controls), I encountered glass beads on a crafting website. I mean BLOODY SMALL glass beads…so I ordered the minimum amount I could (or, in other words, a METRIC BUTT-LOAD of ’em). And, boys and girls, these things are really small. As it turns out, they’re also of varied sizes, which meant I picked through them to get the ones that were sized correctly:

For the levers I used the aluminum from a disposable baking pan. To have enough surface area to glue the beads onto, I put about a forty-five degree bend on one end, then dipped that bend into a small puddle of superglue, then touched the bent part to the beads:
I was pleasantly surprised at how smoothly that went, so I figured getting seven levers into the cockpit would be equally smooth. If your idea of “equally smooth” encompasses FIVE HOURS OF TEDIUM trying to get these things into position then it was indeed, equally smooth.
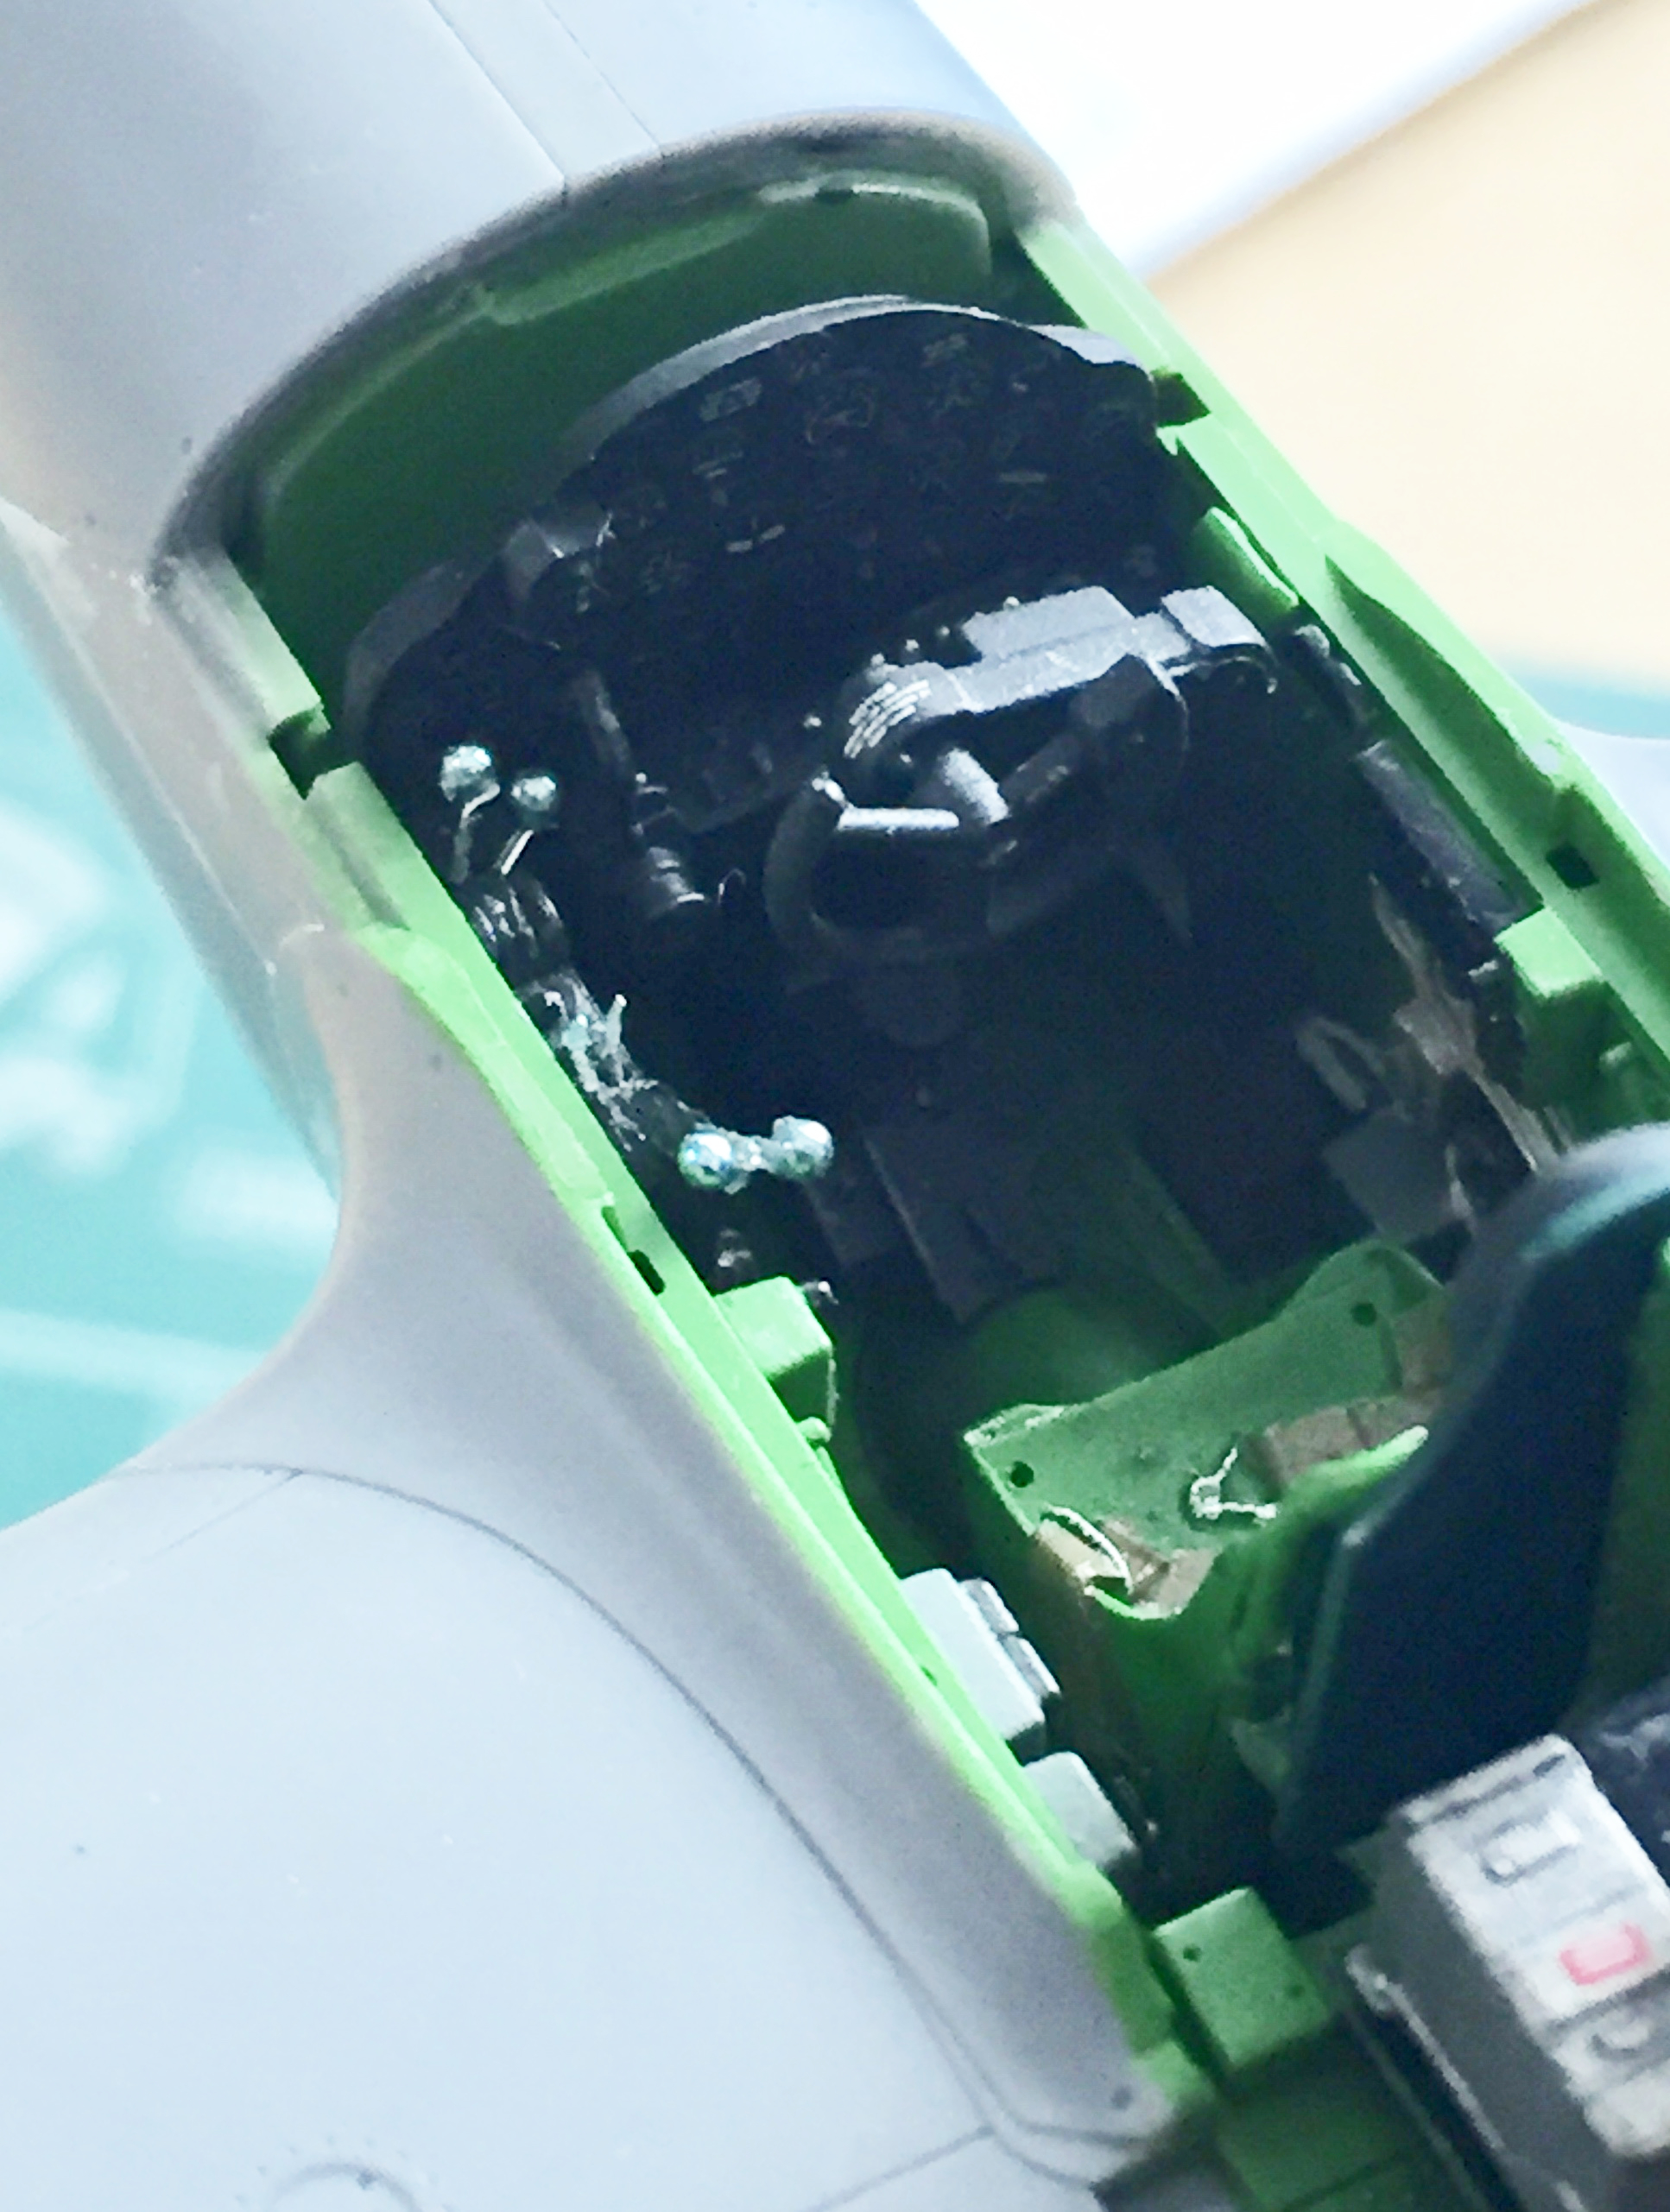
But now that they were in place, I could glue the canopy parts that could be glued at this point into place(s). As the P-38s left the factory, they had a glare shield installed. It was canvas and came back just short of the yoke, which made it difficult to see the gauges without having to jack the head around to see underneath the shield. In the field, these canvas shields were removed, so I didn’t add the part that replicated that canvas shield:
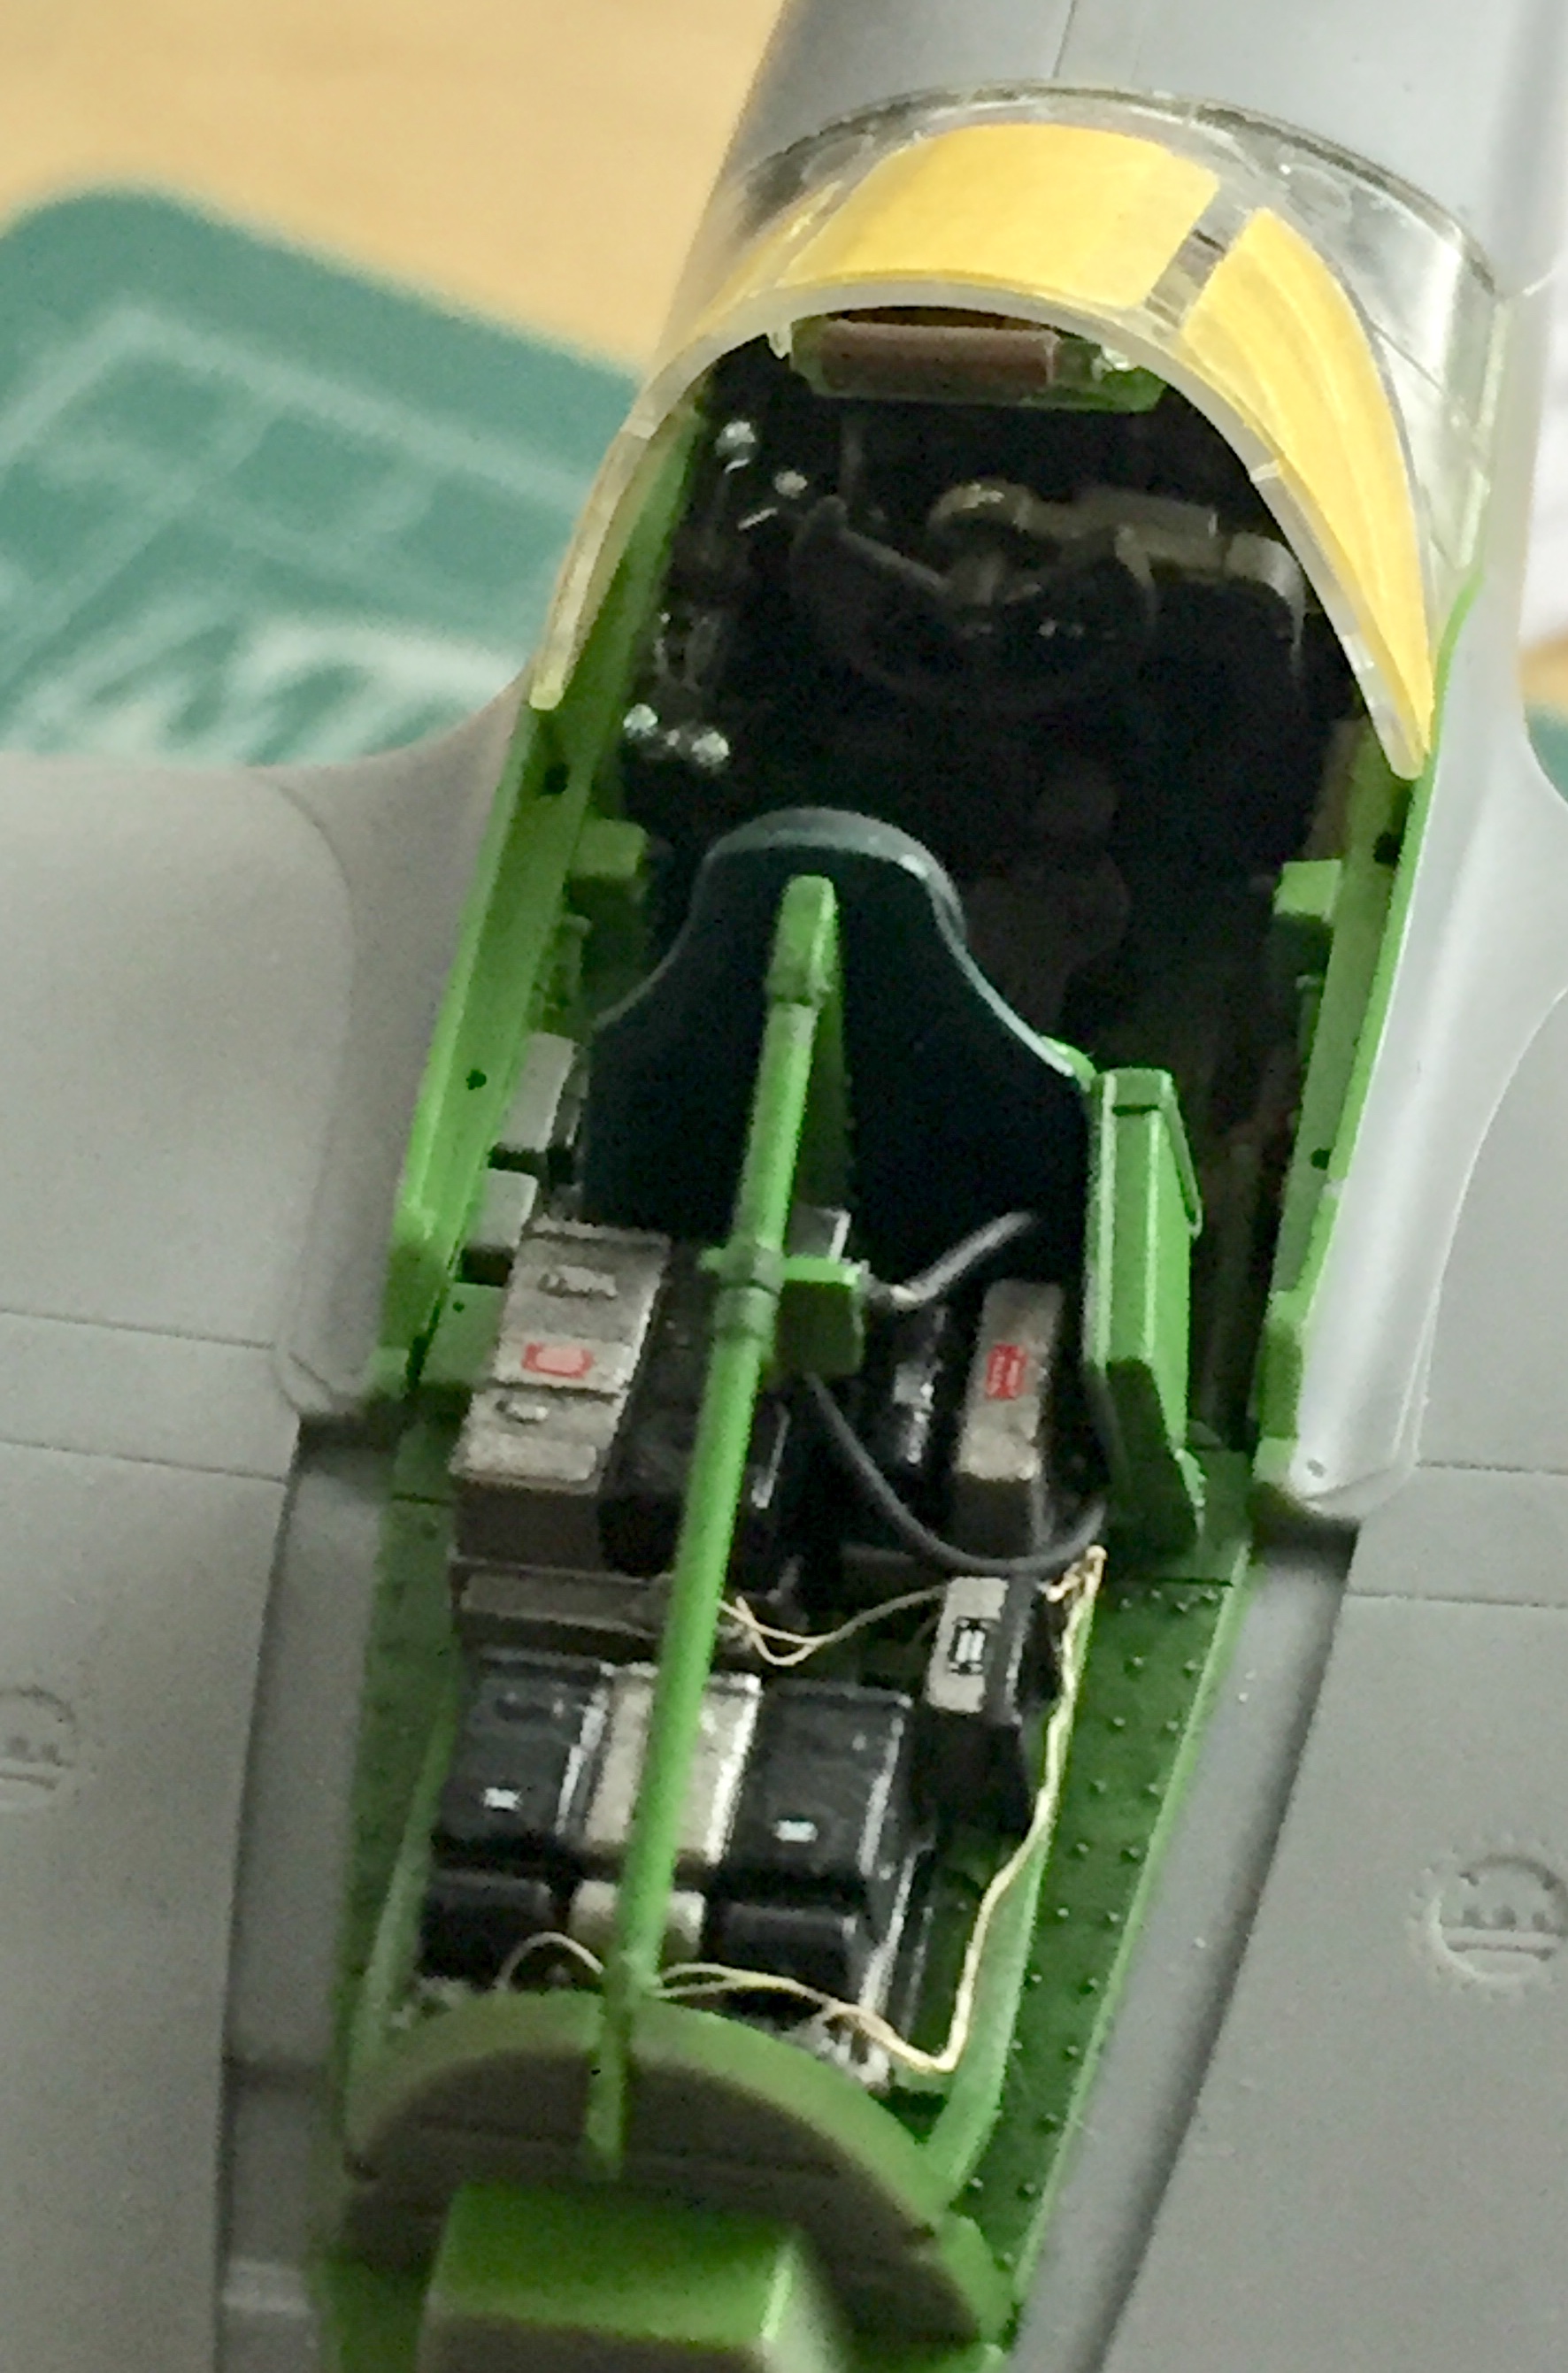
Now that the control levers are in place, I could glue the front and rear sections of the canopy in place:
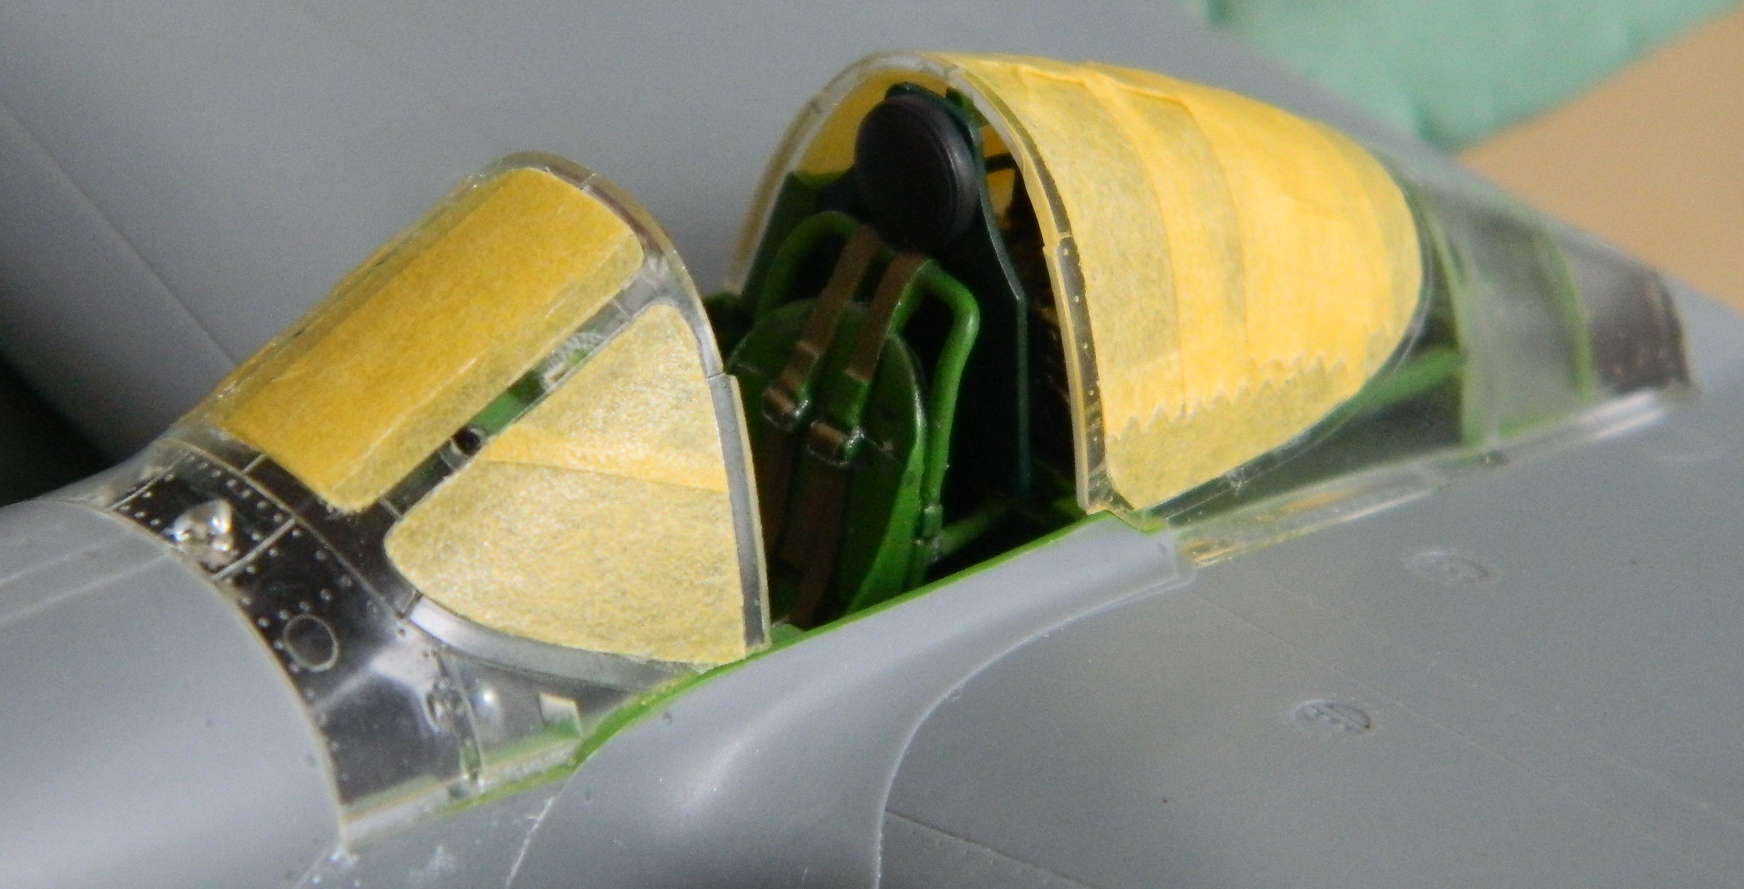
With those in place, I dry-fitted the canopy sections I’ll be using to see how they fit (wonderfully):
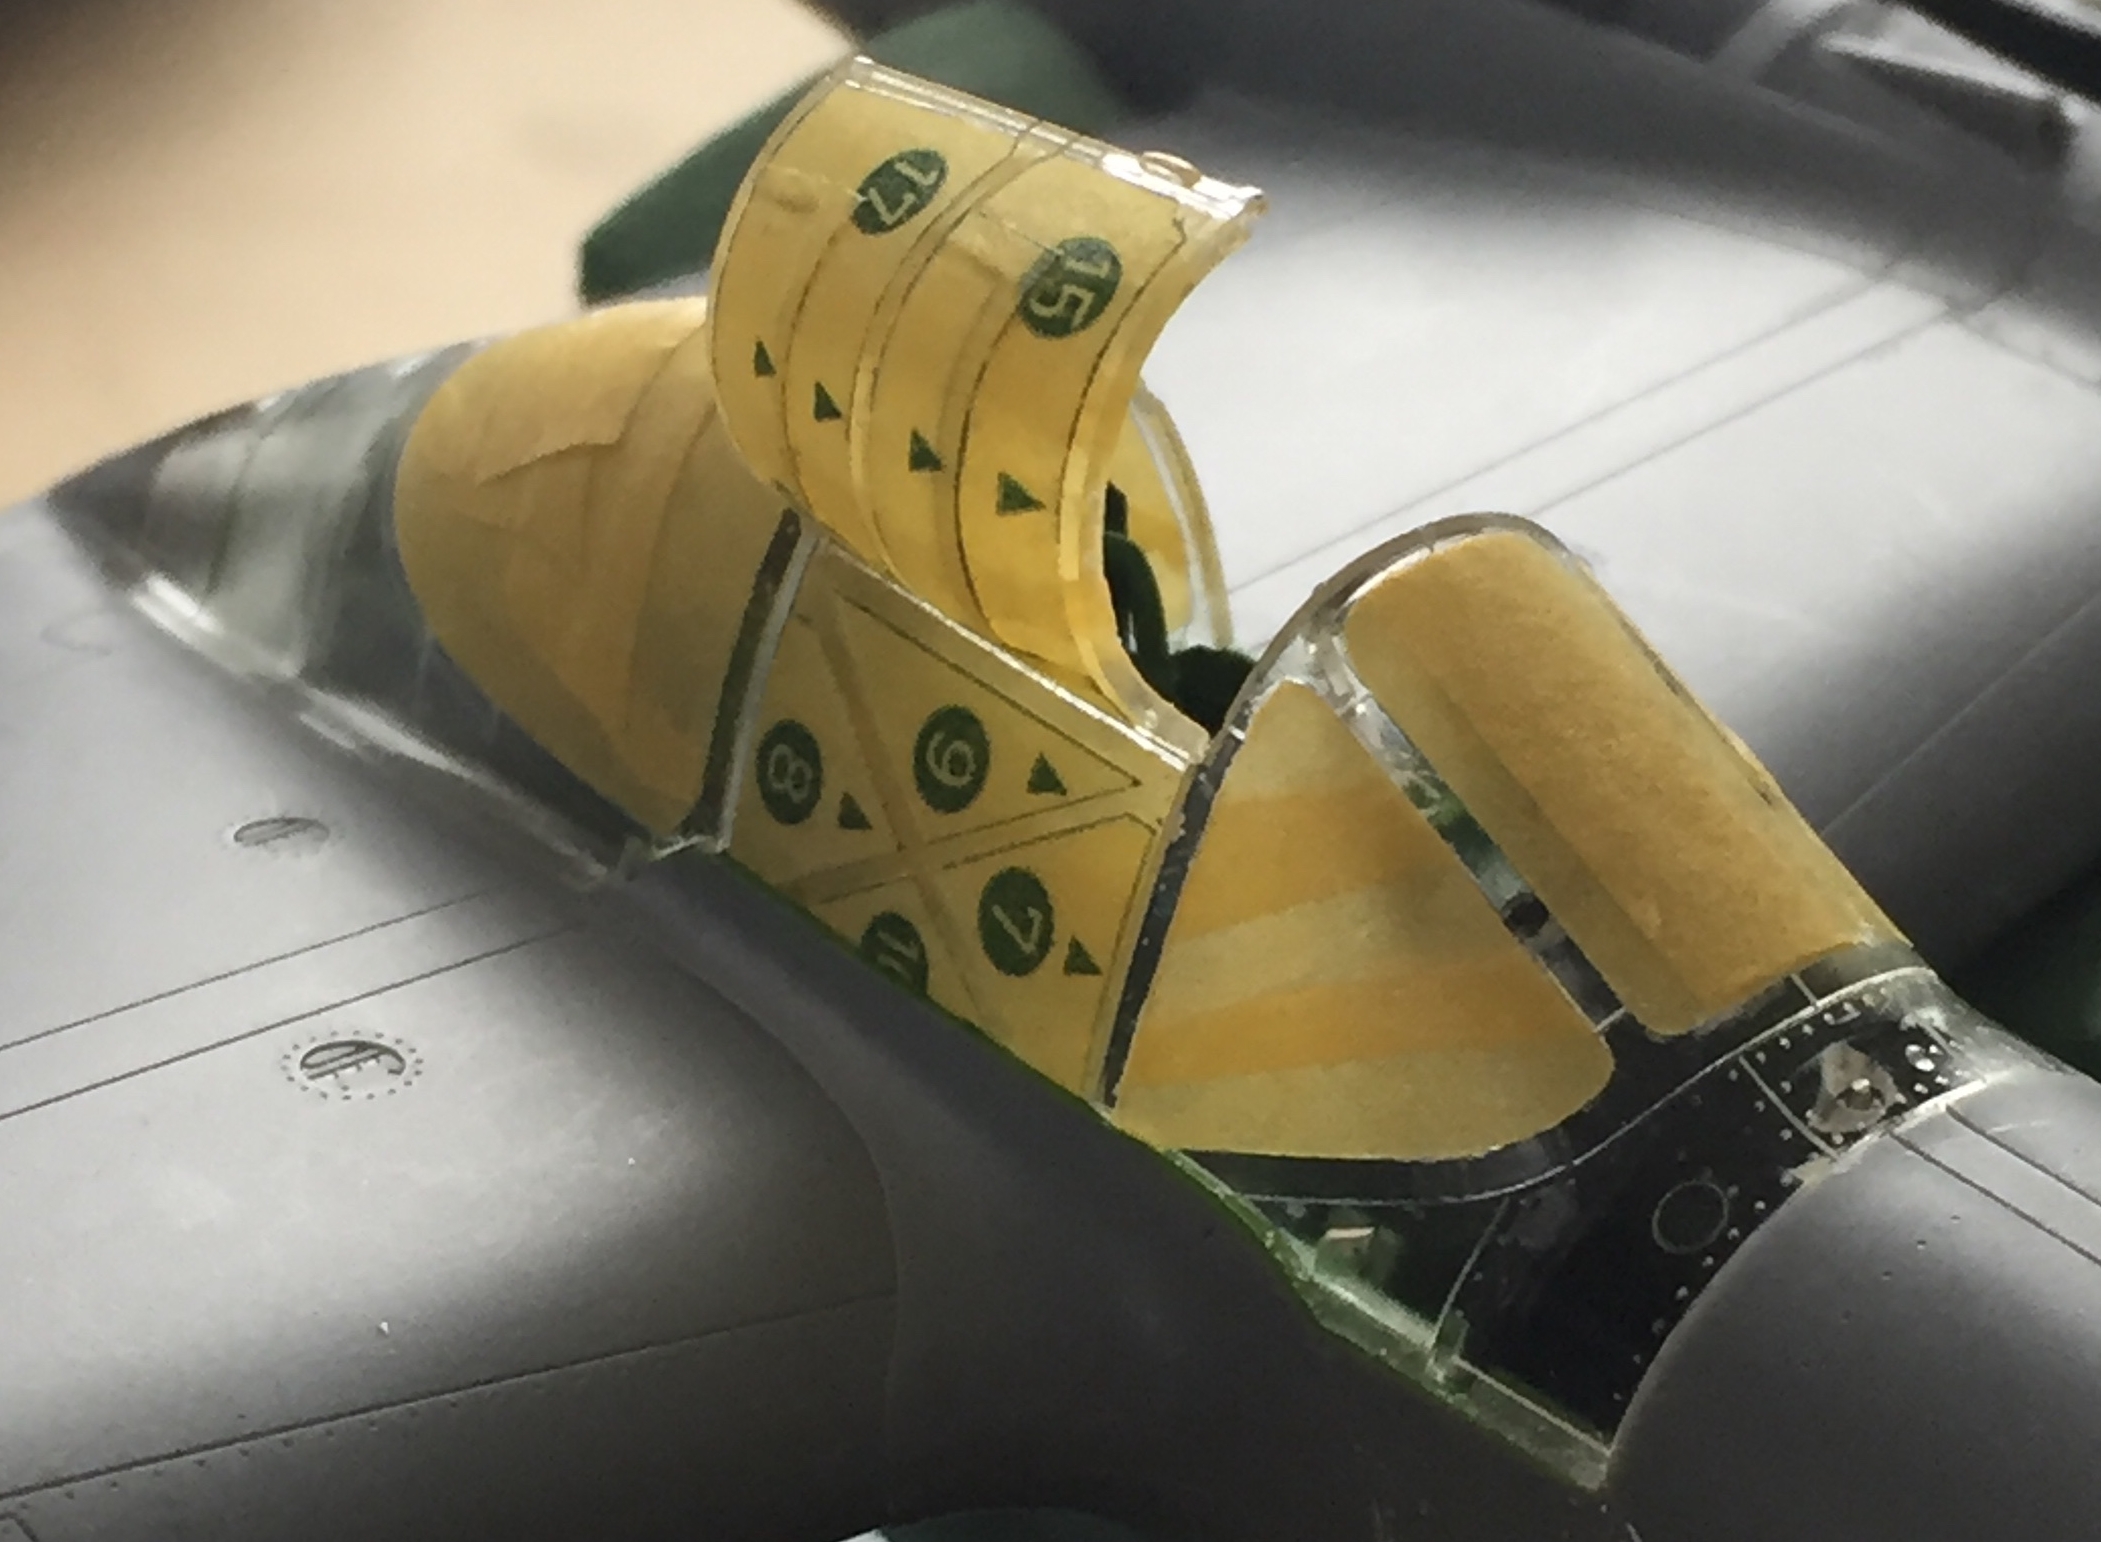
Then I took the canopy section I won’t be using, masked it off in case I want to use it for something else later on, and used white glue to hold it in place to mask the cockpit:

Since the parts are clear, and the inside of them were painted cockpit green, in order for that green to be visible, the canopy parts were painted cockpit green (the wire sticking out of the top of the rear canopy section is where the antenna mount goes and that wire is there to keep paint out so that it’s one less thing I have to clean later):
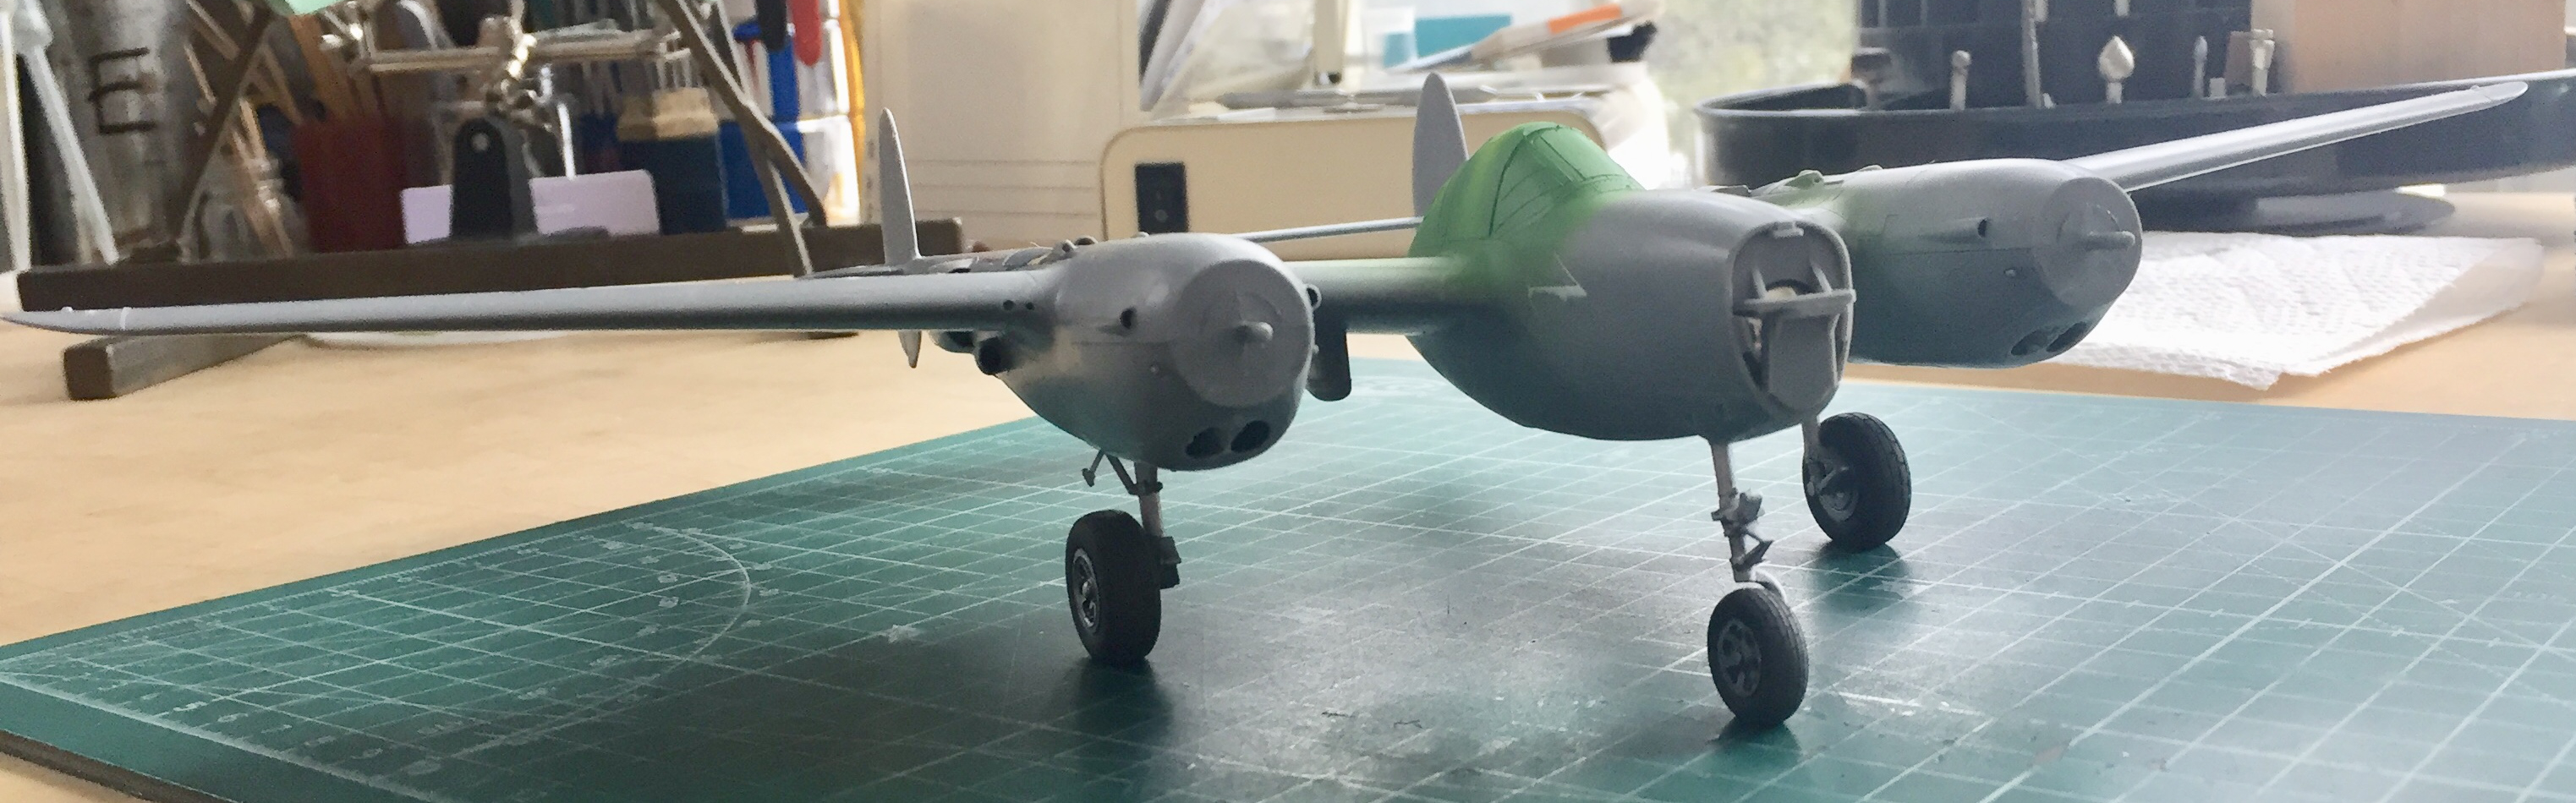
With that section out of the way, it was time to turn my attention to the wheel/tire assemblies. As with the pilot’s seat, the parts are from UltraCast and they’re excellent; zero bubbles and the tire stems. The bottoms are slightly flattened and painting was straight forward. I used Tamiya XF-57 Buff on the tread face to replicate mud/dirt stuck deep in the treads. Then I used Tamiya XF-85 Rubber Black for the tires (though to my eye, Tamiya XF-69 NATO Black is also pretty close) and Tamiya XF-16 Flat Aluminum on the wheels. I finished off the tires with a misted-on pass of Tamiya XF-1 Flat White over the tread face to replicate wear:

Once the tires were painted and mostly cured, it was time to mount them onto the landing gear struts. Since the tires are flat on the bottom, I needed to dry-fit the struts and slip the tires onto them so that I could align the flat spots on the bottom. Here’s the bird on her feet for the first time:
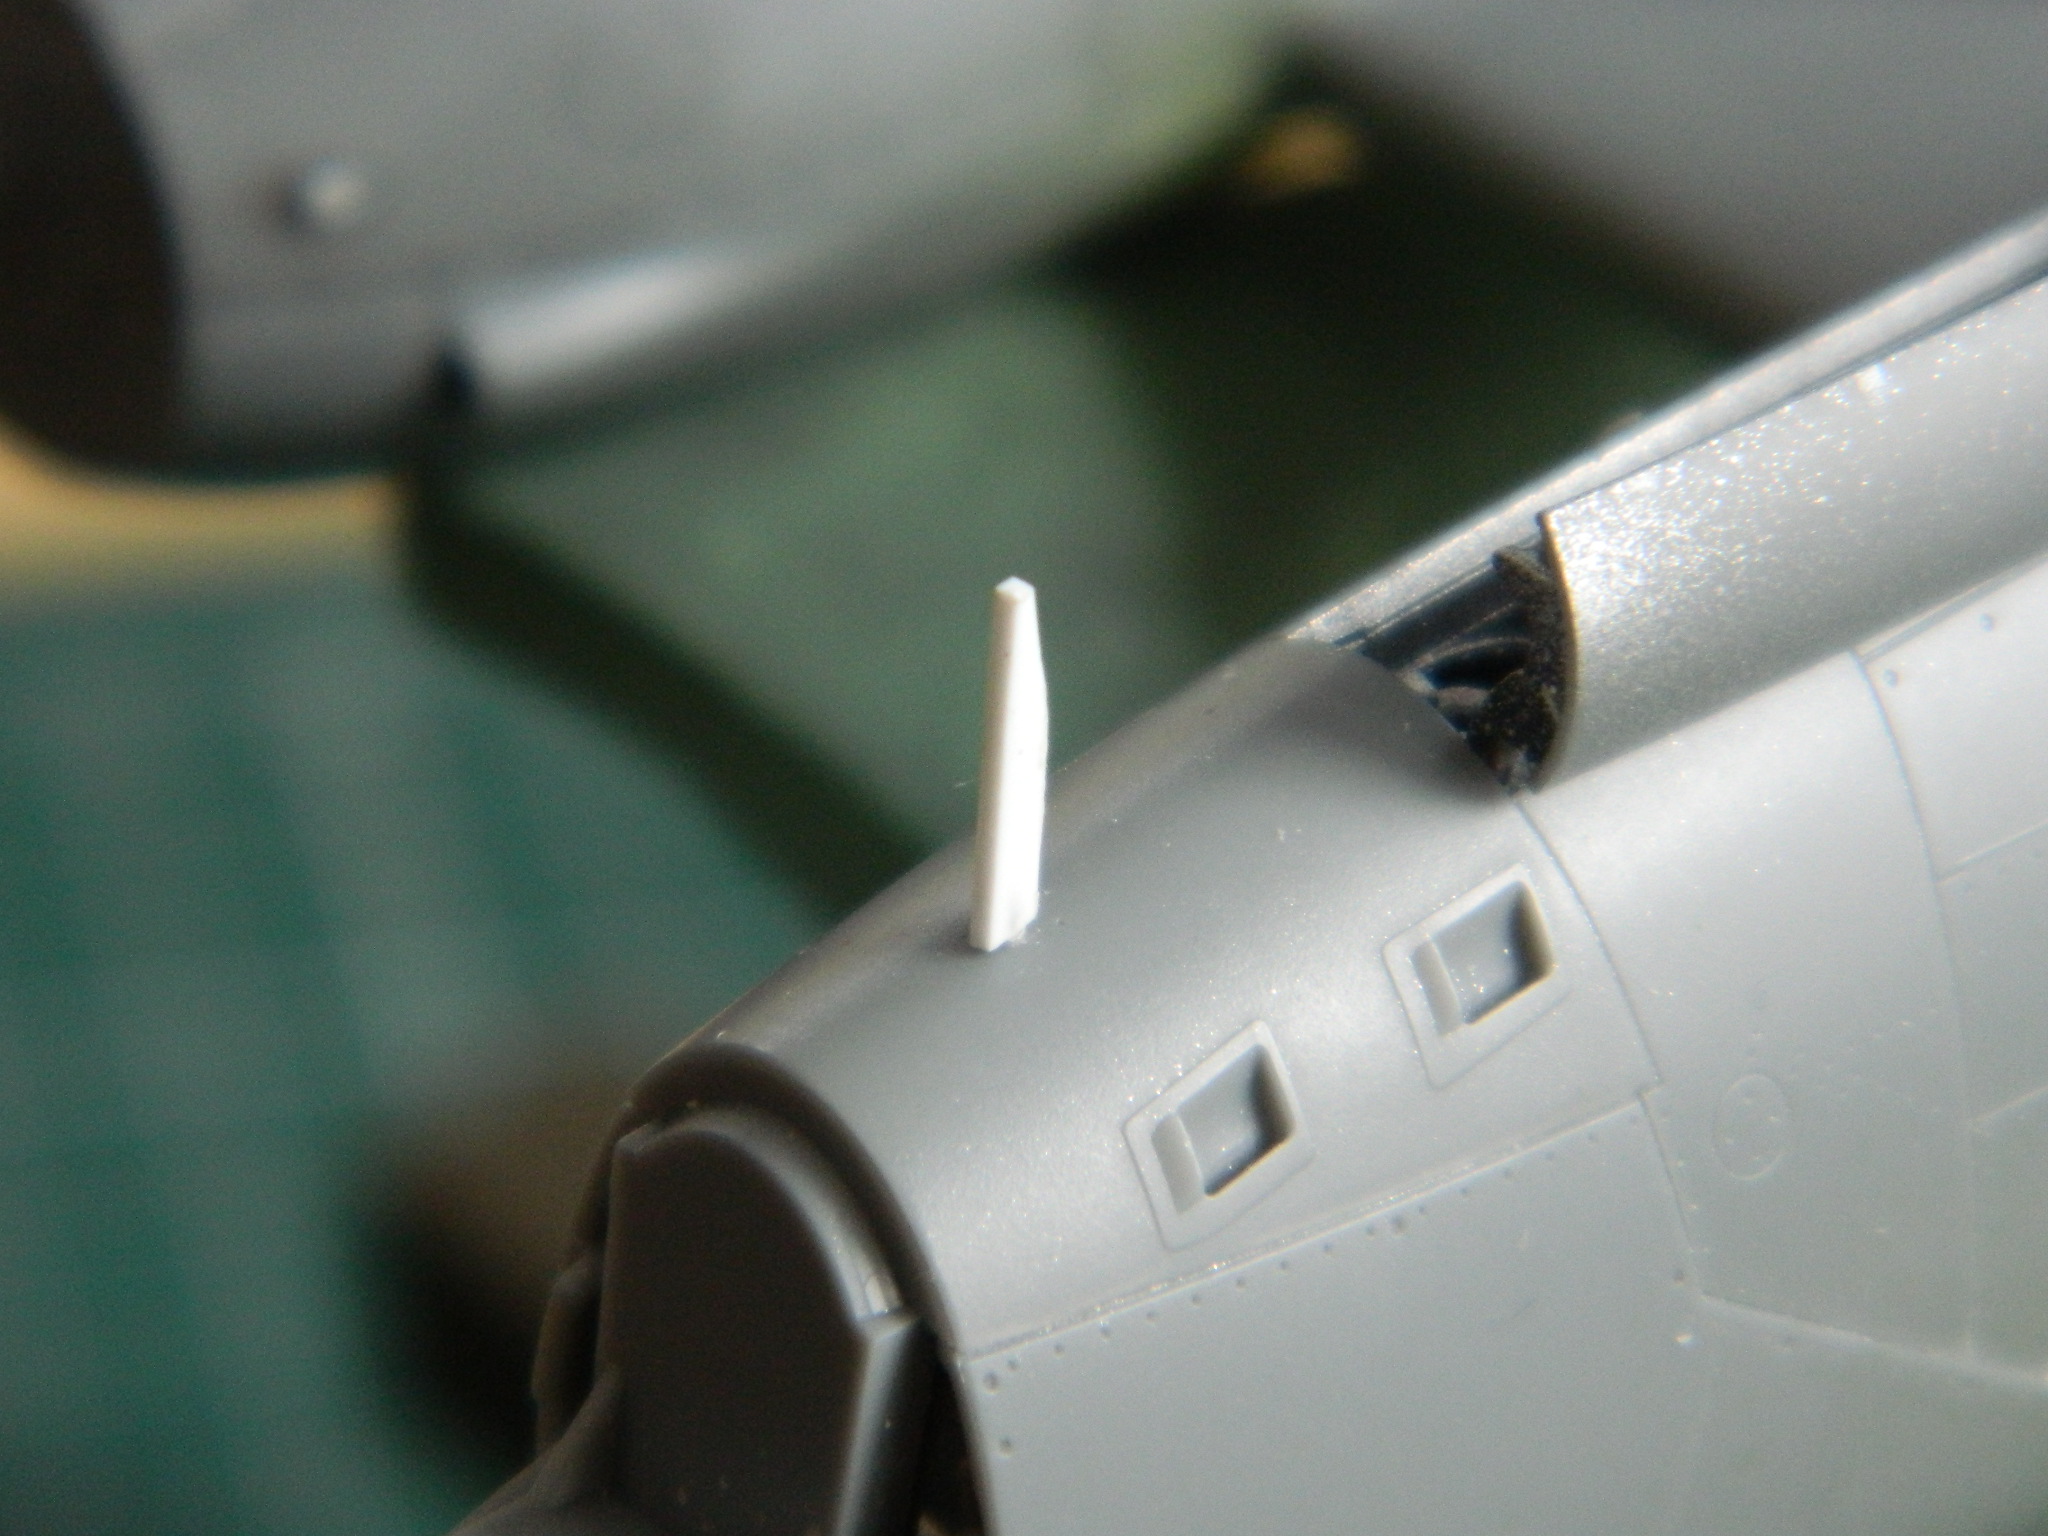
At this point what’s driving the build is what needs to be added so that painting can begin. It was at this point that I noticed an odd omission from Tamiya. There is a prominent radio mast under the nose where the pitot tube used to be (it was moved to the underside of the left wing). Knowing my penchant (nay, avocation!) for knocking parts like this off (OFTEN AND FREQUENTLY AND A LOT), this time after making the part, I added a pin and drilled a hole so that the thing could be removed without going through the breaking part. And so that the wire would fit snugly into the hole, I flattened the end of it (this was done by gluing the pin into the mast, a piece of .020″ (.508mm) scrap, and then using a drift pin on my jeweler’s anvil to flatten the copper wire and not the plastic part):


It was at this time that I masked off the gun barrels. What fun. No, the tape didn’t do it. Small, curved surfaces are like that. What I ended up using was the kit’s parts as mandrels and wrapped aluminum foil around them. Then I slid the tubes off, slipped them over the darkened brass barrels, and then glued the nose into place. Oddly, that part required a bit of putty to make the transition from nose to fuselage sides smooth. No, I forgot to take photos of it.
All P-38s from the first through the H models had the turbo intercoolers located inside the leading edges of the wings. What worked for a 1938 design, when the Allison V1710-C put out 1150 HP didn’t work so well for any of the later variants and particularly the H model with the V1710-89/91 engines that produced 1425 HP. Pilots of the H variant were restricted (by use of RPM and manifold pressure) to only using 1240 HP to keep the intercoolers from detonating. It wasn’t until the change to chin-mounted coolers, both oil and inter, that the P-38 could use all 1425 ponies. That said…
The intakes for the intercoolers in the leading edges of the wings had intake scoops (more like simple holes) at the outer wing root where it met the engine nacelles. There was an outlet scoop (more like vent) on top of the wings near the tips. The vents near the wingtips were squared at one end and rounded at the other. I have less than no idea why but somehow while changing from what the kit molded (a simple rectangle) to what was more accurate (one side rounded), I managed to cut them (nicely) in. The unfortunate part is that the rounded end should have been at the front of the vent, not at the rear of the vent which is where I cut them:
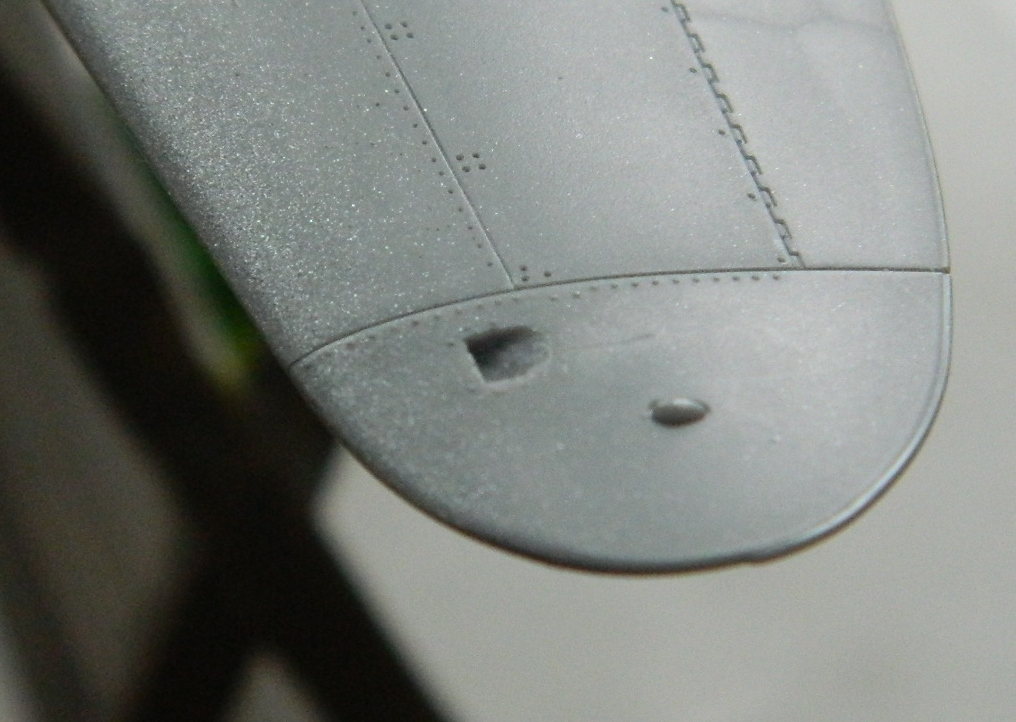
I’m somewhat ashamed to admit that I actually spent a couple of weeks thinking that nobody will notice that so I’m just going to leave it that way. I apologize and abase myself.
Moving on.
Seemed logical to plug the holes (that should have been vents) with with epoxy putty, so I did:


Then when I tried to carve out the curve on the correct side, both putty plugs popped out:

Sometimes a problem is more the result of how the problem is perceived than it is how the problem actually is. Okay, so the putty doesn’t work, well, square off the holes and stuff them with scrap styrene and carve them down and rework the curved depressions:

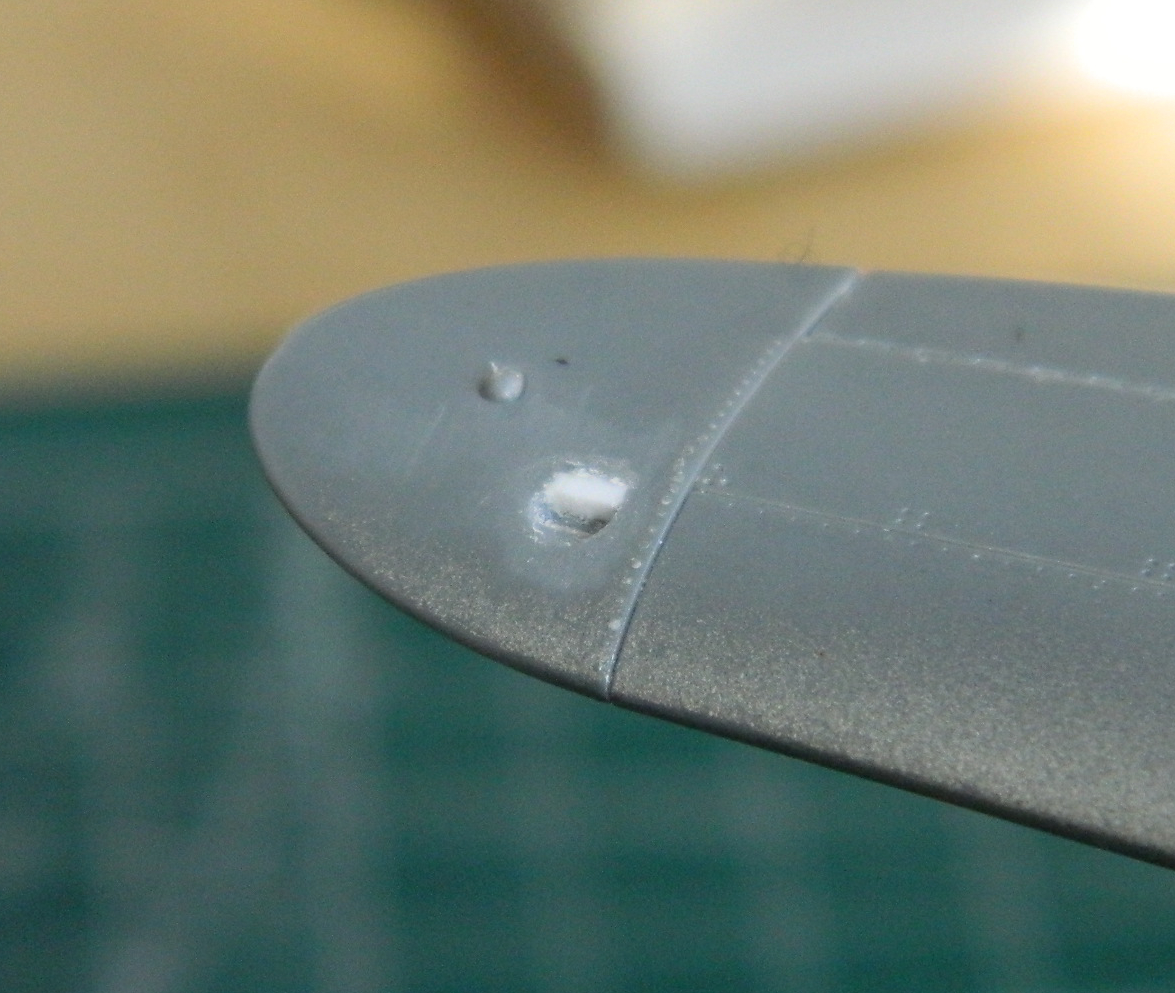
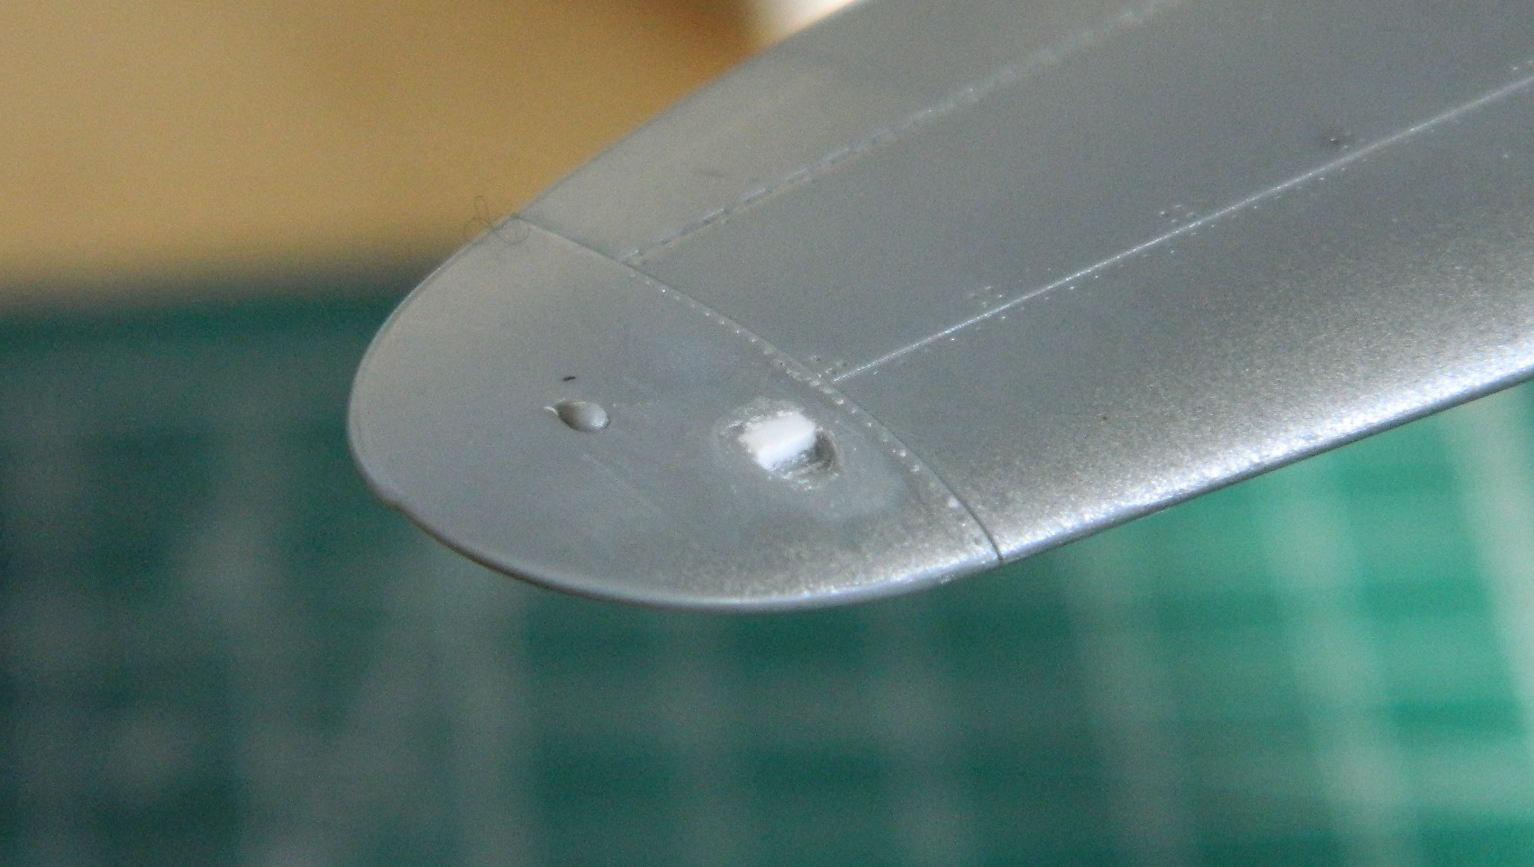
And now that I have the curved sections correctly aligned, I’m positive nobody will notice them.
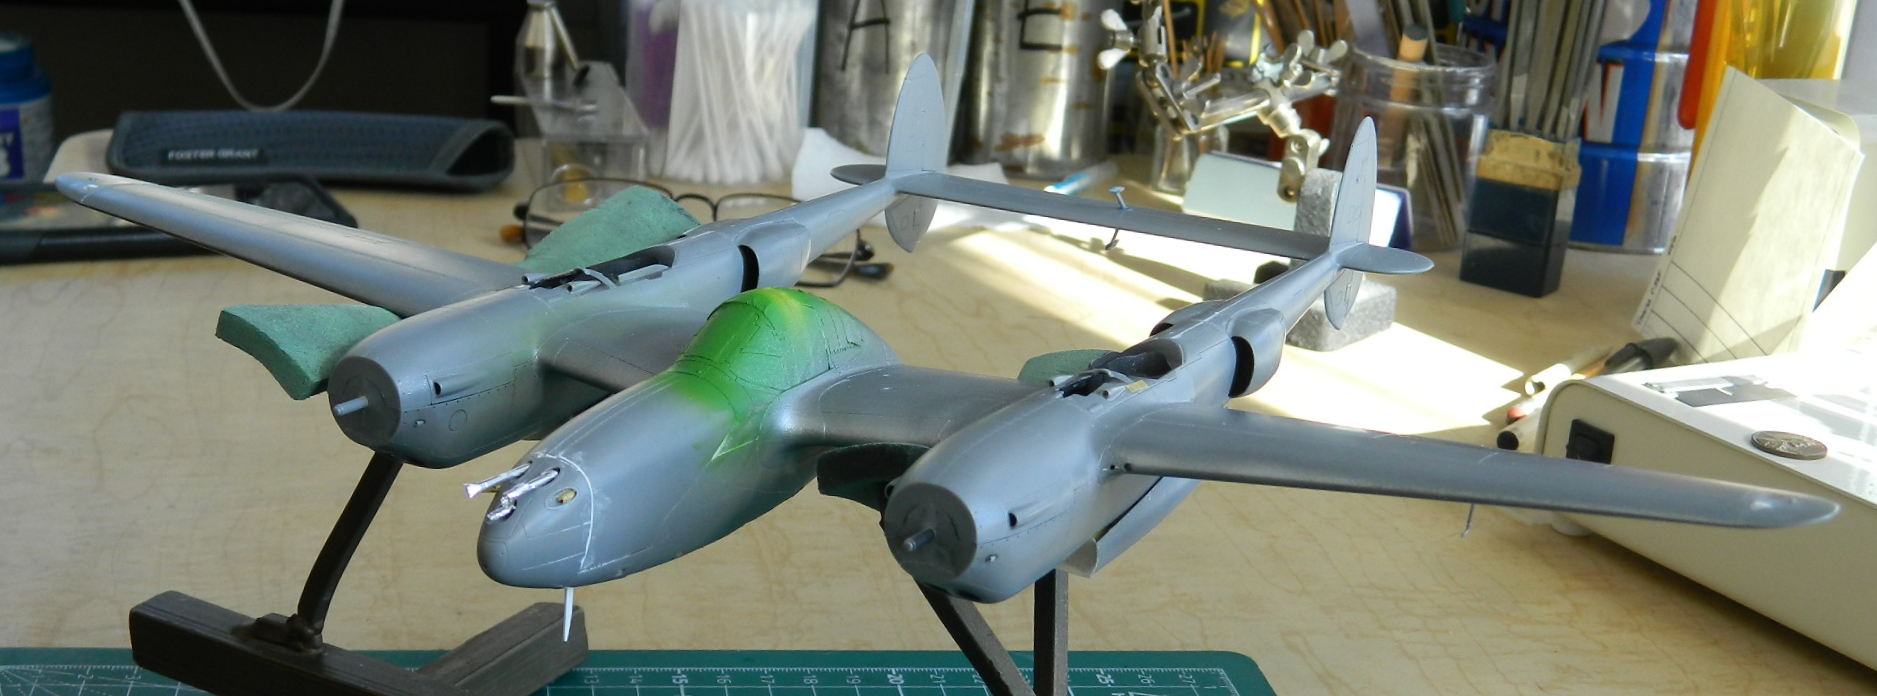
The last thing I needed to do before tossing paint on this thing is to make sure everything is masked underneath and that the small breakable bits are temporarily attached (white glue). Before I took care of those tasks, I used Humbrol’s #56 Aluminum enamel to put a coating along the leading edges of the wings, horizontal stabilizer, leading edges of the vertical stabilizers, and most especially on top of the wings by the cockpit pod where period photos show the paint being worn off down to the aluminum by walking on it:
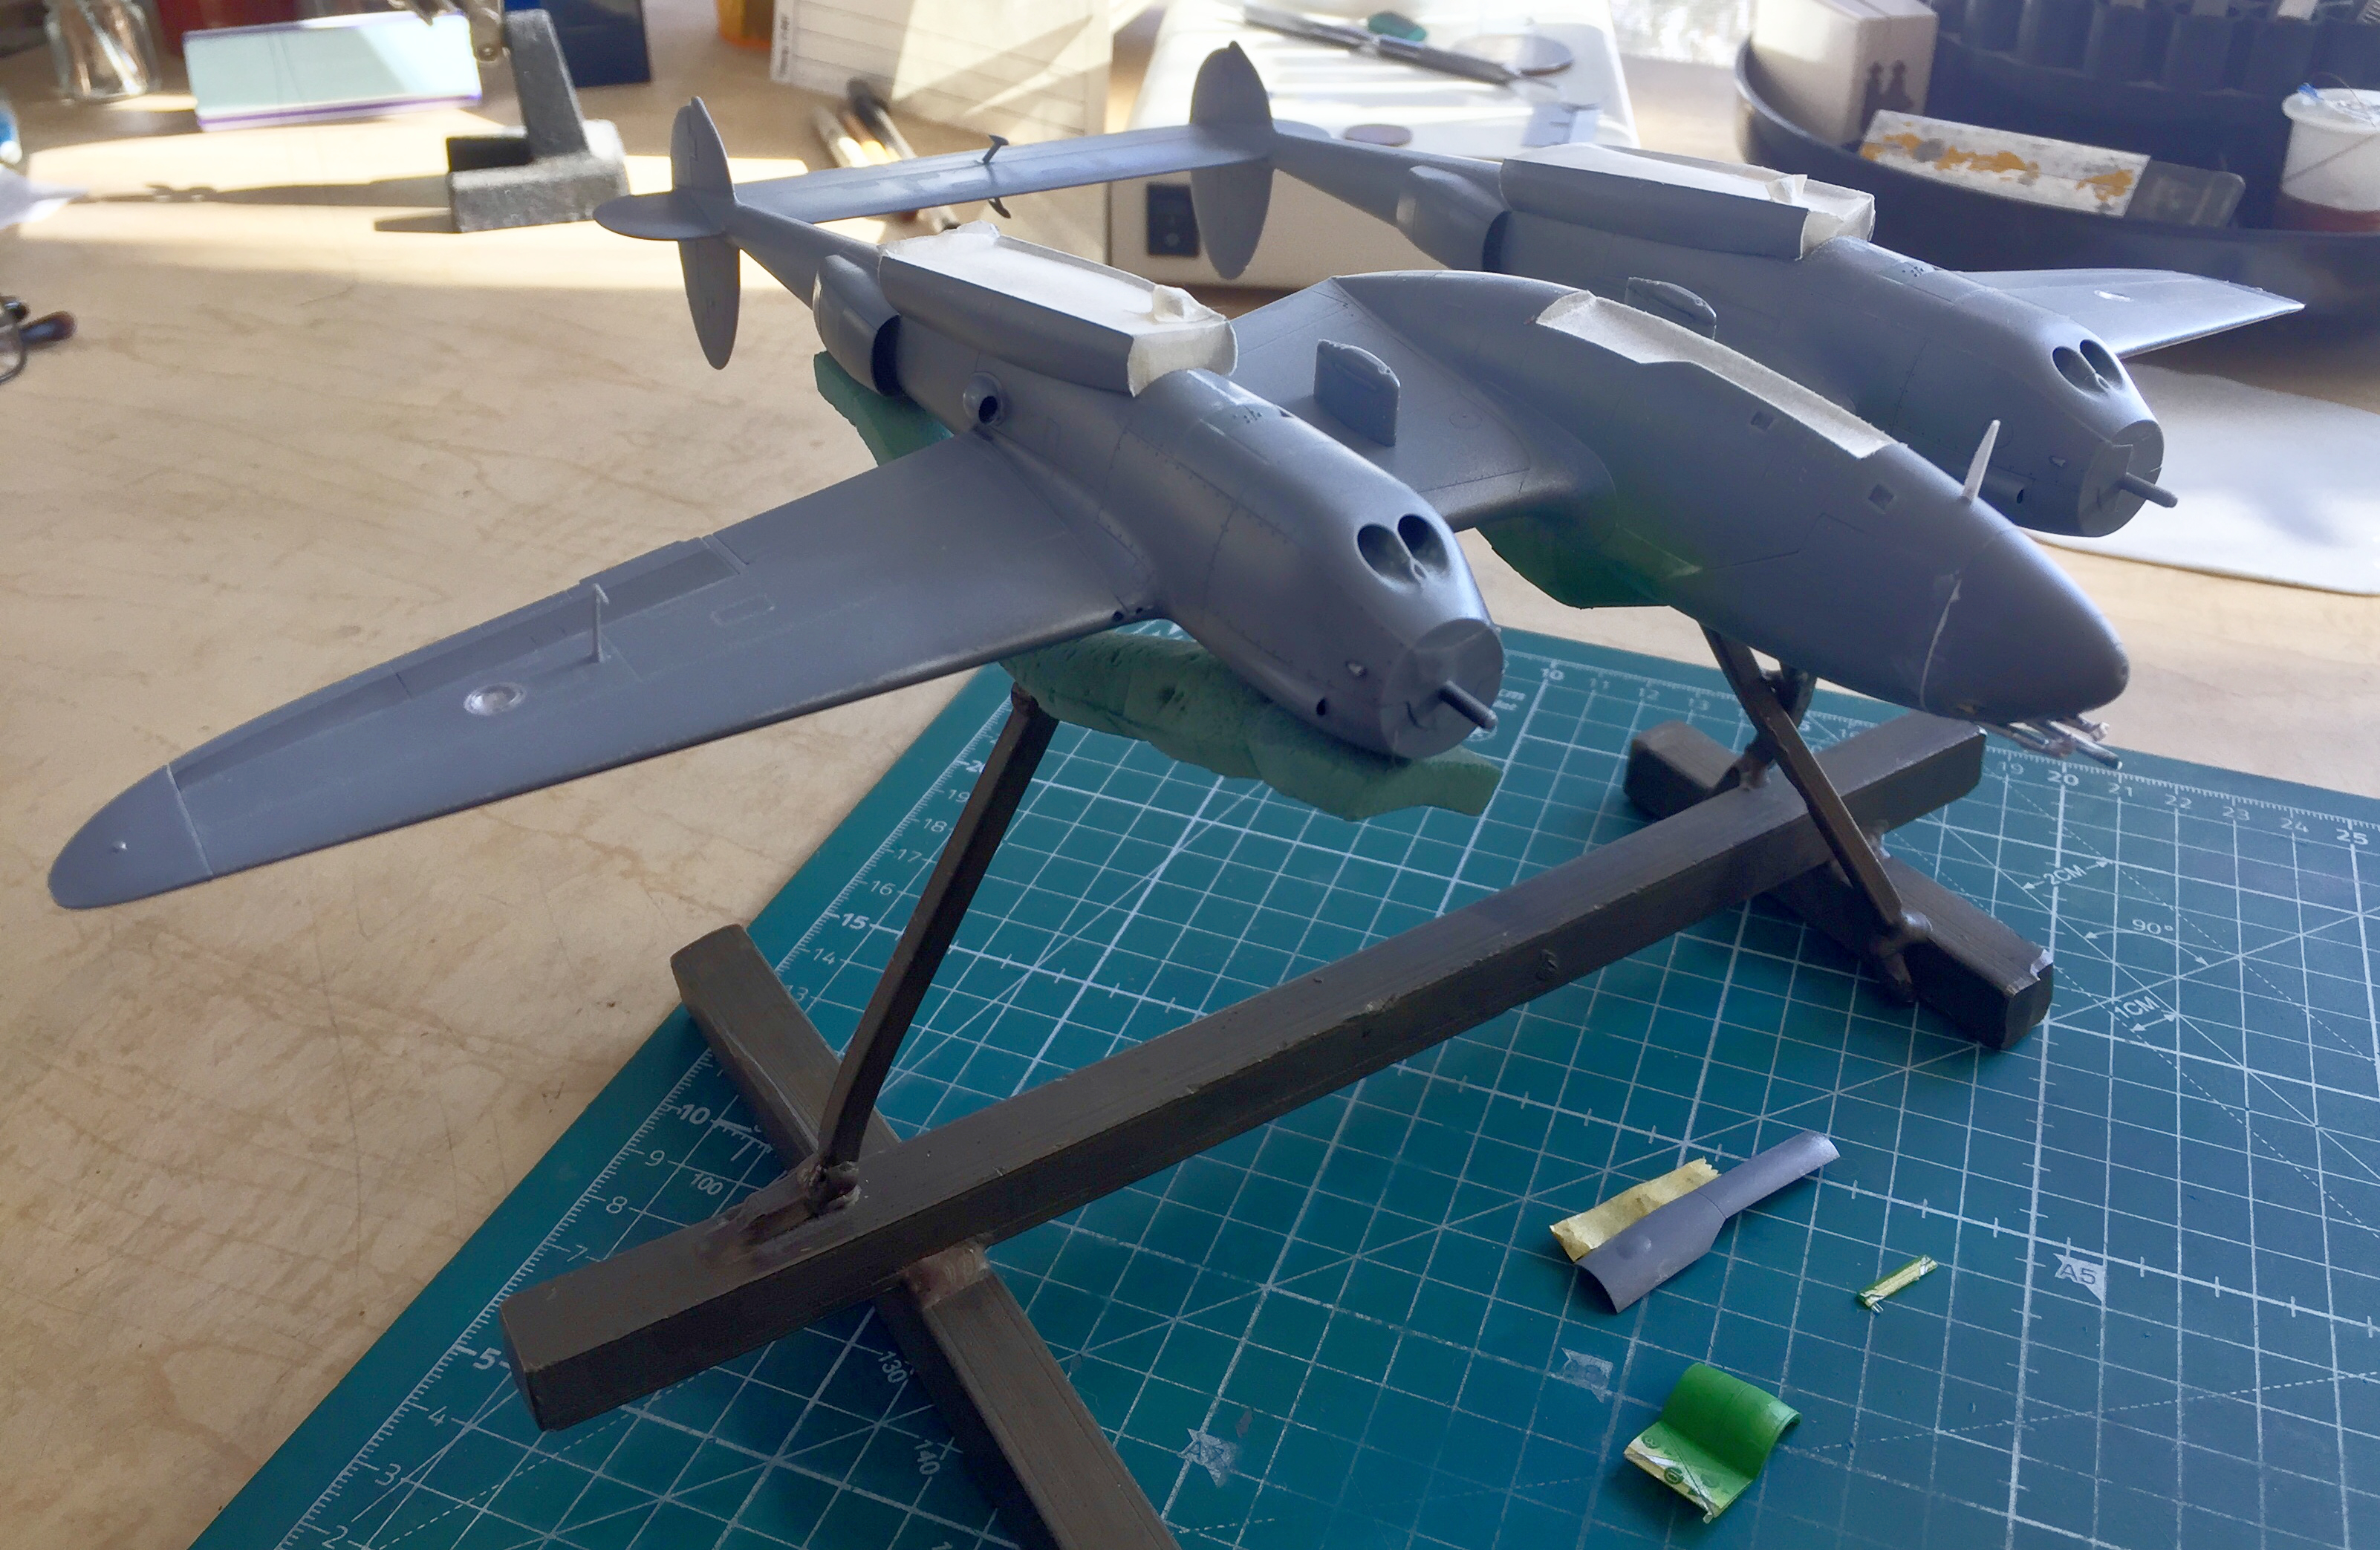
It does appear to me that I’ve chased down all the tasks I had to do prior to painting. Next month we’ll see how accurate that assessment is.

Well done – I love the valve in the supercharger – great work, I wish I thought of that when I was building this kit!
LikeLike
Given the quality of *your* work (such that I’m seriously considering repainting the turbos in your style), I appreciate the compliment!
LikeLike