Small details take an amount of time not commensurate with their size. They take a long time. But the details (of whatever size) are there so I need to replicate them.
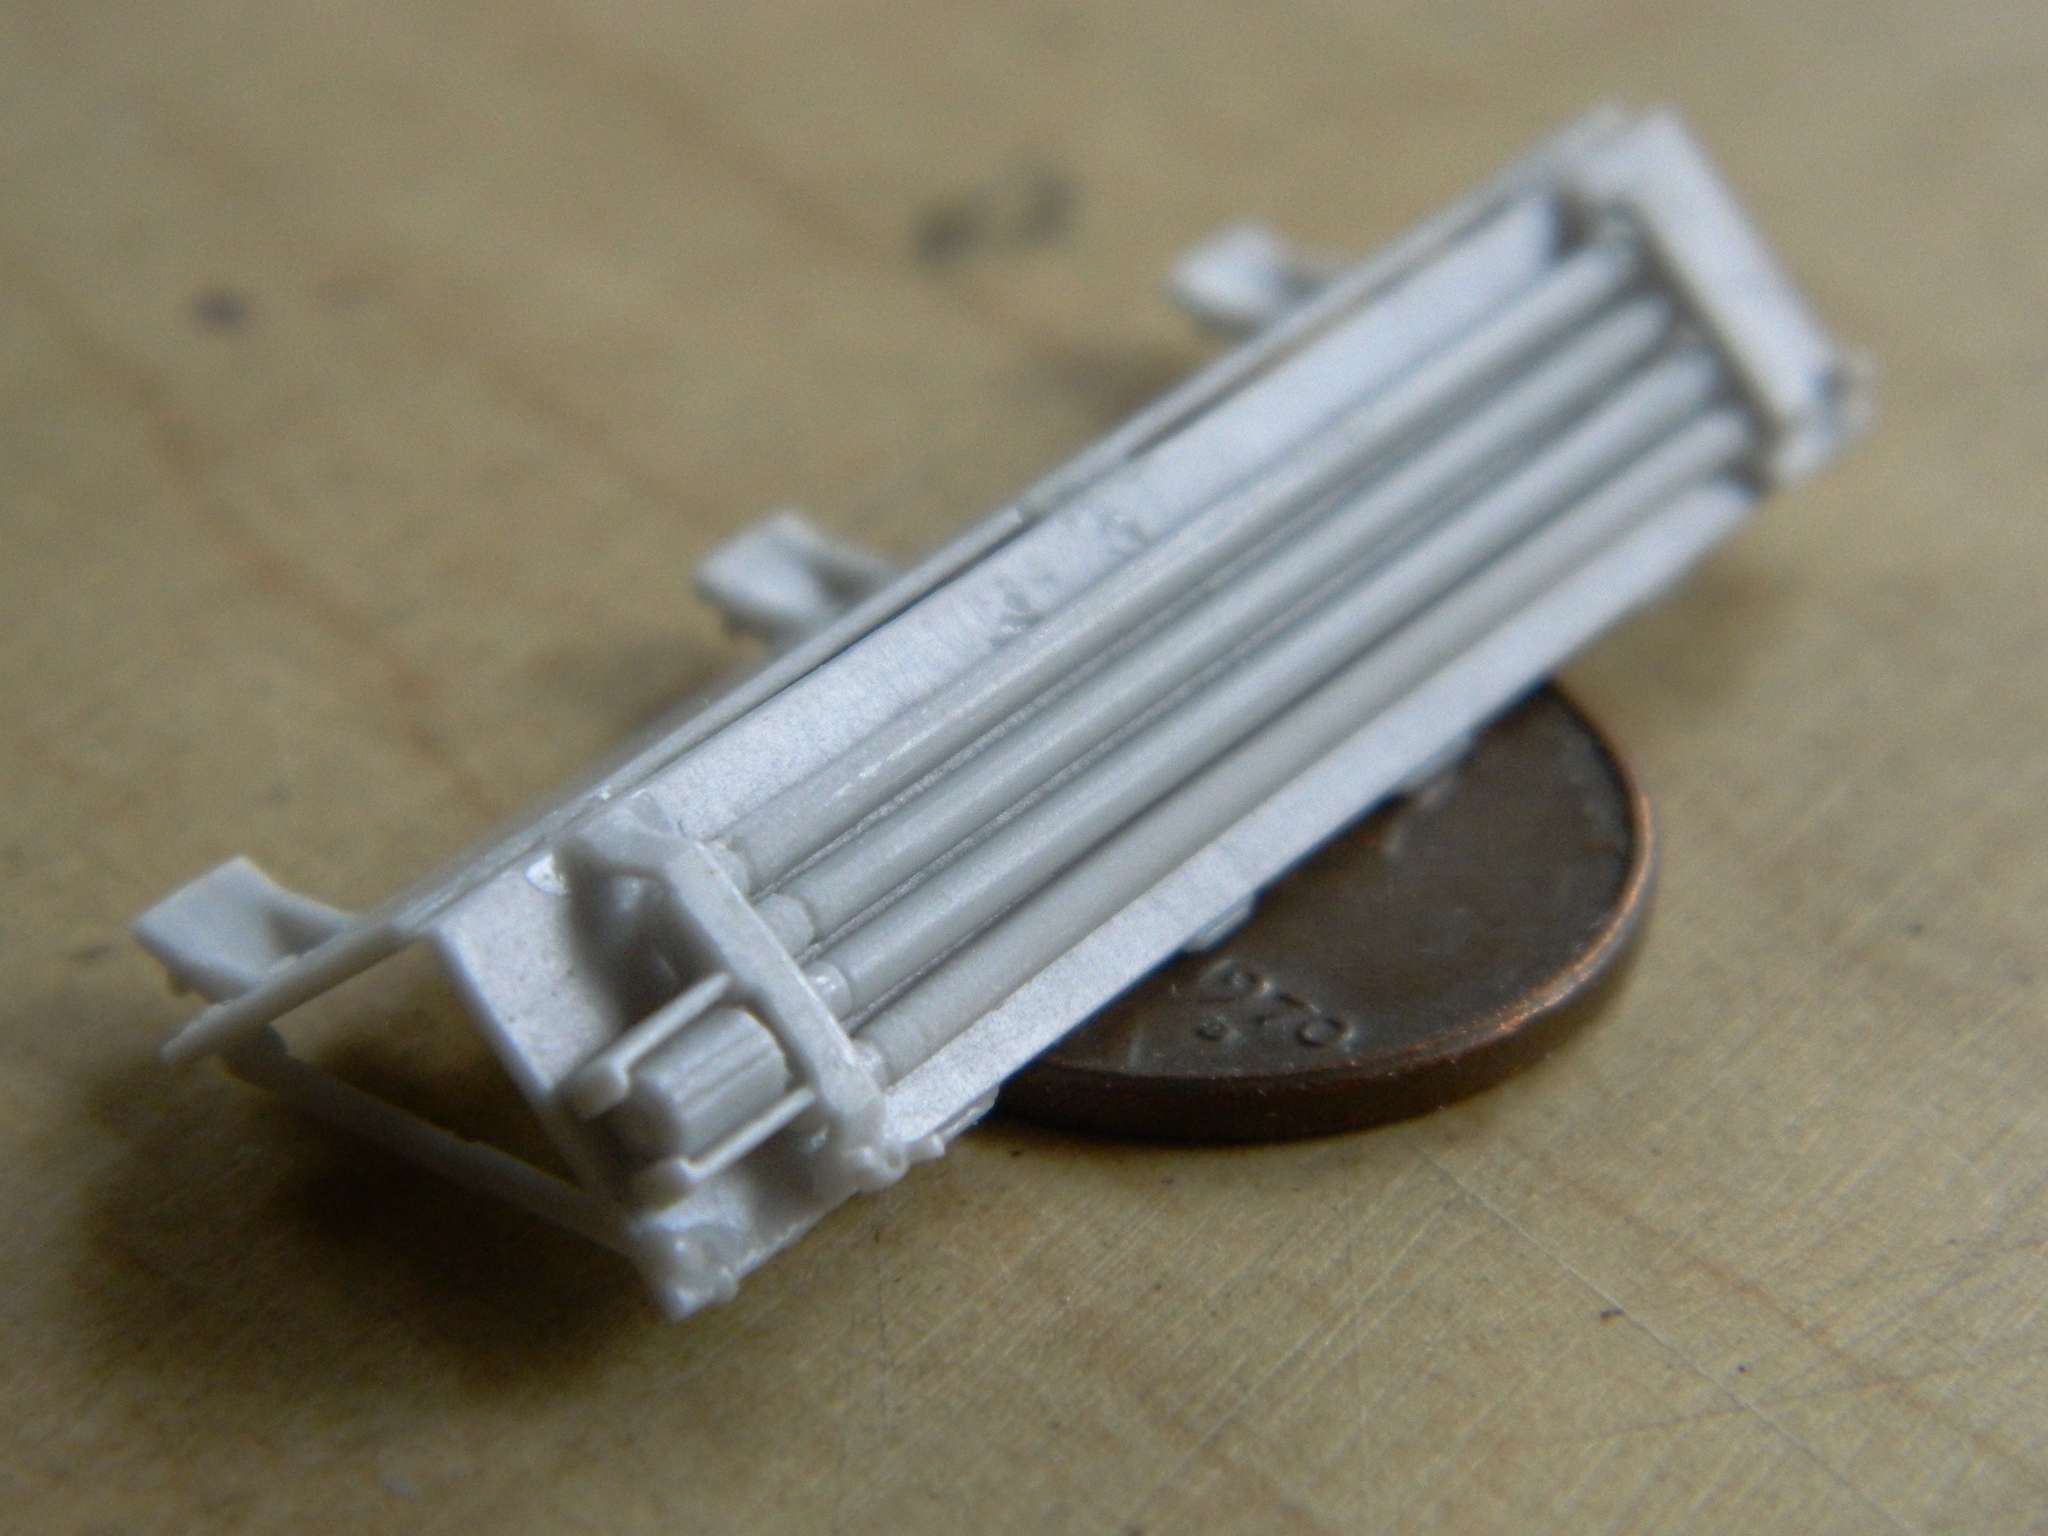
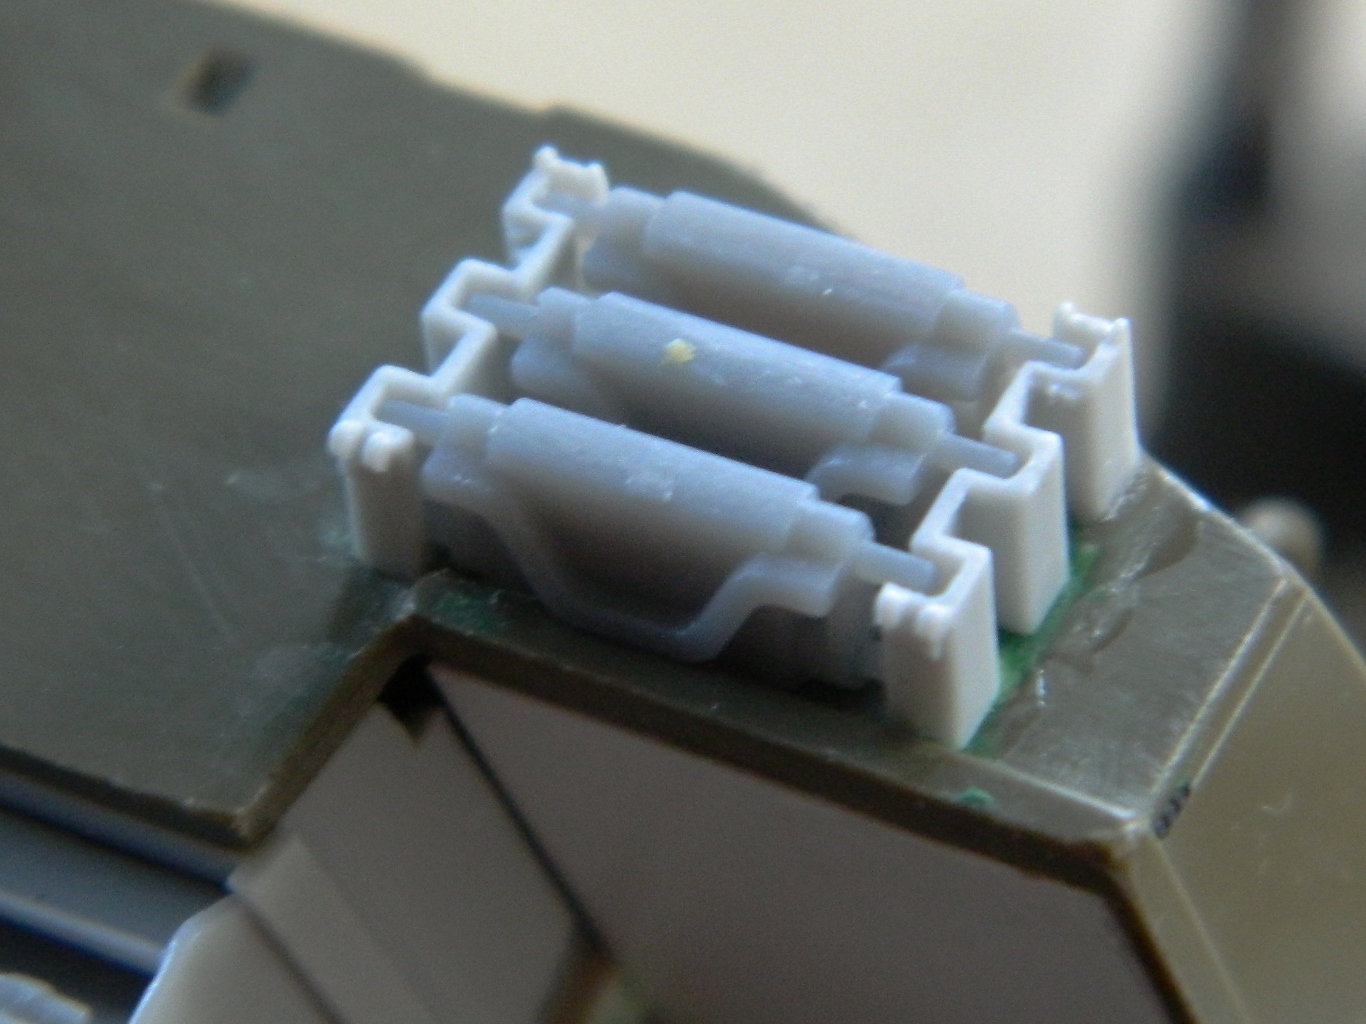
The M4A3 had a folding shelf bolted to the back and attached to the underside of it were the cleaning rods and sponge to clean the bore of the 75mm. These parts are from TMD:

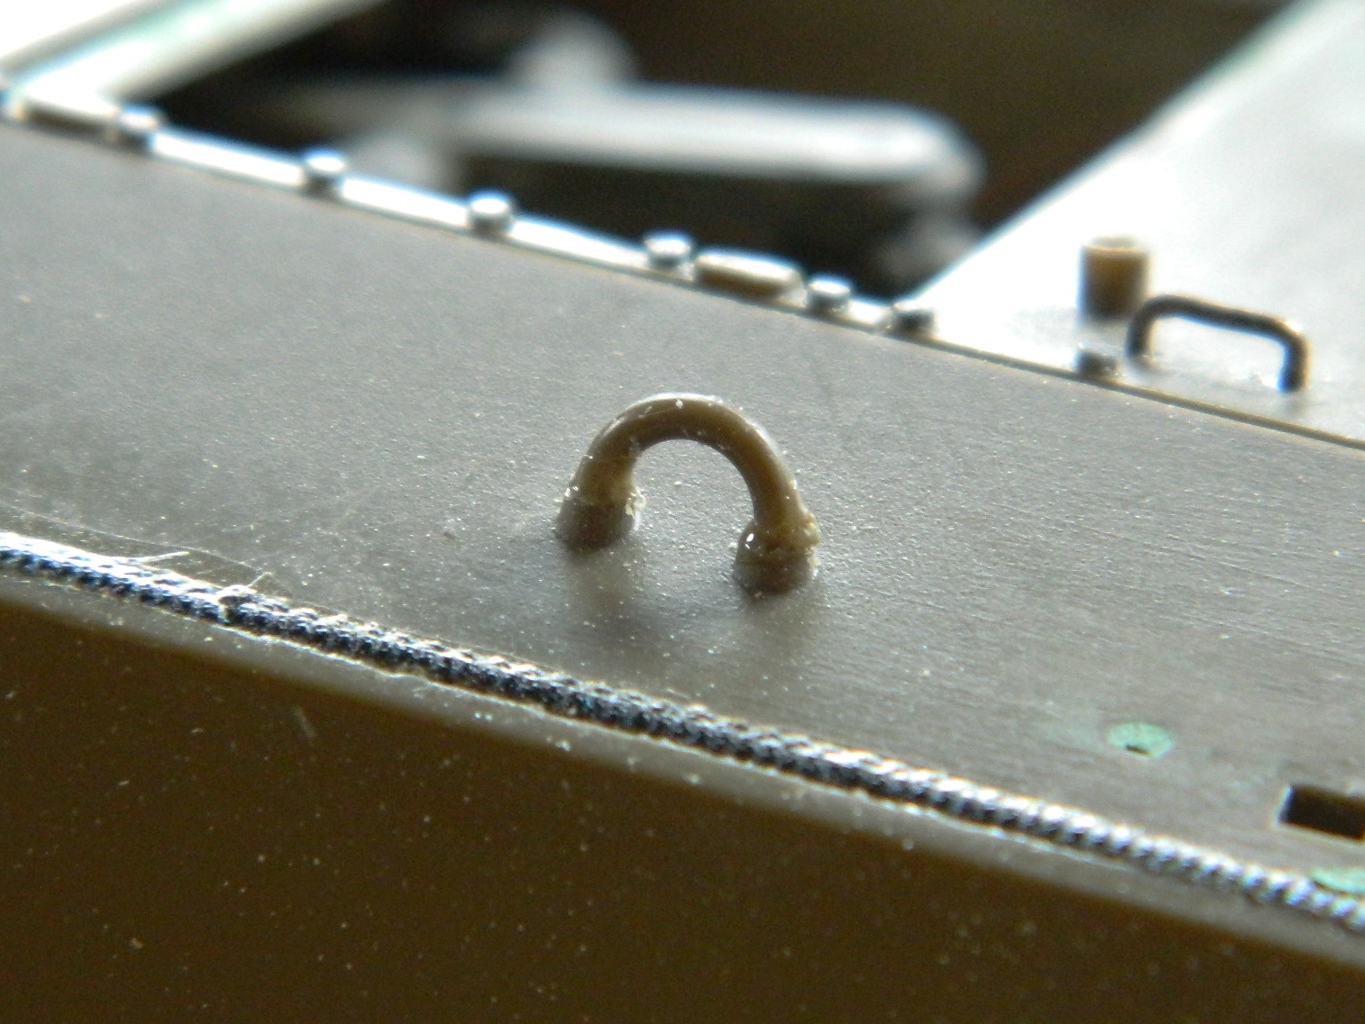
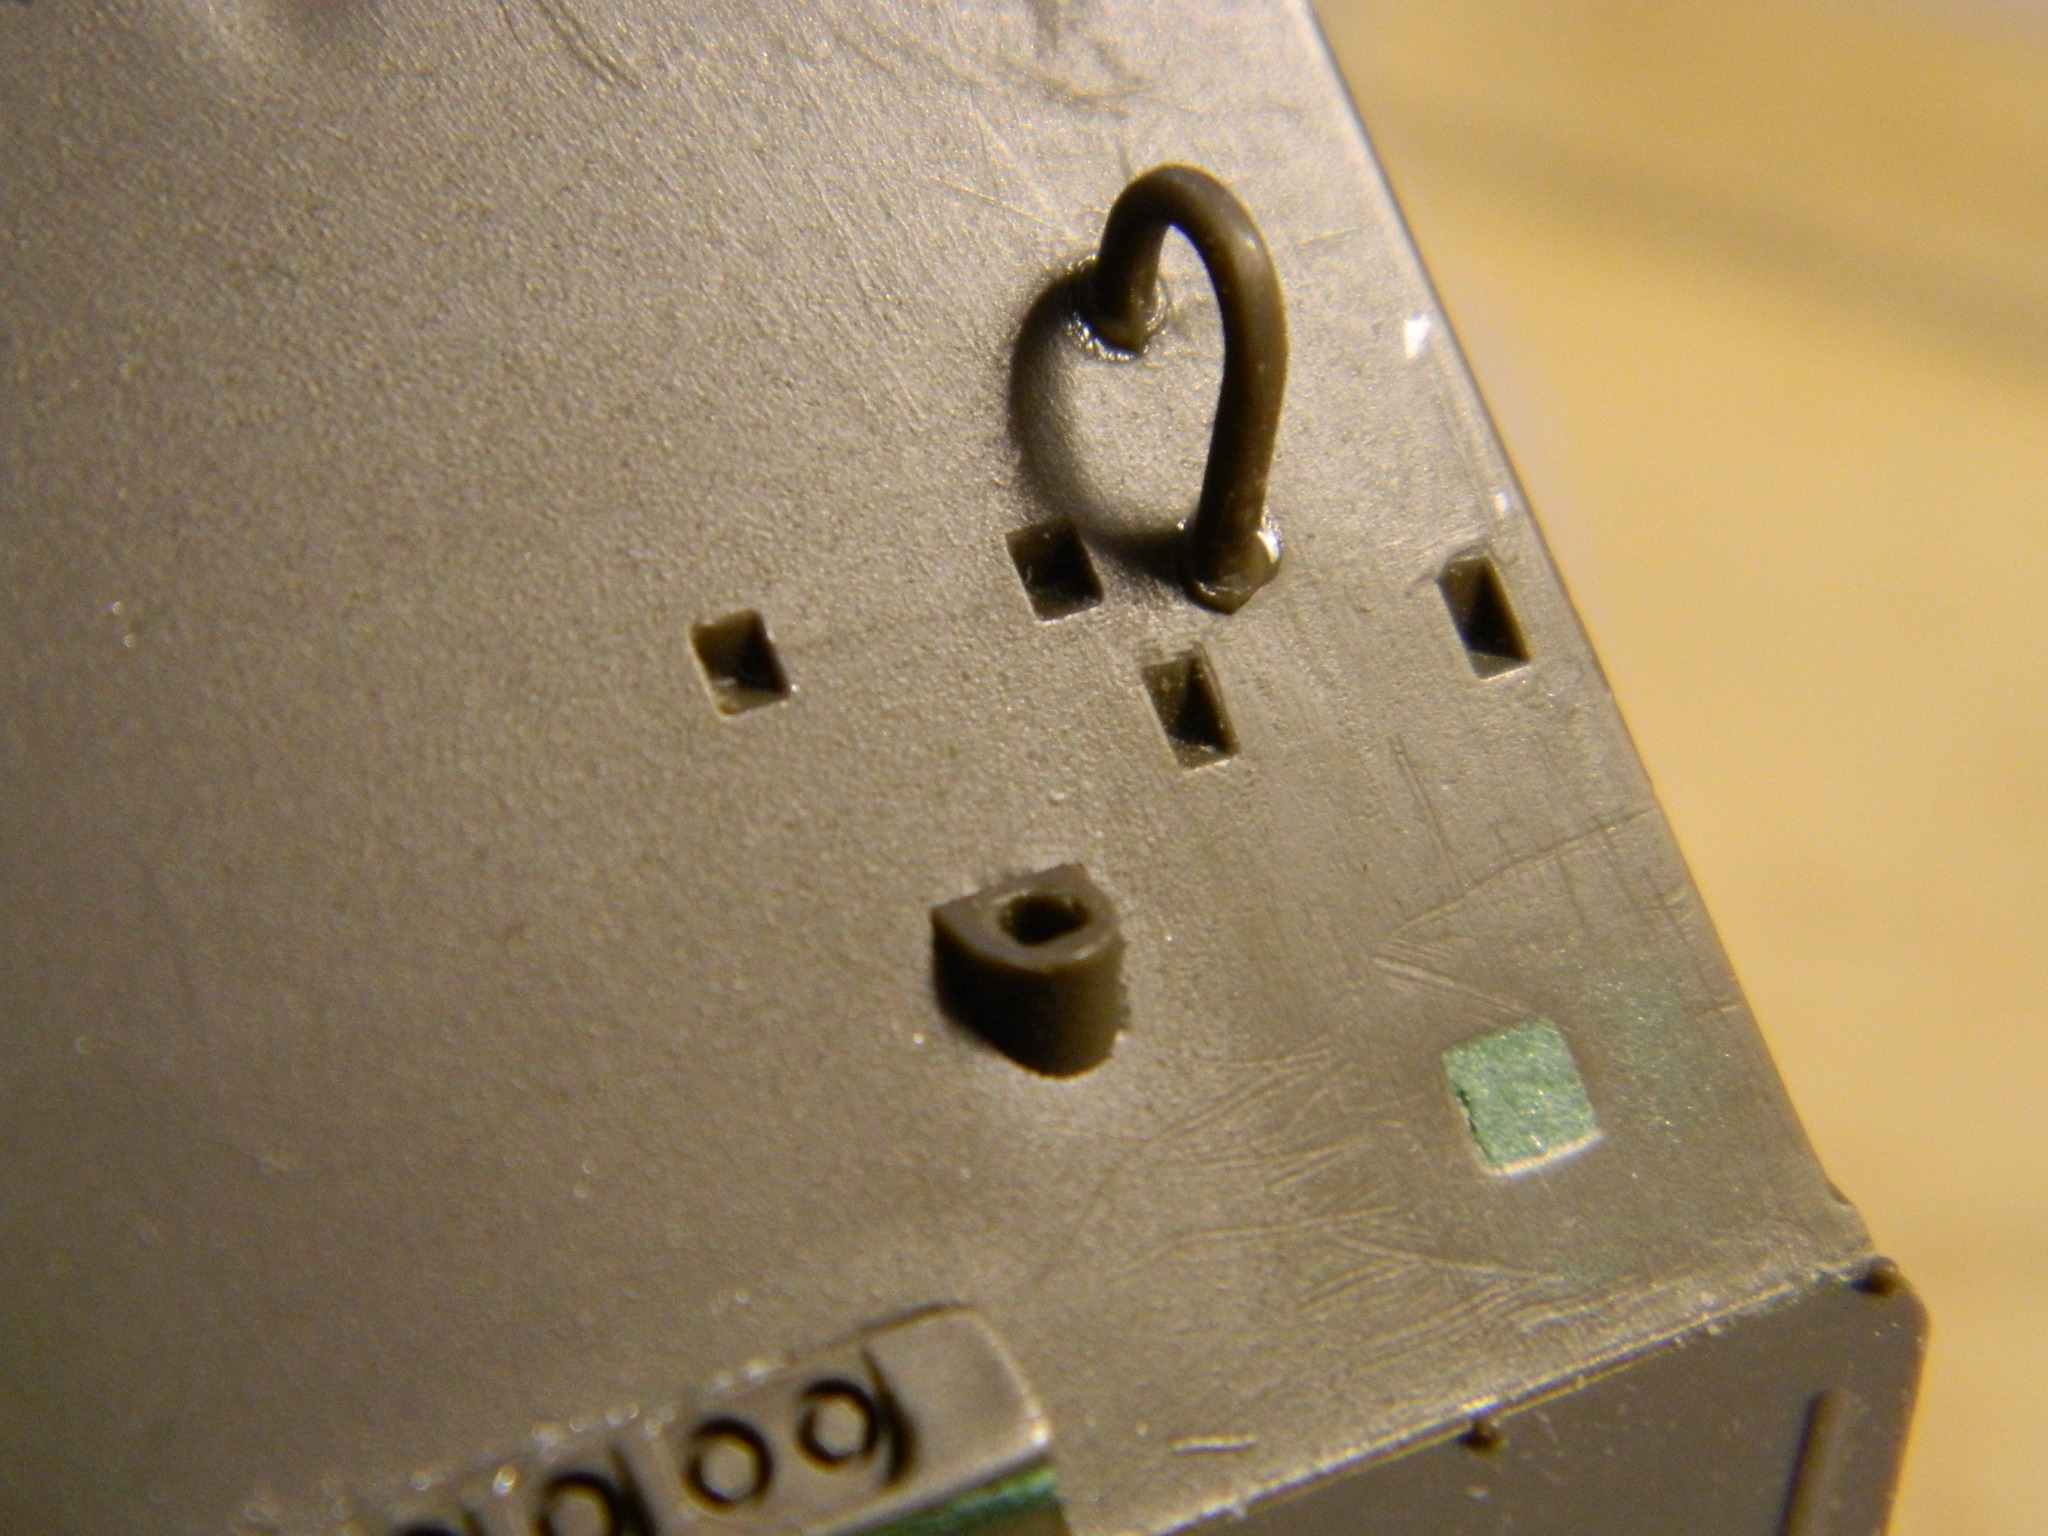
It took me a bit to realize what’s wrong with the rear lifting points. I finally realized after going over reference photos that they are molded too tall. I used my smallest saw (the size of an Exacto #11 blade, only with teeth) to cut the vertical sections, remove a bit, and then glued them back on:
Then I added the travel lock for the main gun:

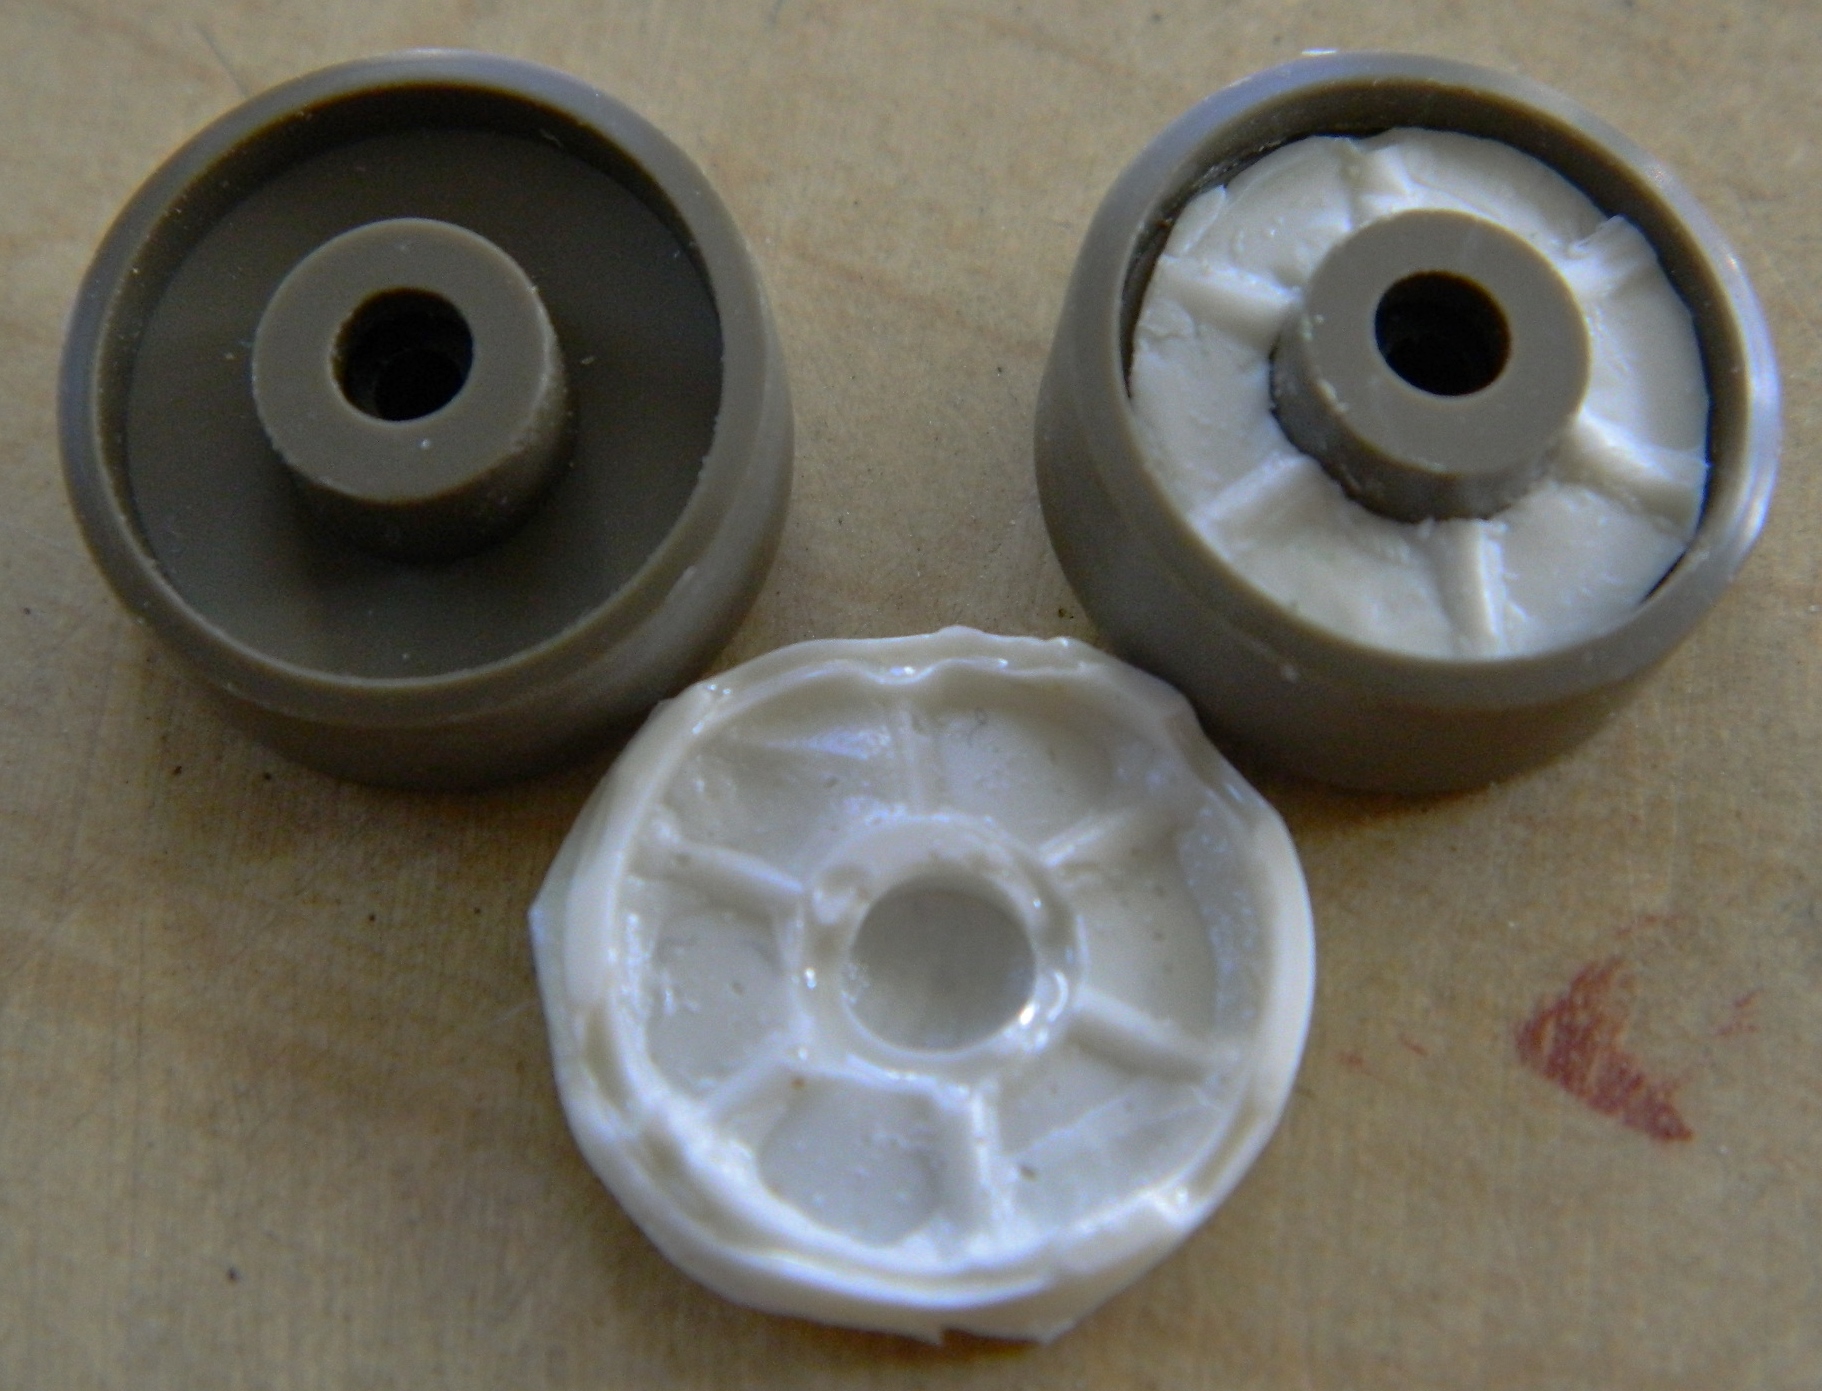
Knowing that I’m going to be working on the tracks soon, one thing (of several) that bothers me about how Tamiya molded their parts is that none of the road wheels or idler wheels have backs. I solved that problem by using TMD’s road wheels, and I was going to do the same thing for the idlers, but decided instead to use the kit’s wheels (for structure and fit) and replicate the rear details by using the molding putty to cast facsimiles of the front and then graft them onto the backs in much the same manner I copied the pistol port detail for the turret. Yes, I noticed also that this is NOT my best molding effort, but the sections that didn’t fill happen to be sections I don’t need to use:

While the homemade putty was curing (takes days), I started working on the spare track link brackets (TMD again). First I cut the resin parts from pour blocks, cleaned them a bit, and then used spare track links from the AM track sets and tested the fit. Satisfied with how all the parts worked together, I attached (most of) the racks to the back of the hull (there are retaining straps that will get added later) and dry-fit the spare links. The racks get painted with the rest of the hull so the spare tracks will get added later on:


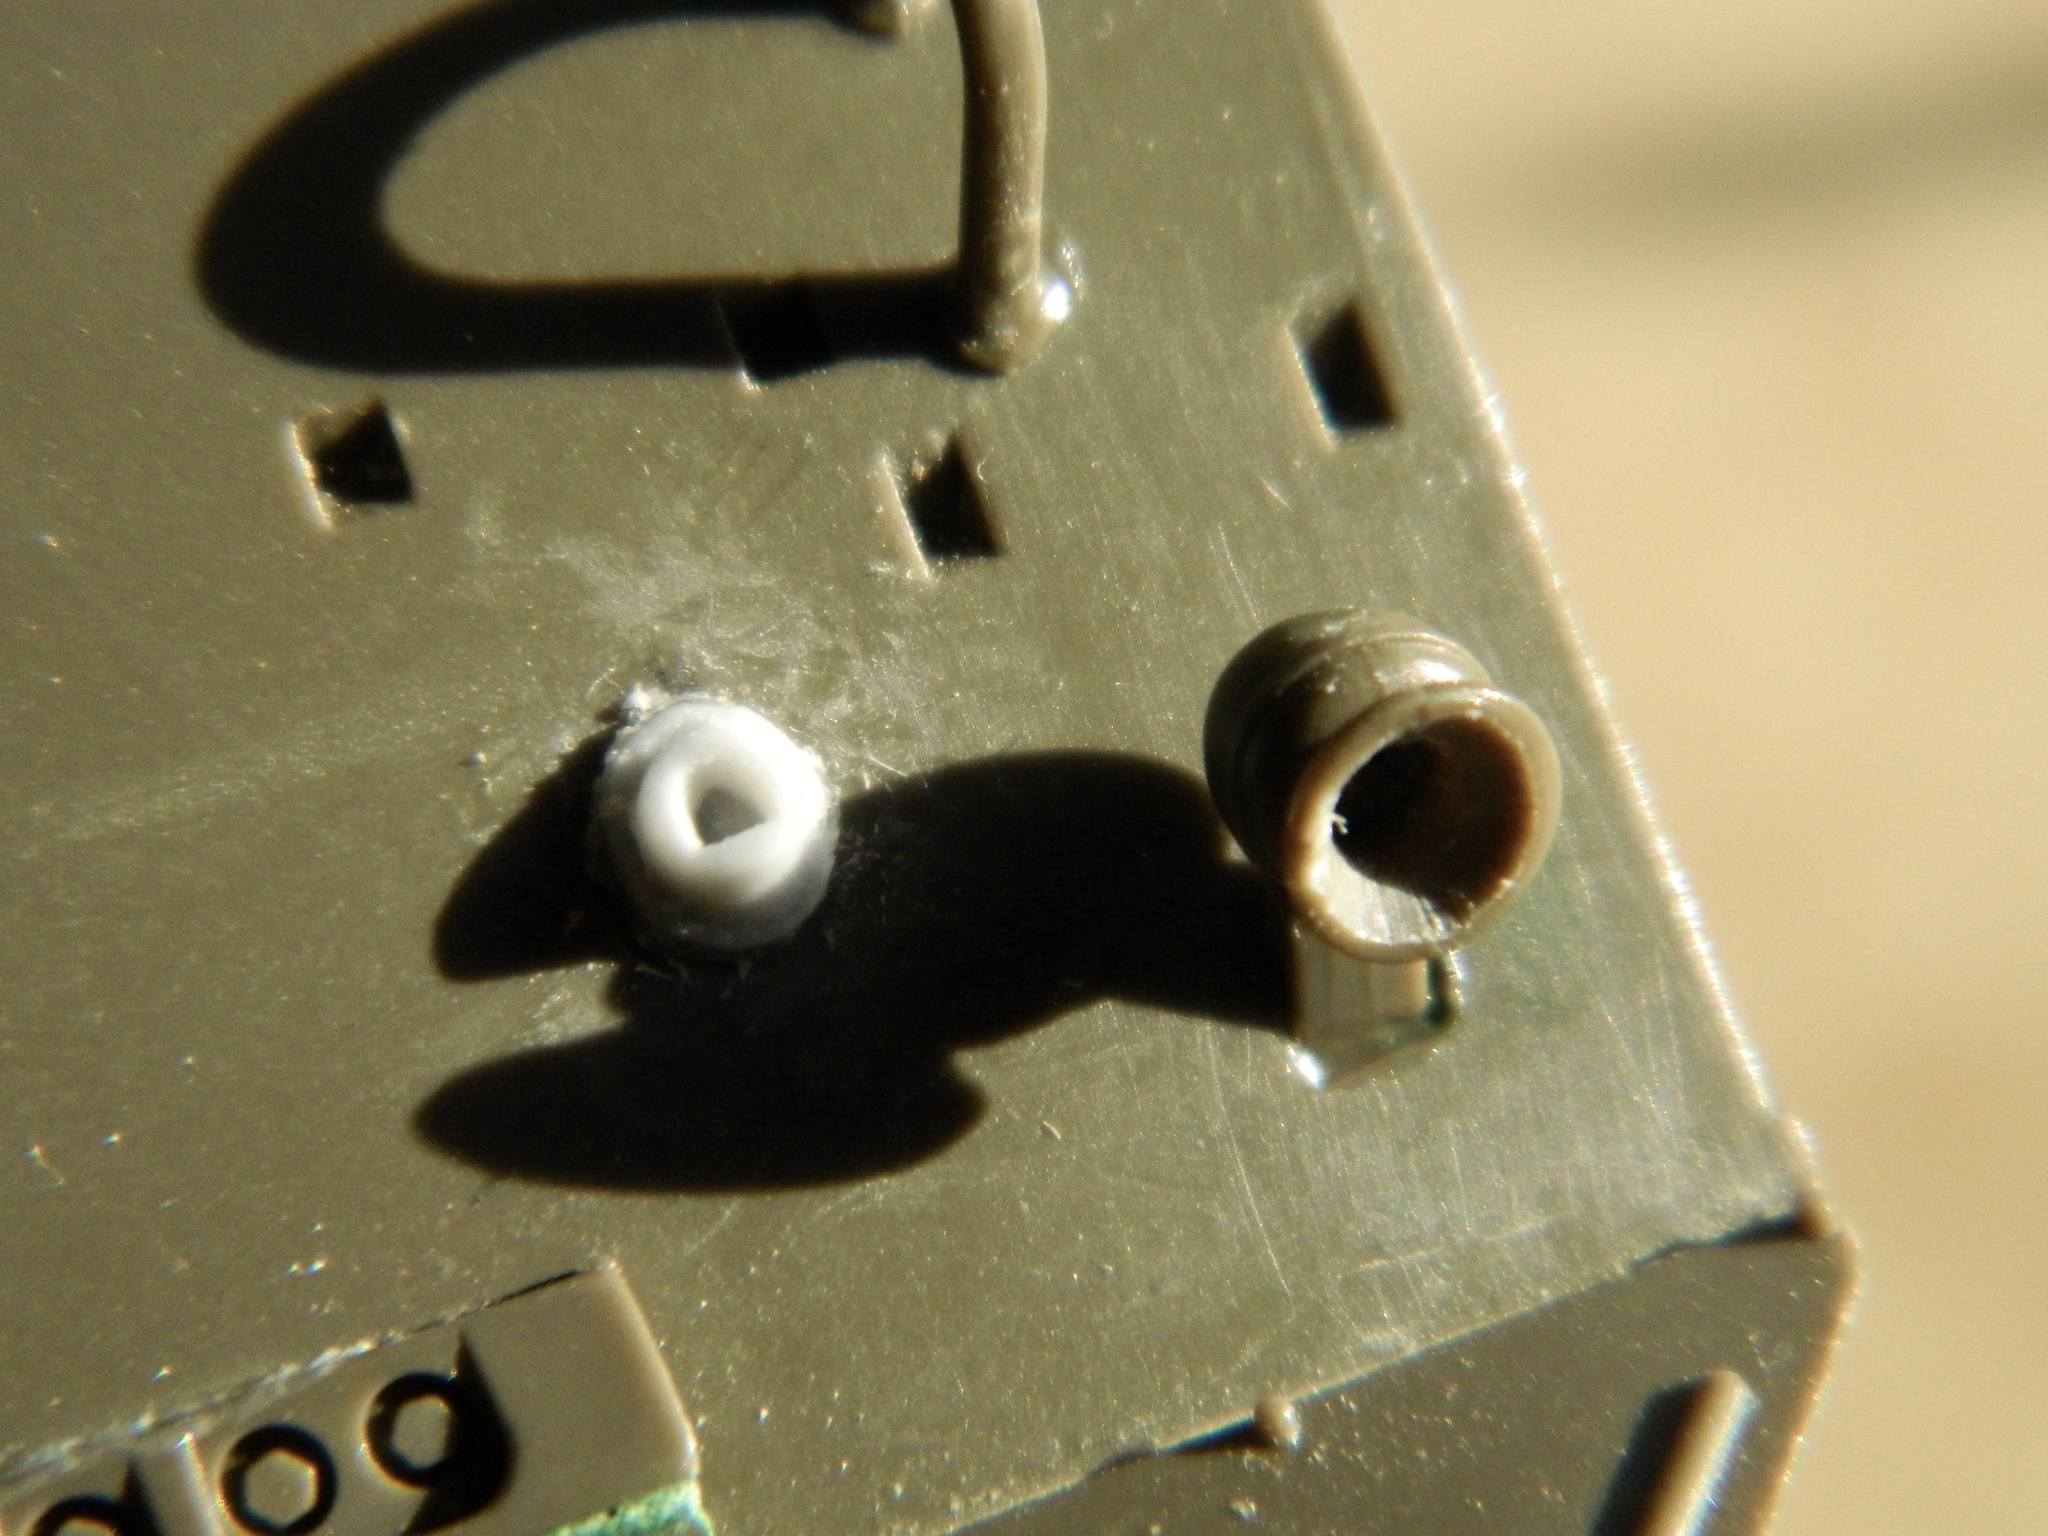
At the other end of the hull I replaced the molded headlight mounts with resin mounts (TMD). The siren was molded solid so that was drilled out and the bell section thinned and then mounted in place. I added the front lifting points and as with the rear, they’re too tall, so I will also section and lower them:
And then it was time to fit the tracks and start getting them under some paint.
::clears throat meaningfully::
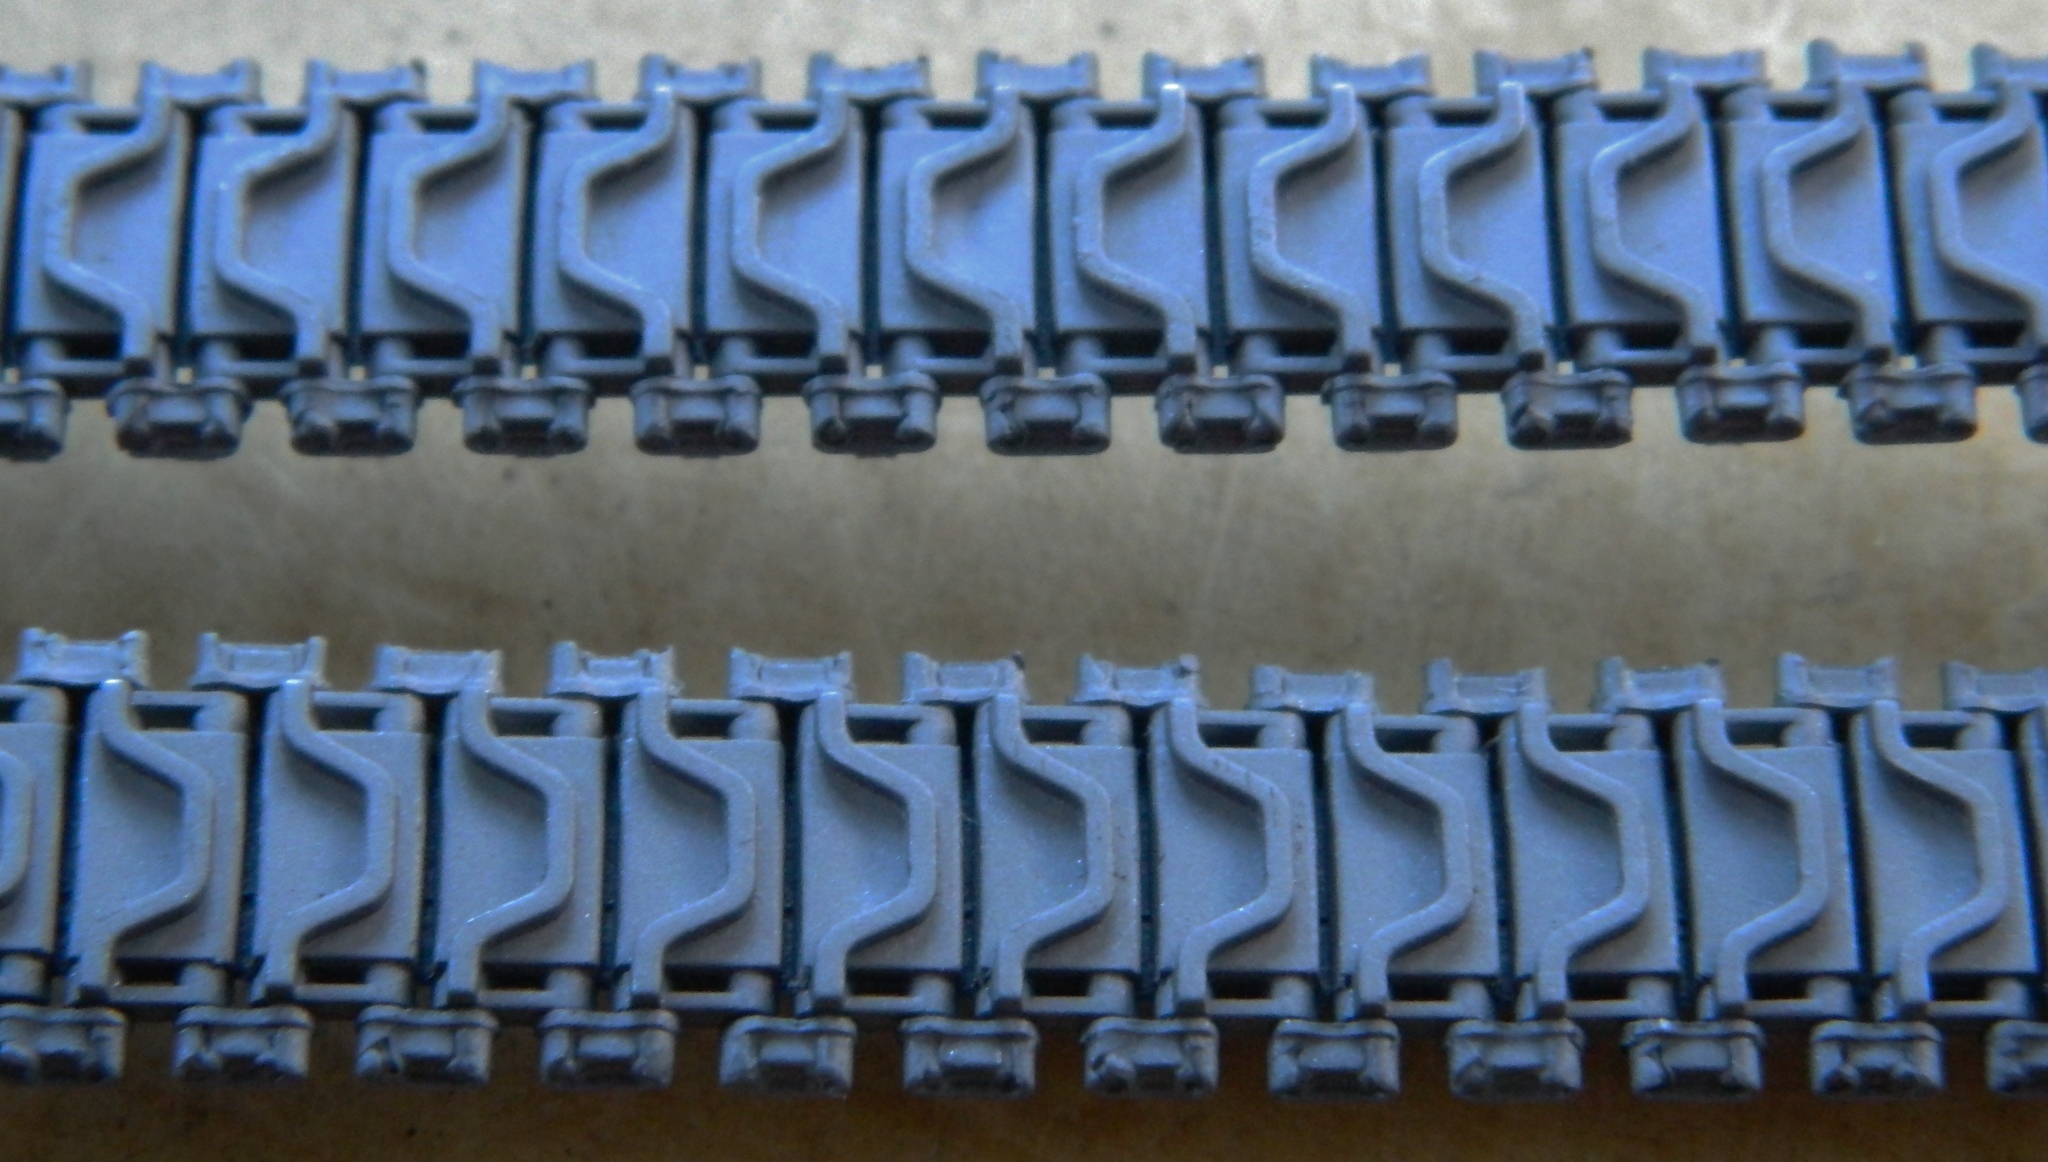
Tracks. Back in the Dark Ages when I last built models (1991), if individual track links were available, I didn’t know about them. Like most everyone else, I used the rubber band tracks and, like most everyone else, soundly cursed them as I touched up the paint that always seemed to fail to adhere to the tracks as soon as I bent them (which is what y’gotta do to put the things on the tank). When I heard about individual track links, I thought that was a great idea!
Chalk that determination up to ignorance.
Individual track links (often molded in styrene, and one manufacturer even does them in pot-metal) certainly solve the problems associated with the rubber band tracks, but as solutions often do, they create new problems.
TEDIUM.
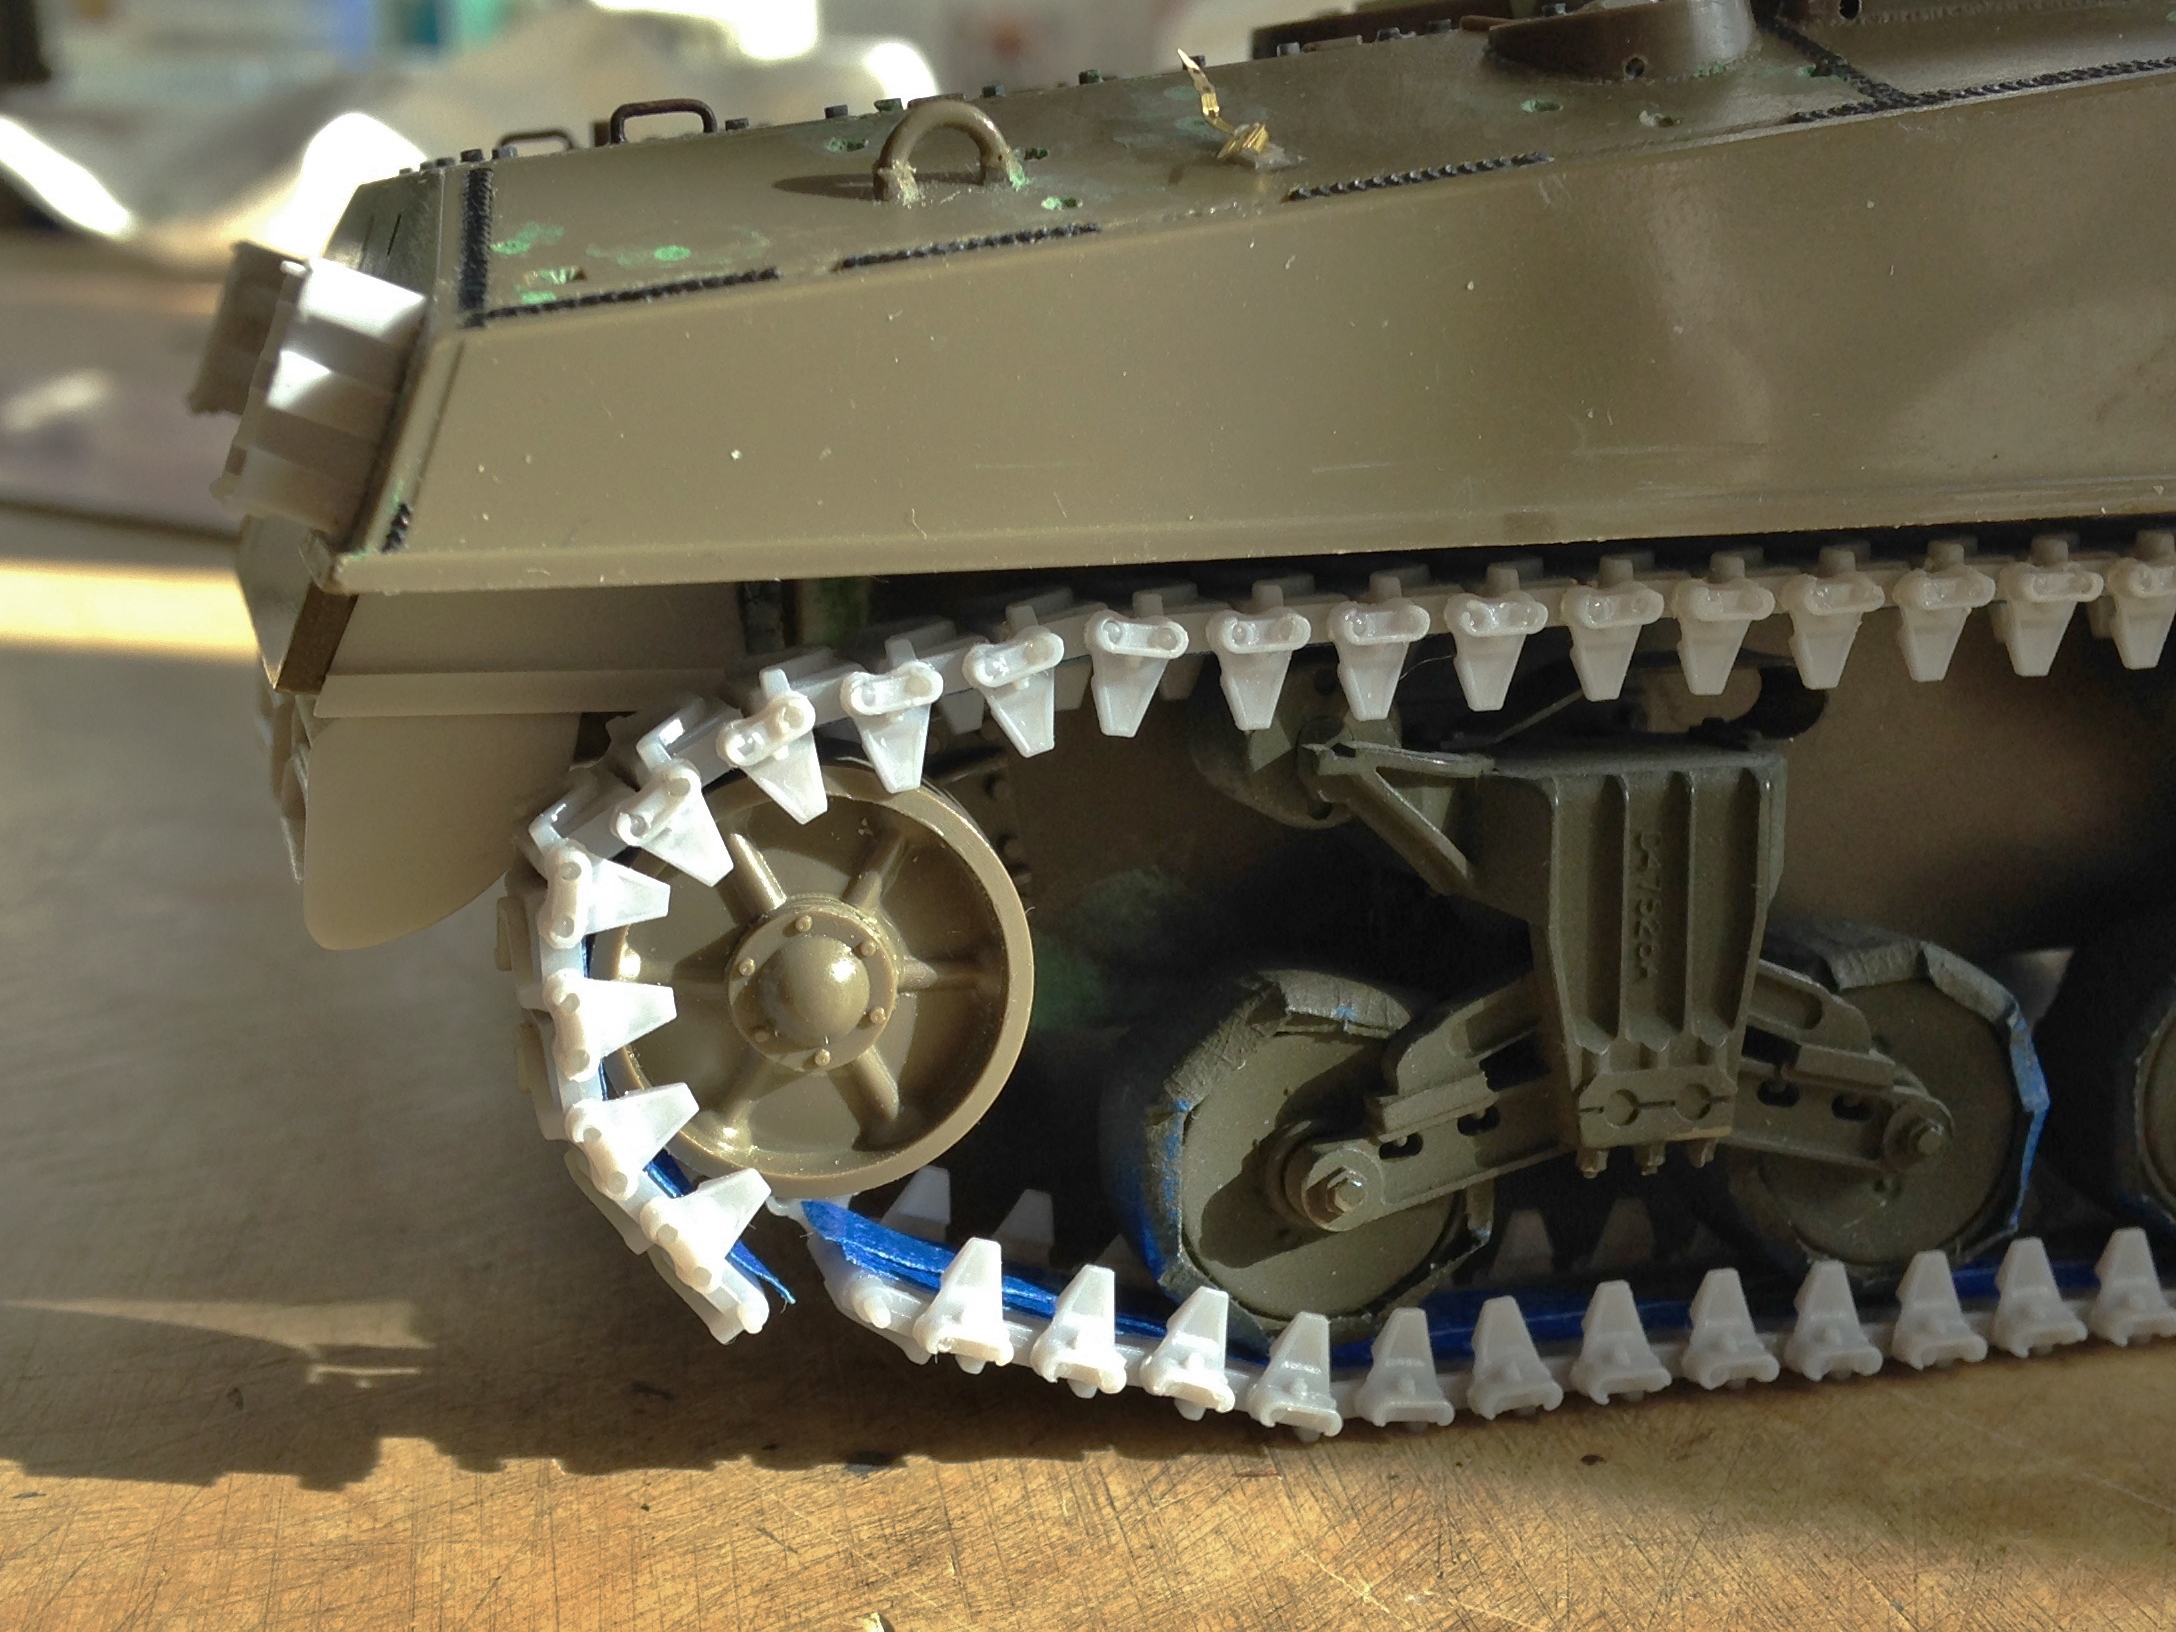
Tedious to clean up, tedious to assemble, and dry-fitting them easily requires the builder to have four hands…or at least I require four hands. The Sherman has 76 six links, each of which has two track connectors on each end, and that 76 is per side. (I think I’ve already mentioned “tedious” and I don’t want to be tedious by continuing to mention the GOD DAMNED TEDIUM) (too much). So with that counterproductive mindset, I set about dry-fitting the tracks to the suspension. It was at this point that I was SO THANKFUL that I’d picked up a set of eccentric idler axles because if I had to fit these tracks without them, I’d probably still be sitting in the shop, cursing, blaspheming, and just generally being a whiny punk about the whole thing. Those eccentrics made it relatively easy (relatively):

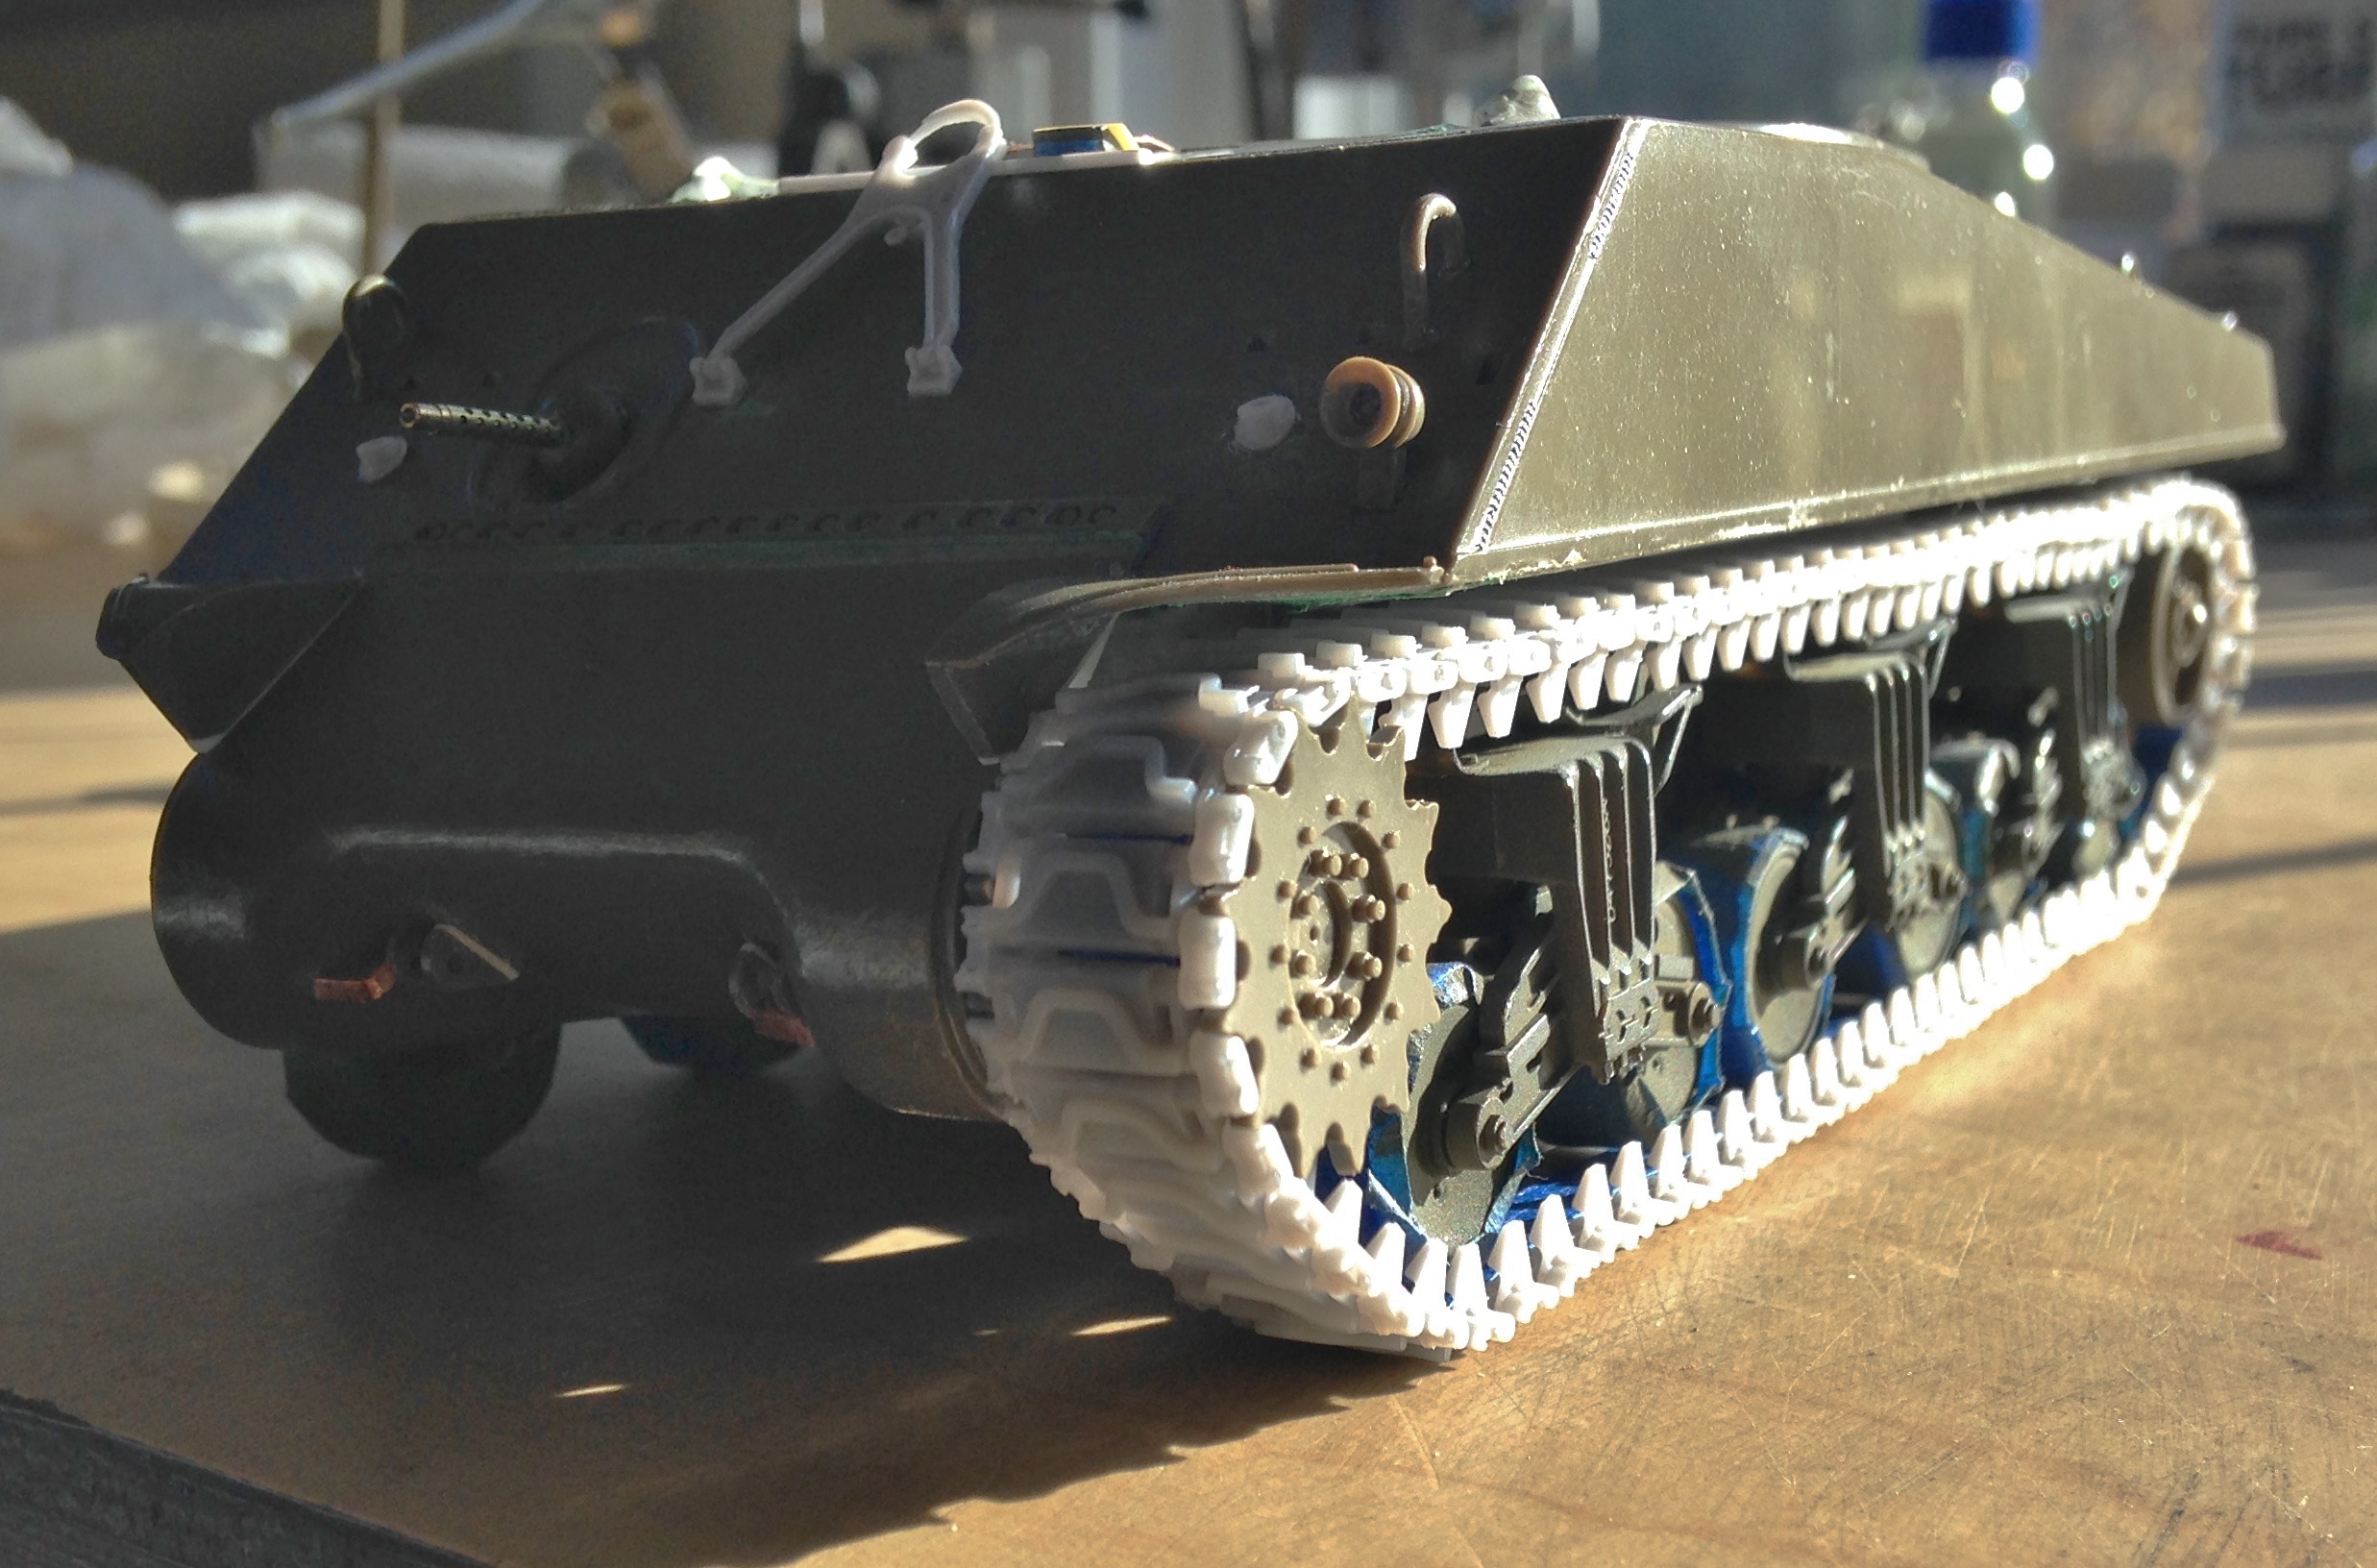
Gotta say, they sure do look good. So with the tracks just dry-fit (nothing is glued on them, they’re just pressed together) (did I mention four hands?), I started gluing them to each other just at the outer edges of the outer connectors. I wanted to get two sections per side that I could then slide off because the hull behind them hasn’t been painted yet and I simply refuse to consider the monumental stupidity of trying to mask off the tracks so I could do that. So that means they have to come off. I glued what I thought was easily removable sections.
::clears throat meaningfully again::
It seems I wasn’t exactly correct in my decision of where to break the tracks. What drives that particular task is the need access to both sides of the track so that I can slip the links off (something they only do easily when I don’t want them to slip off), slide/wriggle the glued sections off, and then later on after the tracks have been painted, be able to slide/wriggle them back on and be able to get at both sides of the tracks to put the connectors back on.
In the Glossary you will find “Brain Fade.” That’s in the glossary because evidently I experienced a small, but really maddening, case of it somewhere in the process of gluing, sliding, and wriggling.
One section that goes around one of the drive sprockets was glued improperly, requiring me to go to my spare links to redo that section. The only problem with that was that I needed seven links to redo them and only had five links left. So after some very colorful (if anatomically unlikely) invective, I realized that I had enough track links if I used two of the links I had intended to be mounted in the racks. I then realized that I could use two of the previously-glued links to replace the spares, but to do that I would have to drill holes and add the pins back that were destroyed in taking the tracks apart to get those two much-needed links:

I was quite pleased with my ingenuity, which evaporated as soon as I saw that one of the links had been glued in BACKWARDS (due to brain fade):

Once again perfection eludes me…
I thought about removing the BACKWARDS link and doing for it what I had done for the spare links, drilling out holes and adding styrene rod, but there’s no way to remove just one link without having to do the entire section. After much more colorful invective (delivered at sufficient volume to send the cat running to a hiding place), I realized that to fix it, I would have to buy another set of track links. To see how in-your-face the BACKWARDS link would be, I put the sections back onto the tank:
The offending link is at the end of the bottom run where the track isn’t joined. Realizing I was emotional, and emotions are not the way to solve a problem that requires accurate skull-sweat, I turned the light out in the shop and went to bed.
Whatever stroke of genius I thought might visit me during my sleep evidently didn’t have the delivery address correct and failed to arrive. Only the fact that the offending link is not up where it is easily seen is why I accepted the fact that this is just how it’s going to stay. (And there’s no point in lying to you by telling you I did so with any grace whatsoever.)
One thing I did learn (other than check EVERYTHING before the application of glue, which I thought I already knew) was during masking off the areas of the tracks that are rubber. Running a strip of tape the length of the tracks makes them MUCH easier to fit when nothing is (accurately or not) glued.
I masked the inner surface of the tracks because I’m going to be using acrylic paint for the rubber and enamel paint for the steel and I want solid adhesion for it. Once the sections of track were masked, I used steel paint on the face of the tracks and both sides of the alignment teeth:
After giving it an hour to dry a bit, I buffed the areas of track, the cleats, edges, and teeth faces, that would be subject to wear:

Individual track links. Well, haven’t I learned something about them…and I was going to learn more.
Since the time is approaching where these tracks are going to be permanently added to the build, it was time to address the absence of detail on the back of the idler wheels. I pulled two castings from the mold, cut out the centers, trimmed the edges, and glued them in place:
Putty was necessary to fill the gaps:

Though not perfect, the addition to these wheels is substantially better than no detail at all.
Yeah…tracks…individual links… ::facepalm::
