As sometimes happens, while I was cruising around the ‘Net looking for better photos than the ones I had, I actually found a better photo! One of my epigrams is that solutions create new problems. The solution of finding a better interior photo created the problem of discovering that though I did the best I could making the mines from the photo I had, it was NOwhere near accurate enough. That meant I had eleven useless little resin buttons I’d thought were mines. That meant I had to do the whole mold/casting process again (the old master is on the right):

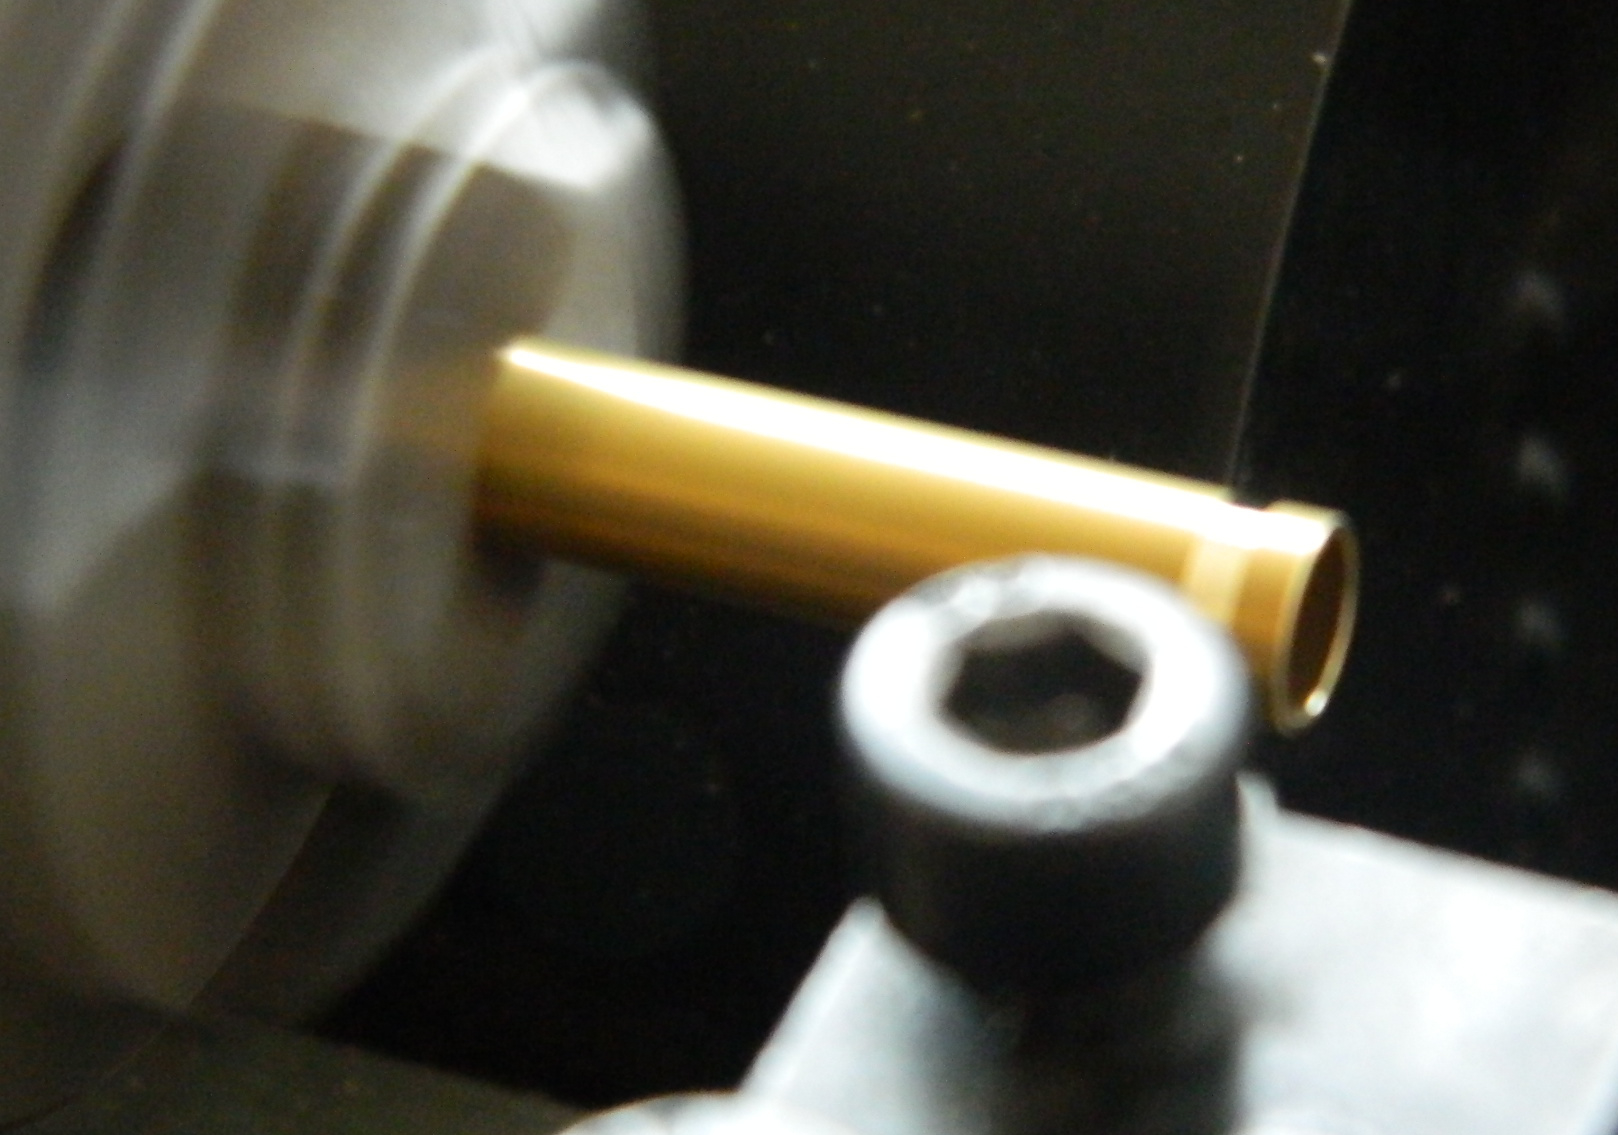
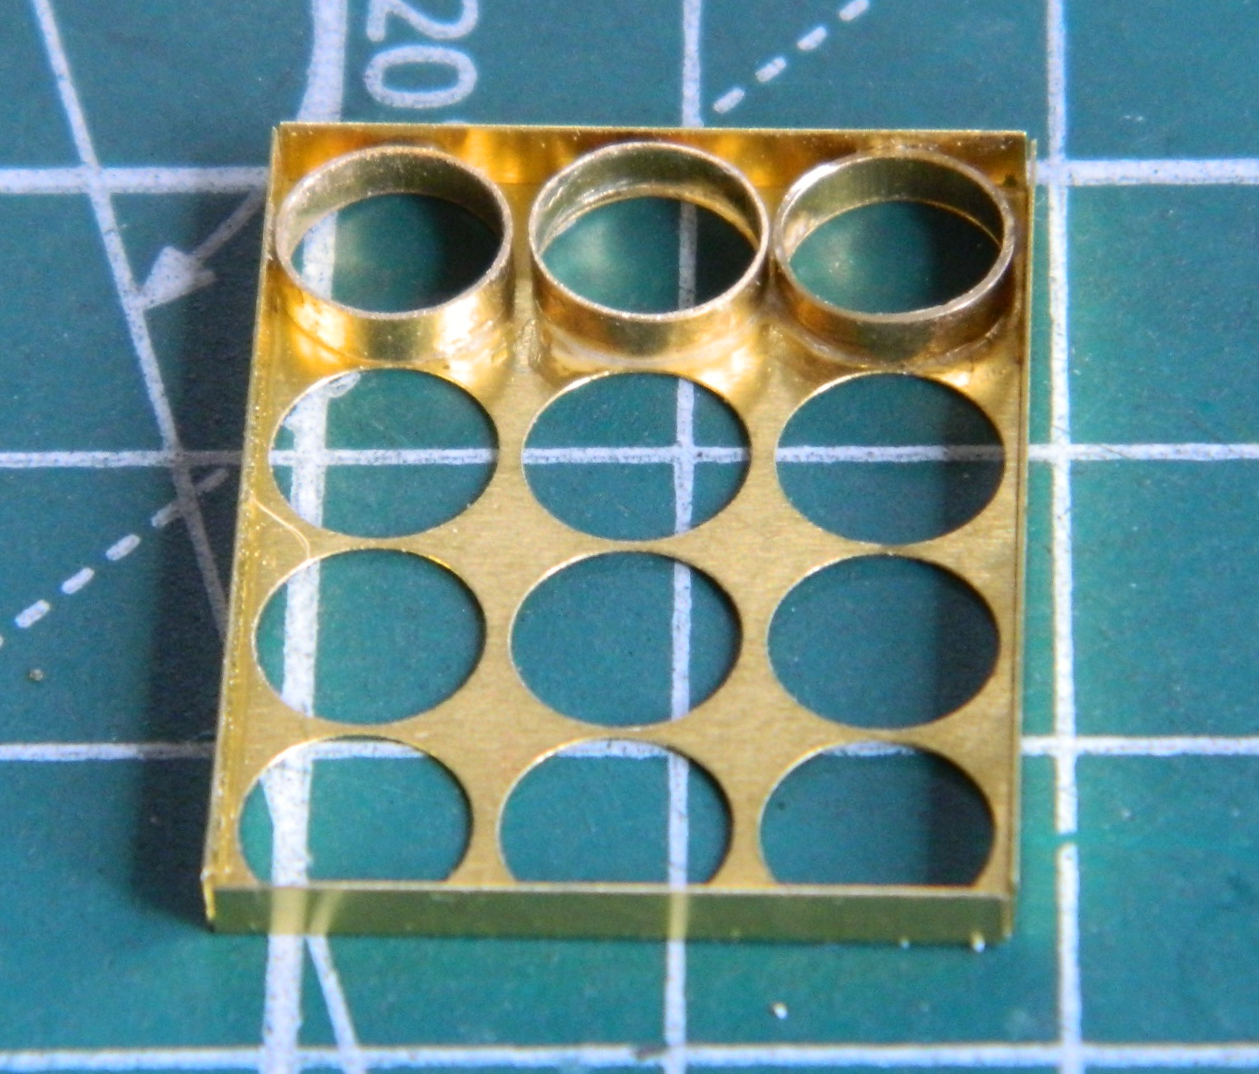
While I was waiting for resin to cure, I attended to something that had occurred to me. These mines go into a rack. I doubt they just floated there, that meant each aperture in that rack had to have a sleeve inside it to hold the mine in place. I checked my styrene tubing stash and didn’t see anything I thought would work. Then I checked my metals scrap box and found a short section of .25” (6.35mm) thin-wall copper tube. To make matters easier in terms of thin slices taken off the tube and the cuts perpendicular to the tube’s length, I used my lathe to cut off three sleeves (ultimately I only used two). Once cut and the ends cleaned up, they were superglued into the rack. This way the empty mine locations look like they’d actually hold a mine:
Once the (fresh, because I tossed the stale) resin cured, I demolded the new mines and cleaned them up. While I was removing pour stubs, I realized that once again bubbles were in the castings. As before, I used cast-off resin to make plugs and superglued the plugs into the squared off holes. Just as before, once the plugs were taken down, I added the handles that I’d popped off the inaccurate mines, added .010” (.254mm) gluing discs, and then stuck them to scrap cardboard with double-sided tape so that the airbrush didn’t launch them into cat-toy land. I used a mix of Tamiya X-18 Semi-Gloss Black (3 parts) and XF-2 White (1 part) to paint them.
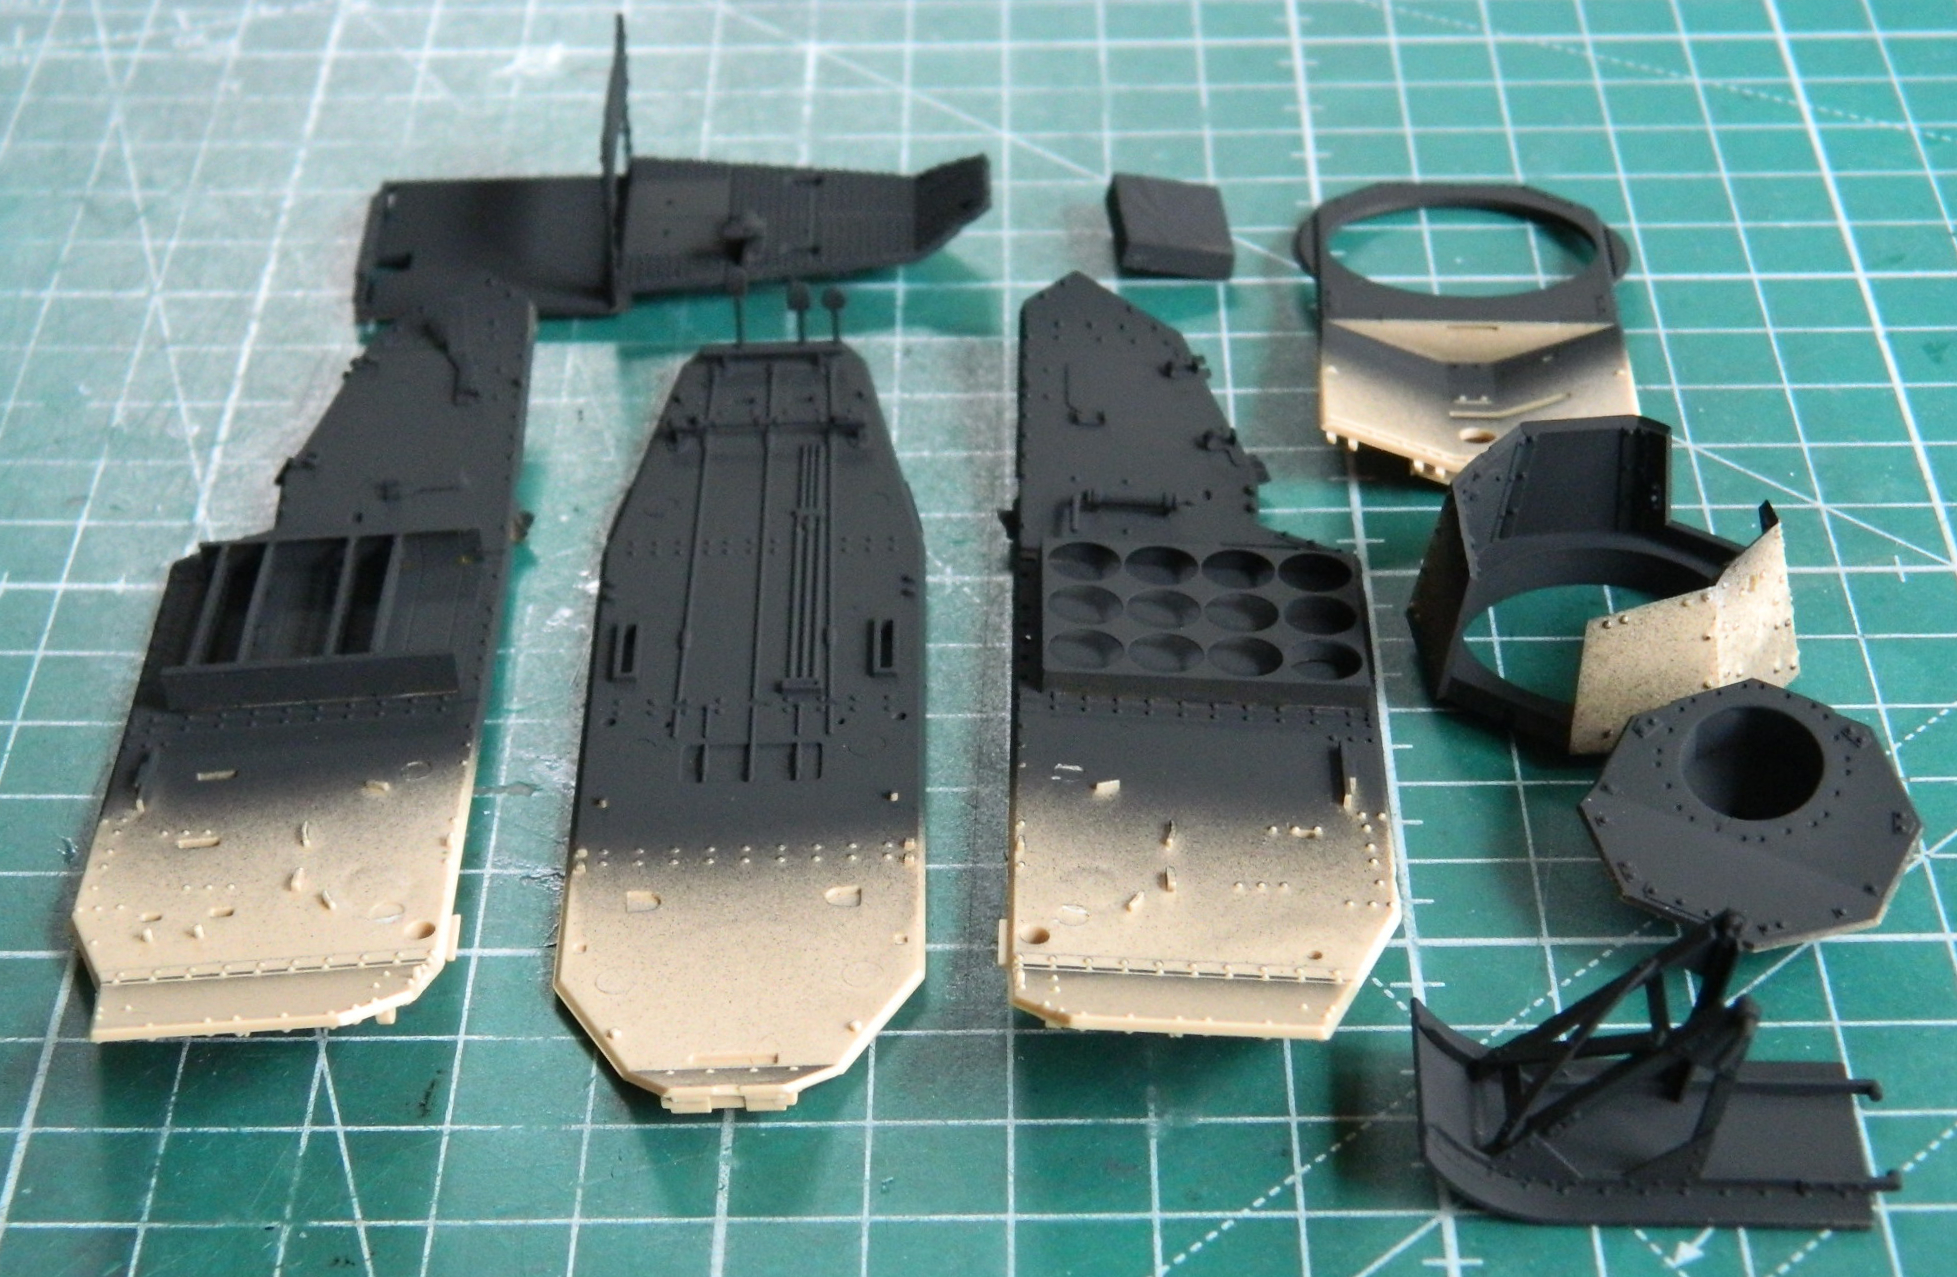
Something is always driving a build and I’m at the point where getting the interior parts all painted is in the driver’s seat. That starts with painting all the parts Tamiya’s XF-1 Flat Black to pre-shade things:
While I let the black dry, I mounted the gun to the front plate of the turret and then added wear, then I added lead foil to replicate the leather straps on the inside of the turret’s rear doors as well as the PE striker plate:

I misted several light coats of Tamiya XF-2 Flat White over the interior parts, laying down more white where light would hit more directly, making things look more white than white things in shadow (hence the term, “pre-shading”). After letting the white sit overnight, I added the mines and ammo to their respective racks. Then I painted the fire extinguisher copper and the gauge faces dirty white. The steering controls, shifter, and foot pedals were painted with Tamiya’s X-18 Semi-Gloss Black. The leather pad and seat back were painted a “leather” color using Tamiya XF-64 Red Brown and XF-49 Khaki evenly, one part of each color. The floor was painted Tamiya XF-62 Olive Drab. Before adding the raised and textured floor to the base floor, I used a silver-colored pencil to replicate wear on the floor, pedals, and lever controls:


The gun was glued to the front of the turret, the turret top glued down then I started assembling the lower hull and interior:


I did something less than a perfect job aligning the individual plates of the turret’s sides which left gaps. I used Vallejo’s Acrylic Putty, #70.401, to fill in those gaps between the plates that comprise the turret. It took a few applications in a few very small areas (as well as a couple of judicious uses of the 3M white acrylic putty) but eventually I closed all the gaps:
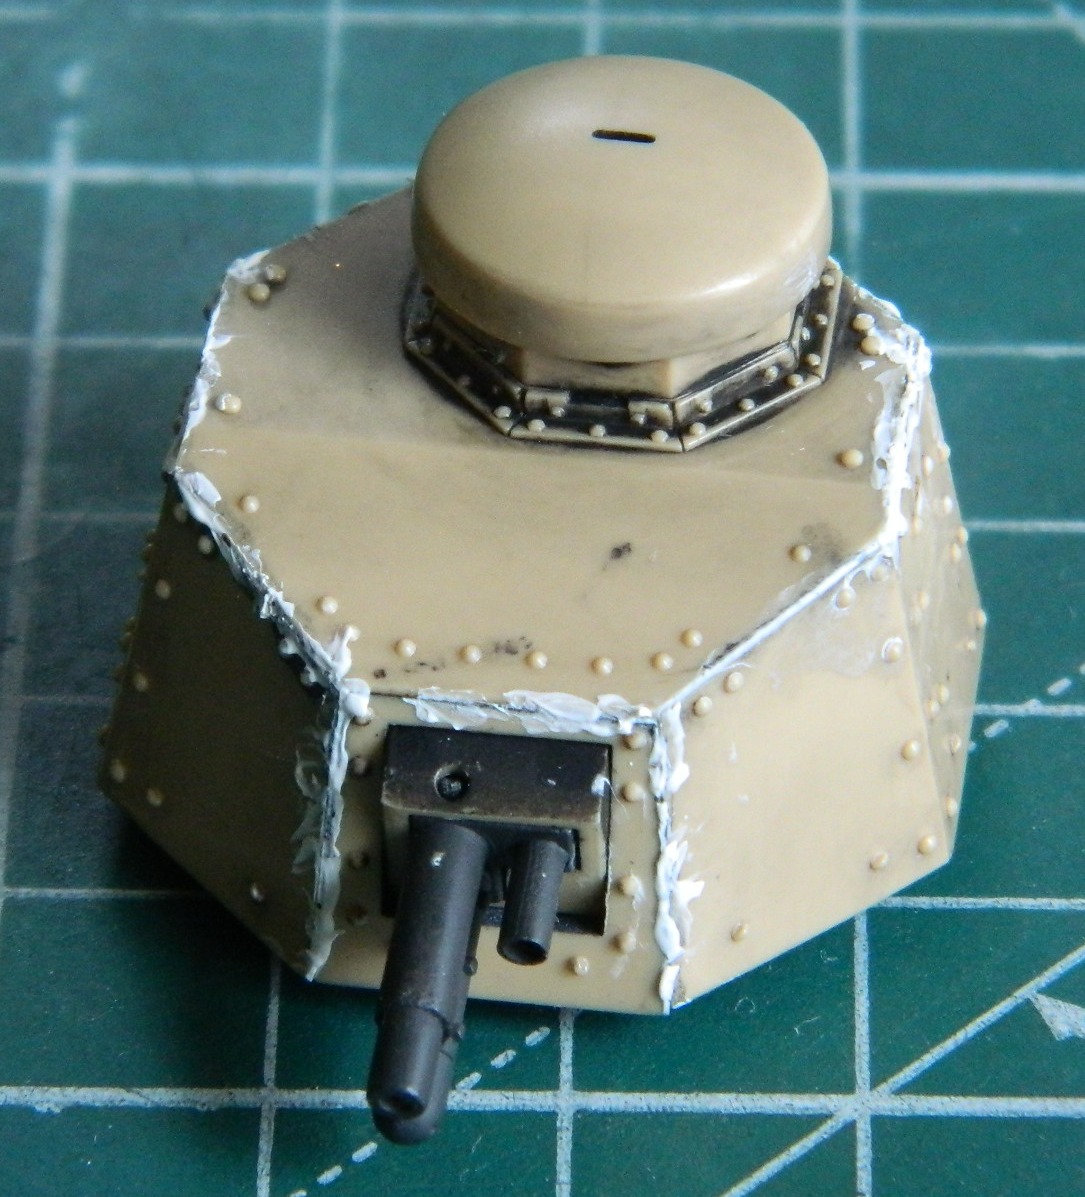

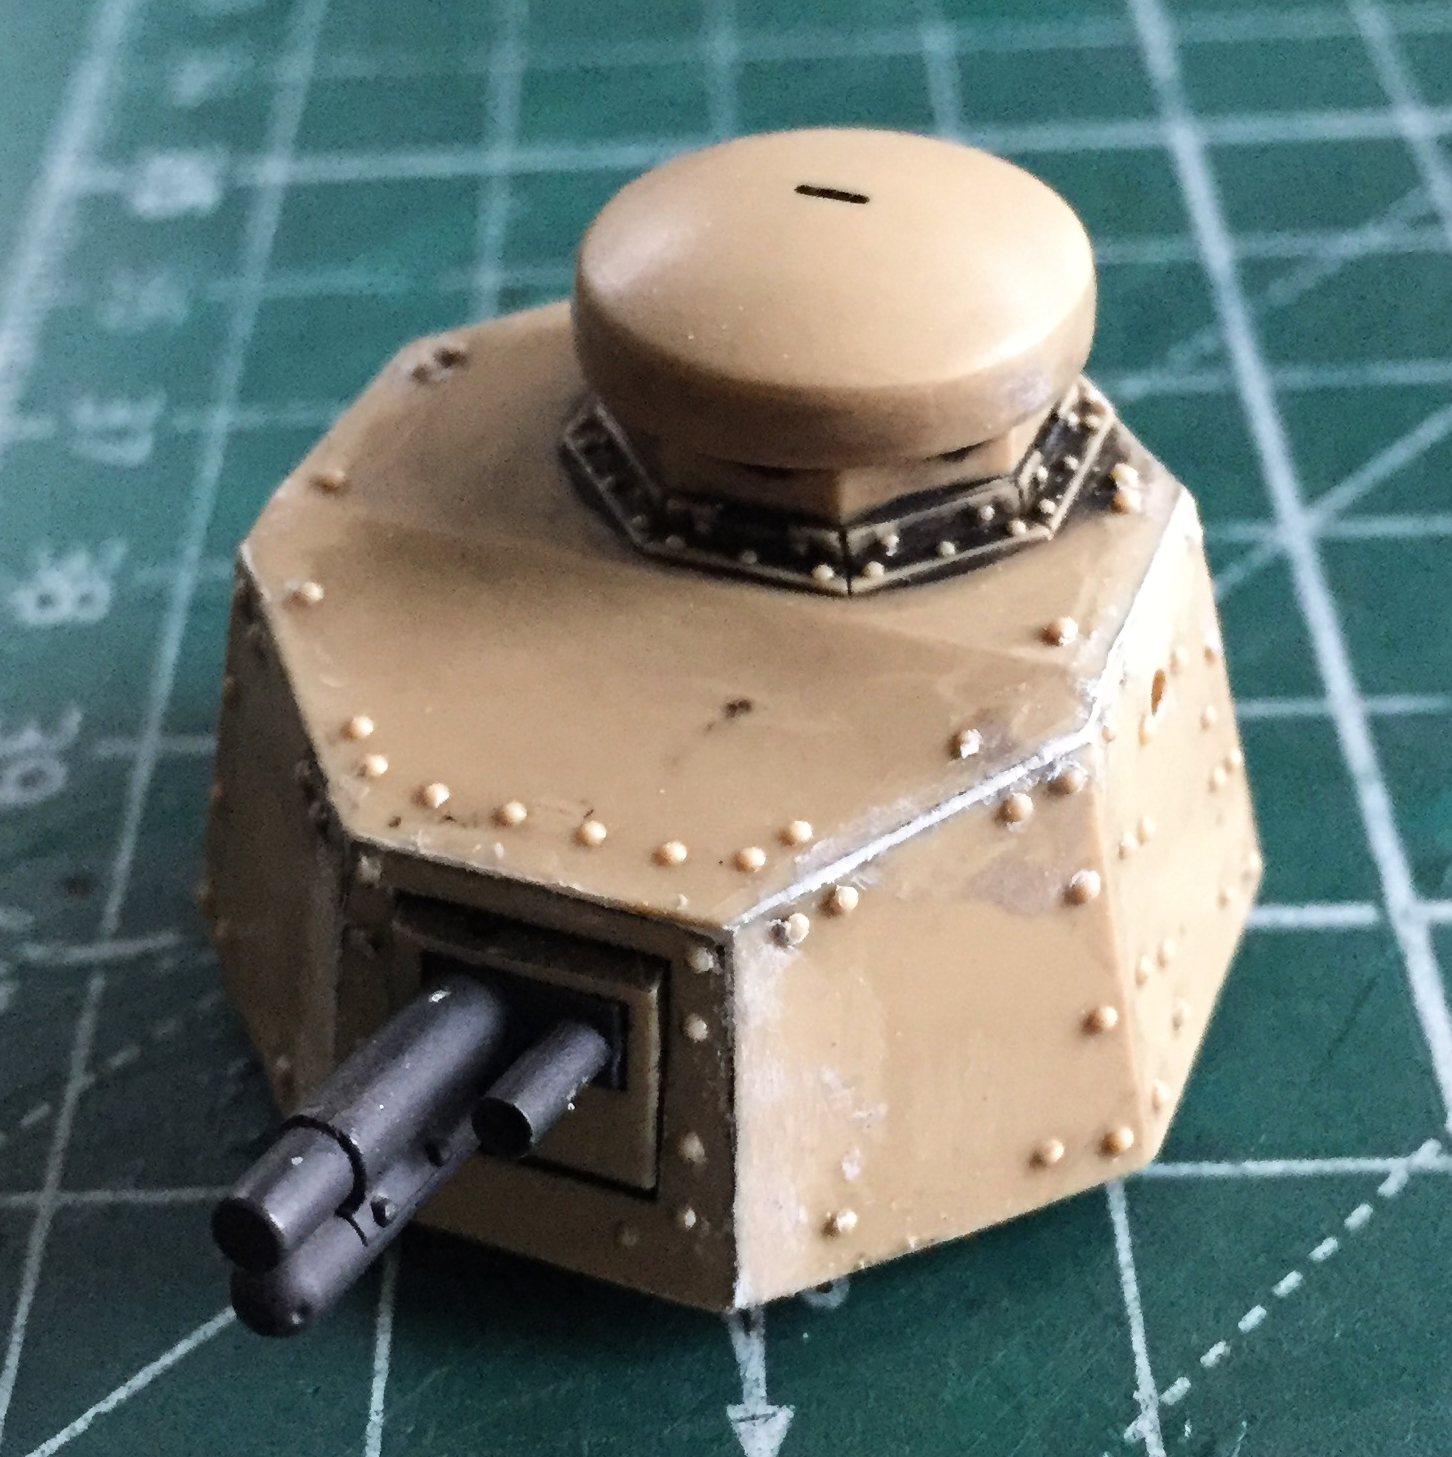
A quick word about puttying things around details you want to keep. Whenever possible, cover the details with masking tape. When that’s either not possible or more hassle than you want to deal with, instead of sanding the putty smooth, use the edge of a sharp knife (on this turret, I used a scalpel) and scrape the putty away. It’s easier to keep the detail from being lost than sanding permits. (I also used the scalpel to place the putty as well.)
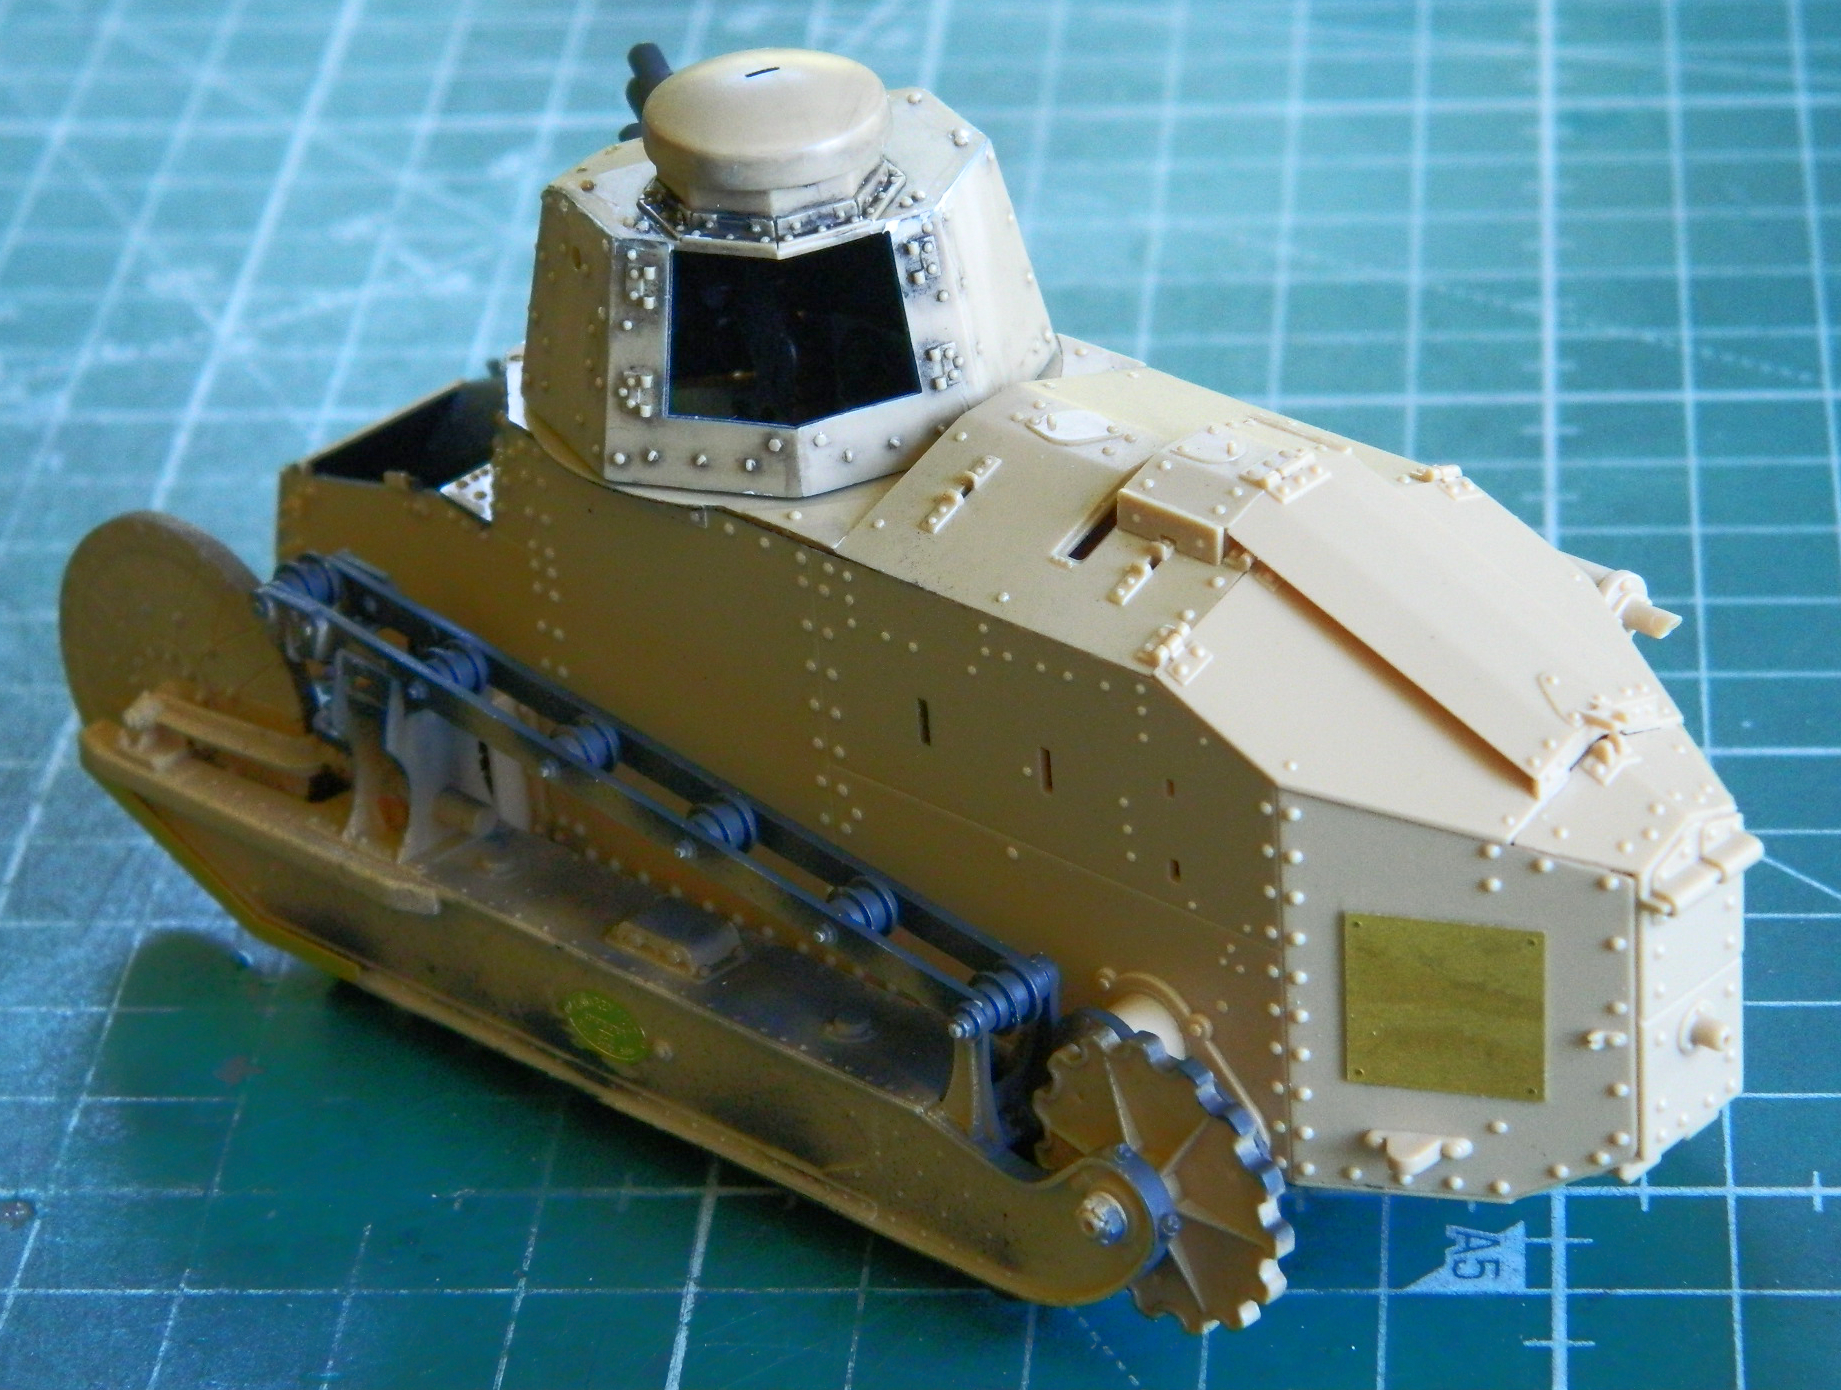
One thing that turned into a moderate ass pain was the armor plates around the driver’s position. (And as a side note, this place is the easiest “tell” between the FT-17 and the licensed copy the US Army fielded, the M1917. On the latter, the sides on either side of the driver’s position do not pinch towards the upper hatch opening the way the FT-17’s does.) Each part has to be in place to allow the other plates to align properly. The problem comes when one realizes that the other plates have to be in place to allow each part to align. (A problem compounded by only having two hands.) It took me longer than I’d anticipated and judging from the styrene I had to add to make things “fit,” as well as some sections I had to remove and reshape, somewhere along the line I have something out of alignment (too late to fix whatever that is now…). The two sides to the upper opening for the driver are supposed to be vertical and they obviously are not:


No, I’m not pleased with how that opening turned out. I also spent quite some time to get them to where they will remain.
So again, getting things under paint is what’s driving this build presently. I attached the forward mounts for the suspension (MORE operational parts ridiculousness. Okay…make the weight bearing parts from metal. Makes sense. But another operational set of springs?! [There’s also an operational spring in each suspension assembly.] I hope the engineers responsible for this sober up [or perhaps simply grow up] before they start work on their next project):

It was at this point that I realized that I can finish assembling the tracks onto the suspension before mounting the suspension assemblies to the hull! That will make things SO much easier! I tried dry-fitting the suspension assemblies to see how workable the notion of finishing them before attaching them could be.
Very:

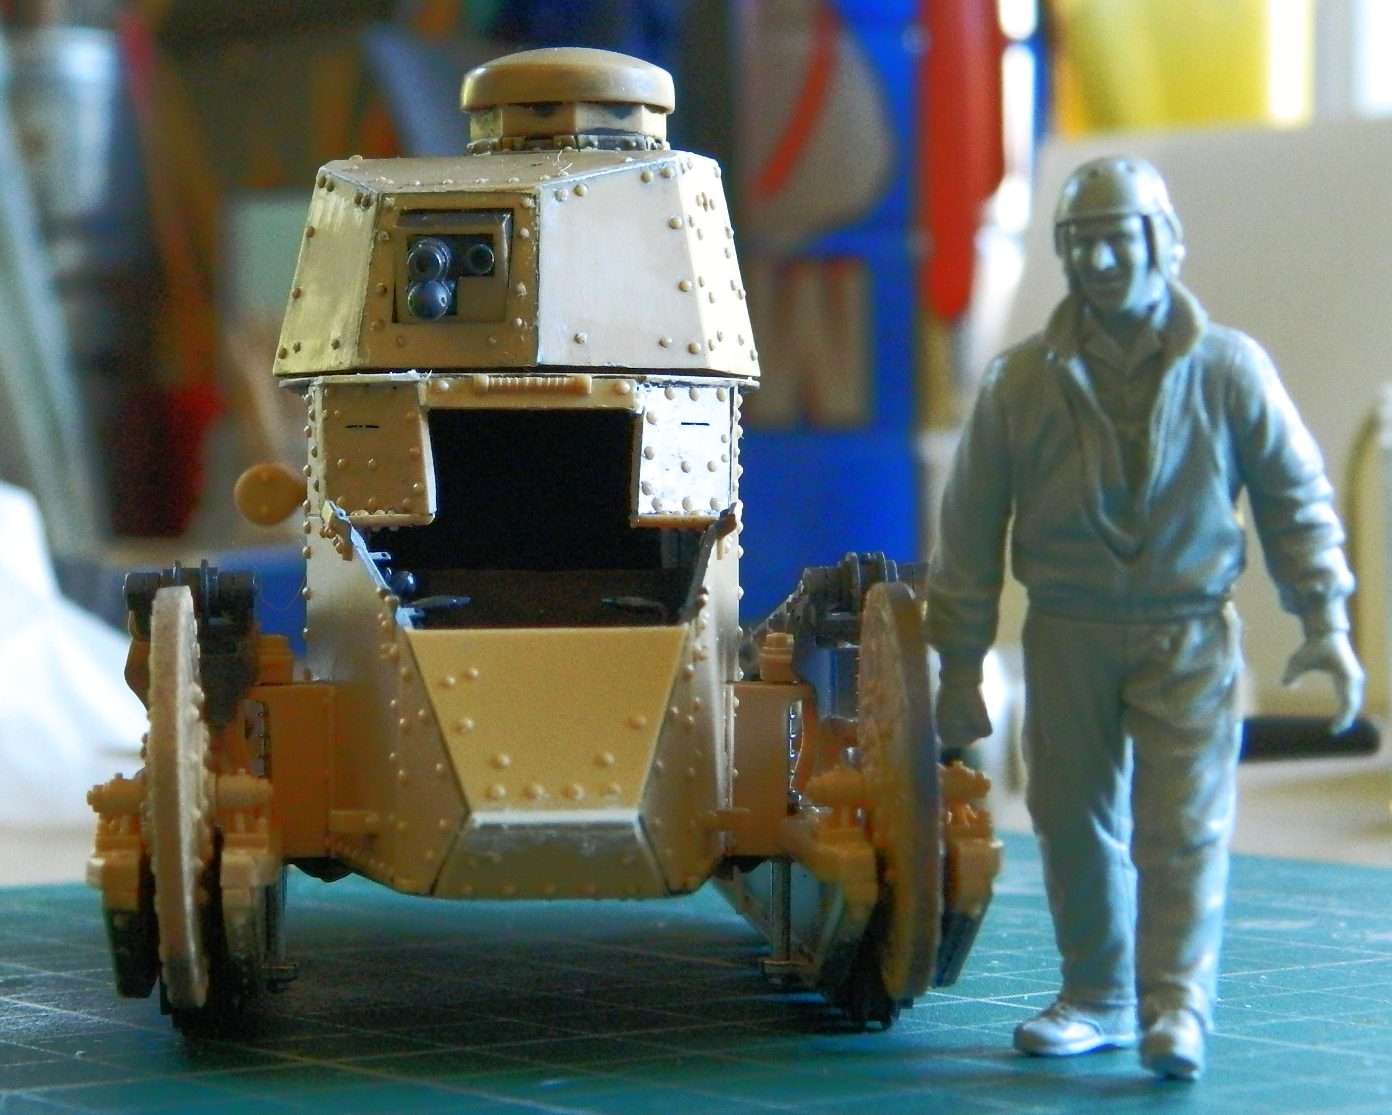
It’s one thing to know this is a small tank. It’s something else to pose a 1/35 scale figure (the same scale as this tank is) to get an idea of HOW SMALL A TANK THIS IS:

And just as I’m about to post this, I finally figured out what’s been nagging me the past couple of days. I forgot to wear and stain the interior. Well, at least it’s easier to get into where I need to in order to add what I forgot to add. Swabs and brushes can reach where I need them to.
::sighs::
