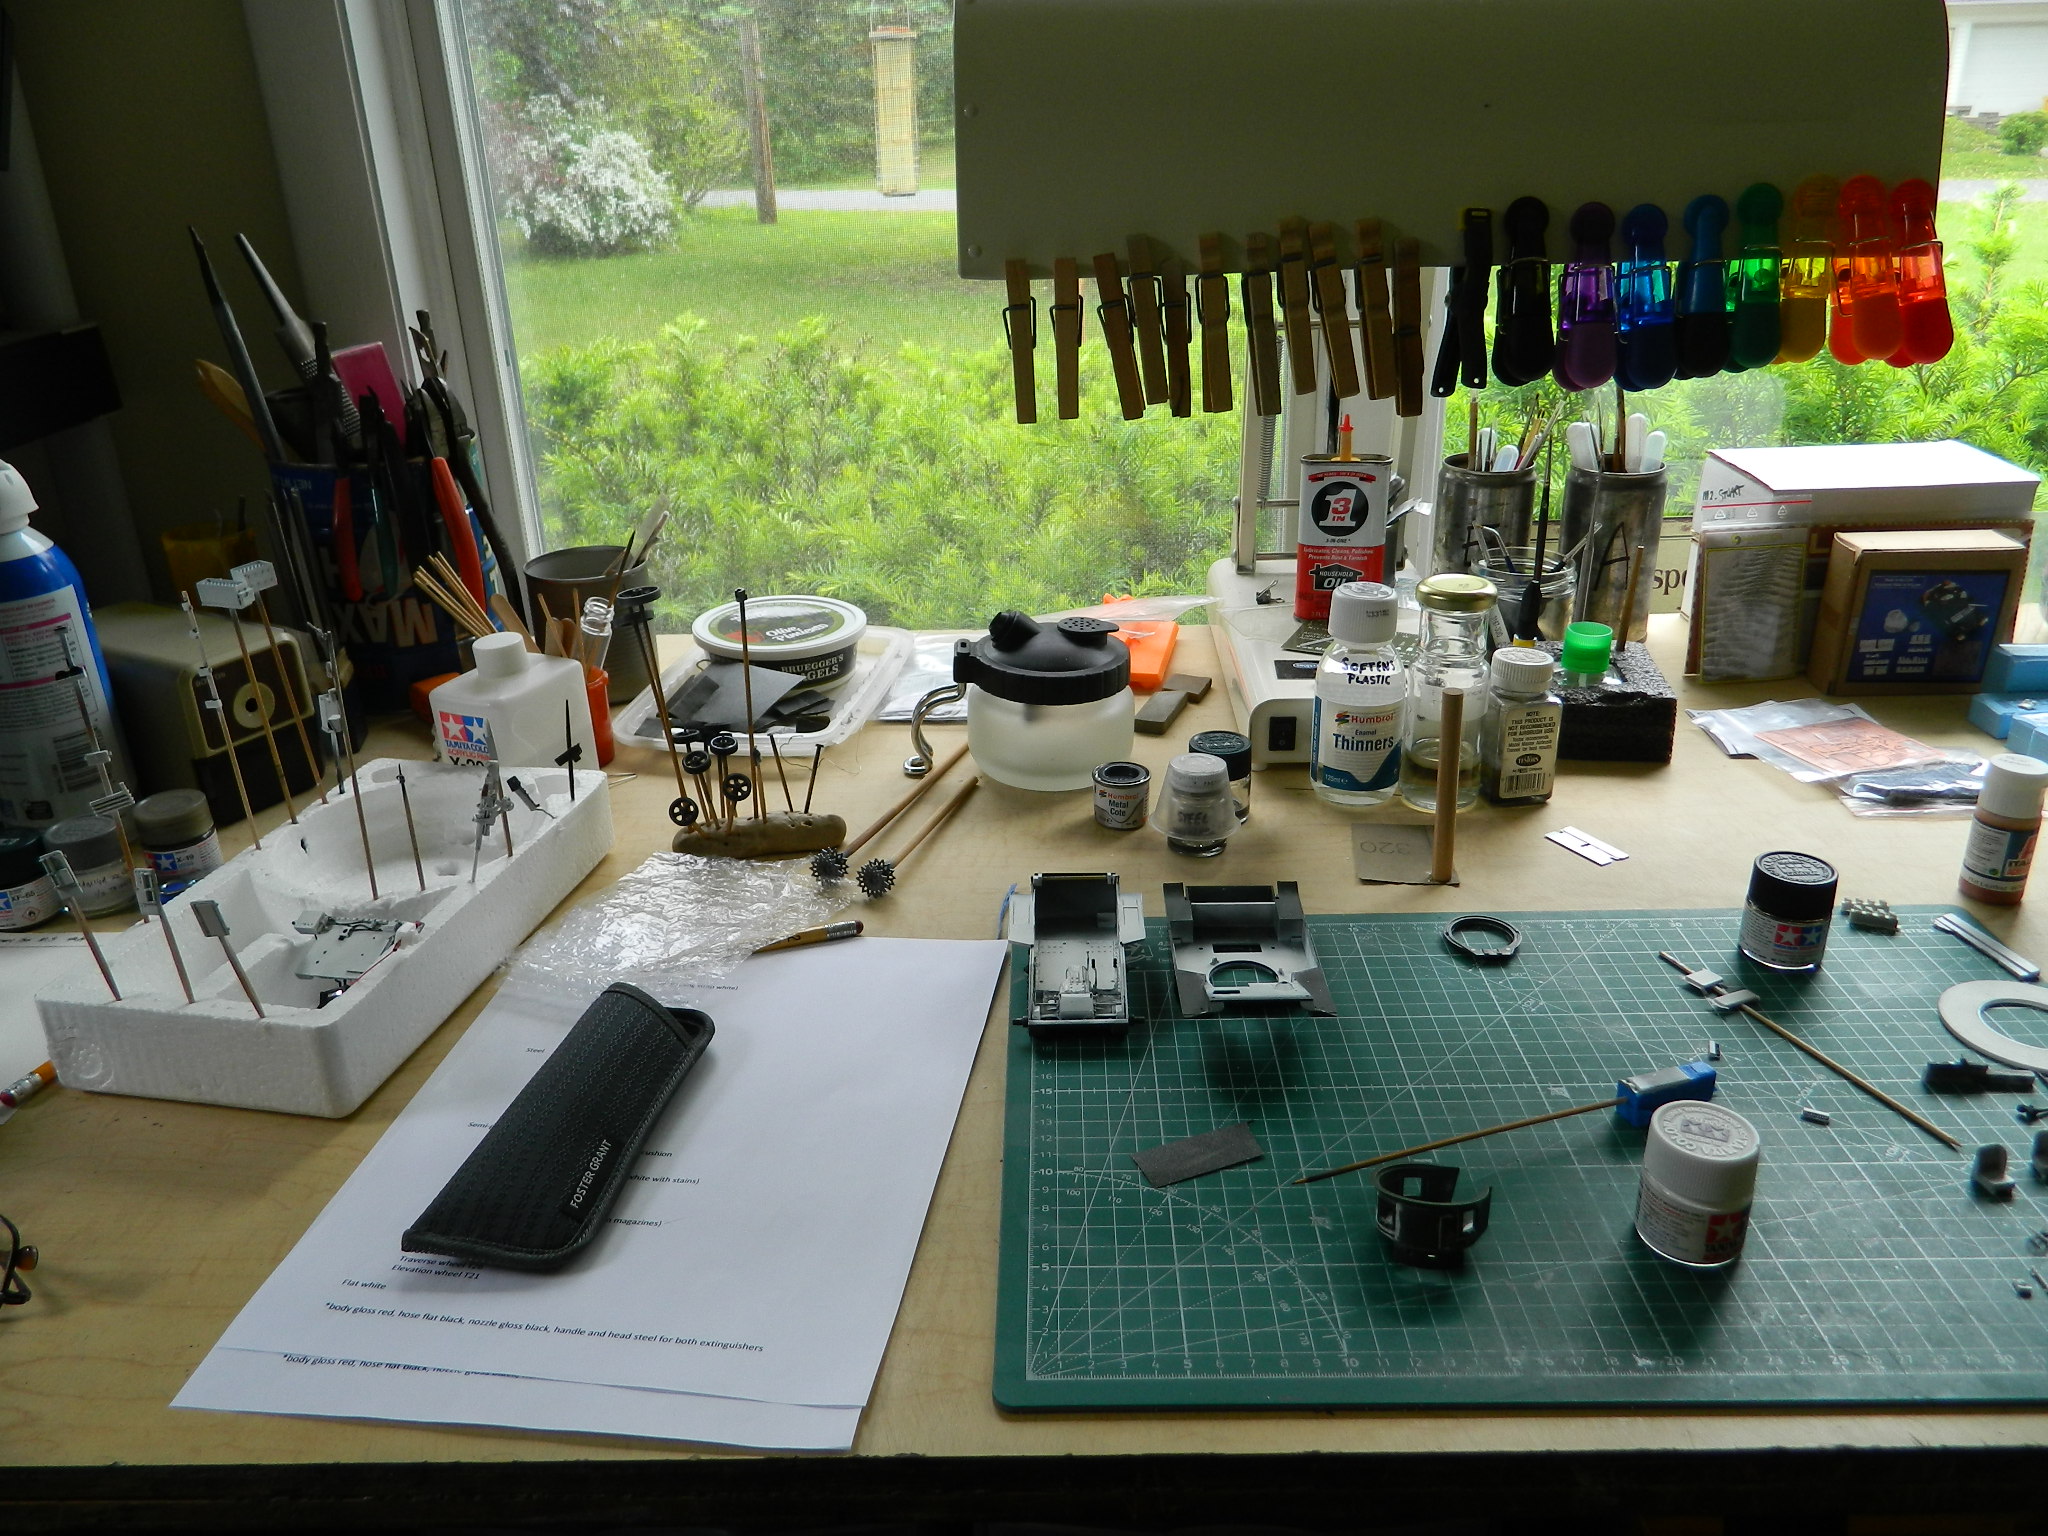
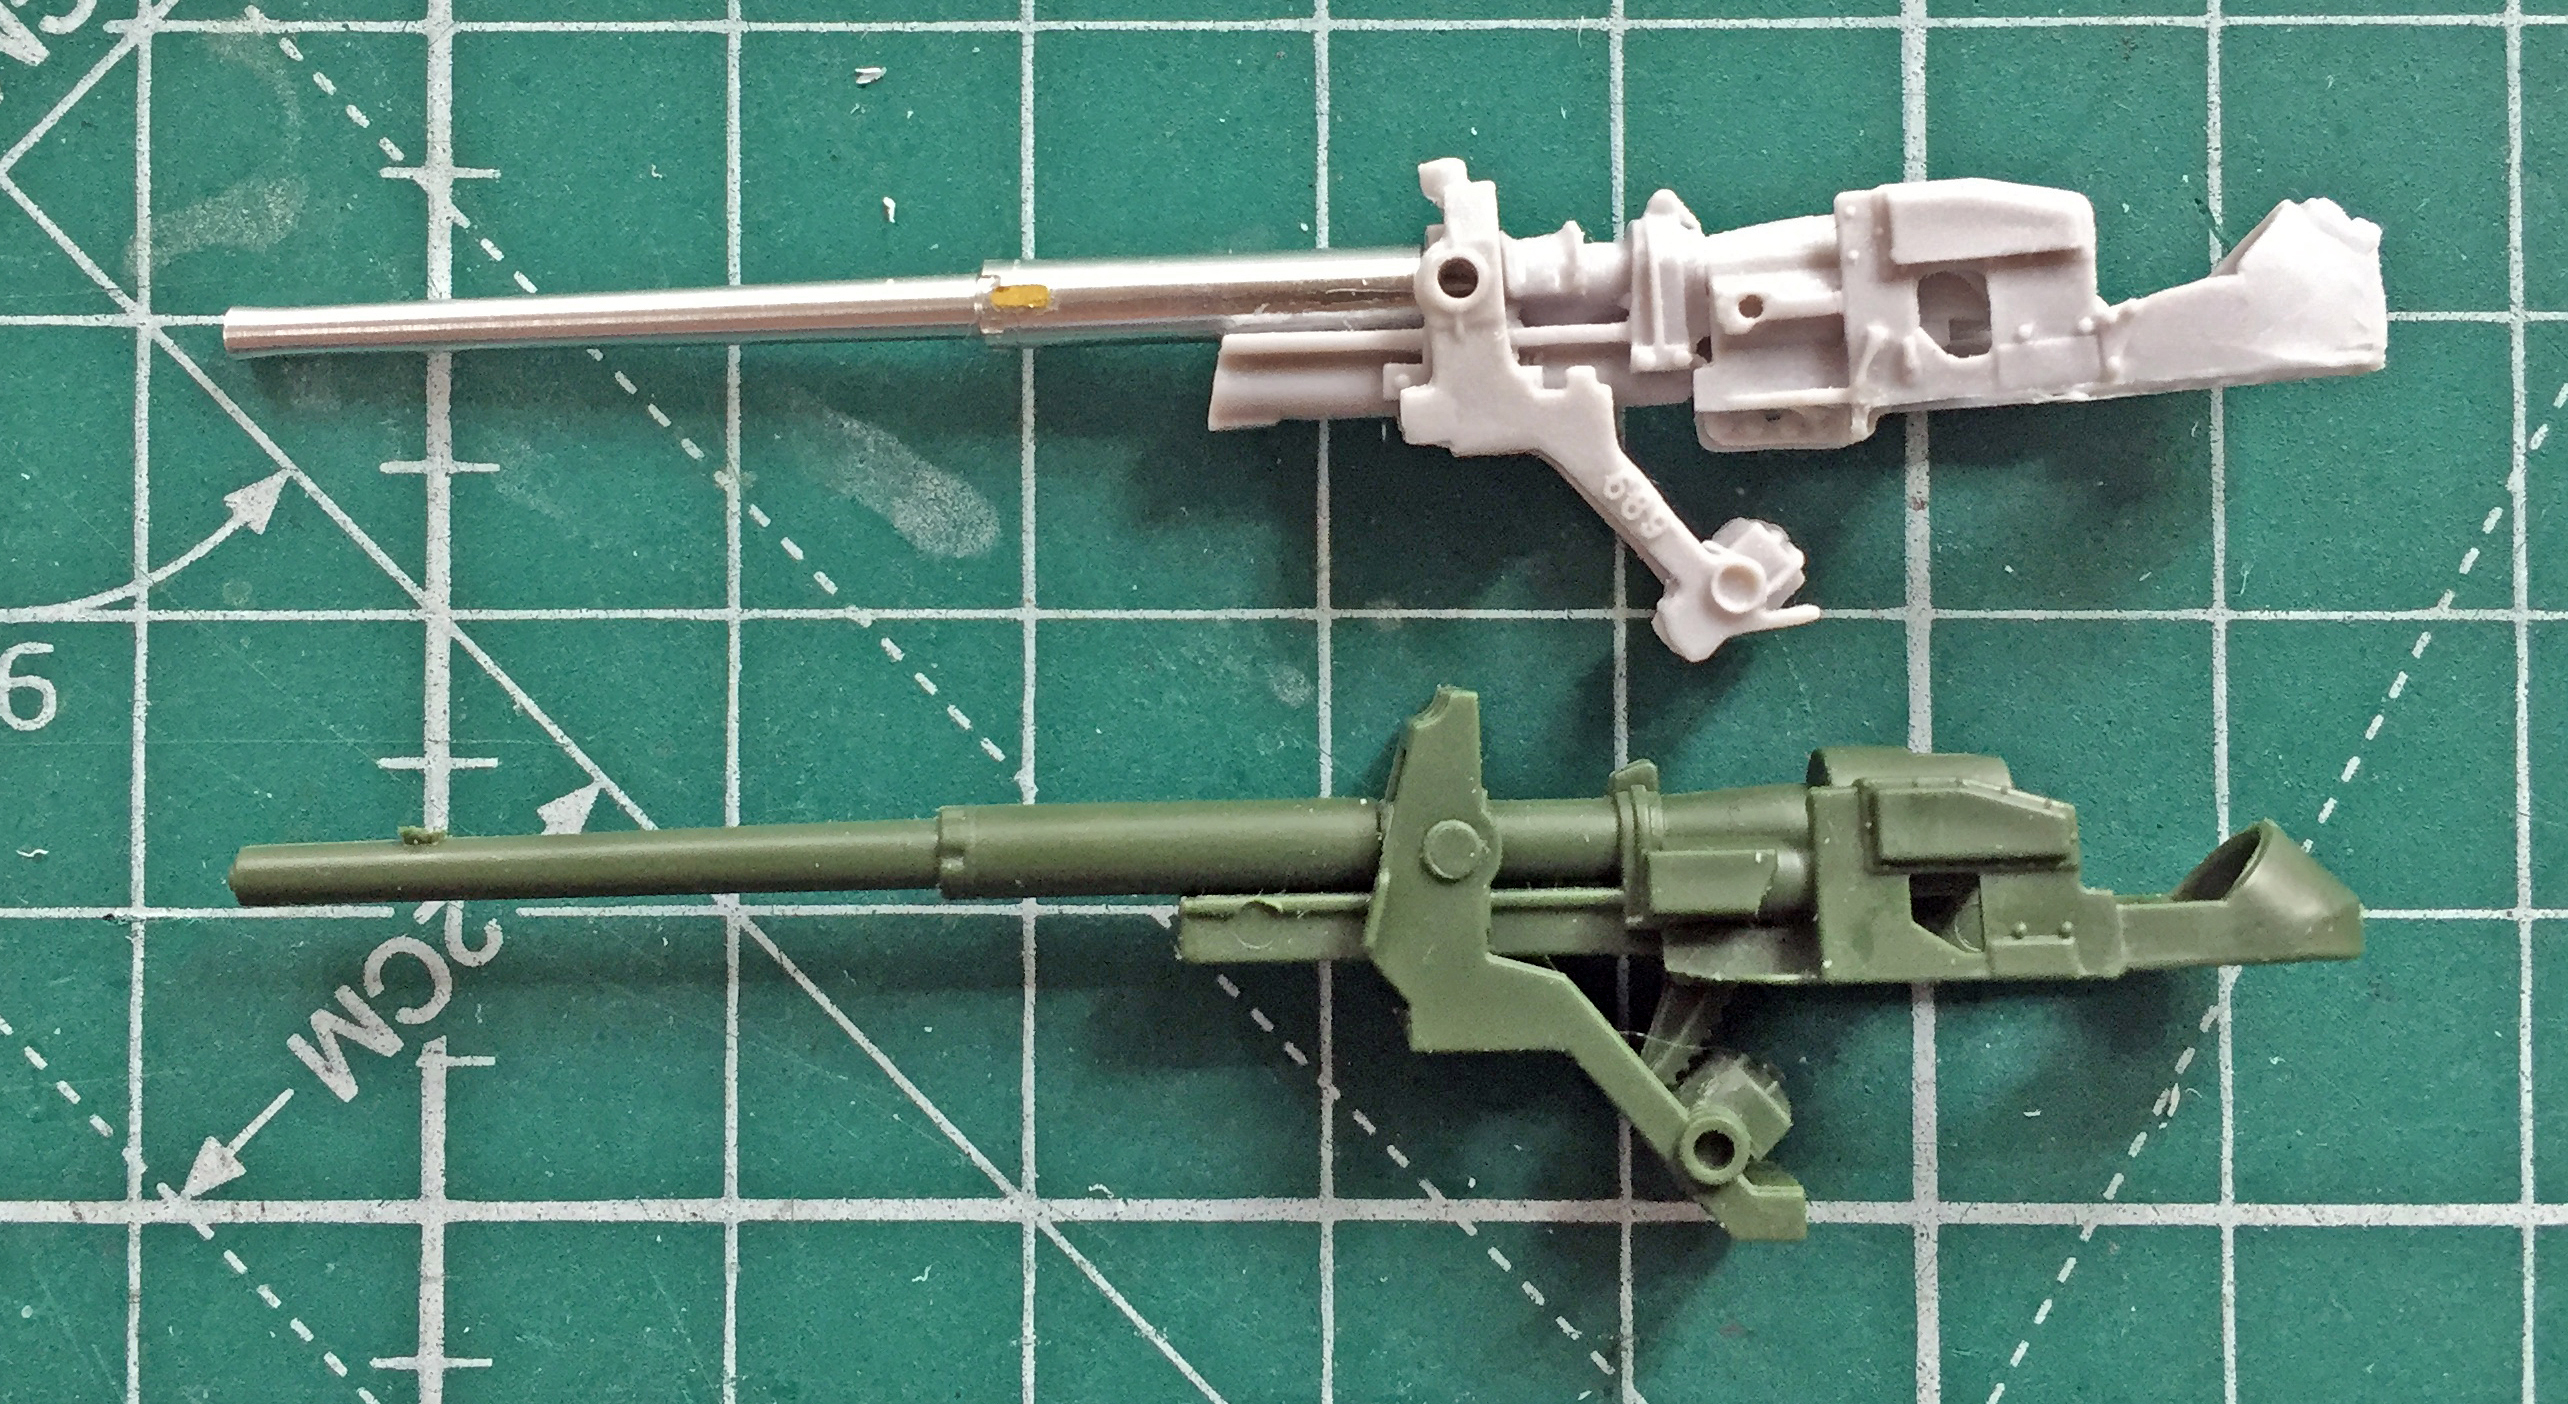
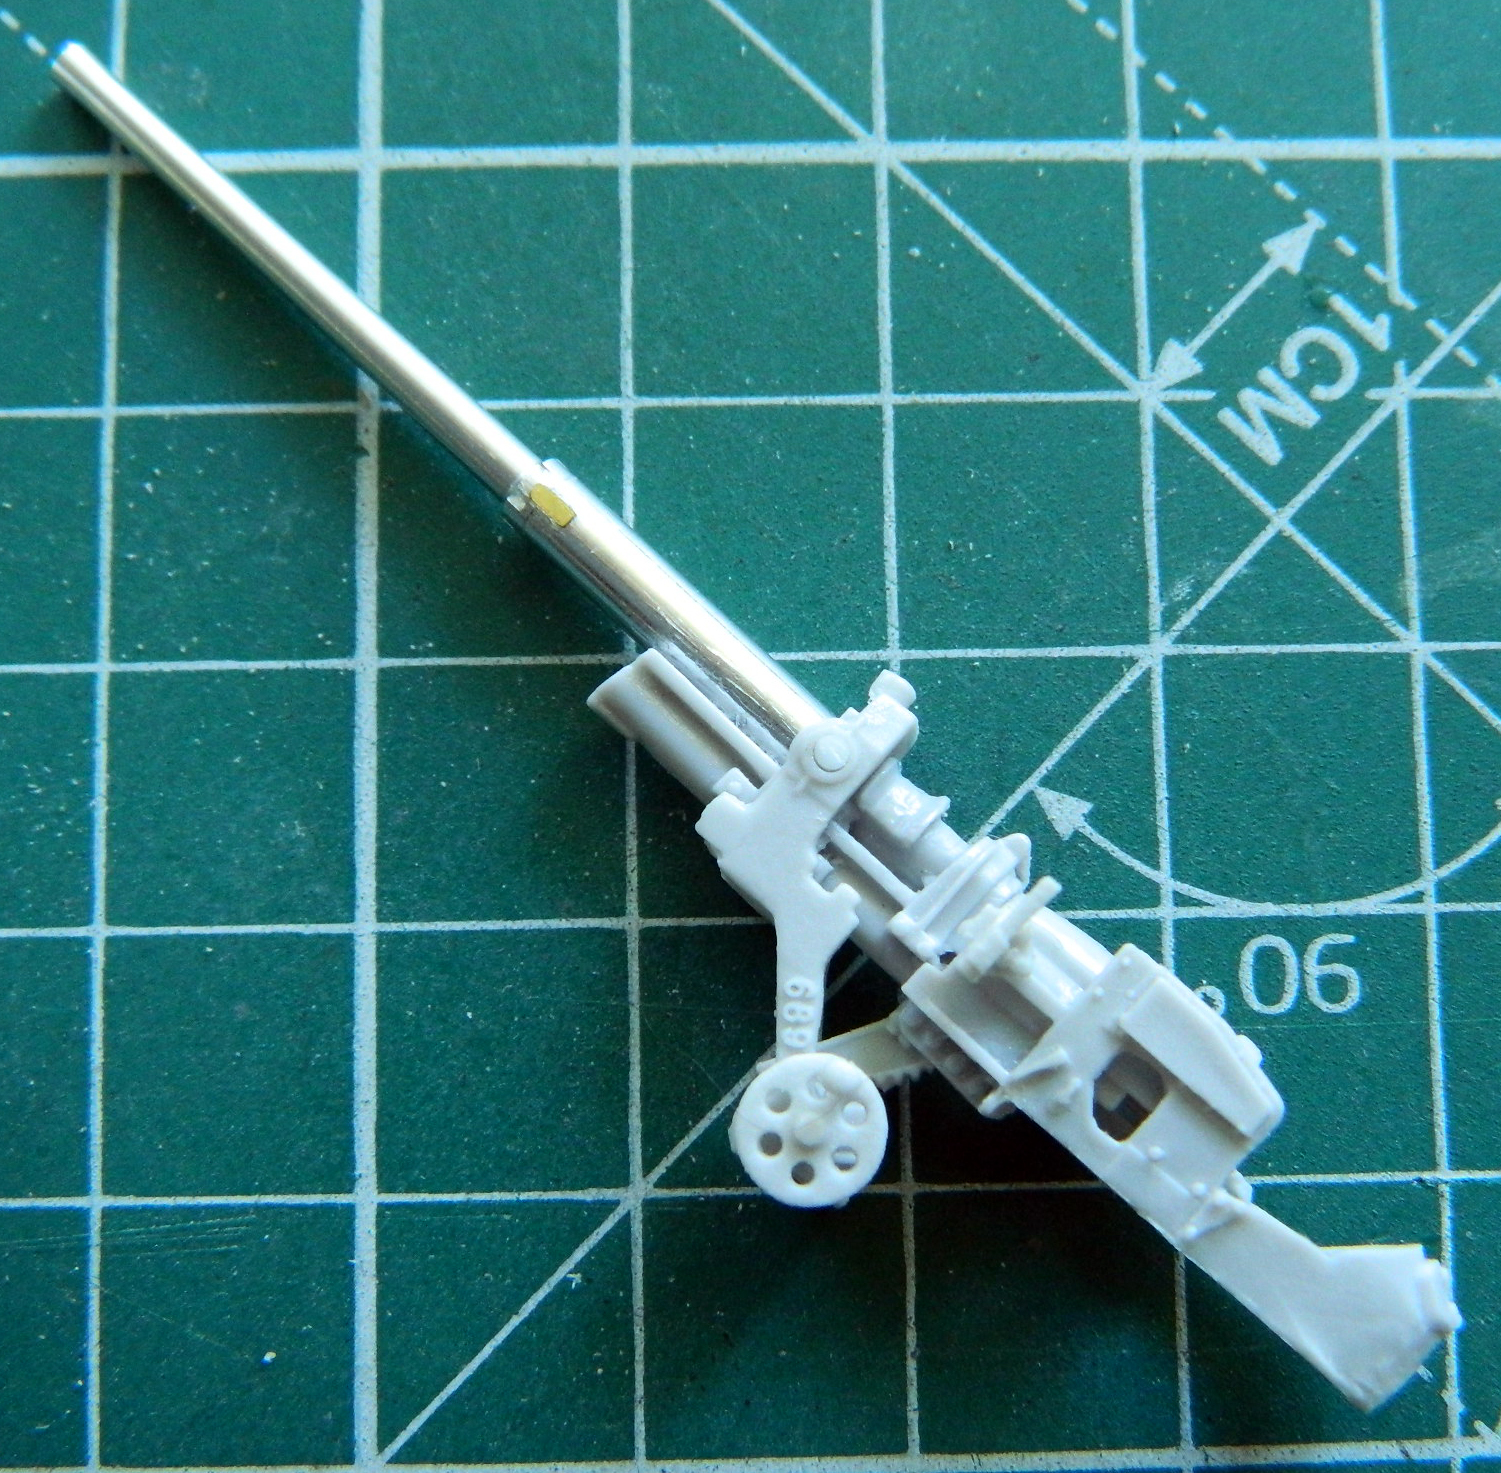
I discovered Master’s machine gun barrels (their Ground Master Series) when I did the M4A3. The .30 caliber (7.62mm) barrels are amazing pieces of work. The cooling shroud is a separate piece from the barrel. The last time I used Master’s barrels, I used superglue to hold the parts in place. This time I used solder, only soldering the parts where they attach to the machine guns’ receivers:

As fine as these parts are, I discovered the last time I used them that painting them doesn’t really show them very well. Yes, they’re better than the kit or resin barrels, but do not show as well once painted. While running around the ‘Net doing things (yes…porn), I encountered someone else who thought the same way about painting these beauties. His solution was to use a solution (ain’t I clever?) that ages brass! As with most solutions, there are problems and limitations with it, but the end result makes dealing with those problems and limitations SO worth it.
The aging compound was purchased from a firm that makes chemicals to treat firearms:

I made a little cup from aluminum foil and immersed the soldered parts in the solution and stirred it a bit. Then I discovered (because the solution leaked all over the bench) that this stuff dissolves aluminum:

The solution starts out relatively clear and as the brass takes on its color, the solution turns blue. The first attempt resulted in the chemicals not really getting inside the cooling jacket to color the barrel. The parts also came out looking rather sooty:
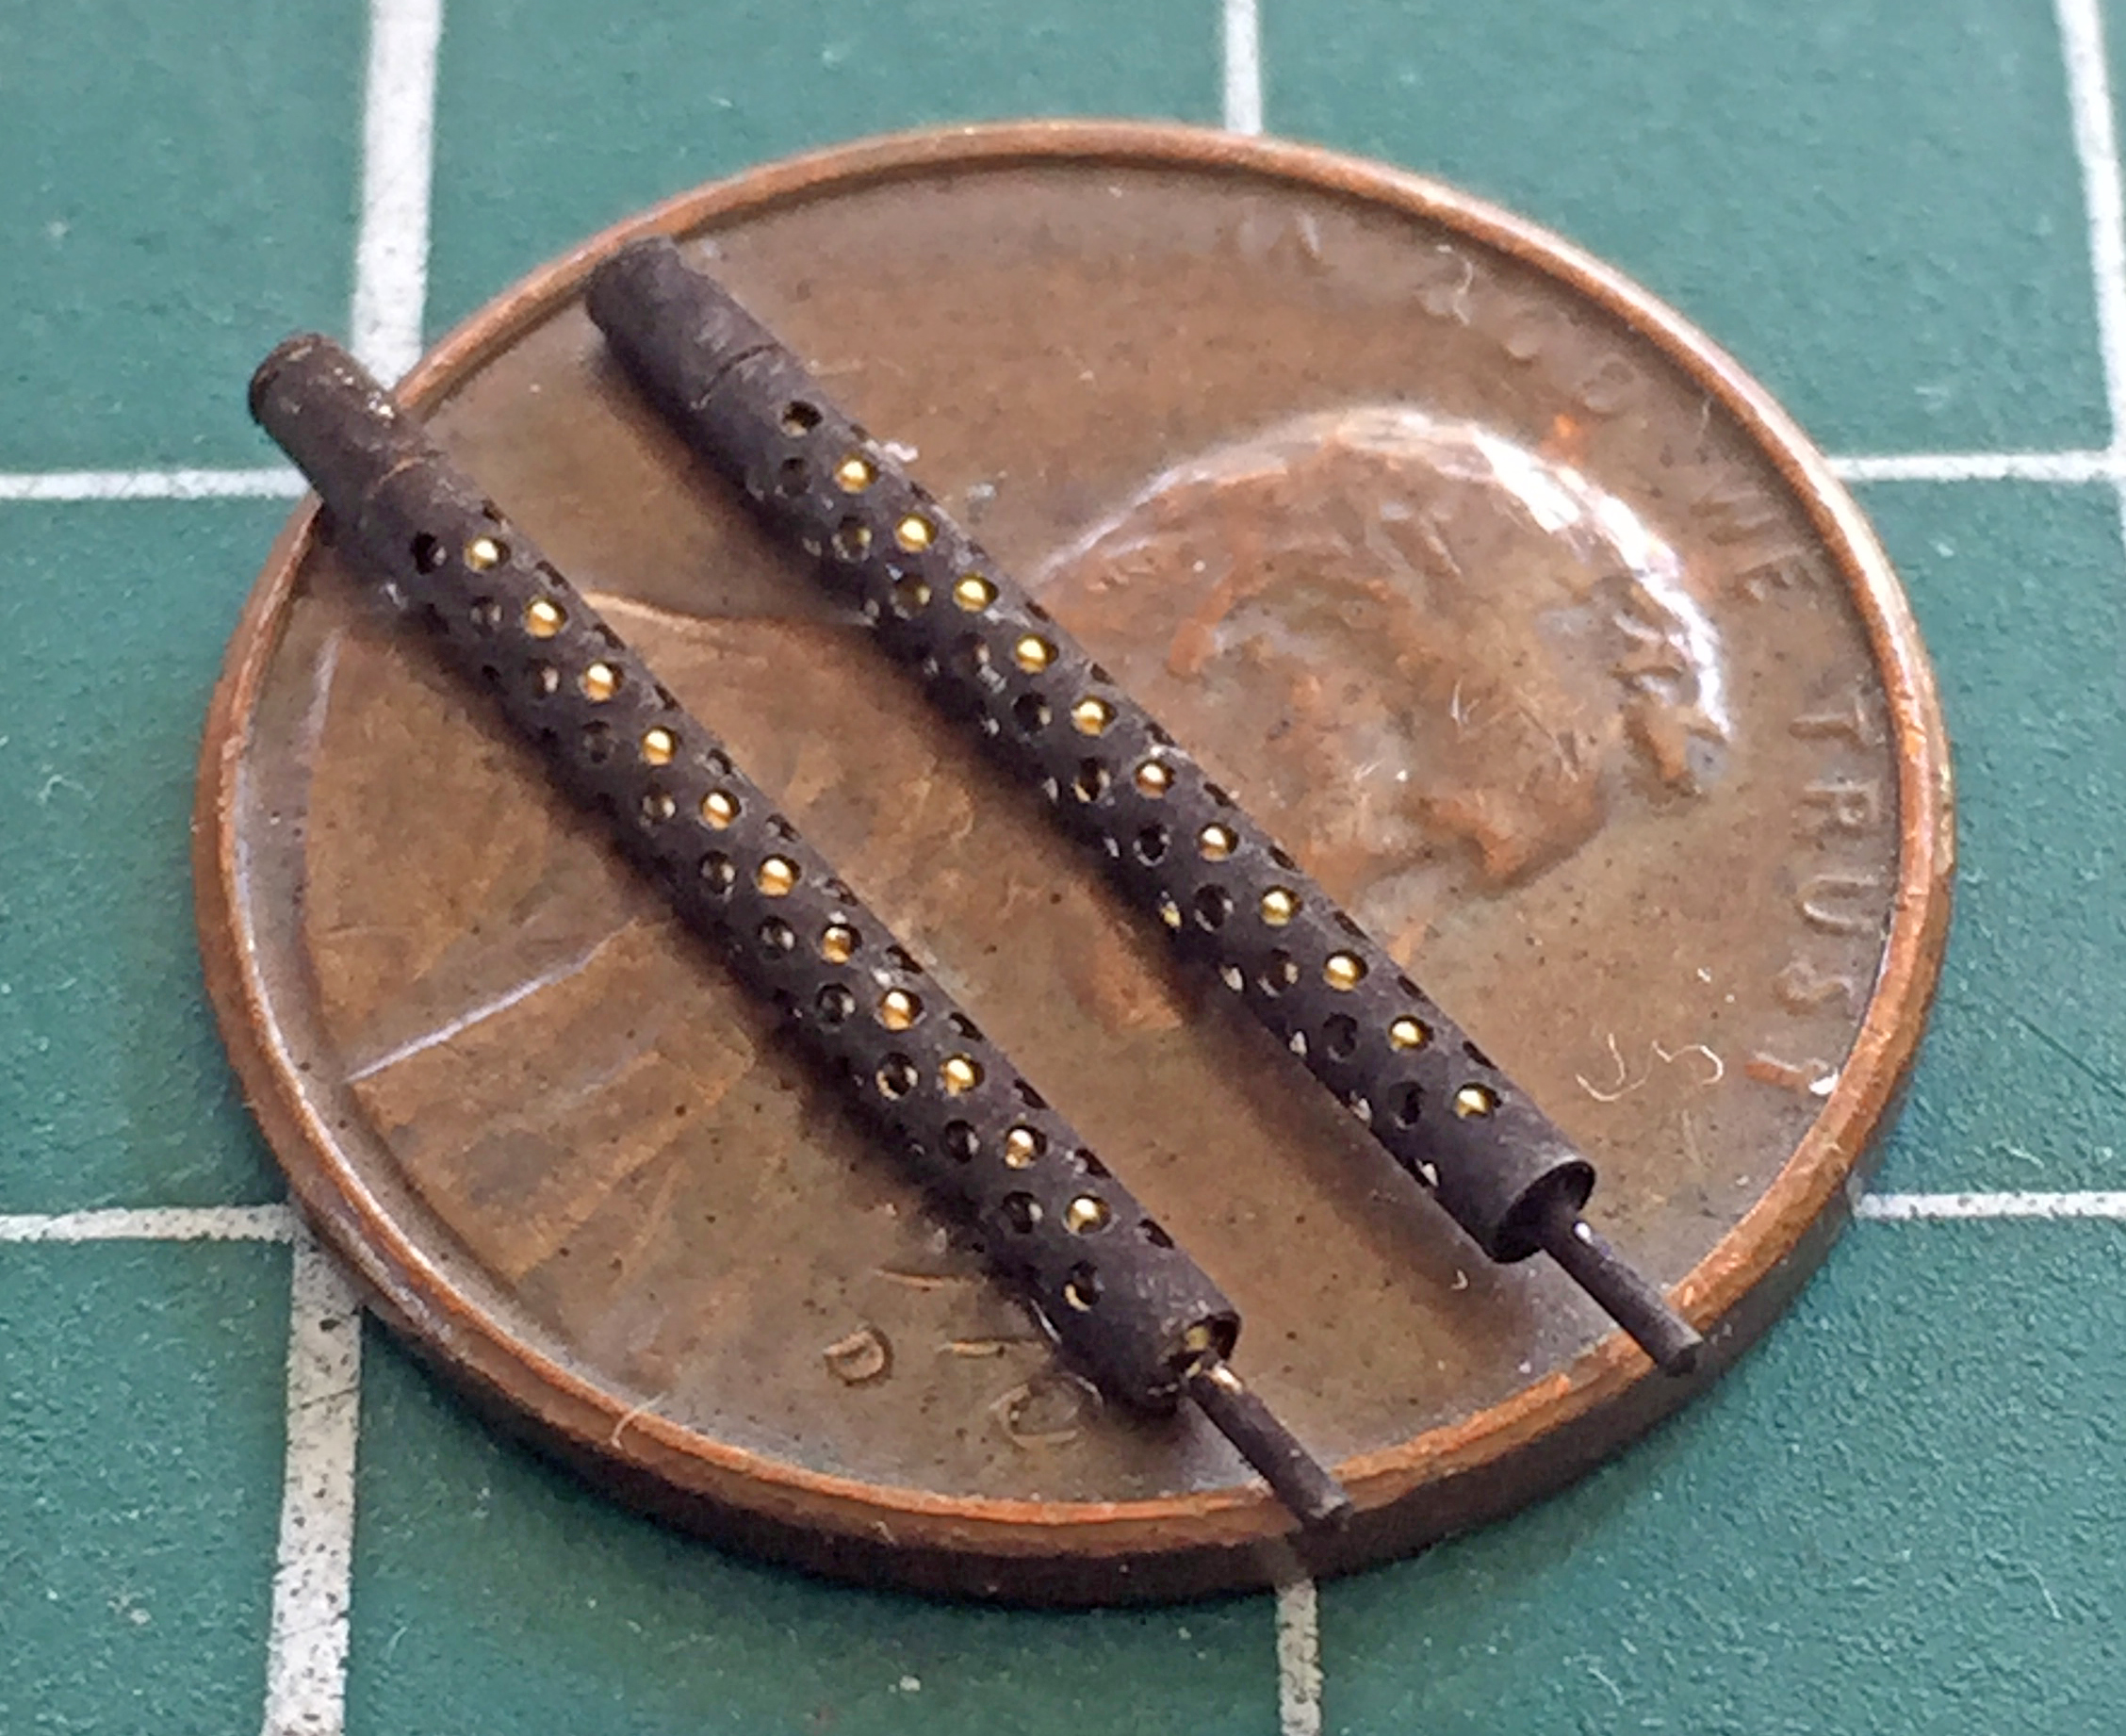
For the next immersion, I used an empty paint bottle (because, well, can you imagine the mess if it still had paint in it?) to hold the solution. The barrels were immersed again and if they had snot, I would have shaken it completely off of them. The result was better, though not perfect. I tried a few times and have come to realize that the next time I use the blackening solution, I’ll do so before assembly (and go back to superglue because I’m thinking that much heat to a treated surface will undo all the coloration). With the coating more comprehensive, I buffed off the sooty surface and really liked the results:

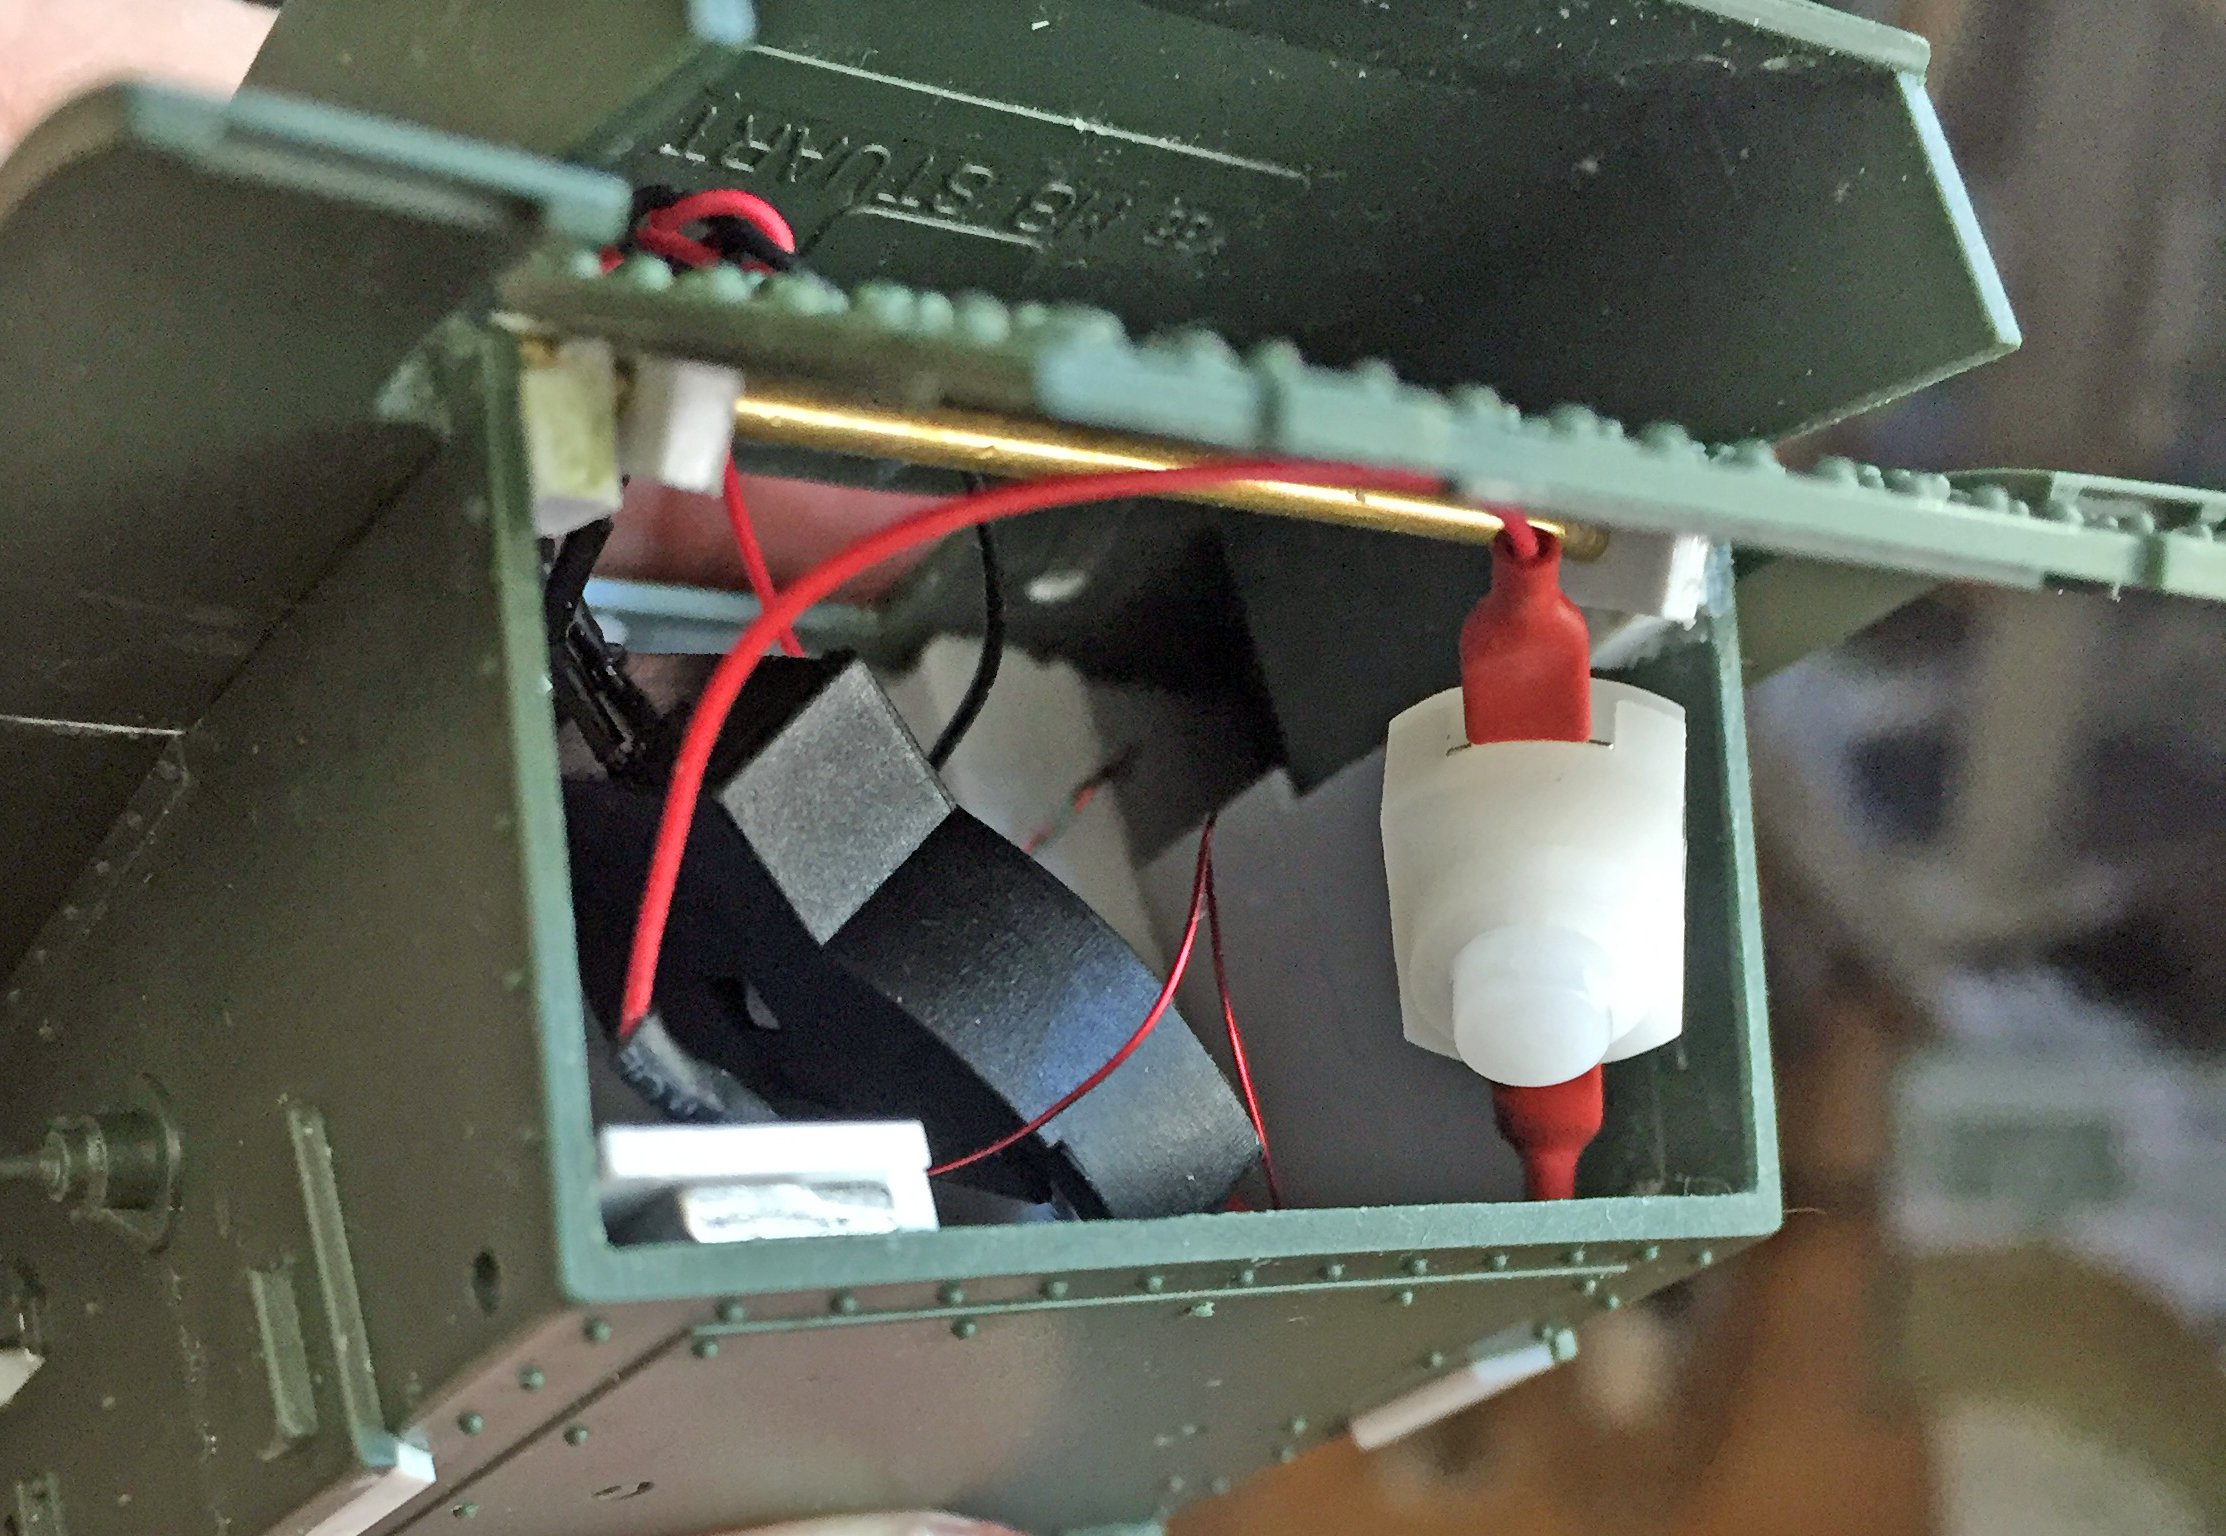
Another feature I wanted to add to this build is a LED inside the fighting compartment. I added that to the firewall and ran the wires into the area where the engine would go. The leads for the LED and battery/switch assembly were ample. They were ample enough to pretty much fill the damned space with just wires. So the wires were trimmed, soldered, and insulated:

Another of those things that had been hovering over my head was the question about how the battery and switch would be accessed. My initial thought was to cut open the inspection plate on the bottom of the hull under the engine compartment where these things were going to live (because that was the most complicated way to do it). Then I came out of my head and looked at what was sitting on the bench in front of me. The entire rear end of the lower hull is one piece. Hmmm… If I use that hull section as my access door, I’m not going to make work for myself but instead would use a feature of the kit to my purposes. Okay, so how do I make the entire back of the lower hull open? Well…I could make that entire back hinged. I already had the magnets I’d planned on using to keep the access door closed (wherever I put it), so keeping the access panel closed was already considered. Okay, then I guess I should make some sort of hinge.
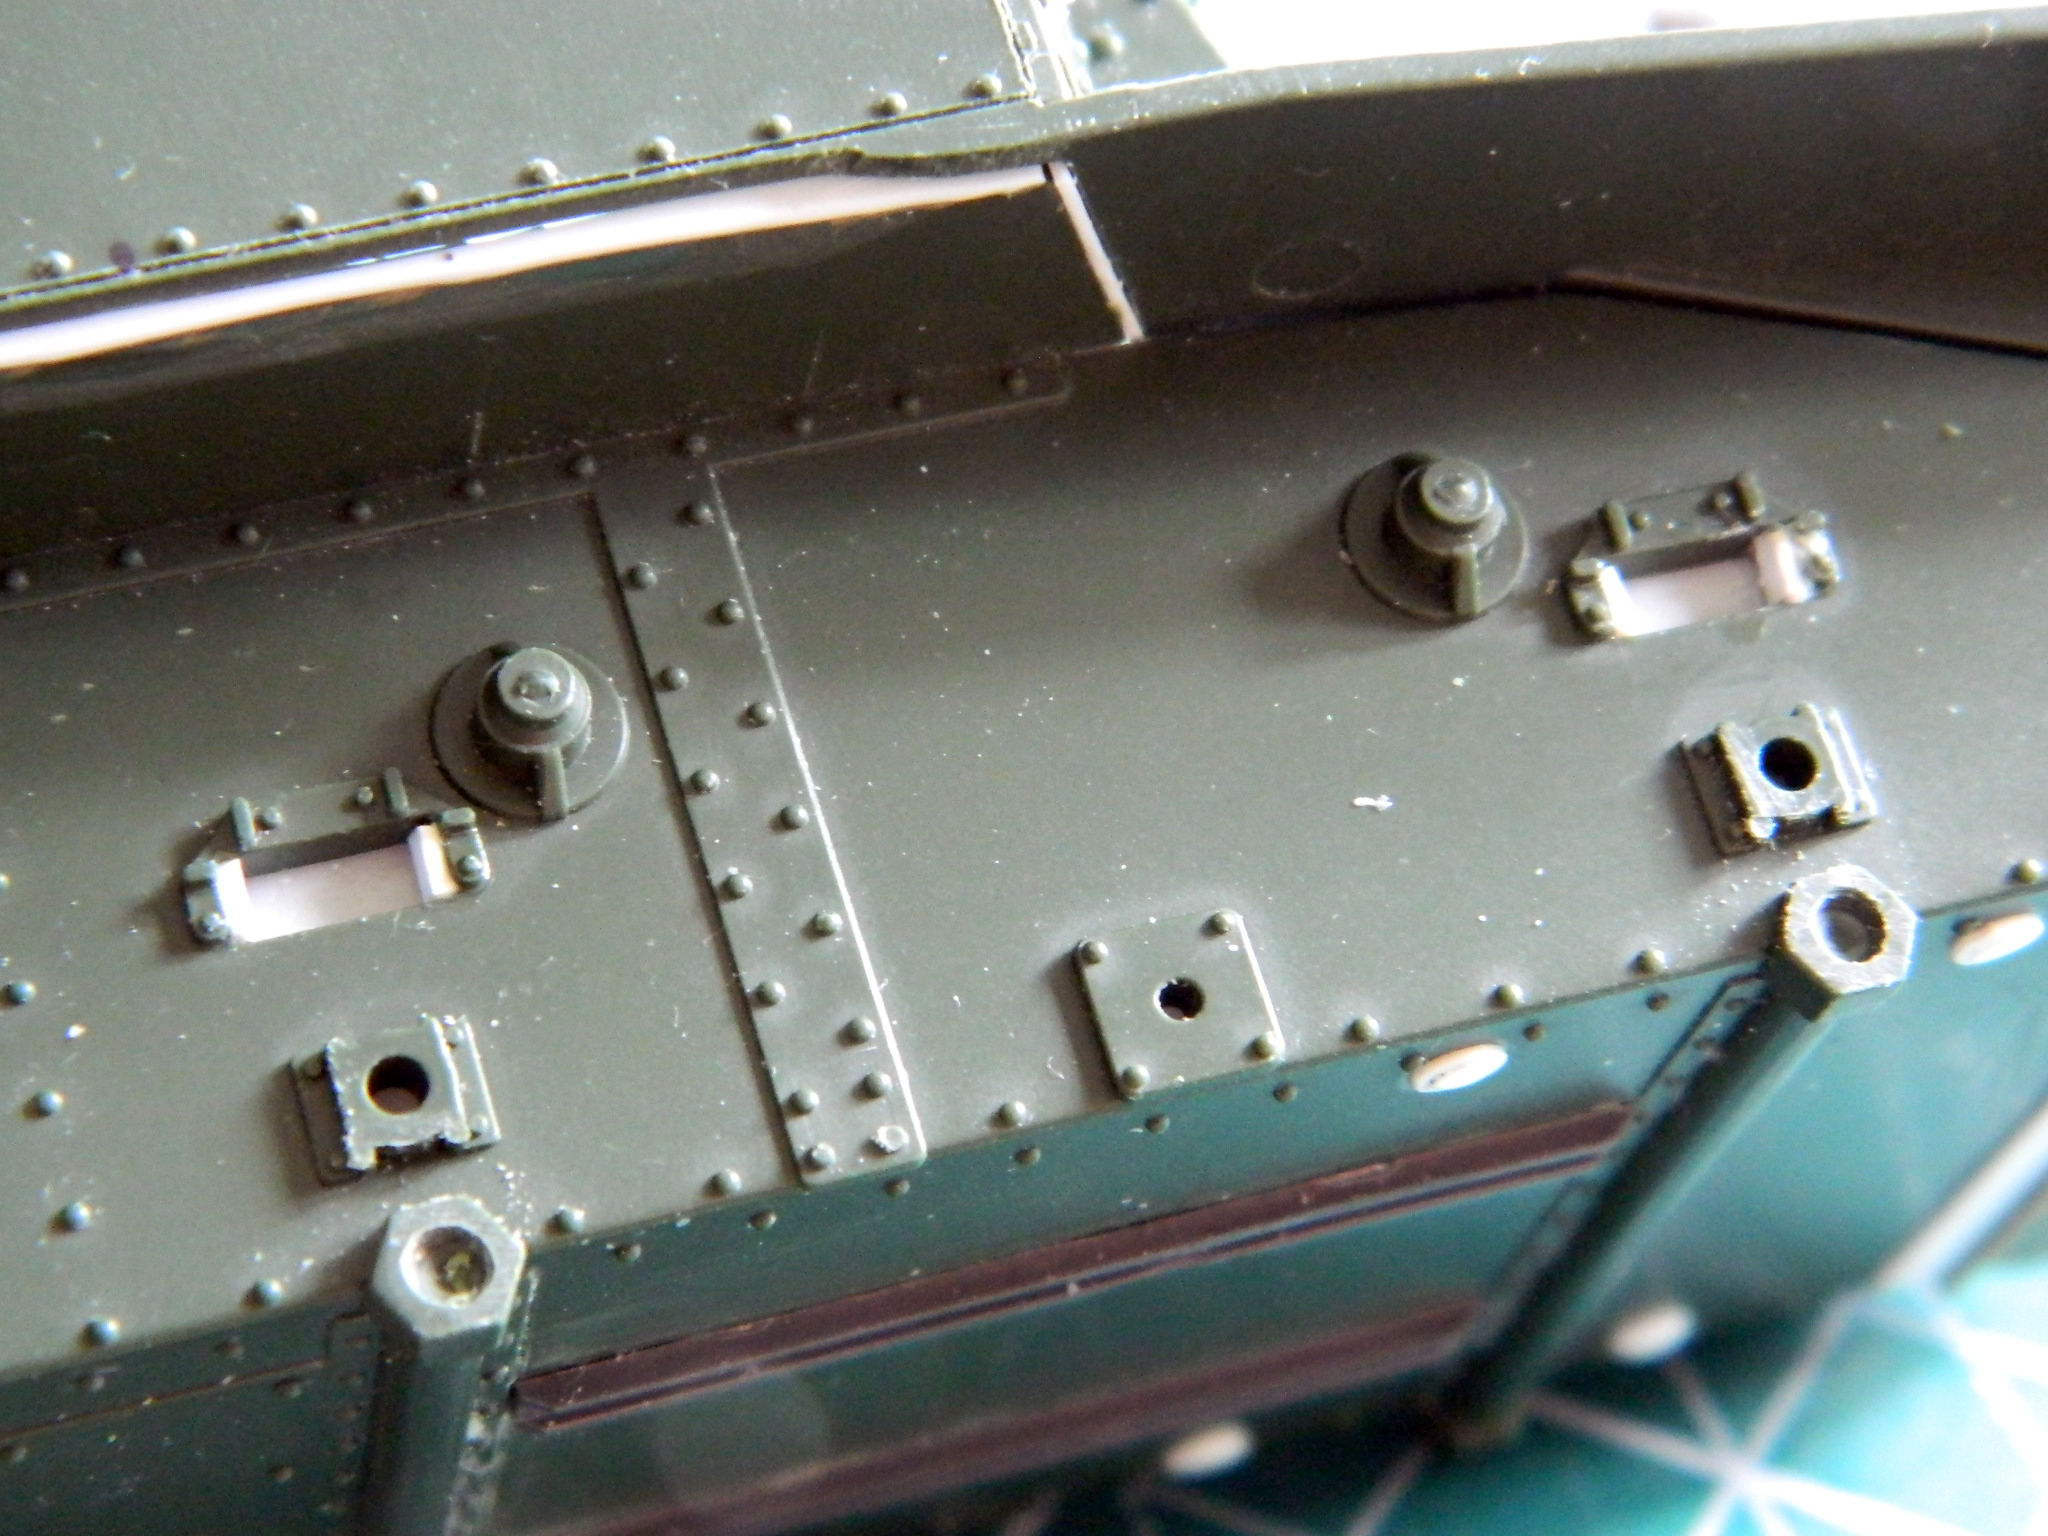
I used a piece of 1/16″ (1.58mm) copper tubing as my hinge pin. .080″ (2.032mm) styrene scraps were used as the tubing sockets and were drilled to accept the ends of the tubing and glued to the sides of the hull. I drilled out .060″ (1.524mm) styrene scraps, slid them over the tubing, and then glued them to the rear plate:
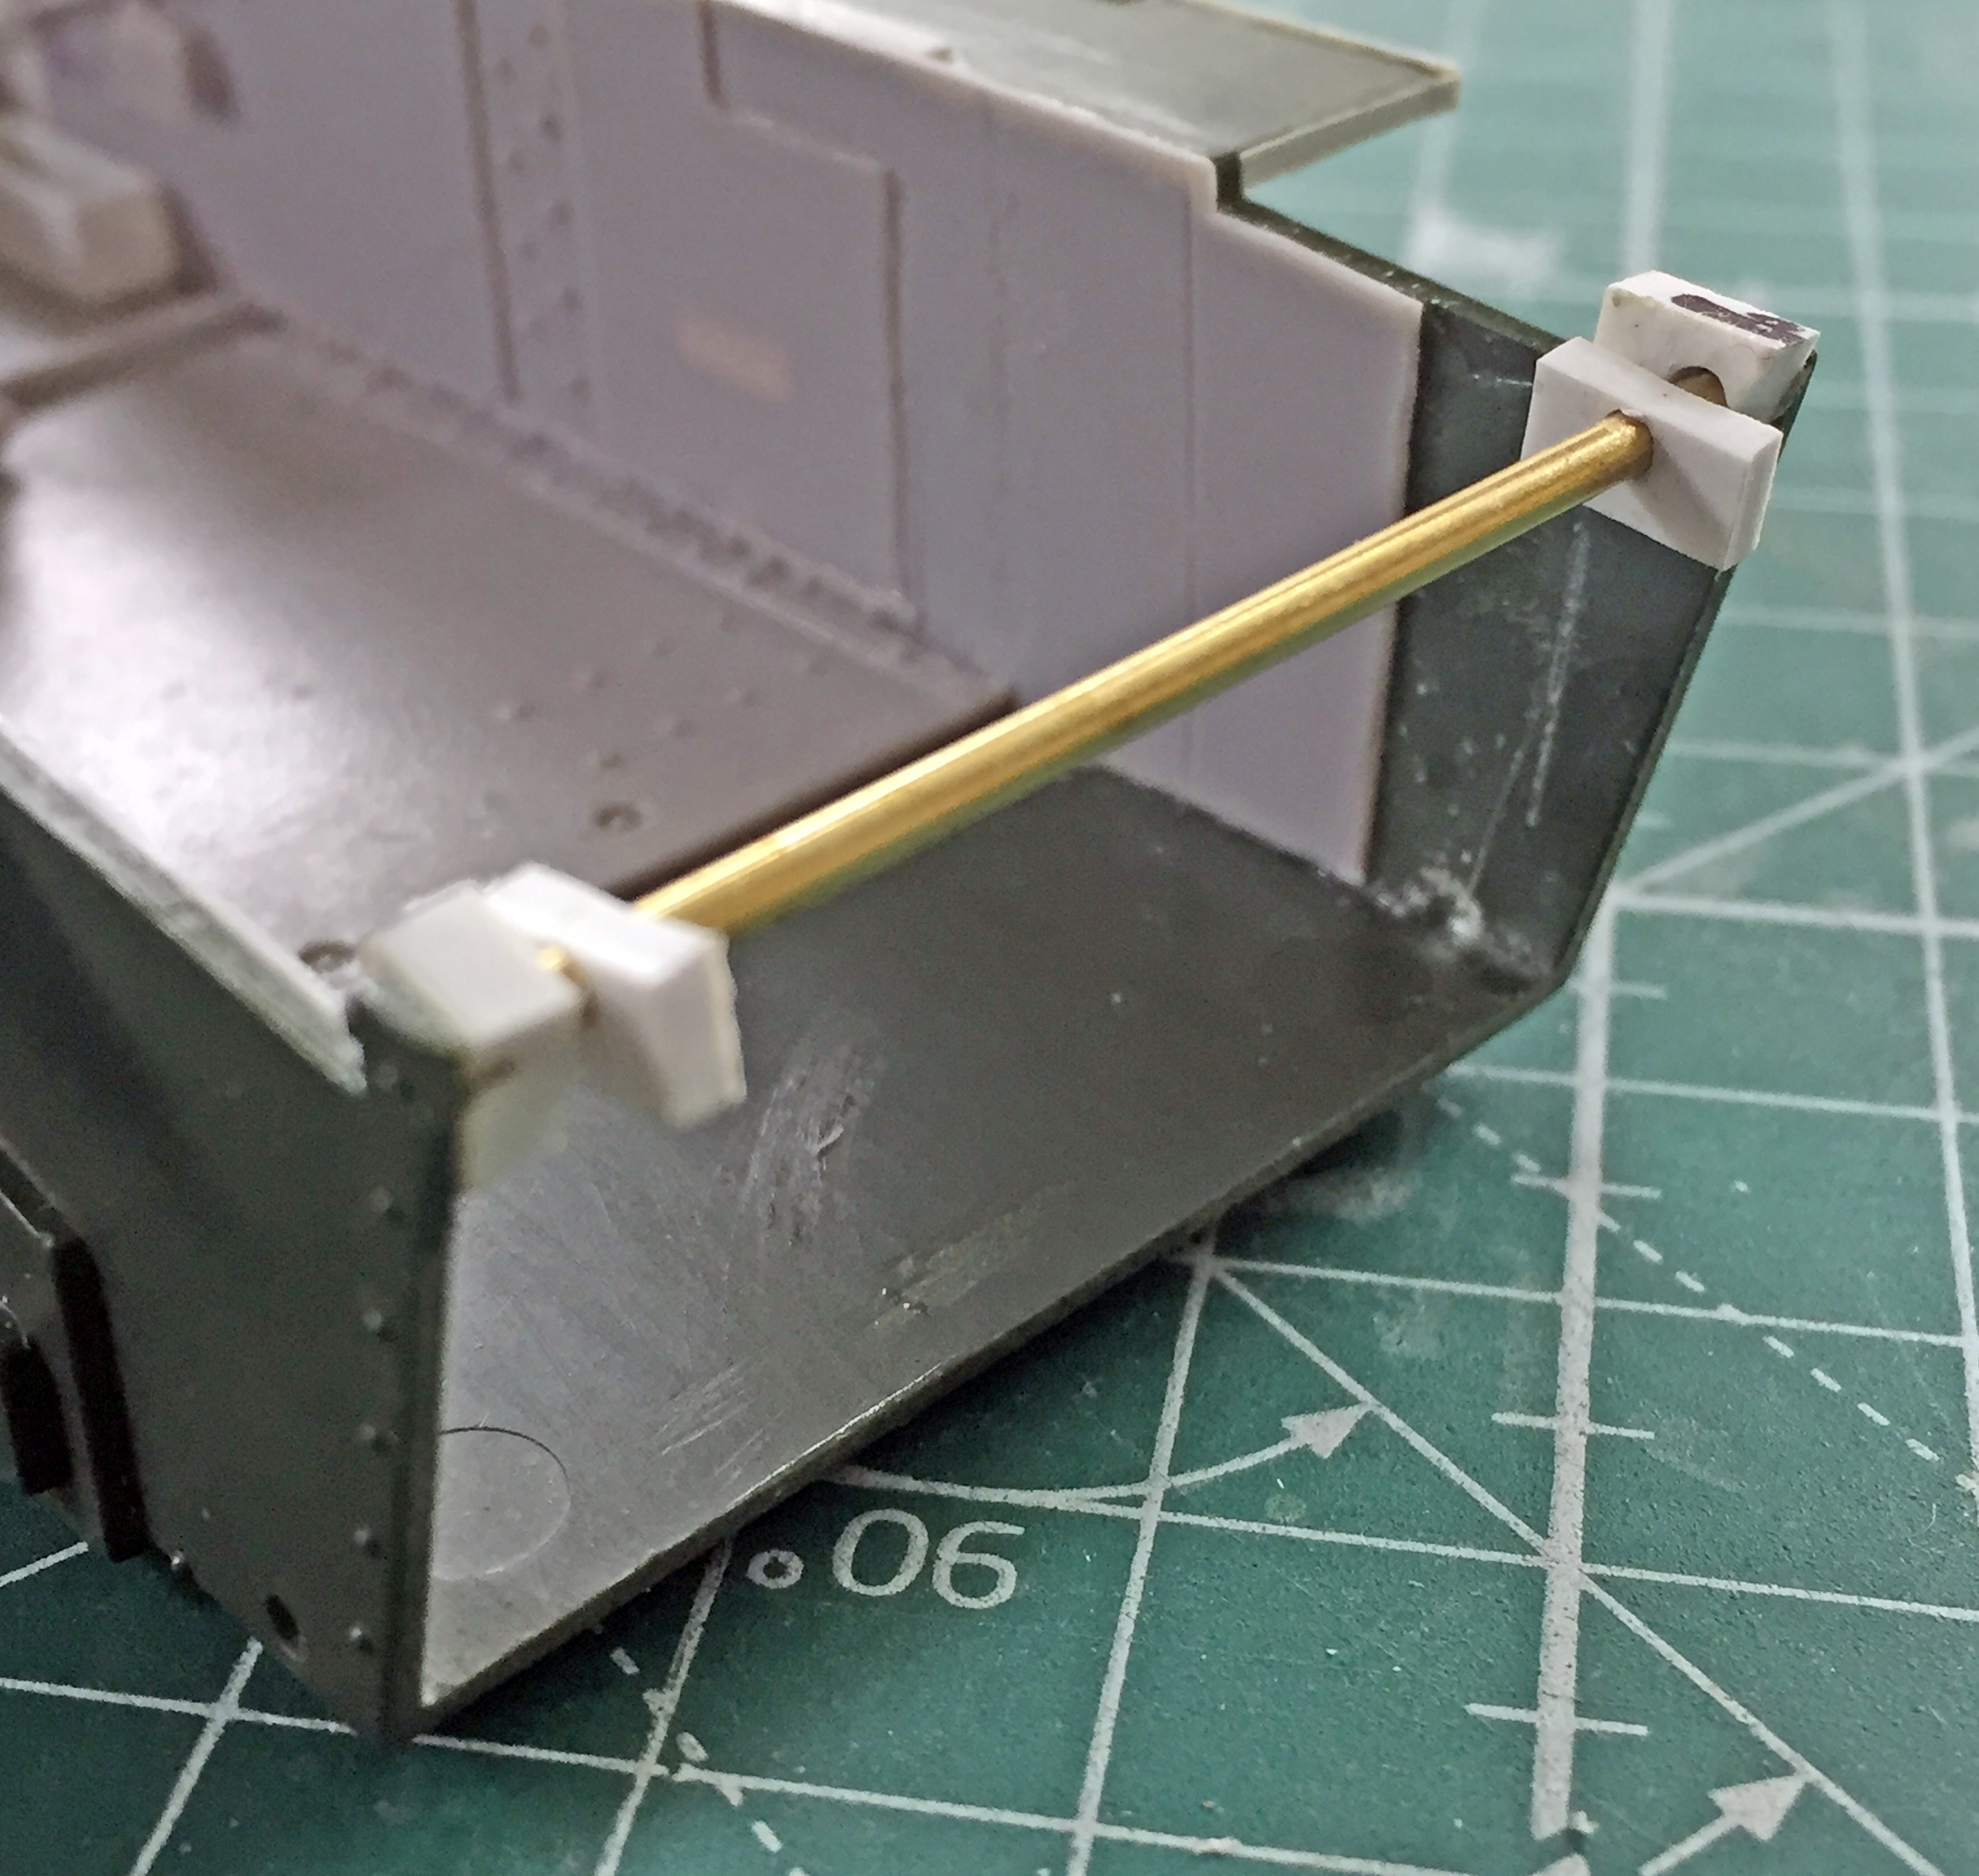

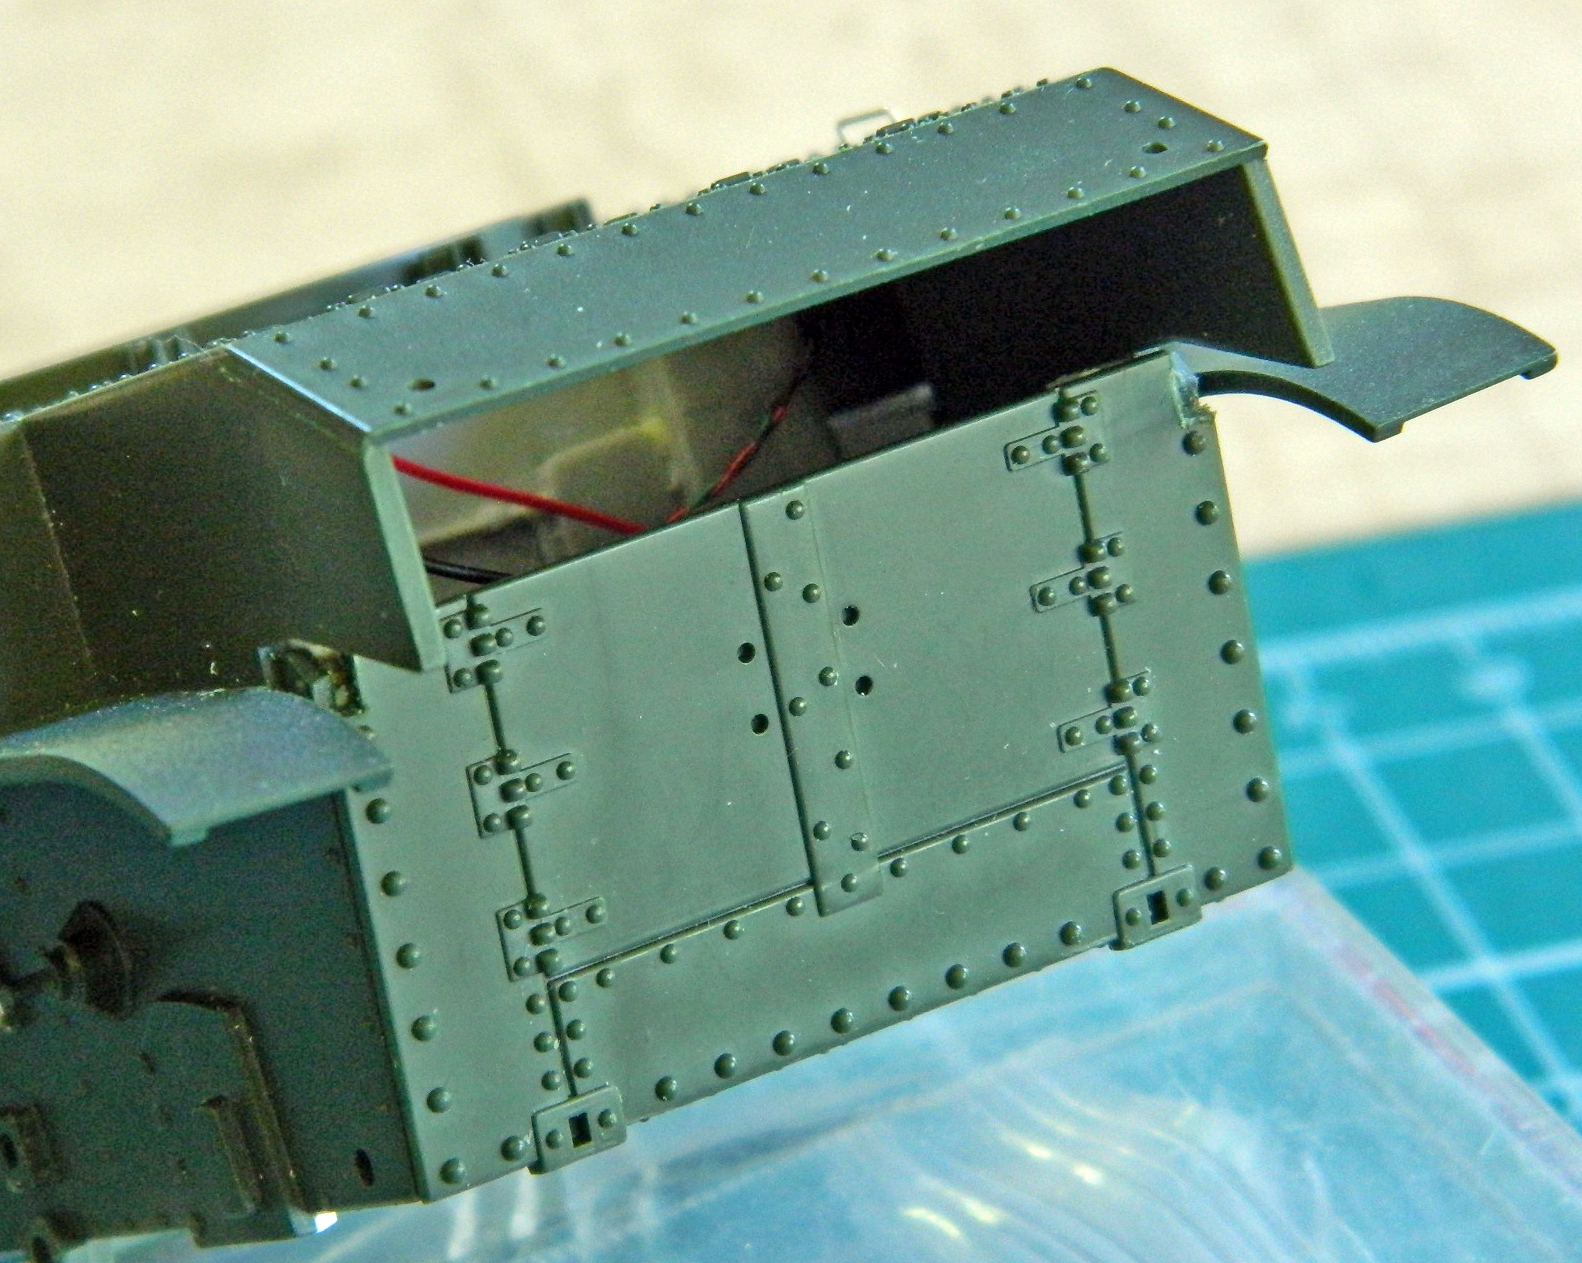
It closed snugly without giving away the fact that it was hinged and could open. However, the plastic blocks needed to have the tops of them radiused so that the door would open far enough to allow access so that the switch could be operated battery could be changed out.
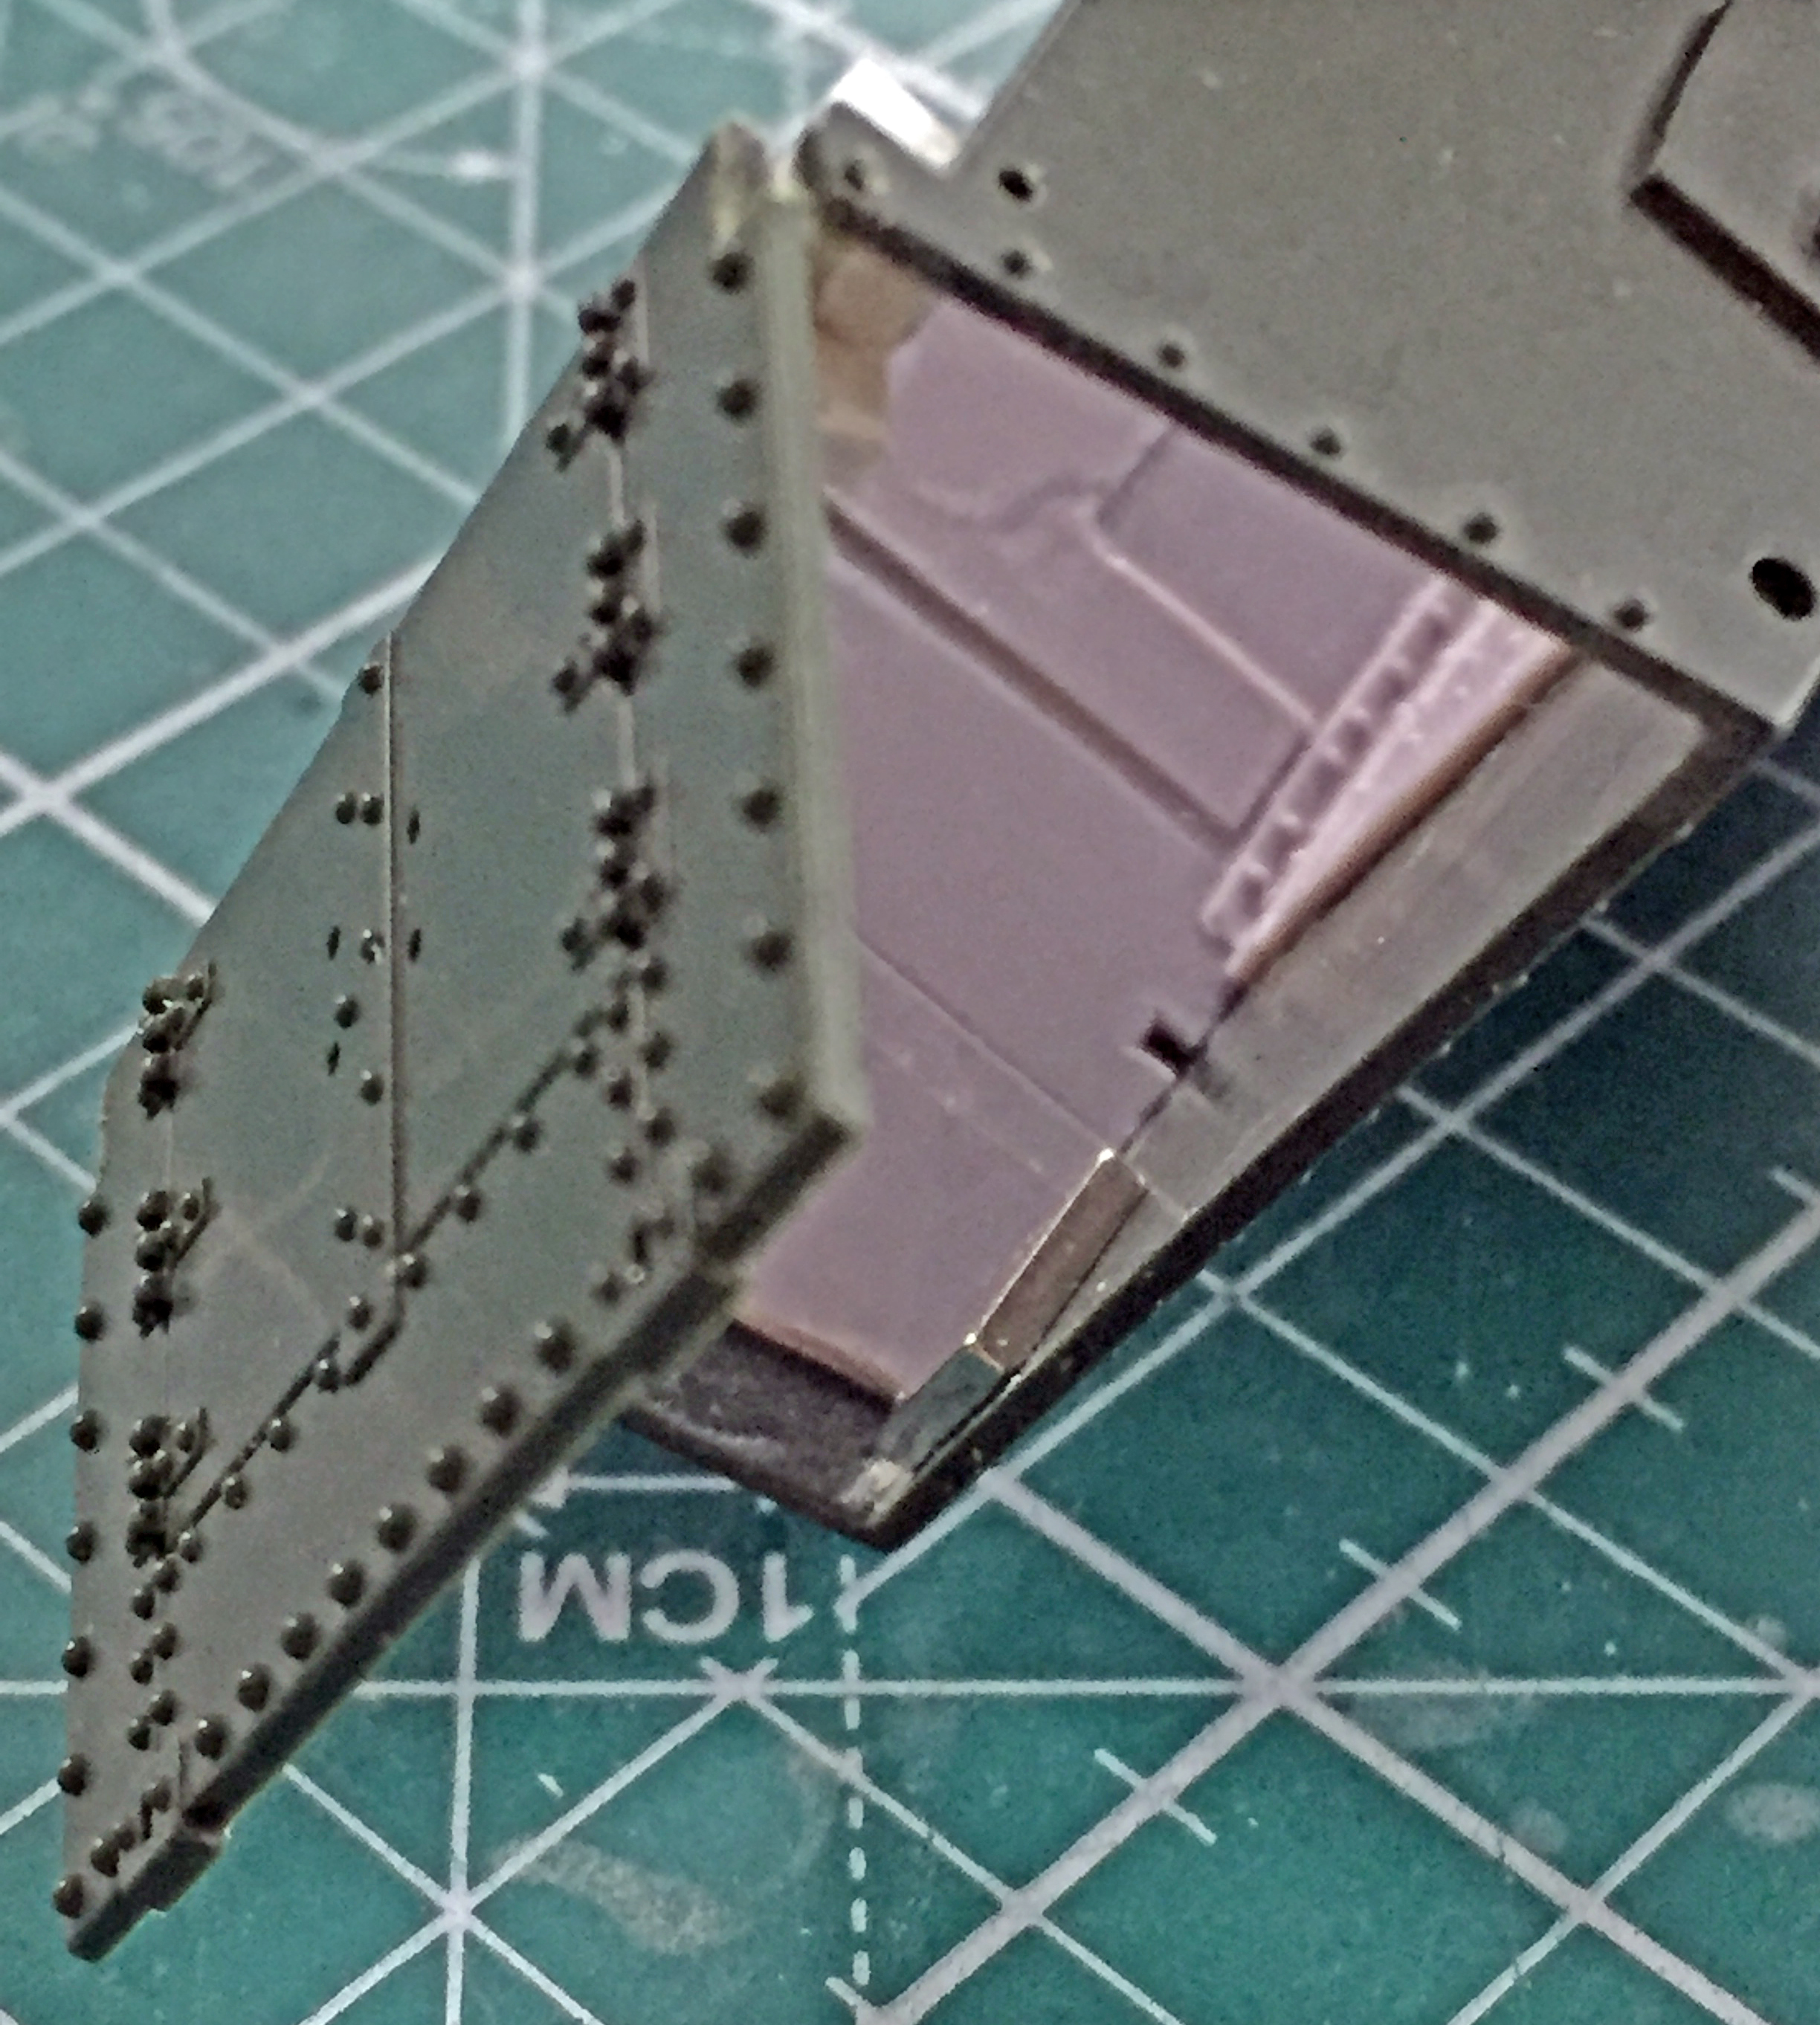
This opening was how far it initially opened, which isn’t close to enough:

After cutting, scraping, and filing (and the requisite cursing and foul invective), this degree of opening will work:
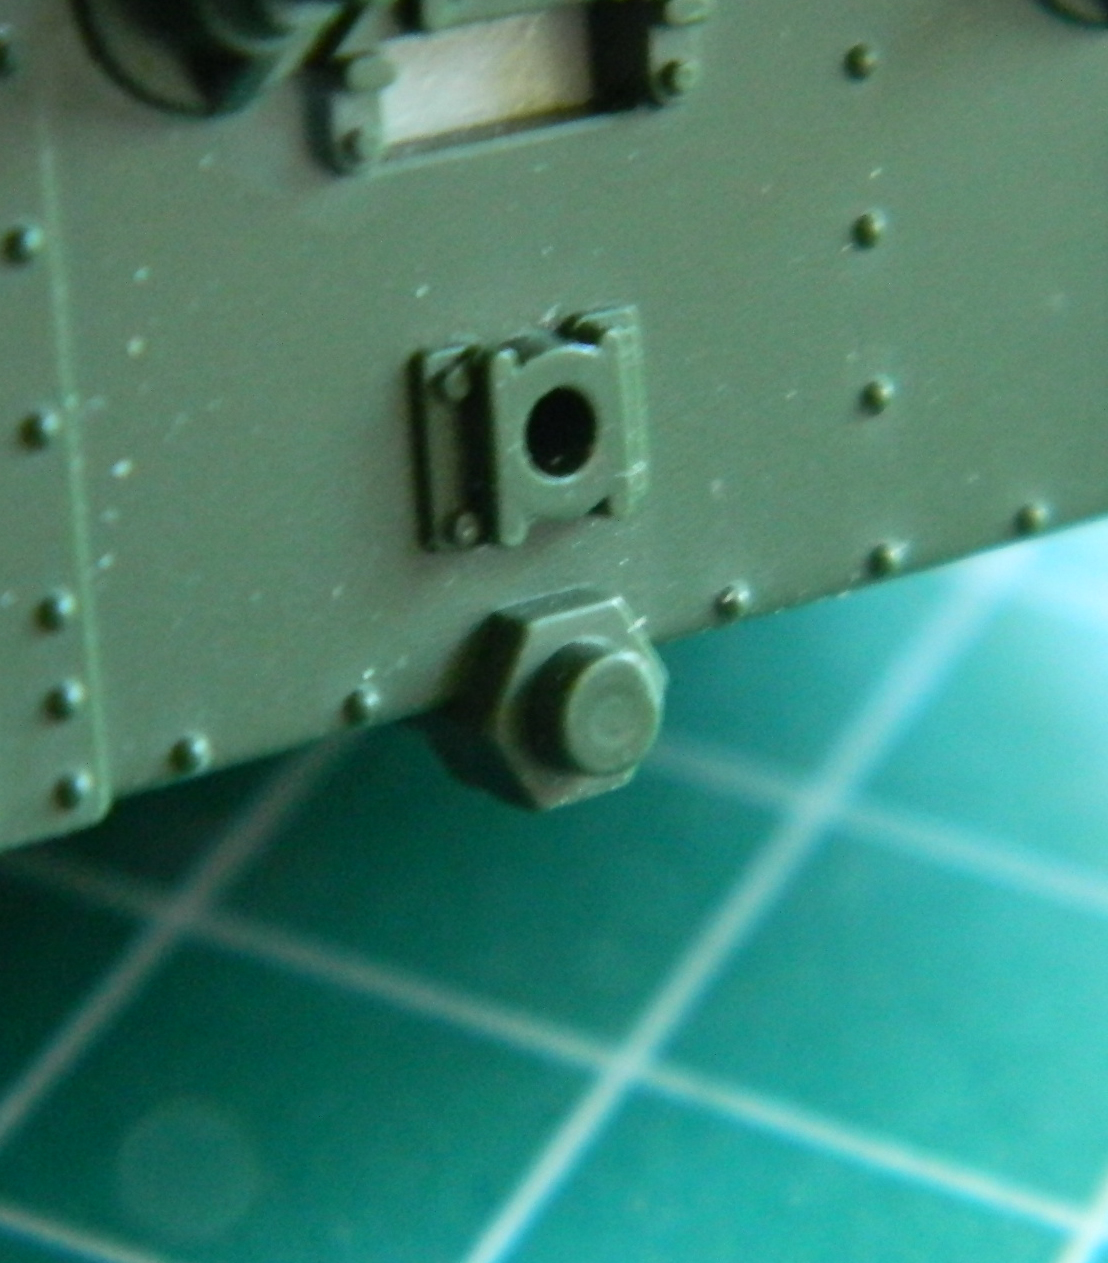
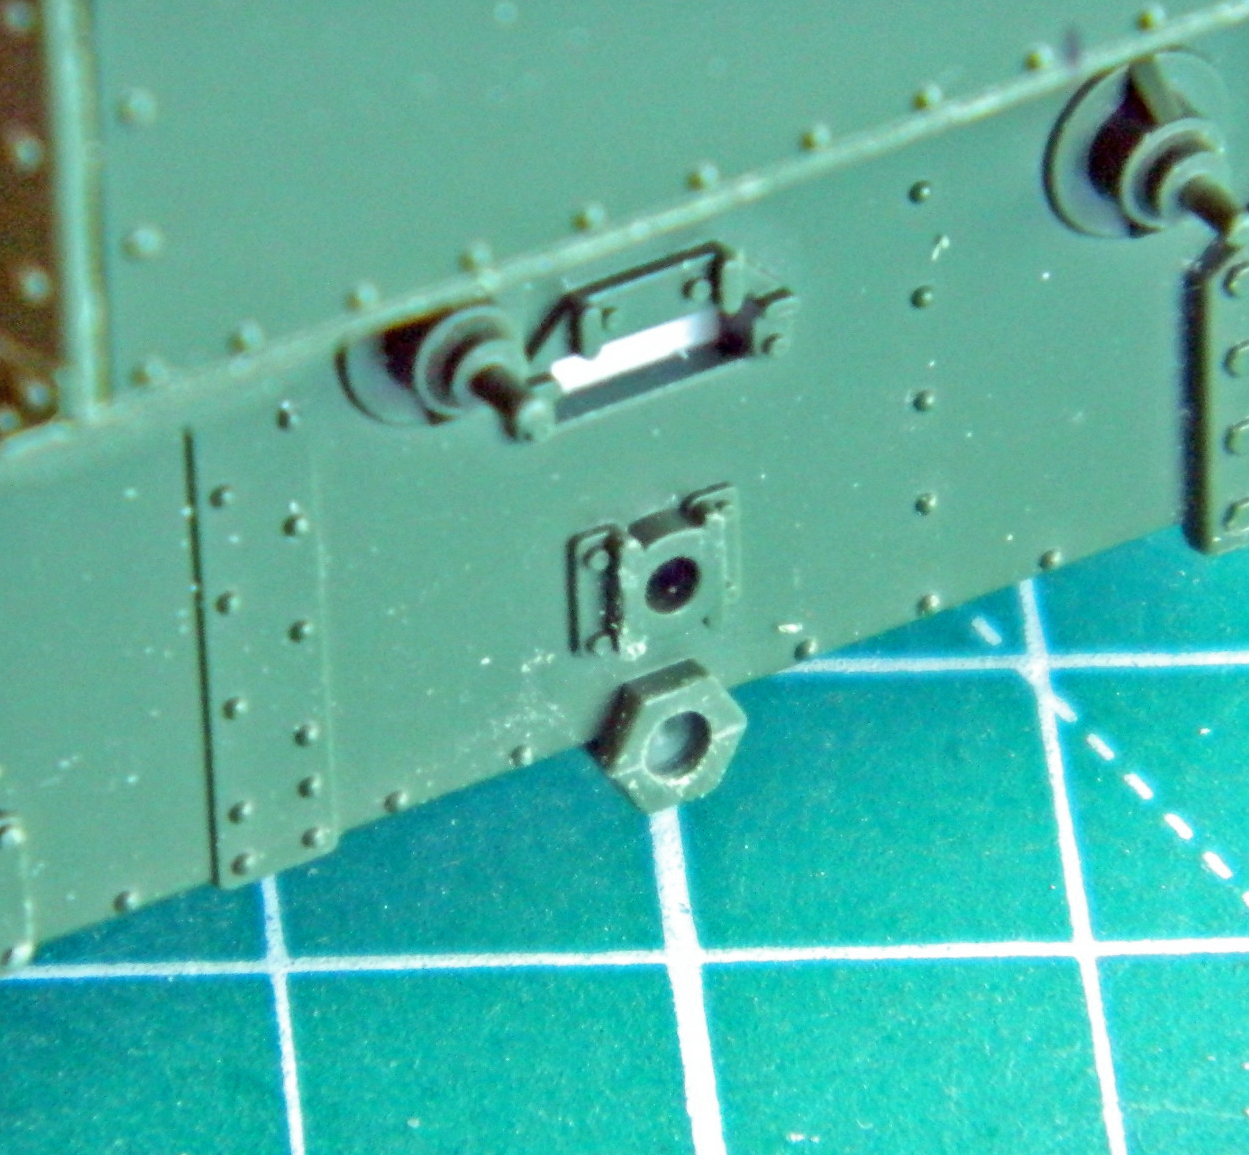
Now the magnet had to be installed. These are rare earth magnets and they’re damned powerful for their size. However, magnetism’s effect decreases with distance. After diddling around with it, I decided that a gap of .015″ (.381mm) between the magnet and the small piece of sheet metal I’d glued to the rear hull plate would hold it closed without excessive force (because this IS plastic…) needed to open it:


I was also unsure how the magnet and the battery would react with each other in a confined (or even wide open, for that matter) space. I used .060″ (1.524mm) styrene to box the magnet in and keep it from contacting the steel battery:


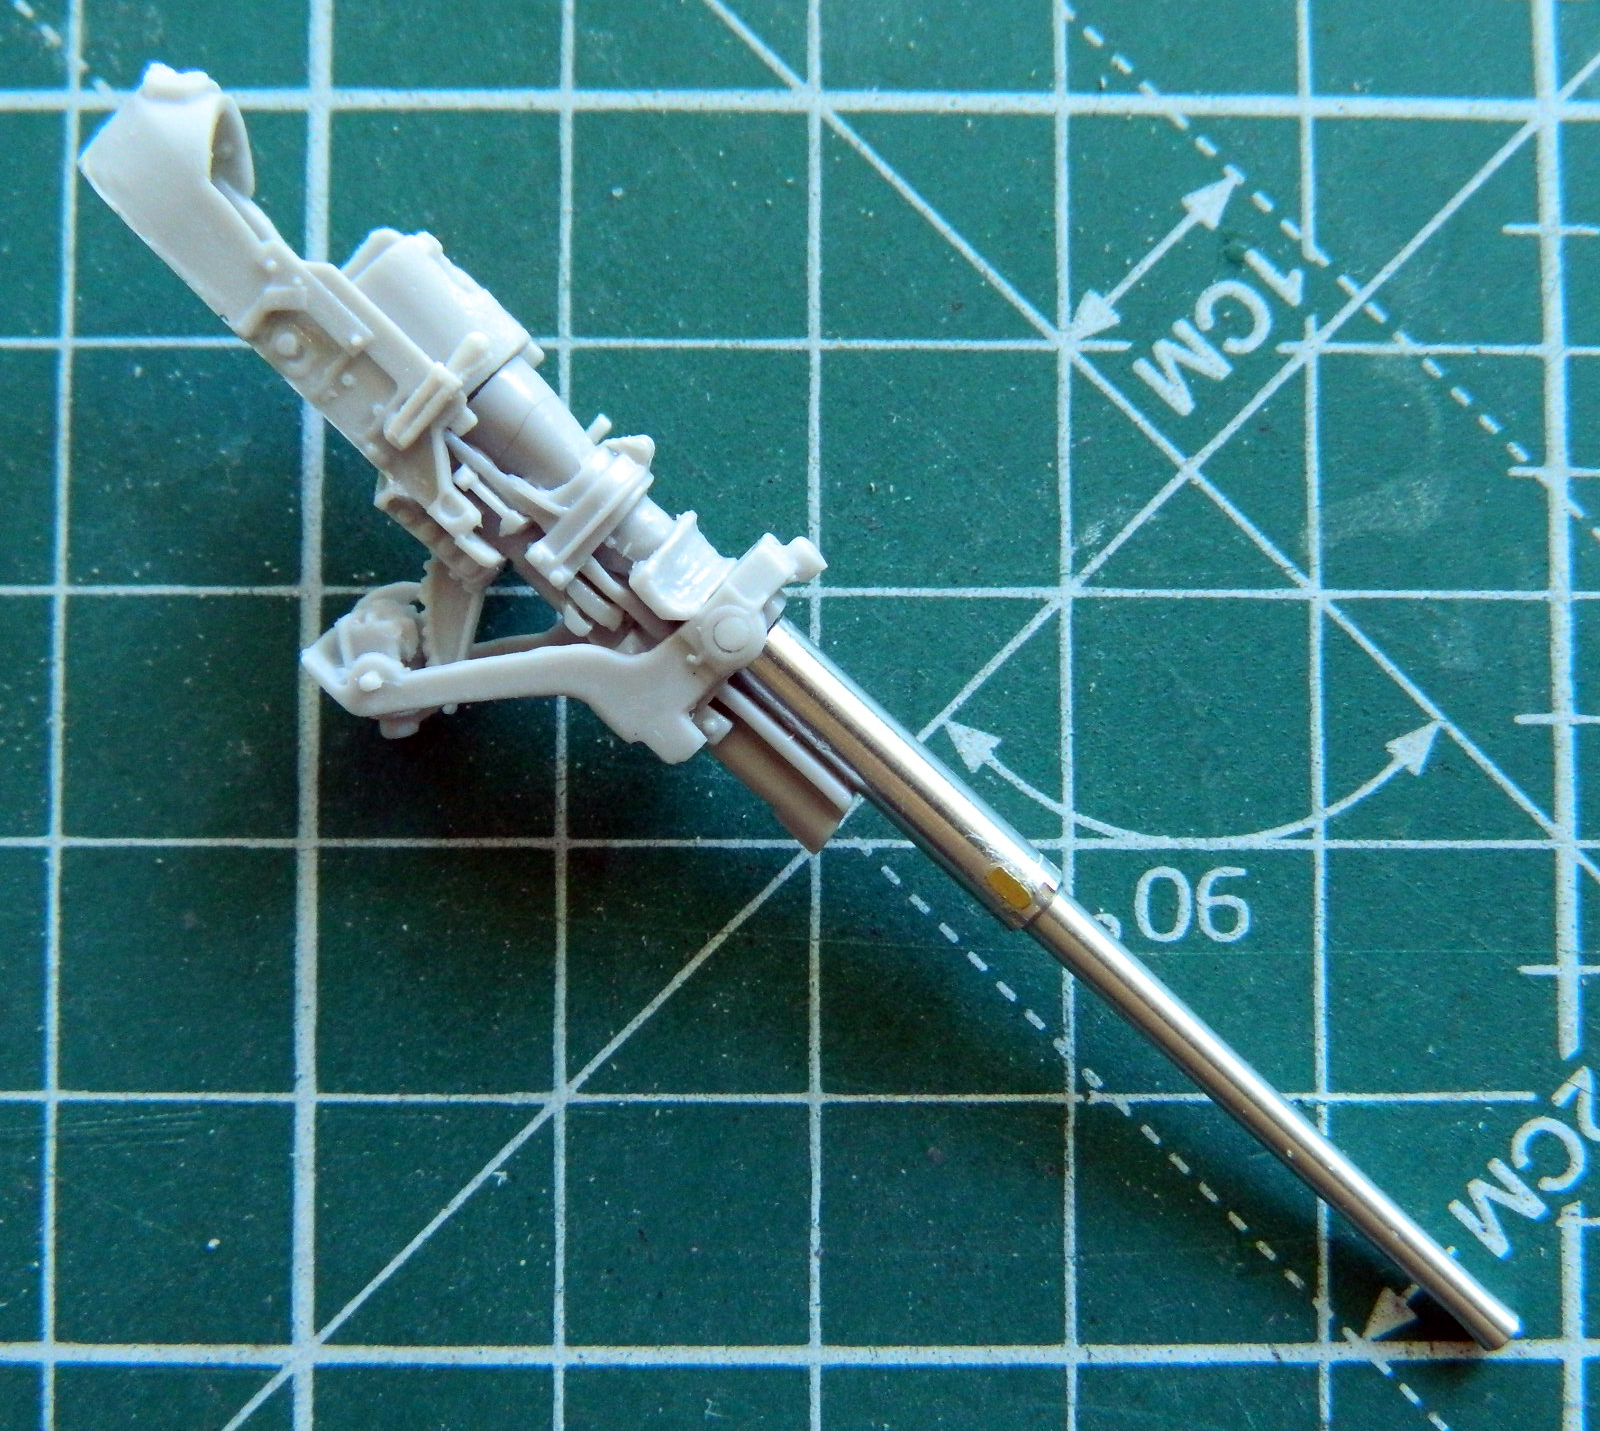
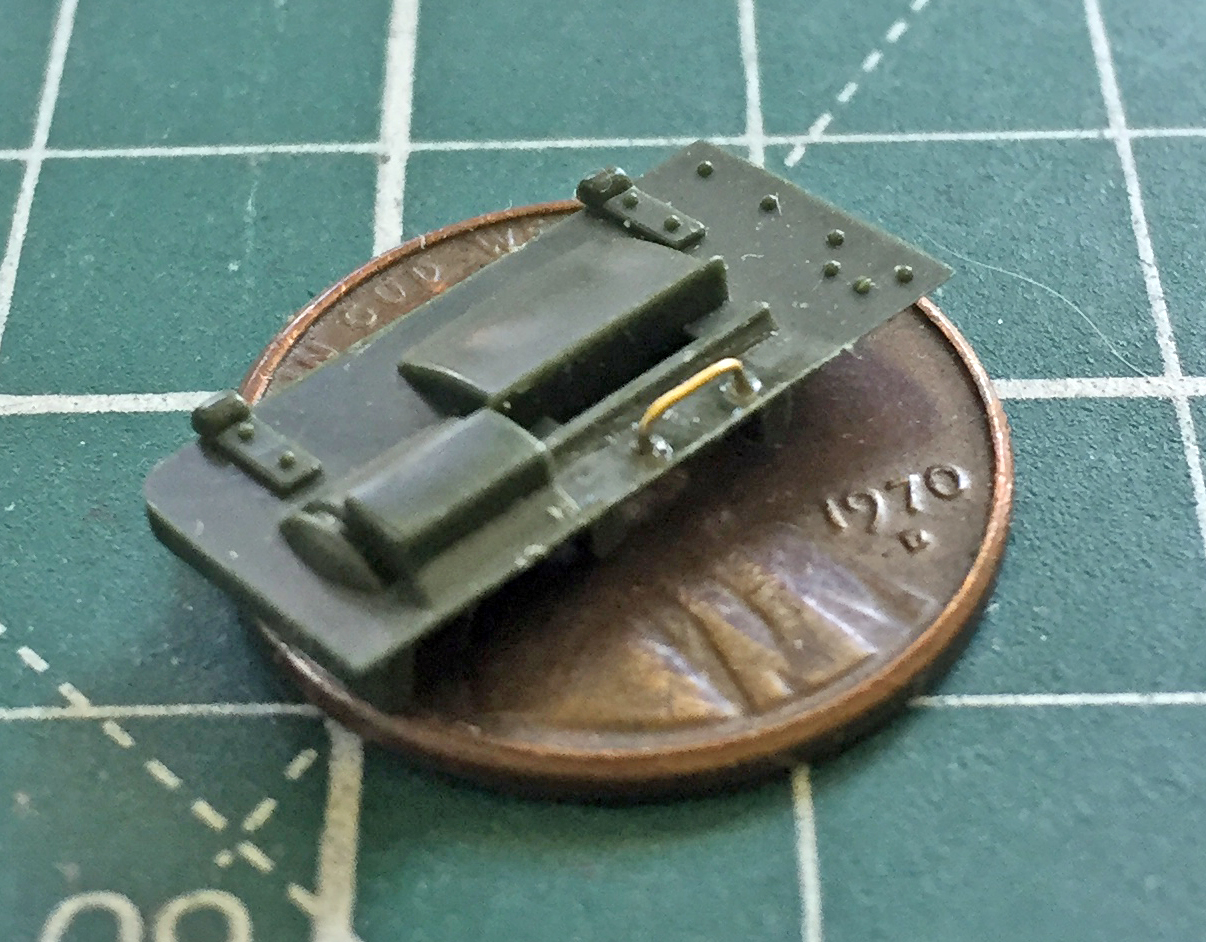
Then it was time to start getting the interior parts ready for paint. I replaced the 37mm gun barrel with an RB aluminum barrel. That process started with the removal of the resin barrel rear section and drilling the receiver to socket the aluminum barrel’s pin securely and then create the pivots for the trunnions:


I’ve had people ask me if all the hassle needed to replace gun barrels is worth it. Yeah…I’d say it is:

I’m using both the suspension and tracks from AFV. One would suppose that having tracks for an M3 Stuart and a suspension for an M3 Stuart from the same manufacturer would mean that the parts fit. Uhm…no. They do not. Note how the further the track wraps around the sprocket, the less the track fits…until it doesn’t fit at all:
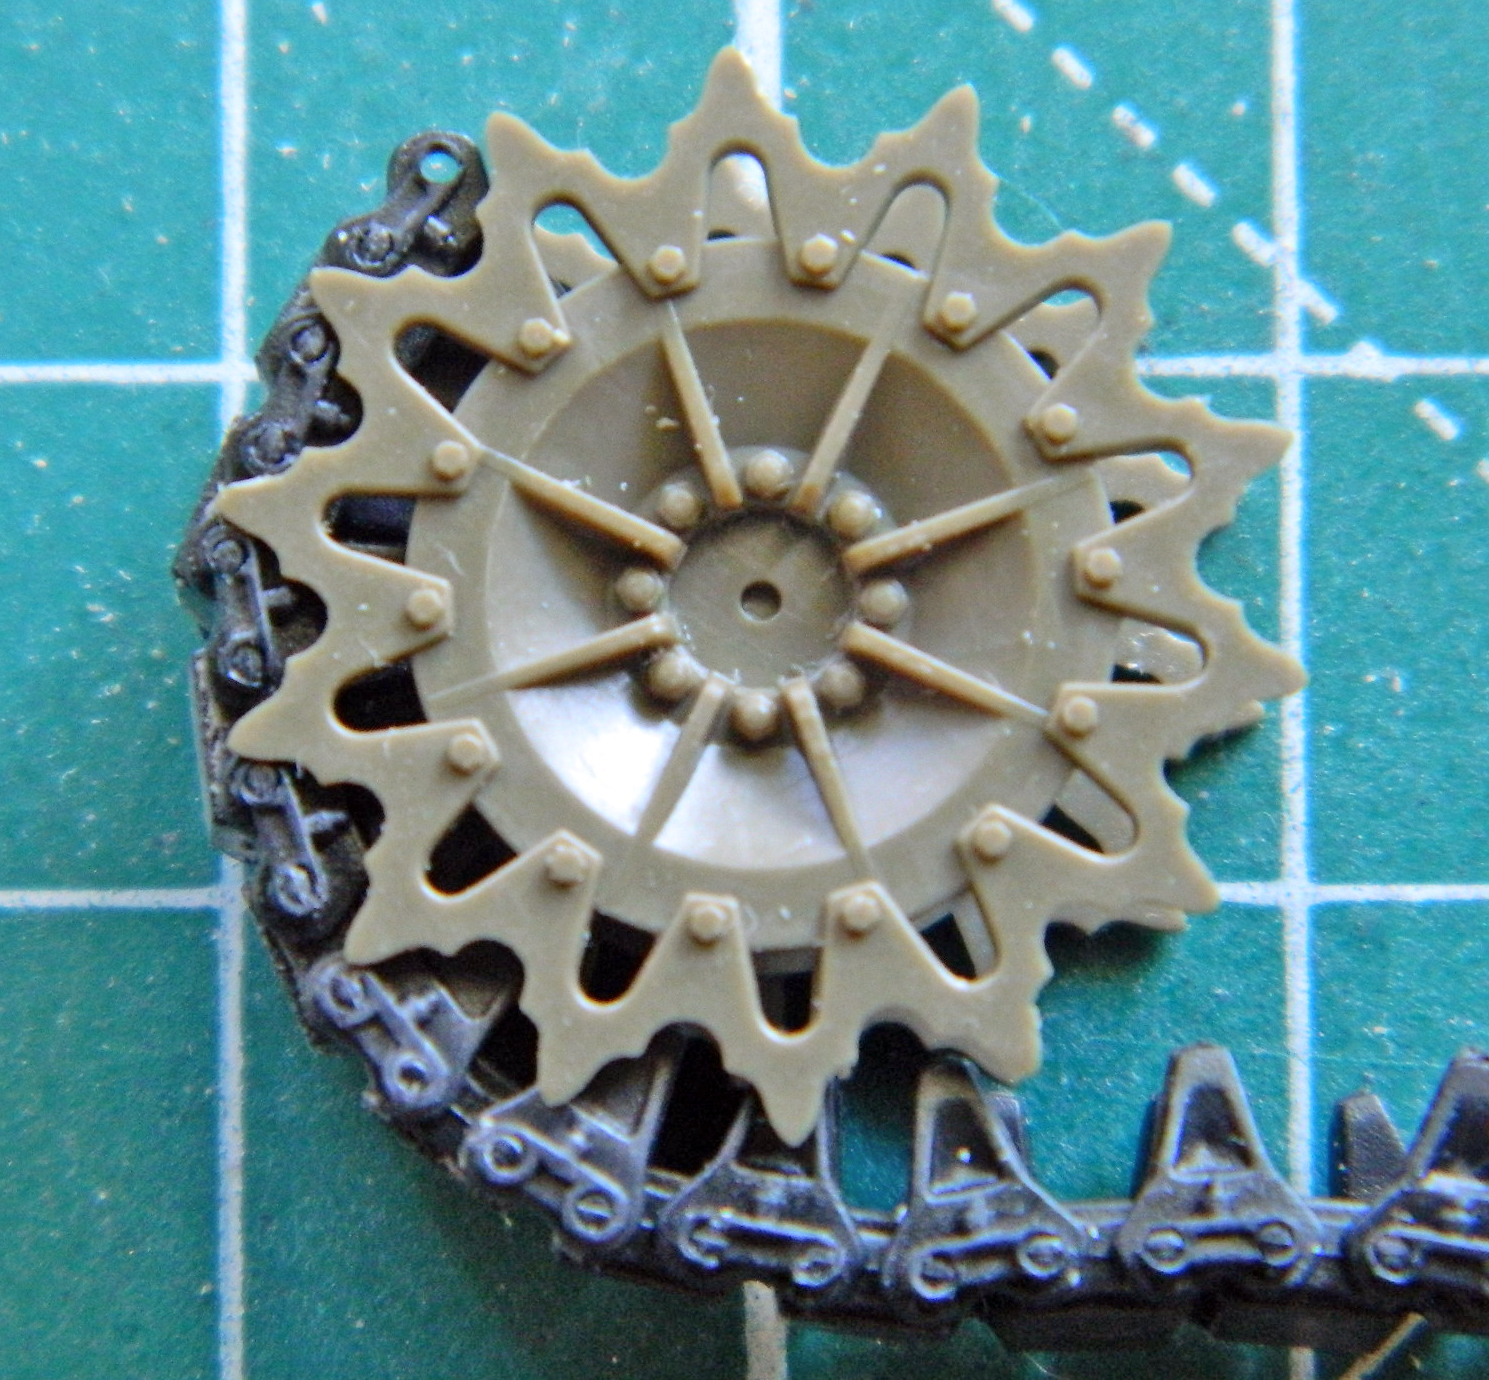
Well, THAT makes no sodding sense! And the AFV drive sprocket is more accurate than the one Academy provided (on the left):

But if it doesn’t fit, then its seeming accuracy is an illusion. So even though the kit part doesn’t appear to be as accurate as the AFV part, if it doesn’t fit, then it’s not accurate at all. The Academy sprocket fits fine:

Go figya…
Since I’ve had my bubble burst regarding fit, now wouldn’t be a bad time to check fit for the remainder of the suspension parts. Yes…there will be some fitting required. These are suspension parts for the bogies. The part on the upper right is the kit part. Note how much larger the block where the two different suspension parts are in contact. That’s how much wider the kit’s part is, which means there’s a larger socket where it’s supposed to mount to the hull:

There is also a pin on the bottom of the kit’s hull that has to be changed to a socket for the AFV suspension:
Okay, so I drilled out what needed to be drilled out:
And I added .020″ (.508mm) styrene to both sides of the suspension mount (and I draw your attention to the mounts just inboard of the suspension mounts where a clamp slipped off and snapped off both mounting pins…which I will have to fix):
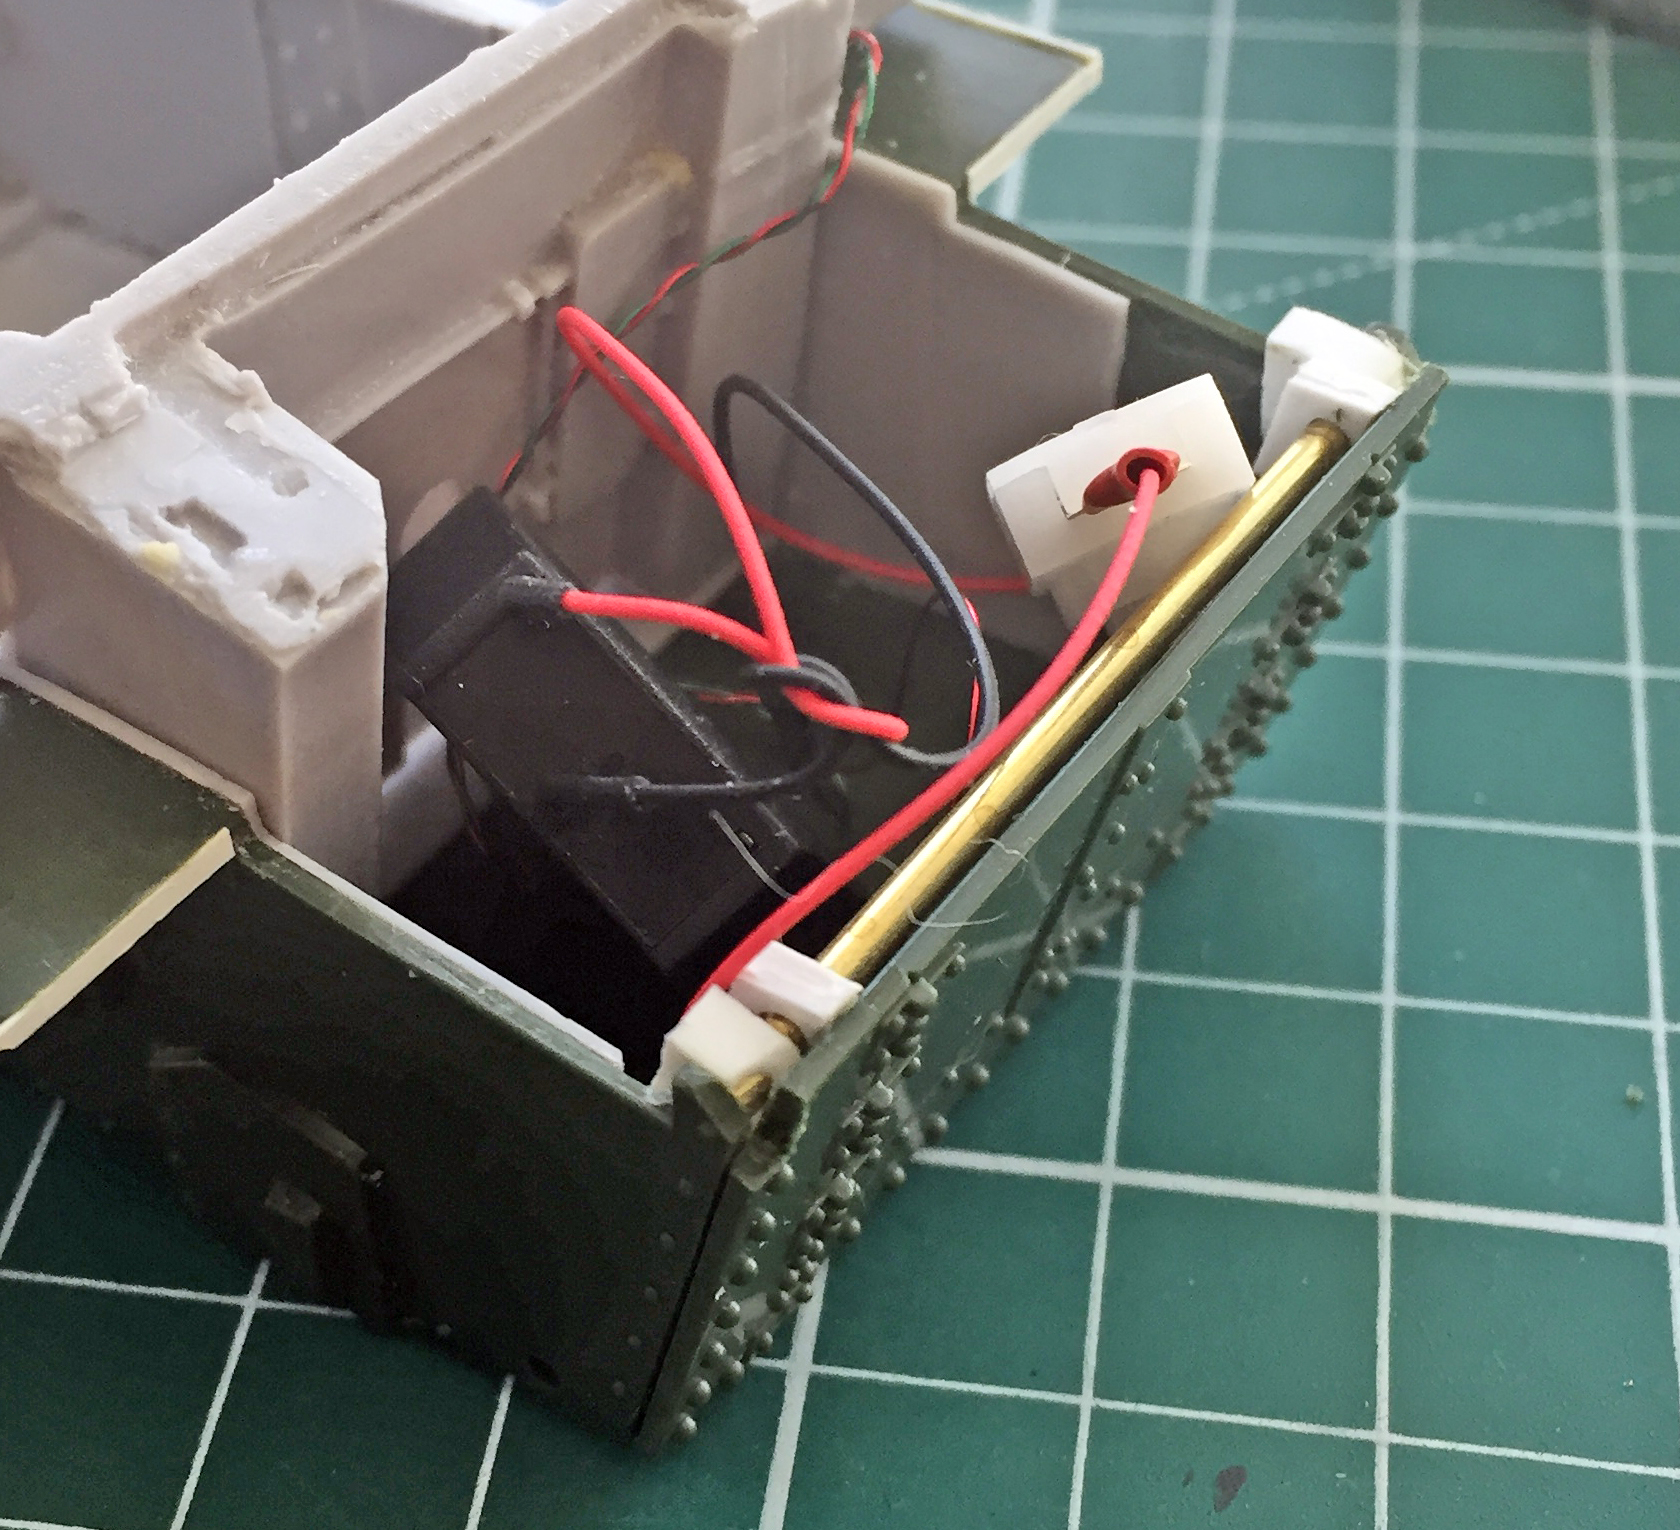
While getting parts prepped to paint, I dry-fitted the upper hull to the lower hull to see what I needed to do to make the switch/battery access work. The first thing I noticed is that I’m going to need a blocking plate under the upper hull so that there’s no chance of see-through happening:
Then I checked (again) the ease of operating the access panel and the access to the things that need to be operated or eventually replaced:

I also checked how well the electronics (such as they are) stow. I’m pleased with how this part all came out, particularly ease of access:
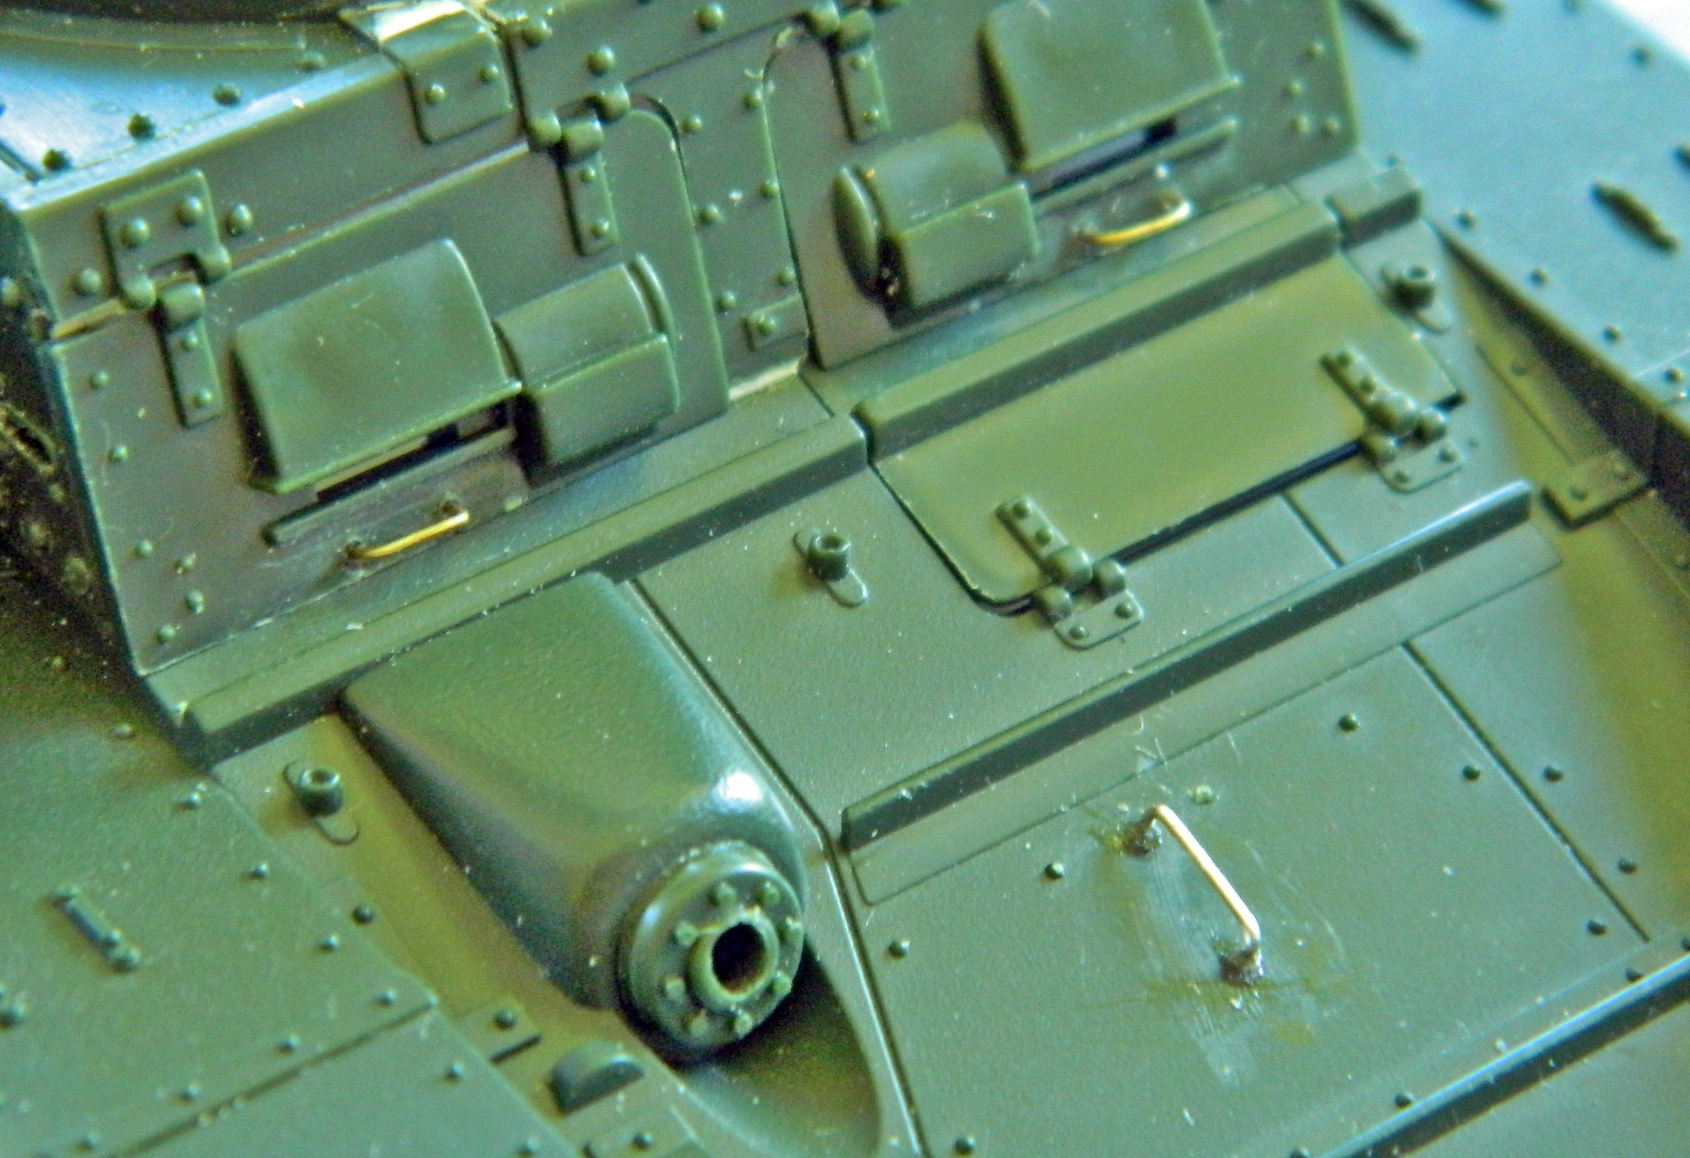
The driver’s lower hatch needed a little detailing. The top of it (to the right of the photo) is hinged so that it has the room to open and it also has a leather-covered pad (probably to keep the driver’s teeth inside his mouth). I scribed a line where the hinge should be and then used .010″ (.254mm) scrap and some stretched sprue to replicate the hinge (even though the hinged area has to be folded up to open the hatch, it’s always shown extended in my reference photos). I don’t know what the inner panel on the main body of the hatch is for, but I’ve seen it in references, so I used .010″ (.254mm) scrap to replicate it:

I filled the mounting holes (using sprue) for the plastic grab handles because, often even when using the plastic grab handles, the mounting holes tend to be too large. Replace the plastic handles with wire and those holes become WAY too large:
The transmission cover and battery cover were treated the same way:

Seeing as I’m easily confused, I printed out a paint sheet to keep me from overlooking things (which of course I did anyway…):
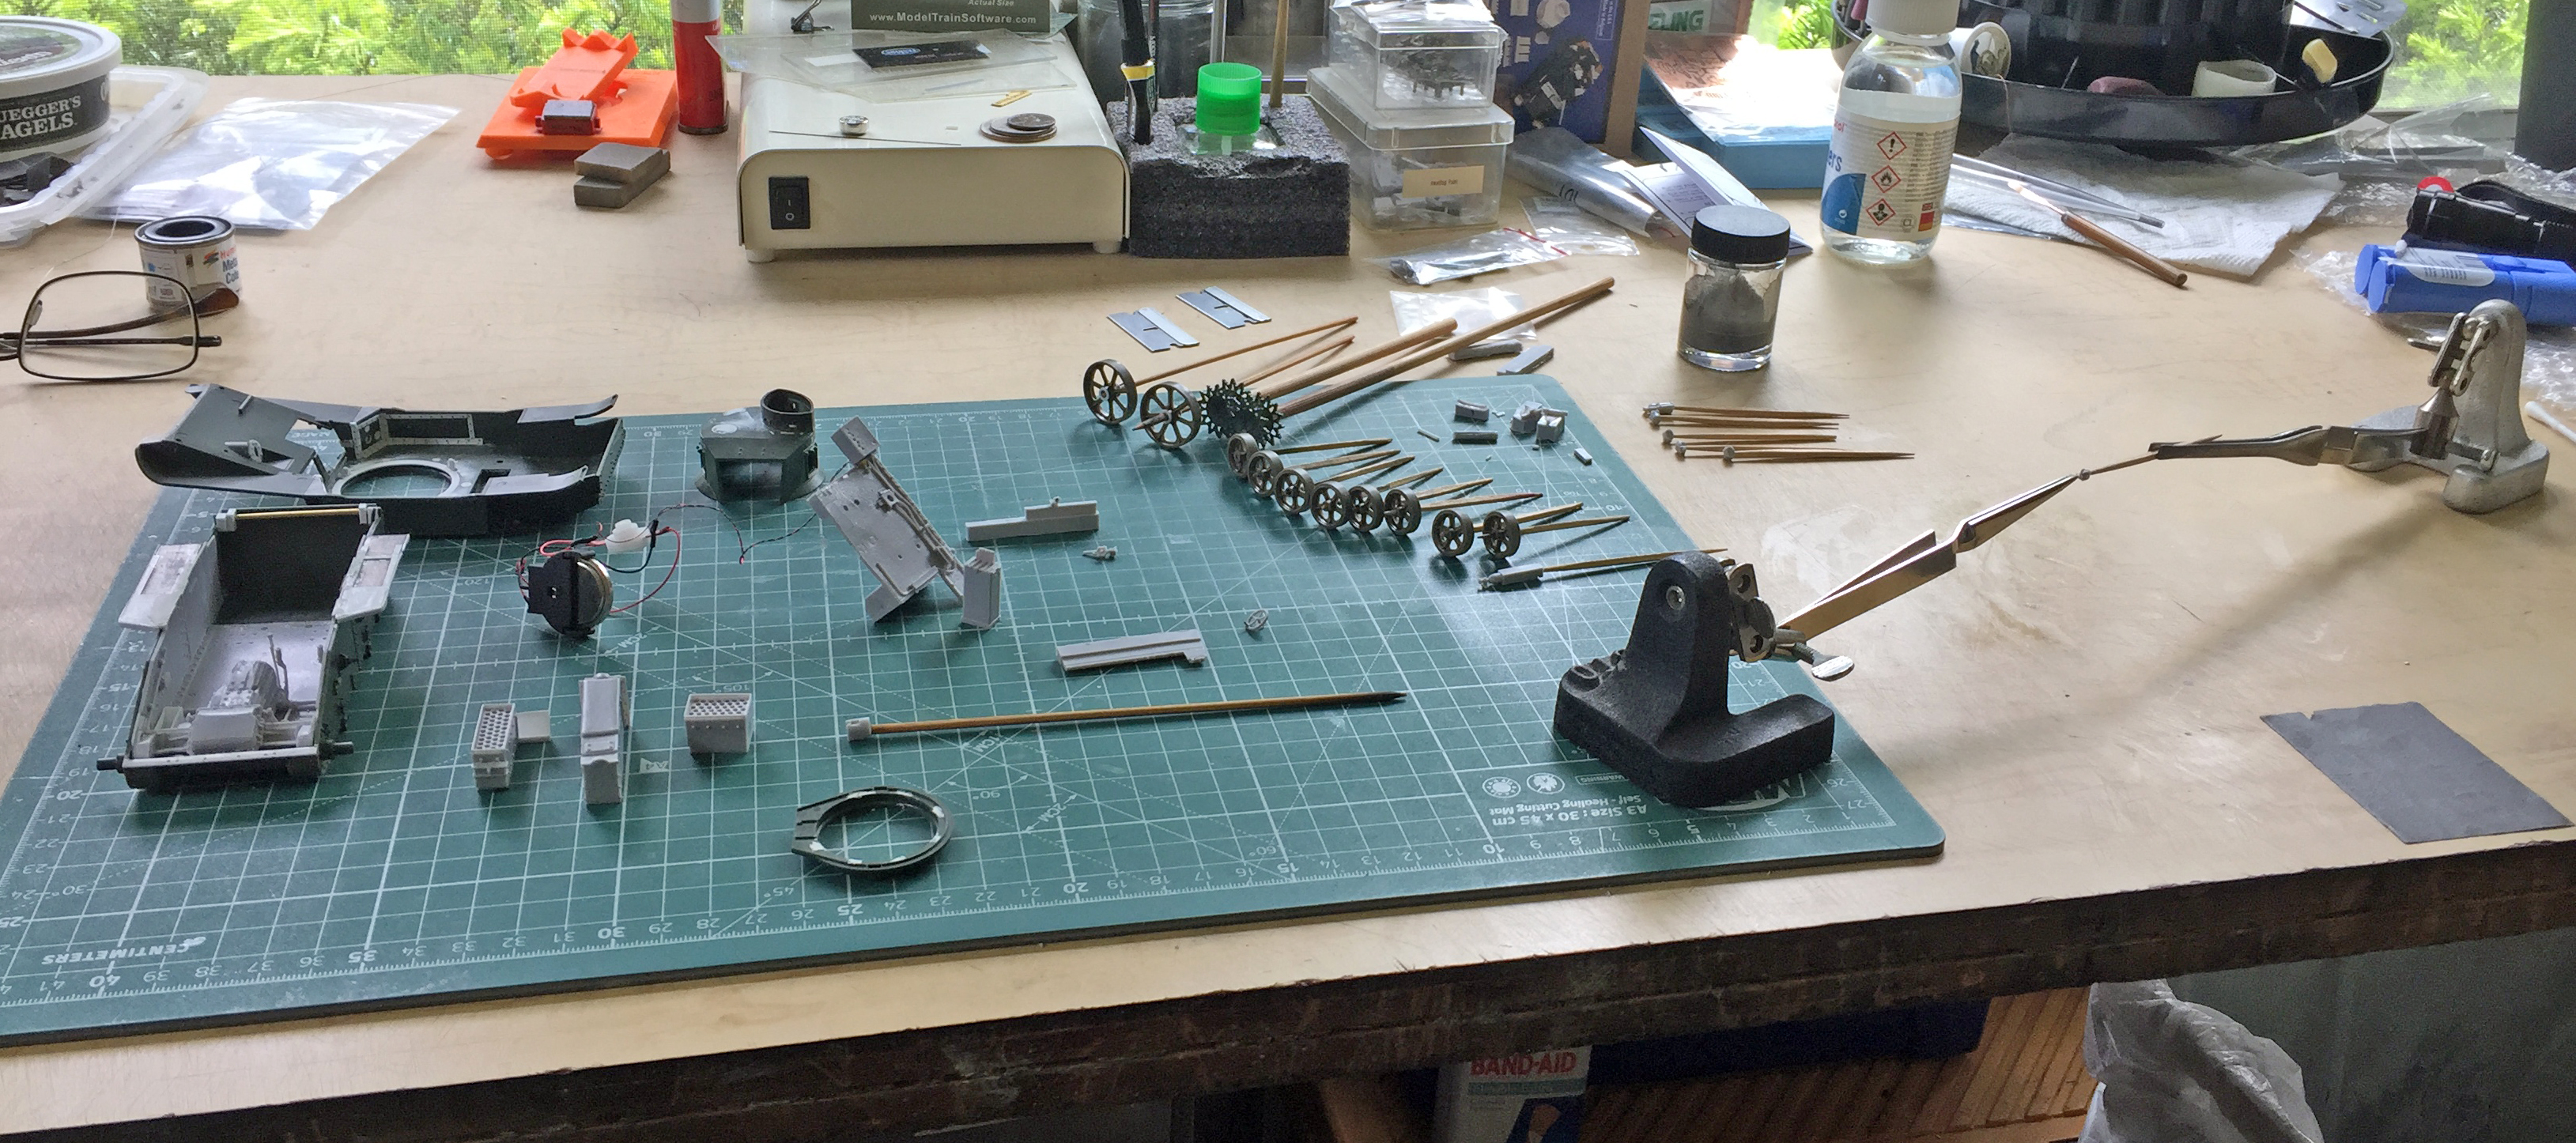
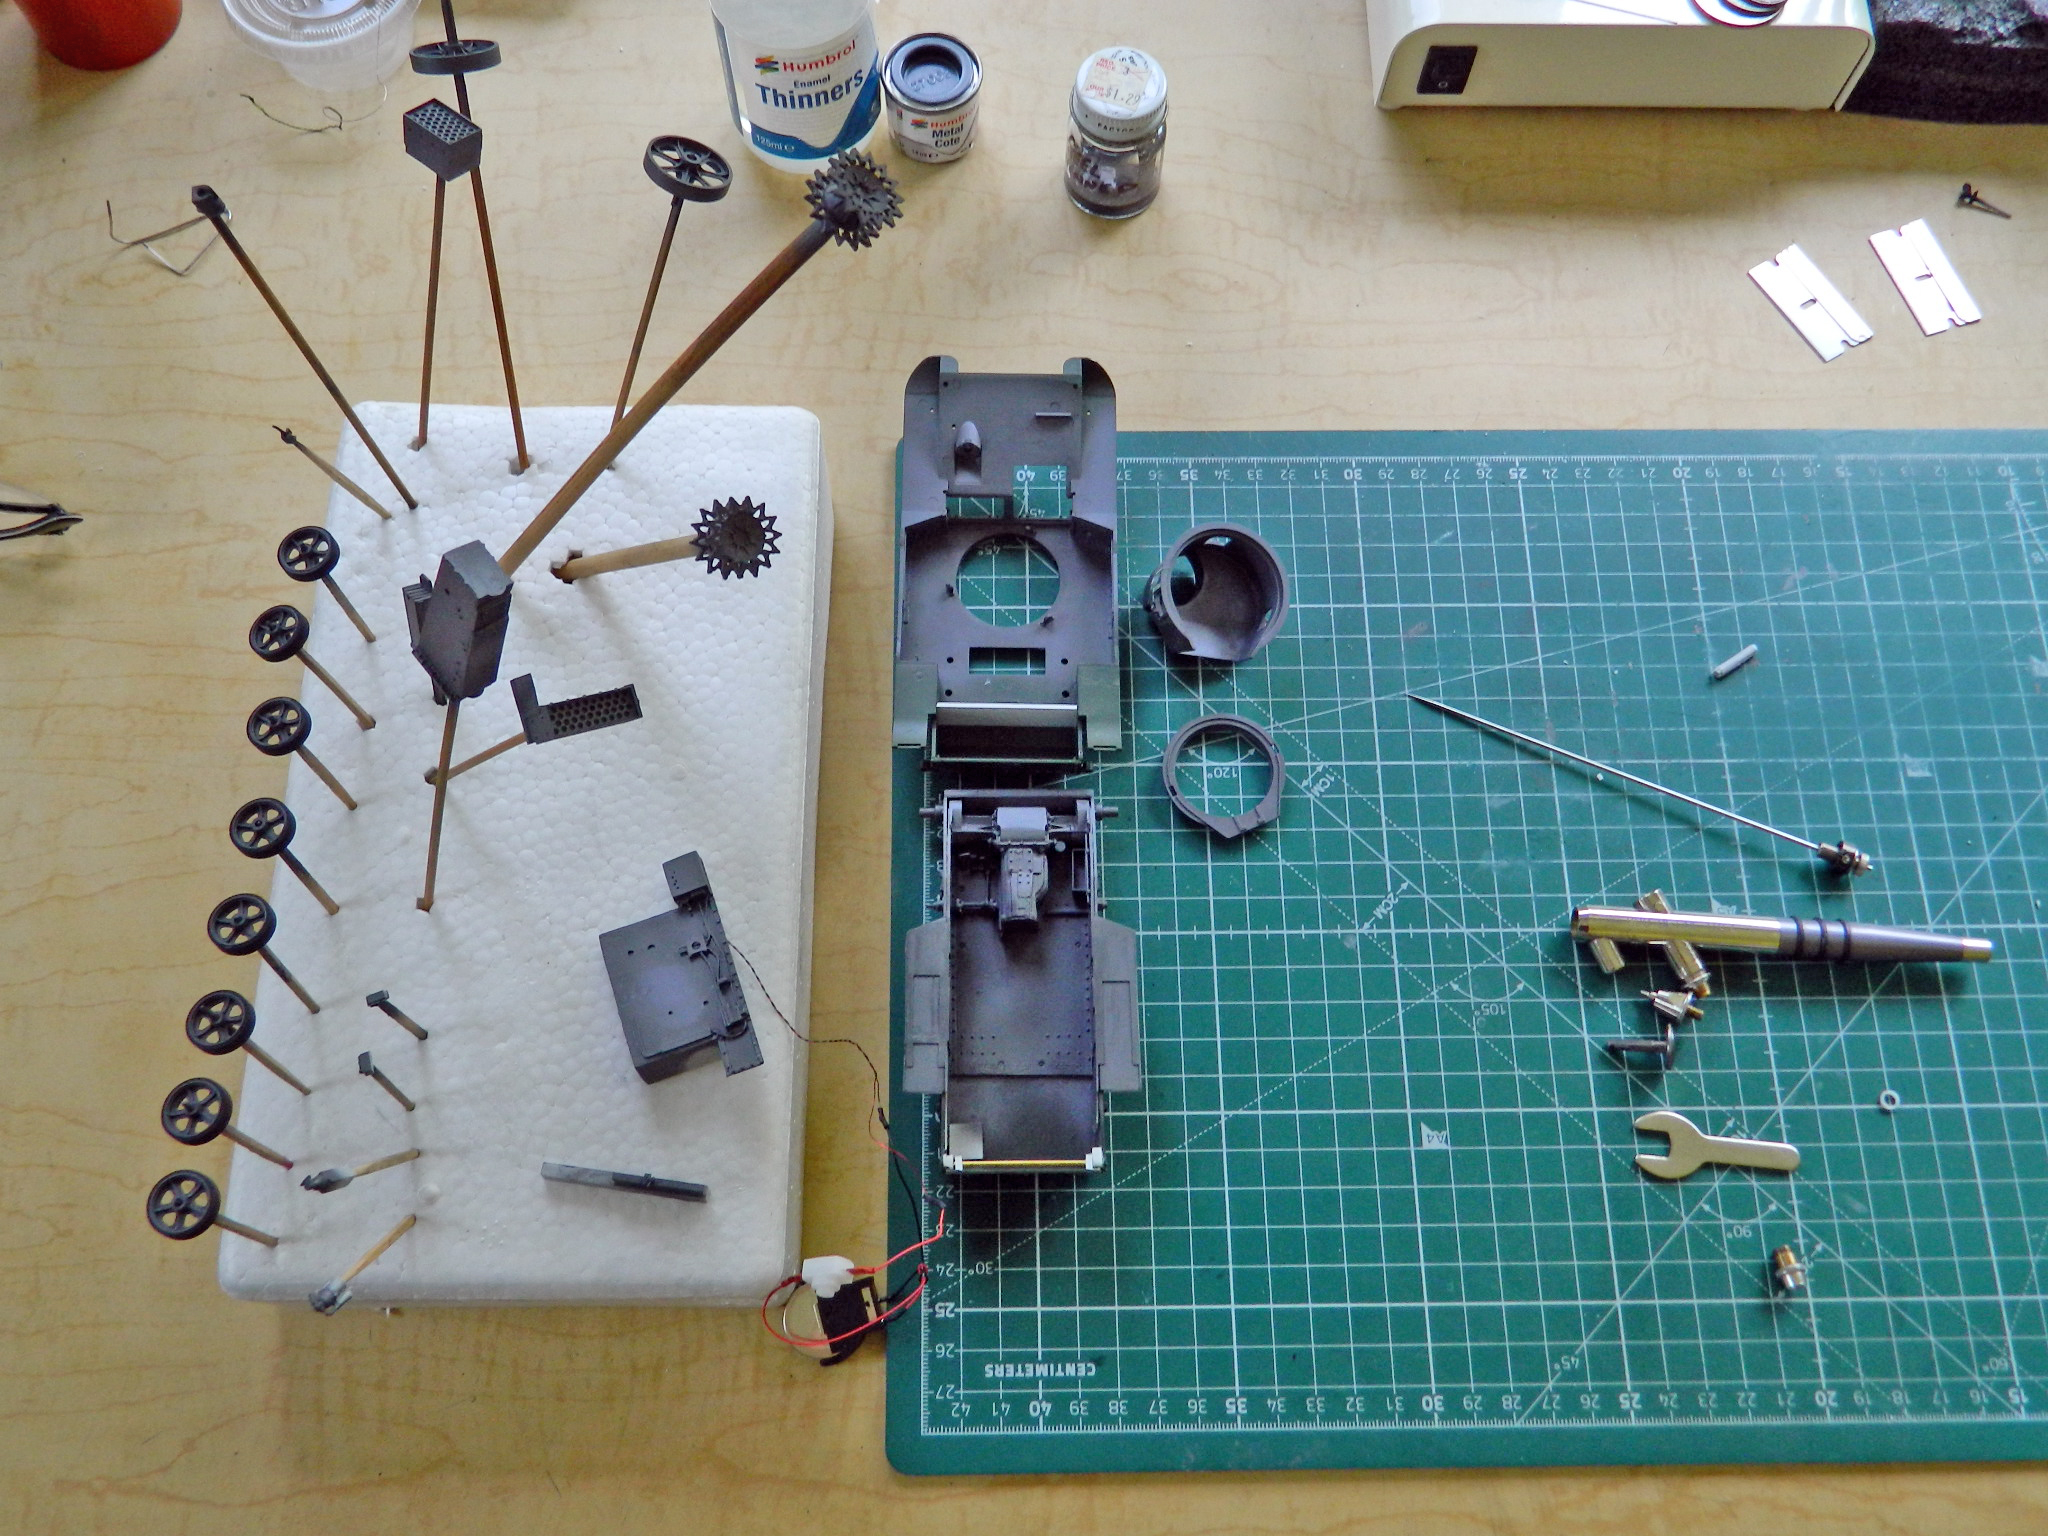
There are a LOT of small parts that need paint. Holding those with my sausage fingers has shown me that that doesn’t work well. I glued things (using superglue or PVA) to bamboo skewers so that I could get a grip on things (would that getting a grip were that easy in all things):

First I threw down the steel undercoat using Humbrol’s Metal Cote #27003 (my go-to paint anytime I need something to look like steel):
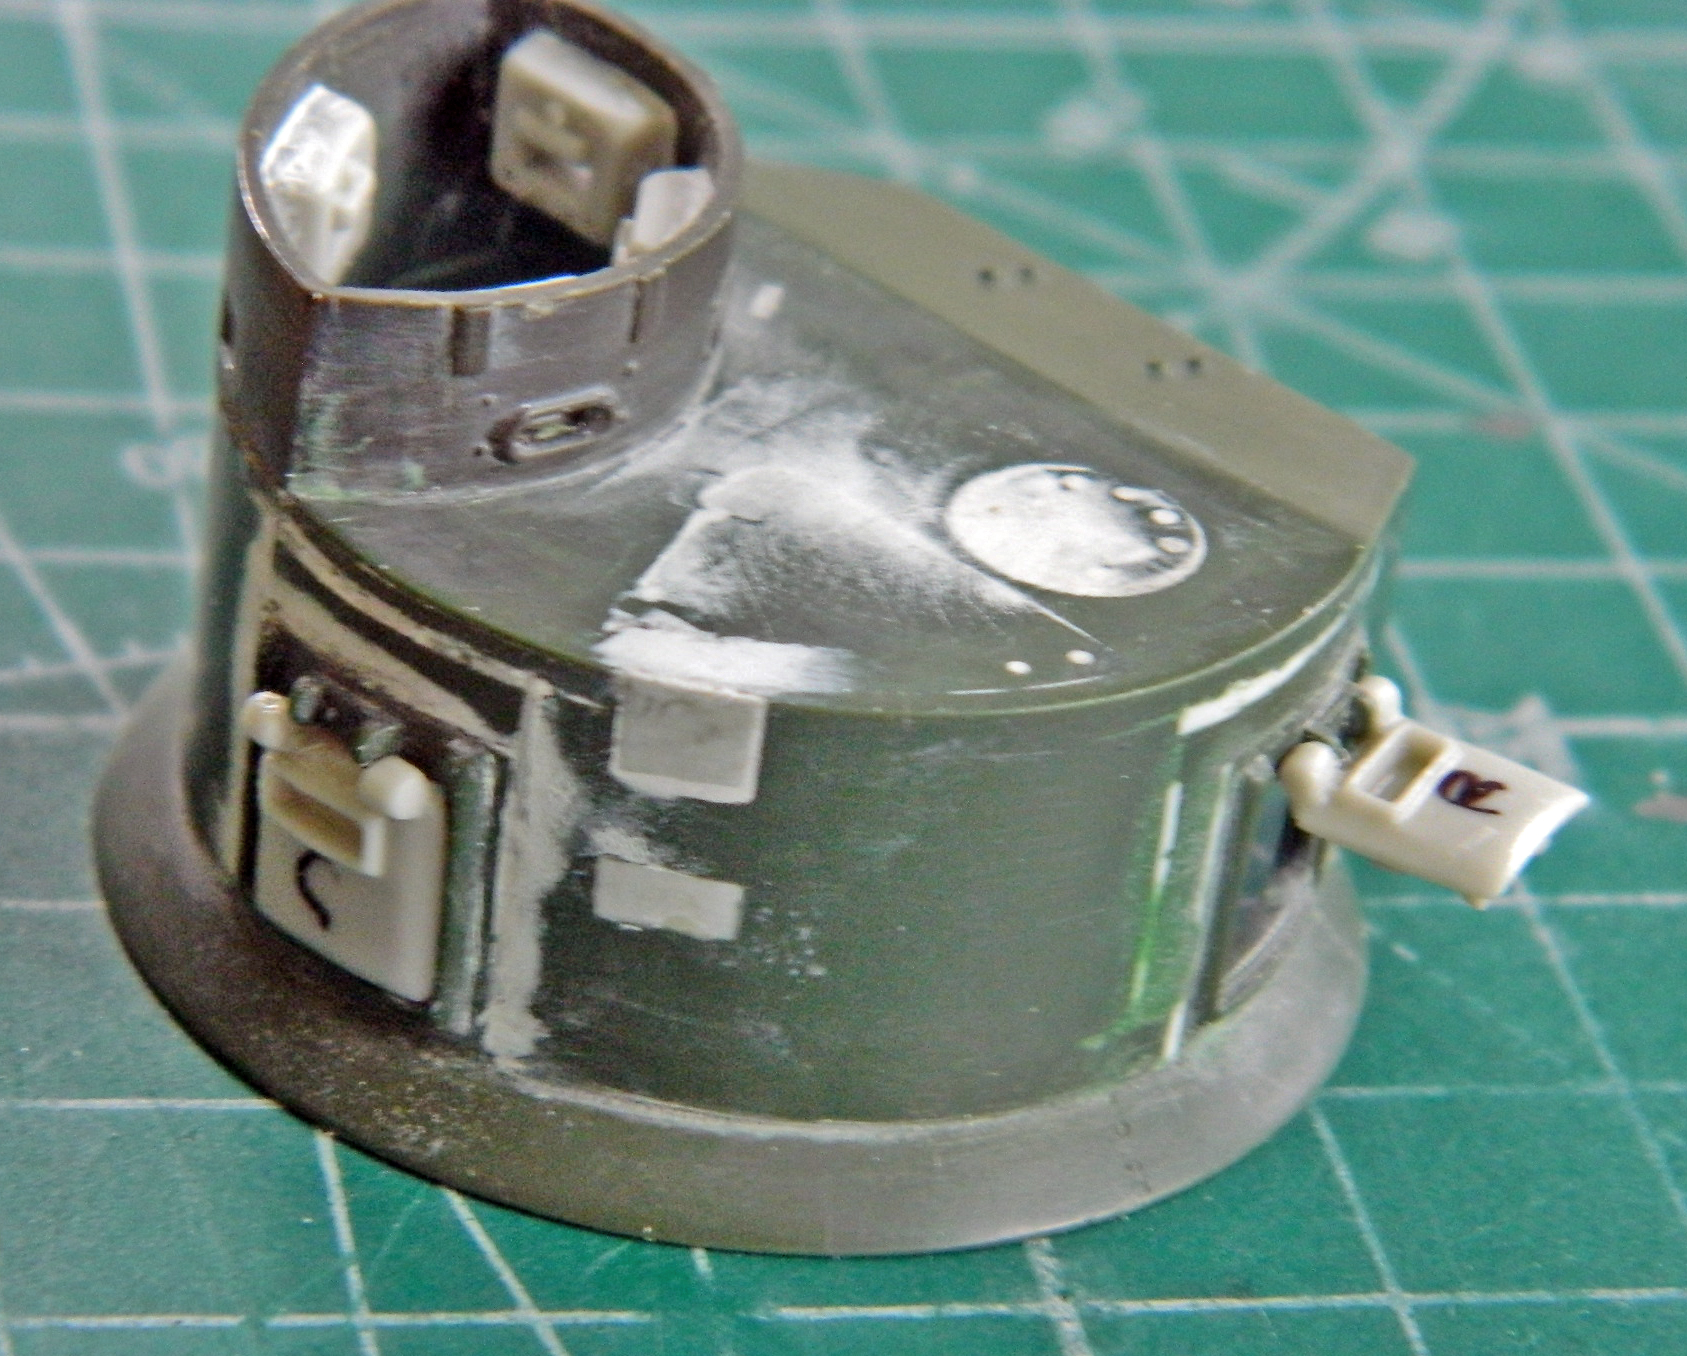
Then I tried an experiment. Normally my next coat would be of flat white. Some rubbing and chipping wear would be added, then it would all be hit with a coat of clear gloss so that I could enhance details with a dark wash. Well, maybe if I used gloss white instead, I could skip an entire step. After the wash would be time to hit things with clear flat. So I tried it:

All went well with the wash, and then was time to throw some clear flat over it all…and here’s where the wheels started to come off that wagon. It seems that a flat coat over a gloss coat has a problem. As the flat coat dries/cures, it fractures as the flat coat contracts and pulls apart. Seems the gloss undercoat doesn’t give enough tooth to the flat so that it will stay together.
Well, damn and bugger.
Luckily a strip and repaint drill wasn’t required. Where the clear flat pulled away from itself won’t be visible once the interior is assembled, weathered, chipped, and stained. Lesson learned.
At this point something that had been nagging at me, the ol’ “Have you forgotten something,” showed that yes…I had forgotten something. Inside the turret cupola are the armored covers for the direct-vision slots and I had neglected to put those in. Wonderful. I stripped out the steel and white paints (and interestingly, as I went after the acrylic paint with denatured alcohol, I discovered that it also lifted the enamel steel paint as well…so that requires further experimentation also, since turpentine STINKS) so that the resin parts would glue in securely.
The cupola is curved, as are the armored covers. However, the radius of the arcs between one side of the cupola and the other are different. The resin armored covers were fit to the rear of the cupola, not the front. Note the gap under the center of the cover (if you can…not the best photo of it, just the best I could get):

After filing and sanding all three front covers, they now fit as they should:

There is a very slight gap around the edges of all the armored covers so the 3M acrylic putty (LOVE that stuff!) and a chisel-tipped toothpick took care of that (and all the slots were cut open and the armored covers aligned with the openings):

The pistol ports with the kit were okay, but the aftermarket set from Verlinden has an even better set (which is where the armored covers came from…I copied them from the Verlinden resin parts):
The two-part hatch for the cupola needed some work as well. When closed, there is a gap between the two hatches. I added .020″ (.508mm) styrene to the edge of one to fix that:


The hinges on the hatch halves doesn’t quite match the hinges on the cupola. Since fixing the hatches on the cupola are easier, that will come soon.
So the inside of the turret will get painted with steel again. And since I’ll have that paint in the airbrush, the guide horns of the tracks also need to be painted steel. So while this stuff is now ready for paint, I have to get the tracks ready for paint too: