I had originally intended on using Eduard’s limited edition of the Academy P-38 as my next build. You can find my opinions under “Opinions, Reviews, & Tips,” under the title, “A Big, Steamy, Cup of Disappointment. My Experiences with Eduard’s Limited-Edition Early P-38 Kit. It Ain’t Pretty.” To summarize, if you really want a P-38 kit sitting on your shelf, don’t bother with either Academy’s kit or Eduard’s limited-edition offering, “Early Lightings.” Both are a waste of money individually and together they’re a waste of too much money.
Moving on…

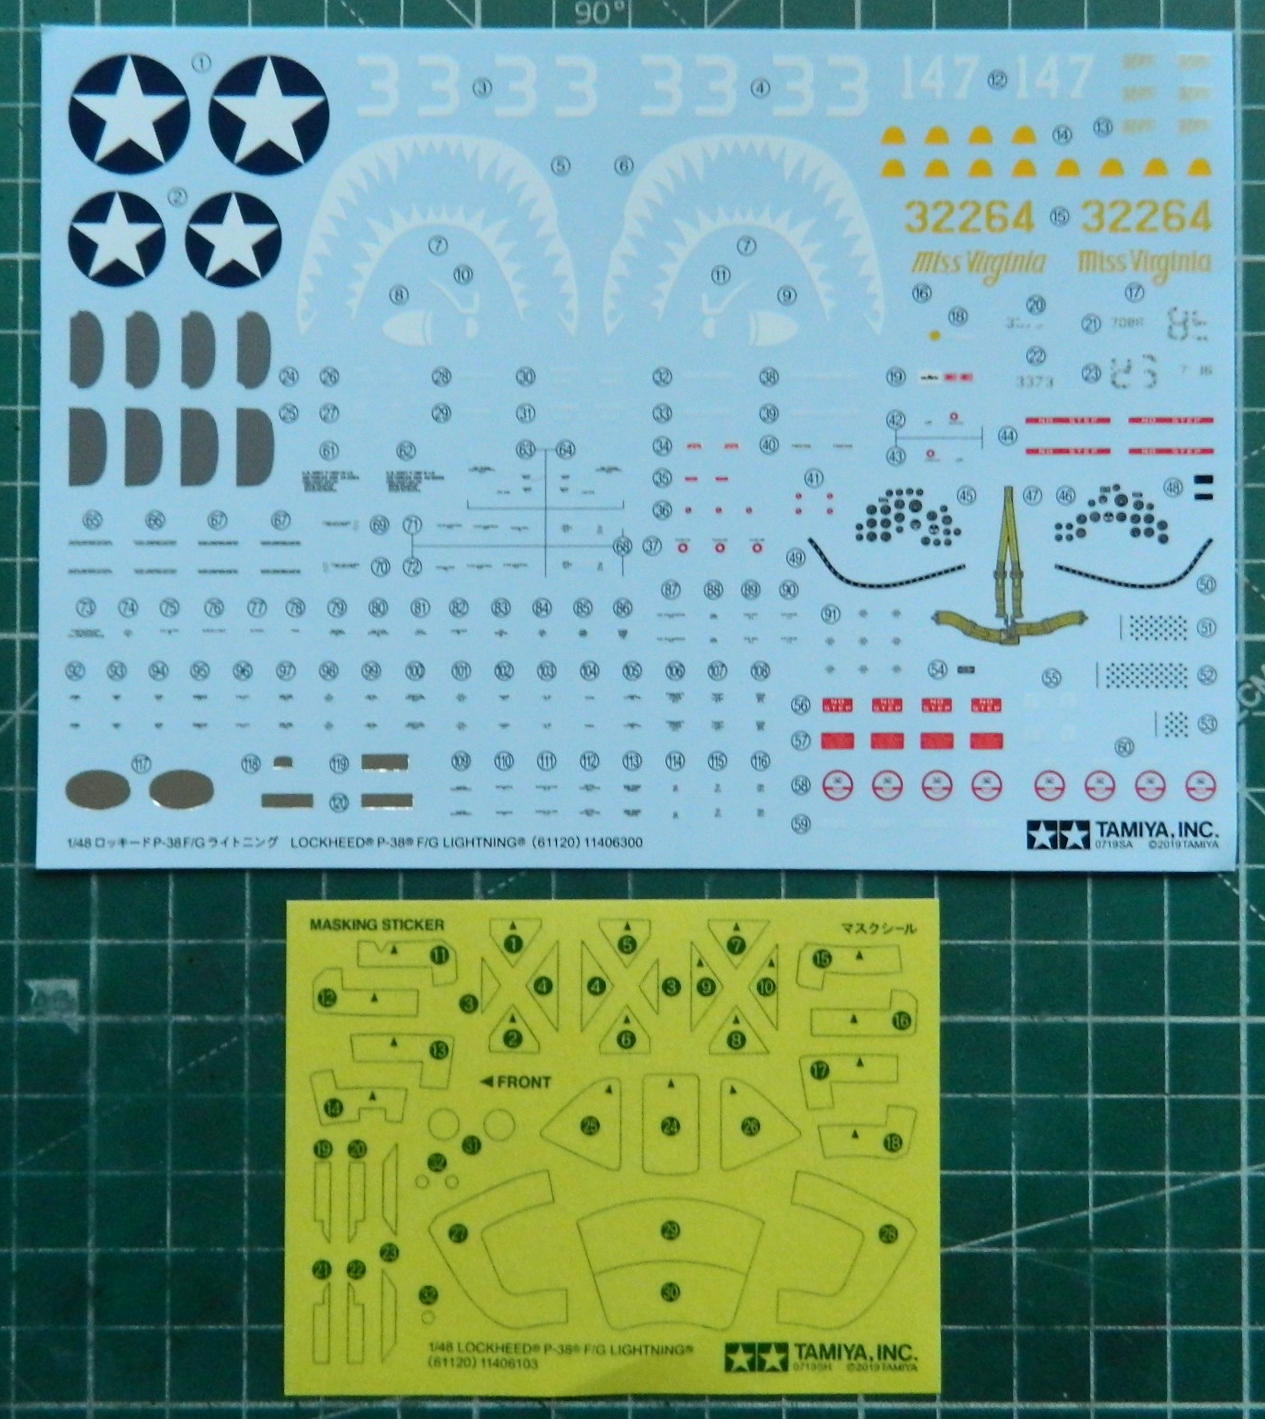
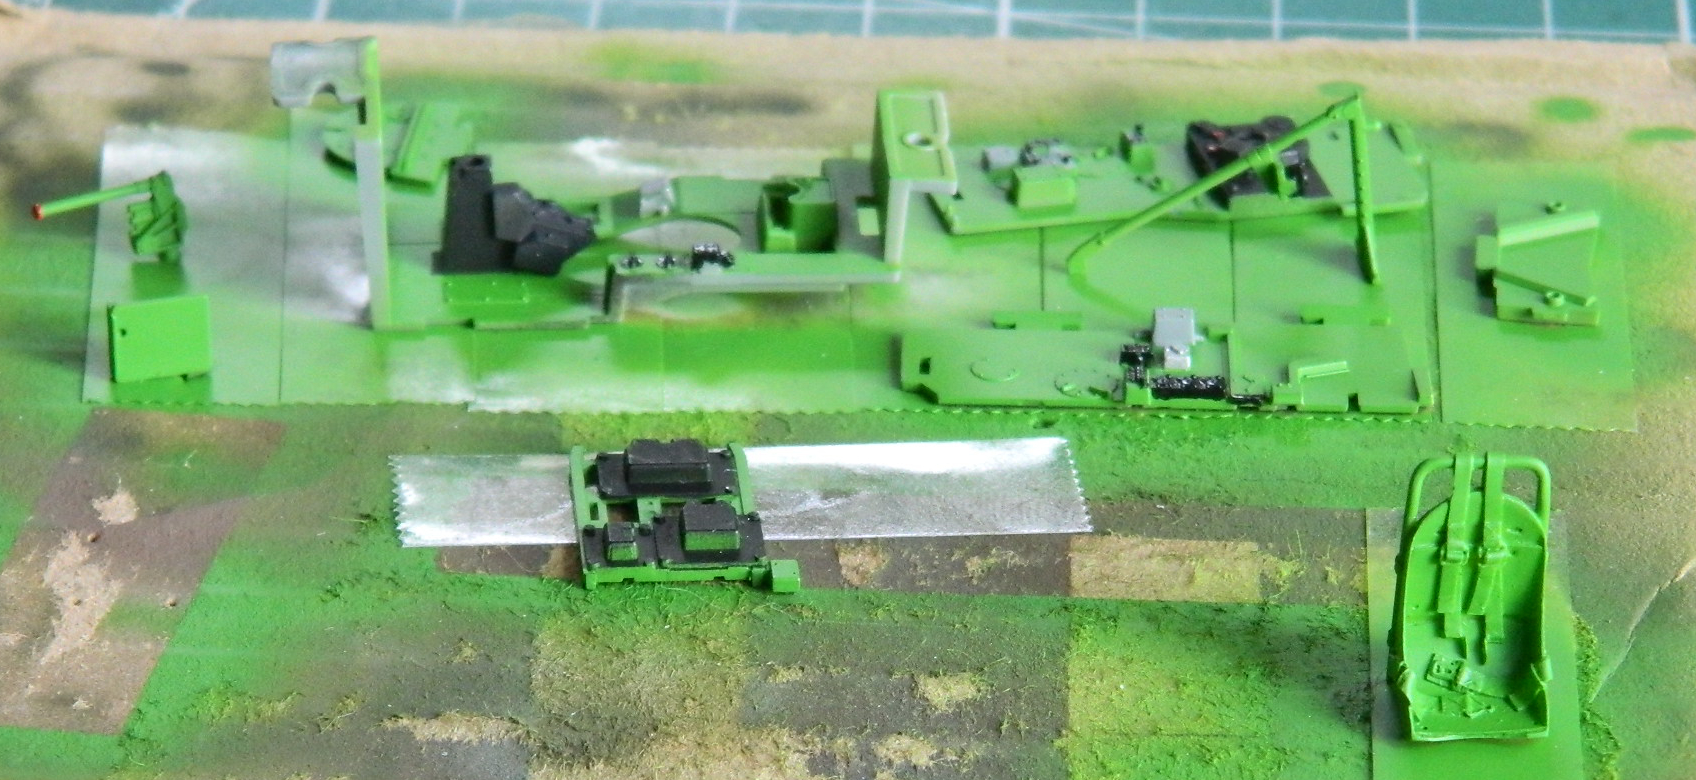
When I opened the box, this is what I found:


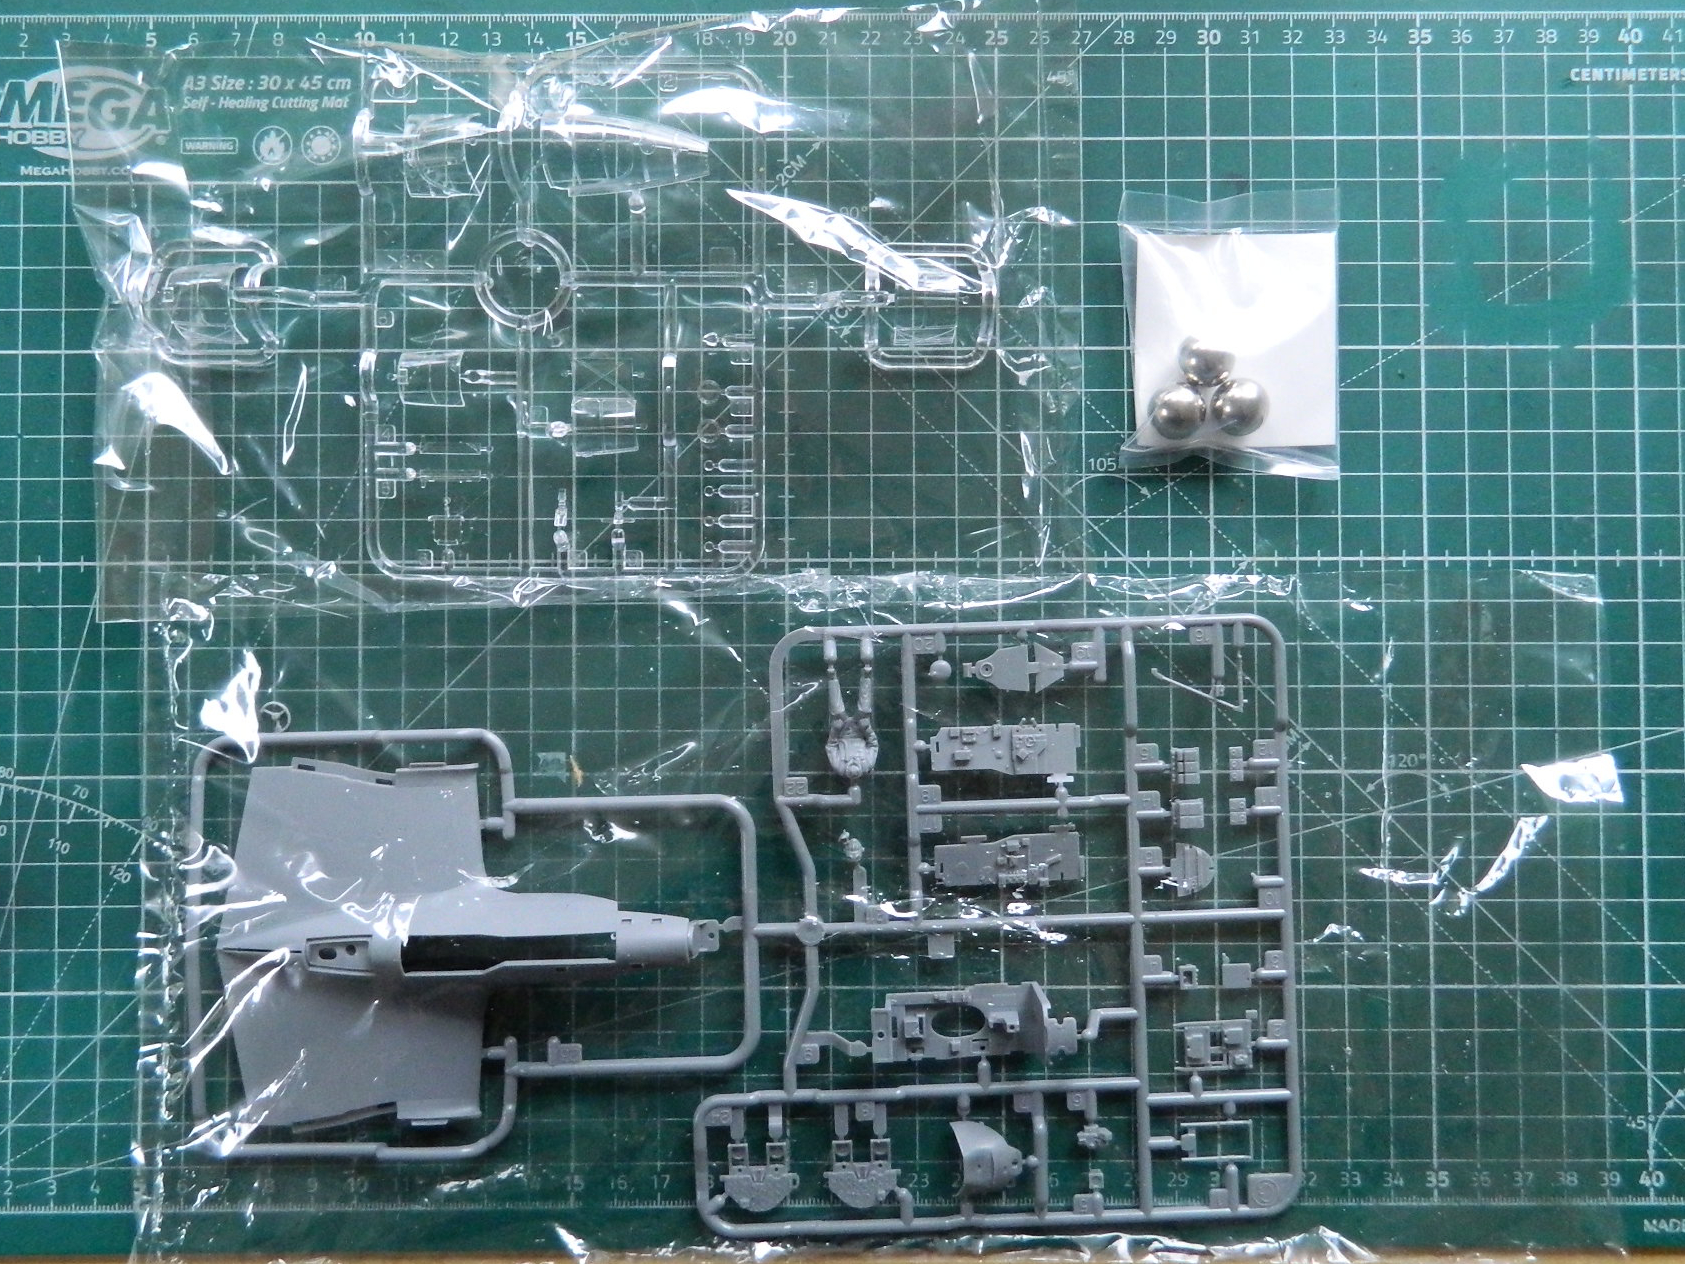


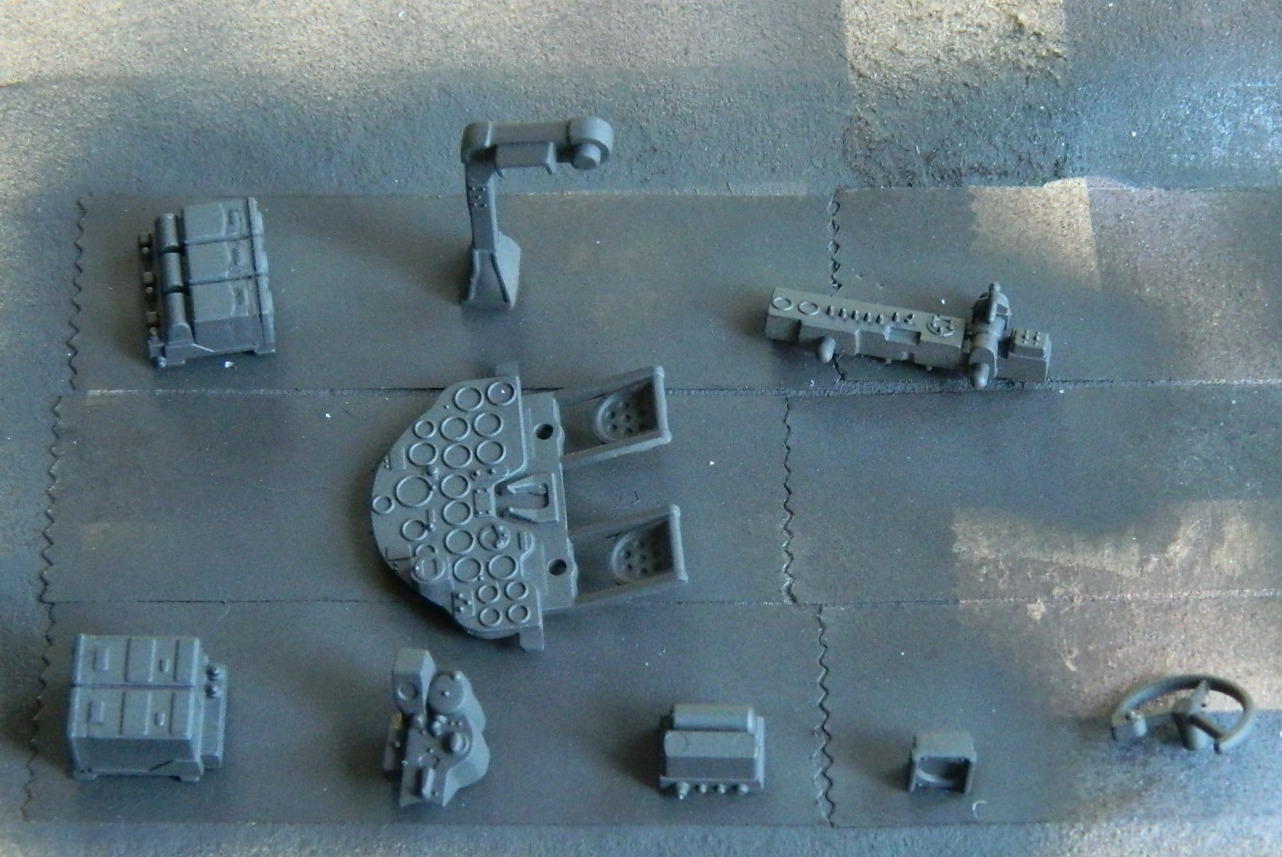
The AM parts I’m pretty sure I’ll be using are seats and wheels/tires from UltraCast, machine gun barrels from Master, E Z Line Fine antenna lines, and possibly oxygen lines from Model Design Construction:

Construction begins as it usually does for me when I’m doing an aircraft, with the cockpit. What drives the build at this point are the things I need to clean up, paint, and install inside the fuselage so that I can assemble that fuselage. In this case, it starts on the left side of the cockpit, especially featuring the throttles/propeller controls. As provided by Tamiya, they’re out-of-scale and inaccurate. Each of the molded on control levers is a single and they should be doubles (twin engines, y’know):

The seat that comes with the kit is okay, but the decals intended to be used as the seat belts and harness are just not acceptable. Instead, I’m using the UltraCast seat:

And preparing all the kit parts (with a few simple modifications, starting with cutting off the incorrect control levers) and then painting them is where it starts.
Speaking of painting, a word about “cockpit green” and Tamiya. Stated simply, Tamiya doesn’t offer the US cockpit green as a paint option. However, since this kit calls for that color, and what’s Tamiya going to do…call out another manufacturers paint? Guess not. What they did do was supply the mix formula! Two parts XF- 3 Flat Yellow and one part XF-5 Flat Green will get you to cockpit green:

Then all the parts that need to be (or mostly be) black were done with Tamiya XF-1 Flat Black mixed with 25% Tamiya XF-2 Flat White for scale color correction after I used double-sided tape to fix the parts to a scrap of cardboard. Some of the parts should be semigloss black but since all the parts regardless of color have to be hit with a clear gloss for a wash, using semigloss made no sense. It’s all getting covered with clear flat after the wash; I can hit the parts that want semigloss black later:
Once the cockpit green sat overnight, I detail painted Tamiya XF-1 Flat Black, Tamiya XF-16 Flat Aluminum, and Tamiya XF-25 Light Sea Gray:
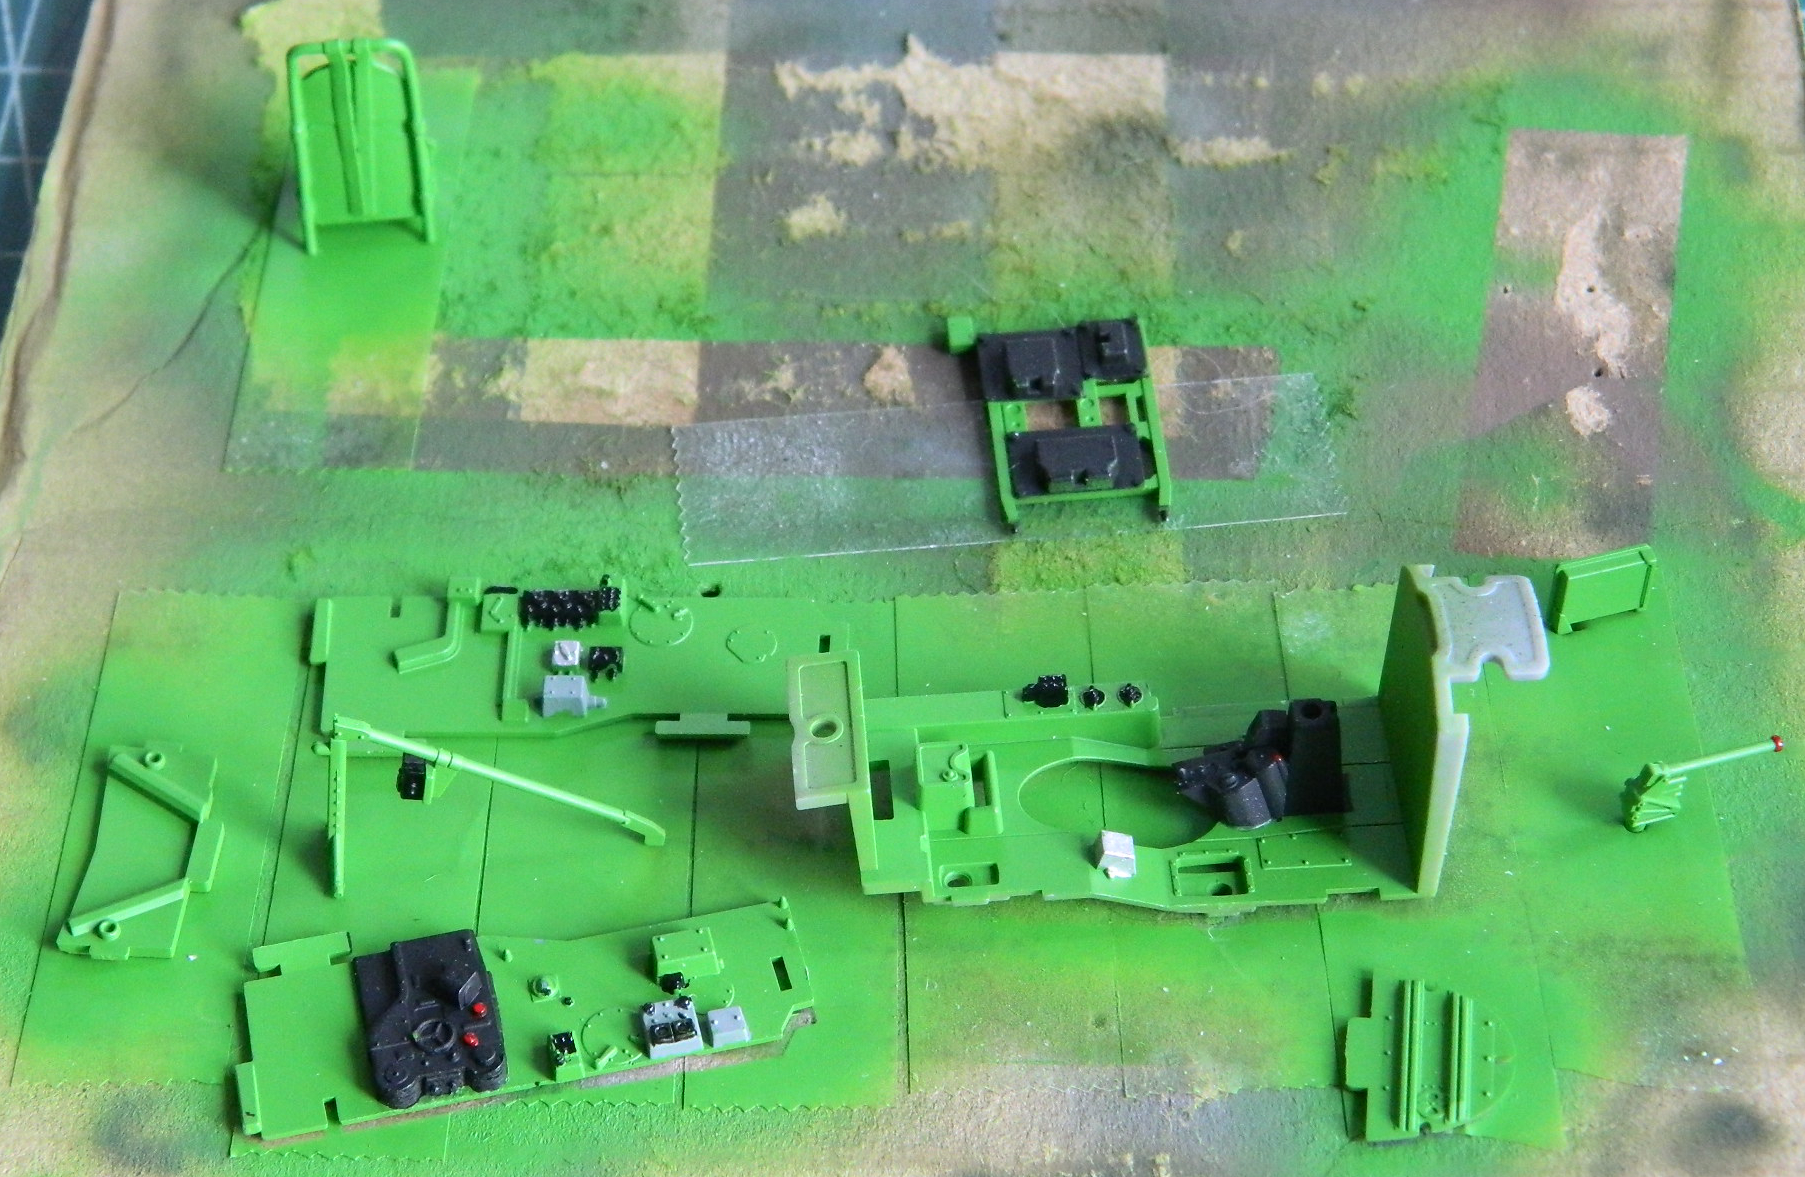
Some of the radio parts, which had been covered in flat black, needed to be aluminum. I used the flat aluminum from before on those parts and detailed some of the black sections with a silver pencil. The knob on the end of the emergency hydraulic pump handle was touched with red:

The seat was its own special paint challenge. The harnesses were painted Tamiya XF-49 Khaki, and the hardware was painted Tamiya X-11 Chrome Silver. After a clear gloss coat, the wash, a clear flat coat, and worn areas touched with the silver pencil, this is now the seat:

I’ve seen a number of modelers who paint the small parts while they’re still on the sprues and that hasn’t been my choice until now. I decided to try it and see how it worked. For the landing gear and their bays (and all the assorted bits that go into those areas), I wanted to preshade with black and then just mist flat aluminum over the black. The first step is Tamiya XF-1 Flat Black:

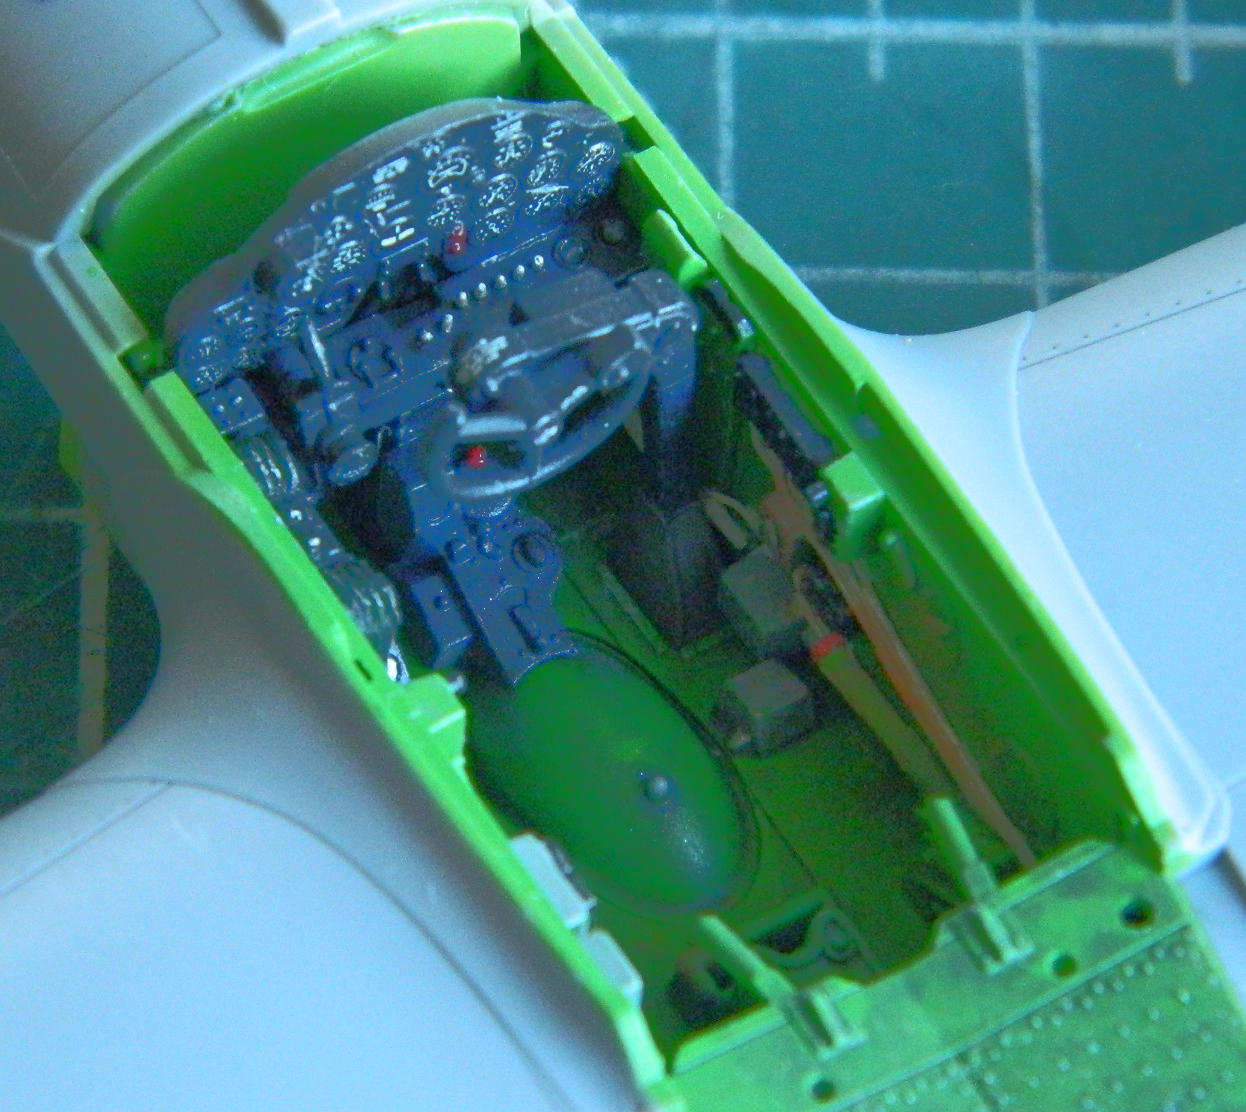
With the cockpit parts painted, washed, and worn, then they were assembled and glued into place. The gauges on the instrument panel are done with a decal (that aligned perfectly), overshot with flat clear, and a drop of clear gloss replicates the glass gauge faces:

The fit of the parts was flawless. What a lovely thing!
Since I had the radio parts (as well as the support arm for the control yoke) decaled, it was time to add the wiring harness. I used 48awg. wire, doubled (and tripled where necessary), stuck the ends into drilled out locations and held in place with superglue. The resulting wiring harness was painted dirty white:

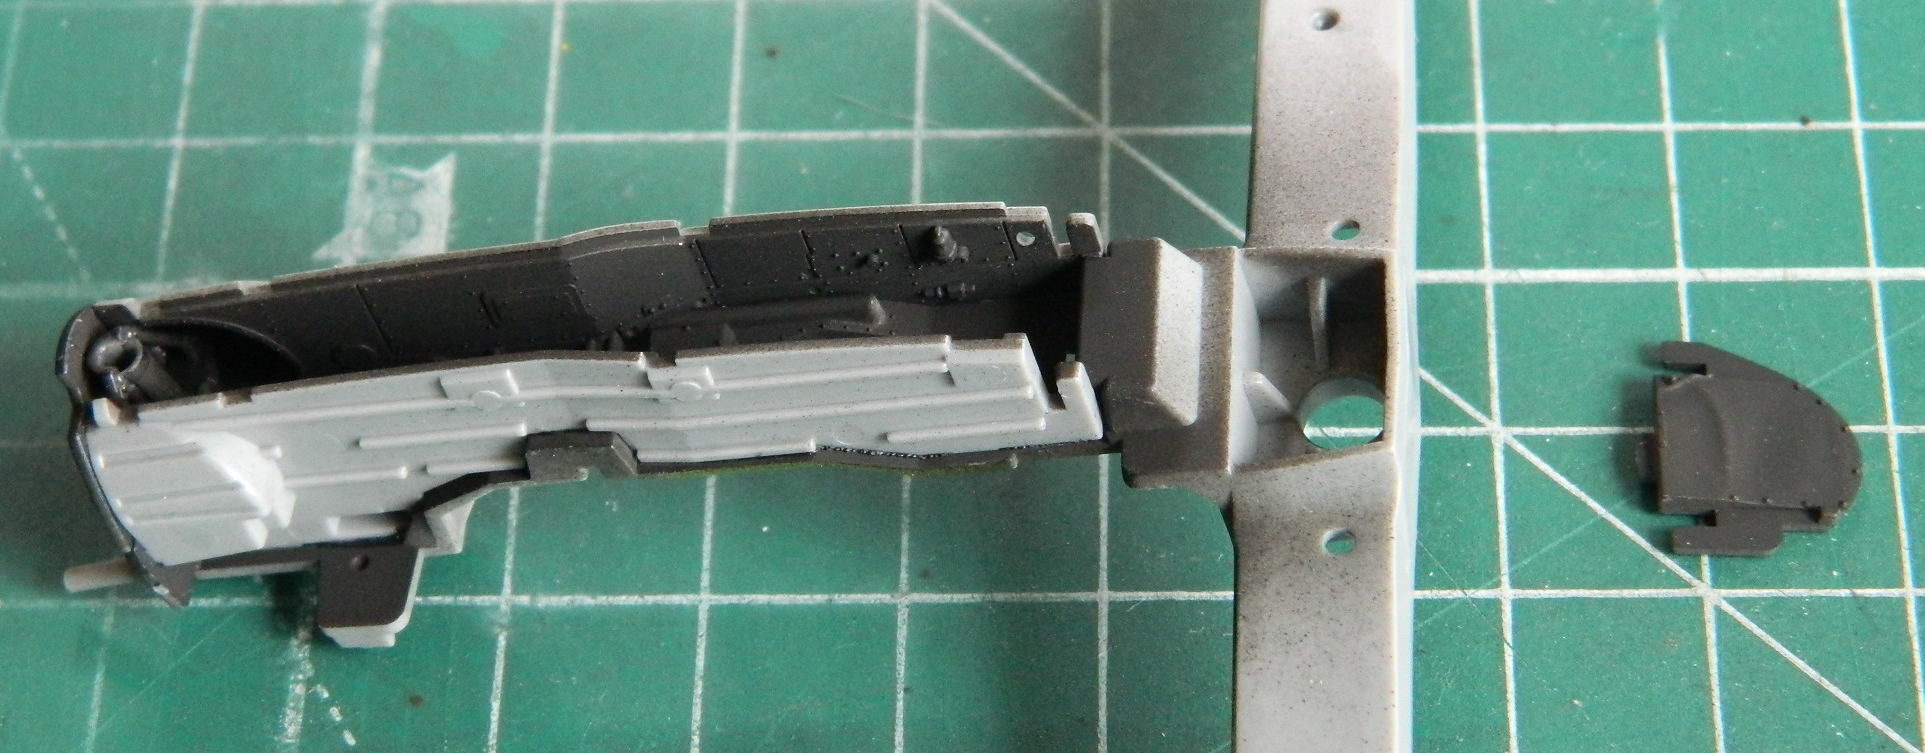
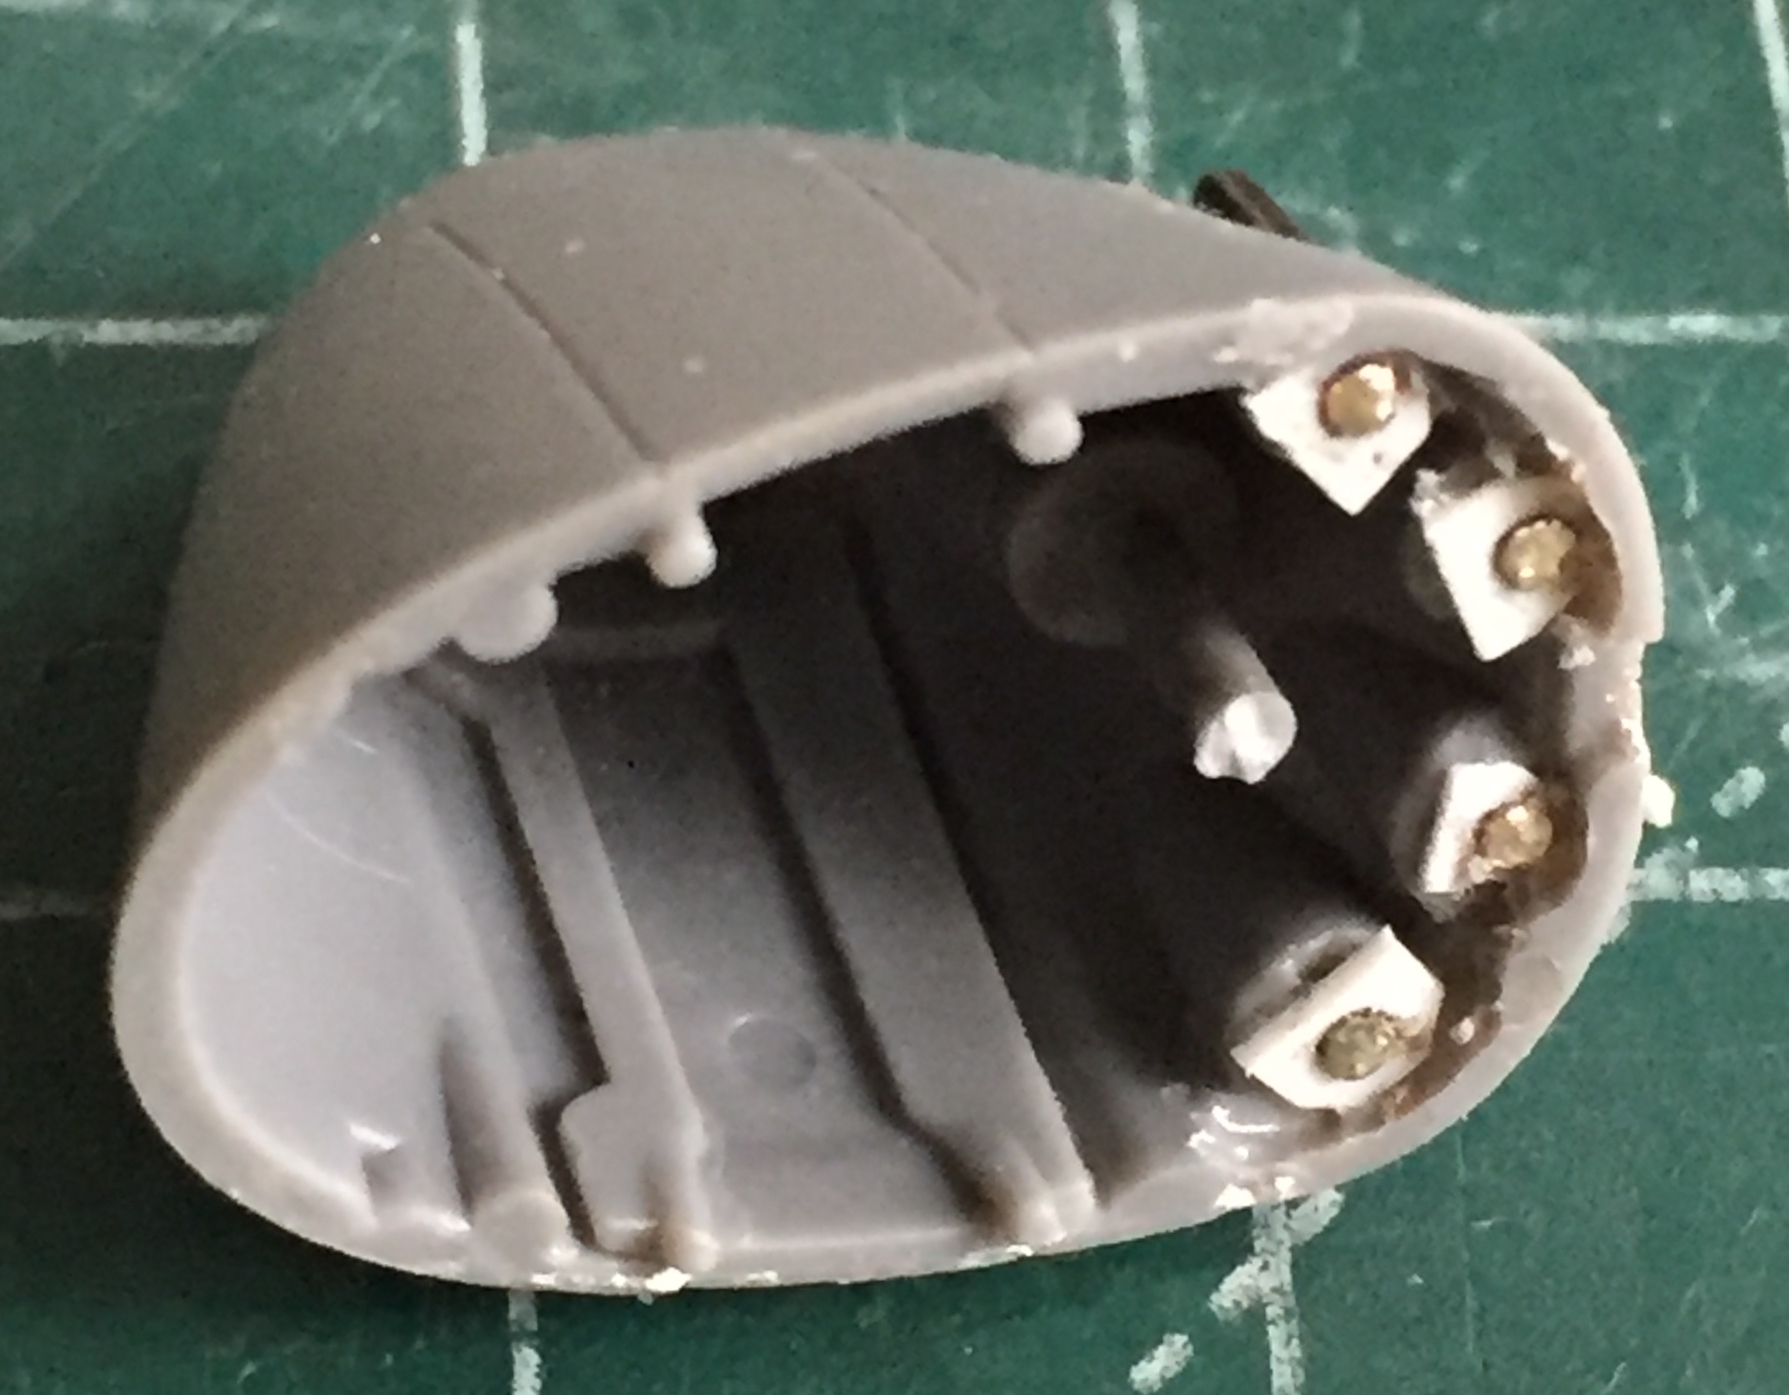
The nosewheel bay was painted black, assembled, and installed in the lower half of the fuselage pod (the masked area at the rear of the bay was painted khaki and masked):


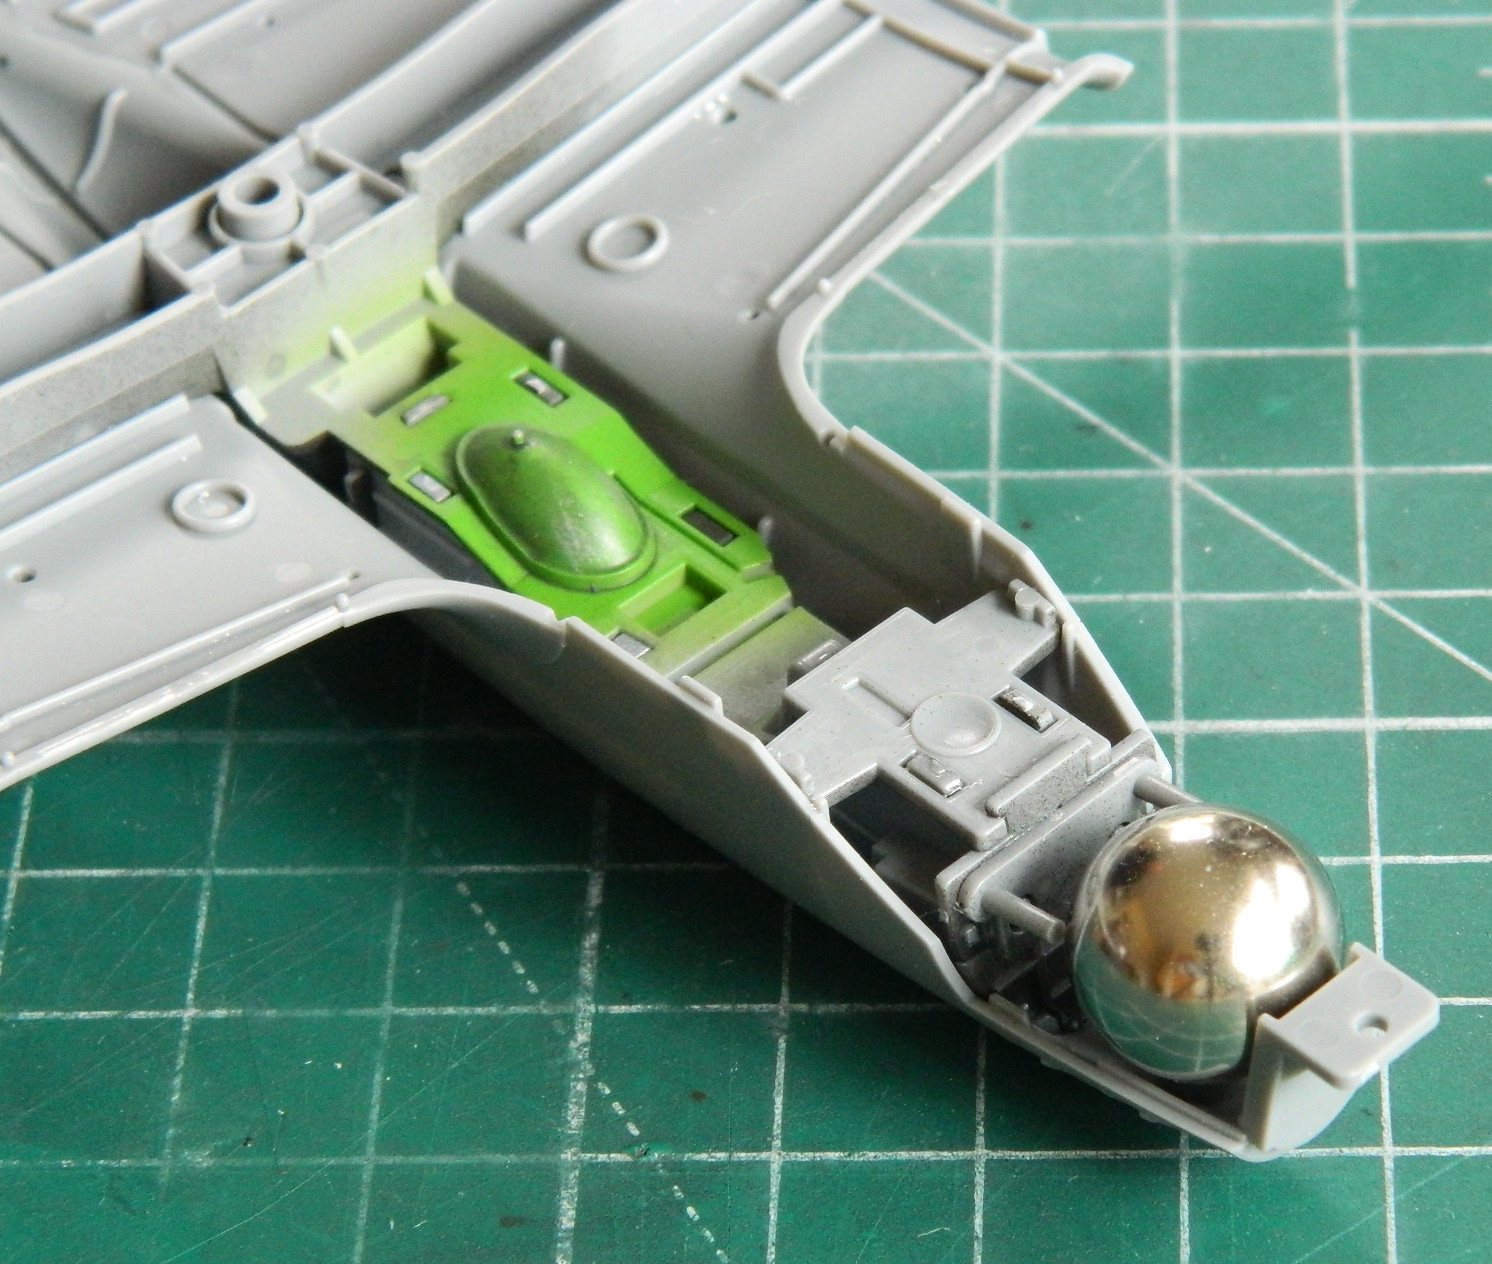
Tamiya not only provided three places for weights, nose and inside both engine nacelles, Tamiya also provided three steel balls (11.5g each) as weights, the first of which was superglued into place:
Then the lower half of the fuselage pod was cemented to the upper half and thus the cockpit parts were (mostly) in place:


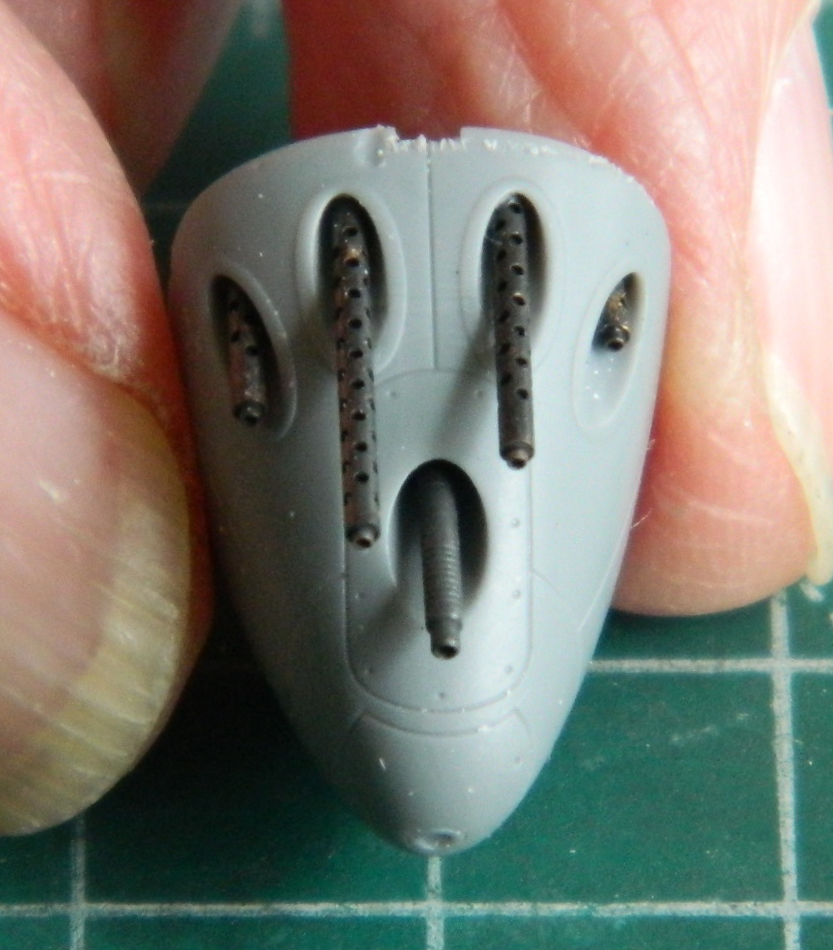
I then started work on replacing the kit’s machinegun barrels with Master’s amazingly machined brass replacements:
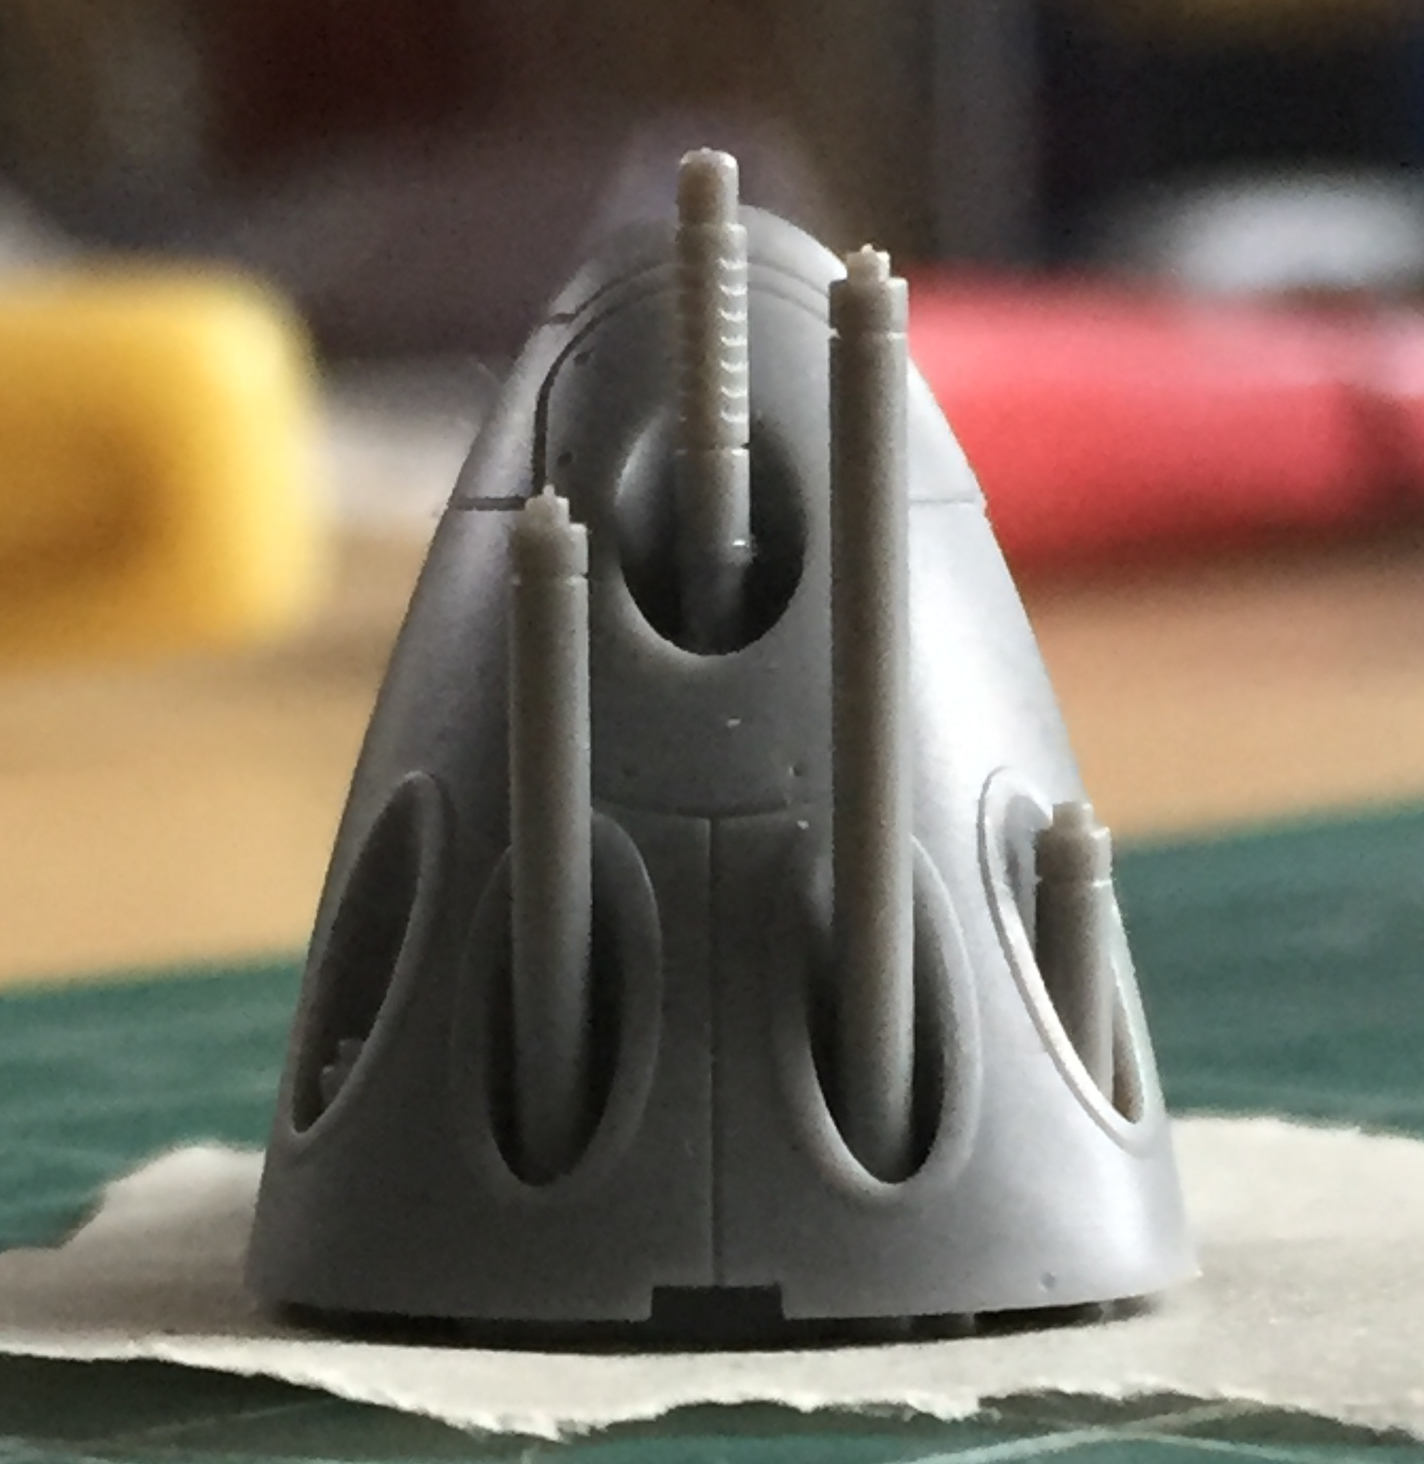

The machinegun barrels were all of one part, the cannon barrel (the one furthest forward) was separate. To replace those with those tiny barrels required (by me, anyway) them to be individually mounted. I used scrap .015″ (.381mm) styrene, drilled to accept the barrels, and the barrels aligned to be as vertical to the styrene mounts as I could get them.
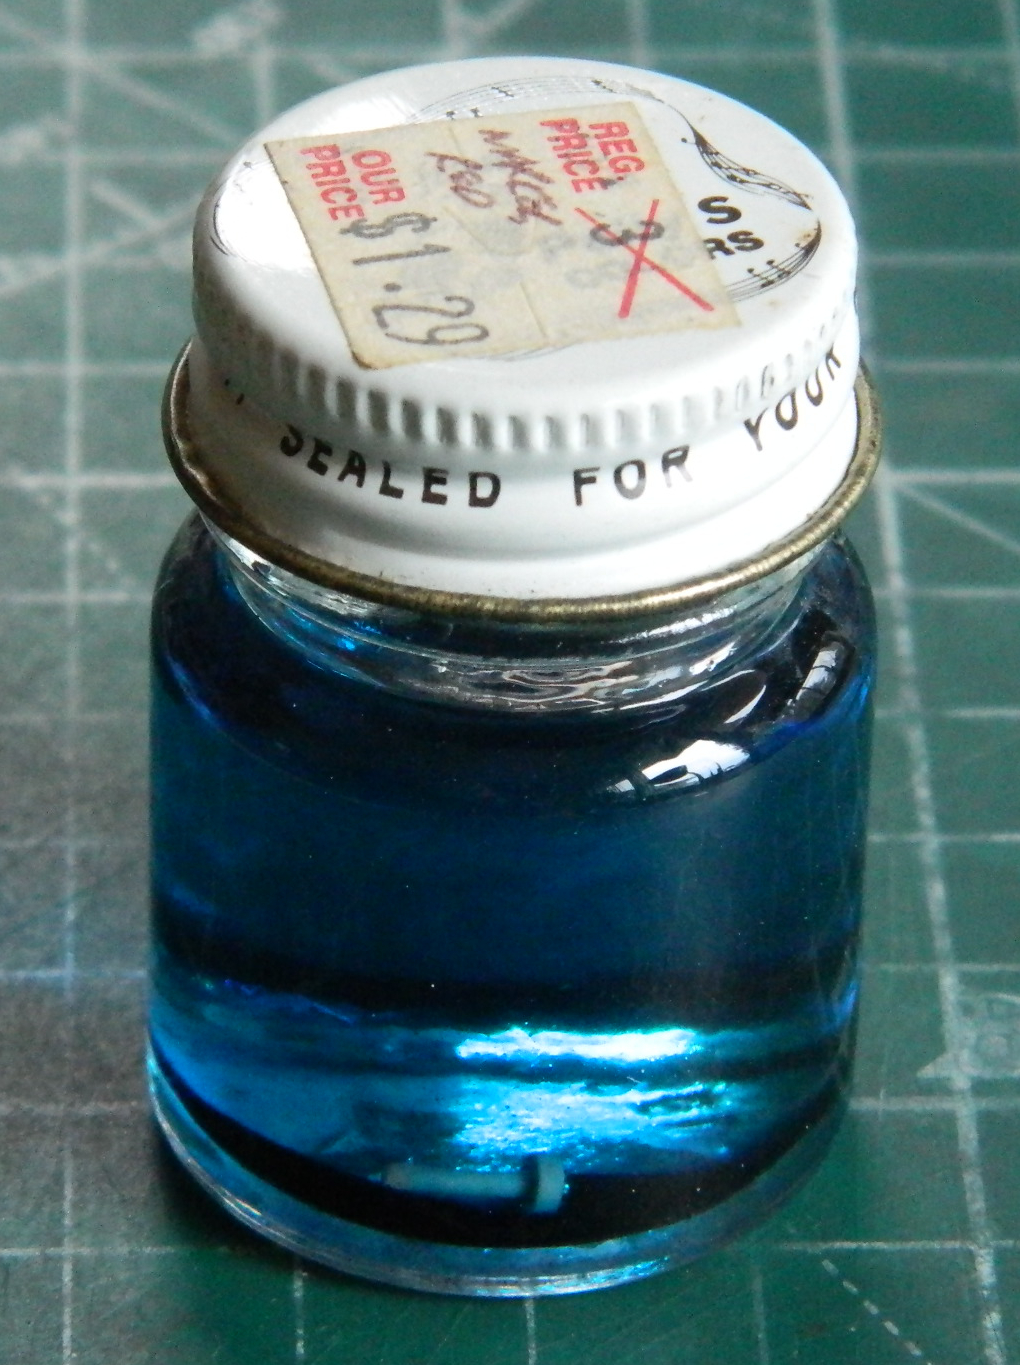
But before I could do that, I needed to color them. I used this stuff to color brass machinegun parts:

It’s acidic enough to dissolve aluminum, so if you decide to use it, pick something it won’t react with. I use an old paint jar because it’s glass.
The barrels before color:

Experience has shown me that they have to be colored unassembled. When they’re assembled first, the chemical doesn’t get into the cooling jacket (the tubes with the holes) well enough to cover completely, so clean them with denature alcohol, drop them into the jar of chemical, and shake them vigorously:
The liquid turns progressively darker the longer they stay in there. After about fifteen minutes, I use tweezers to remove the parts and drop them into water to neutralize the caustic elements of the compound:
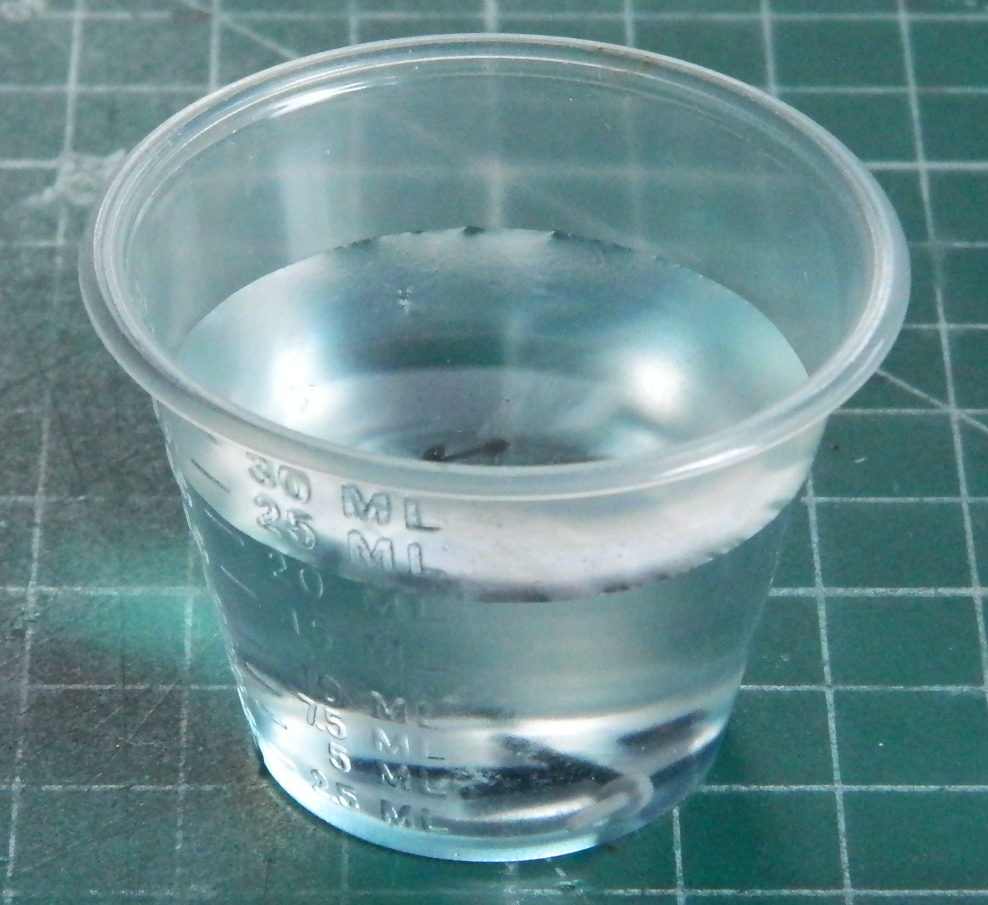
I drop them onto a paper towel, dry them, and then buff them. As they come out of the chemical (and water), the surface is powdery. Buffing them removes the surface powder:

Frequently, as was the case this time, the parts go back into the chemicals to either darken the finish, cover the spots that didn’t color…or both. One application may not be sufficient.
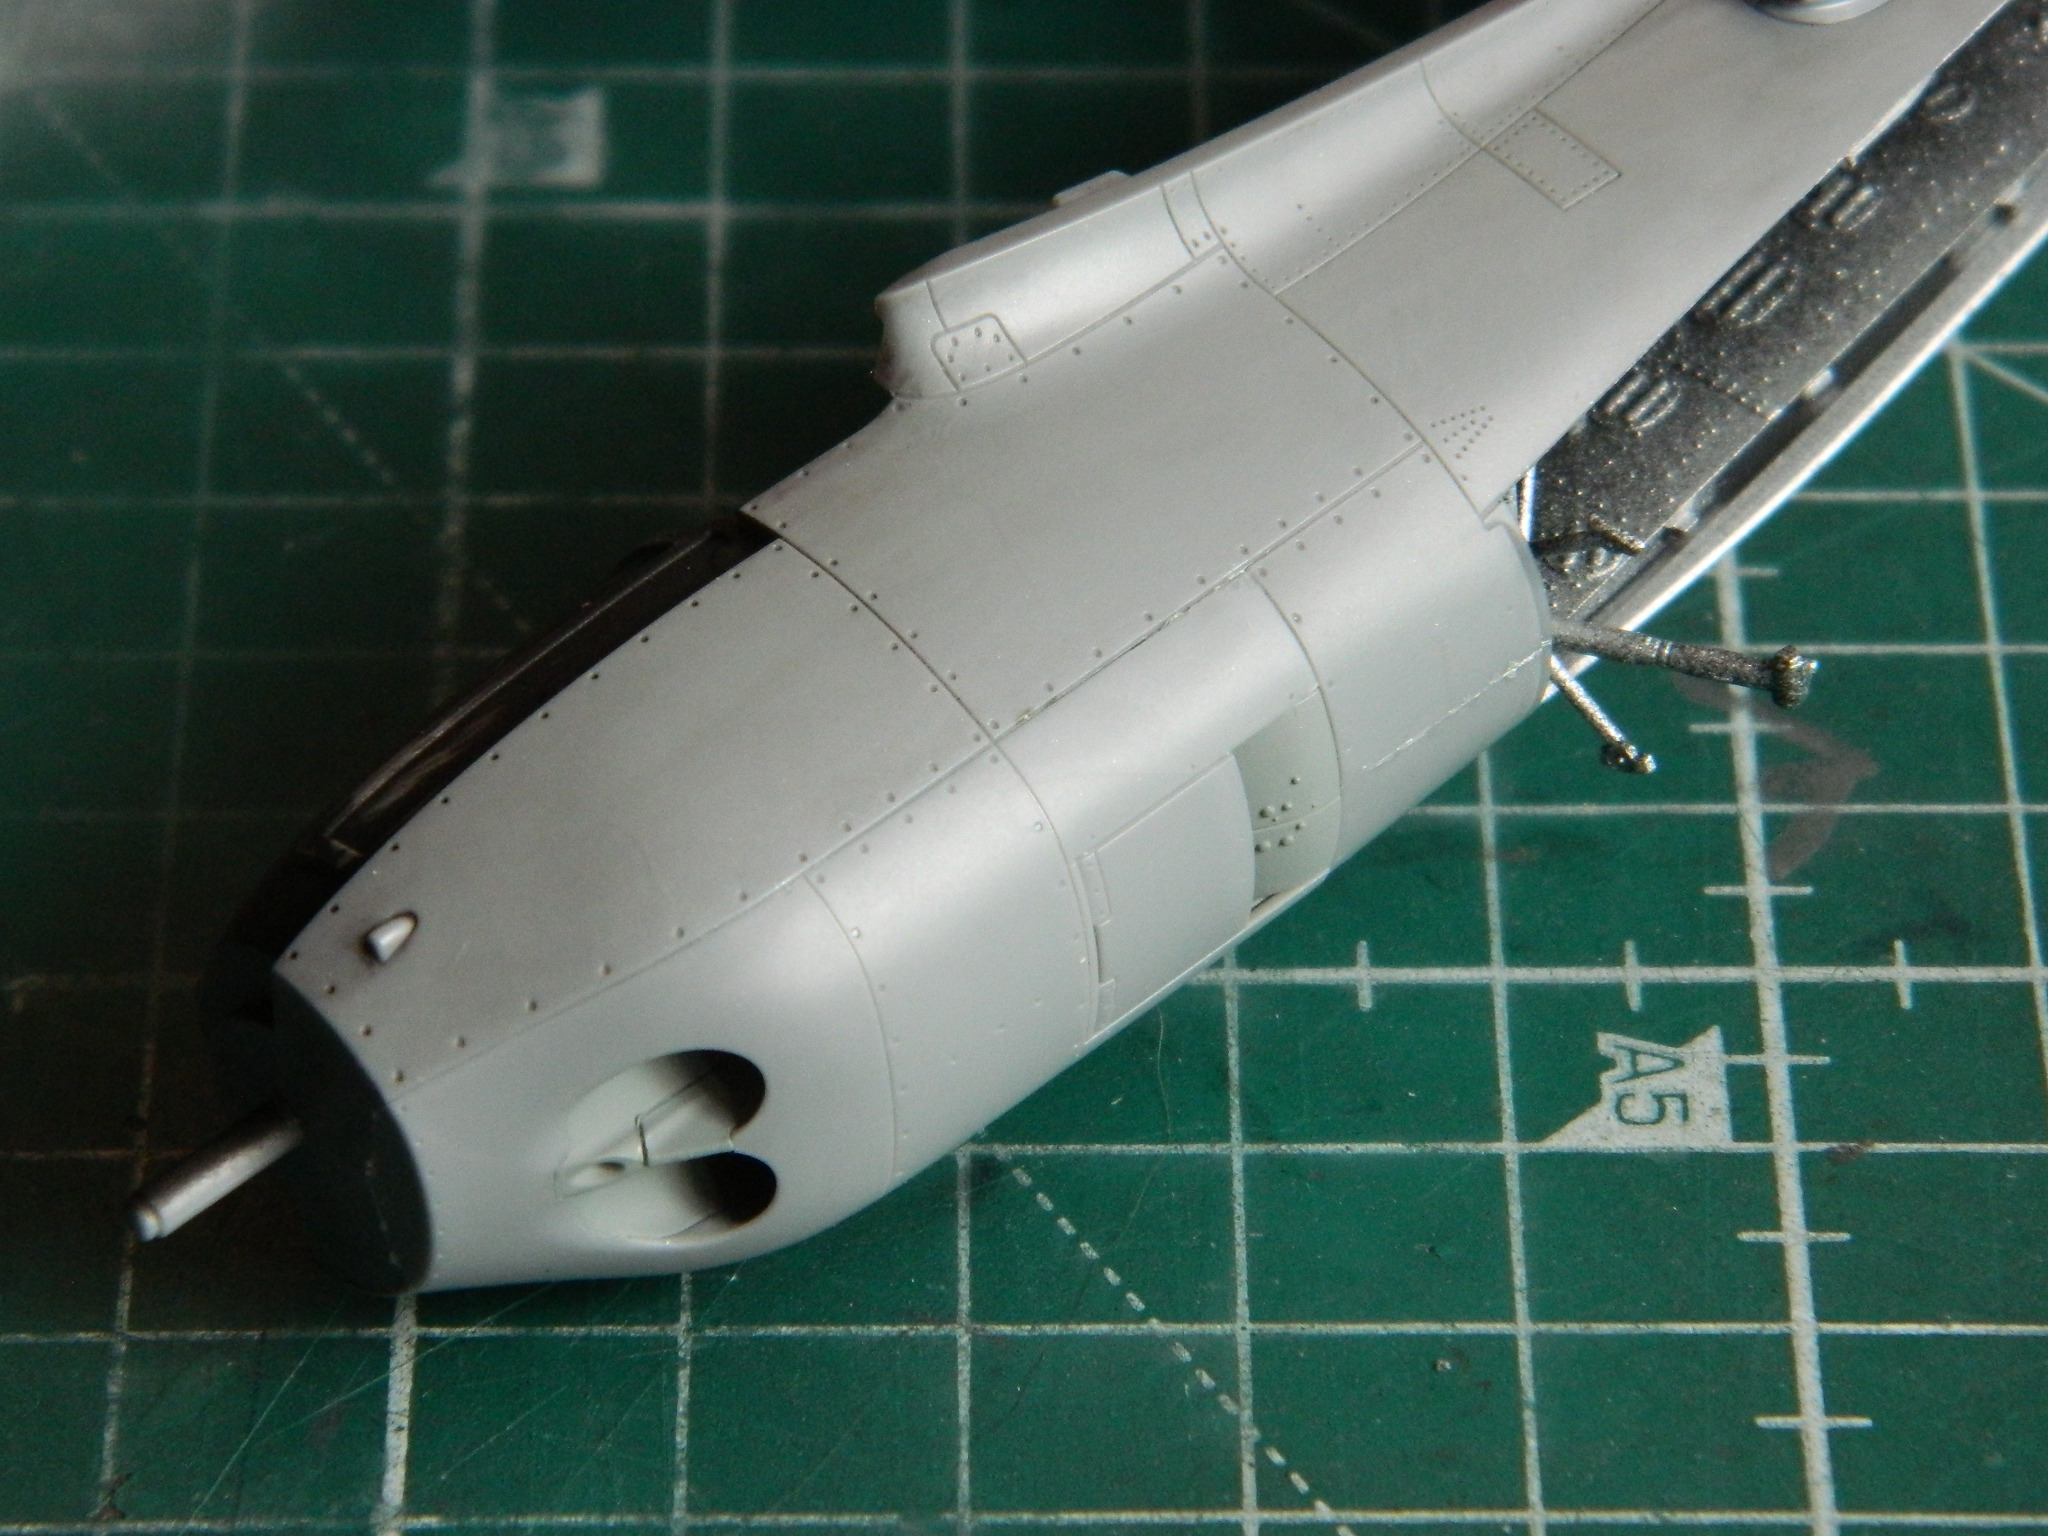
Then the butts of the barrels were superglued into the styrene mounts, the mounts were trimmed to fit inside the nosecone and not protrude far enough to interfere with the nosecone’s fit. In this case, I had to use my Buffalo Model #15 to grind away some of the backs of the barrels to get the fit I wanted:
It took a bit of time to be certain that the barrels came out inline with the long axis of the fuselage and parallel with each other. The time spent was well worth it:

Then I added the skins to the upper wings:
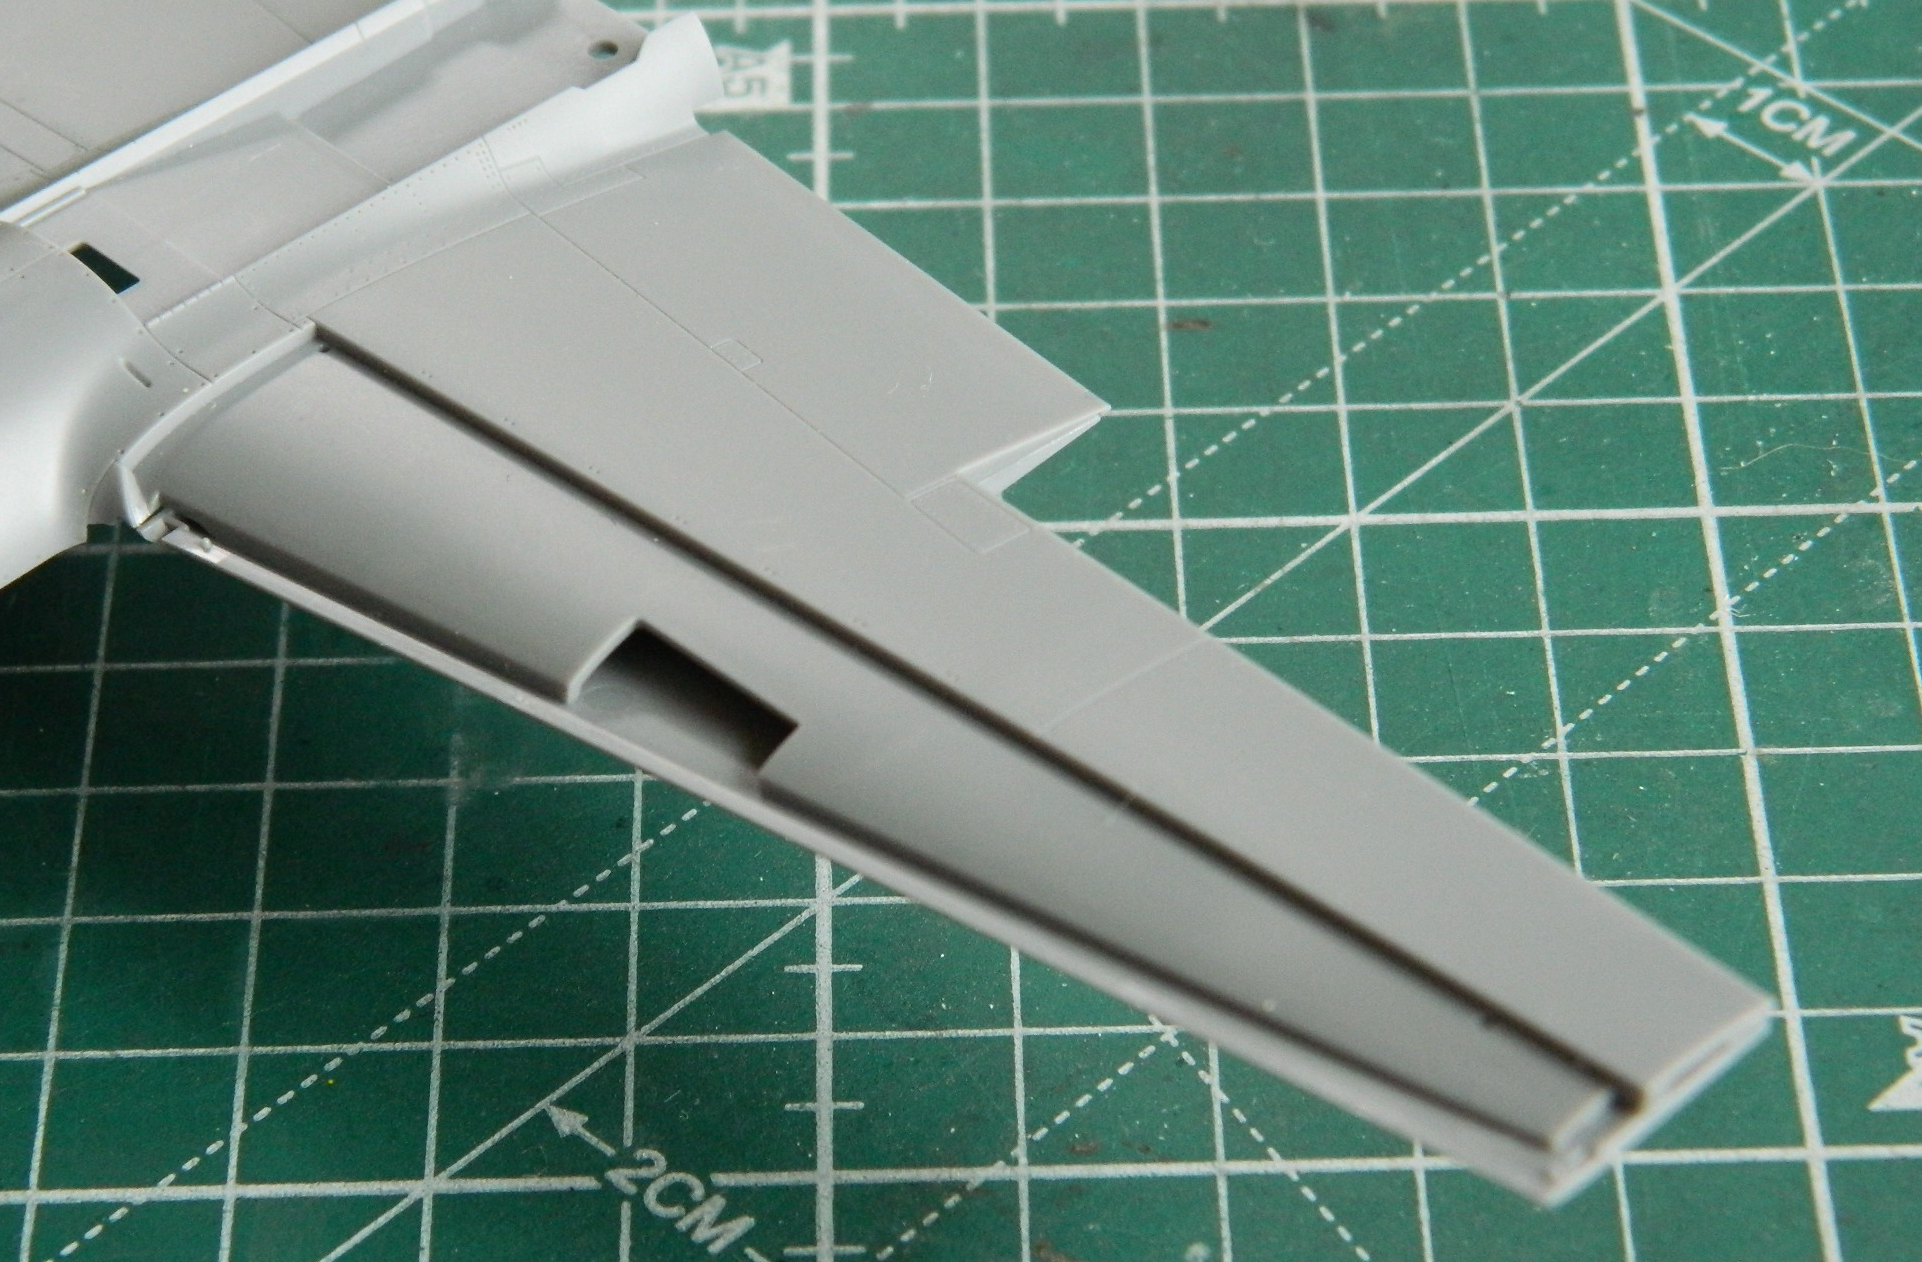
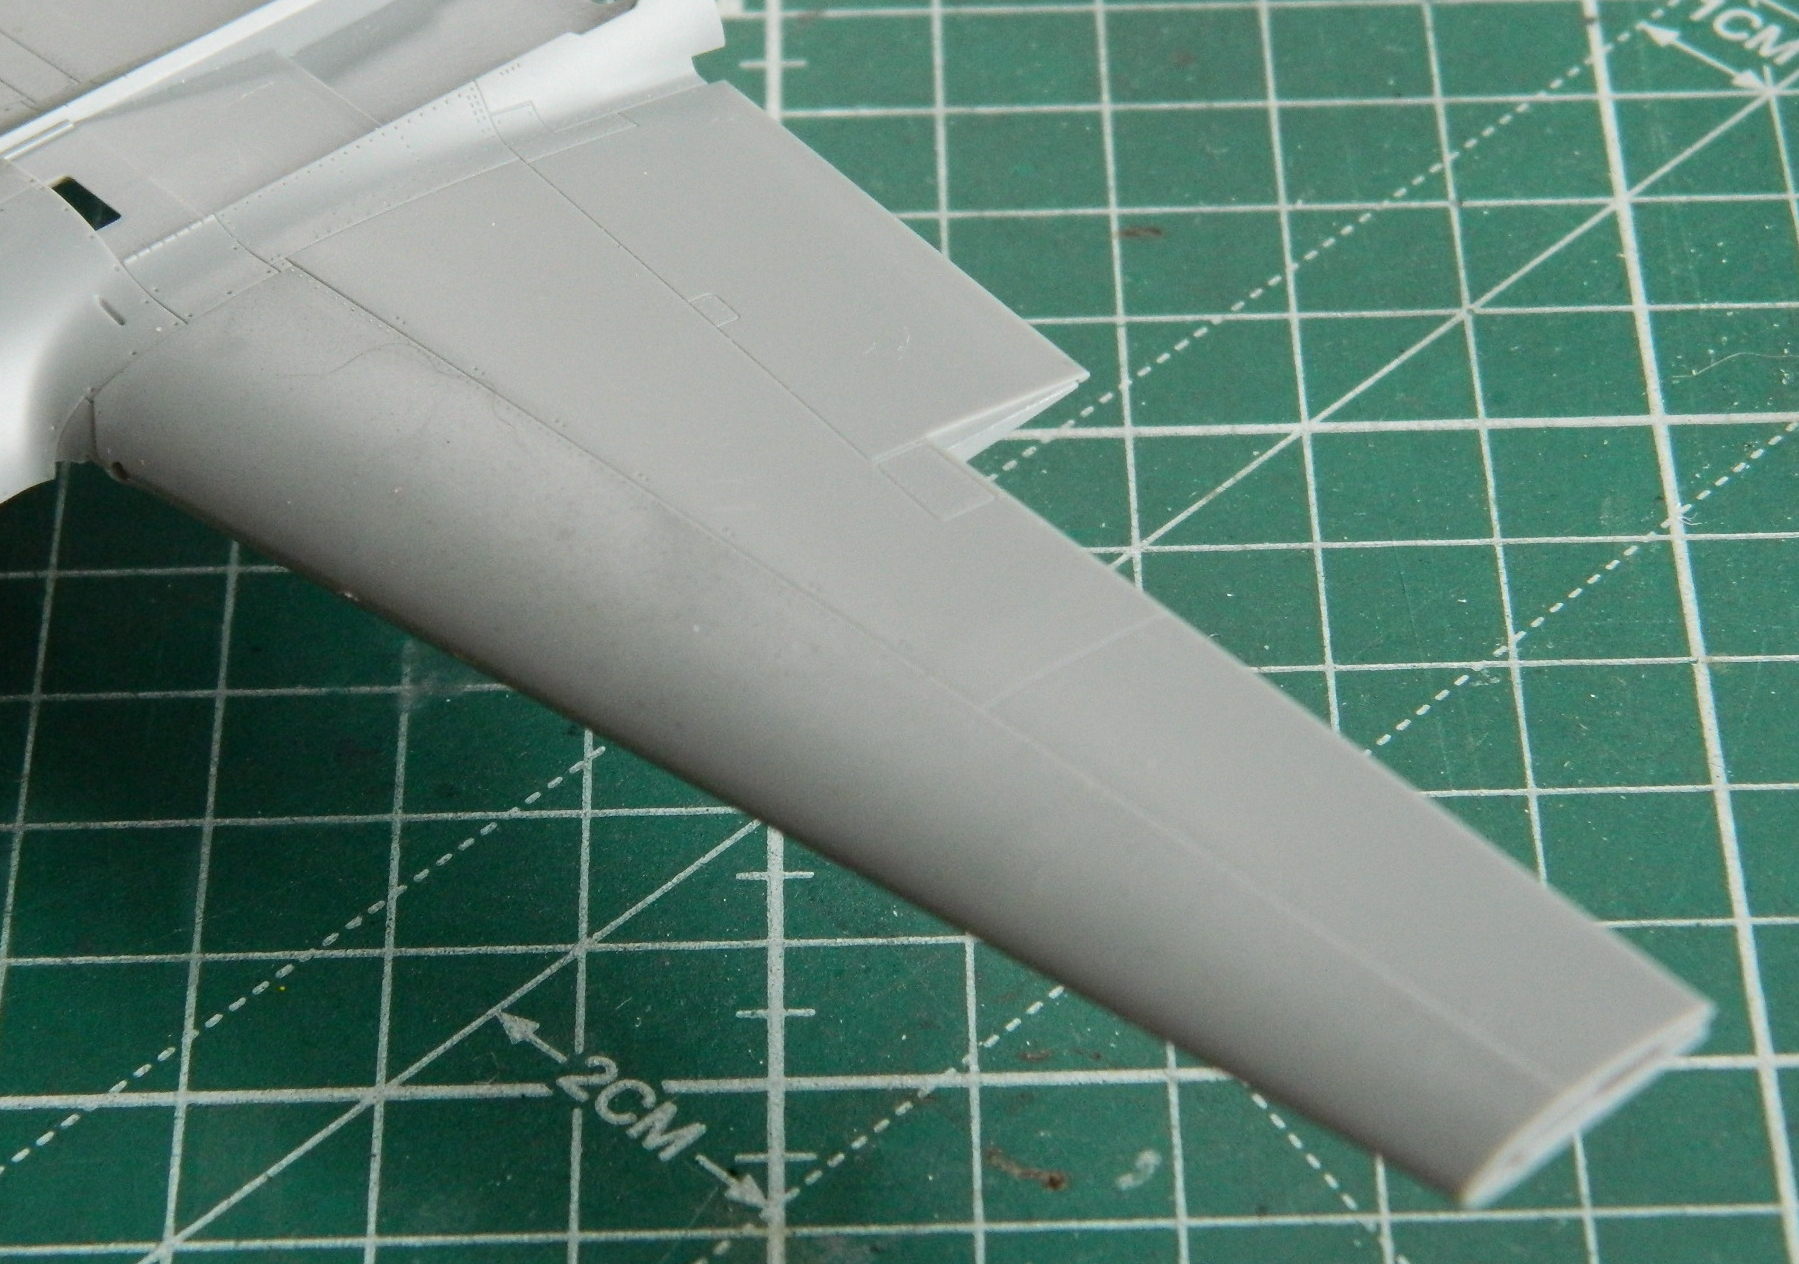

The early variants of the P-38 had the intercoolers for the turbochargers located behind the skin of the leading edges of the wings. Not a particularly inspired design feature and before the J model was a limiting factor as to how much boost the engines could have and consequently how much power they could reliably produce. Supply too much boost and the intercoolers had a tendency to explode. Doesn’t do good things for aerodynamics or keeping the pilot from an involuntary stint with the infantry…or worse. The entry for cool air were holes just outboard of the engine nacelles where they joined the wing. The exit point for the hotter air was a port on top of the wing near the tip. The actual ports were shaped differently from the way the kit had the ports. I made a template from some scrap .010″ (.254mm) brass shim stock and carved away (LOVE that Buffalo Model #15 for things like this!) what was incorrectly molded:
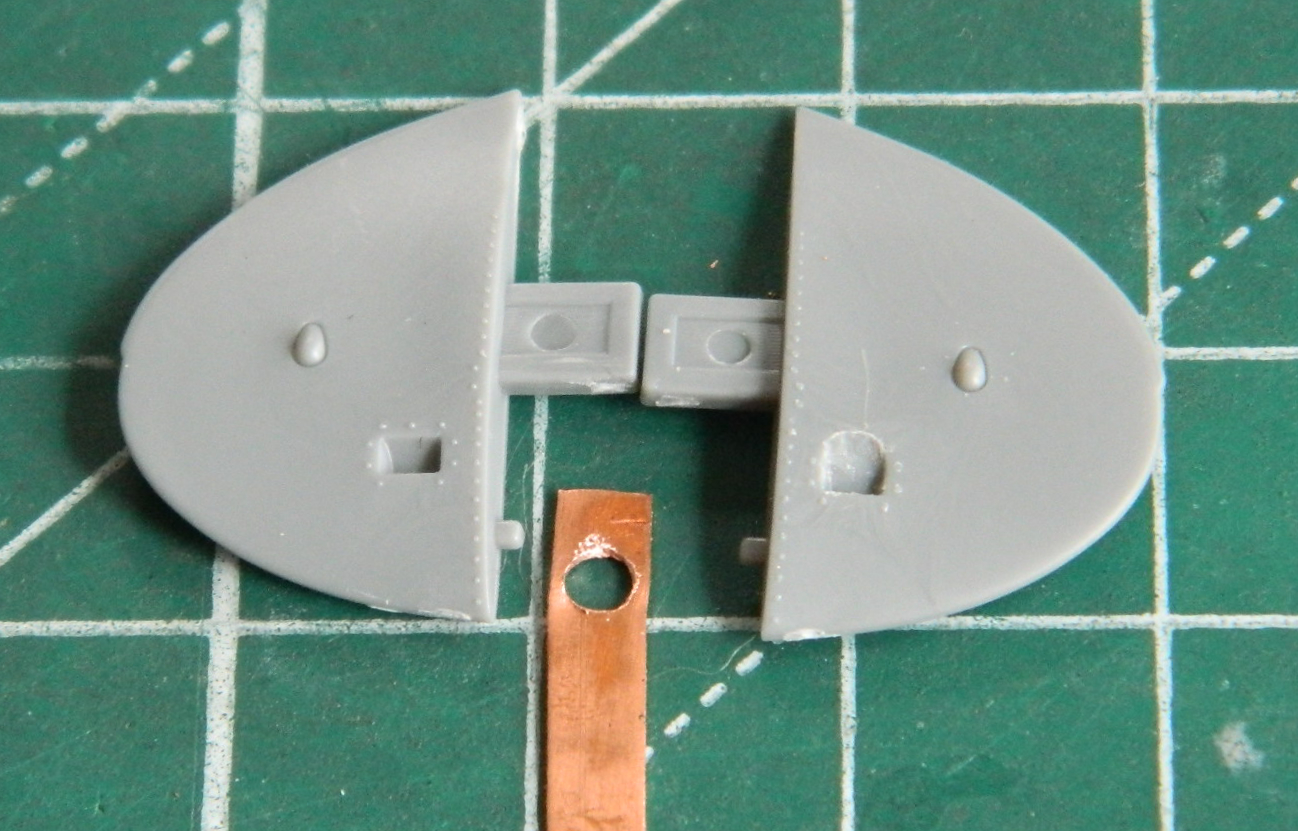
An “interesting” feature of this kit are parts that fit in the main landing gear bays that are evidently air filters for the air intakes of the carburetors. I’ve not seen any references that show these things used in the field, so I decided to not include them. That required me to resculpt (Buffalo Model #15 again!) the mounting point to an air intake (mounting point on the left one, opened intake on the right one):

With the upper fuselage and wings in place, I finally noticed two spots that will need a tiny bit of filler. I added tape around where the filler would have to go to keep from removing any more surface detail than I absolutely had to. This had to be done on both sides:


And since handling this bird was going to become more cumbersome as parts get added, I taped the canopy parts (another job of beautifully molded parts that fit perfectly) in place to protect the tiny bits. Since I had to do that, I decided to add the rest of the cockpit parts (seat and radios):

I didn’t take any photos of the landing gear bay parts as I assembled them. Again, they went together flawlessly and fit where they had to go with equal aplomb. I did, though, take photos of them after painting:

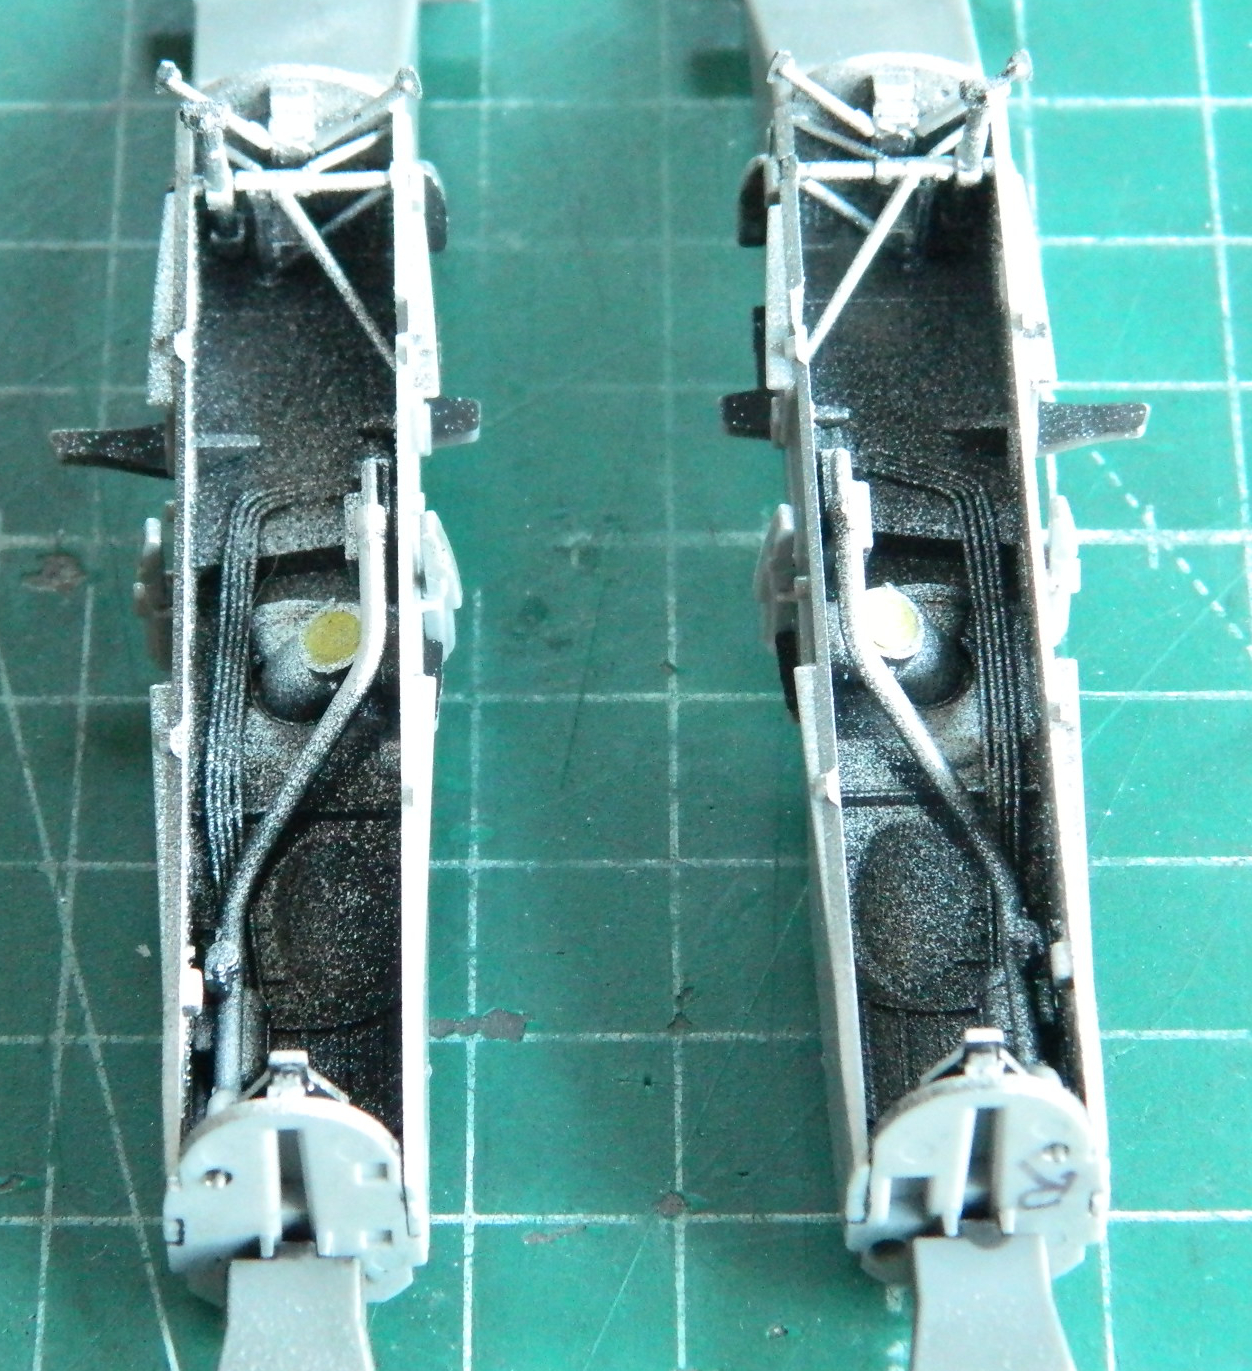
With the main landing gear bays mostly assembled (fit is wonderful…this really could spoil me, y’know), it was time to assemble the booms. The parts (times two):
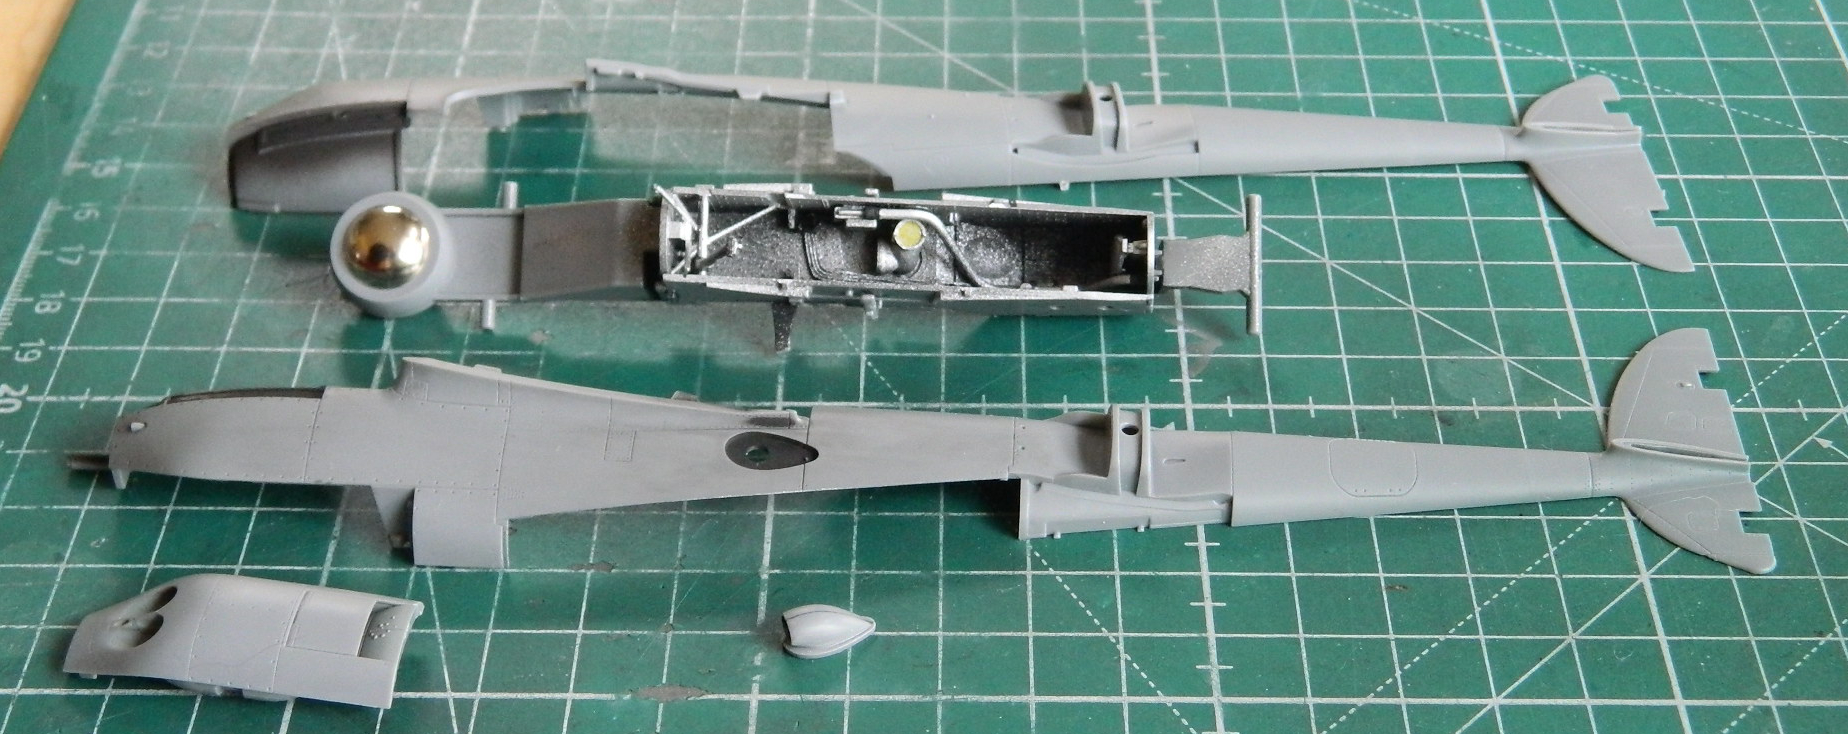


And the assemblies:

These were done twice, of course.
The radiator areas were painted Tamiya XF-62 Olive Drab and the kit supplied decals for the radiator faces. The decals were a bit thick so I used Walther’s Solvaset to get them to snuggle down (took two applications):

With the interior of this area painted and the decals set, the shrouds went on (they fit better than they show in the photo due to the paint inside covering the mating surfaces):

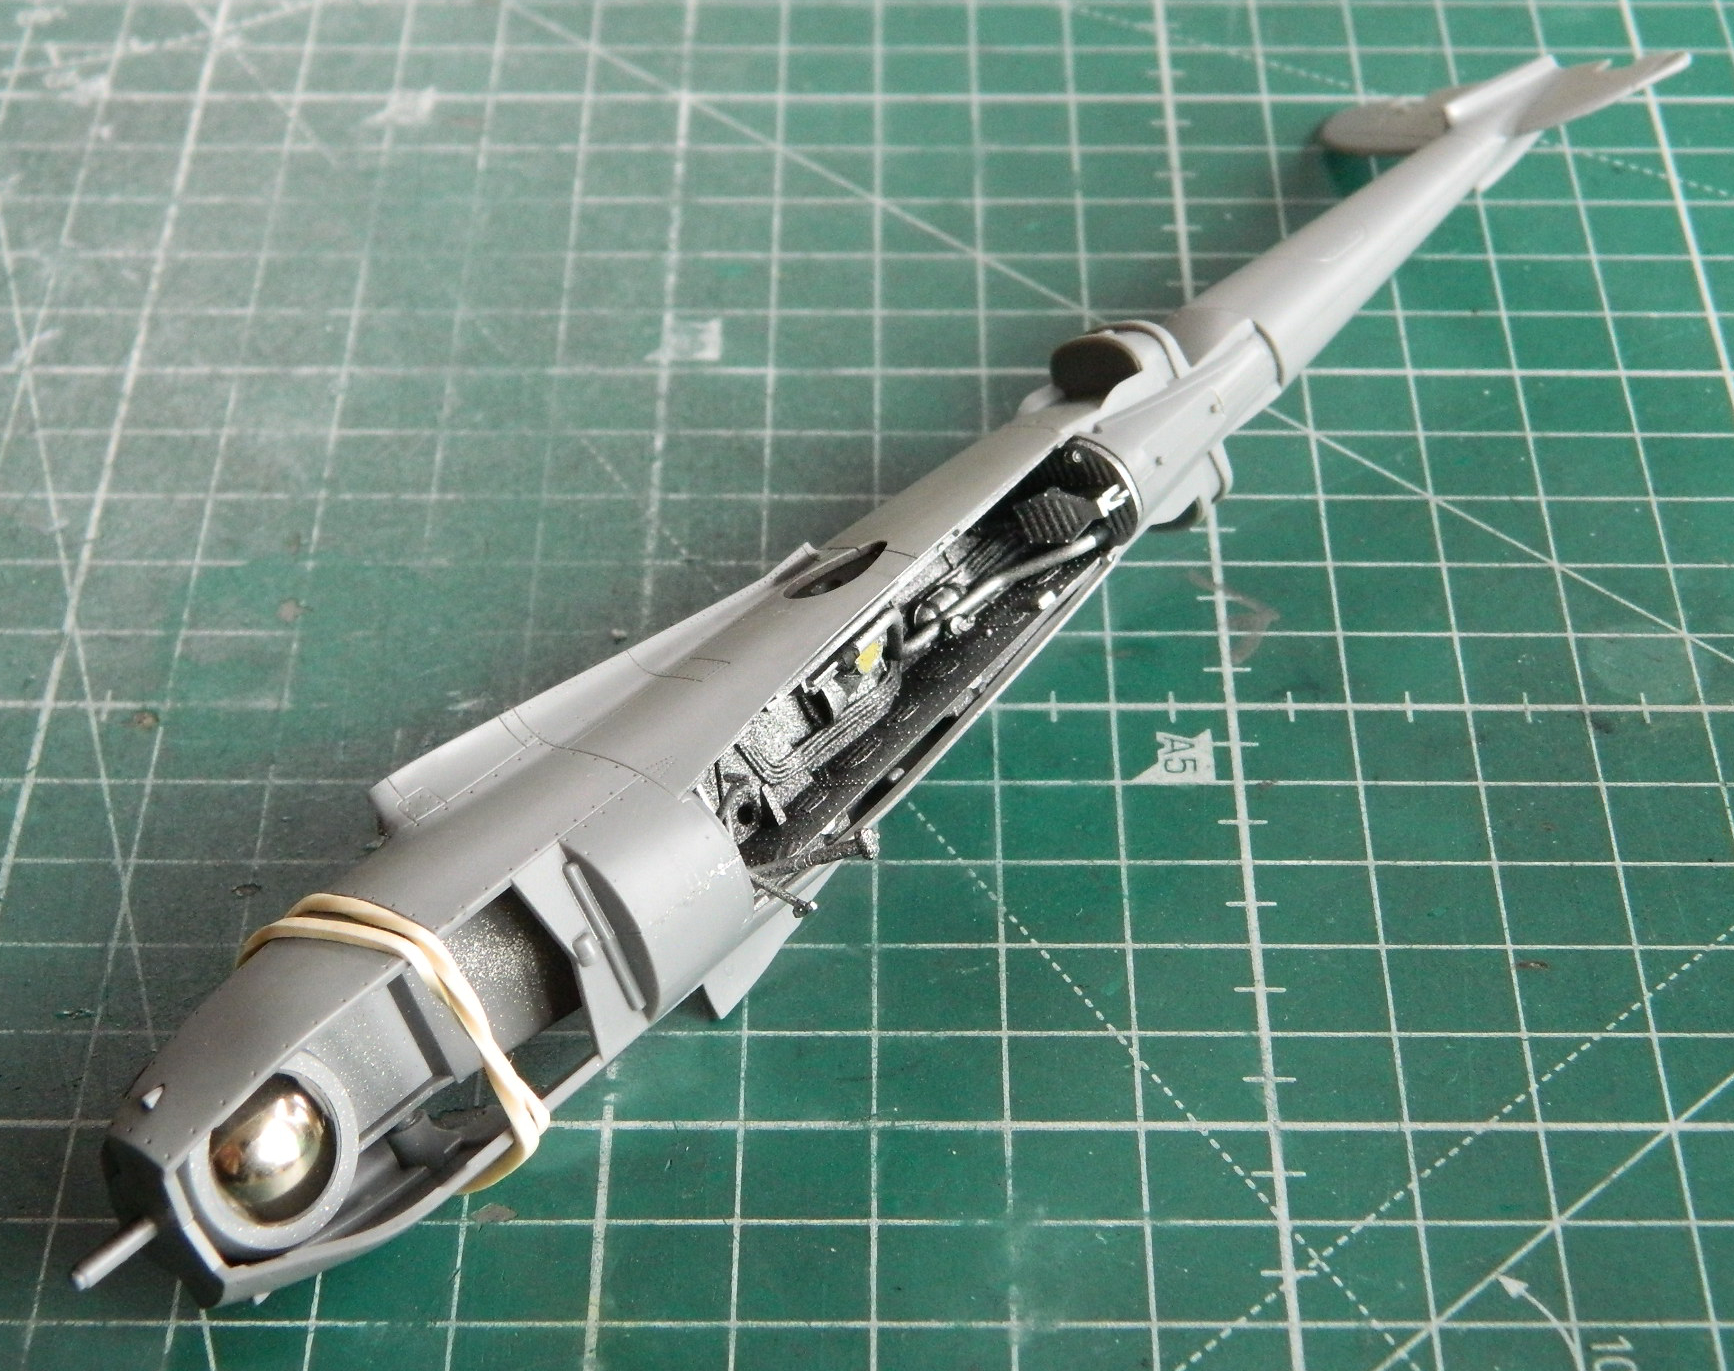
Now that the booms are built, they get added:
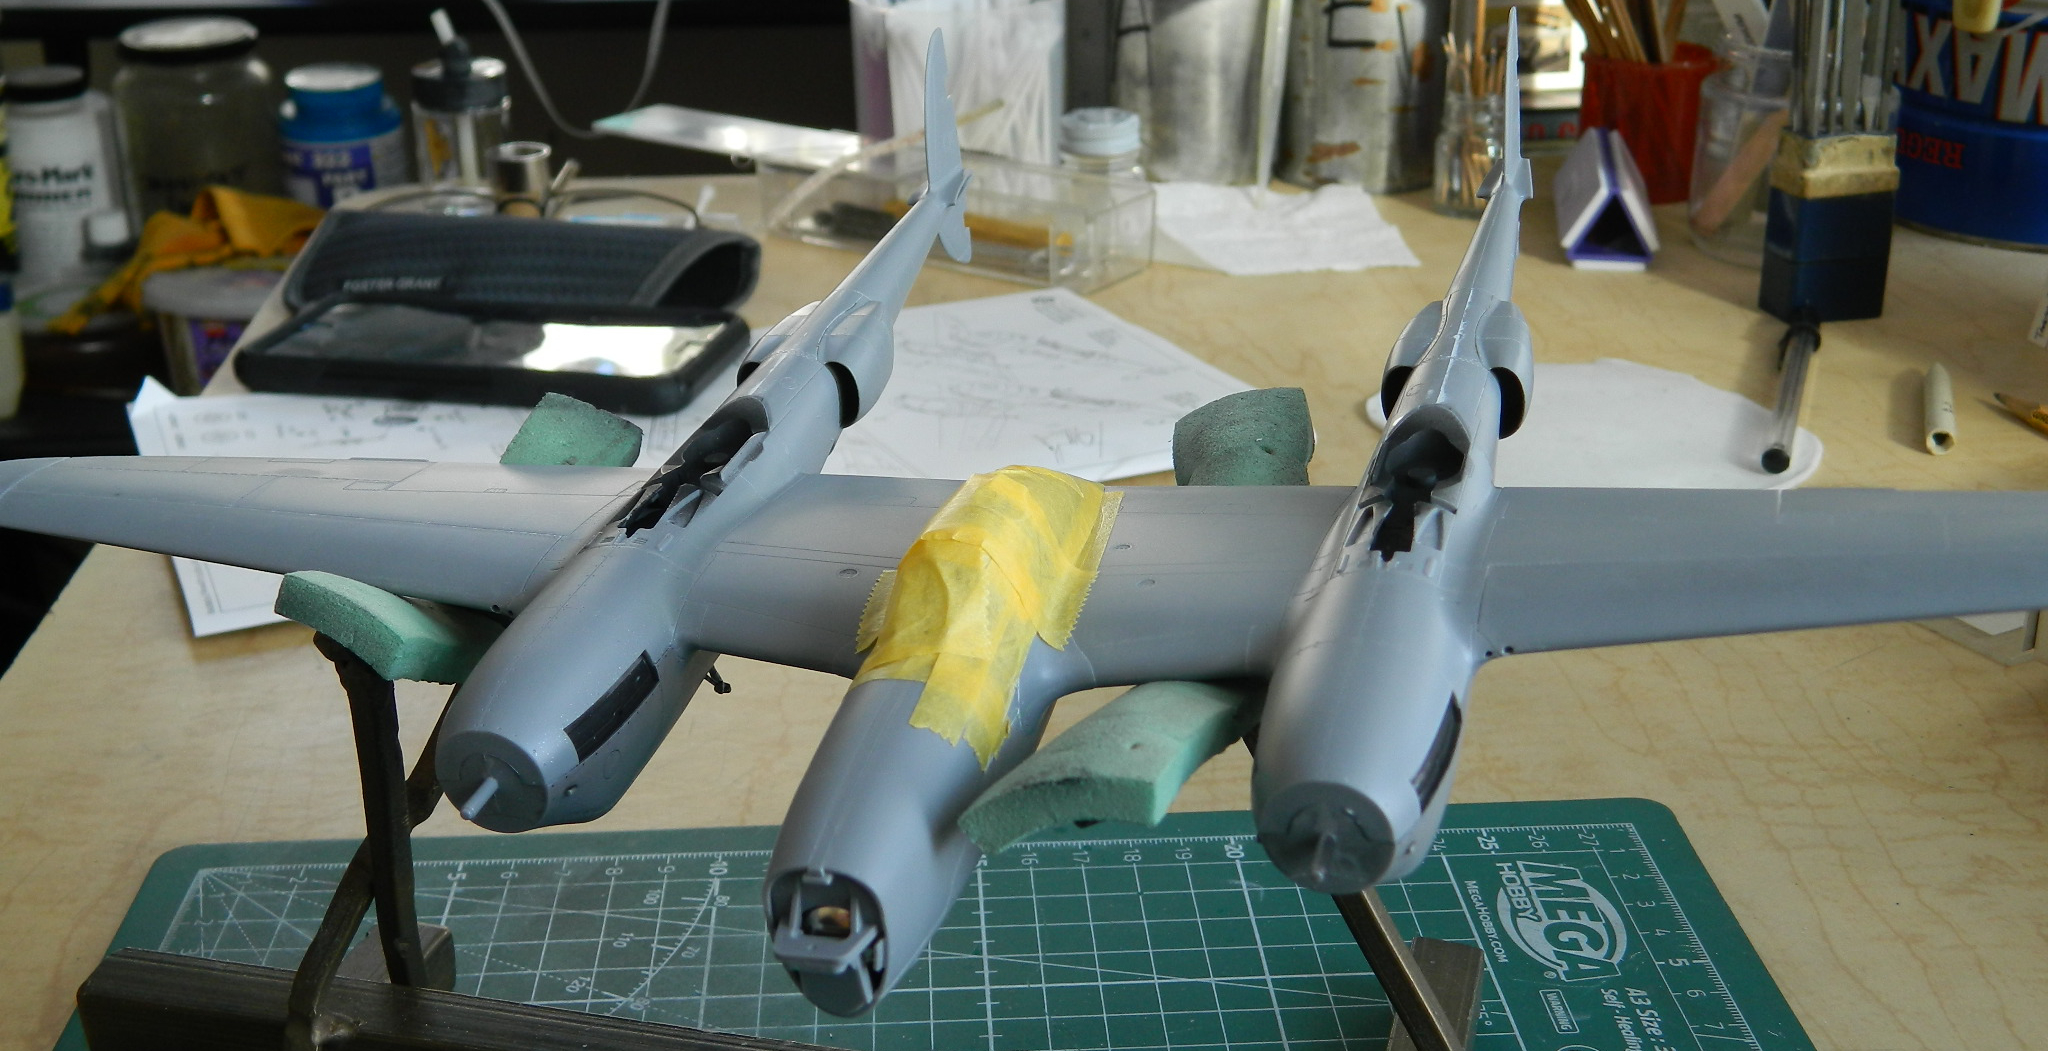

Having gone this far, I added the elevator and rudders:


Yeah. That’s definitely starting to look like a Lightning.
