I’m going to add some PE details. They’re thinner than the kit parts and often more accurate to scale (but sometimes they’re thinner than they should be, so, obviously, check), but they’re flat and will need to be bent.
I’ve bent PE details before and that process can sometimes be quite annoying. Bend, it’s wrong; unbend to get it flat, bend it again to get it right, and so on. The problem with bending metal is that it will only bend so many times before it fatigues and separates (I’ve heard that sometimes marriages also have this problem). The obvious remedy to this is to bend the part only once (not sure that would apply to marriage).
Micro-Mark makes a useful bending brake for folding and bending PE parts (though sometimes you will still need to make your bends using jeweler’s pliers). The “fingers” allow multiple bends and if you need to bend one long piece, the finger-plate can be reversed and acts like a traditional bending brake (albeit a small one):

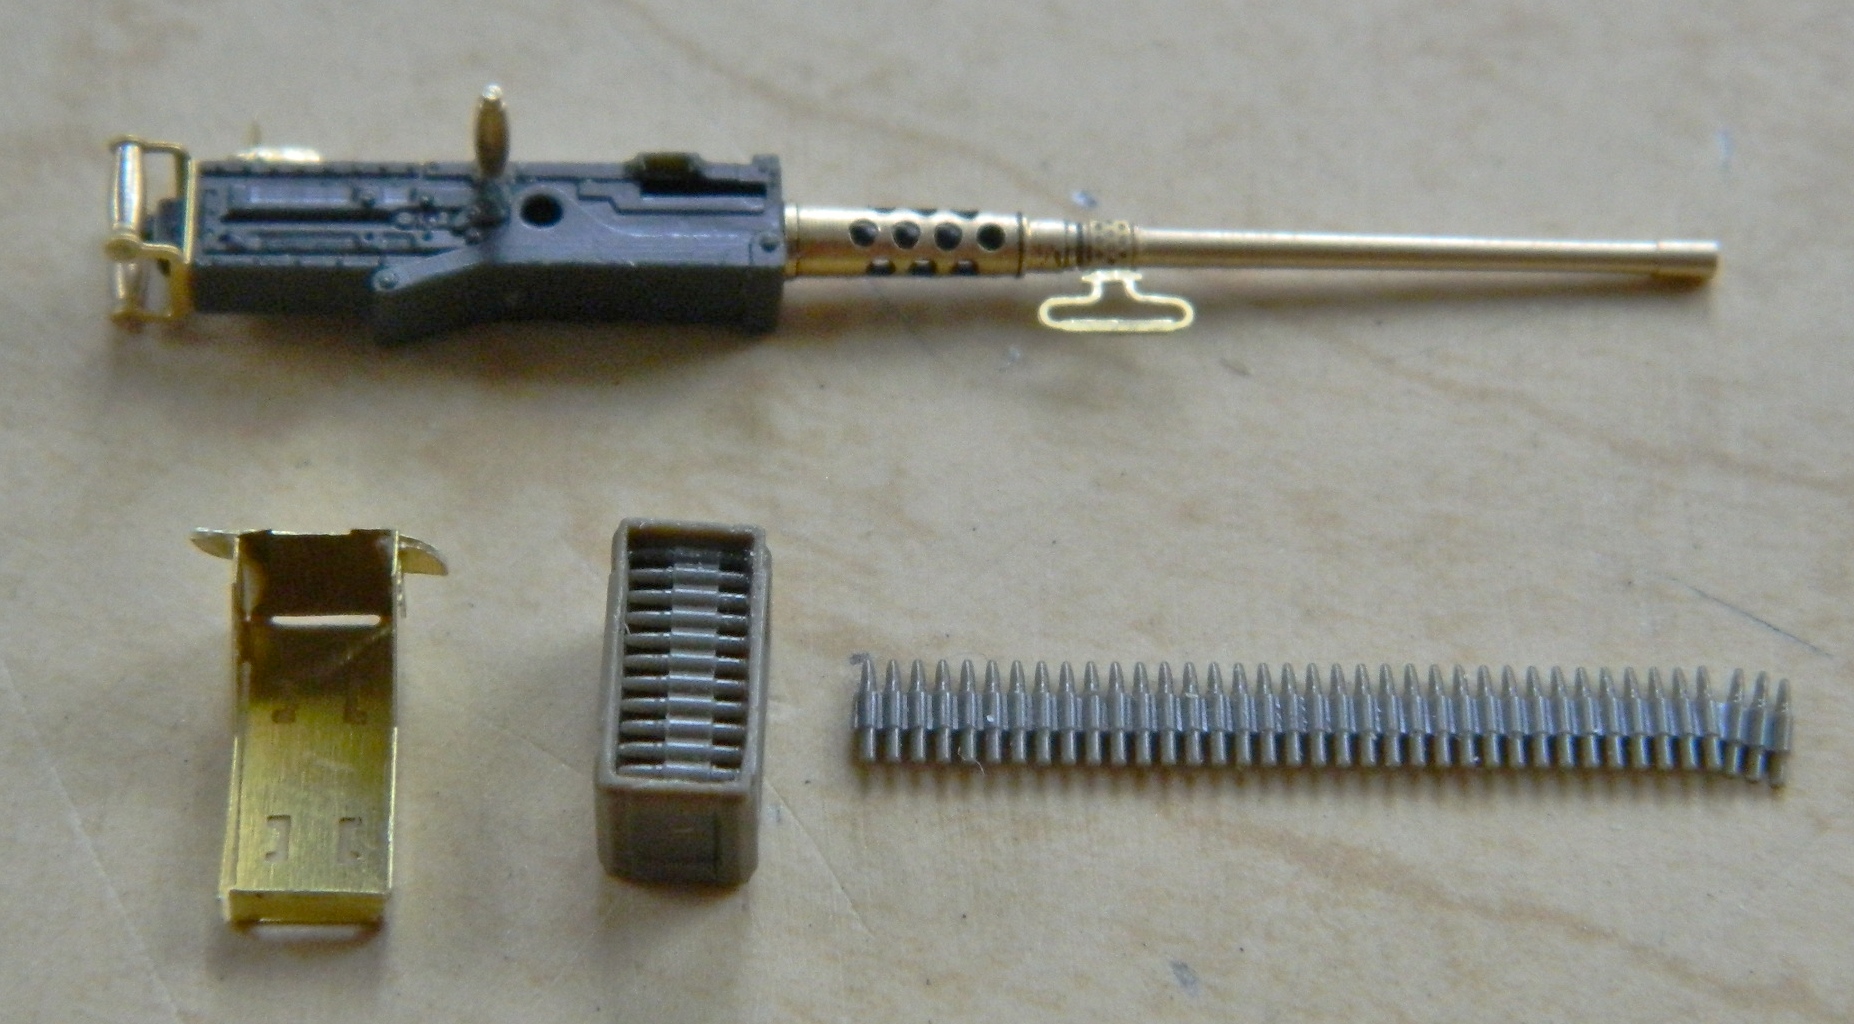
The part is aligned to the appropriately-sized finger and the clamp tightened. Then a straight-edged razor blade is used to lift the part and create the bend. After that, it’s a matter of loosening the clamp and moving the part for its next bend. In this case, I’m using a Verlinden PE set for the Sherman and bending the ammo box holder that attaches to the side of the .50 caliber:


The end result, though it looks nice, seems just a little too thin for my eye and at this point reserve judgement as to whether or not I’ll use it.
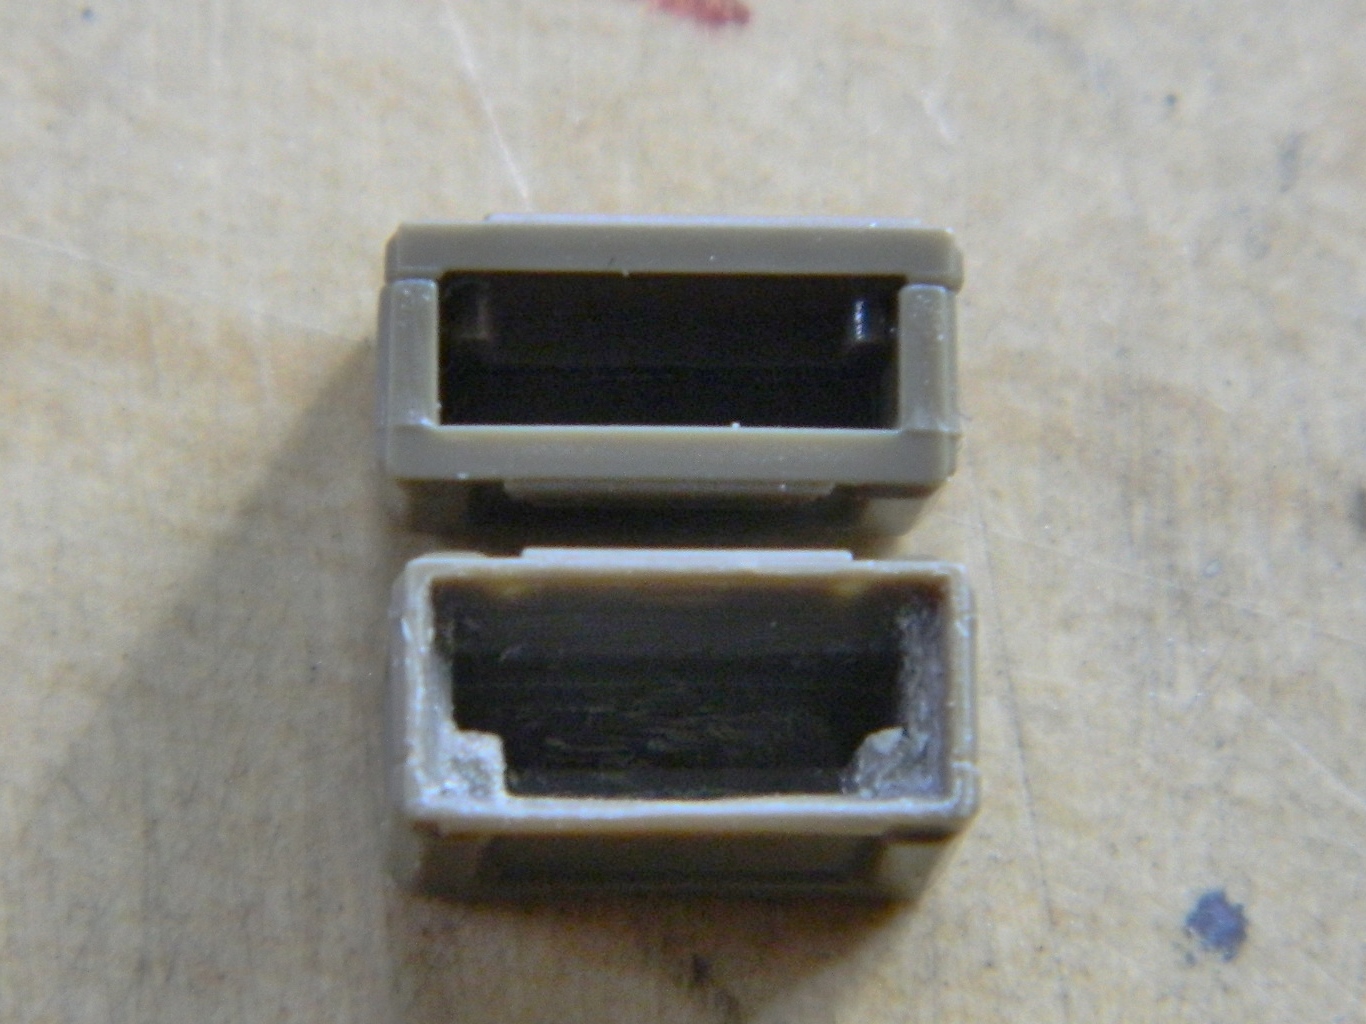
But the ammo box itself (kit part) wasn’t intended to be modeled open. As such, the sides are WAY too thick and needed to be thinned enough for a scale ammo belt to sit in the box properly:

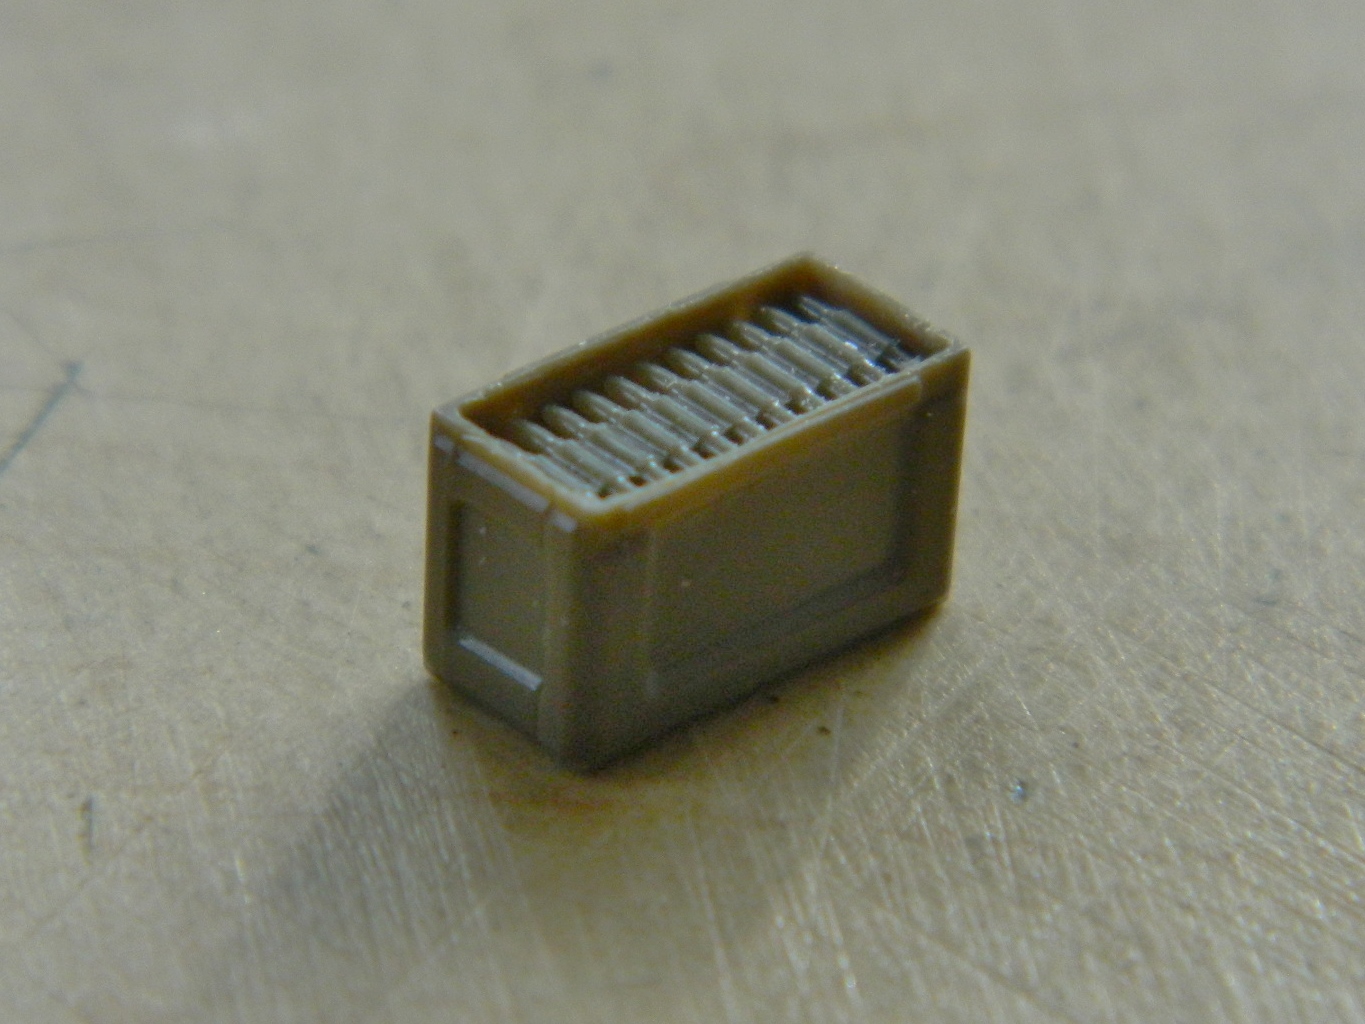
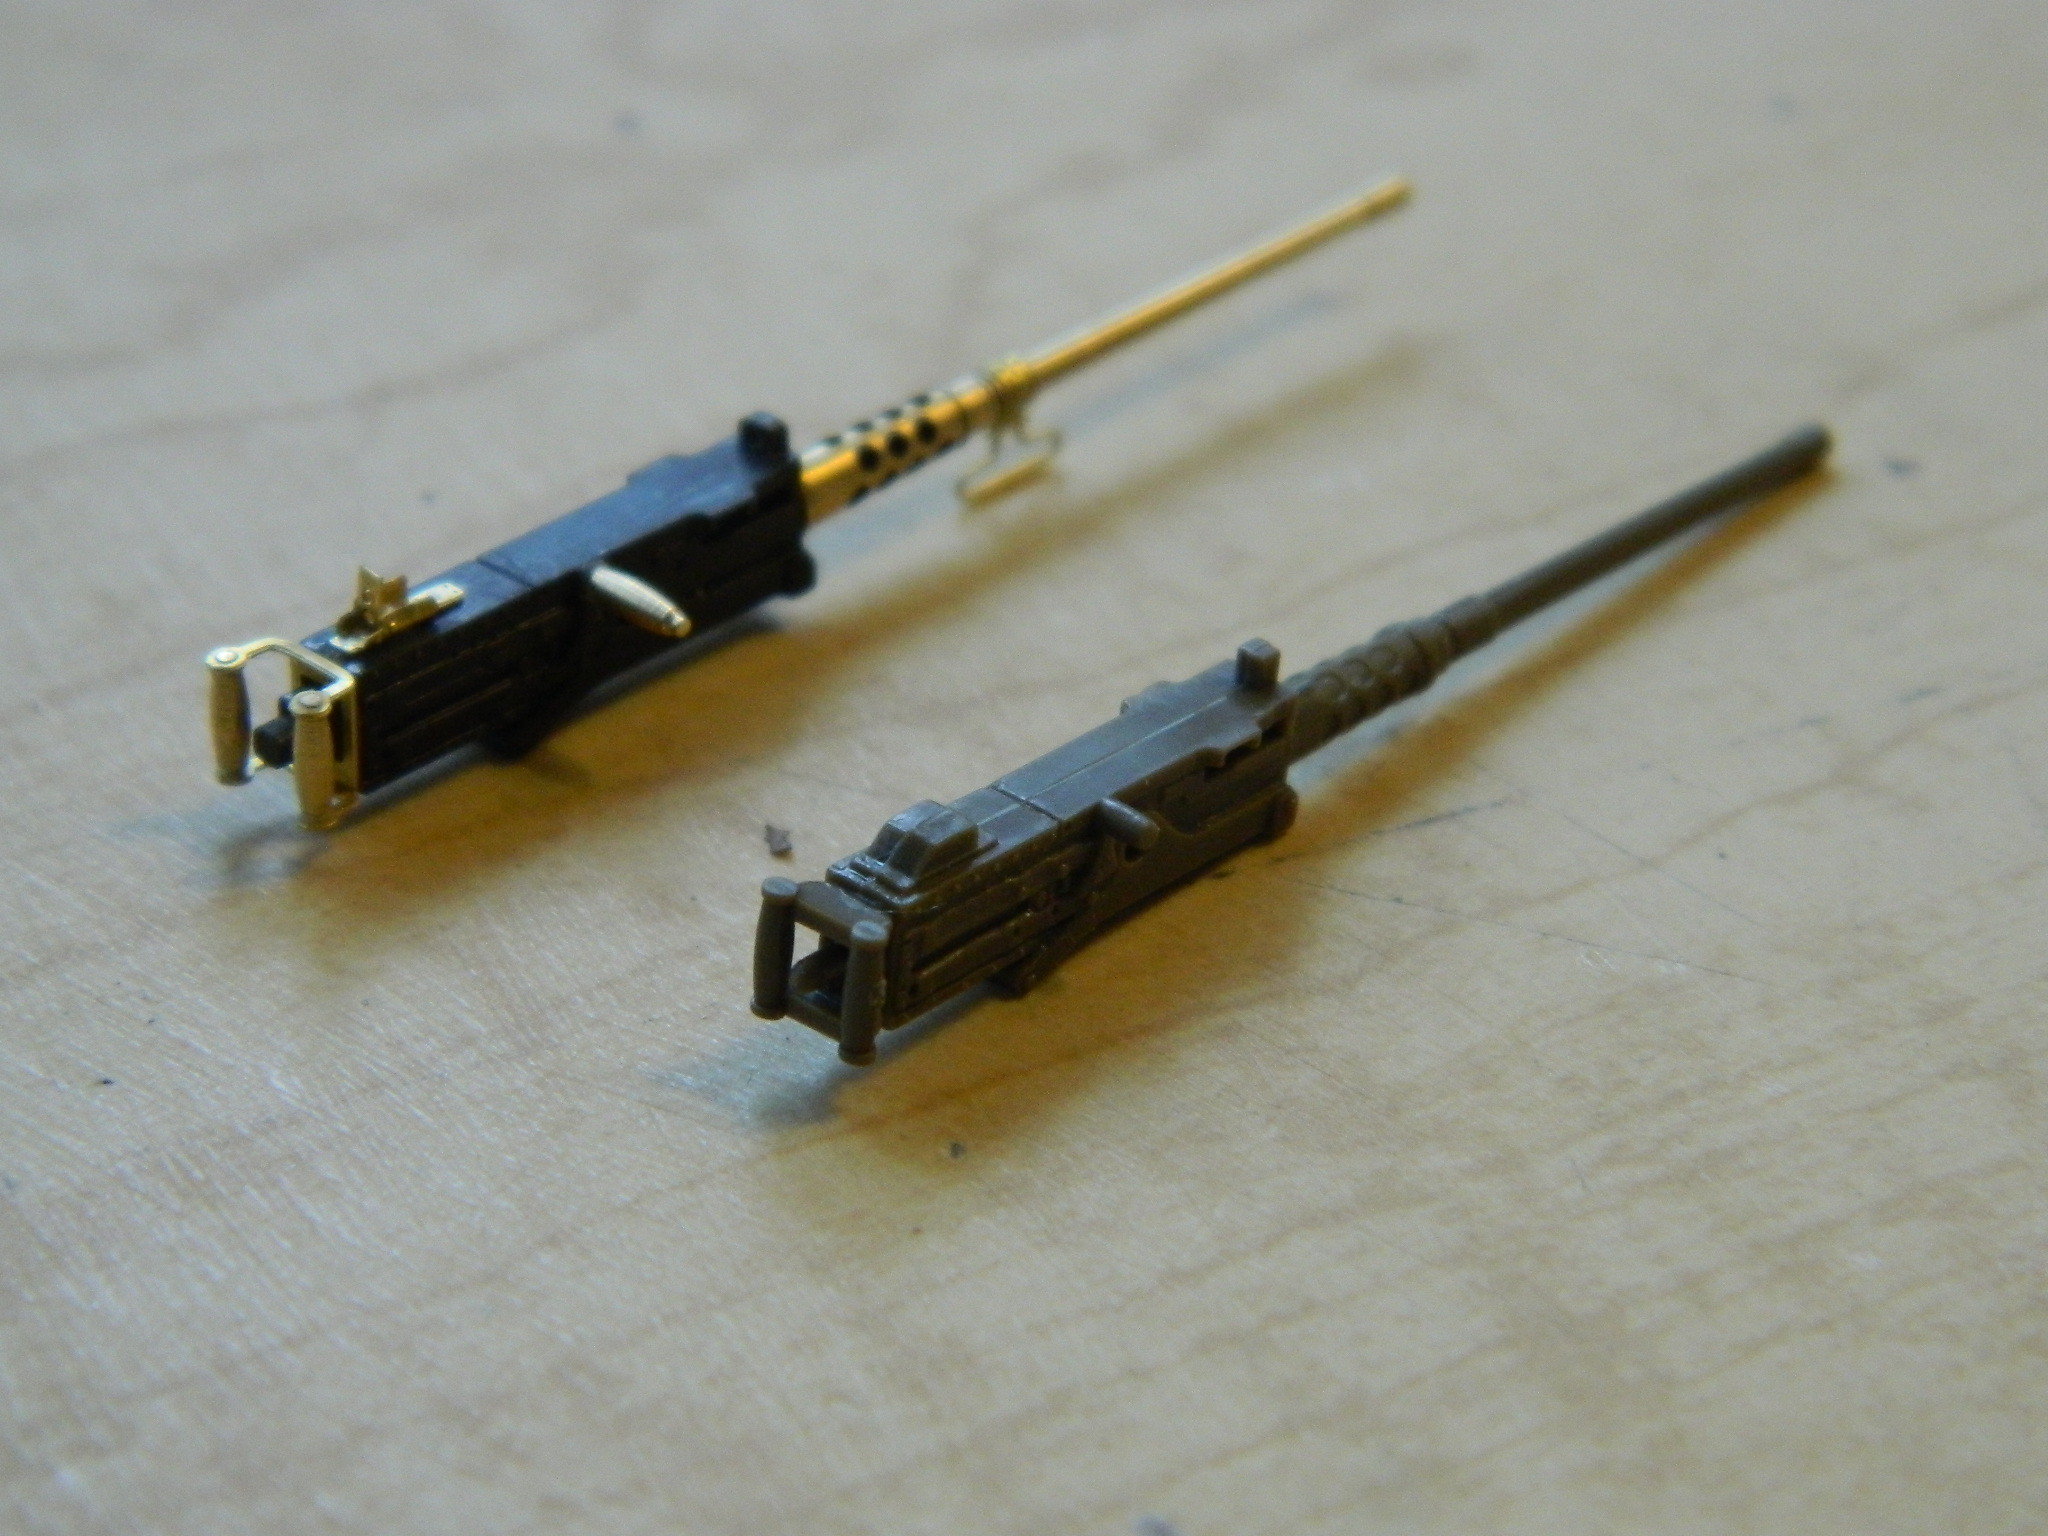
The vendor (M&M Models) who provided the .30 caliber barrels also provided this nice little detail set to upgrade the .50 caliber:

Just so you have an idea as to the difference this makes, lookit this:
By this time I had finished making the vacuum pump and chamber and it was time to pour some molds and make some copies.
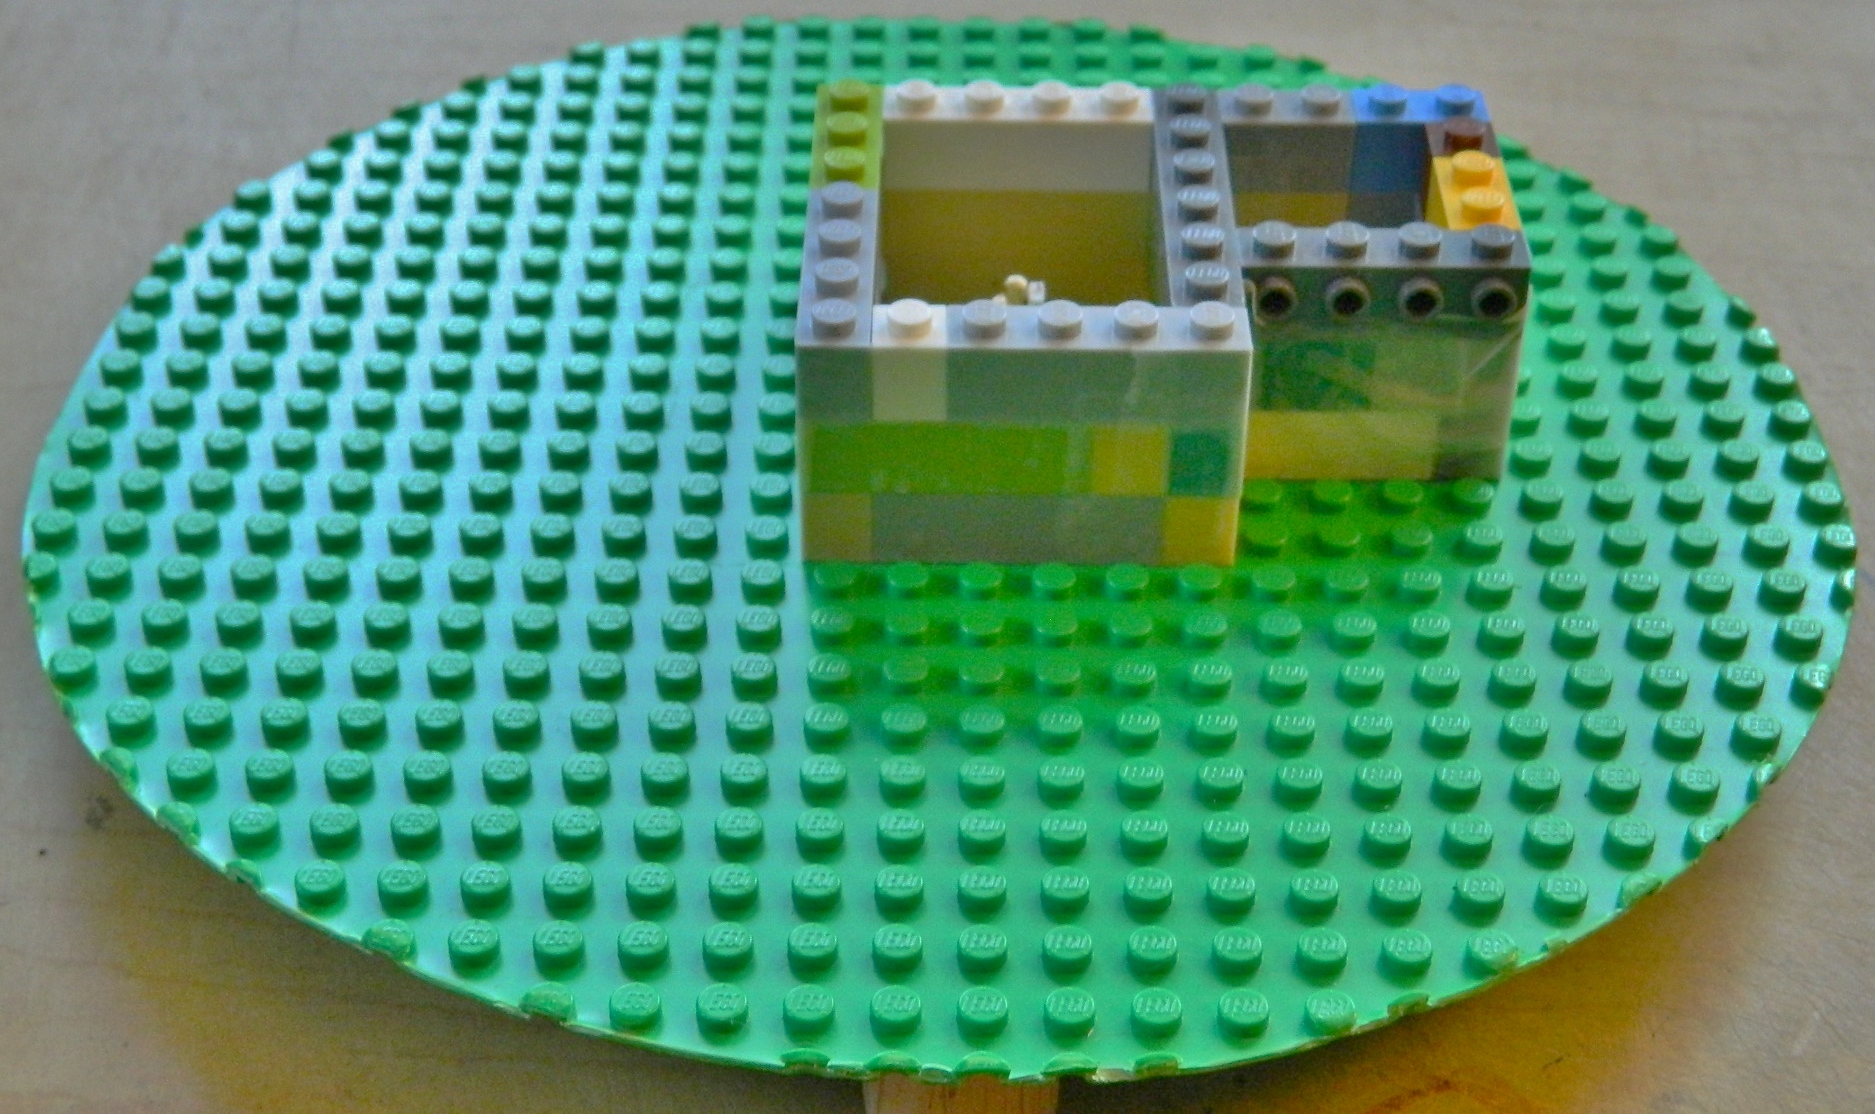
While thrashing around the ‘Net looking for information about vacuum pumps, I ran a cross a YouTube video that showed a modeler using Lego parts to make mold boxes. Well, I thought that was rather clever and got me some (and I had NO idea Legos were so damned expensive!).
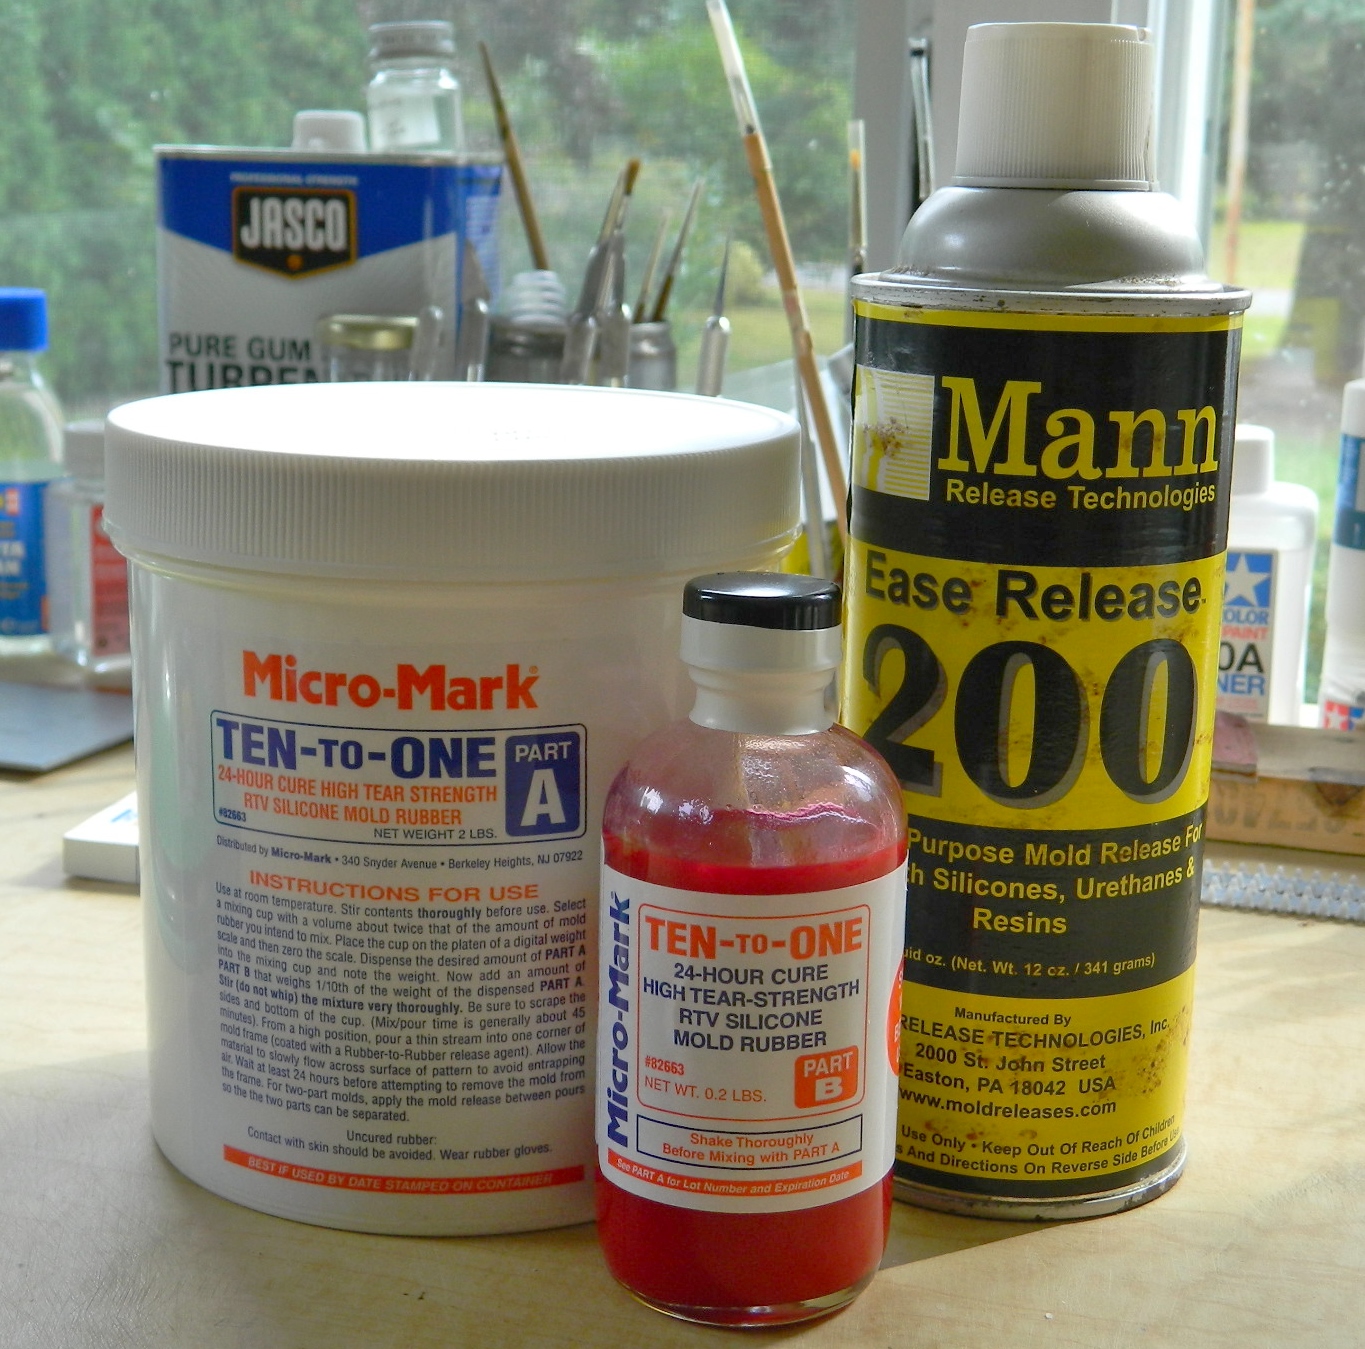
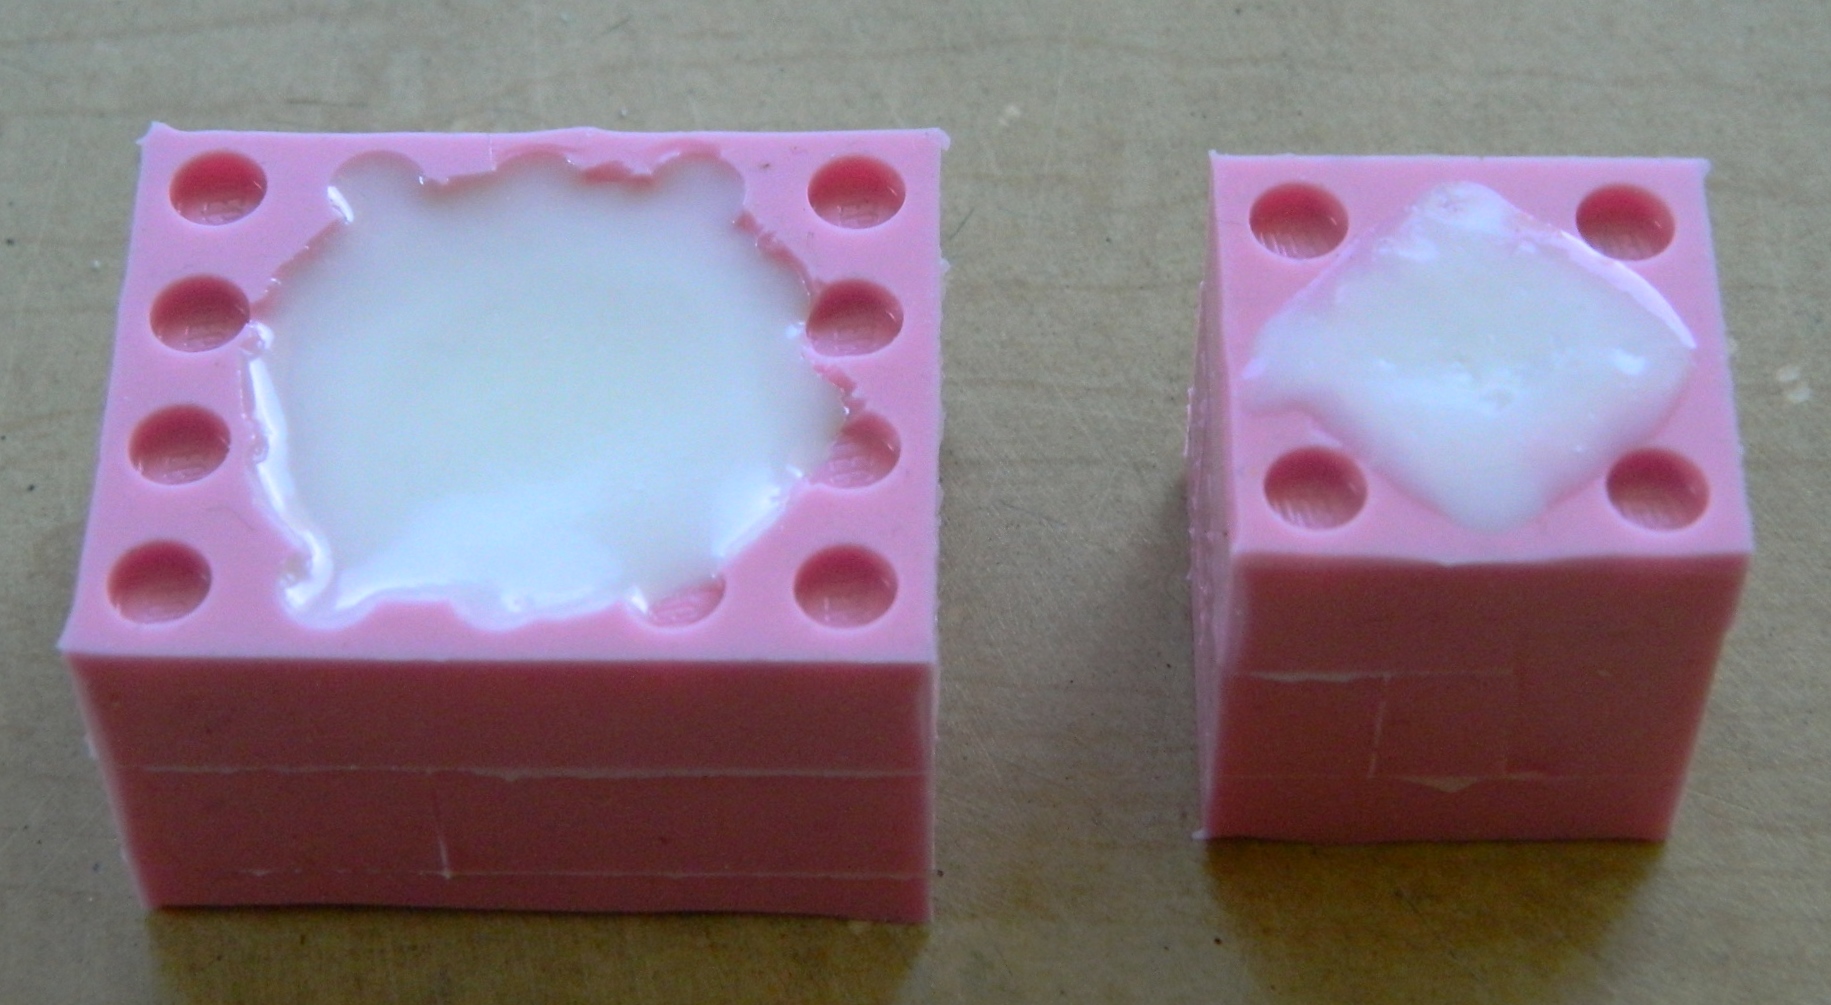
Micro-Mark supplied the two-part mold making rubber as well as the parting agent. The parting agent is sprayed wherever you don’t want the silicone molding rubber to adhere (and there is a parting agent specifically for silicone molding rubber to keep it from bonding to itself, which is necessary when making a multi-part mold so you can open the mold up):
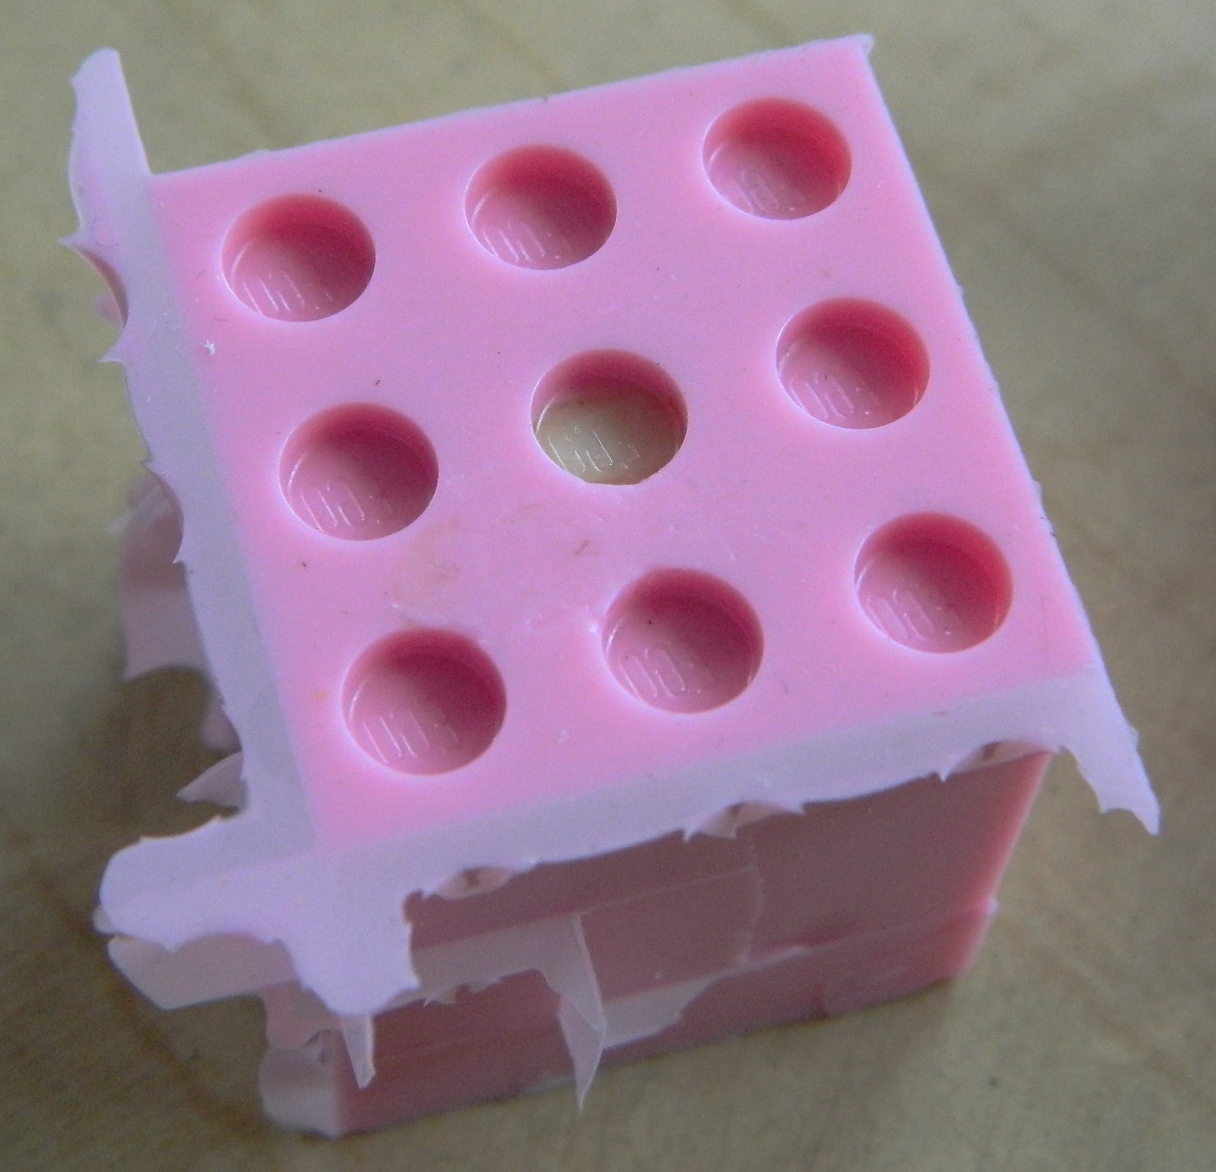
I attached the brass master I’d made for the blower assembly to a resin pouring cup I’d made with the reusable molding compound and used white glue to fix it in place to the Lego base and then built the mold boxes. The other part I’m taking a mold from is a piece from Verlinden’s detail set for the M3-M5 light tanks (just to see if it’s possible at my skill level and to have a sacrificial casting I can cut in half so that I can check for the propagation bubbles):


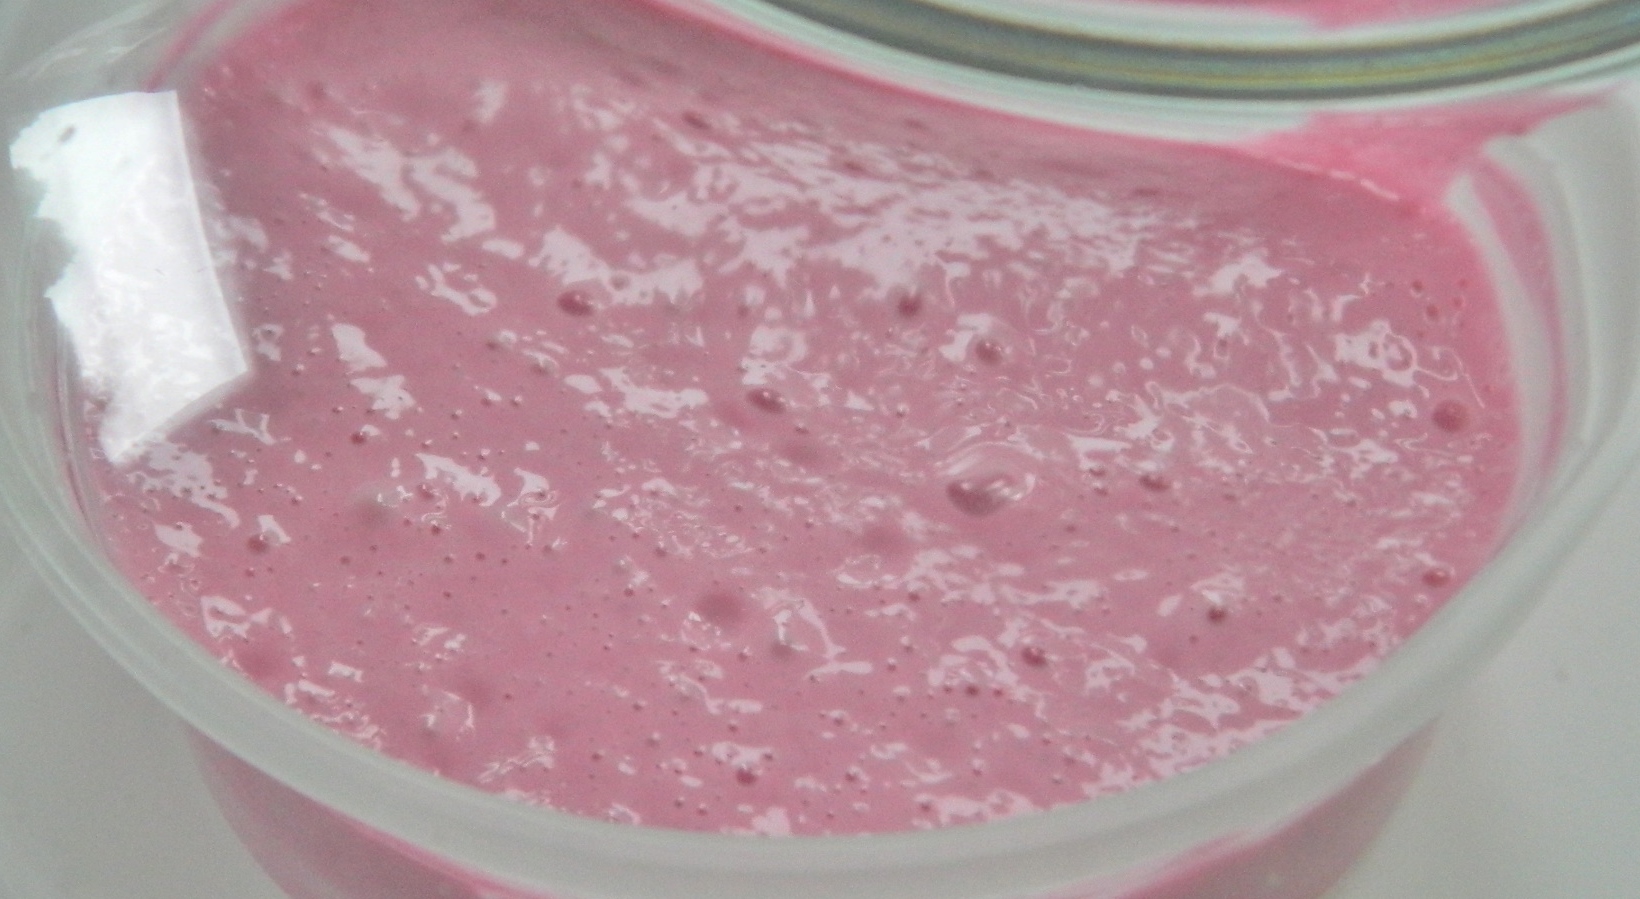
The two-part molding compound has a hardening agent that’s mixed into the rubber compound so air bubbles also get mixed into the compound. For both the molding rubber and resin, I selected items that had the longest pot life. This allowed me the time I needed to degas the compounds. Here you think you can see the bubbles:
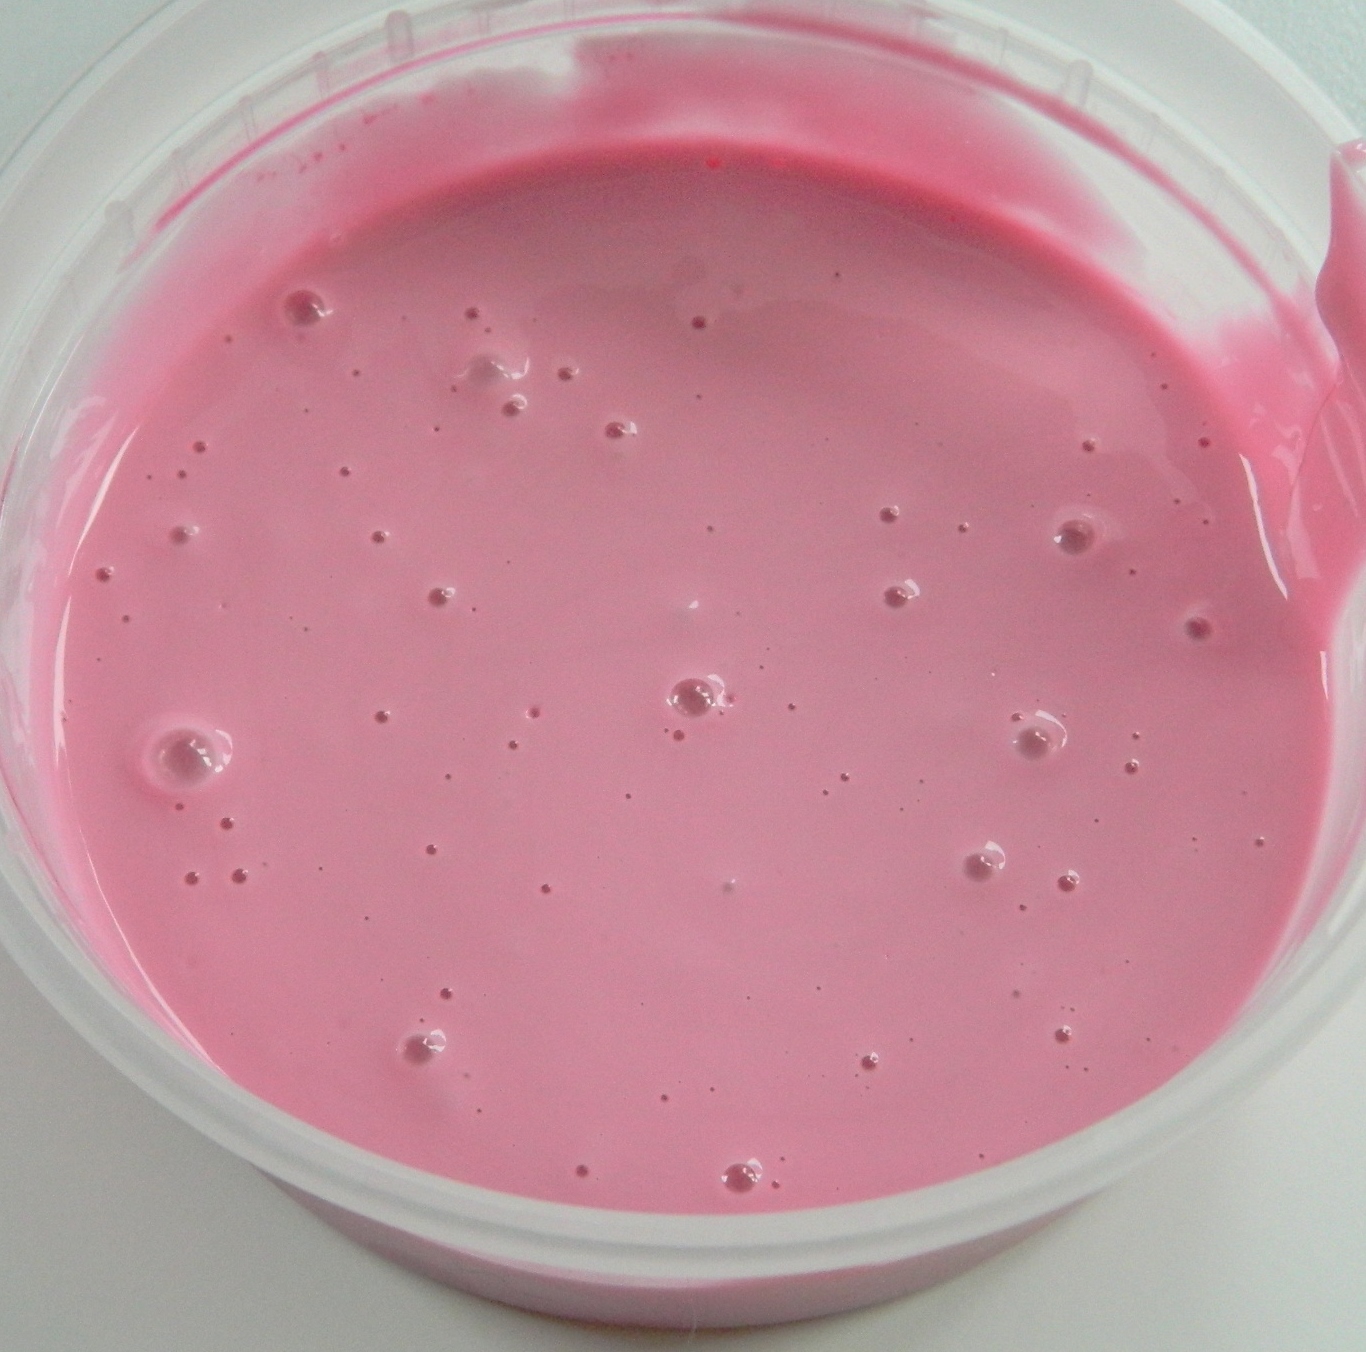
When the compound is exposed to a vacuum, this is what’s actually in the compound (and all those little nubbins are bubbles that haven’t made it to the surface yet):
A hint about molding. Before you start mixing compounds, molding or resin, have what you need the compounds for ready before you start mixing.
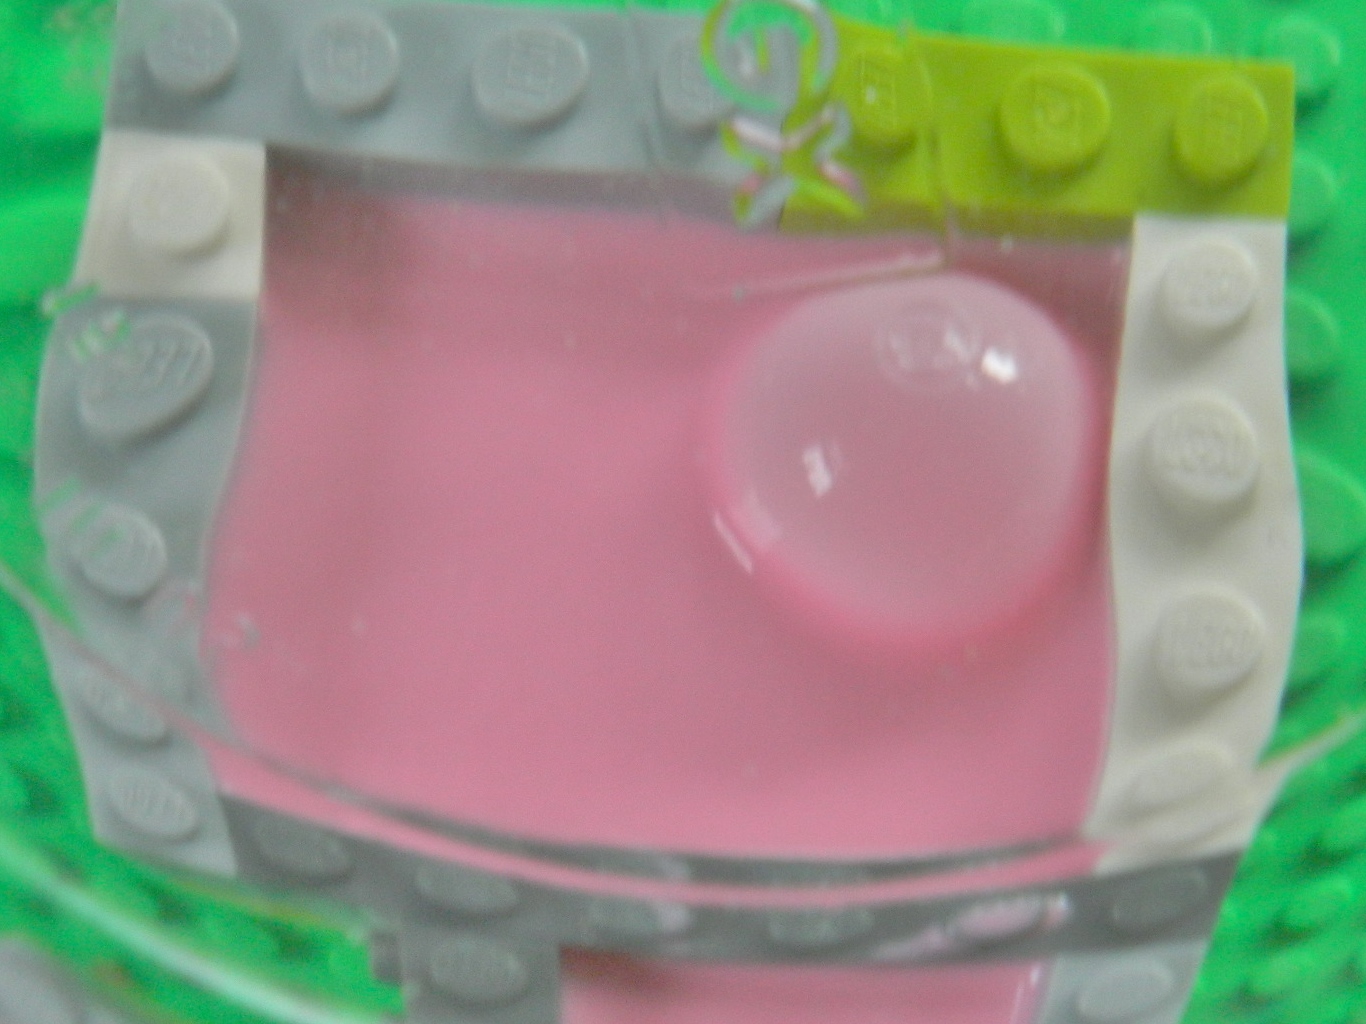
The molding compound has a 45 minute pot life, so I mixed it, degassed it for 20 minutes, and since the mold box had already been sprayed with release agent, I poured the molding compound into the box and degassed them for another 20 minutes:

With only a partial vacuum (the best my pump will manage is about 28″ of vacuum) and a time limit (pot life, y’know), there’s no way to get all the bubbles out. But I can get the large bubbles out, and when the vacuum is released, normal air pressure causes the small bubbles to compress to the point where they can’t be seen or screw up the part you cast in the mold.
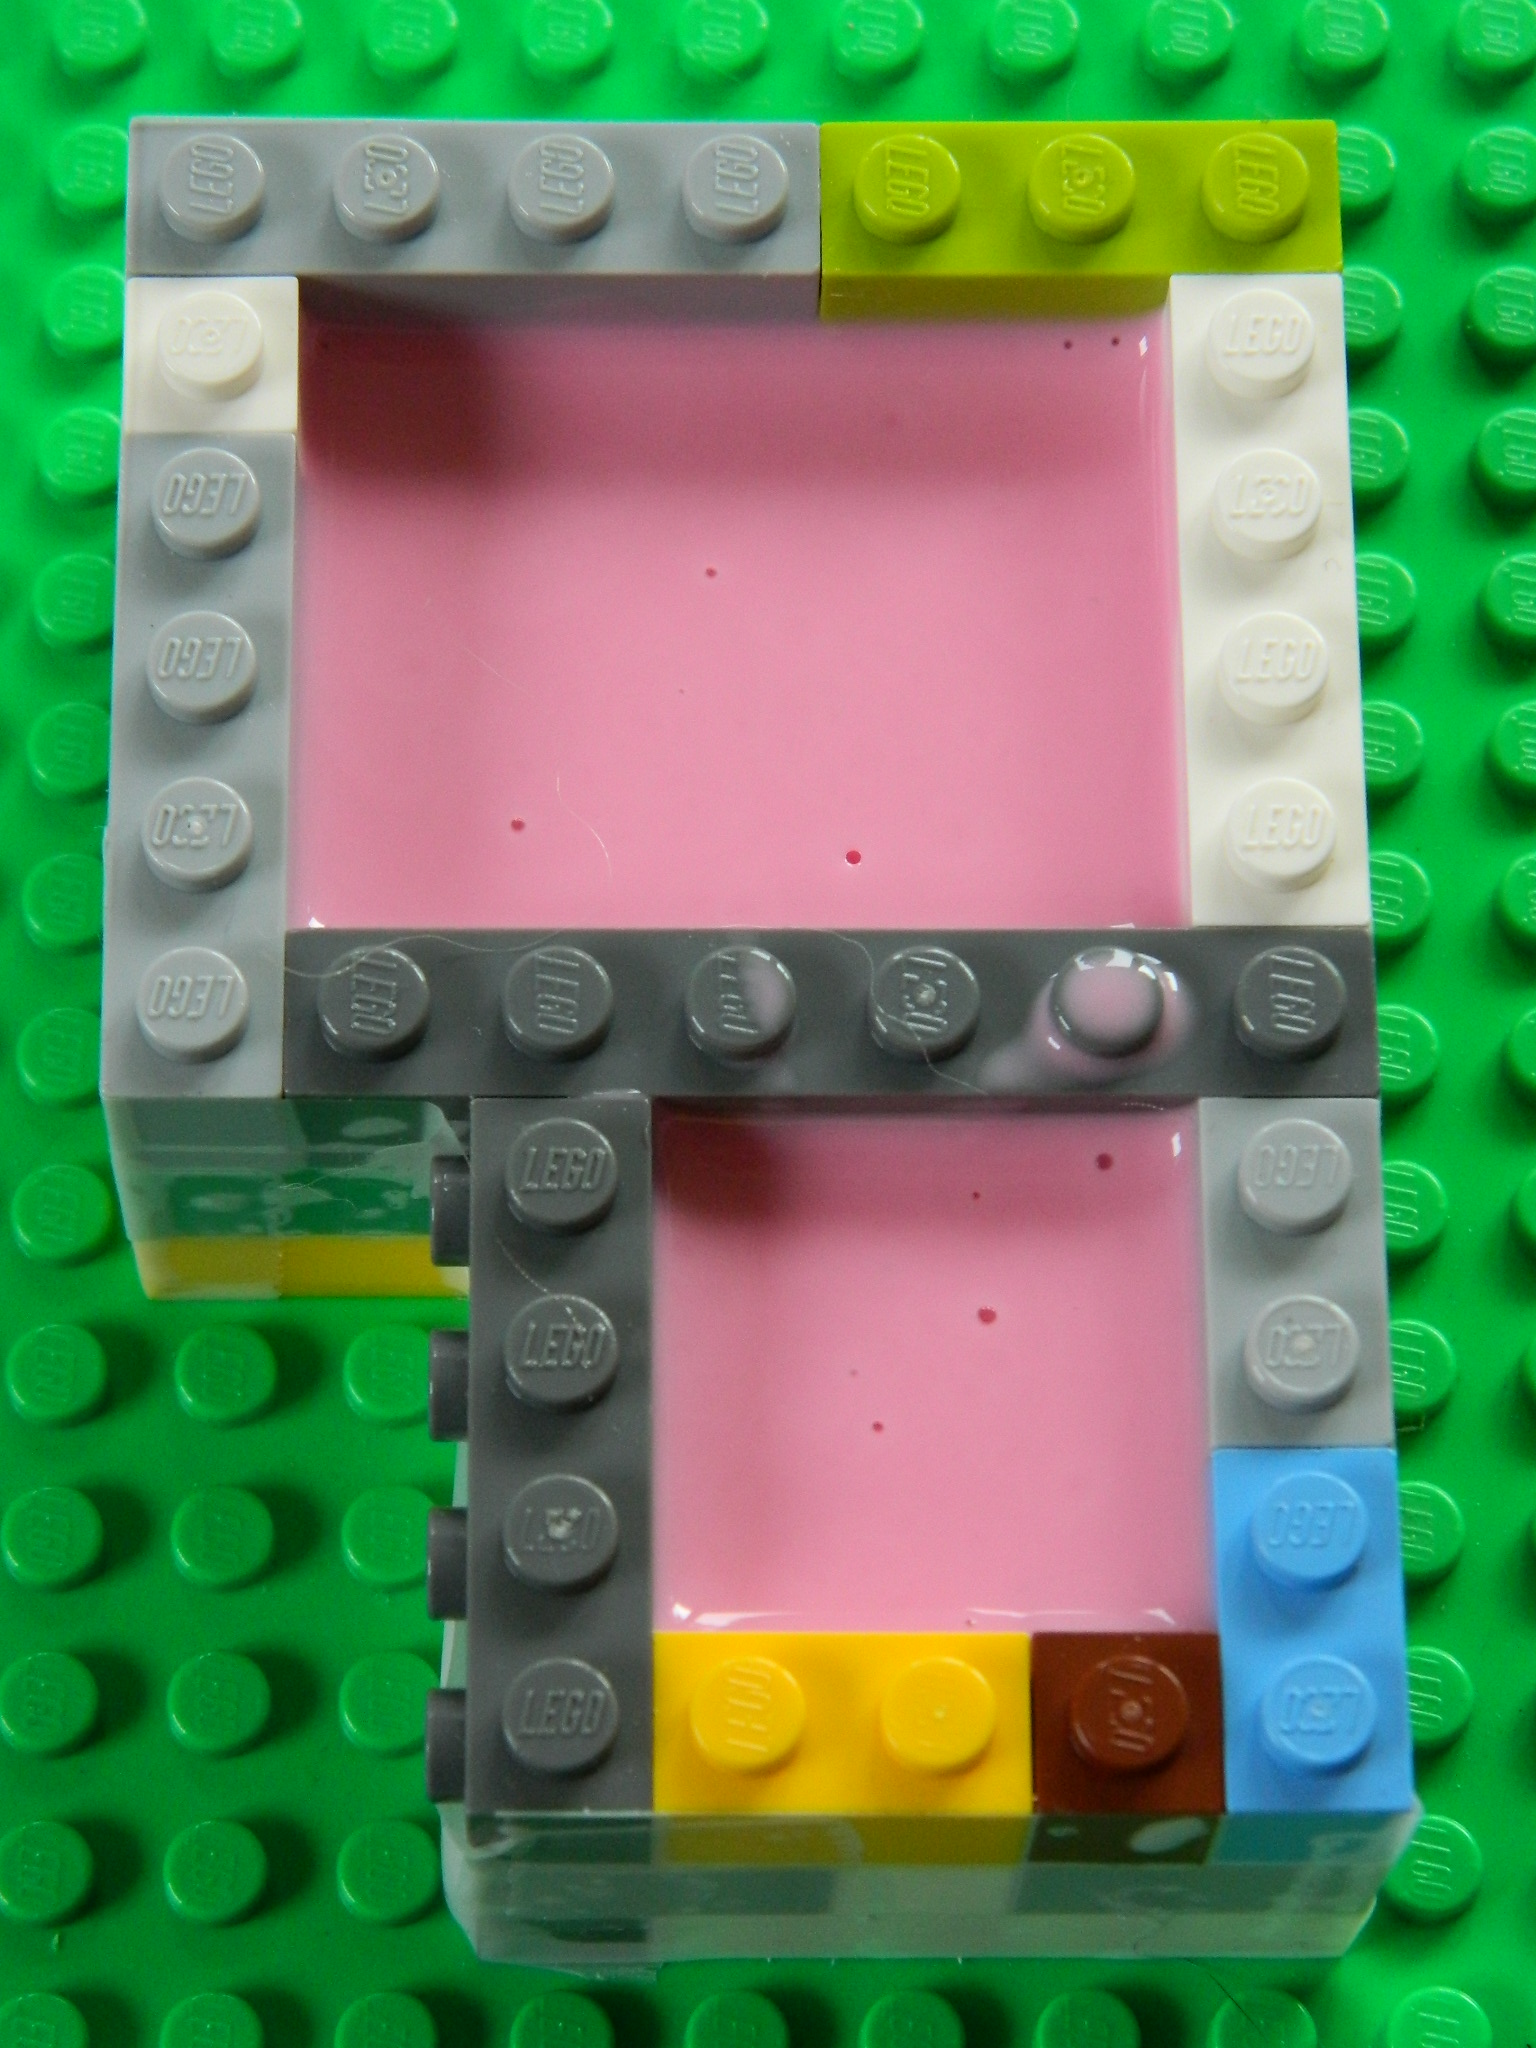
The mold is taken out of the vacuum chamber and allowed to sit until the molding compound sets up and cures (for this compound, 24 hours):
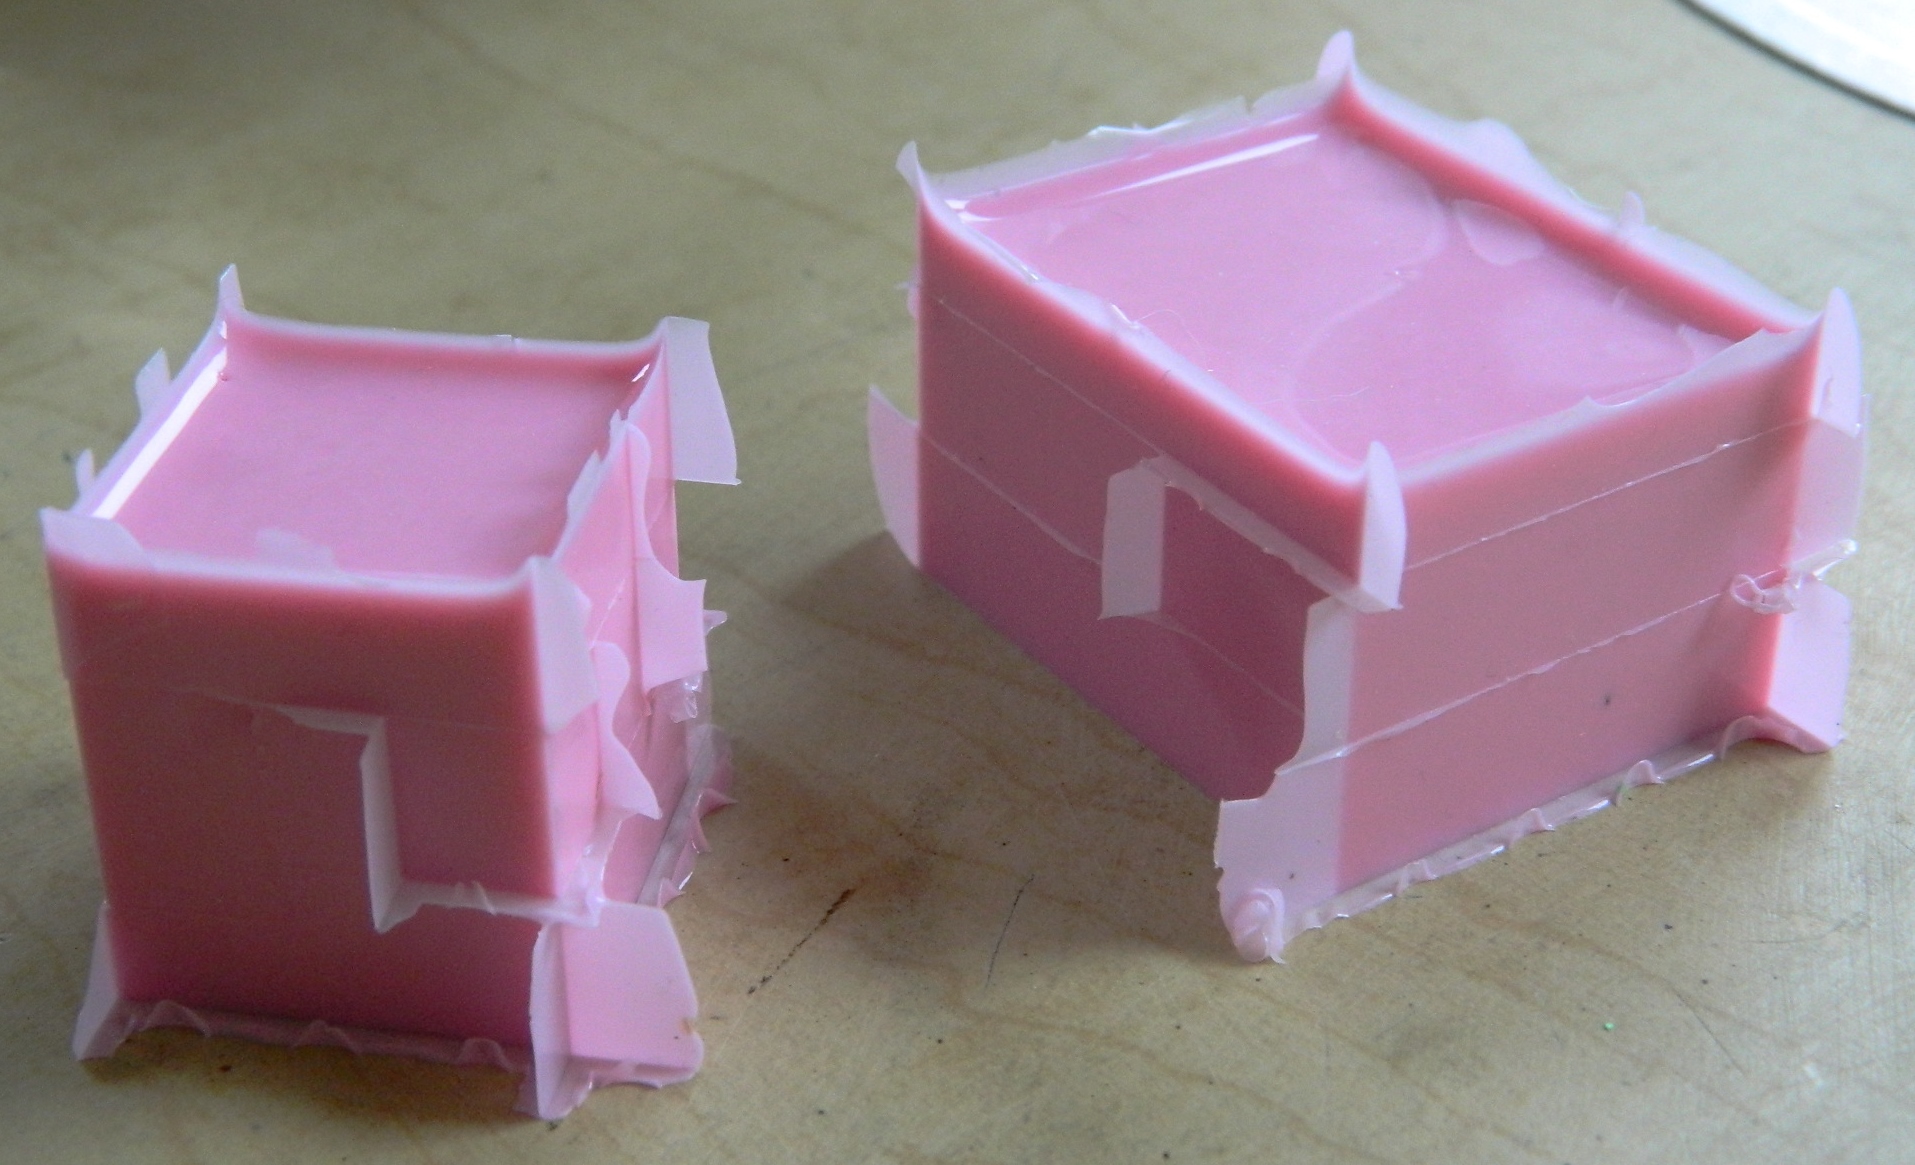
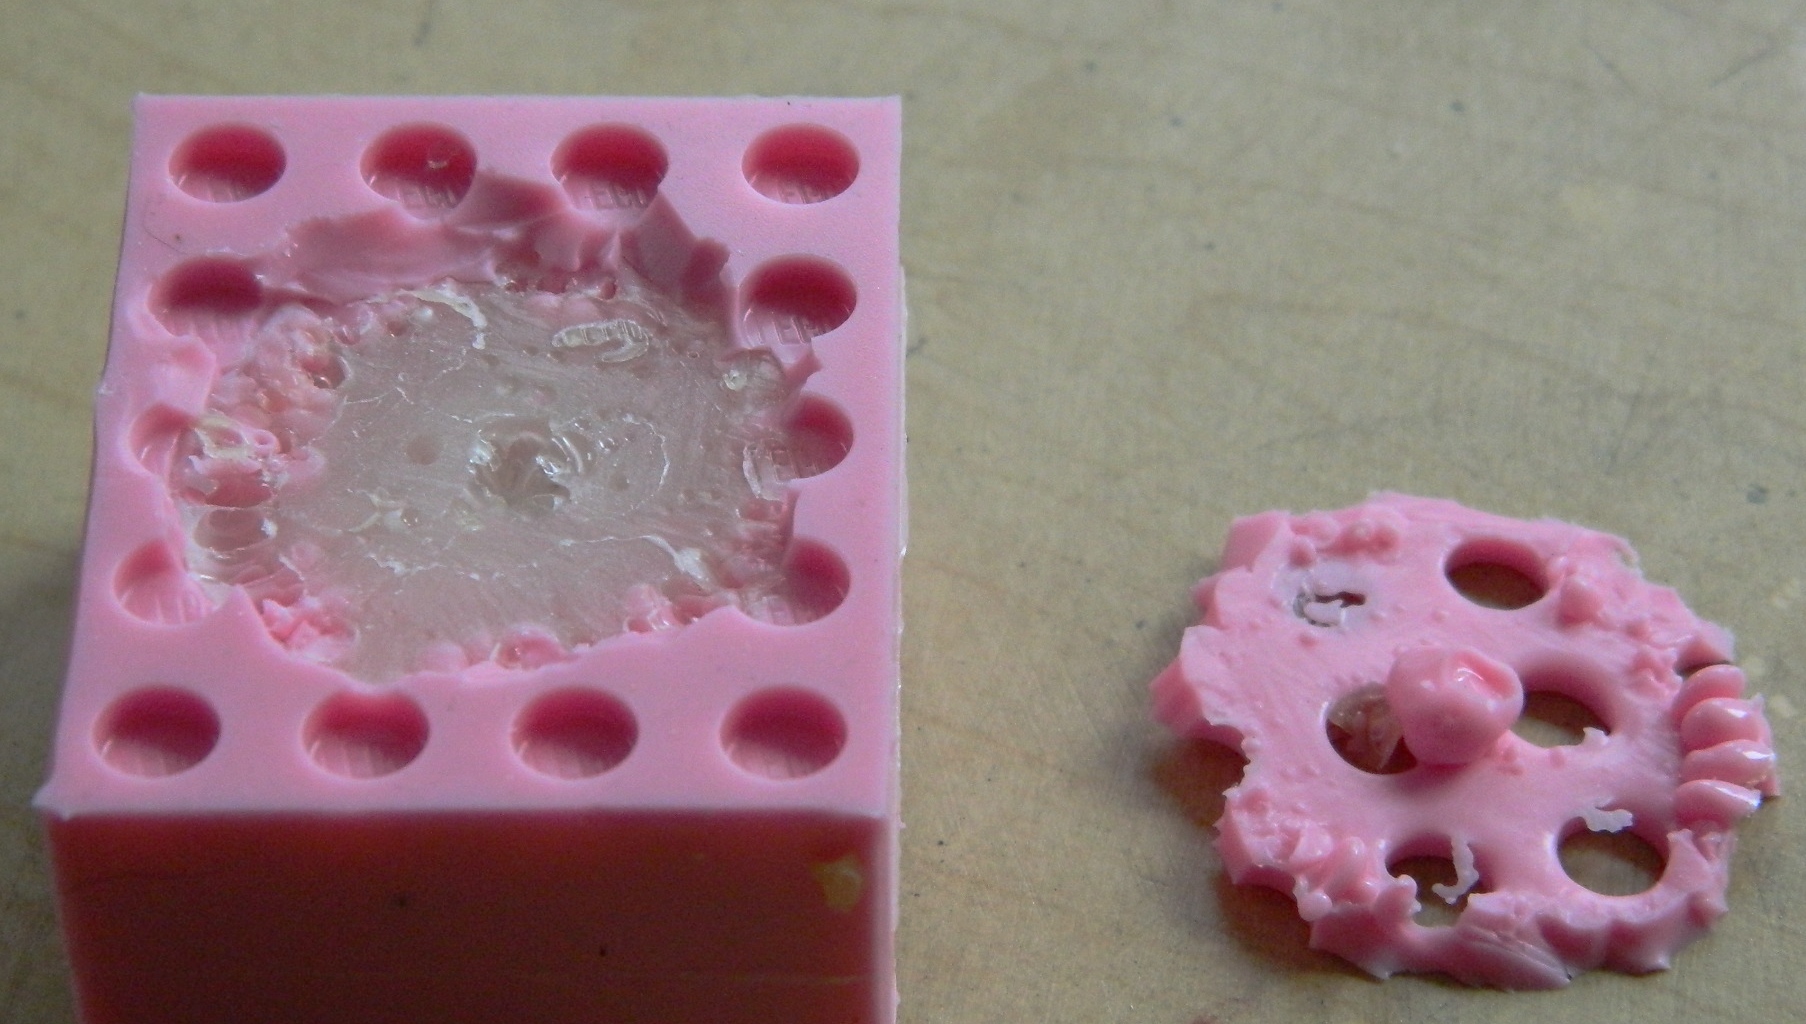
The next day I popped the excess molding rubber out of the mixing container and cut it in half to check for bubbles. Whatever bubbles are there, I don’t have the microscope to see. Good enough:

When I was assembling the molding boxes, I noticed there are small gaps between the blocks. Having not used this molding rubber before, I didn’t know the extent to which the rubber would insinuate itself between those cracks. To eliminate that insinuation, I used scotch tape to cover the cracks…and it seems that was a good idea. Taking the blocks away showed me there was a degree of insinuation:
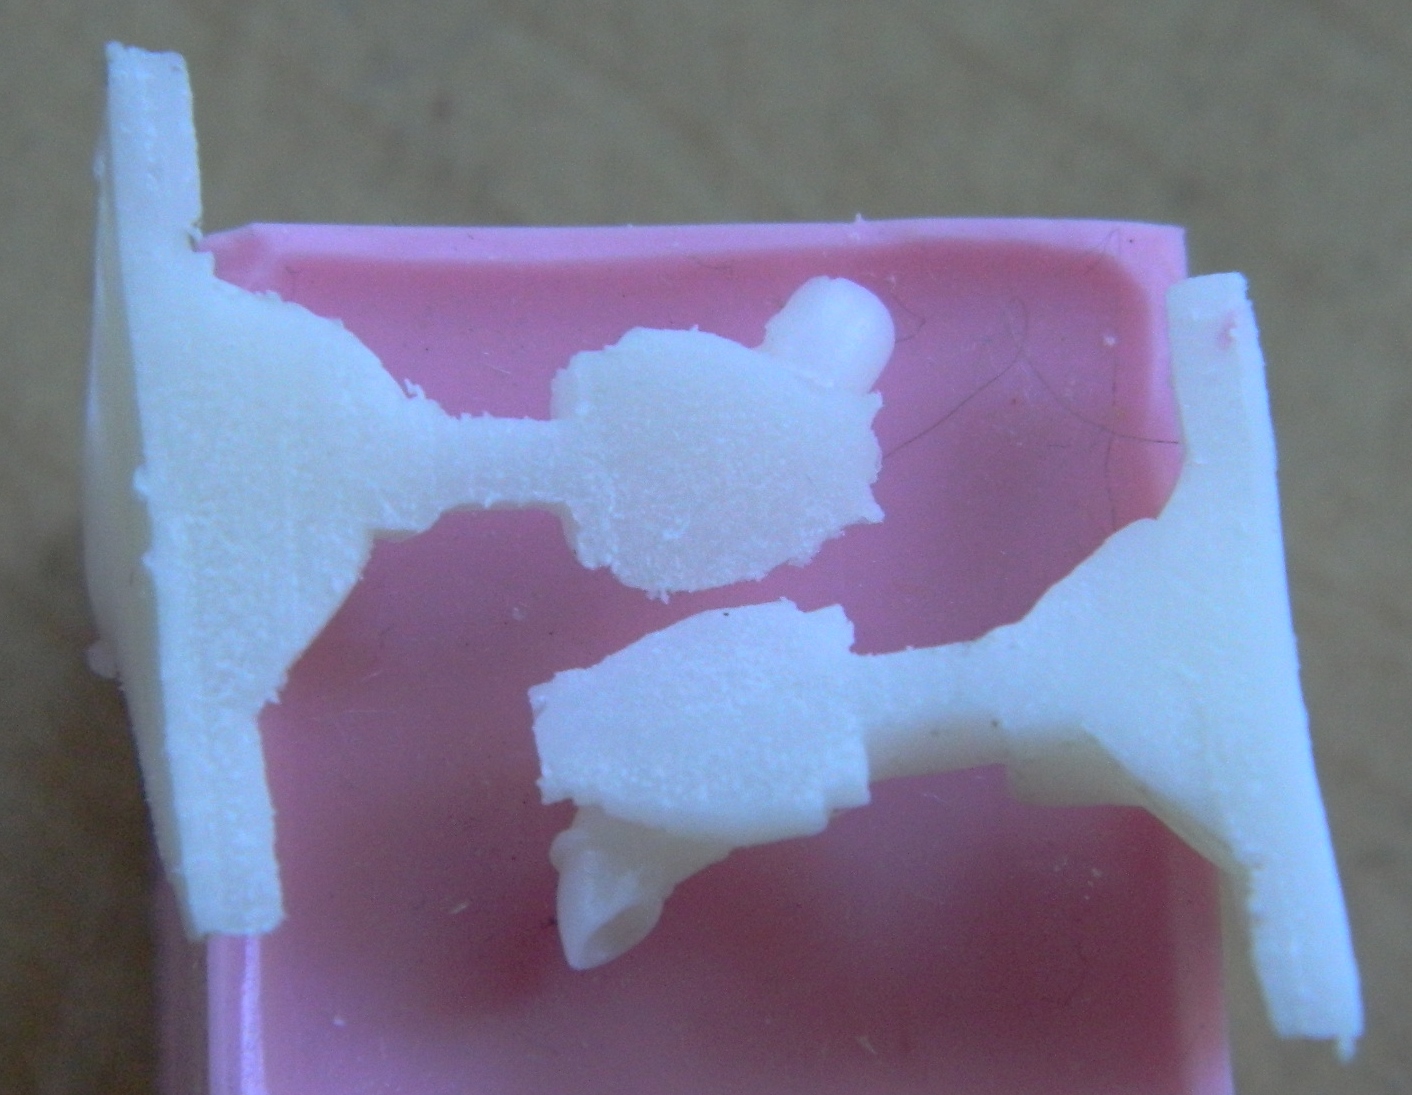
With the rubber out of the boxes, it was time to get the masters out of the rubber. With the smaller mold, its shape acted like an anchor which required me to cut the mold down the sides to release the master:

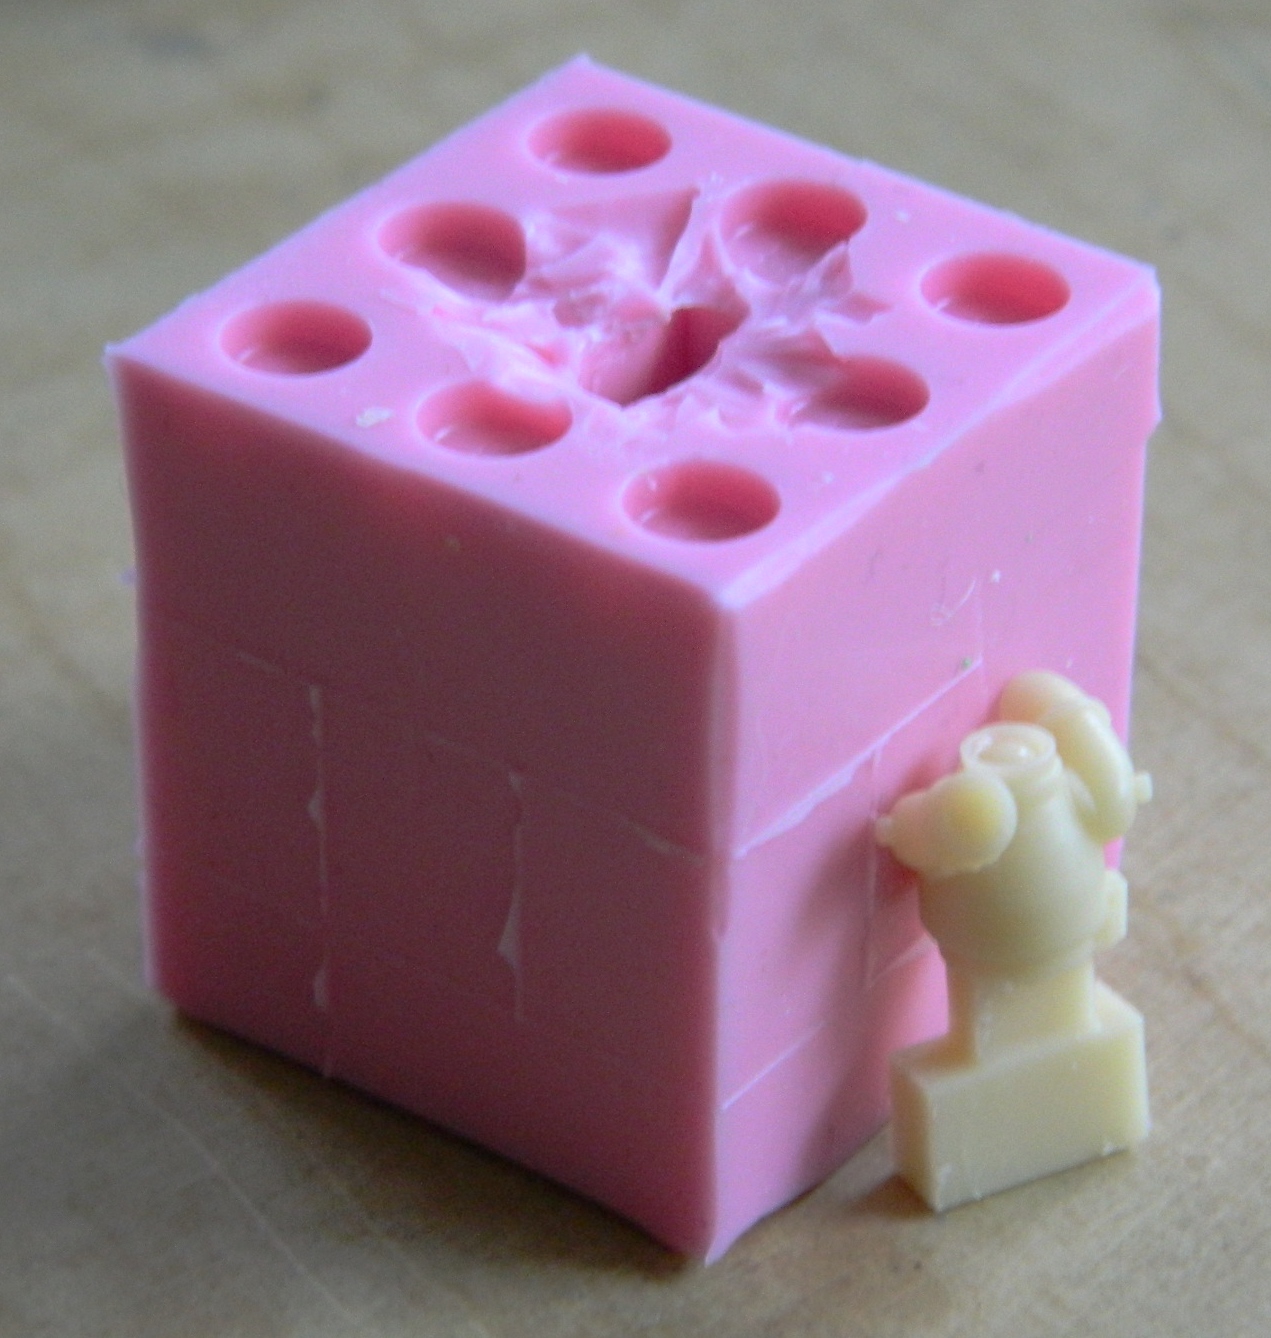
To get the blower assembly out, all I had to do was to cut away the rubber to get at the master, flex the rubber, and pop the master out (the switch box came out separately as the process of popping the master out caused it to detach):

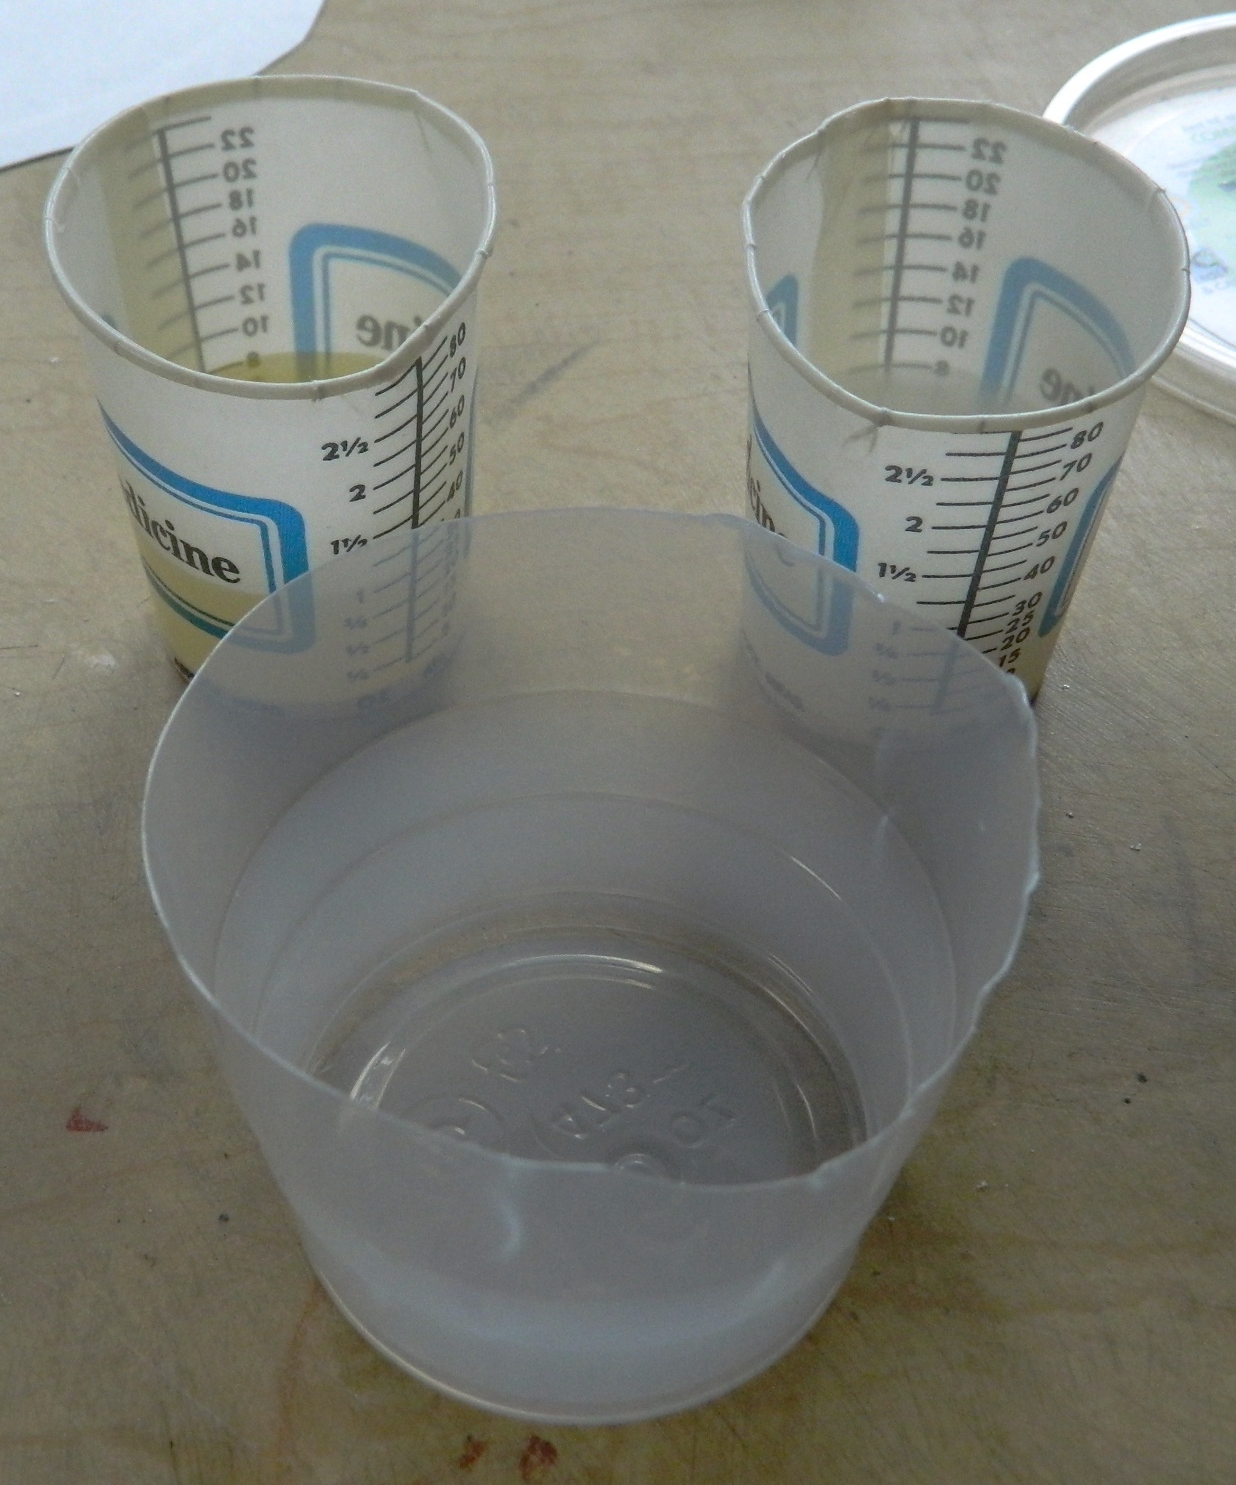
THANKFULLY the resin is mixed by volume and not by weight. I used a cut down plastic cup as my mixing bowl. I expected a degree of froth from the mixed resin during degassing but I didn’t know how much, so I wanted to leave enough volume in my mixing cup to keep from having to clean up (another) mess:
As with the molding rubber, the resin compound was mixed and degassed. Since the resin compound only has a pot life of 20 minutes, I degassed the mixed compound for about 7 minutes, poured it into the molds, and then degassed for another 10 minutes. After degassing, I wanted to leave enough time for the very small bubbles to be re-compressed by atmospheric pressure so as to become invisible:


This is another 24 hour cure, so I let it sit overnight before removing the castings:
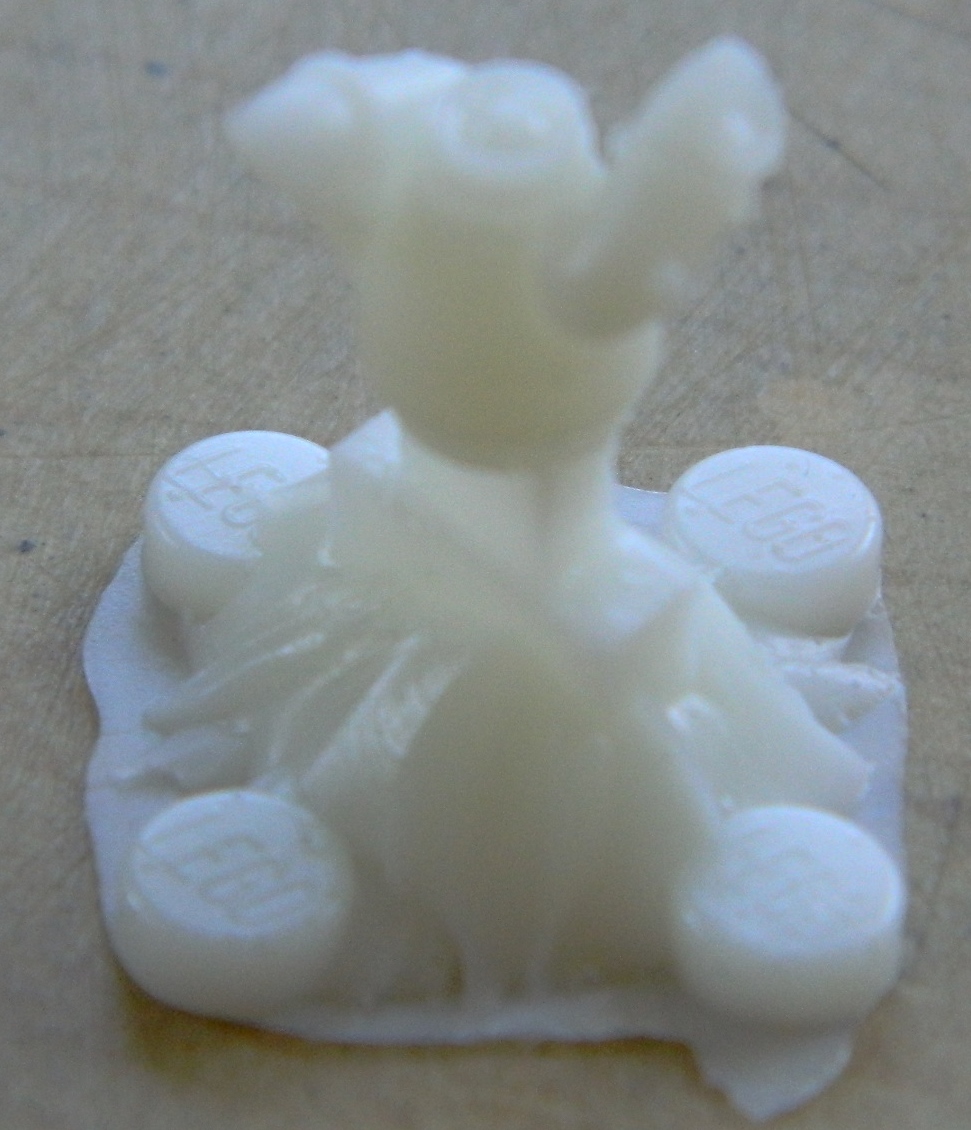
In addition to seeing if I could use a commercially available part as a master, I also wanted a sacrificial part that I could saw in half so that I could see just how many bubbles (or not) were produced during the curing process of the resin. It looks like I ended up with a nice, dense, casting:
And here’s the part I was really after, the ventilation blower assembly that I can use on this build and any subsequent build based on the M4A3 hull. In the picture to the right, you can see that this process is fine enough to replicate the switch, which was made from 24 gauge wire: